blue stripes close up
Yarn Dyeing

The sock blues: green and blue striped socks

I’ve bean just dyeing to share my latest project: Green and blue striped socks, featuring blue yarn created with black bean dye!

green and blue striped socks

I won’t tip-toe around the facts: sometimes, these socks gave me the blues. They have been in-progress for 8 months, and I dyed the blue yarn almost 4 years ago. If I was hoping to get them done in a timely fashion, I really blue it.

But on the plus side, they’re beautiful, they fit, and they’re done! Here’s what went into making them.

The Sock Blues

blue yarn from black bean dye

Back in the fall 2014, I used my blue dye from black beans tutorial to dye several sock yarns. (I also made black bean soup at the same time—perhaps a story for another post).

As seen drying on the laundry rack, the yarn on the left is a commercially prepared white wool yarn that I  bought at a second-hand store. The yarns on the right were wool yarns I hand spun on a spinning wheel!

As lovely as they are, my hand spun yarns do not absorb dye that well. They took on pale, grey blue hues. But my second-hand yarn became a rich, almost periwinkle blue. The difference was striking once I made them into hanks and set them in a basket.

handspun blue yarn skeins

Fast forward several years, to the summer of 2017.

green toe up socksI had started a pair of socks using the free Universal Toe-Up Sock Formula from Knitty, casting on to a very long, size 1 circular needle to knit them both at the same time. I was hoping to use up some forest green wool blend sock yarn I originally intended for another project. But I realized my socks would be quite short with only the green yarn. So I decided to add the blue yarn in as stripes to make them longer.

Let me pause here to say that I have knit 4 pairs of toe-up socks, and I still find them REALLY HARD to make. The needles are so small, it feels like they take forever even when they are going quickly. I struggle with yarn amount, pattern selection, loose stitches, and foot fit—basically everything. The fact that I love to improvise doesn’t always help.

But I just keep trying! This time, I decided to concentrate on getting a nice snug fit. What could possibly go wrong?

I thought I had the whole project wrapped up when I got these off the needles in January 2018. But then I tried to put the socks on and they Would. Not. Fit.

Turns out, when I did the bind off, I made it far too tight. And instead of redoing them straight away, I let them sit there for a few more months.

Which brings us to April 2018: Finished striped socks!

striped knit socks green and blue hand dyed

I am perfectly content with these socks, but I’ll be the first to admit their flaws. They have yarn carried up over the stripes on the outside (didn’t pre-plan the stripes). There’s a gap in the join of the circular knitting  (I am a loose knitter). And sadly, the second-hand, blue-dyed yarn is prone to breakage.

blue striped socksblue striped socks

But despite these issues, I still think there’s a lot to love about my socks!

For one, the color. Even after four years and a bit of fading, the blue yarn is a great color. I love the contrast with the forest green. It’s exactly what I had hoped it would look like. It’s a color combination I don’t often see, but really enjoy.

blue stripes close up

For another thing, once I re-did the bind off to make it more stretchy, they became a great fit! I have small, high-arched feet, and loose socks can be a real drag. I did my calculations right on these. Probably my best fitting knit sock to date. They even fit well before blocking, as shown here:sock on one foot

Finally, I expect to get a few good wears out of these socks before the warm spring weather really kicks in! In fact, I am wearing them right now.

blue and green striped socks

Hope you enjoyed seeing another blue dye project. Here’s to many more!

Tweaks & Alterations, Yarn Dyeing

Blue yarn finished objects! Ombre waves cowl and custom v-neck sweater

It’s been exactly a year since I posted about my tutorial on how to dye yarn blue using black beans, and even longer than that since I wrote about the left-handed knitting challenges of a custom-fit raglan sweater. Now I’m finally going to show you the finished objects!

Blue yarn dyed with black beans –> waves cowl with ombre effect

IMG_1949

I love the finished product! But it certainly was a long road to get there.

As you may recall, the blue yarn was separated into 1/2 oz. dye lots and one 1 1/2 oz .dye lot. As I mentioned at the end of this post, I went back and divided the larger blue yarn into three 1/2 oz. skeins and overdyed so that every 1/2 oz. was a different shade of blue. Way too much work!

IMG_0038IMG_0039 IMG_0182

When I finally had them all complete, I started making the Wave Cowl by Rebecca Hatcher, using a half ounce skein of a different hue for each “wave” from lightest to darkest to create an ombre effect. It worked great!IMG_0330But I still had two issues to solve. The first you can see in the above picture—the bottom kept rolling up, which was made worse by the tightness of this end of the cowl. The 1/2 oz. skein didn’t quite go as far as planned on the last wave, which was the biggest since it tapered up at the neck. So then I blocked the whole cowl.IMG_0312It was beautiful, and the bottom rolled up much less! But it created problem two—now the cowl had lost its stiffness and would not stand up when around my neck. After all that work! So I did what I assume most knitters would do. I improvised. Which basically involved overlapping part of the cowl and stitching together at an angle, increasing the tapering effect and allowing the cowl to stand up properly once again! You can see the seam in the second photo here:IMG_1950  IMG_1946

And now, one winter later, this is one of my favorite things to wear on a cold night.

Custom fit raglan pattern –>perfect fit teal V-neck sweater

Unlike the cowl, with this project I started with Pamela Costello’s customizable pattern and then went through my stash to find enough yarn to knit it! I know it’s technically “aquamarine” not blue, but close enough:IMG_1065As I noted before, the main difficulty I had with this sweater was learning how to do the raglan sleeve increases while knitting left handed. I had no trouble at all with the directions to make it a V-neck (I did an increase every 4 stitch for this depth), and I loved being able to try it on in stages as I made it:I will say that the estimated yarn was not accurate for me because at almost 5’8 but making a rather small size otherwise, I ended up with extra skein of yarn (Hayfield Grampian DK wool blend, if you are curious). I loved that I was able to make it long enough for my arms! I might have made the V-neck  even deeper if I’d known how much the ribbing would add back to it— here’s the non-blocked sweater before adding the neck ribbing, and the blocked sweater with neck ribbing:

IMG_0412  IMG_0727

And here’s a view of the back of the completed sweater (ironically taken on a hot summer day, hence the shorts!)

IMG_1068  IMG_1069

And finally, here I am wearing it more recently under a blazer when it was actually cool weather. I probably would not have bought a sweater this bright, but it turns out I really like the color.IMG_1883And that concludes the blue yarn finished objects!

Food & Garden, Yarn Dyeing

My first sourdough bread and a blue yarn update

Last weekend, I had one major goal—to make my own sourdough bread from scratch. And I did it! I’m not going to lie, it takes a LONG time to make. It’s not something I would do every weekend. But the results were delicious.

Here are the details on my sourdough bread making experience.

Sourdough starter

The starter I used was Carl Griffith’s 1847 Oregon Trail Sourdough starter—you can get it for free from Carl’s website. It came dried in an envelope, and I revived it used the instructions on the website. The most essential part is the following:

Get a small container.  Begin with one tablespoon of lukewarm water, stir 
in 1/2 teaspoon of your starter and let stand for a few minutes to soften 
the start granules. Then mix in one tablespoon of flour. Depending on the 
flour, you may need to add an additional teaspoon or two of water. You want 
the mixture to be like a thin pancake batter.  When the mixture gets 
bubbly, put it in a little larger container.  Then stir in 1/4 cup of water 
and 1/4 cup of flour.  When that mix rises up add 1/2 cup of water and 1/2 
cup of flour.  When this bubbles up, you will have about one cup of very 
active starter that is ready for use or storage in your refrigerator.

I mixed it in glass jar with a plastic spoon. When I did, it looked like this:

Those spots are bubbles, and they’re a sign that the starter is active. I have to admit something here—using just water and flour didn’t give me bubbles. But I read in the Carl’s brochure that a little vinegar would kick the starter into high gear. After reading that, I realized it would probably be a good idea for me, since my tap water is both hard and alkaline, two aspects that starters don’t respond well to. A small amount of apple cider vinegar did the trick. I used anywhere from a few drops to 1/4 tsp depending on how much water I was adding, and I did this every time I added water to the recipe too.

The recipe

For my first attempt at sourdough, I chose a recipe from Carl’s website called  Simple Sourdough Pan Bread, Hand Mixed with a Low Knead Procedure. It’s the second on the list in the above link (PDF here). I chose it because it really did seem straightforward: four ingredients, two bread pans, and only a little kneading. I wouldn’t recommend making sourdough bread if you’ve never made bread before in your life, because many things are left to the baker’s judgement in this and other recipes. But you don’t need to be pro to do this either. I’d recommend baking some other bread first if you haven’t done so before.

Here’s the ingredient list for the recipe—don’t do what I did and almost run out of flour!

Ingredients

• 1 Cup Active Sourdough Culture

• 2 Cups Water
• 5 to 6 Cups Flour (divided)
• 1 Tablespoon Salt

The directions are rather lengthy at this point, but they are divided into sections, so instead of reprinting them all I am going to just write down the section and what time I started it, with photos.

It took longer than the recipe said because a) it is still cold here, and most of the rises require warmth and b) I have a life and could not always do each step at the exact time. Again, this is a long process—do it on a day where you have lots of random stuff to do around the house (for me, grading papers).

Baking bread, step by step

1. Make the sponge,  1:30am Sat

Before I went to sleep on Friday night, I made the sponge. Unfortunately, I forgot to take a photo of this stage. I remember that it was very bubbly the next morning, but when I mixed it it was the same thin pancake batter consistency of the starter. Recipe says do this 6-10 hours before the next step.

2. Make the dough, 1:15 pm Sat

I wasn’t exactly sure what they meant by a “medium” dough, but this dough was really sticky, and I read that this is a good sign for sourdough.

3. Knead the dough, 1:45pm

No photos of the action because I was doing this by myself, but I used the technique in this video that I wrote about in my previous post on bread. The difference I noticed with sourdough is that, due to the stickiness, flouring your hands will not keep the dough from sticking to your hands. You either need to wet your hands and keep re-wetting them as you knead, or lightly oil them. I tried both and I prefer oil a little more, but I tried both and either works.

After this it had to rise by 50%, when it looked about like this:

4. Stretch and fold, 4 pm

No modifications to this technique—oiled surface made things go smoothly. After this step though dough needs to rise until it has fully doubled. I had to put it into a bigger bowl. Here’s the before and after fully doubled:

5. Shape the dough,  8:25 pm

Here’s where you divide the dough, let it rest, then put it in loaf pans. My bread pans are two slightly different sizes, which is why they look a little weird.

6. Final rise, 9:30 p.m.

Once the dough rose enough to touch the plastic wrap, I made expansion cuts and put them in plastic grocery bags for the final rise. It sounded weird but it worked well—this photo is from near the end of the final rise:

7. Bake the bread, 1 am Sunday

Finally, the baking part! While the recipe said 40 minutes at 375 degrees F, mine took closer to an hour. I blame the small bread pan and the fact that my oven runs hot, but since I don’t know how hot, I have to cook everything at much lower temps than suggested.  But with some watchful baking, I managed to get it to a lovely golden color outside, with lots of awesome little air pockets inside!

8. Eating the bread for breakfast! Sunday…brunch (ok it was after noon)

The best part about the bread, of course, is the taste! This bread has some of that nice sour flavor without being overpowering, and its spongy without being squishy or underdone. Sourdough is probably my favorite bread for toast, so I made toast with our homemade marmalade from Christmas, eggs (one over easy one scrambled cause I broke the yoke…), and tea with milk. It seemed a rather British brunch indeed:


Blue yarn update!

While this post is already quite long enough, I wanted to live up to the title of this blog and post about some knitting.

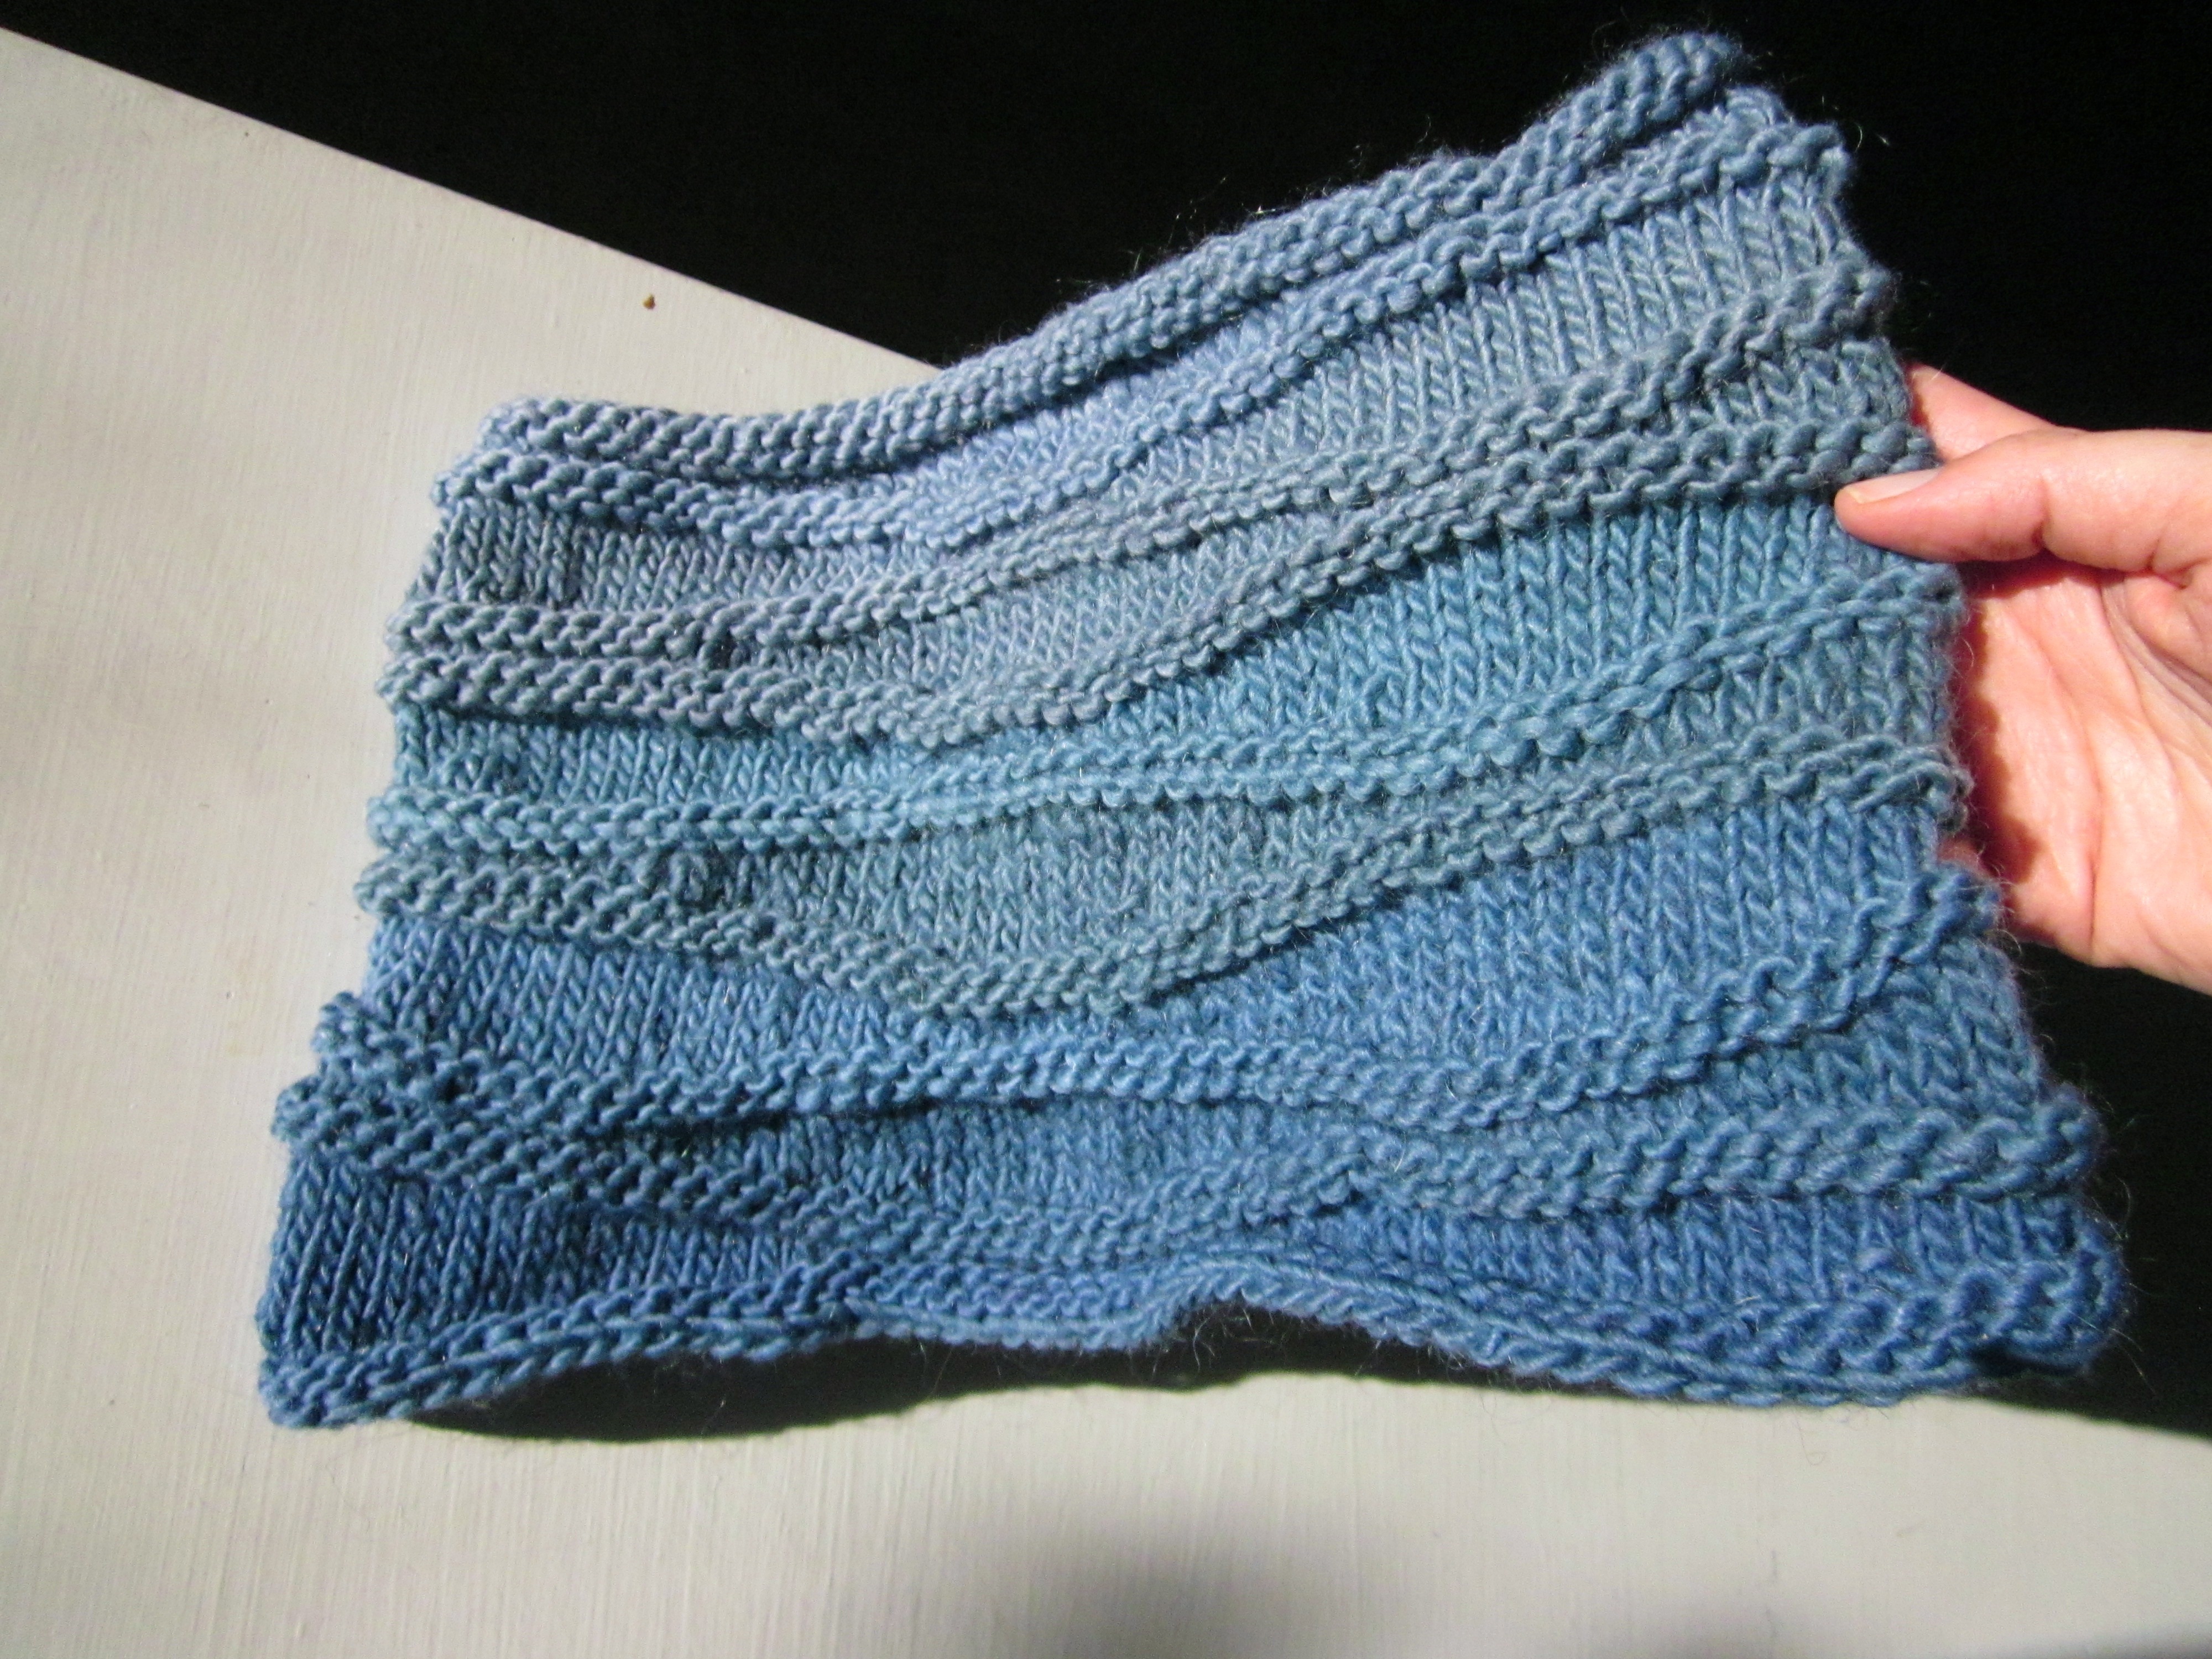
First, I finally decided what to make with all my blue yarn! I’m making the Wave Cowl by Rebecca Hatcher. And just to prove it’s actually a work in progress, here’s a photo of it on the needles!

(btw, that little spot of green in the corner is the subject of an upcoming gardening post :c)

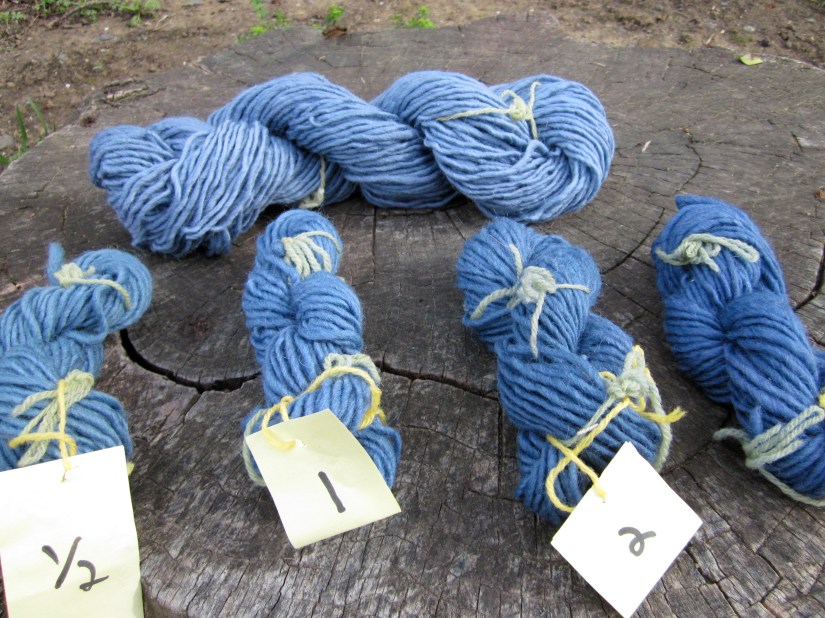
I am probably going to end up making the Cranberry version of the cowl, with its flare at the bottom. I had been wanting a pattern inspired by either the sea or the sky because that’s what the blues of the yarn remind me of. I also needed something that didn’t require more than 1 skein, and preferably one that could work with small amounts of different hues. The awesome knitters over at Reddit (the knitting subreddit to be specific) suggested an ombre pattern that arranged the yarns from light to to dark. I thought that was the perfect idea! However, as you can see from the photos in my earlier post, I had a large chunk of the yarn that was all the same hue. So two weeks ago, I divided that  up into 1/2 oz. parts and attempted to overdye it to varying degrees to get some more color variation. Here’s the result:

I was going to write a post on how the overdying process went, but I think I can sum it up in one sentence: Unless you are desperate, don’t do it. It was a huge pain. Mordanting the yarns again turned their original blue-gray into gray. Then they needed to be in the black bean dye that was quite strong, and they needed to be in there a long time. It smelled much worse than last time. And for all of that, some of them came out with uneven coloring or hardly differentiated. In some good lighting, you can tell the difference, but even then it is subtle:

Those are the same three, in slightly different lighting. Gah, Too much work for such small results. At least I did get some different shades of blue out of it. But the best part was the fact that this time, I rinsed the beans right after soaking them for their dye, then immediately put them in the slow cooker with some chicken broth, canned tomatoes, onions and a bunch of spices. That’s right—this time I made black bean soup! And once the sourdough bread was ready—lets just say it was a tasty combination:

That’s right, I added peas and a lot of sriracha sauce to my soup. Laugh if you want, but it tasted awesome!

Botanical Knits & Crafts, Yarn Dyeing

Natural dye tutorial: blue yarn from black beans!

EDIT: Want to see what I knit with blue yarn? Check out these other posts!

Blue ombre waves cowl   Green and blue striped socks

IMG_0312blue and green striped socks

Welcome to my dye tutorial, the most popular post on my knitting blog! This is a cold water dye using regular black beans, designed to be used on yarn made of wool or other natural fibers (it won’t work on cotton, acrylic, etc.). There’s a lot of soaking time involved, so expect to have a finished product after three or four days. If you have a question, put it in the comments and I’ll respond. Enjoy!

Natural blue dye: background

I have a really awesome fiber dye experiment to share! As you can see from above, we got several lovely shades of blue —a difficult color to achieve —in a process that took about four days start to finish.

Now that I have a spinning wheel(!) and some wool, I’ve been wanting to learn about natural dyeing. Since blue is my favorite color, I gravitated toward information about natural blue dyes. Turns out there aren’t that many. Indigo and woad are the main ones, and they sounded like a lot of work for a first time dying project. Then I came across web posts on black beans as a blue dye. My favorites were blog posts at waysofthewhorl and brambleberriesintherain (now defunct), which then led me to the discovery that there is a ravelry discussion thread (login required) that is many years old and has hundreds of posts! Needless to say, I was overwhelmed with information.

At the same time, no one post seemed to describe exact amounts of beans, water, and yarn used, nor exact times for the different steps involved. So with a little help, we set out to do a test run with all the steps and amounts recorded. As a caveat, not everything went as planned, record keeping wise, but we did out best.

Tutorial: dyeing yarn blue using black beans What you will need (amounts will be determined later):

  • Black beans
  • Water (tap is fine and what we used, but see note at the end of the post)
  • Non-reactive containers for soaking and dyeing (we used glass and stainless steel)
  • Natural fiber yarn, white or off-white (we used Lamb’s pride, 85% wool, 15% mohair, M-10 Creme)
  • Alum mordant (Aluminum Potassium Sulfate—you can find this in the spice aisle of a well-stocked grocery store)
  • Cream of Tartar (also in the spice aisle)
  • Large non-reactive pot for the stove (We used a large enamelware roasting pan. Technically this should not be a container you’re going to use for food after this, and although alum seems to be non-toxic, I played it safe.)
  • Misc. items: additional yarn to tie off your skein in sections, a rack or other place to dry finished yarn, newspaper or something else to protect surfaces from dye
  • Optional: food grade tubing

Dye Prep Instructions

First, figure out how  much water and beans to use, choosing a ratio from below.

Here are rough ratios of Water to Beans in each of our dye lots:

  • dye lot  # 1/2  = 7 to 1  (7 parts water to 1 part beans)
  • dye lot #1 = 3.5 to 1
  • dye lot # 2 = 2 to 1
  • dye lot #4 = 1.25 to 1 [furthest hank on the right]

blue yarn in different shades

Each of the numbered hanks of blue yarn in the photo above is 1/2 oz (14 g) of yarn.

Make sure that you have enough beans and water to create enough dye for your yarn.  I strongly urge to get more than you think you need because beans absorb water at a higher rate than we bargained for. You’ll need enough dye to immerse your yarn.

Ratios work best, because our  actual measurements were rather odd :

  • #1/2 = 1/2 cup beans and 3.37 cups water;
  • #1= 1 c. and 3.4 cups
  • #2= 2 c. and 4.125 cups
  • #4=4 c. and 5 cups

Let each of these bean and water combos soak for 24 hours. This is a cold water dye, so it needs time. I preferred the glass jars for this.

To get the best dye, you’ll need to get as much of the bean water with as few bean particles as possible. From what I read, the pieces of bean tend to make the yarn more  gray than blue.

We strained out the beans, let the dye settle for an hour or two, then siphoned the water off from the top using the food grade tubing so that the bean particle matter did not make it into the final dye. . Other people on the internet suggested spooning the water out and leaving the dregs.

Yarn Prep Instructions

When are 4 hours away from completing your 24 hour bean soak, start preparing the yarn. Alternatively, you can do this part earlier and let the yarn stay soaking in the mordant pot overnight.

First hour:  water soak.

I separated my yarn into four 1/2 oz skeins tied with bits of a thinner yarn to keep them from getting tangled, then unwound the skeins and soaked them in water for 1 hour.yarn soaking in water

Second hour: Mordant on the stovetop

Mordant is what allows the dye to adhere to the yarn and not just wash out or rub off. After water soaking, I moved my yarn to large stovetop pot to mordant it using alum and cream of tartar. I used Sasha Duerr’s Handbook on Natural Plant Dyes to calculate how much need:

  • 8 percent of the fiber’s weight for alum
  • 7 percent of the fiber’s weight for cream of tartar

For mordanting 2 ounces at once this comes to about 3/4 of a teaspoon each of alum and cream of tartar. I will admit that I was probably closer to 1 tsp each, because I couldn’t find my 1/2 tsp measuring spoon. It still worked.


Dissolve the alum and cream of tartar into hot water and add to the stovetop pot along with enough water to cover the fiber. I added the water soaked yarn and brought the pot to a simmer.**Important note: do not change the temperature of the yarn too quickly, it can cause felting** I simmered it for an hour then turned the heat OFF.

Final 2 hours: cooling and rinsing

I waited another 2 hours until it had cooled off, then removed the yarn and rinsed it off with clean water that was the same temperature as the yarn to remove any excess mordant (using a little pH neutral soap is supposed to help).

Dyeing the yarn

Finally, the fun part—adding the yarn to the dyes! blue yarn in yarns 
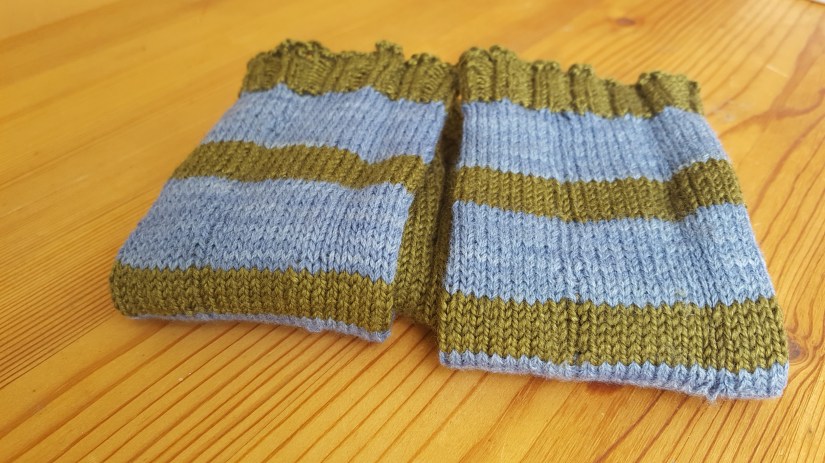
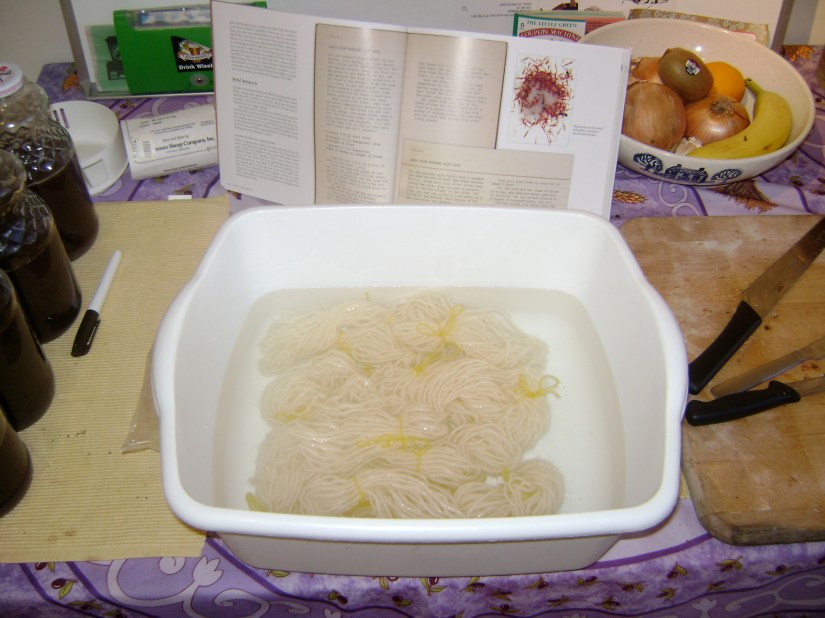
As you can see, some of our dye lots barely covered the yarn, so we turned them upside down or right side up periodically to avoid unevenness in the color. We let them stay in the dye for 42 hours. I’m sure an even 48 hours would be great, but sleep comes first.

During this time, I discovered something that no other blog really mentioned: the color you see immediately can be quite different from the final color. Observe what the yarn looked like about 10 minutes after I put it in the dye:blue yarn first looked purple 
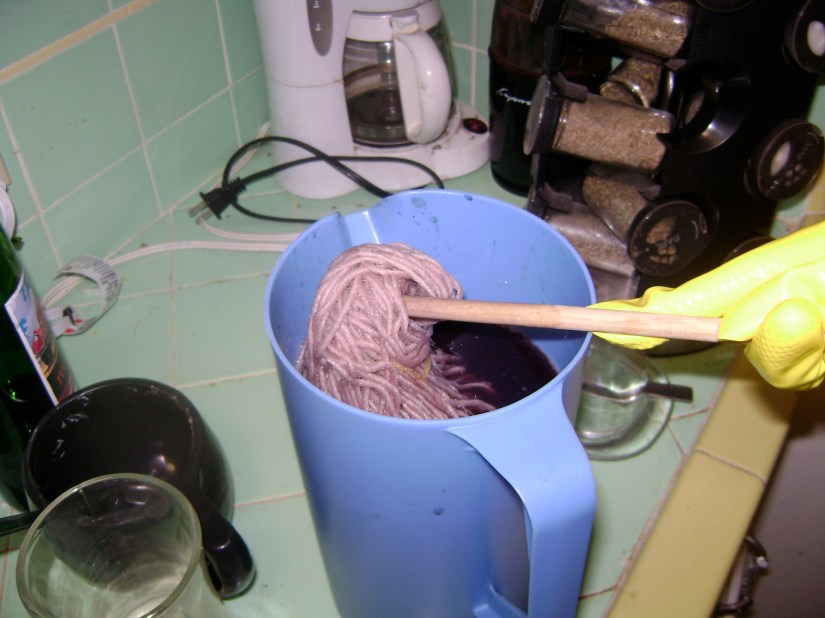
That’s right—it was a light purple color! At first I was disappointed that all our effort to get blue failed, but in an hour or two it started changing into the blue color you saw in the previous picture.

The photo in the blue plastic jar came from round two of dyeing the yarn. After I took out the four small test skeins, I still wanted to dye the remainder of the yarn. So I soaked and mordanted the remaining 2 ounces of yarn, poured all four dye lots into the blue plastic jar, and let it stay there for 48 hours. Not very scientific, although hopefully you can see in the photos that it came out a slightly grayer and more muted shade of blue—one which I still quite enjoy.

Drying the yarn

After removing the yarn from the dye, I rinsed them with lukewarm water and hung them to dry on my laundry rack (I wish I’d taken a picture then!) Here are  they are again, left to right from, darkest (1.25 to 1 ratio) to lightest (7 to 1 ratio), plus the extra hank made from all dye lots combined:

The darkest one is a distinctly deeper shade of blue than the rest. The difference between the two lightest shades is less subtle here, but in person you can definitely tell. And the last one of course has a distinctly grayer tone.

A note on the pH of your water

*The pH of your water can affect the final color of your yarn even if you do exactly what we did. I did some research and found out the tap water we used was rather alkaline, with a pH close to 8. I once saw a blog post that said they got a blue green color from acidic water. If you don’t know what pH your tap water is, you can use the red cabbage test to estimate it.

An updated note on colorfastness

Since creating this tutorial, I have gotten several questions about how much this blue color fades over time. The answer is yes, is does fade over time, but it still looks nice.

I made an ombre cowl from this blue yarn using this Wave pattern. Here it in 2012:

black bean blue dye ombre knit cowl in 2012

And here it is in 2014:

blue ombre waves knit cowl in 2014

So yes, the lighter blue yarns that were grayish faded to a blue gray over time. For more on this project, check out this post.  I still love this cowl!