I’ve been eyeing this sheepy pattern for a long time, and I finally made it. In fact I’ve had this pattern so long that when I got it, it was a free pattern, but now it costs about $4. My version included very few modifications besides casting on 2 fewer stitches in the ribbing (added back in before the colorwork).
To get gauge, I used size 3 needles and worsted weight wool yarn for the green grass, gray sky, and black parts of the sheep, and white DK yarn held double for the white parts.
The colorwork was pretty fun—I had to pay attention more, but It was also more rewarding to see the sheep emerge.
I originally wanted this to be slightly loose and slouchy, but that’s just not the way the pattern was designed, and the tight, thick knit the pattern creates works best in its original shape.
This is the warmest hat I own, and it has the added bonus of just barely fitting under my bike helmet.
I happened to finish the sheep hat while I was at home for Thanksgiving, so naturally I used the leftover scraps to make an ornament for the Christmas tree. I liked the clever use of a paperclip for the blade in this pattern! I decided my version would have laces, and straight stitches were the easiest to add.
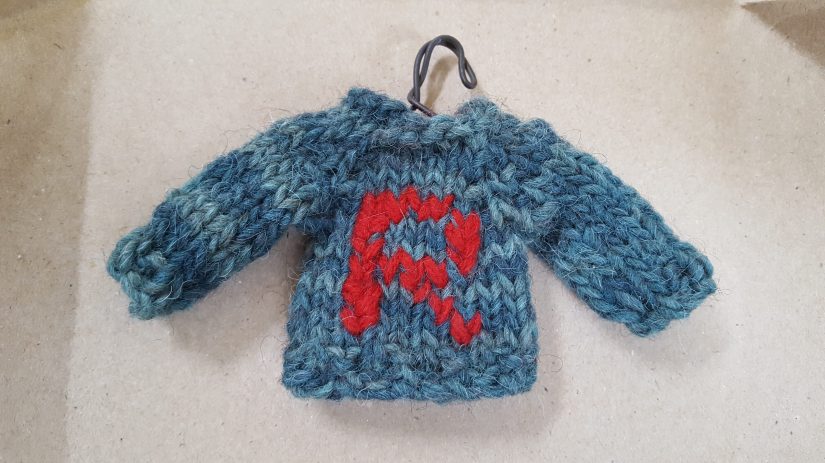
Once I made the ice skate, I was much more interested in knitting another ornament as a gift. I ended up deciding on this pattern because it looked like it wouldn’t take too long and the front of the sweater was customizable.
I also liked the clever use of twisted wire to create a hanger in this pattern! Between the wire and the green wool, it stood up on its own.
But of course, in order to stand out against a green tree, it needed some red. I used a slightly shortened R pattern from this alphabet chart to do the duplicate stitching. I like this chart because it worlds well for small scale knits like this one.
I kept thinking of the Christmas jumpers Ron Weasley always got from his mom in the Harry Potter books when I was making this tiny sweater. As it turns out, there’s a free Weasley sweater pattern if anyone wants to give those a go!
2015 is almost over! Who knows when I’m going to have the time to do detailed craft posts and tutorials again. With that said, I have made a few small things over the past 6 months, and I imagine a lot of people reading this like to look at the photos on craft blogs anyway. So here the crafts of each season:
Summer
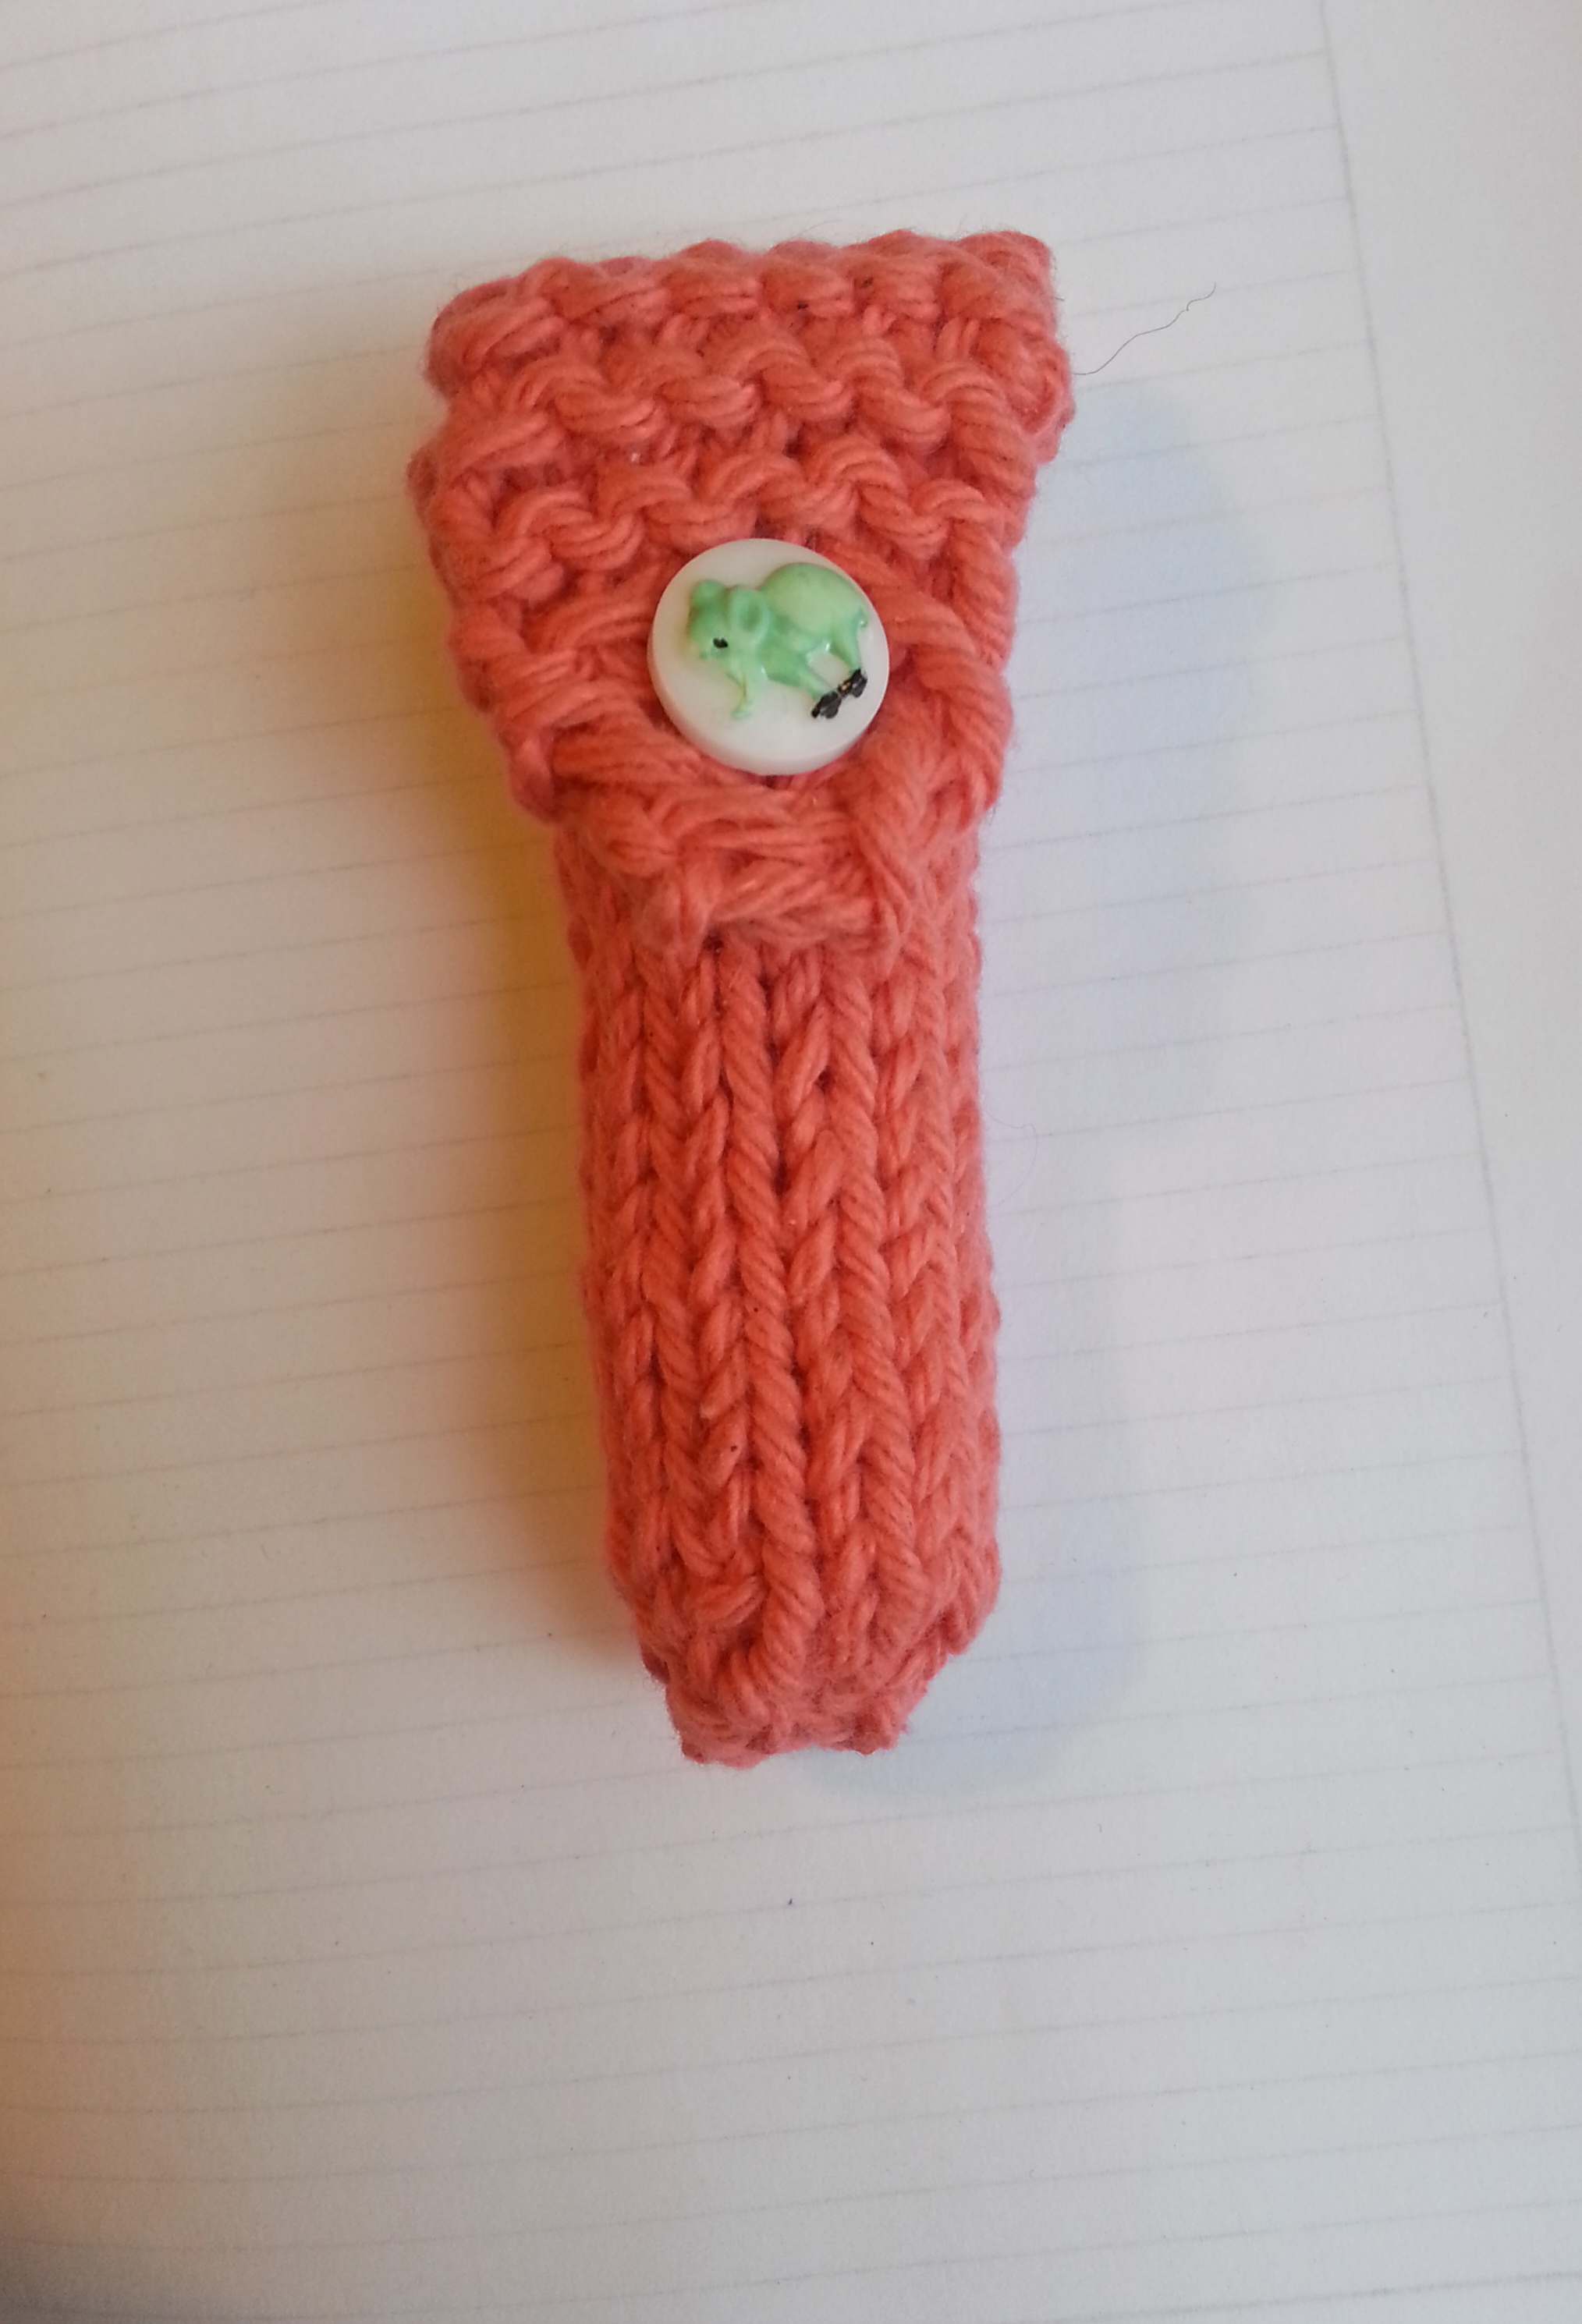
A second chapstick holder for A.! You wouldn’t believe how much use he got out of the first one (well, you would if you saw it). This time, in a less phallic color.
Another linen stitch headband for myself, also in green. I call this the commencement headband because knit a large portion of it during my graduation ceremony.
Autumn
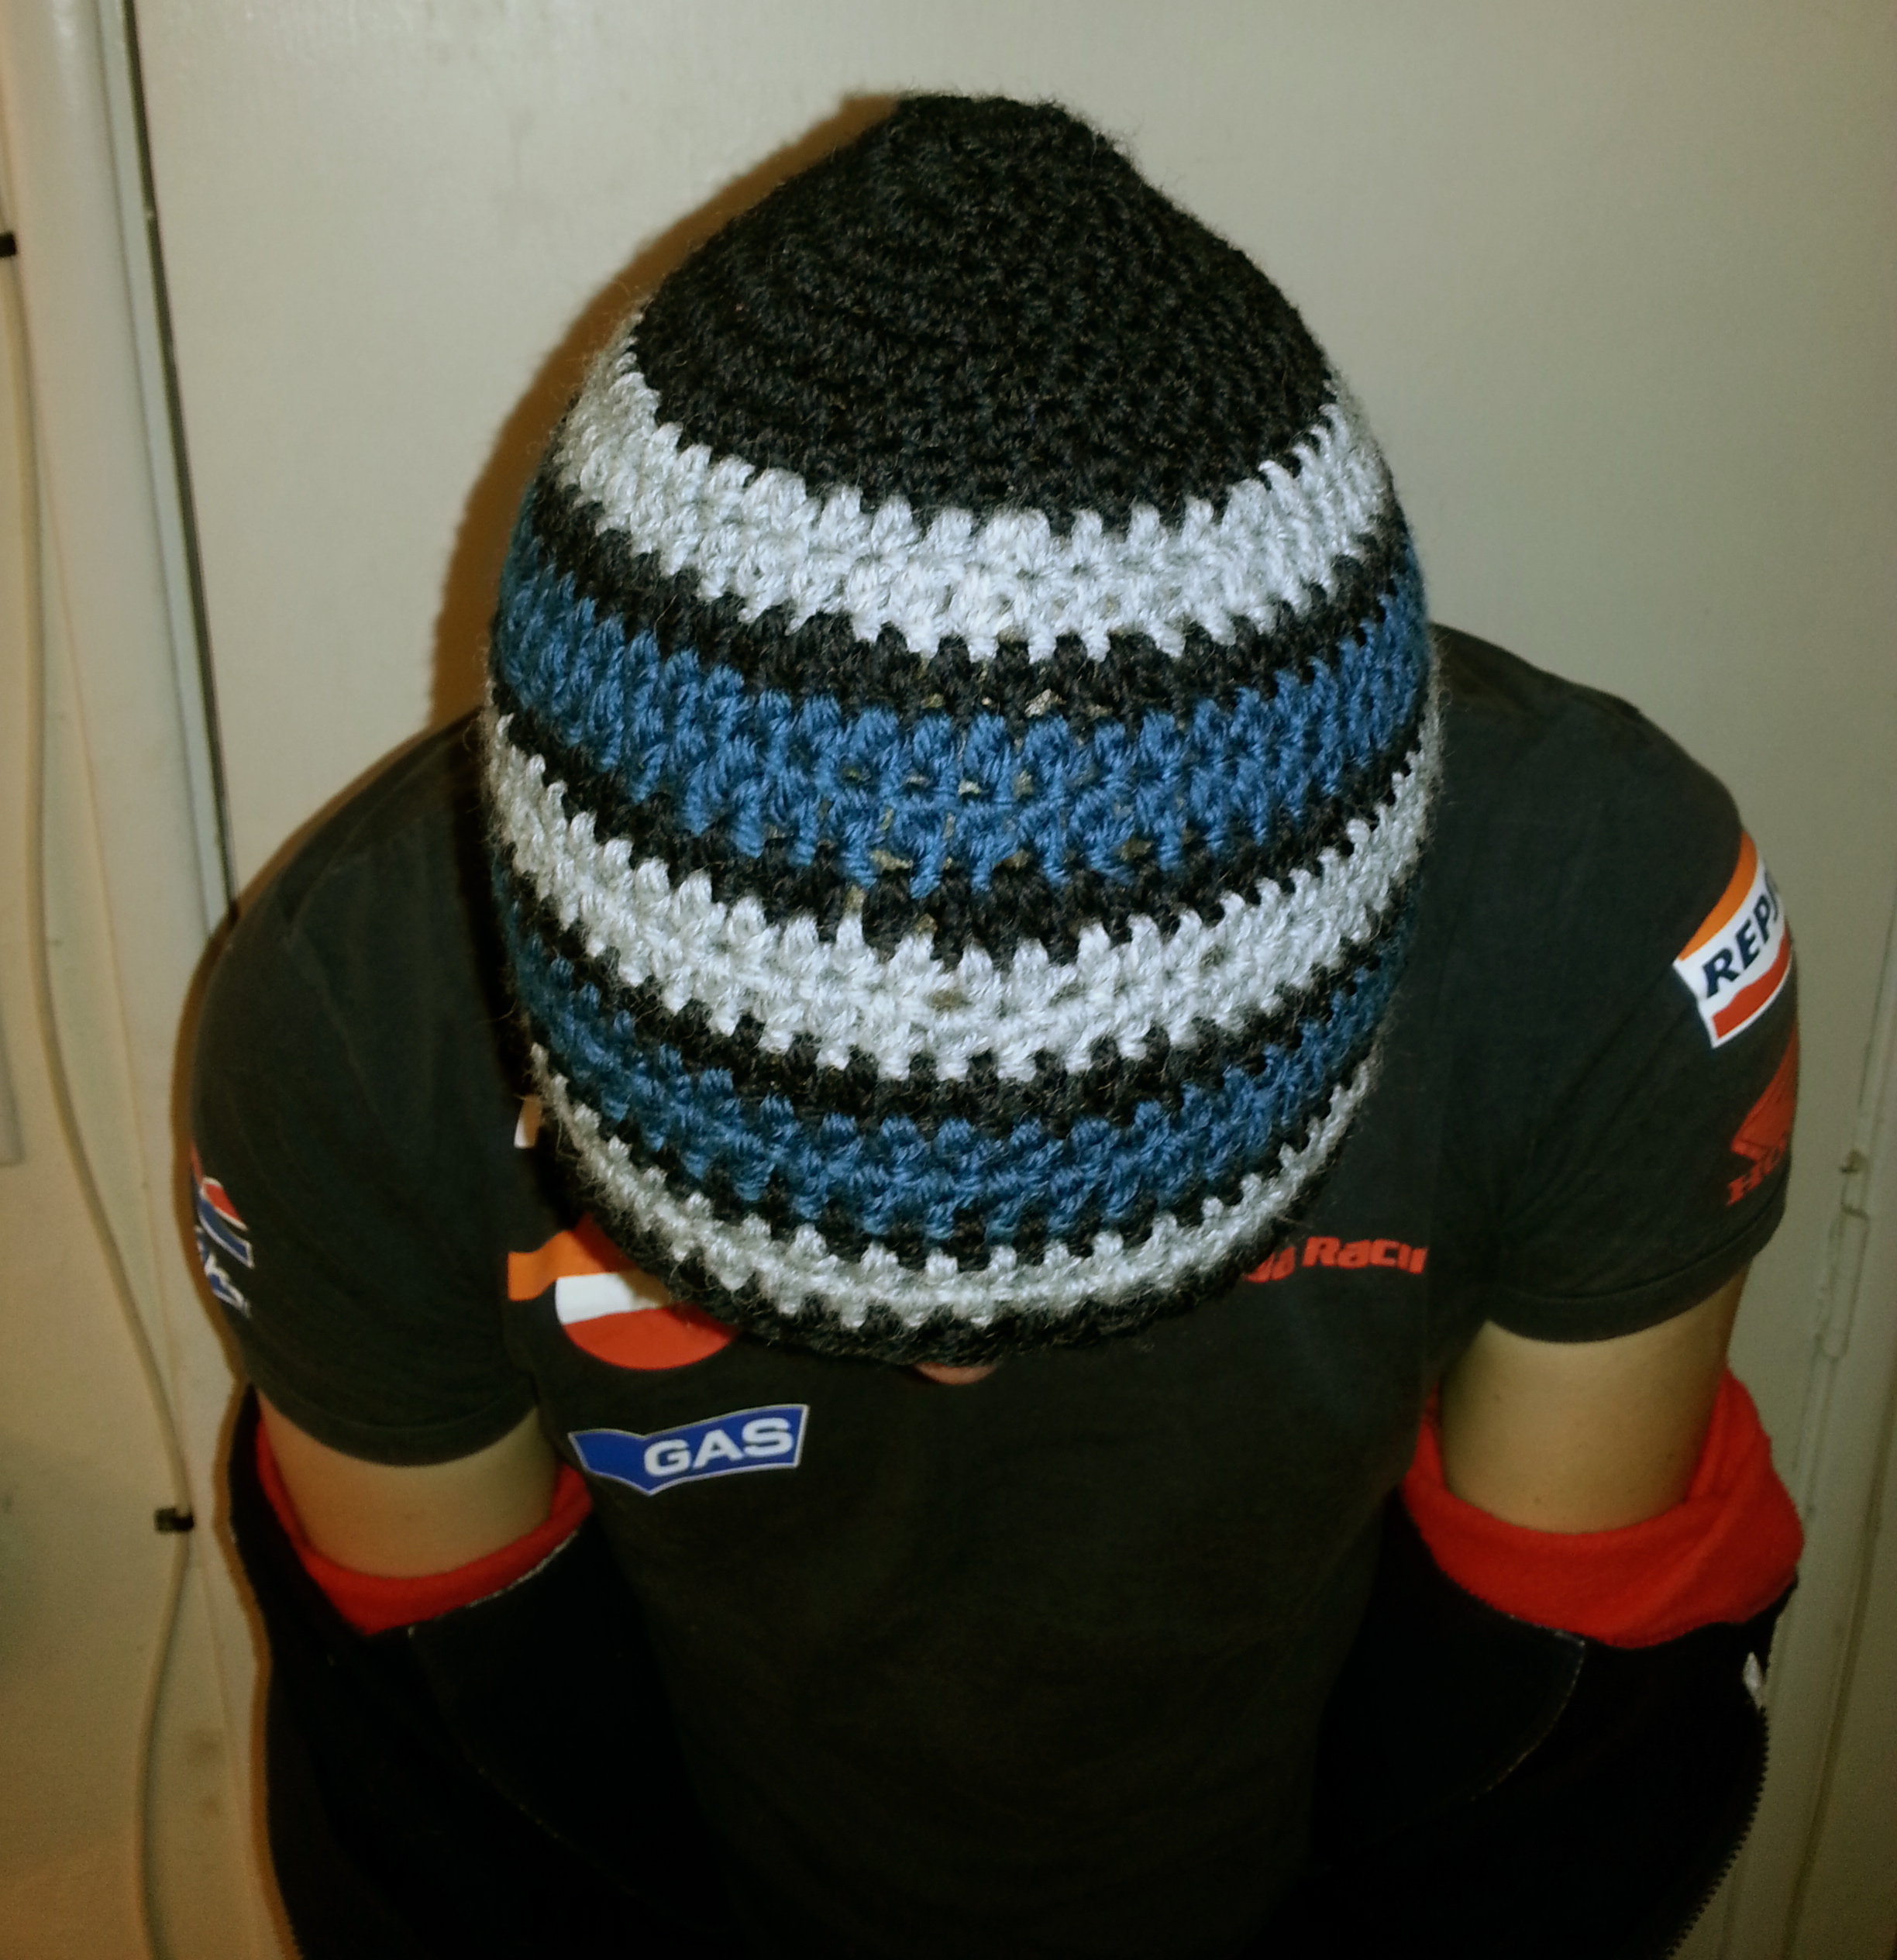
An ombre version of the Yosemite beanie for G. As per usually, I made this pattern up as I went along to match the yarn. I did the colorwork because I didn’t haven enough of any one color, but I ended up really liking the gradient effect. Crochet.
Ok, I know lots of non crafty people carve pumpkins, but these jack o’lanterns turned out really nice. I’d never used stencils before, but it was great. T’s is both a small scale image and a meta image, which neither of us noticed until he finished and we lit them up.
Winter
Ombre paper snowflakes! Made with origami paper in shades of blue and this Italian tutorial. Confession time: this photo is from Xmas 2014. I put them up this year too, but I forgot to take a picture.
Bonus images!
Winter
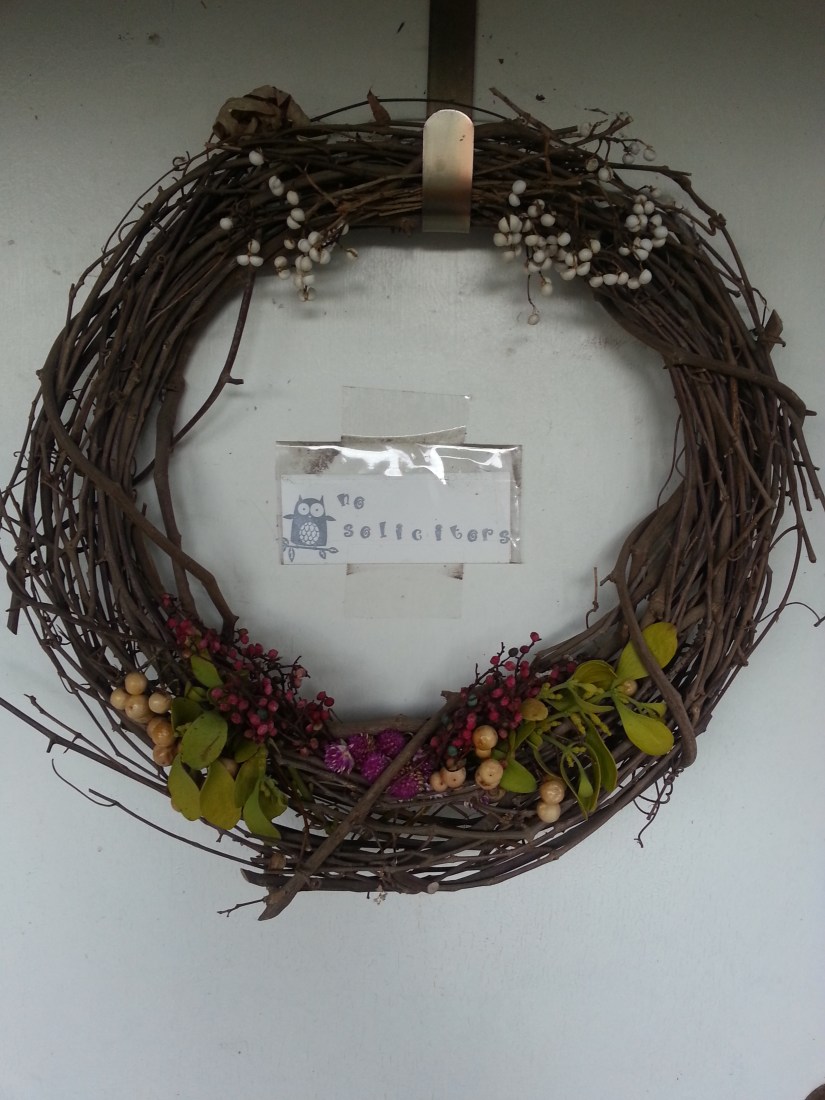
As in previous years, I made Christmas decorations out of branches and berries gleaned from the local flora. This year I put together a holiday bouquet with the best pieces. (I also tucked the smaller bits into my grapevine wreath, so that now it looks like something out of the shire:)
Works in Progress:
I am still working my miette cardigan— here it is back in September:
Conclusion: I did stick to my 2015 New Year’s goal of only using what I already owned to craft! I think my 2016 goal is to finally finish the mustard yellow sweater above.
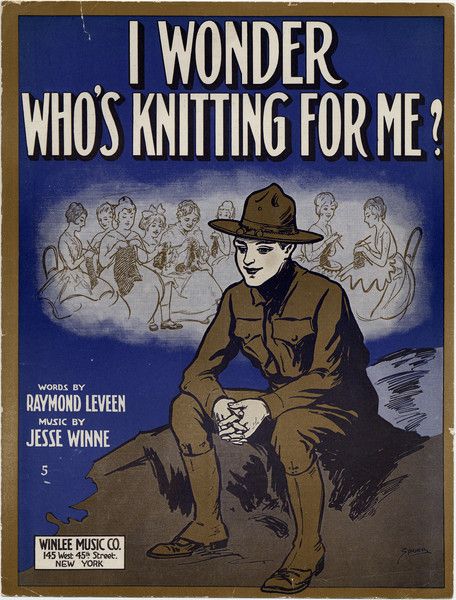
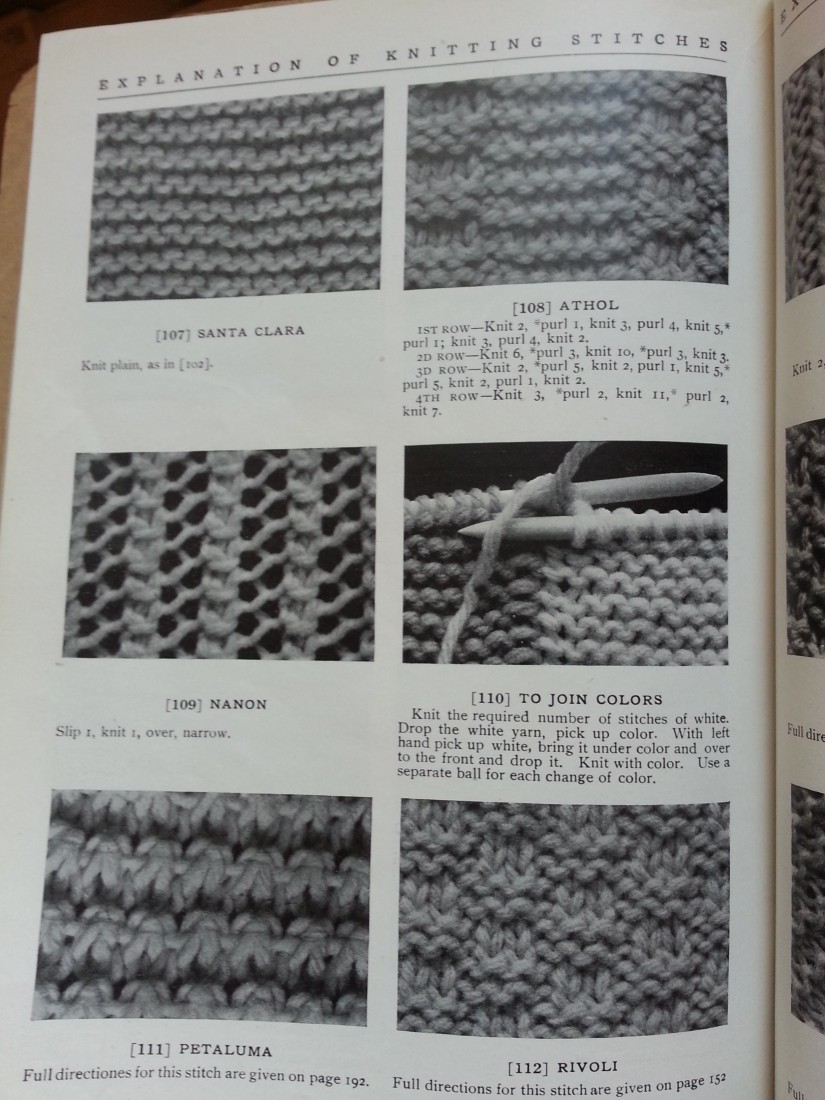
It’s my four-year blogiversary, and even though I an swamped with work, I can’t forgot my annual tradition of sharing WWI era knitting patterns! Since I started this blog on 11/11/11, which is Veteran’s Day in the US and Remembrance Day in Canada and the UK, I have been sharing patterns from my 1918 copy of Fleisher’s Knitting and Crocheting Manual (16th edition).
For previously posted free patterns and instructions on needle size, yarn, and gauge, please see the posts from 2012, 2013, and 2014. And now onto the pattern book!
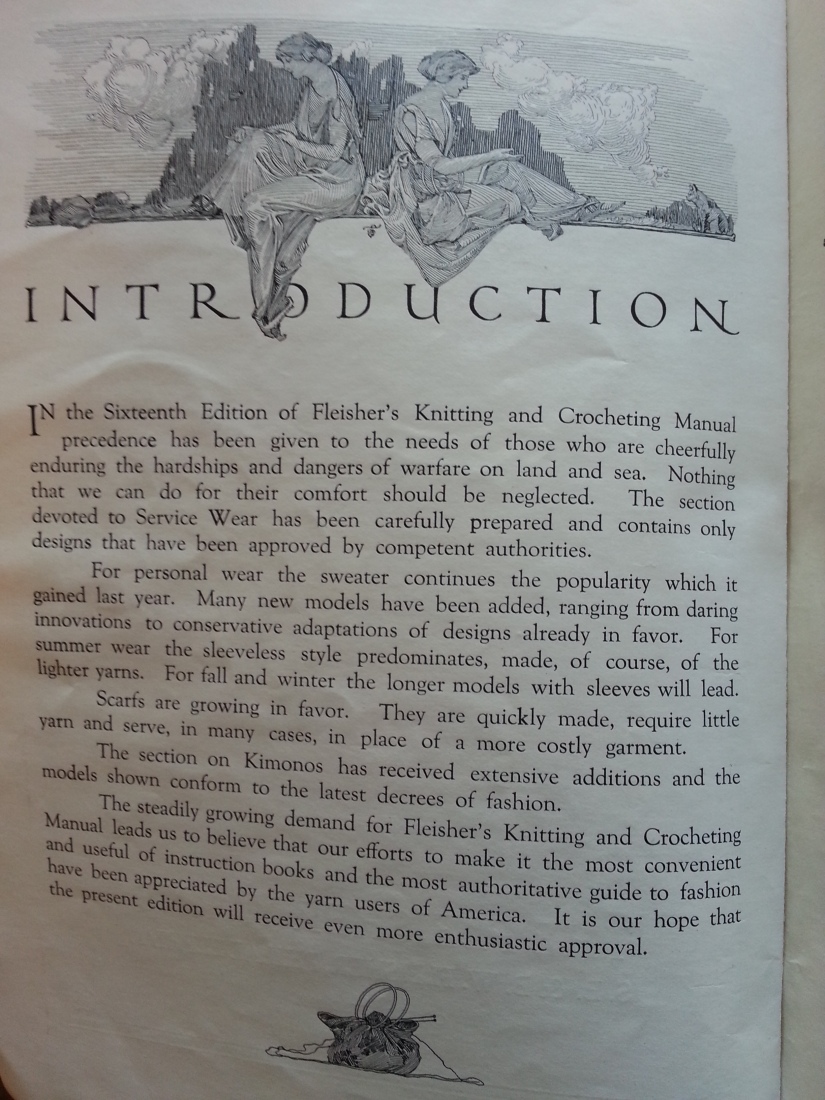
(things I love about this introduction: all service wear has been “approved by competent authorities”; scarves are apparently “growing in favor,” and US knitters and crocheters are collectively known as “yarn users of America.”)
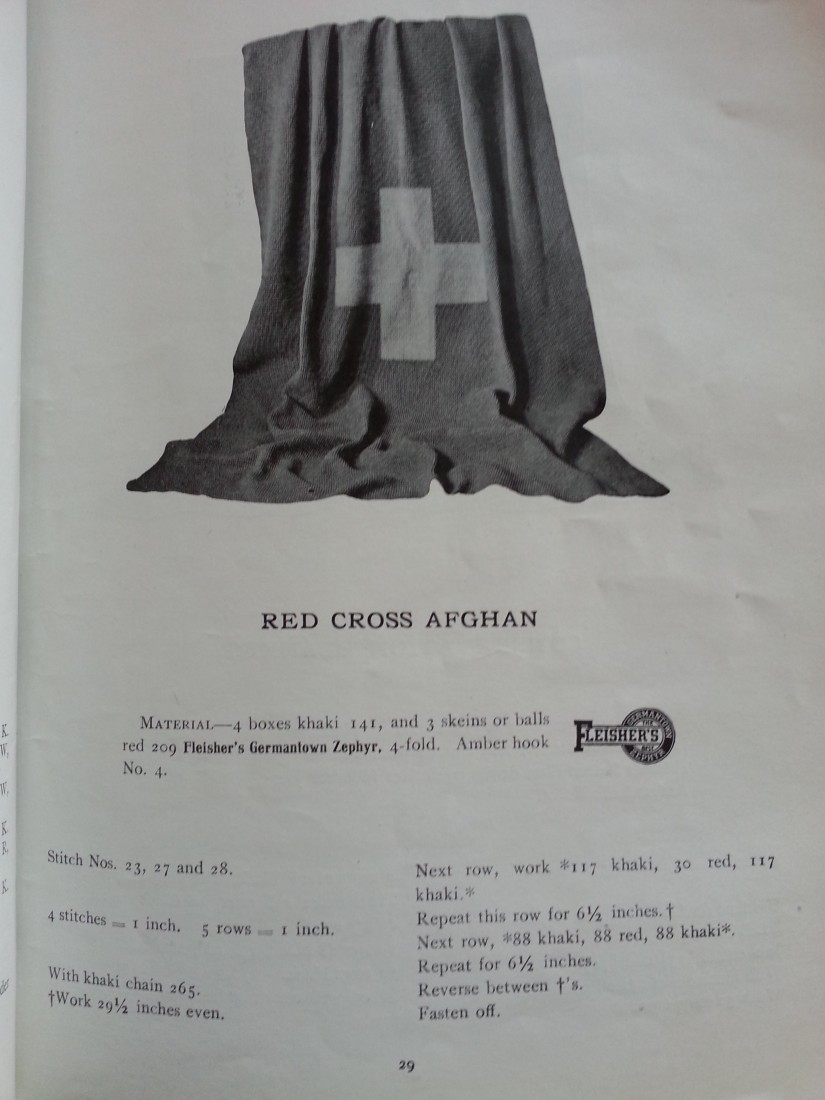
First, up: The Red Cross Afghan.
This is a crochet pattern, which I suppose makes sense, given the heft of blankets. But note that cross here is done in “khaki” yarn, not white!
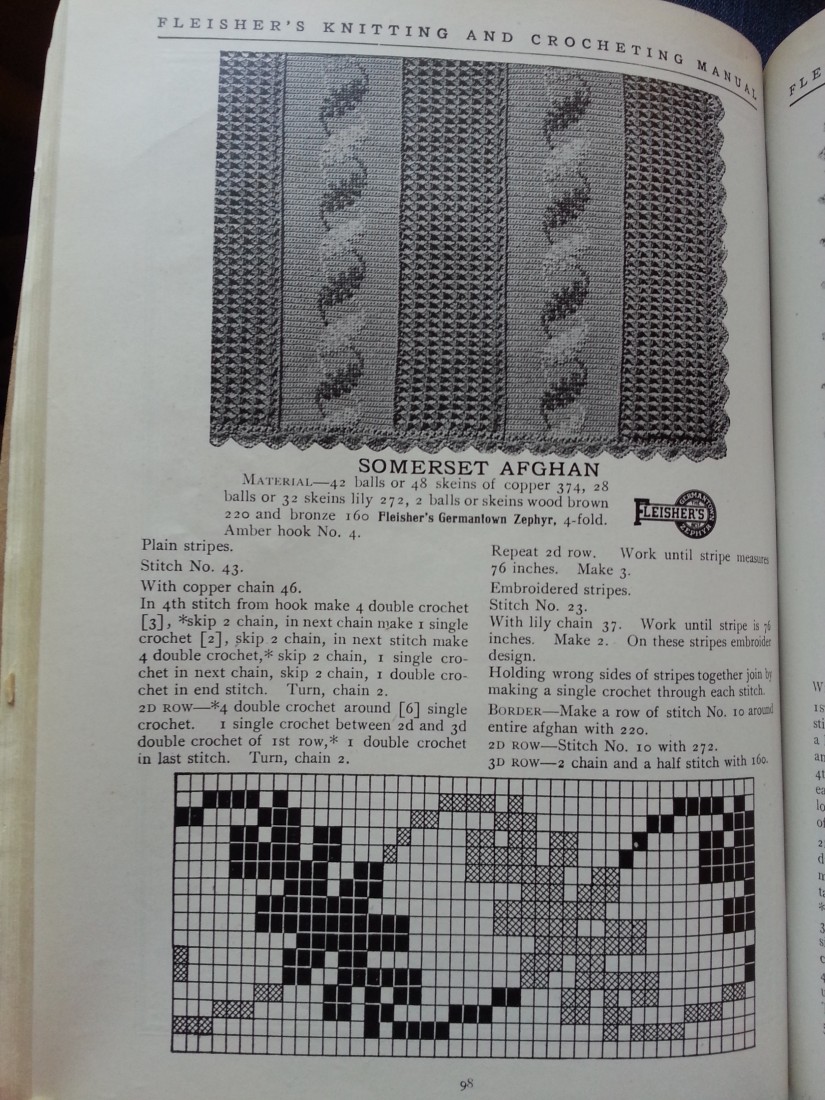
Somerset Afghan
Another crochet afghan, but this one has an intriguing colorwork design. Is it some sort of leaf or vine? I’m not sure, but part of me wonders if it could be adapted into a nice knitting colorwork pattern as well.
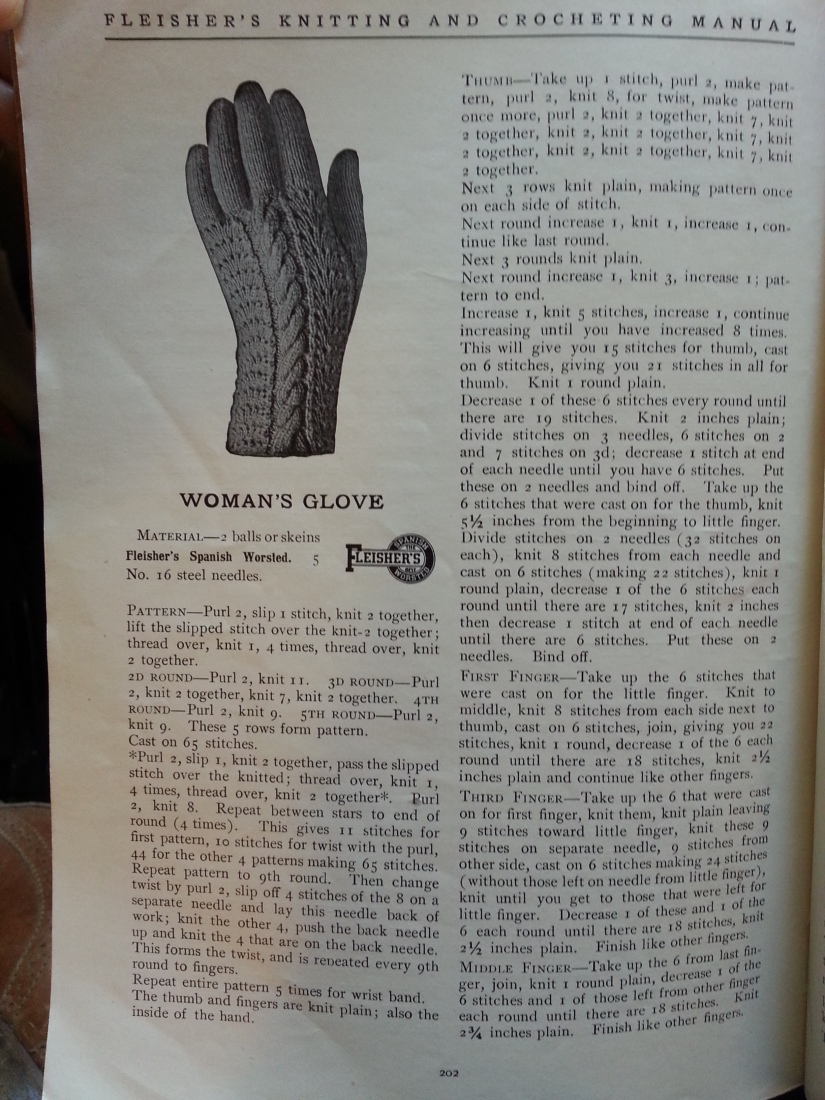
Woman’s Glove
I love the little details on this glove, especially the cable. Of course I doubt I’d attempt these, as I’ve never made gloves and these patterns are often a bit vague on the details.
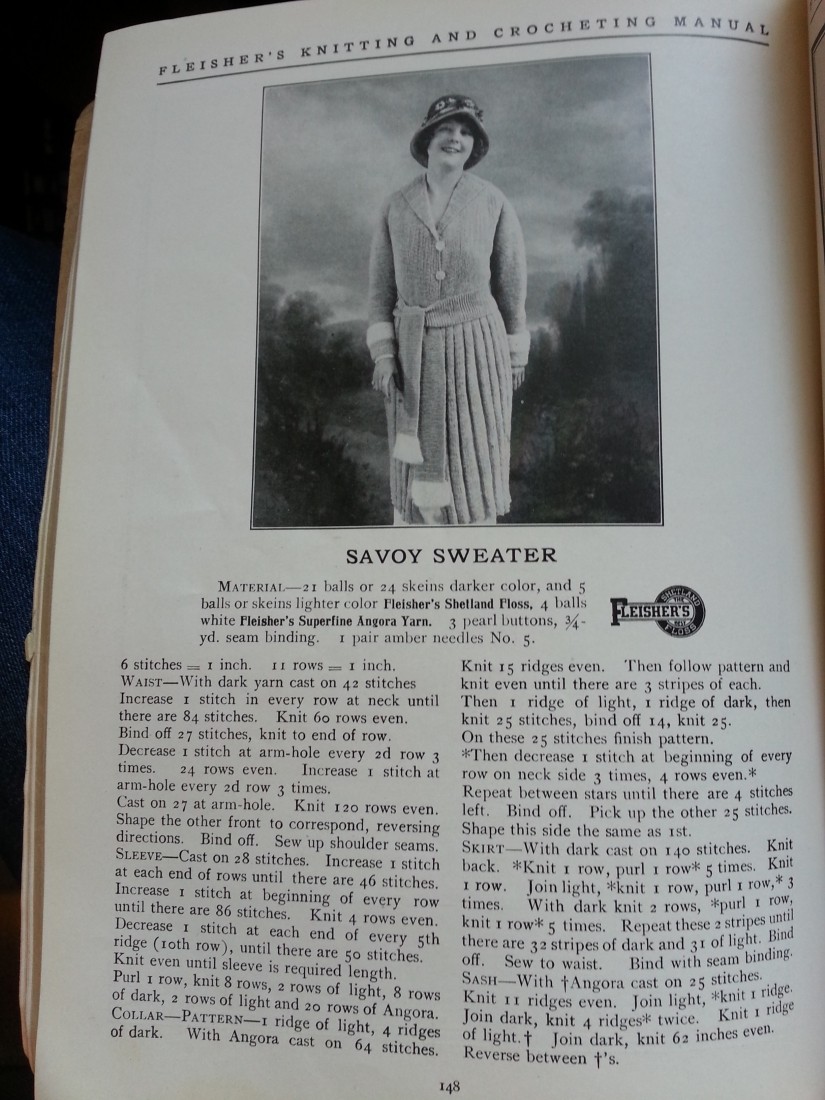
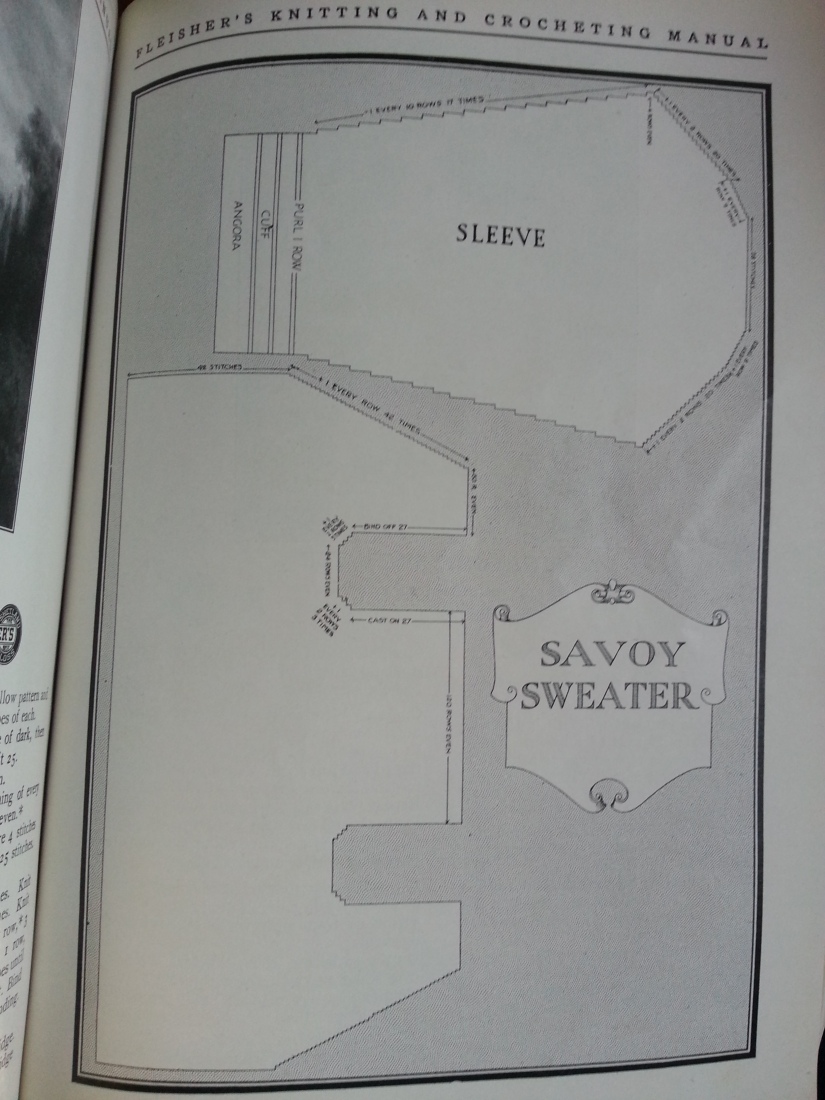
Savoy Sweater
Look at this long full coat! I don’t even want to imagine how long with would take me. I’d at least ditch the belt. I do like the pleats though.
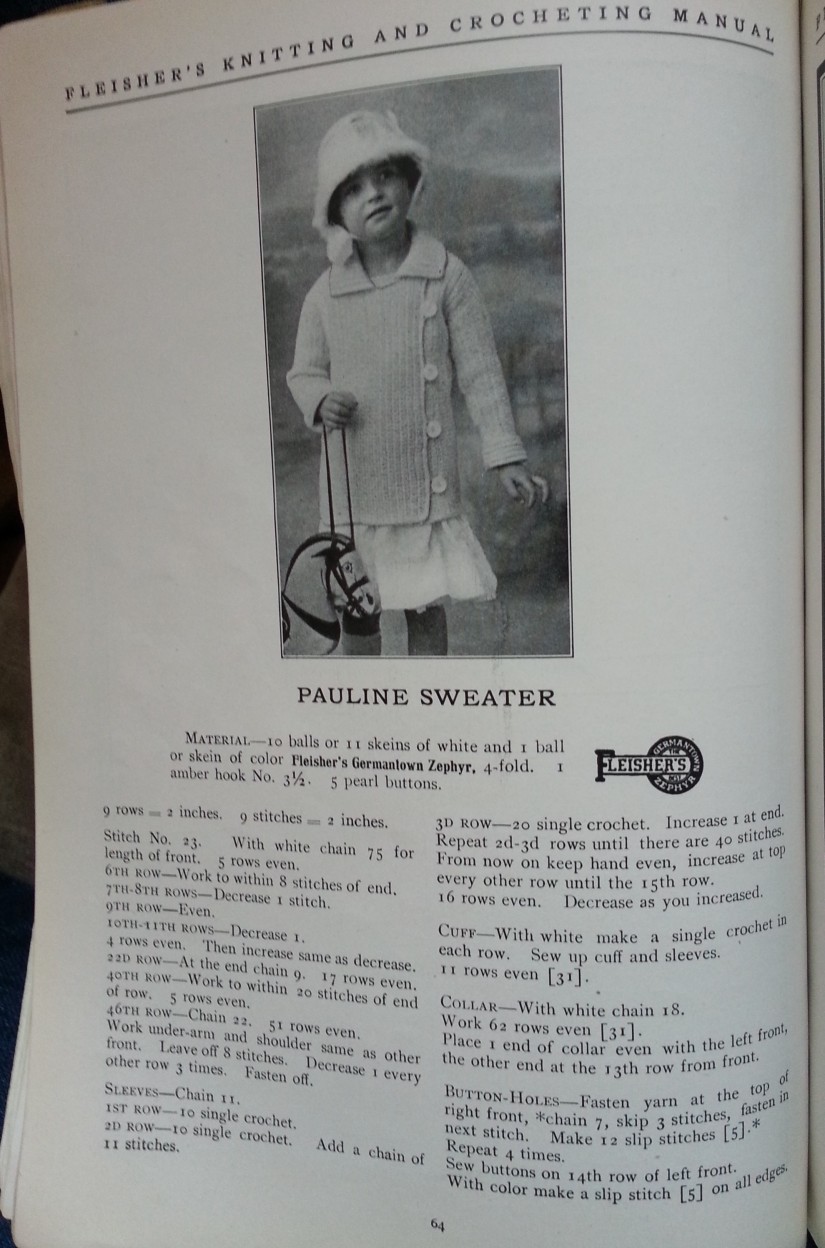
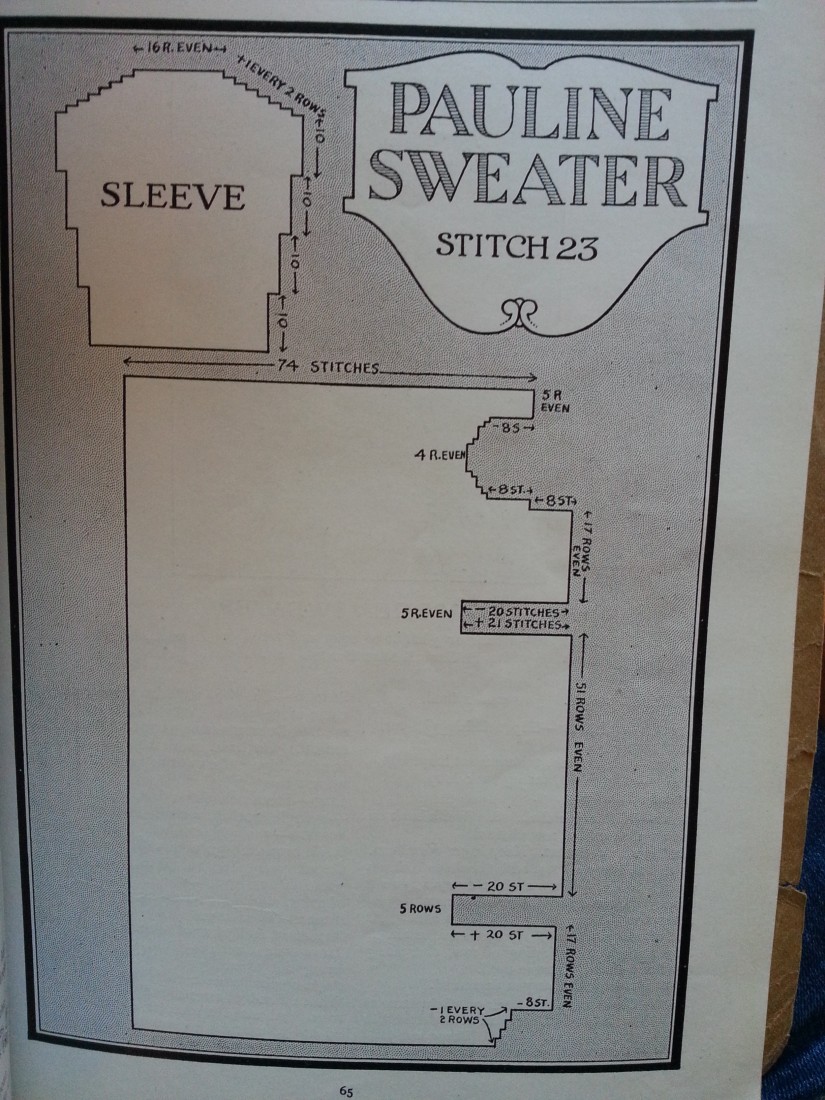
Pauline Sweater
This is a child’s crochet sweater, but I’d rather like it in a grown up size. I think the off center buttons are such a nice touch.
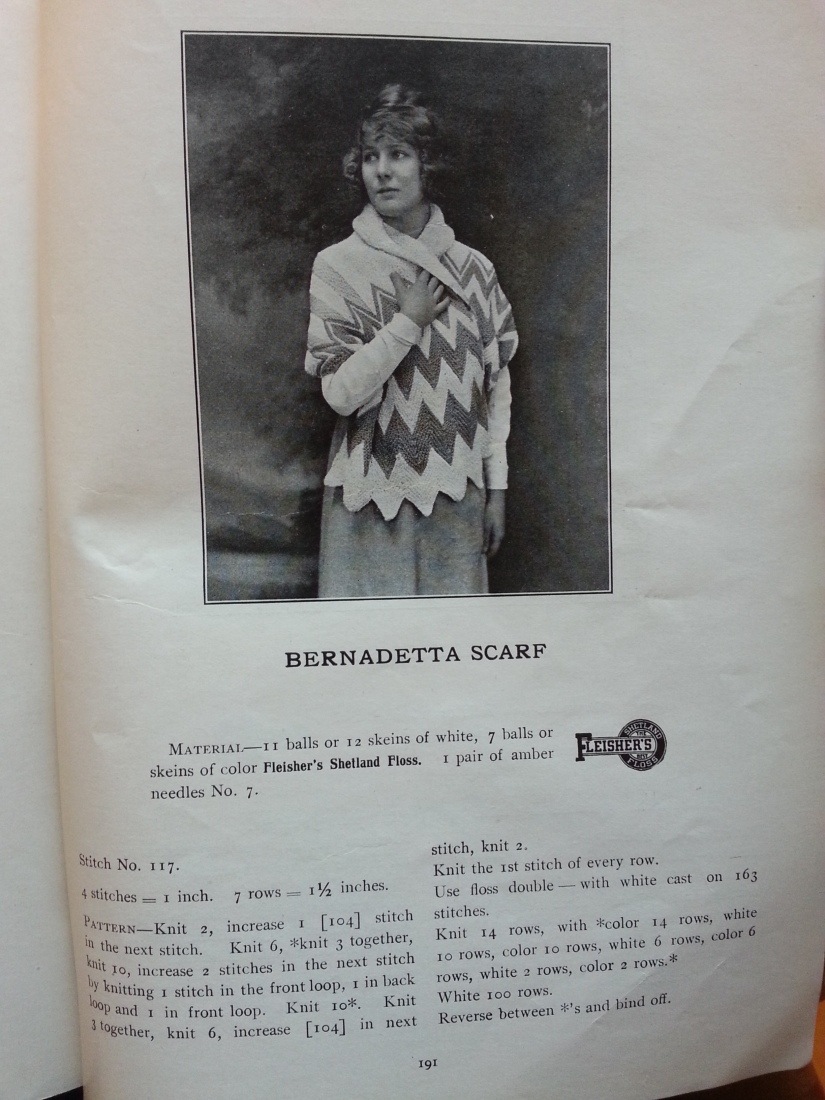
Bernadetta ScarfI think this might be more accurately labeled a shawl due to its size, but it’s hard to see the full shape from this photo. Nevertheless: what a lovely chevron piece!
Miscellaneous stitches
I complain a lot about the vague directions and unclear photos in this book, but it reality these is a little section that’s part stitch dictionary and part closeups of stitches used in the patterns. (I still don’t know what “narrow” means as a stitch though…)
Hope these World War I era patterns are useful to you!
This is a quick post to share some knit and crochet hats I’ve made. Some of them are things I made a long time ago but never shared (in those cases, sorry about the crappy quality of the old photos!). They all have three things in common—they are hats, they were made gifts, and they involved colorwork. They were all things I made for guys as well, but they don’t have to be for men only—I would wear any one of these hats.
Hats make great holiday gifts—they don’t take as much time or require as much fitting as other projects do, they are super practical, and you can probably make them with yarn in your stash. This patterns, as usually, are all available on the internet for free.
To the hats!
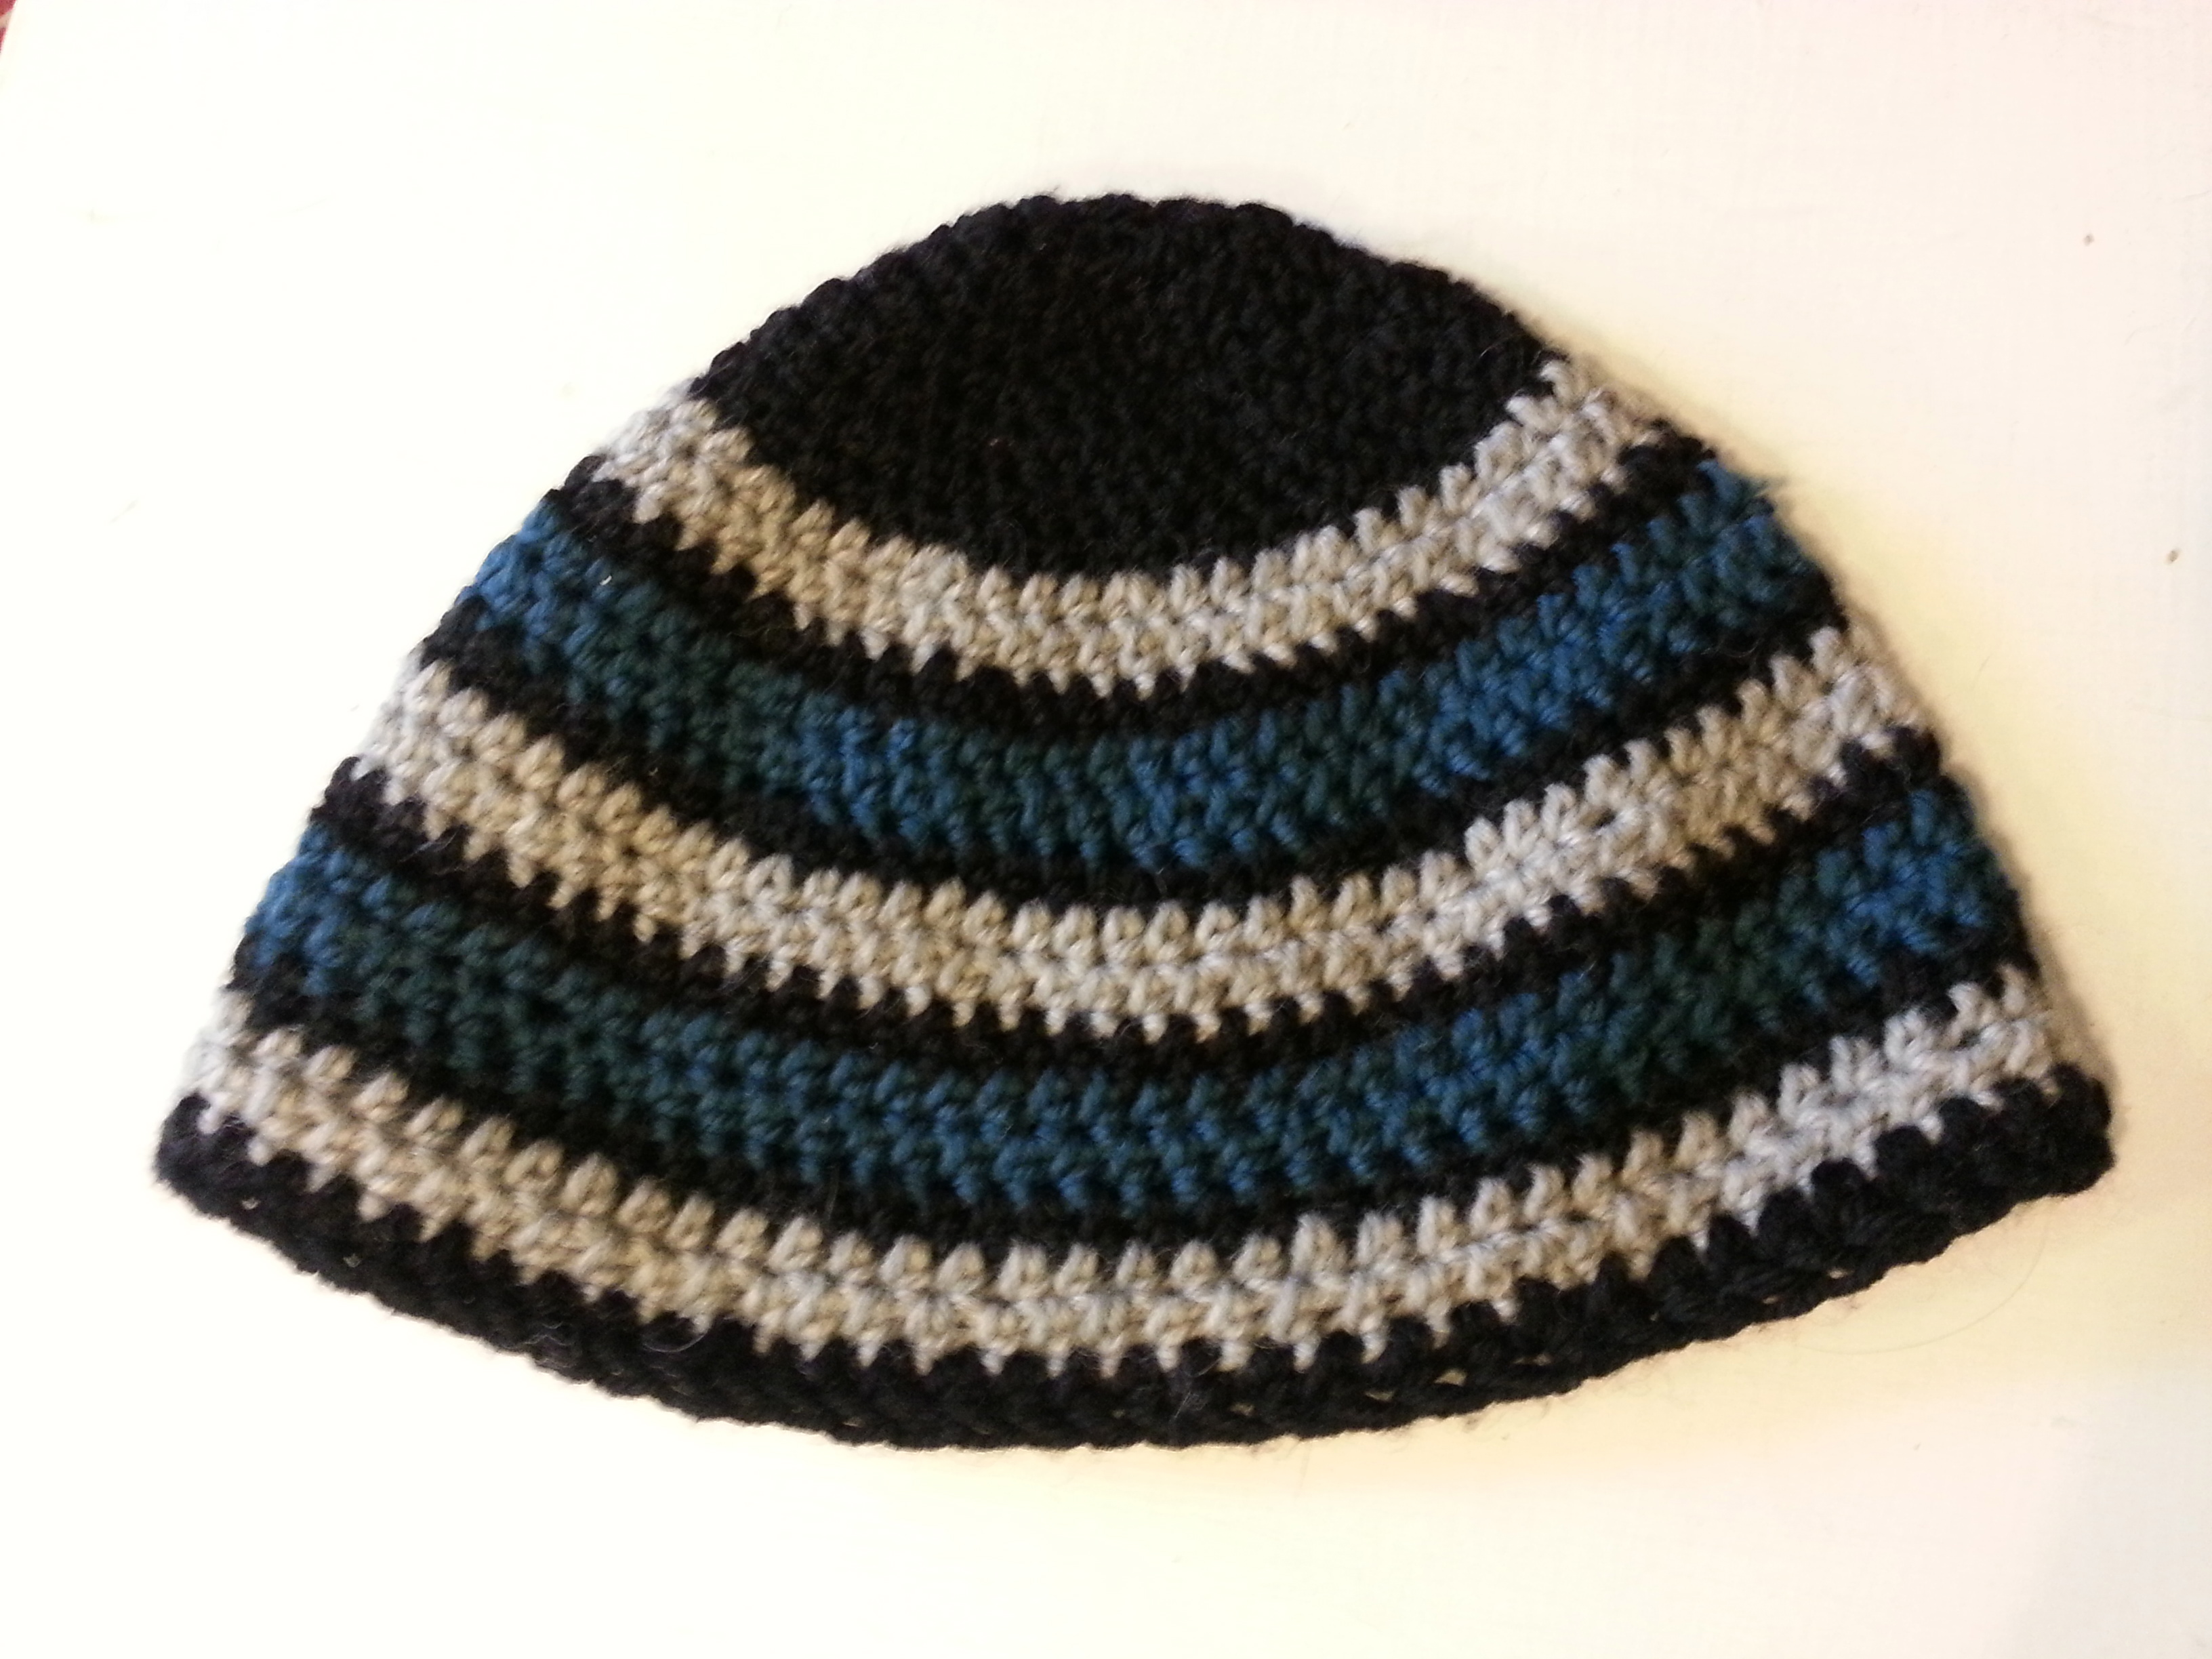
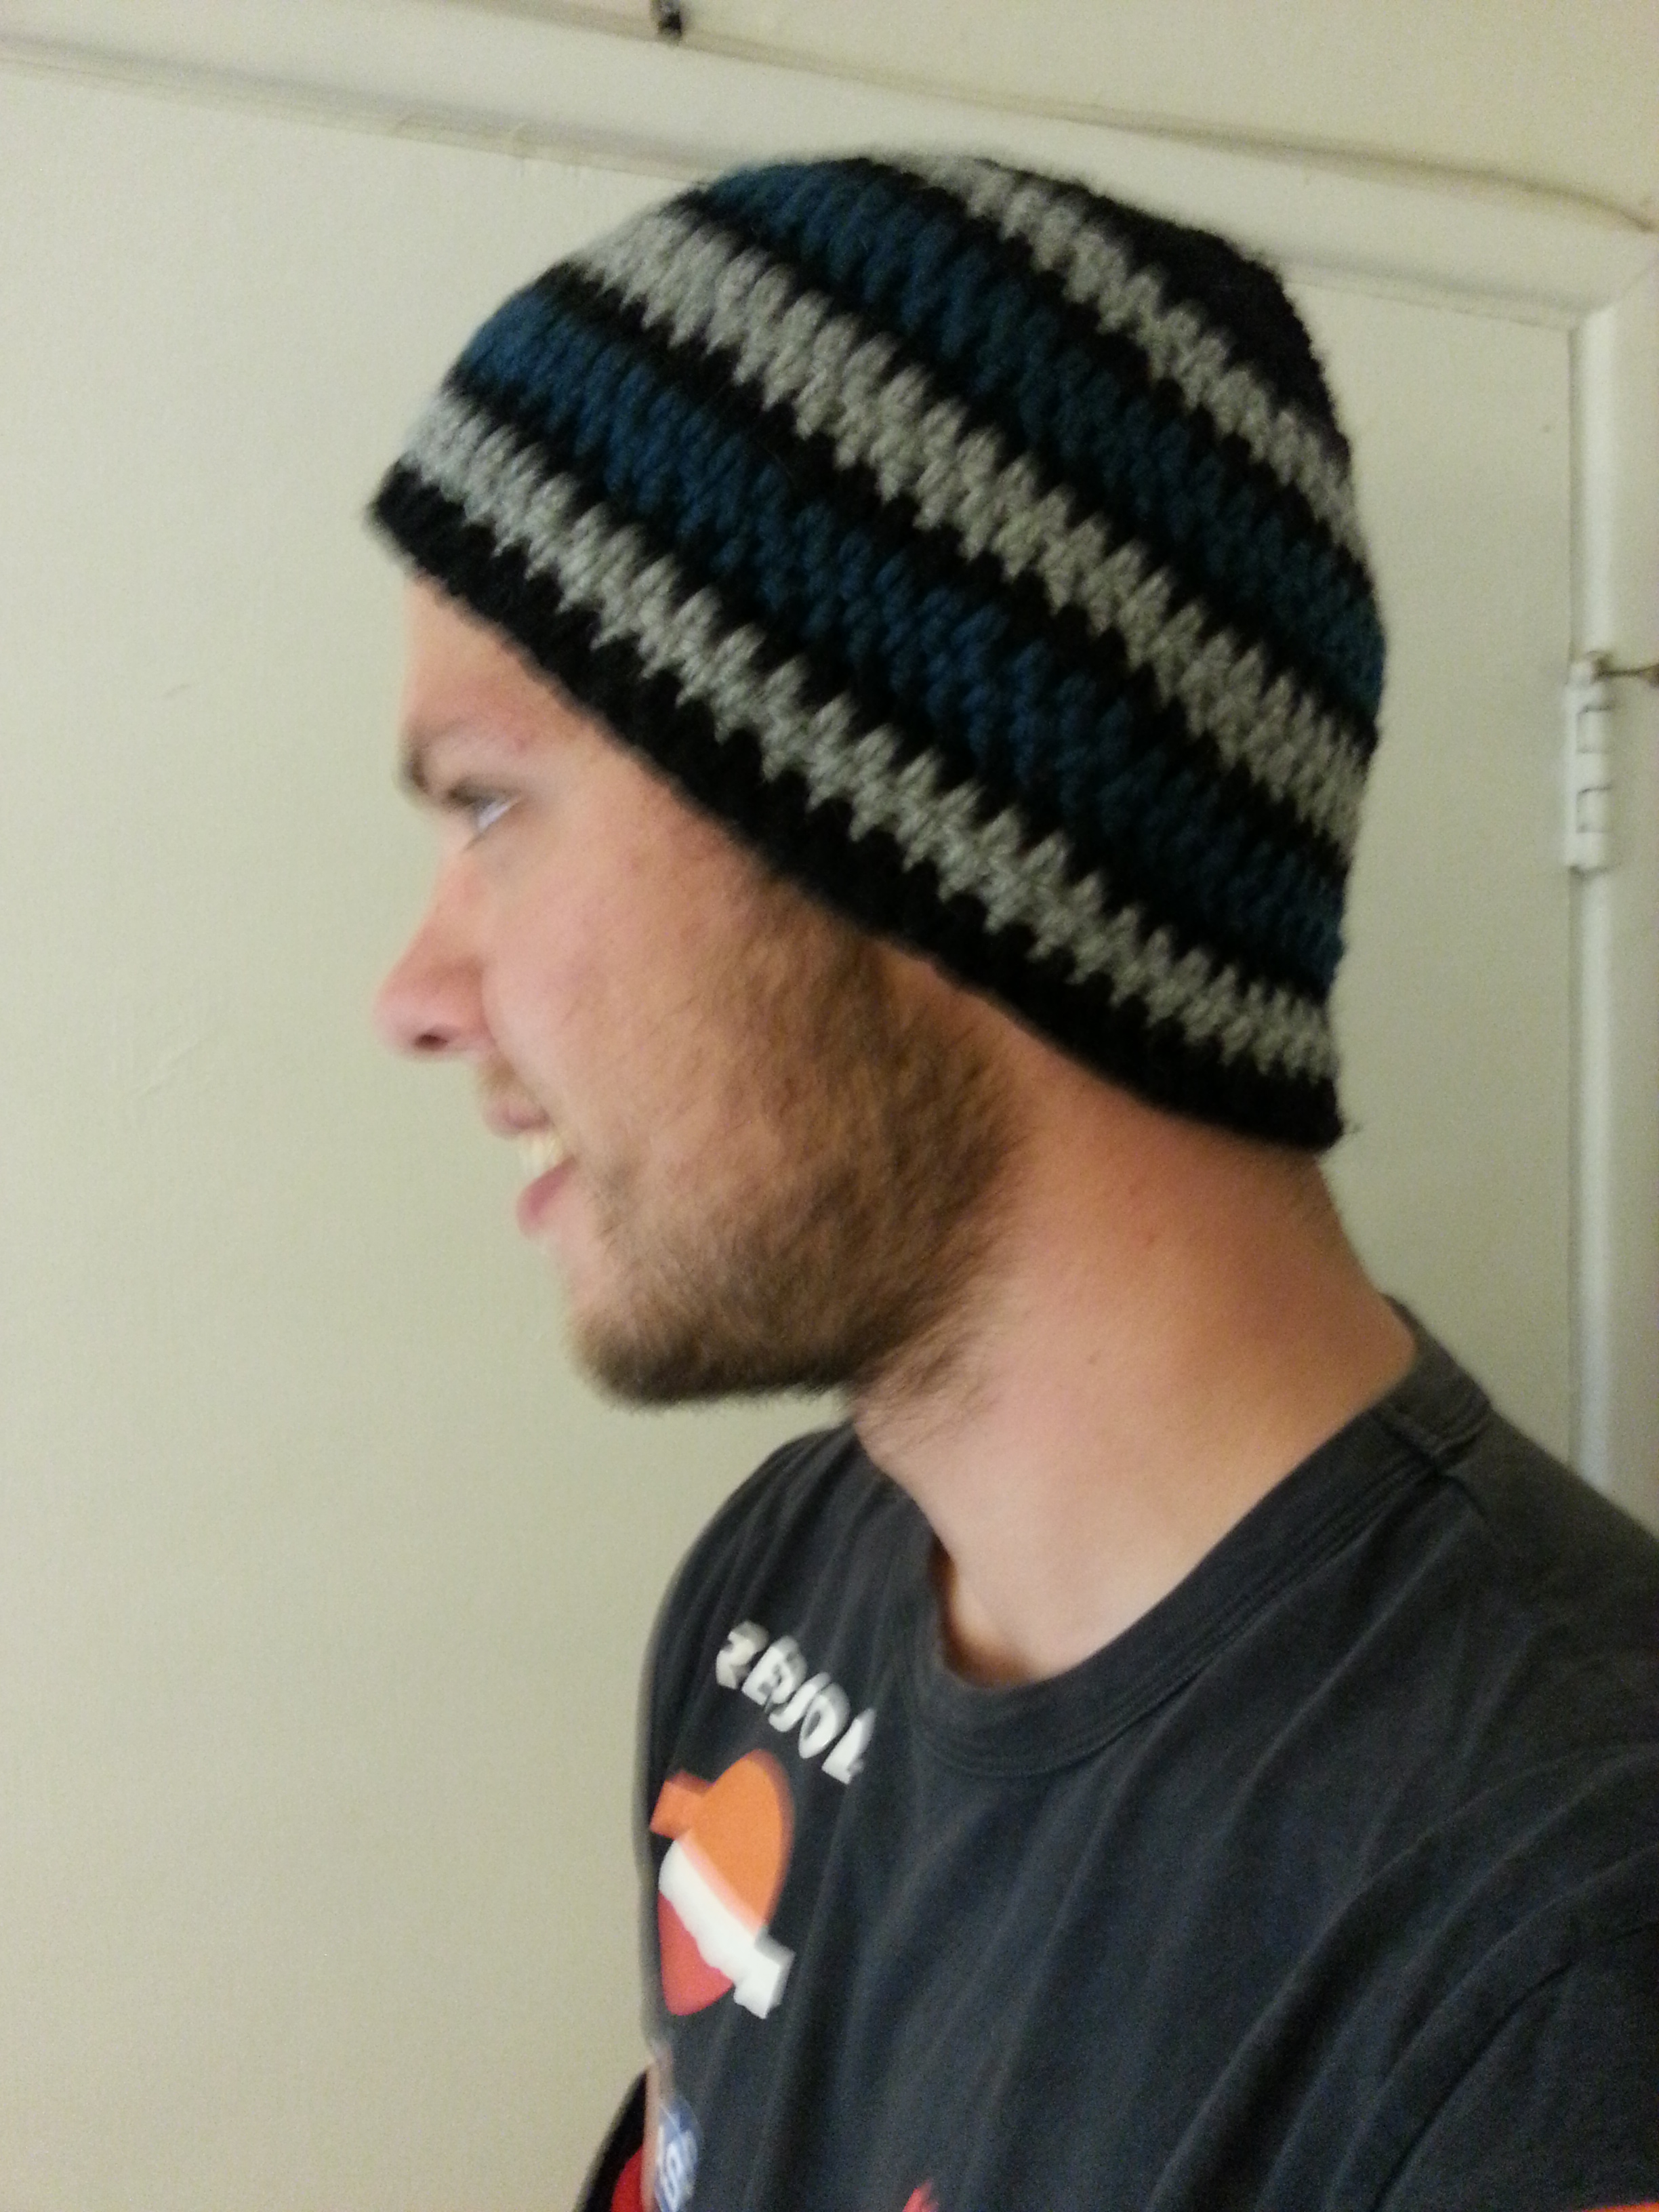
The Striped Beanie (Crochet)
The fastest way for me to make a hat is to crochet one. And the easiest way to make said hat more interesting is to add stripes.
I made this beanie in a few hours using blue, gray, and black worsted weight wool from my stash. I placed stripes of blue and gray two rounds tall between stripes of black that were one round tall so no one color dominated.
I do not actually have a pattern for this hat—I have done versions of it several times, and I adjust it to the recipient. But I would suggest using this free beanie pattern if you want to make something similar.
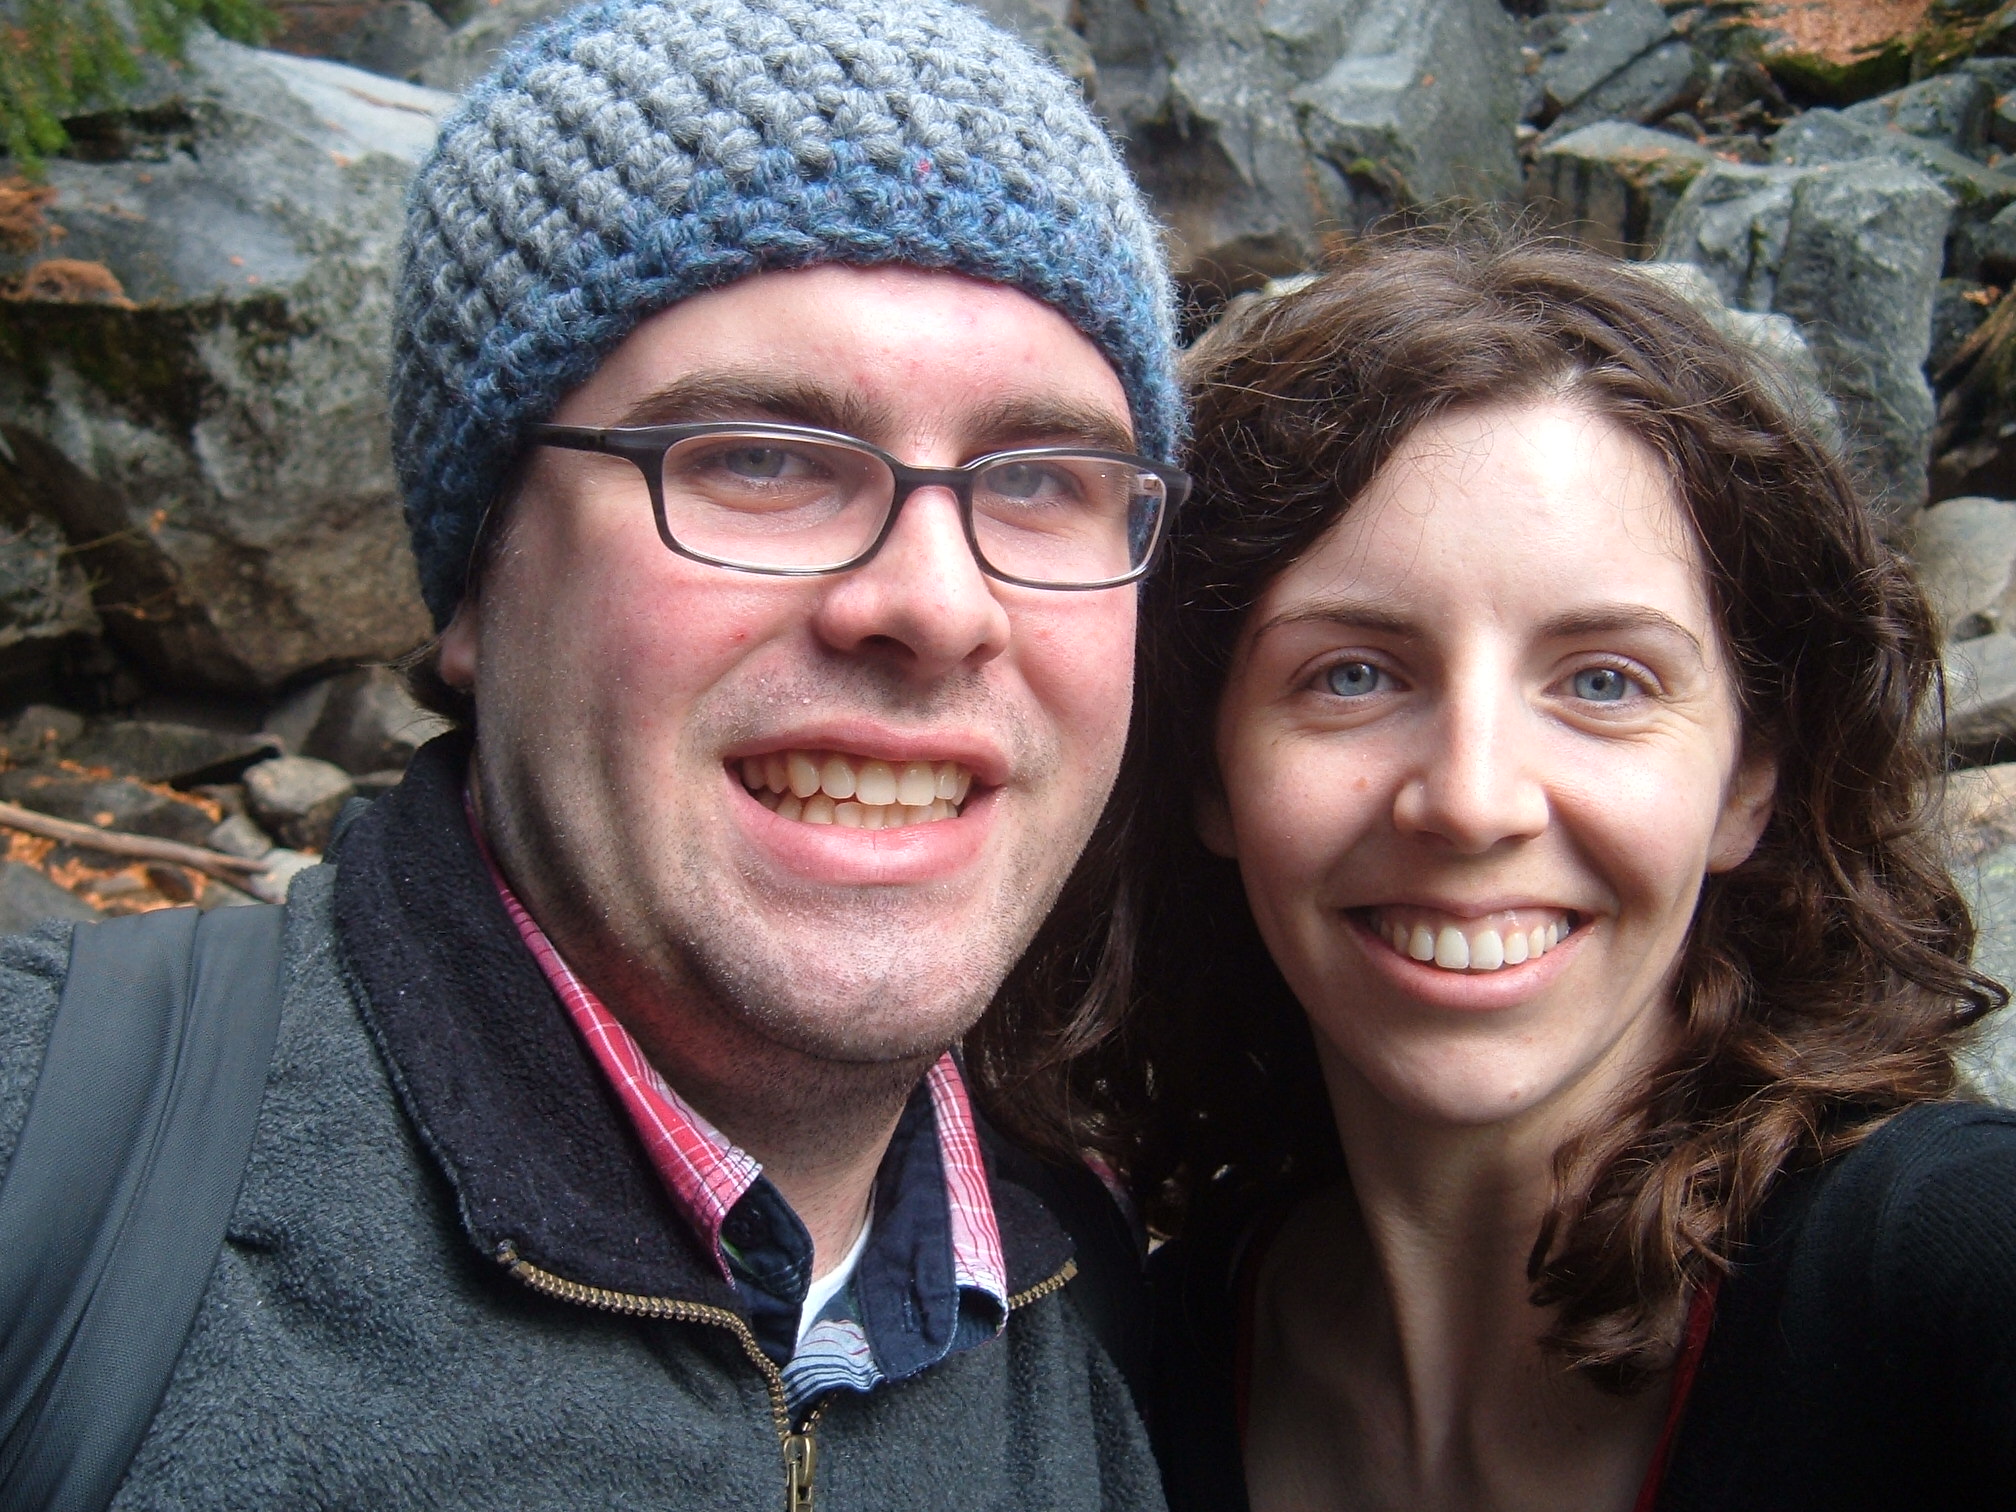
Here’s a version I made seven (!) years ago, this time out of two colors of bulky weight wool blend, with one stripe 5 rounds tall in the middle:
(side note—look at how long my hair was then!)
The Swell Earflap (Knit)
Want something a little more challenging and with more ear coverage? Try Swell:
This earflap hat has a basic repeating chart to form the wave pattern. You need to be comfortable with colorwork in the round, but once you get the hang of the pattern it’s not too difficult.
I will say that this pattern runs small! I am a loose knitter and I made the medium—it just fit him. Also, it looks best on very short or very long hair, but not so great on my medium-short curly bob:
That’s me trying to keep my hair under the earflaps without success.
In my version, I omitted the peace sign on the earflap and joined the flaps to the hat with knit stitches in stead of purls to make it more seamless.
Originally I did include the tassels, but the recipient preferred it without, and was able to remove them without difficulty.
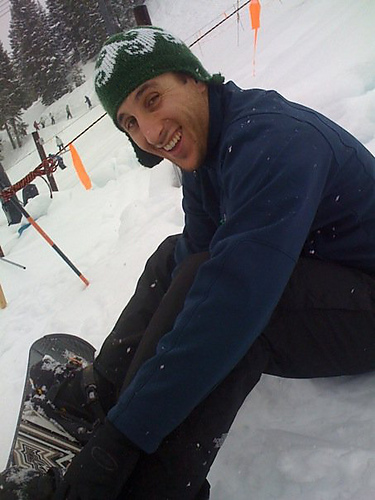
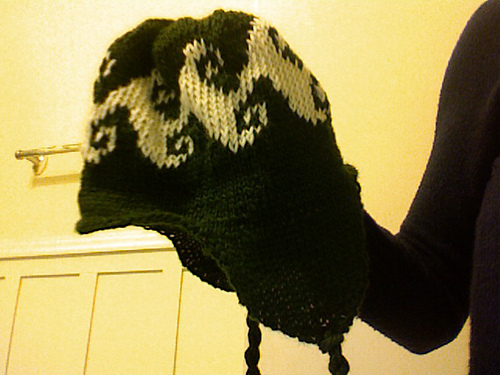
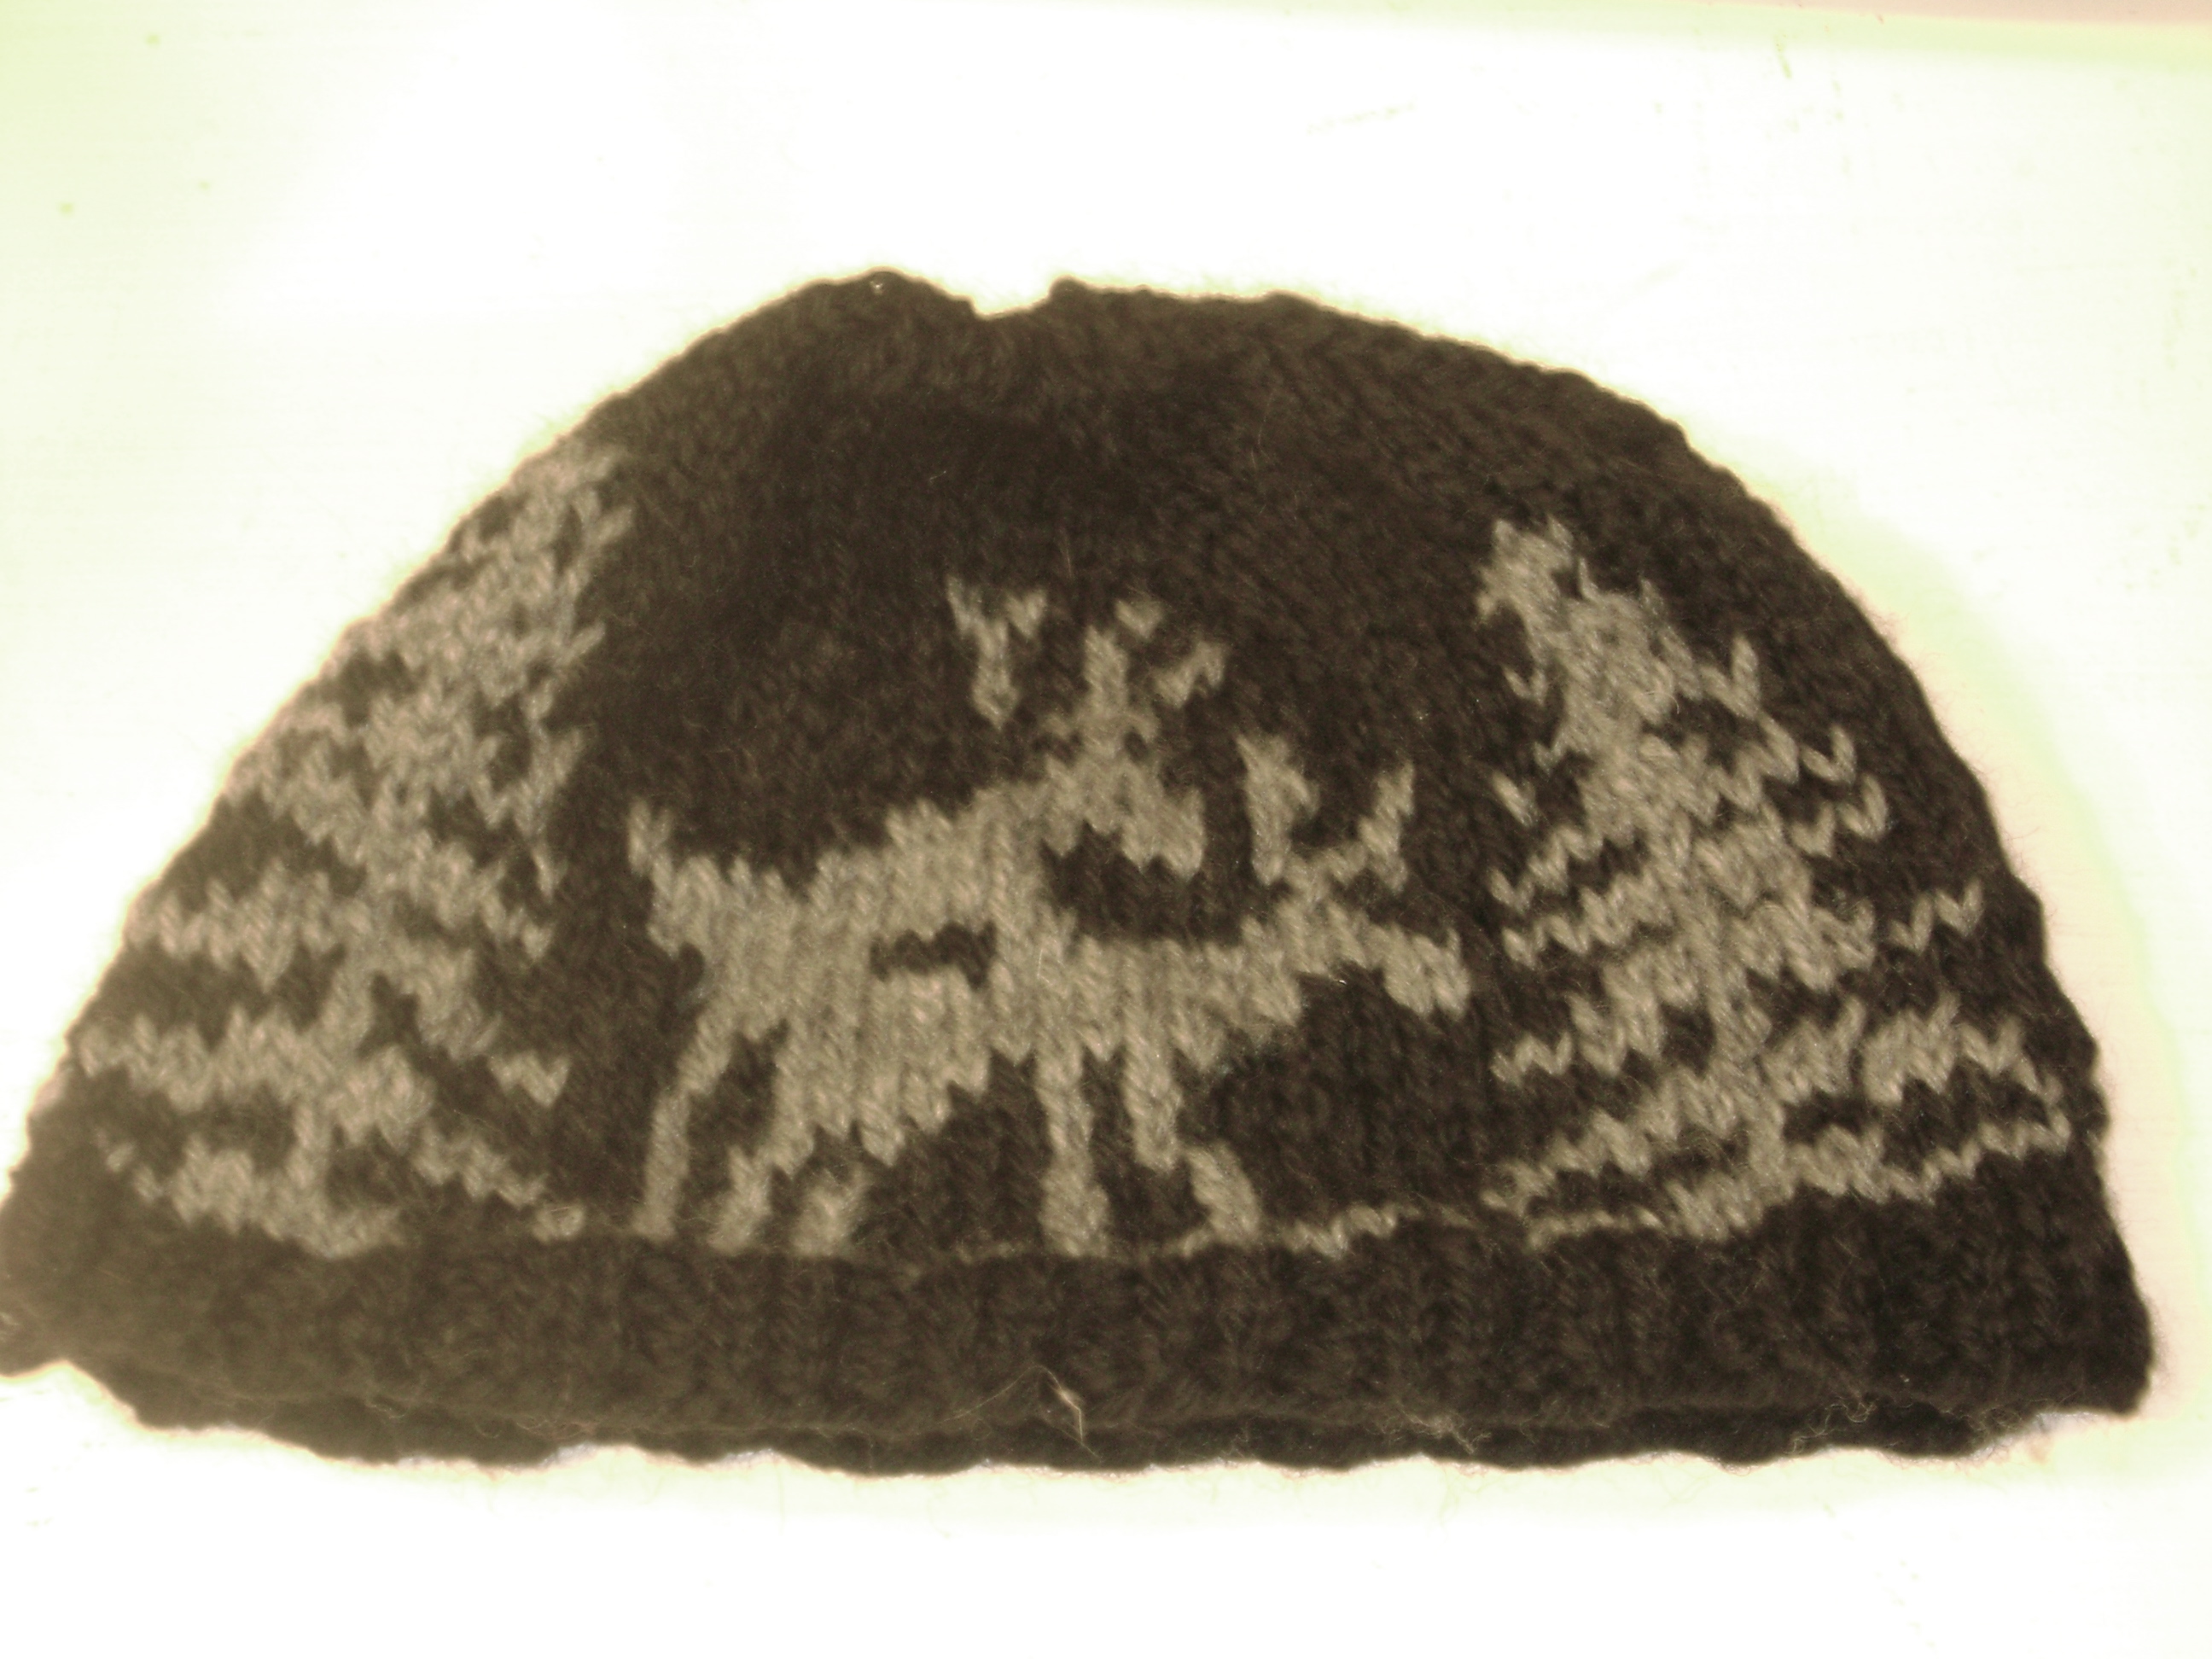
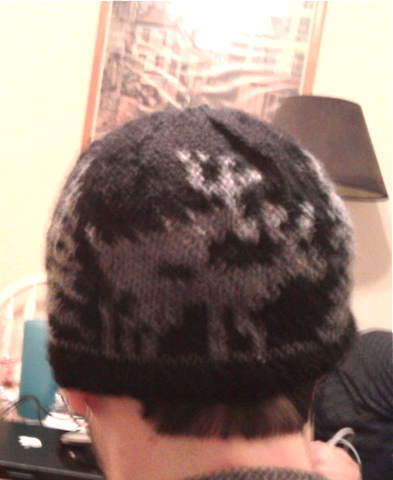
The Procreating Ungulant (Knit)
Looking to make a hat with more complicated colorwork and a slightly NSFW motif? The Fornicating Deer is probably what you want:
This is hat is the full package—it’s seasonal, it’s intricate, and it features two deer in the process of making another deer. It also runs really small. Confession—the first time I made it, I got 3/4 of the way through a size small and had to rip it back. It was awful. But the final product (made with gray and black wool, worsted weight) turned great.
My version was a weird size—I actually used Swell as a basis for it, sort of. Since the medium sized Swell hat had 88 stitches and did not divide by the 32 stitch chart, I actually started knitting at the beginning of the second tree and ended at the end of the first tree, then did this all over again (total of two times). This gave me a total of 90 stitches, which was close enough to the original swell pattern (I just increased twice before beginning the chart and decreased twice before starting the top decreases). It worked.
Surprisingly, with the colors I chose, the exact activities of said reindeer are not apparent until you really examine it closely. Heh.
Three years ago—on November 11, the anniversary of World War I’s end—I started this blog. Every year since, on what is known as Veteran’s Day in the U.S. and Remembrance Day in the Commonwealth, I have shared free knitting and crochet patterns from my thrifted 1918 copy of Fleisher’s Knitting and Crocheting Manual (16th edition), which dates to the era of the Great War. (Check out the 2012 post and the 2013 post for more patterns.)
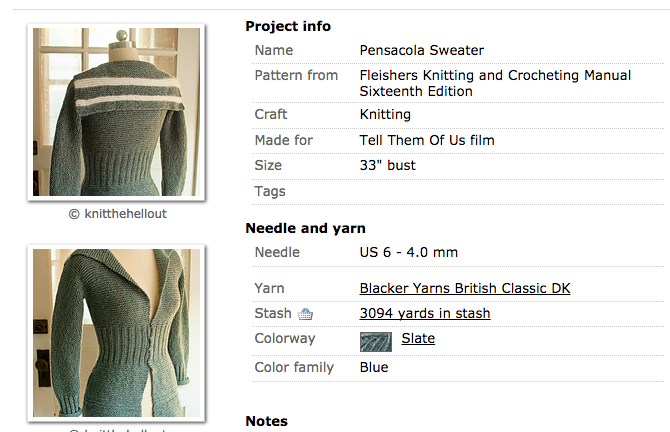
I’m continuing the tradition this year with a special post of all cardigan sweater patterns. There’s a little something for everyone—knitting and crochet, children’s and adult’s sizes. I decided to share all sweater patterns partly because it’s National Knit a Sweater Month, and partly because I have finally seen what one of these 100-year-old sweaters looks like in color! Way back in February, Cassandra of Knit the Hell Out knit the Pensacola Sweater from this knitting manual (You can read about why she made it and how she interpreted the pattern here). You should really check it out!
Sweaters are inspiring me this year. So without further ado: this year’s free knitting patterns!
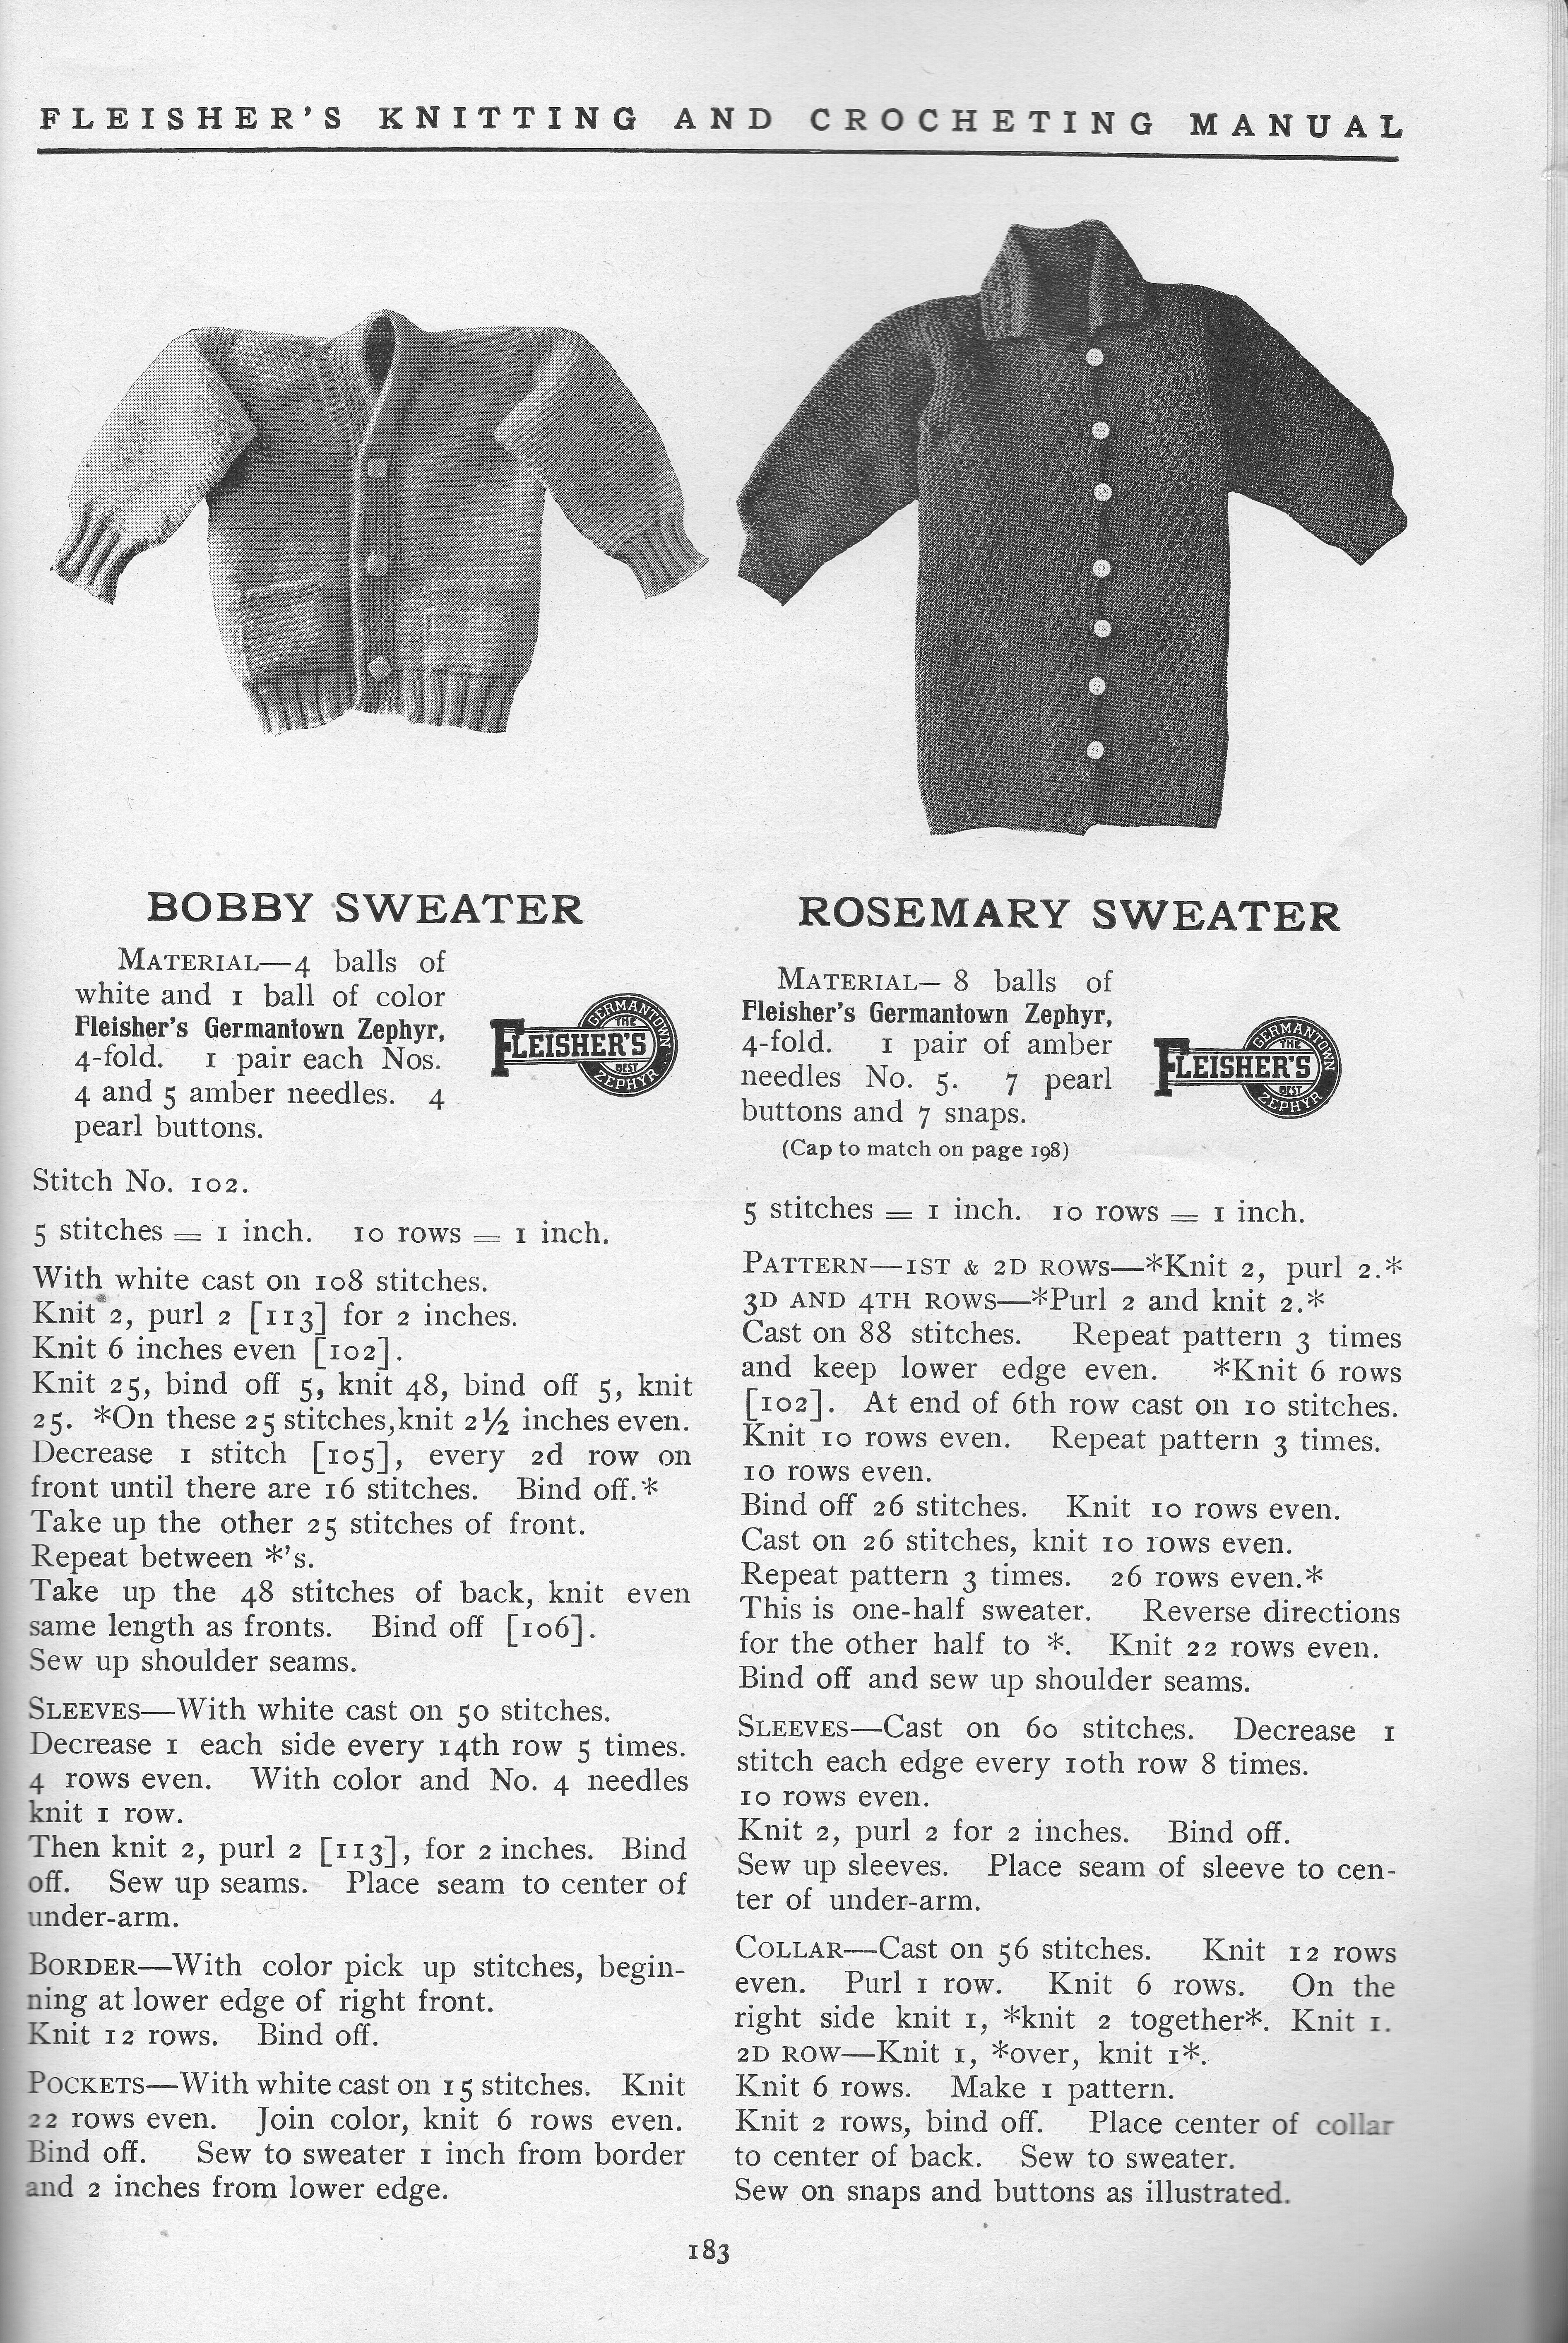
Bobby Sweater and Rosemary Sweater (knit)
Have some little ones? Then check out these adorable mini cardigans for children. Like most of these patterns, there are no sizes listed. The “Germantown Zephyr” yarn was a probably a DK or worsted weight yarn and a ladies vest took about 6 balls to make, if that helps. As the Bobby Sweater requires only 4 balls, I would guess it’s probably more of a toddler size, and the Rosemary Sweater at 8 balls was probably intended for preschool to early elementary school age children, but again, it’s hard to say.
I love the simplicity of Bobby—only 3 big buttons! But I also love the details on the Rosemary, with its fun collar, interesting stitch pattern, and off center row of buttons.
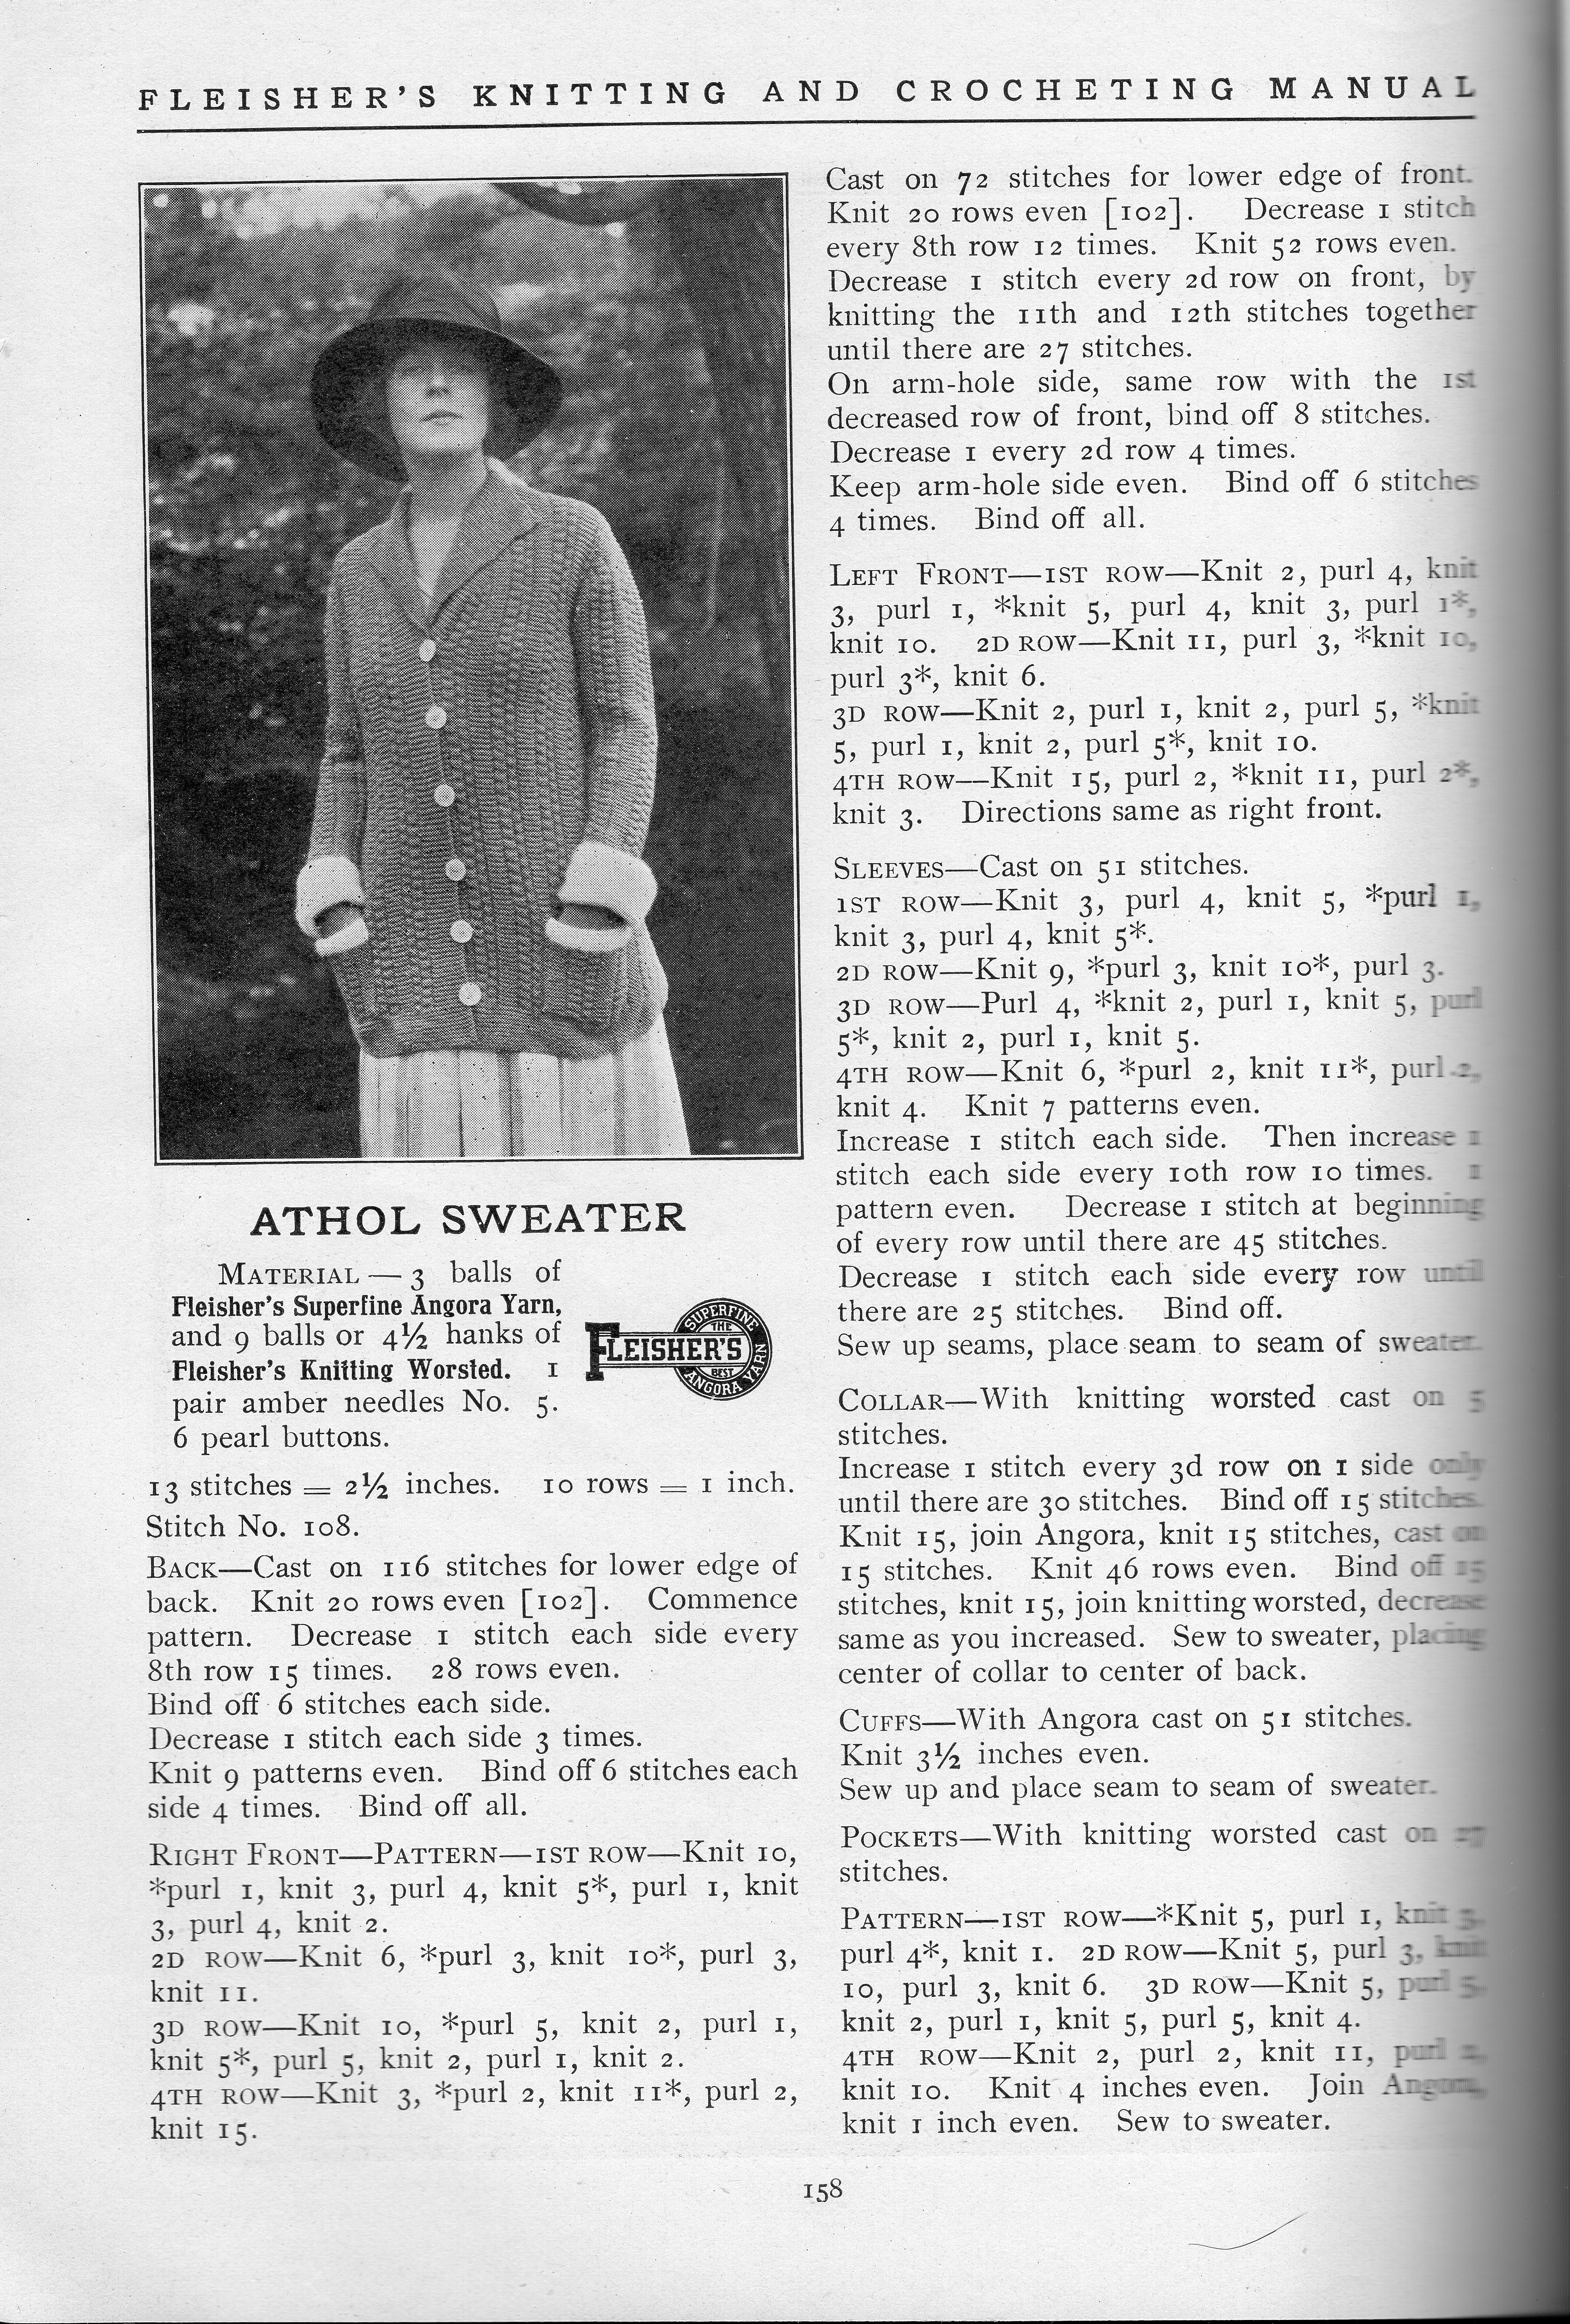
Athol Sweater (knit)
Who can say no to Angora cuffs? Ok, that’s not really the biggest appeal of this women’s cardigan to me. What I like about Athol is the stitch pattern, which looks easy enough but is eye-catching with its ribs and ridges. I also really appreciate that sweater model is making use of those pockets.
Athol also comes with a handy schematic of for sweater construction. It looks pretty straightforward—back, set in sleeves, two front pieces. (Guess you’re on your own for attaching the collar.)
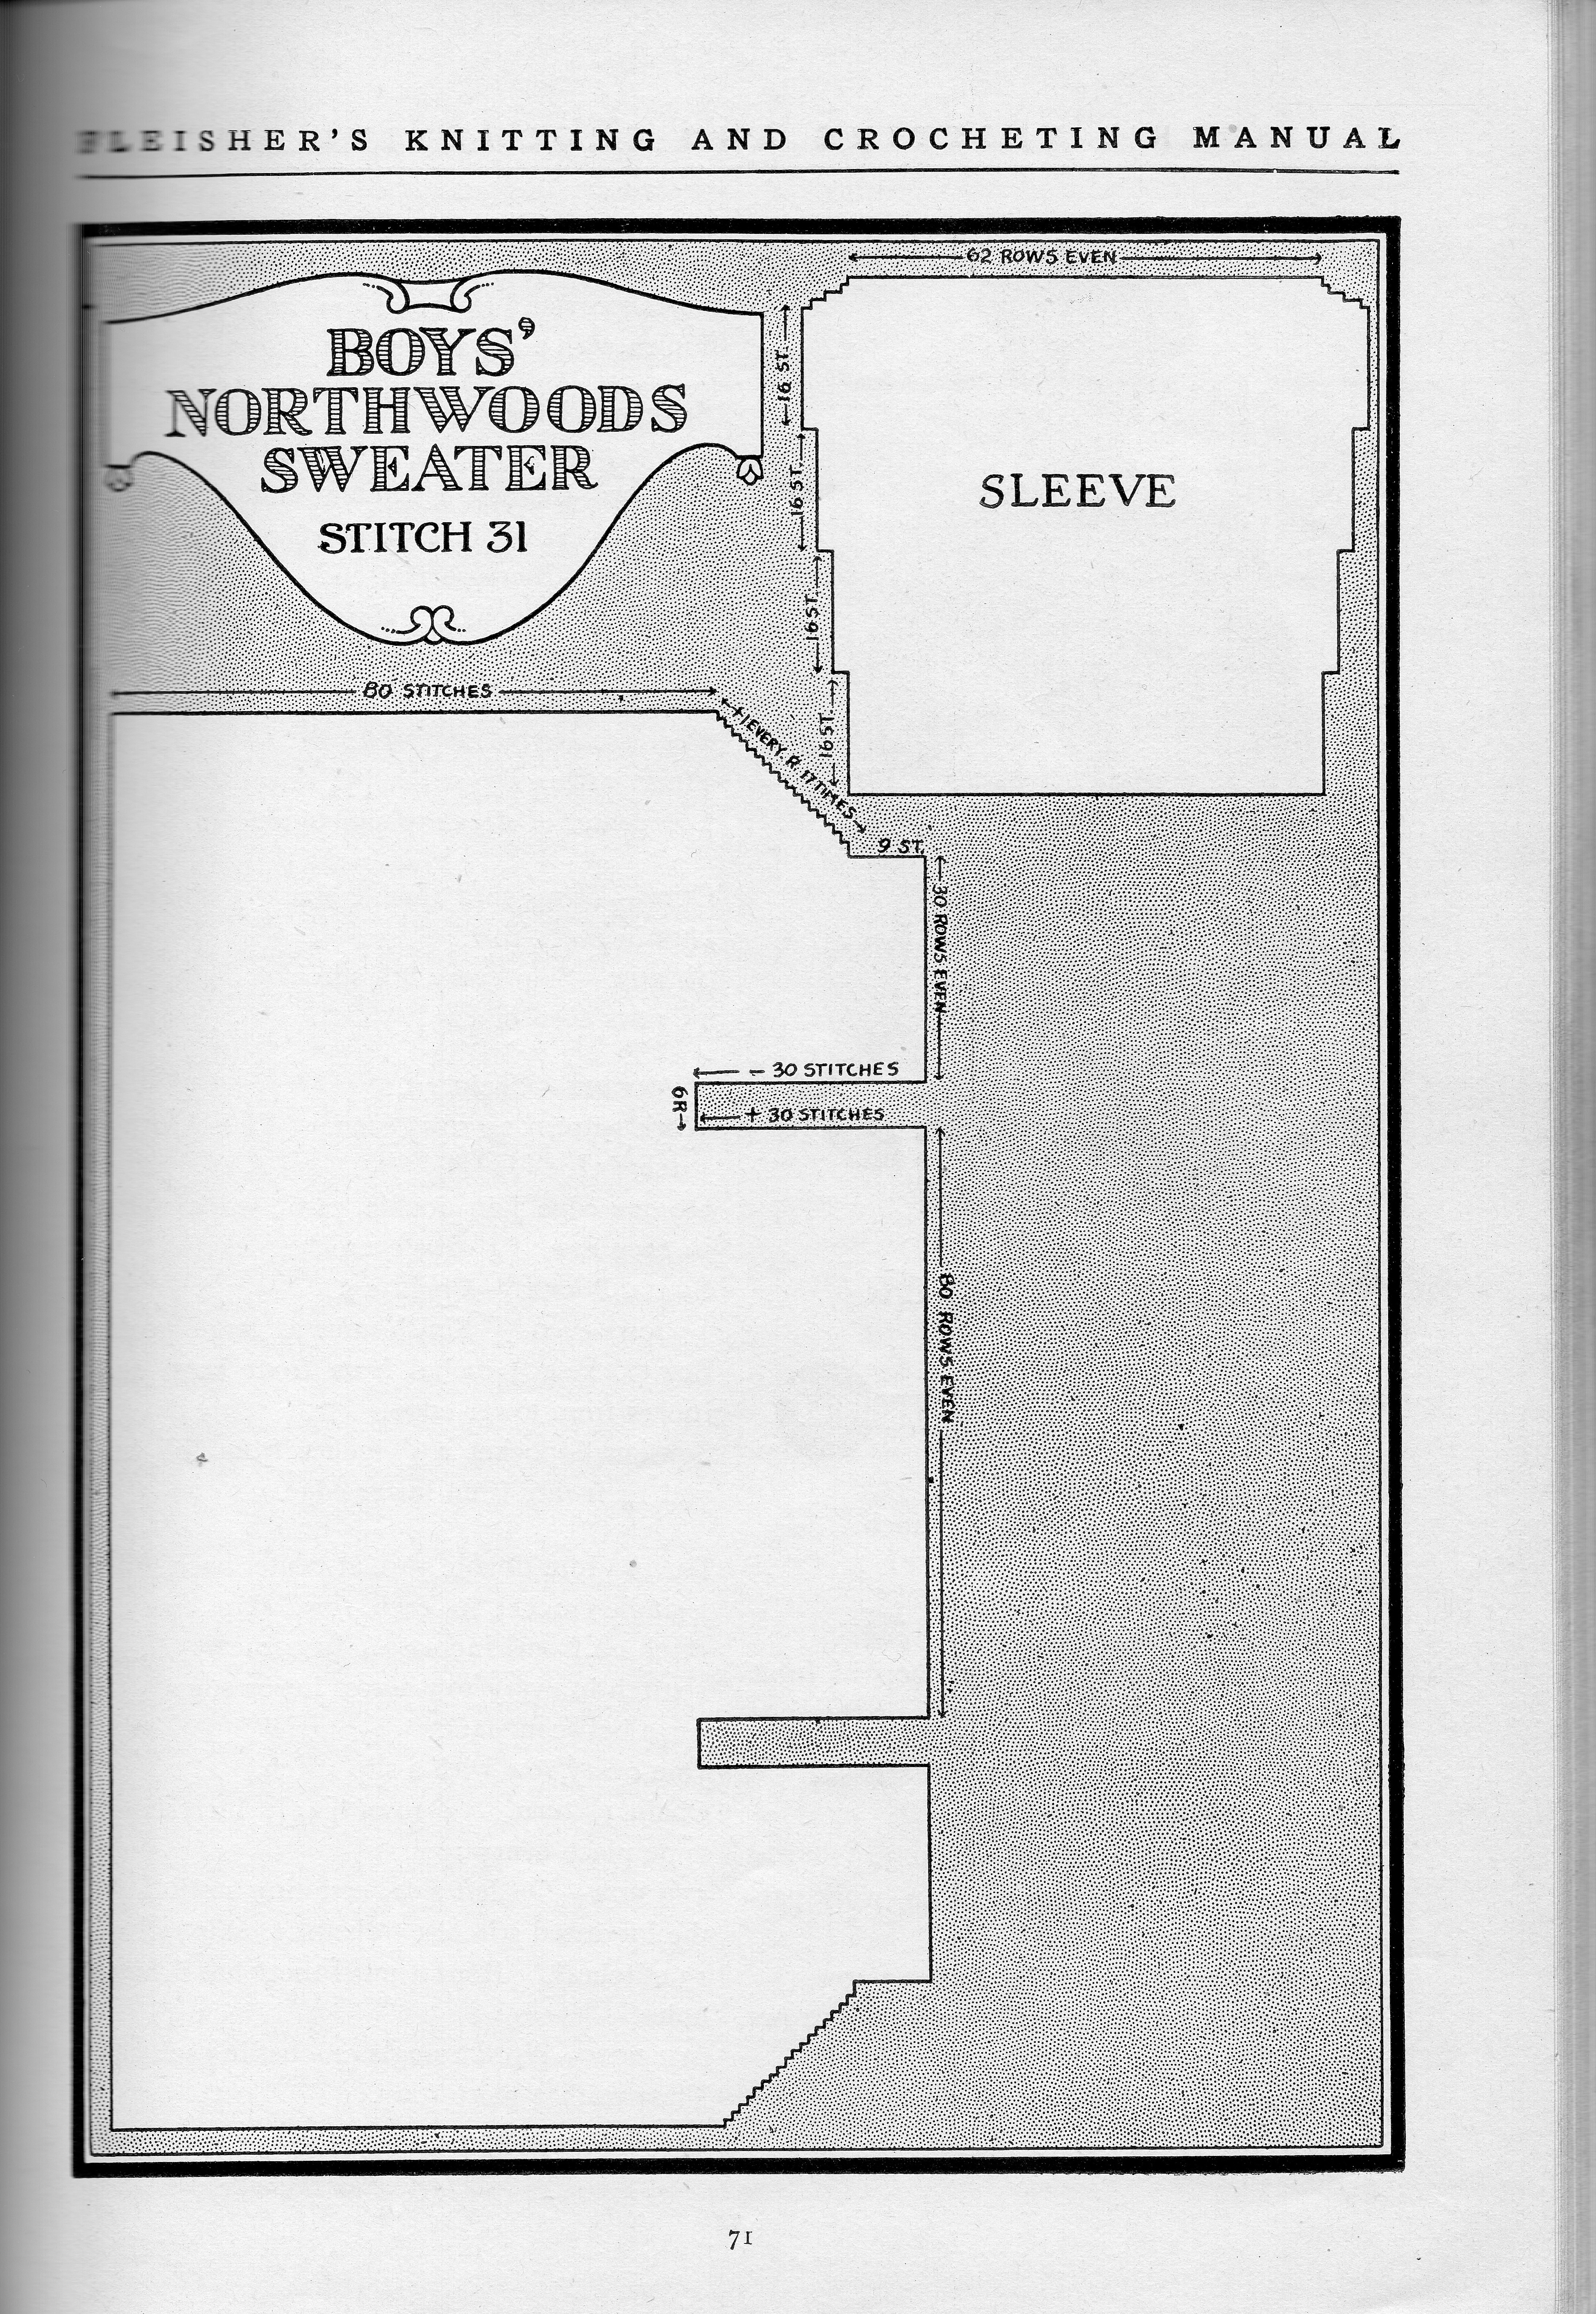
Northwoods Sweater (crochet)
One of the interesting things about this Fleisher’s Manual is how many crochet patterns it had. Northwoods is a boy’s cardigan done in crochet with a worsted weight wool yarn. I think every detail of this sweater is nicely done—the pockets, the cuffs, the shawl collar.
While I’m not sure what size it is, this patterns also comes with a schematic for how to piece it together. Once you have swatched to get gauge, you could figure out approximately what size you will end up with.
P.S. There is also a man’s version of this sweater, but it’s missing pockets! Why?? I don’t know, but it just didn’t look as nice as the boys version.
Man’s Sweater (crochet)
So instead of sharing the adult Northwoods, I thought I’d share the creatively named “Man’s Sweater.” Man’s is also crochet— not exactly a common phenomenon for men’s cardigans! (I looked on ravlery for crochet men’s cardigans and there are like, six total.) I think the upper pockets are a bit ridiculous (and I swear they are not lined up properly in the photo) but I like the button collar and the overall construction looks very pleasing.
Hope you enjoyed this year’s 1918 patterns! I promise to have some of my own knitting posted soon.
It’s that time of year again—Halloween! The perfect holiday for those who love to craftily construct homemade costumes. The holiday for those of us who never got too old to play dress up:
Me and my little bro as pint-sized cowboys
The DIY Halloween costume post has become a little bit of a tradition for me. In my 2012 Halloween costume post, I shared four fun DIY costume ideas (not including those from my top ten nerdiest crafts post), including Patty Mayonnaise, Princess Peach, Holly Golightly and a Carrot. In my 2013 Halloween costume post, I shared six more playful costumes, some for individuals like Radioactive Marie Curie, Ballerina Annie Oakley, and Lady David Bowie, as well as some for groups like Alice in Wonderland, Game of Thrones, and The Great Gatsby.
This year, my focus is on fun, kick a$$, and easy DIY costumes for ladies. Every October, there are news stories about how store bought Halloween costumes for women (and increasingly girls) are pretty much all “Sexy Fill-in-the-Blank.” No problem if that’s what you’re looking for—but now it’s basically the only option out there. On the other hand, every year there are news stories about the amazing DIY costume ideas out there—which are fantastic, but often take a lot of time and/or money to make. This blog post covers the middle ground! So without further ado, here are 6 costume ideas in three categories.
HISTORICAL COSTUMES
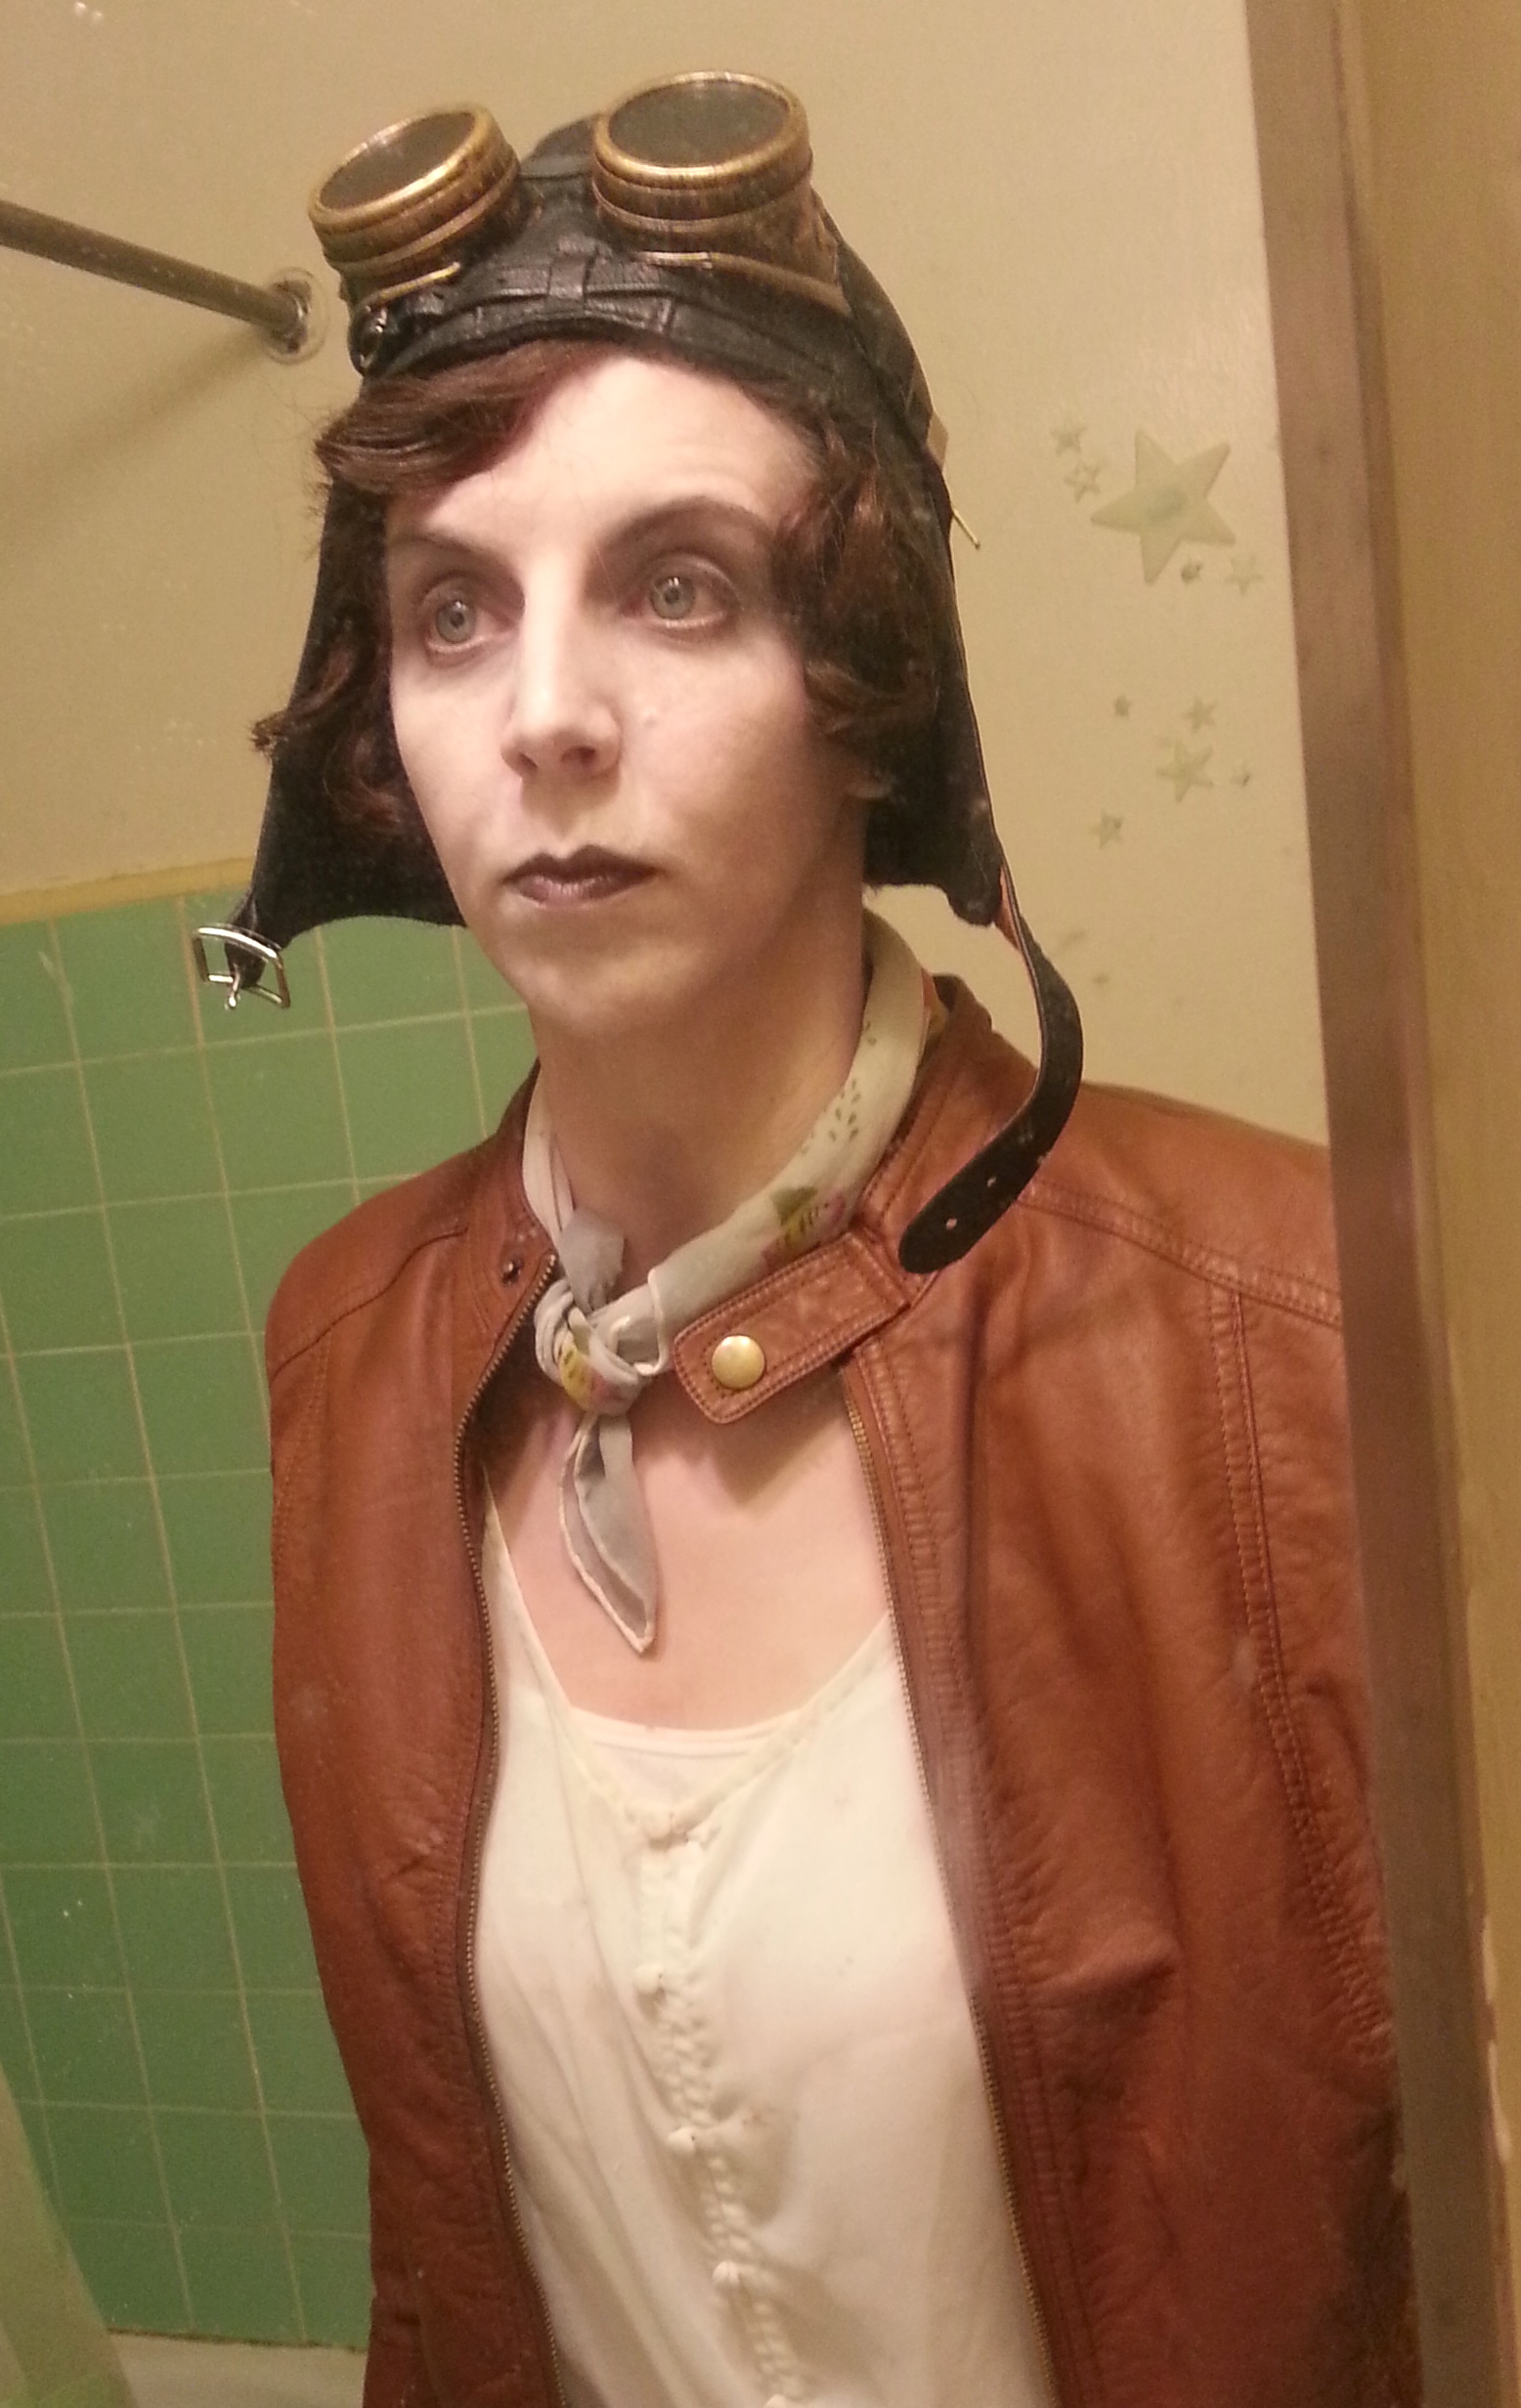
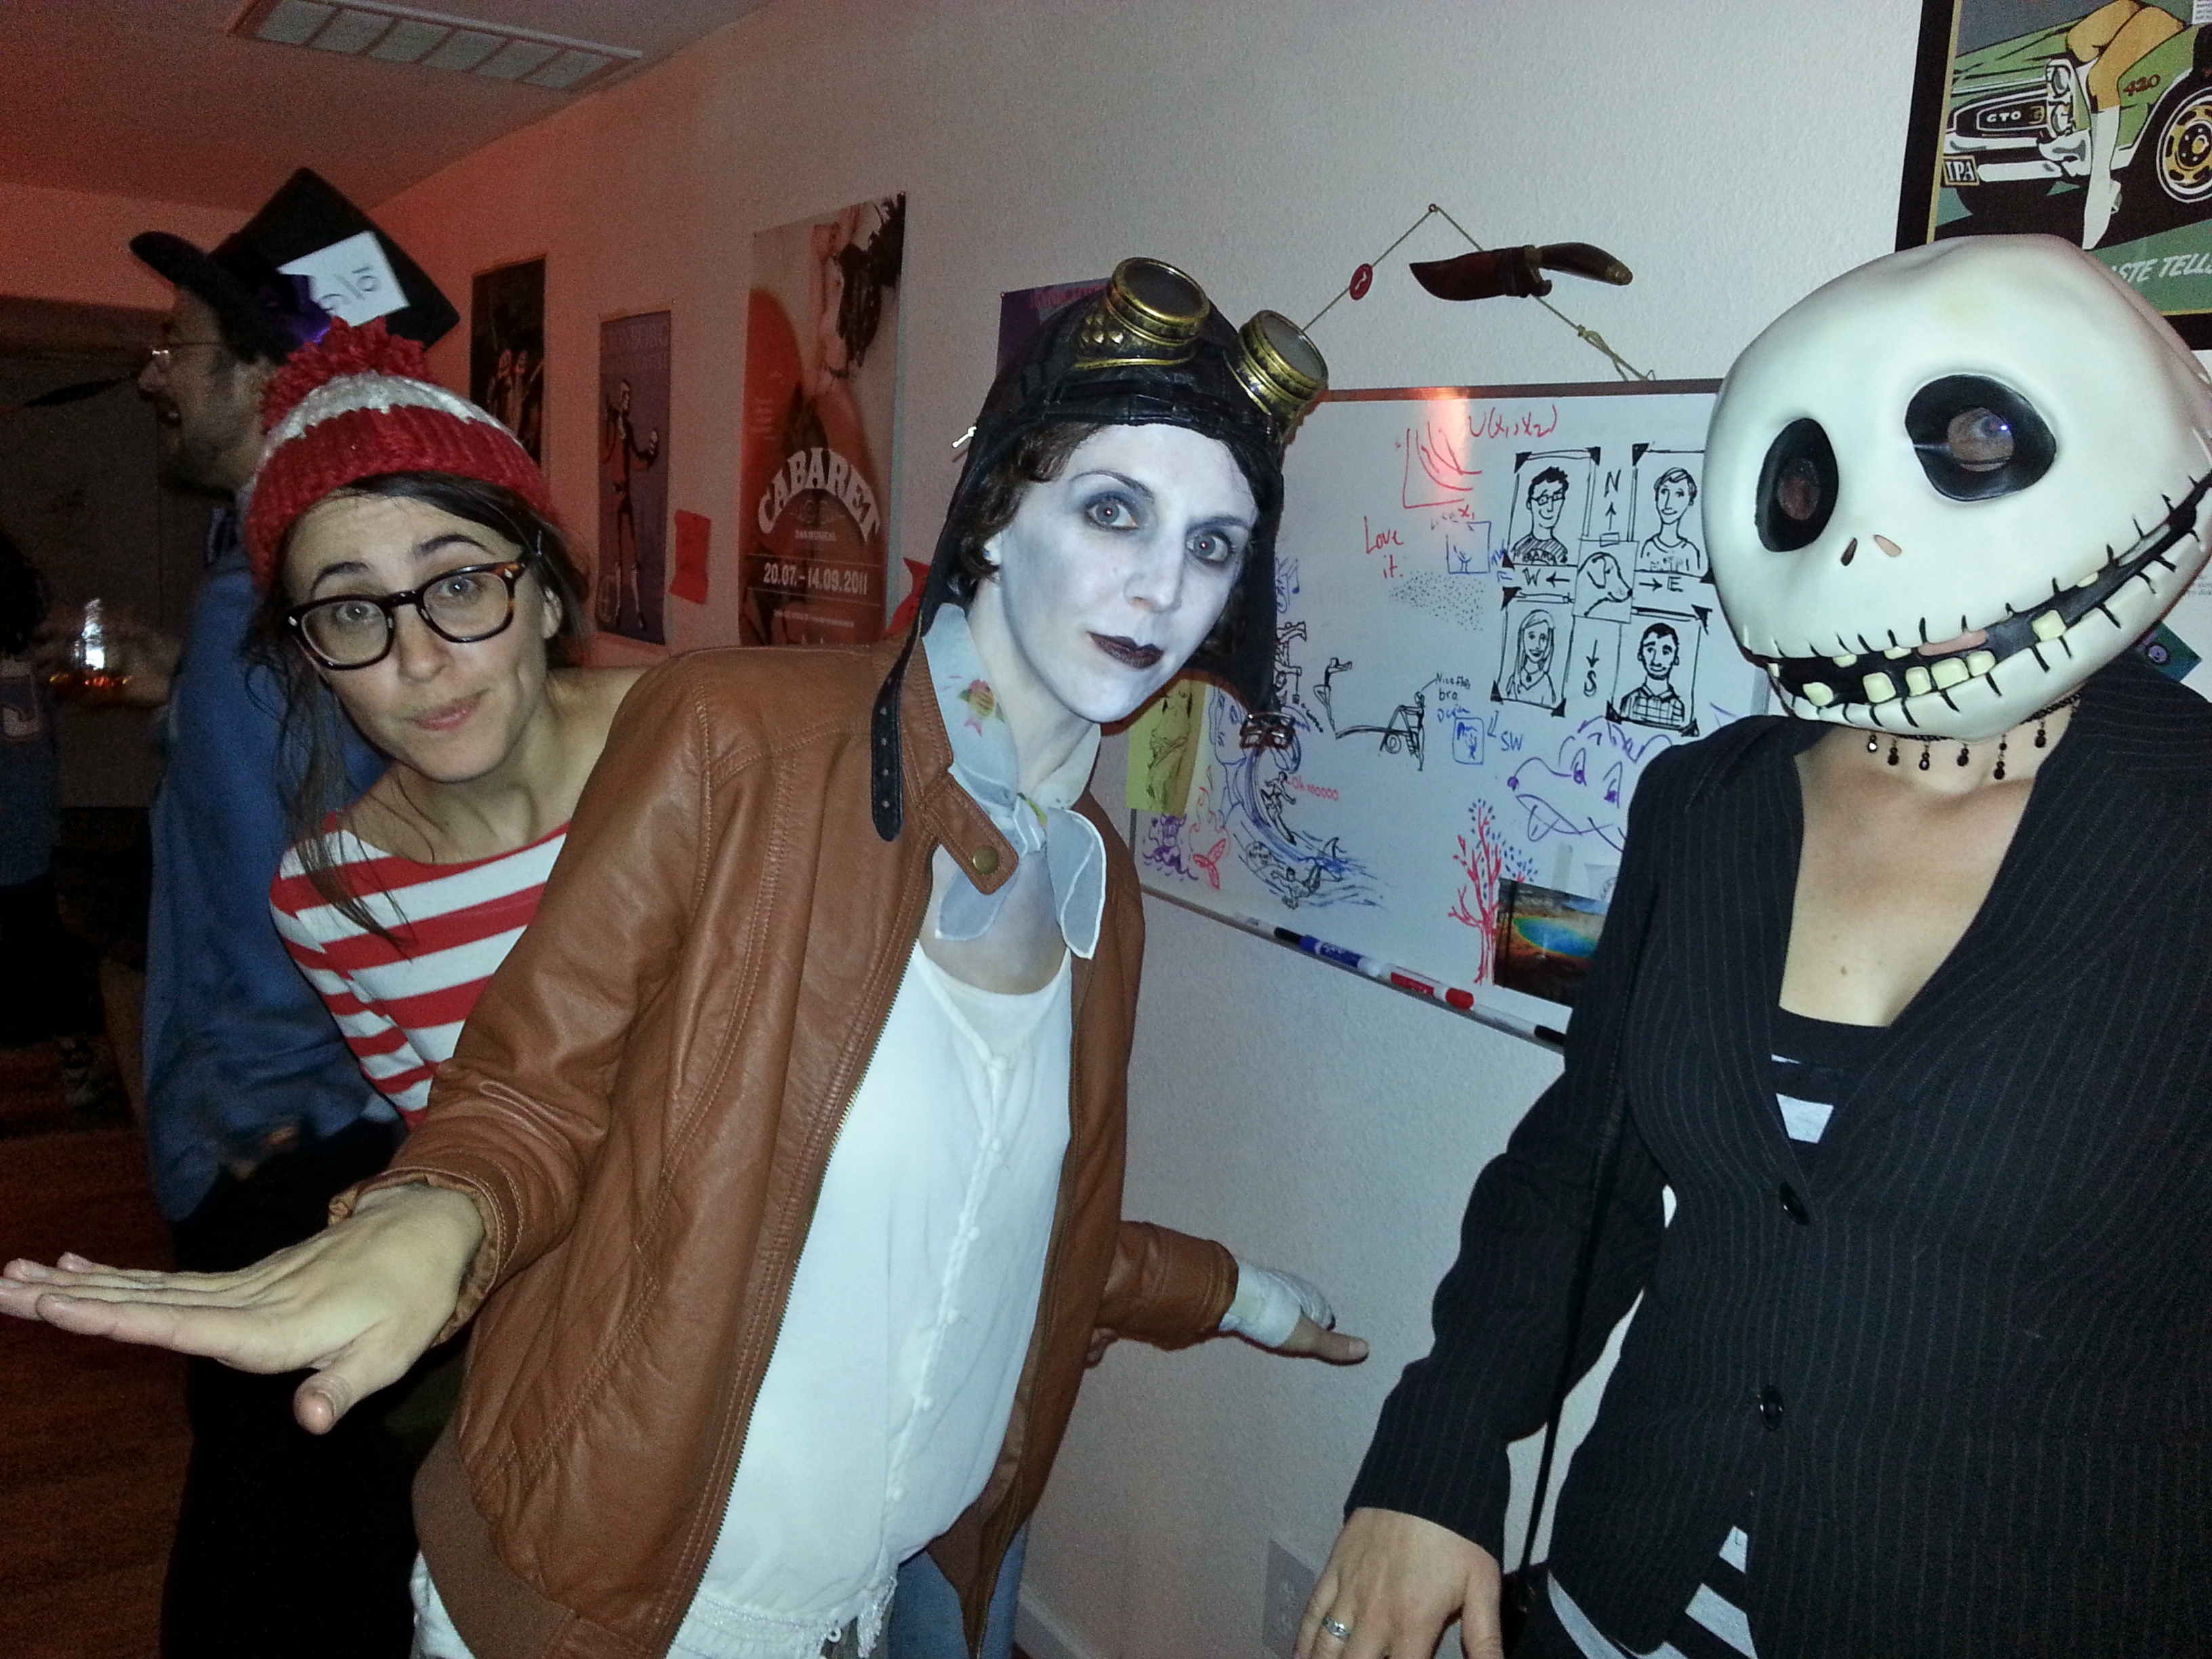
The Ghost of Amelia Earheart
In keeping with the creepy-versions-of-historical-women theme of several previous costumes, this was my Halloween costume last year. Famous female pilot Amelia Earheart was the first woman aviator to fly across the Atlantic Ocean. She disappeared without a trace while flying across the Pacific Ocean in 1937. She still haunts people’s imaginations—which is why she makes a perfect ghost.
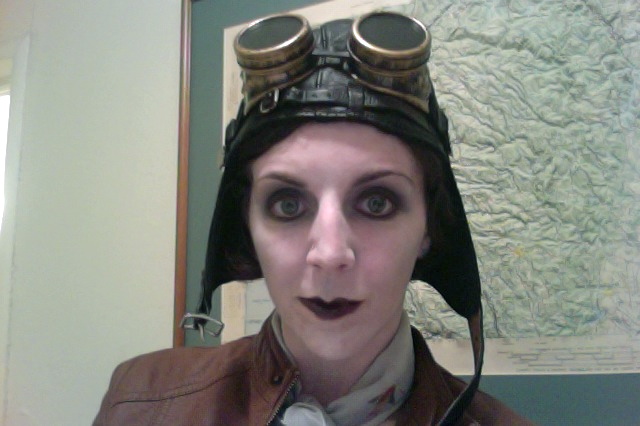
Most of this costume consisted of clothing I already had—a button-up white blouse, gray scarf, tan pants, brown boots and a brown faux leather jacket. The two items I had to purchase were the aviator hat and the googles. I got both online for relatively cheap—both were found on ebay for about $10. (Apologies for the blurry mirror photo).
Since I wore this costume to two different parties, so I had some time to work on the ghost makeup. The first time I did it very subtle, as in the close up above—white powder on my face, light gray eyeshadow around my eyes, and black lipstick. But the next time, I went for a more ghoulish, undead look.
Here I used black and dark gray eyeshadow and black eyeliner around my eyes, with the light gray eyeshadow on my cheeks. It was a much more dramatic look, kind of like an easier version of the grayscale makeup I’ve seen people do. I like this version better.
This was easily my favorite photo from the party. And the costume was a hit!
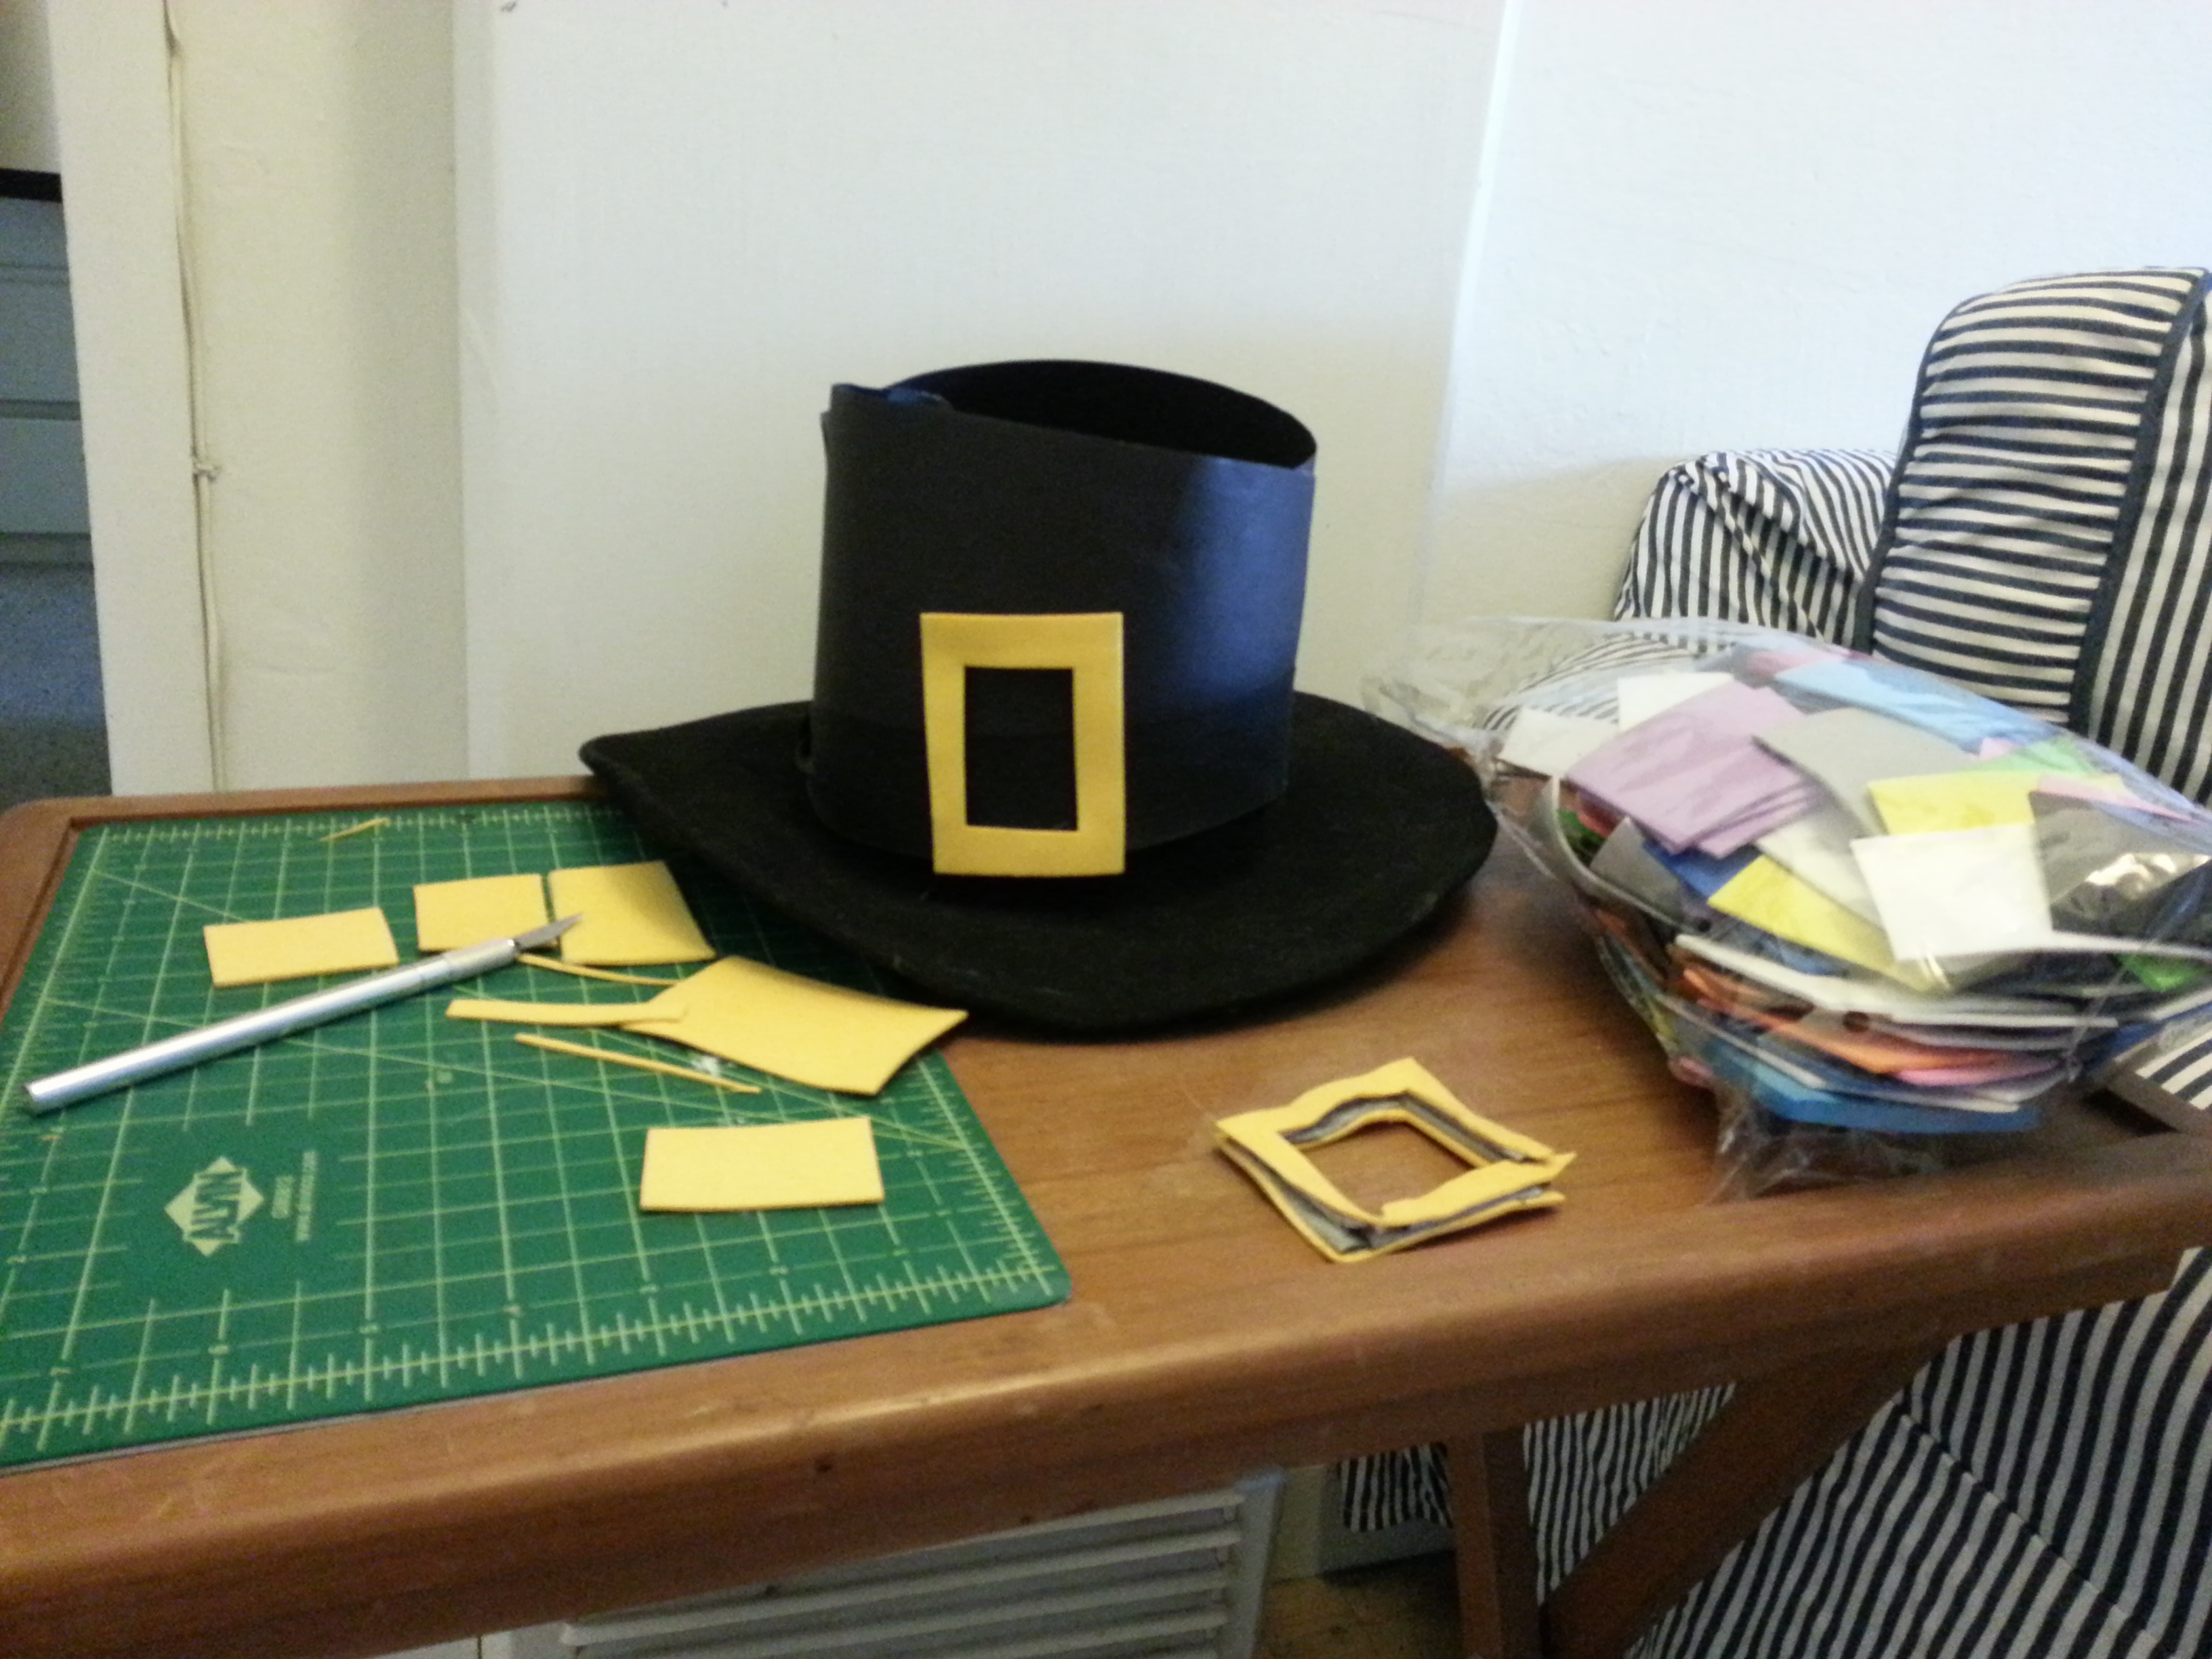
Thanksgiving Pilgrim
If you don’t mind skipping ahead one holiday, you too can be a Pilgrim. I realize that pilgrim women wore bonnets and dresses, but I really wanted to wear the buckle hat, so I did.
This costume does require a little bit of sewing. But you only need a small amount of white fabric (felt for the least sewing) and an old shoe lace. You can make a quick collar pattern by folding your felt in half (if it’s fabric, make sure there are two layers of it, then fold in half), then finding a shirt or dress with a neckline that fits you well and folding that in half too. Trace the line of the neck and extend the shoulder line as far as you would like it (the longer the line, the bigger the collar). Then trace a one-quarter circle from the shoulder line to the fabric fold. There’s a good tutorial here.
If you used felt, just sew the shoulder seams together, cut the shoelace in half, and sew it to the corners of the collar at the neck. If you used doubled over fabric, bear with me, I’m bad at sewing descriptions and I did this a year ago. Basically you’ll have four pieces of fabric, you need to sew them into two facings. Sew the shoulder seams for each pair together so that you have two complete collars facings. Put them right sides together and sew those collars together around the edges, except for the inner curved neckline. Turn right side in and press. Turn neckline hem about 1/2 inch in and press. Top stitch together, leaving 1/2 inch open spaces at the corners, then thread the shoelace in one opening and out the other.
Now for the hat and shoes! You’ll need construction paper (or large pieces of foam sheet paper), an X-acto knife or scissors, and tape. I used a wide brimmed black felt hat to start. I cut two rectangles of black construction paper and taped them together at an angle and placed that over the top to make it look more like a Pilgrim’s hat. I then cut a rectangle out of yellow foam paper, cut a smaller rectangle out of the center, and taped it to the hat as a buckle.
Make two more buckles and tape them to some black shoes (Mary Janes work well). I paired all of this with some simple clothing I already had—white tights, white socks, knee length black shorts and a black long sleeve t-shirt.
Don’t forget to make a hand turkey! Mine is crossing a busy street, as the local turkeys are wont to do.
additional ideas:
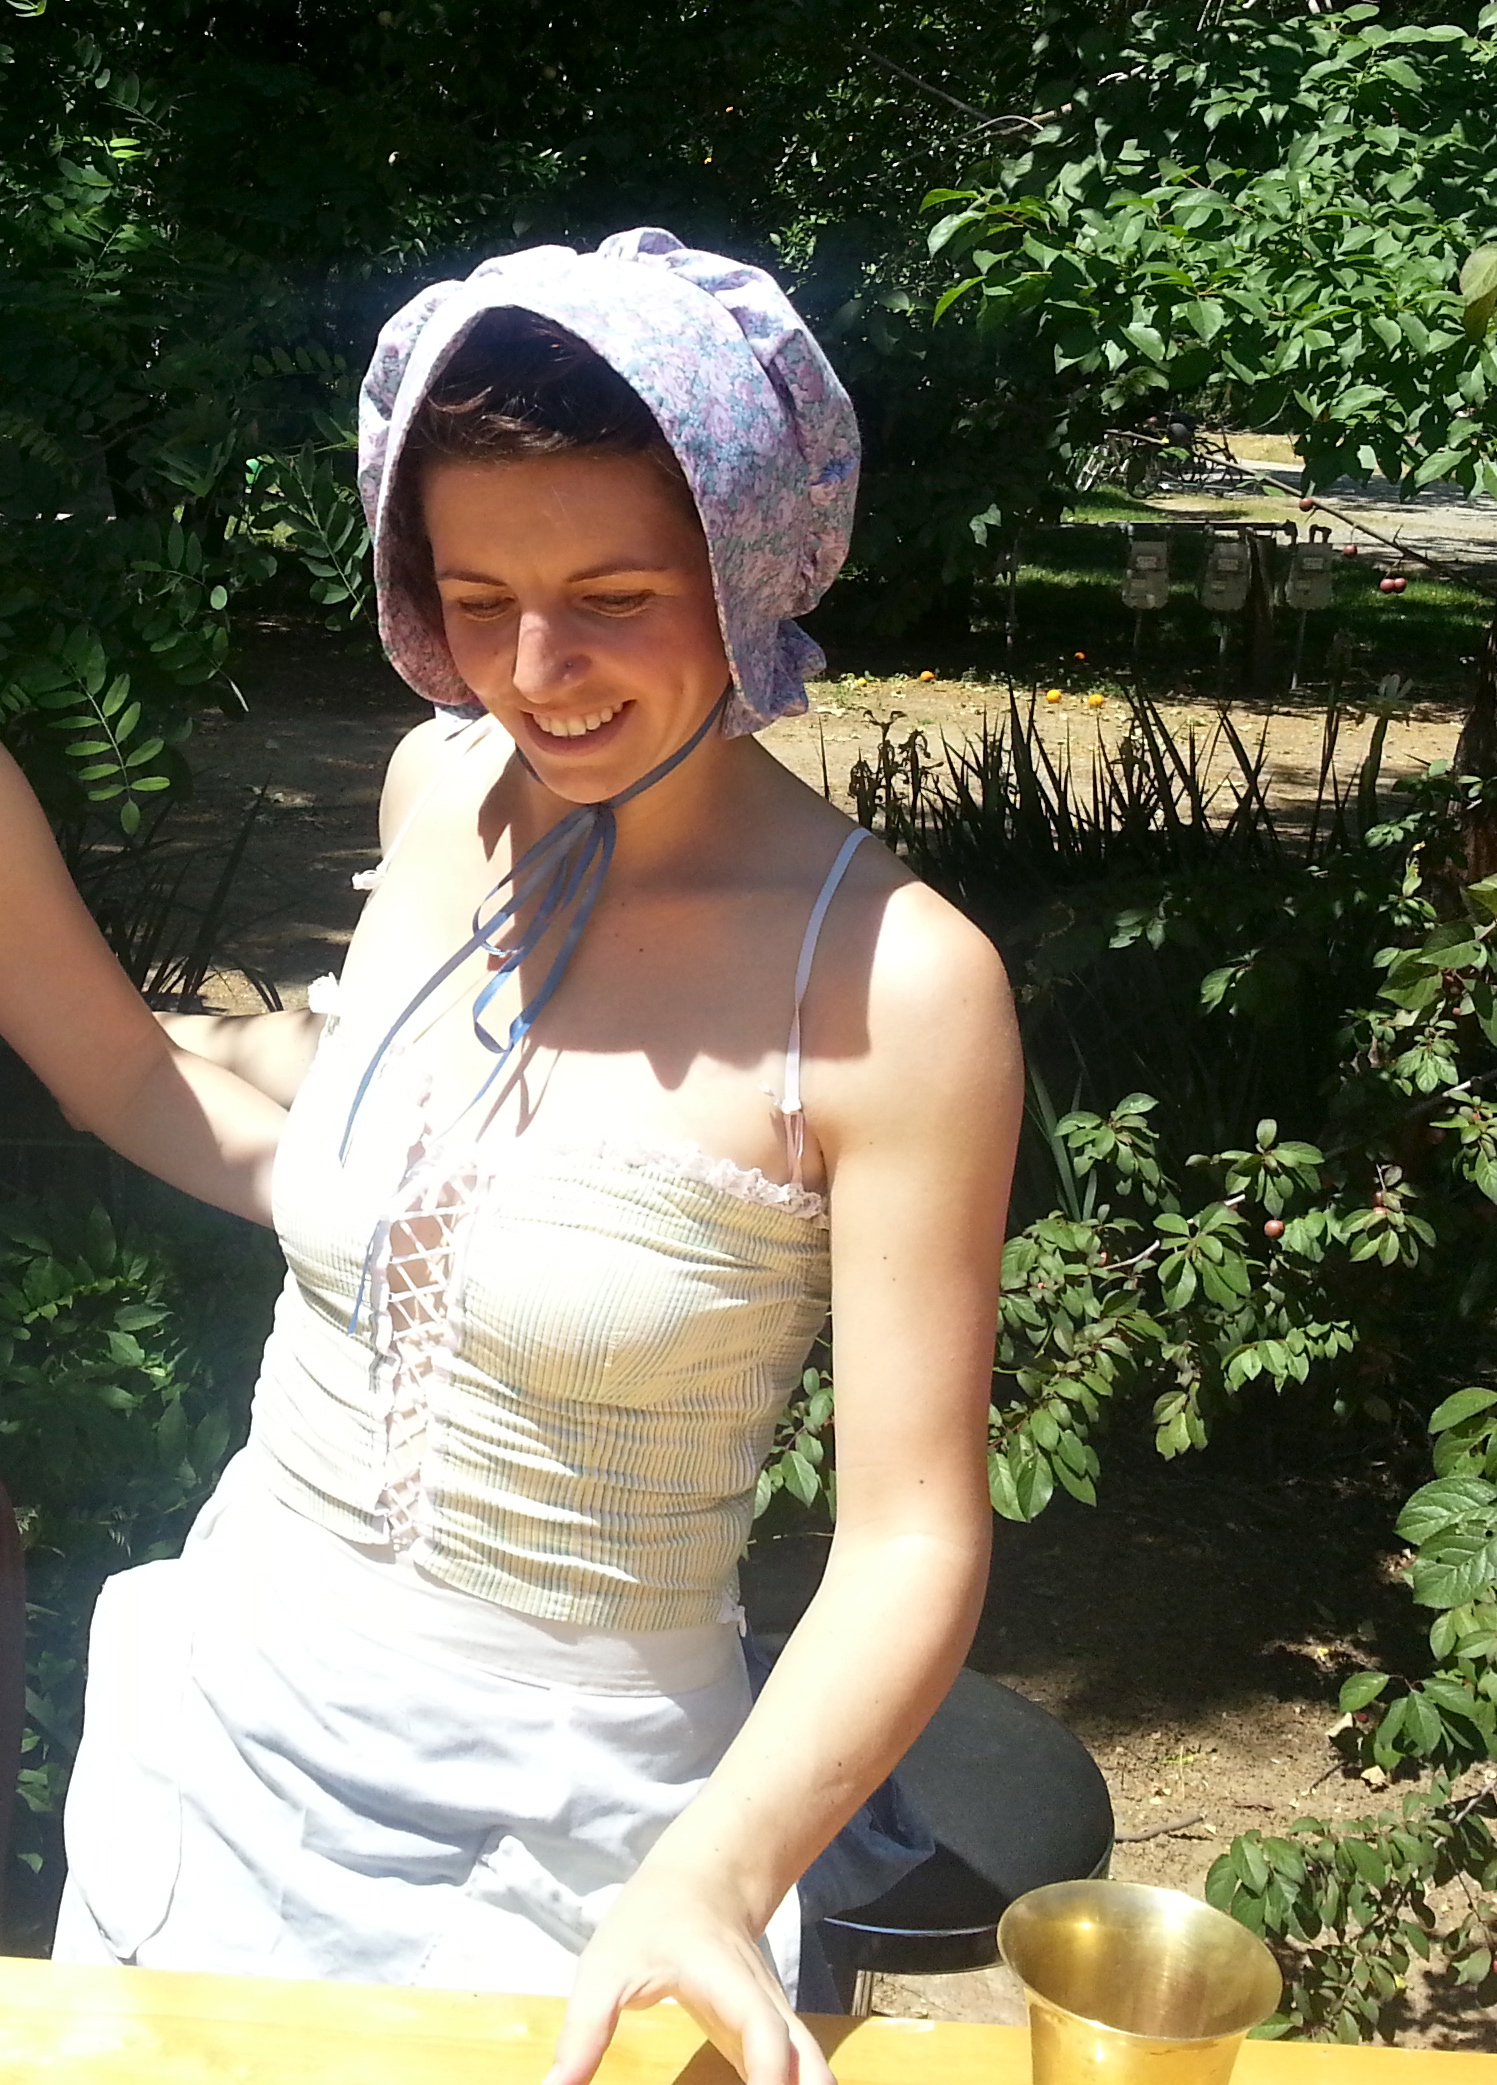
I already blogged about our live action Oregon Trail game, but the prairie girl outfit is another good historical costume! Your Laura-Ingalls-Wilder-loving-inner-ten-year-old will be proud of you for making your own bonnet.
NERDY COSTUMES
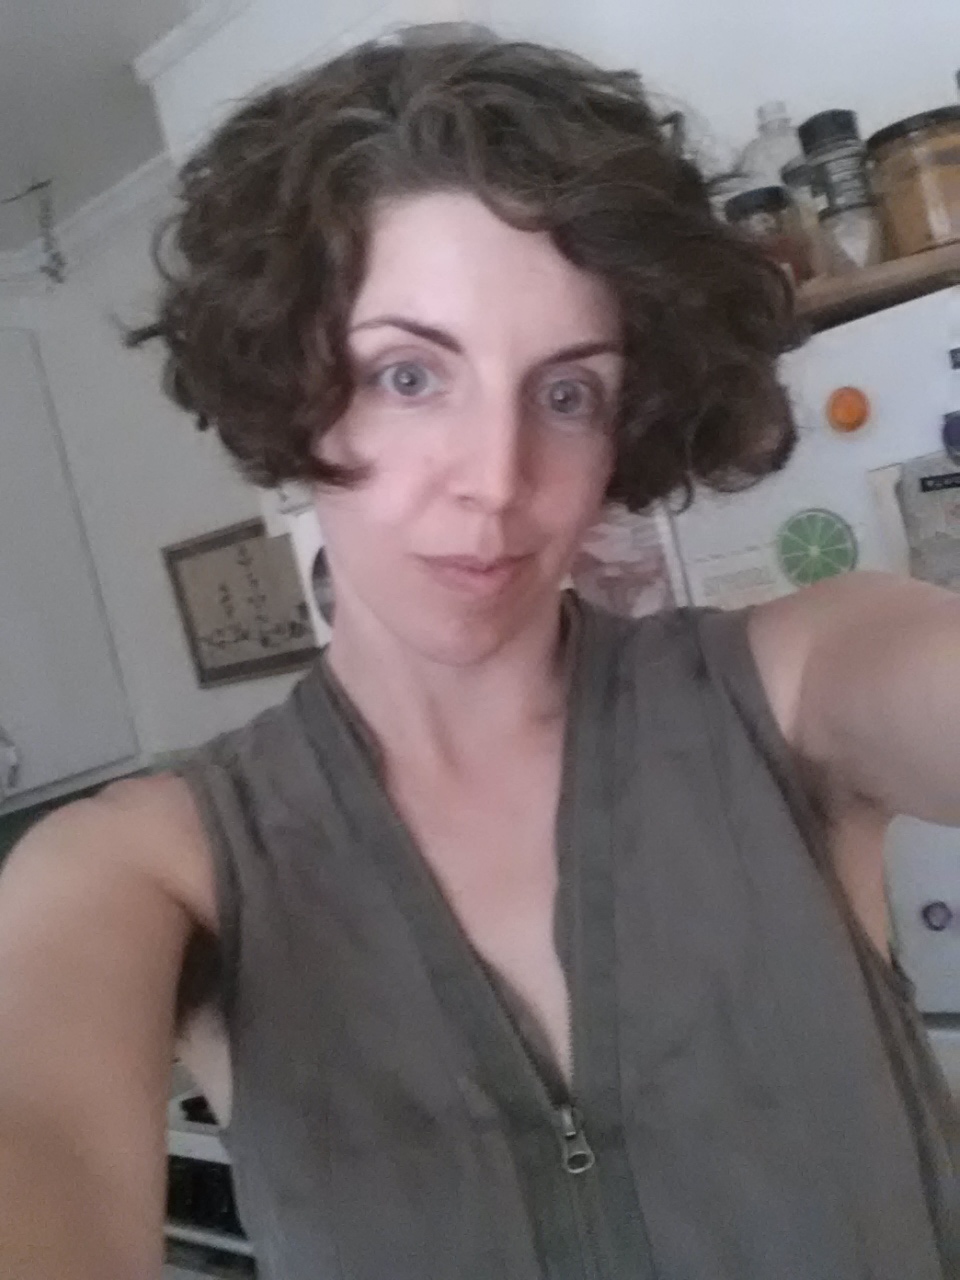
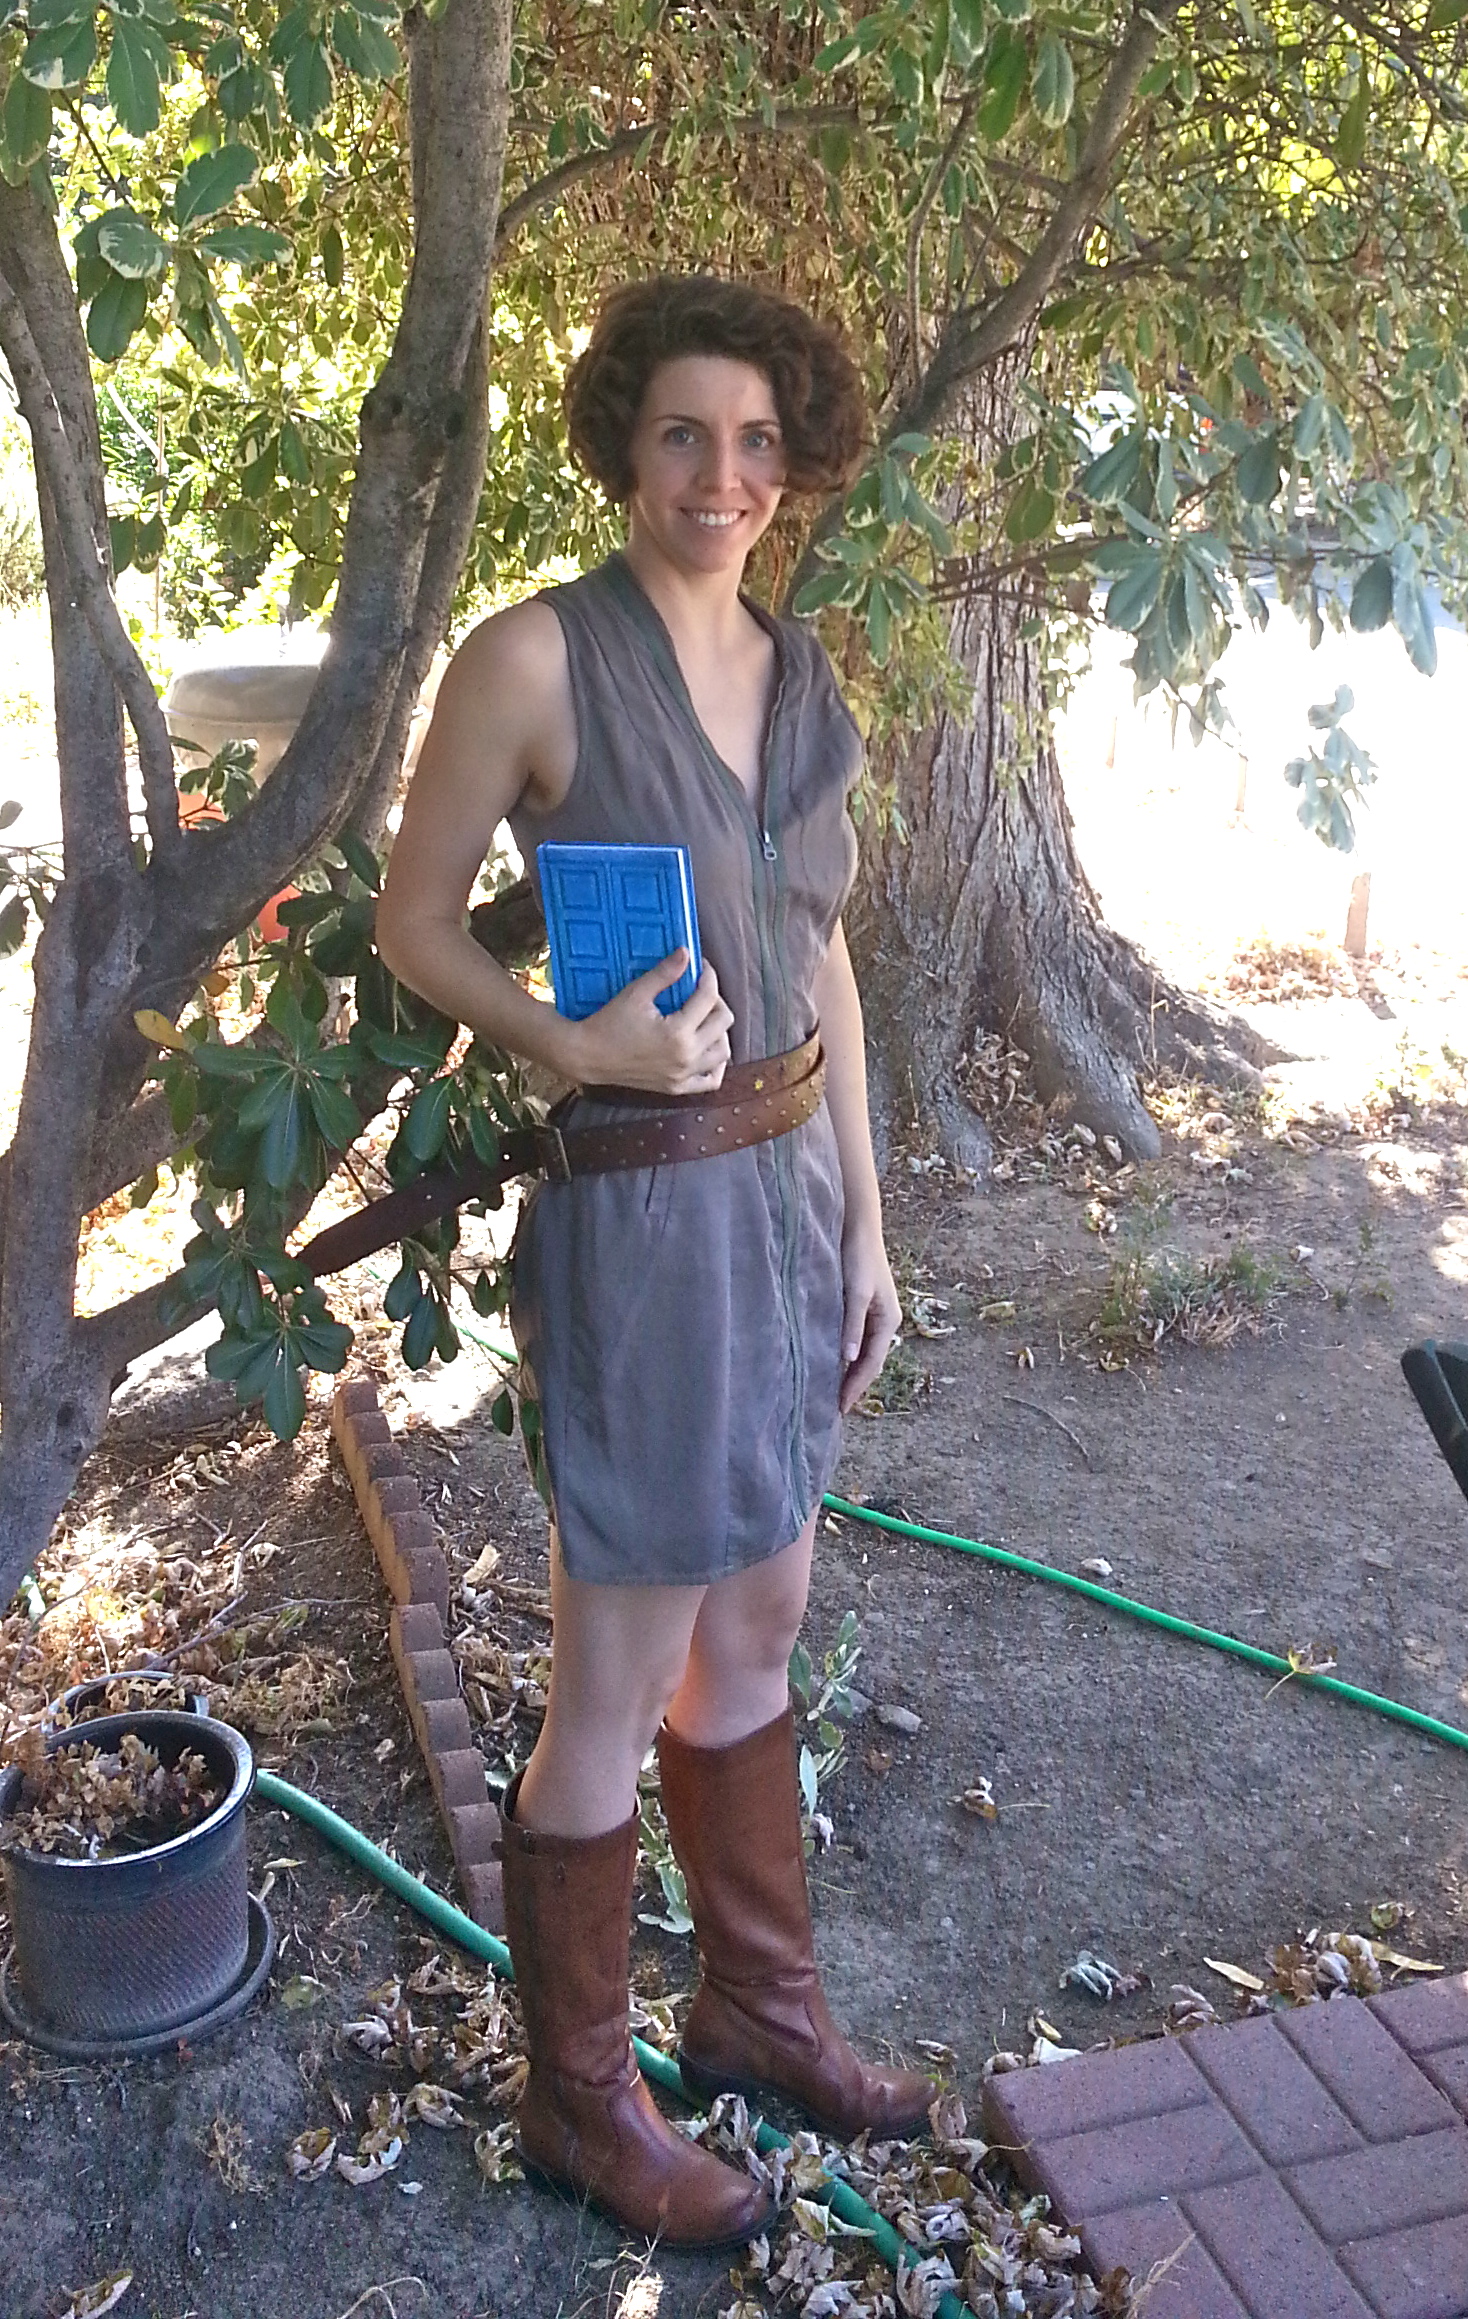
River Song
I am a total sucker for the cheesy wonderfulness that is Doctor Who, as you probably know from previous posts. But a realistic costume for his fellow time traveling troublemaker River Song was not in the cards for me—her original parachute style dress is outrageously expensive now. So this is my version.
First, the dress. I really wanted to make one that looked like hers, but my sewing skills are not that advanced. Instead I found one in a similar color with the same zipper style neckline on ebay for about $12. It took some searching and it’s a bit loose on me, but you know. I like to think my hair makes up for it.
Now of course, the most important DIY part of this costume is my sonic screwdriver. This is my own original pattern for a sonic screwdriver chapstick holder, which you can find right here! Alternately, you could also just hold a banana like I did in the first photo (and for any fans who point out she wore a different dress when she had the banana…this is probably not the cosplay website you were looking for). Or you could buy or make your very own TARDIS journal—there’s a great tutorial for making one here.
The only other accessories you really need are some brown boots, black tights (not pictured because it’s still like 80 degrees here), and a wide studded belt. I faked it here with the two brown belts put together. A brown gun holster would also be a nice touch.
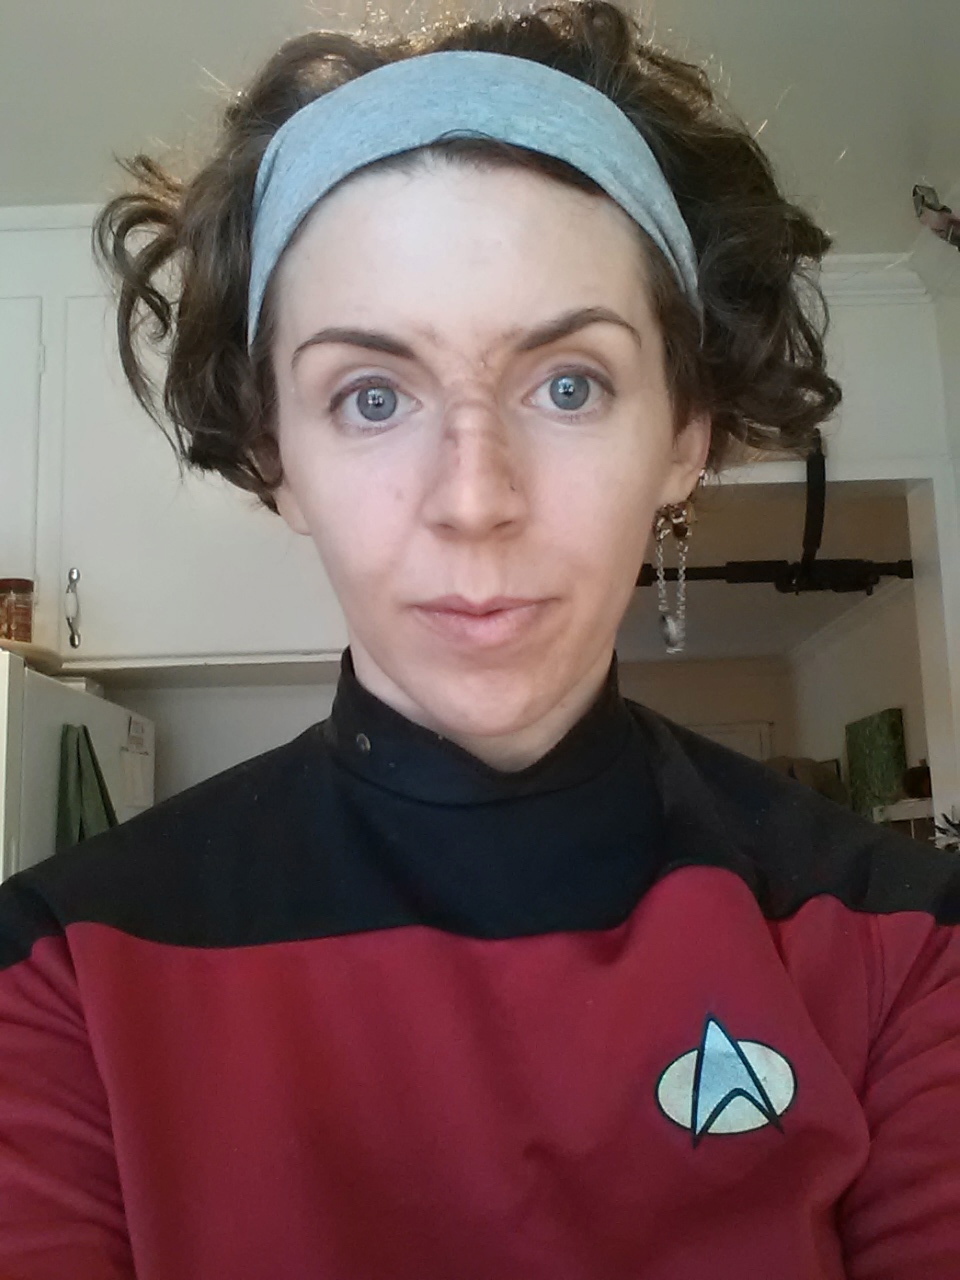
Ensign Ro
Any other Stark Trek TNG fans out there? Casual viewers may not know this character, but I always had a soft spot for Ensign Ro Laren. I’ll admit, I threw this costume together last minute because I discovered I still had the uniform top in my costume box. I’ve had it since I was like 12! (I’m not sure whether to be slightly proud or slightly embarrassed by this). It doesn’t quite fit as well as it used to, but it works.
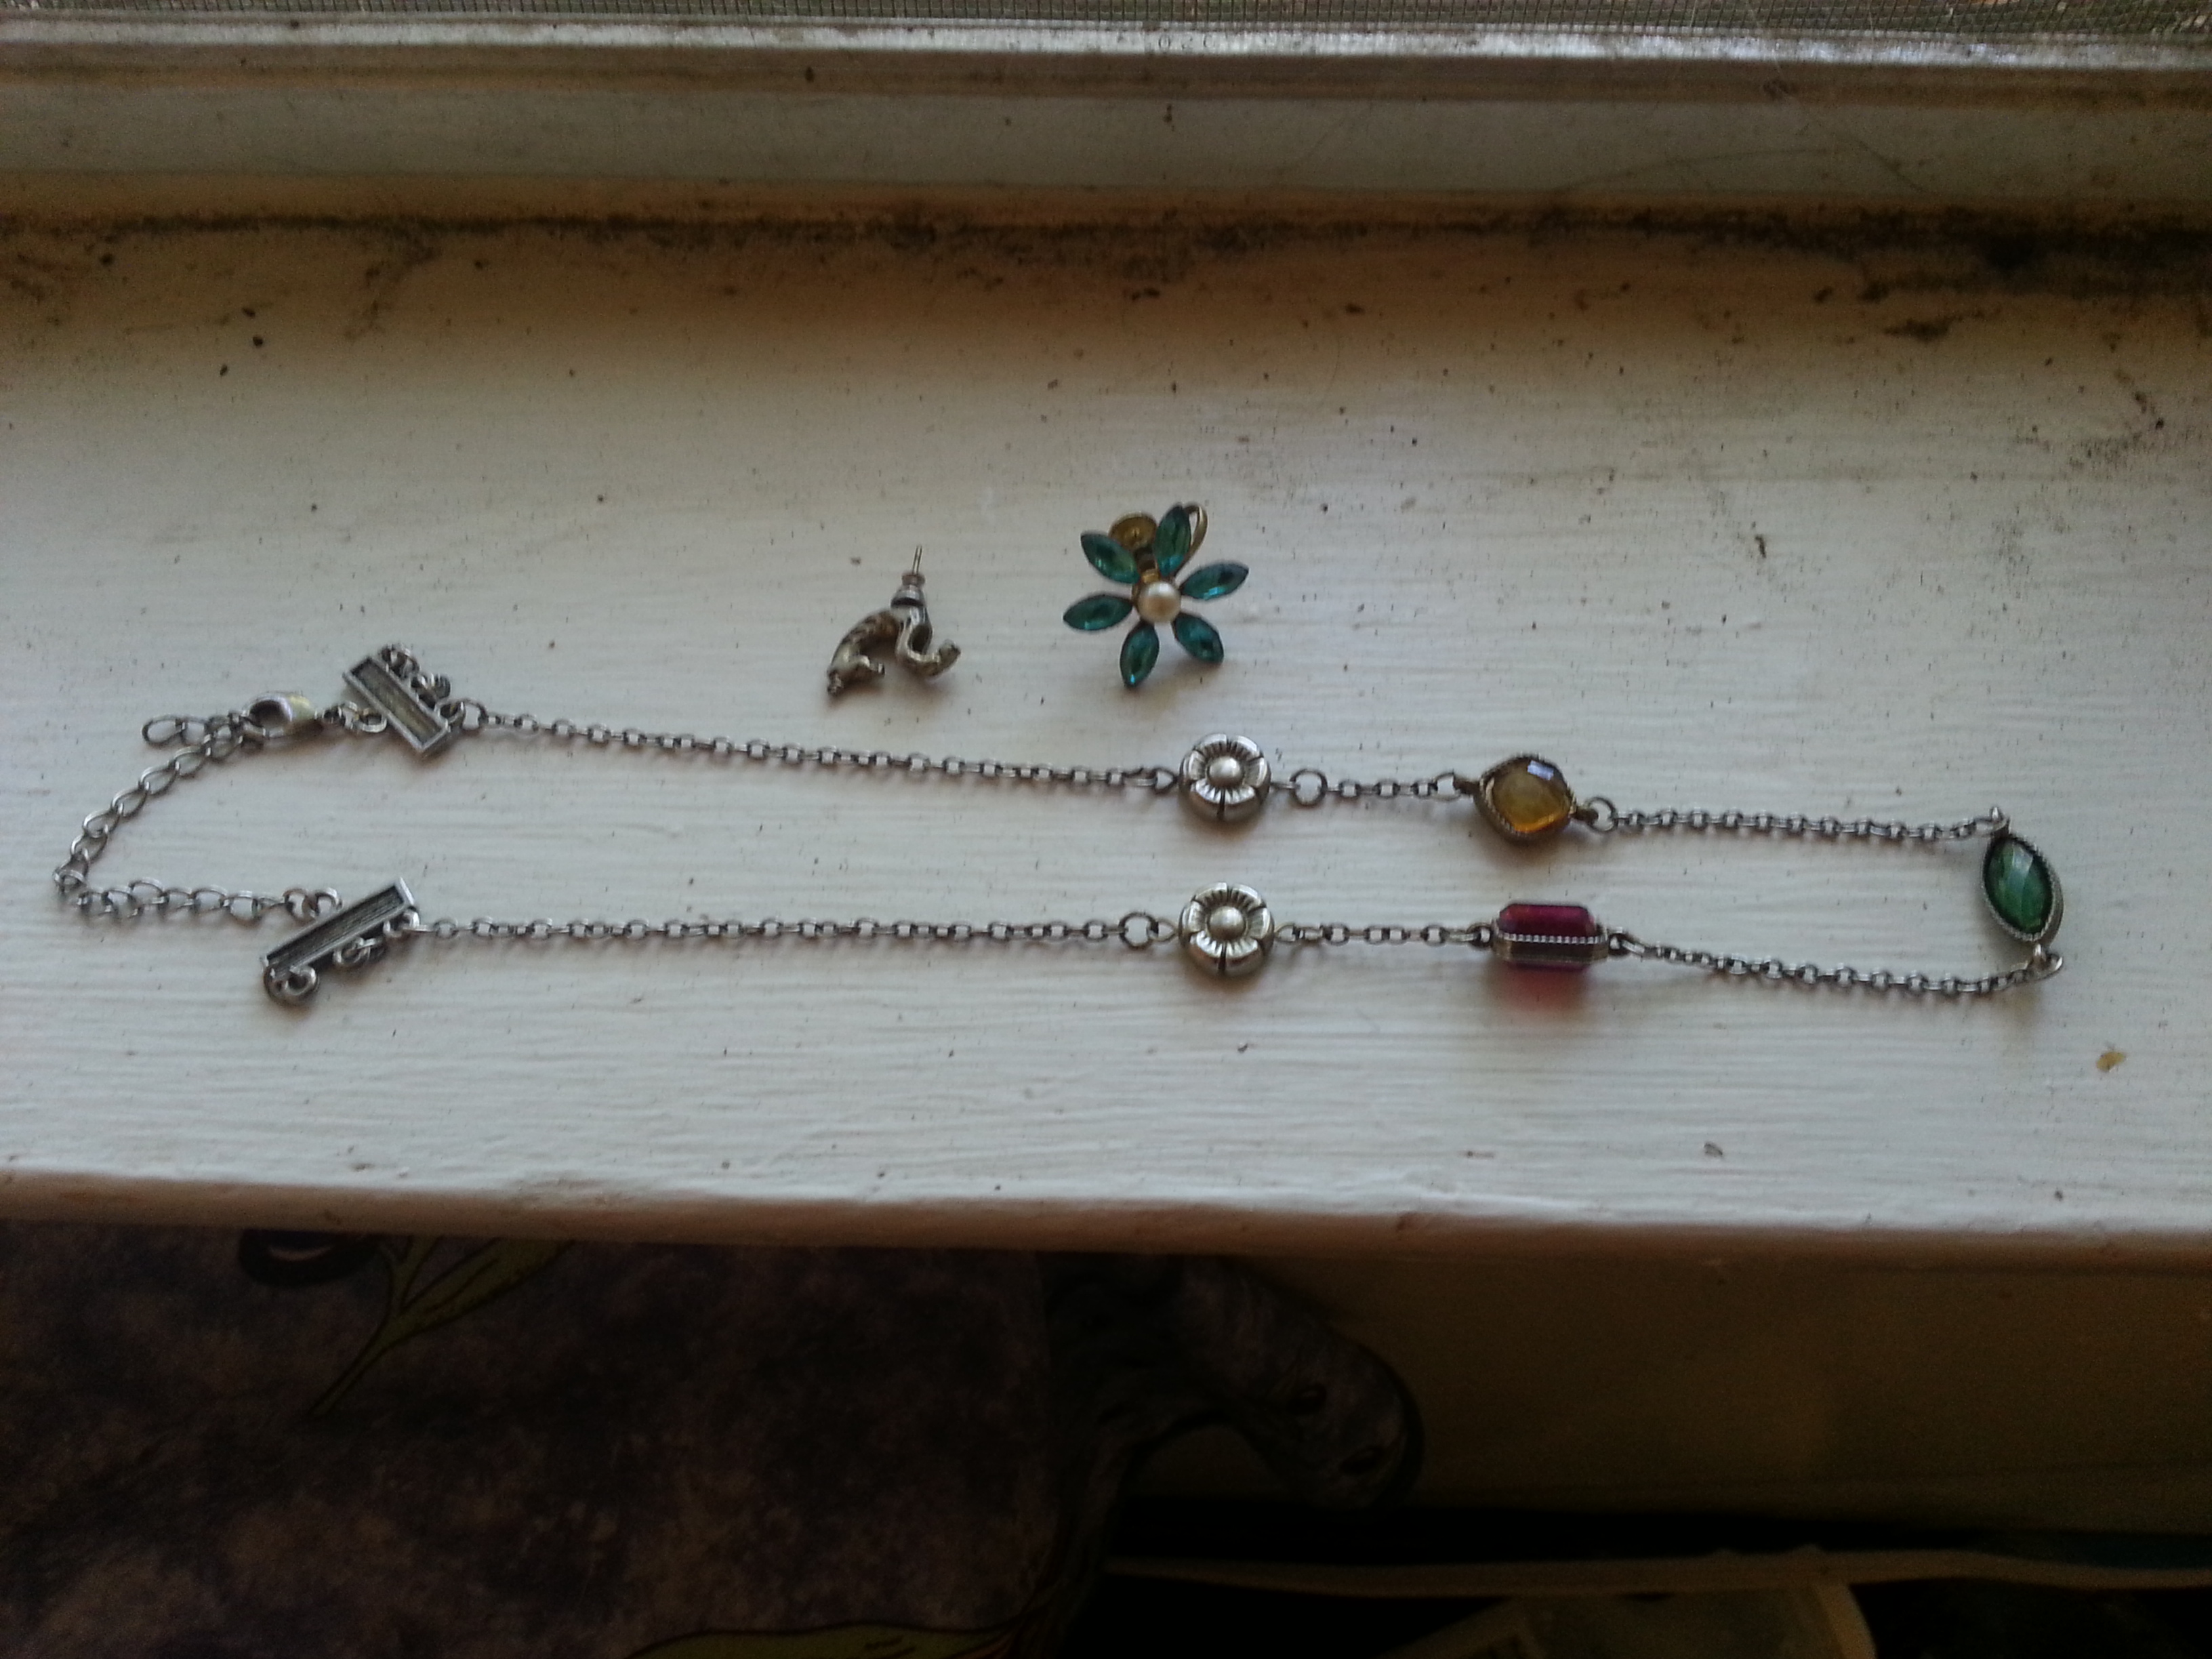
I had some fun making her Bajoran earpiece for this costume. I used a broken necklace, a regular pierced earring and a clip on earring to recreate it. I also made a pip for the collar of my uniform using a thumb tack and an earring backing, just as I did when I was 12. I didn’t get too elaborate with the Bajoran nose—I just used eyeshadow in two different shades of brown to create the illusion of creases.
Truth: I was not quite ready to take photos of myself outside in this, so excuse the blurry mirror photo. This is just to show the rest of the outfit (black leggings, black boots). If I’d had more time I would have straightened my hair and tried to find a red headband. At least there are some stars in the background!
additional costume ideas:
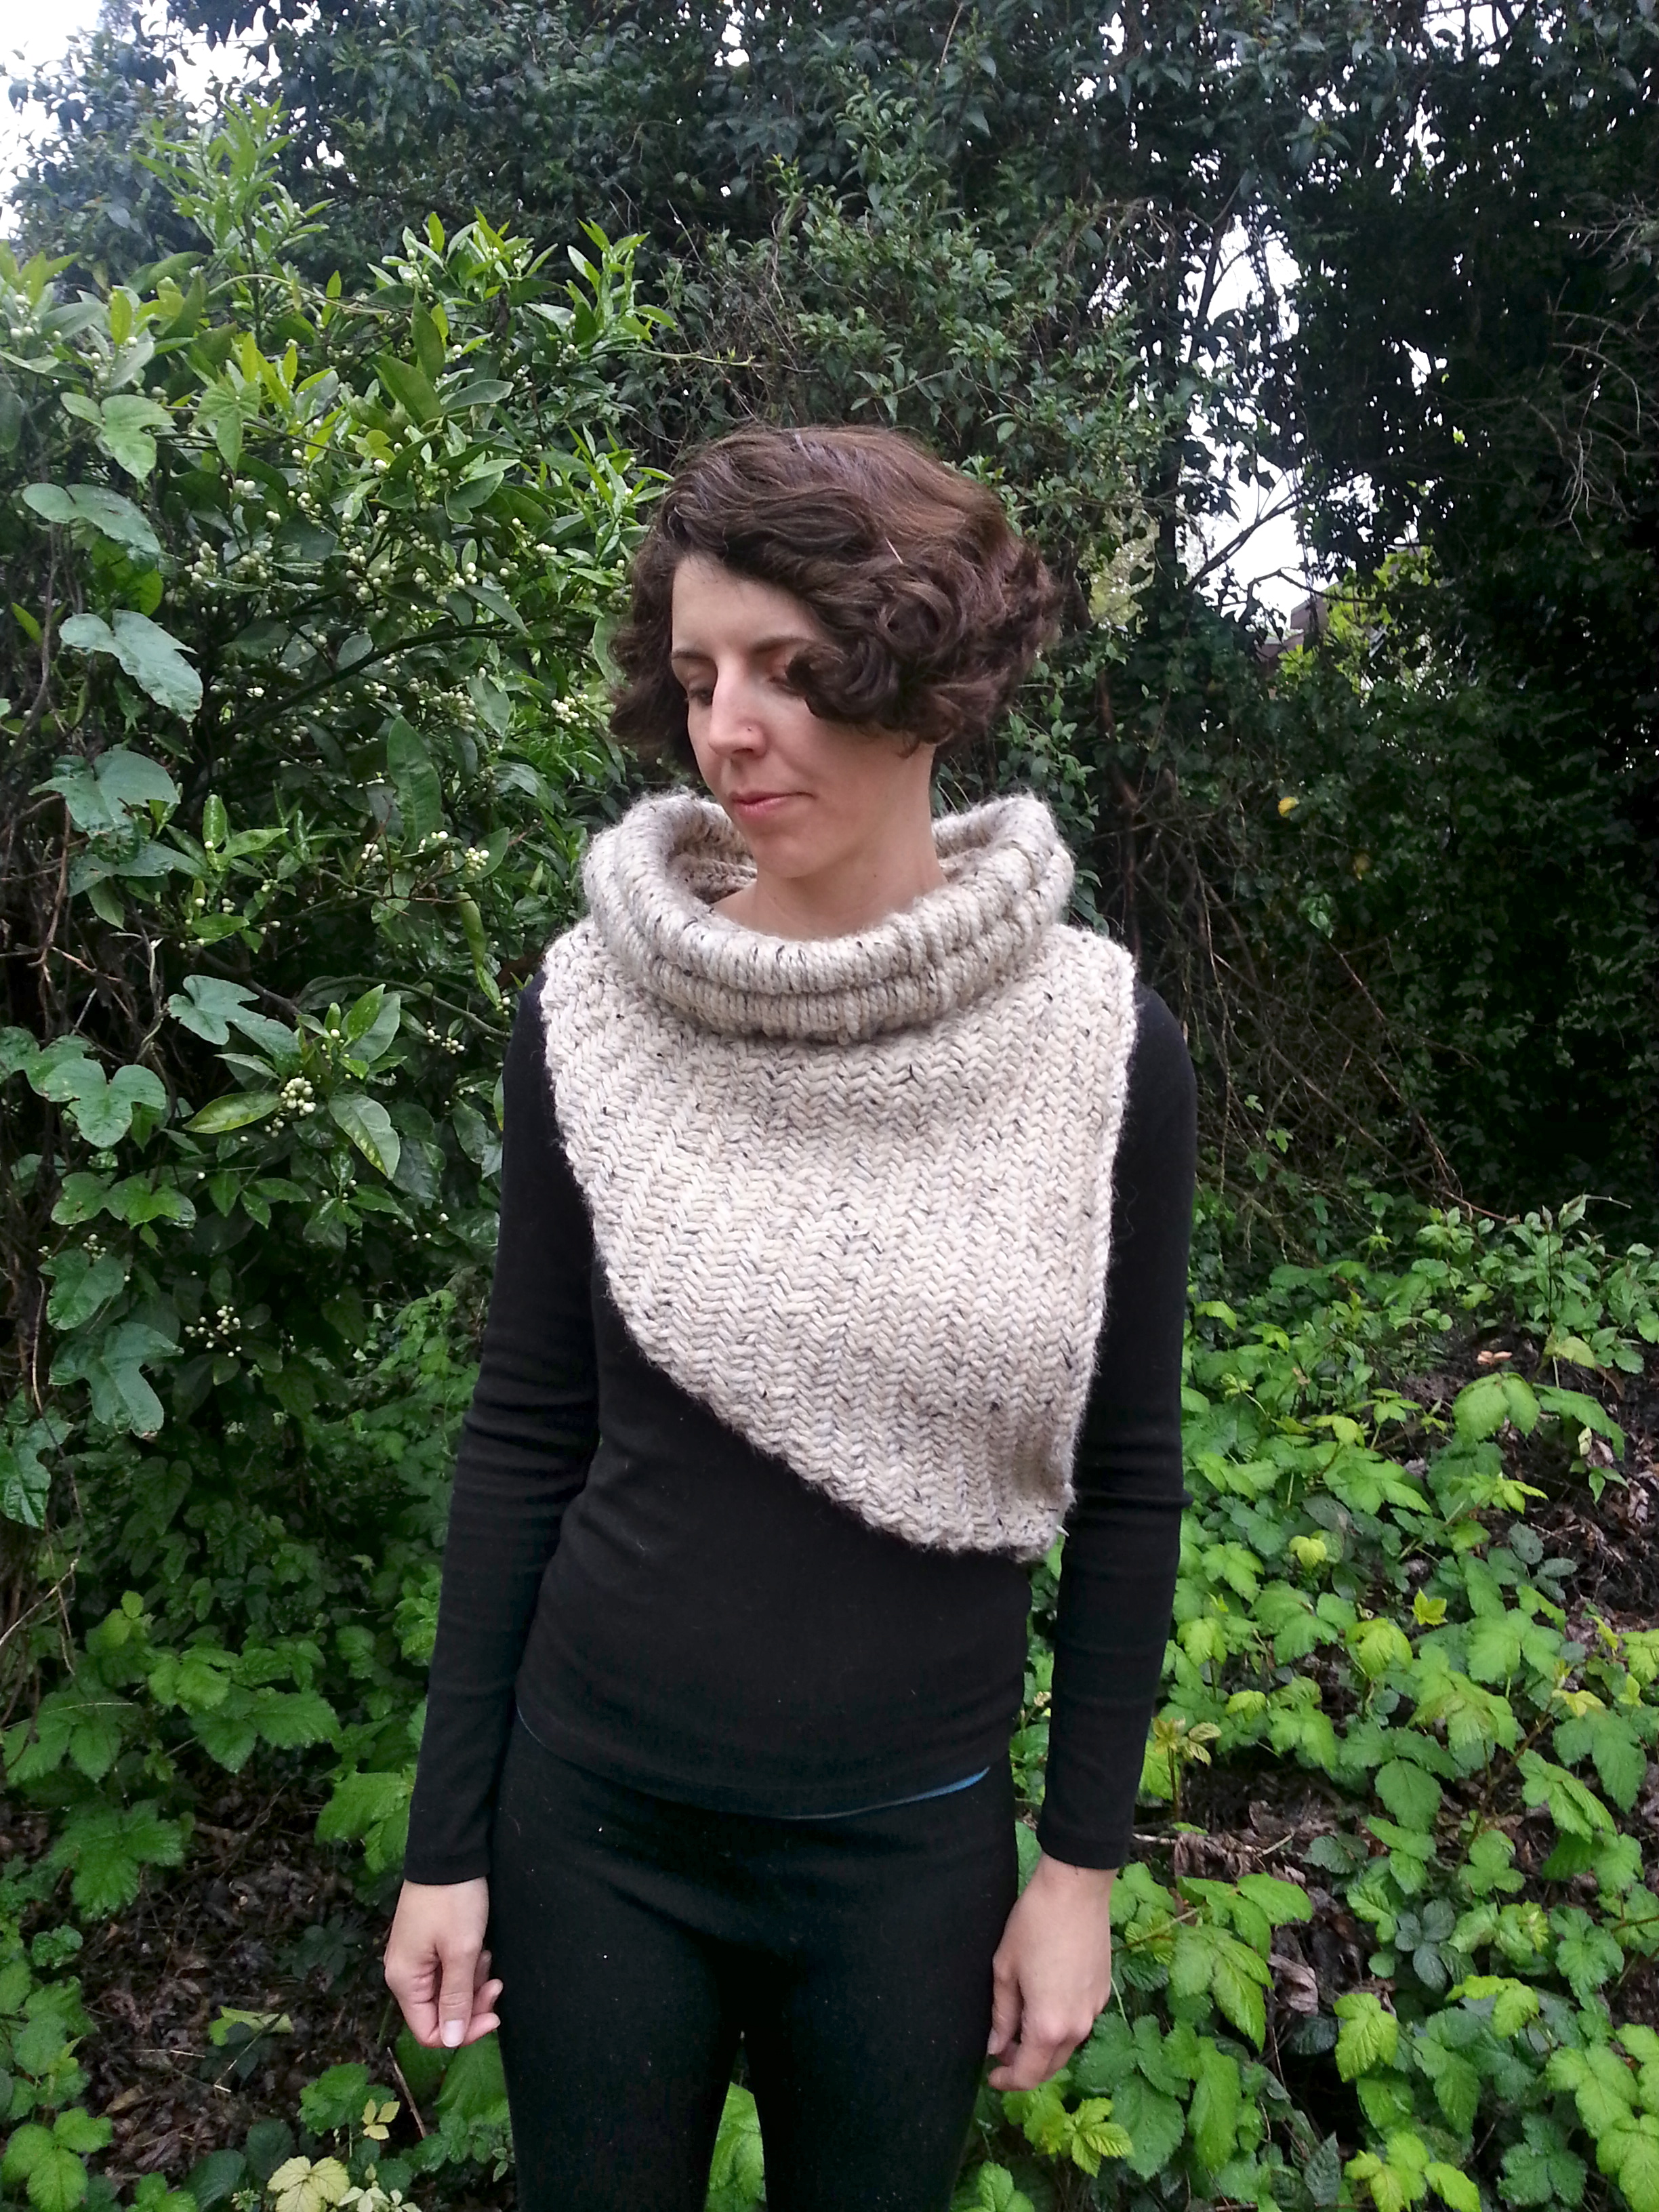
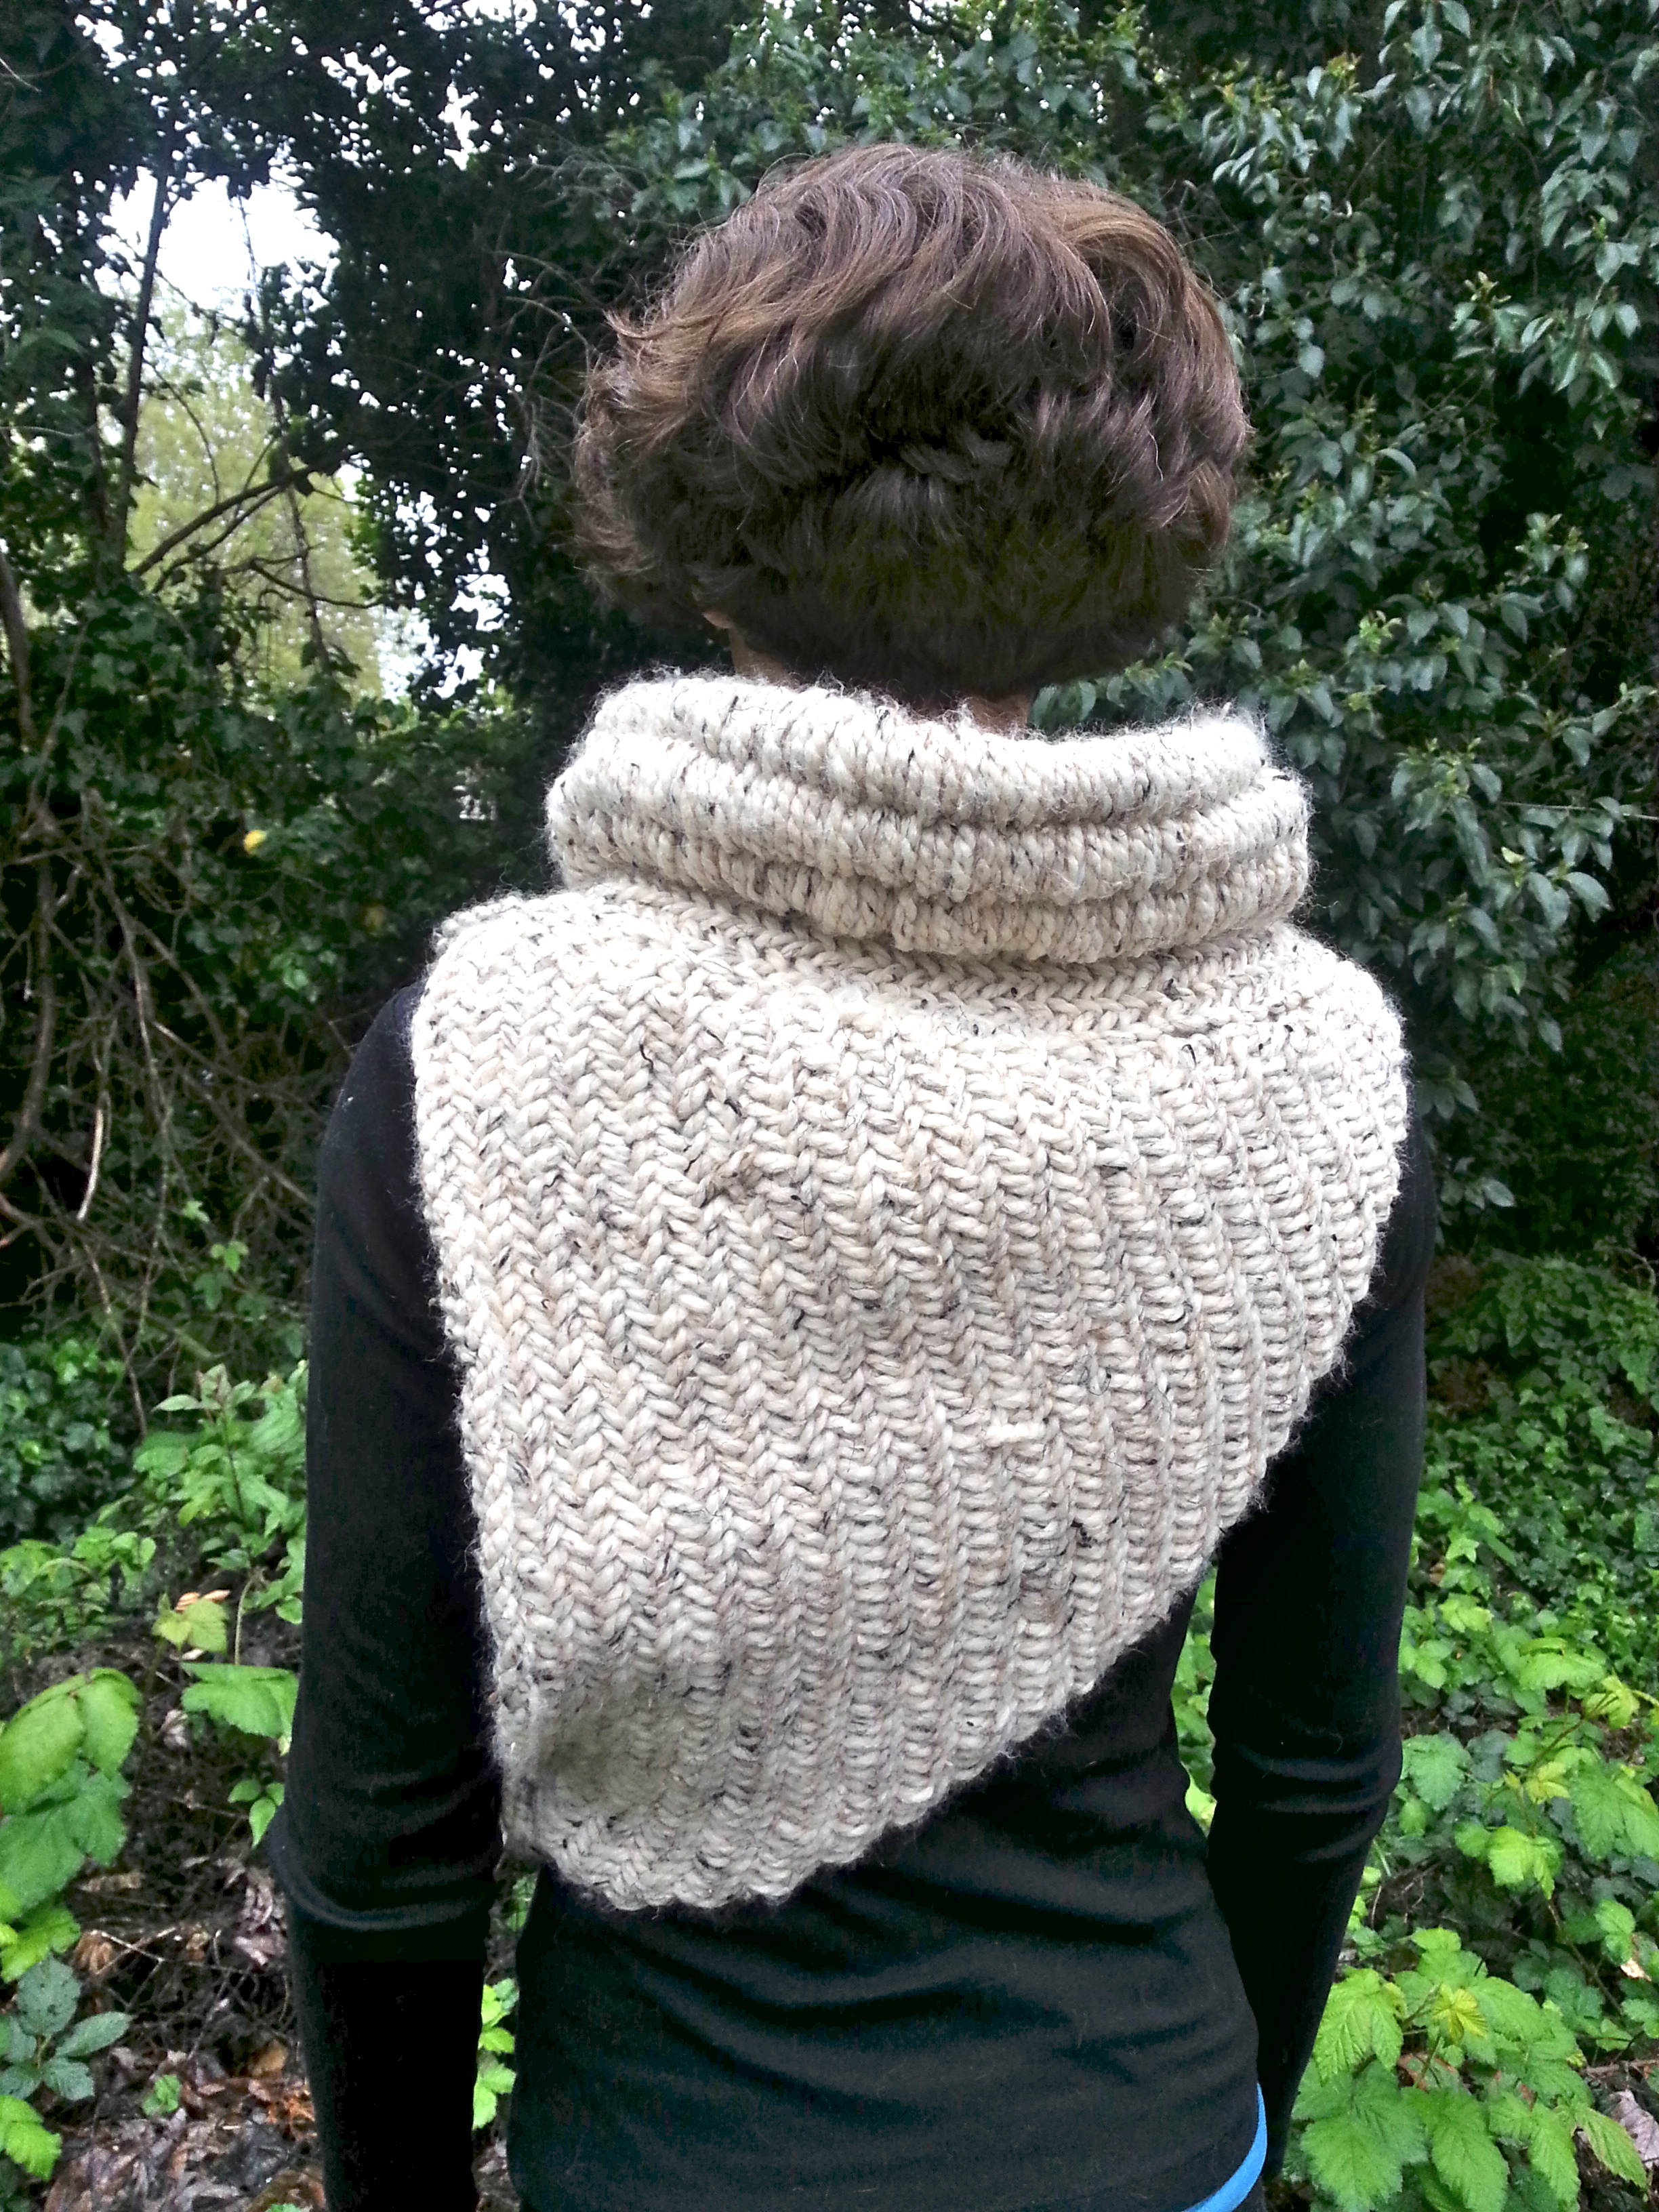
If you can knit the Hunger Games Cowl fast enough, you could be Katnis Everdeen! Bonus: it would be a warm and cozy costume.
ABSTRACT COSTUMES
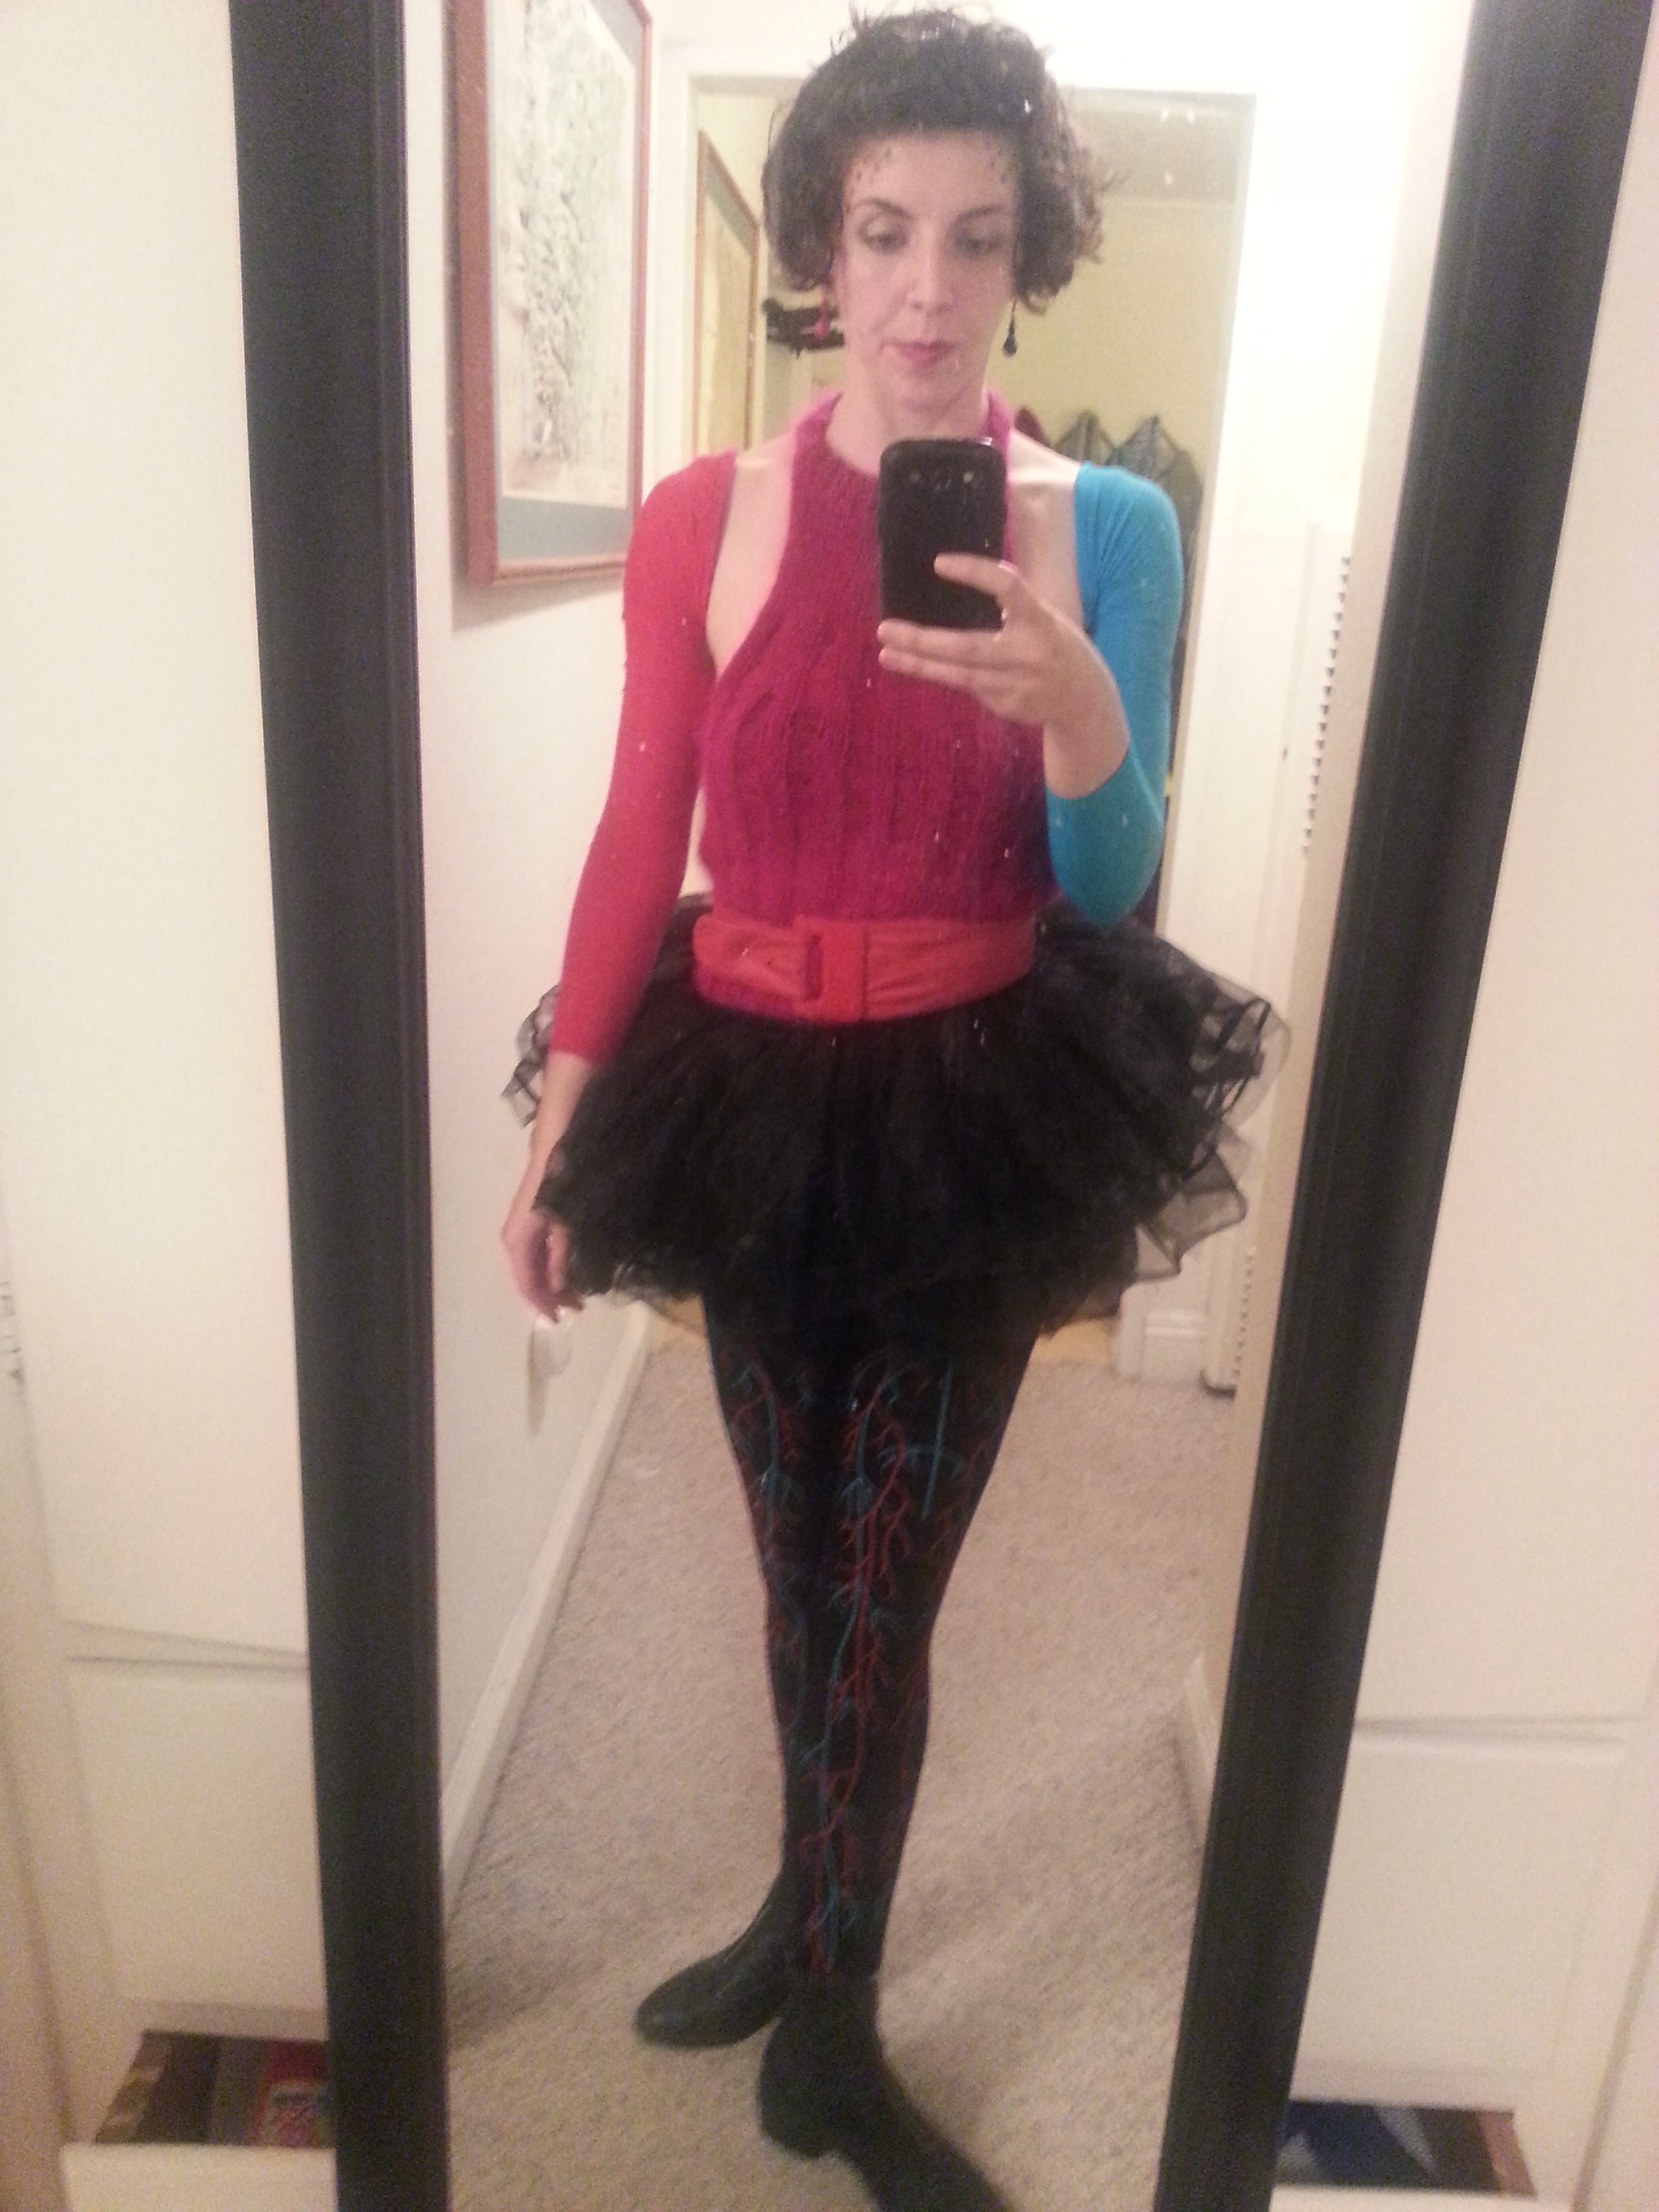
Anatomical Heart
Sometimes, I like to attempt non-humanoid costumes. I was particularly pleased with this interpretation of the human heart. Since veins and arteries are often depicted in blues and reds in anatomical drawings, I went with that theme. I painted dots in blue eyeshadow and red lipstick on my forehead, with an earring of each color. Then I found some children’s tights in a discount bin at Target in blue and red. I cut off the feet and stuck one arm in each, tying them together behind my back to form a sort of shrug. It stayed put surprisingly well.
Recognize the top? It’s was my Valentine’s Day party Free Fall Tank. It’s a quick pattern that you could totally finish before Oct. 31. I thought it worked well for the heart costume too. The red belt and the black tutu…well, that was more to make it more costume-y for the party. But check out the tights!
These were the tights that actually inspired the whole costume. Ebay tights are the best.
You should know that I served lots of donuts dressed like this. I doubt anyone knew what it was supposed to be, but I knew what it was. In my heart.
Christmas Tree
As I promised that some of these costumes would be very easy, this final idea is one that I executed in about 30 minutes. Technically this was for an ugly sweater party around Christmas time, but it works just as well for the October holiday.
Remember the foam sheets I mentioned for the Pilgrim costume? I got a bag of odd sized ones from the dollar store, and cut them into squares. I used all the green ones to create a Christmas tree with a brown one for a stump, then found some sparkly ones in different colors to be the gifts below. I used duct tape to adhere them to an old sweater and wore it with my brightest red pants.
You could always go as a grumpy Christmas elf too.
additional ideas:
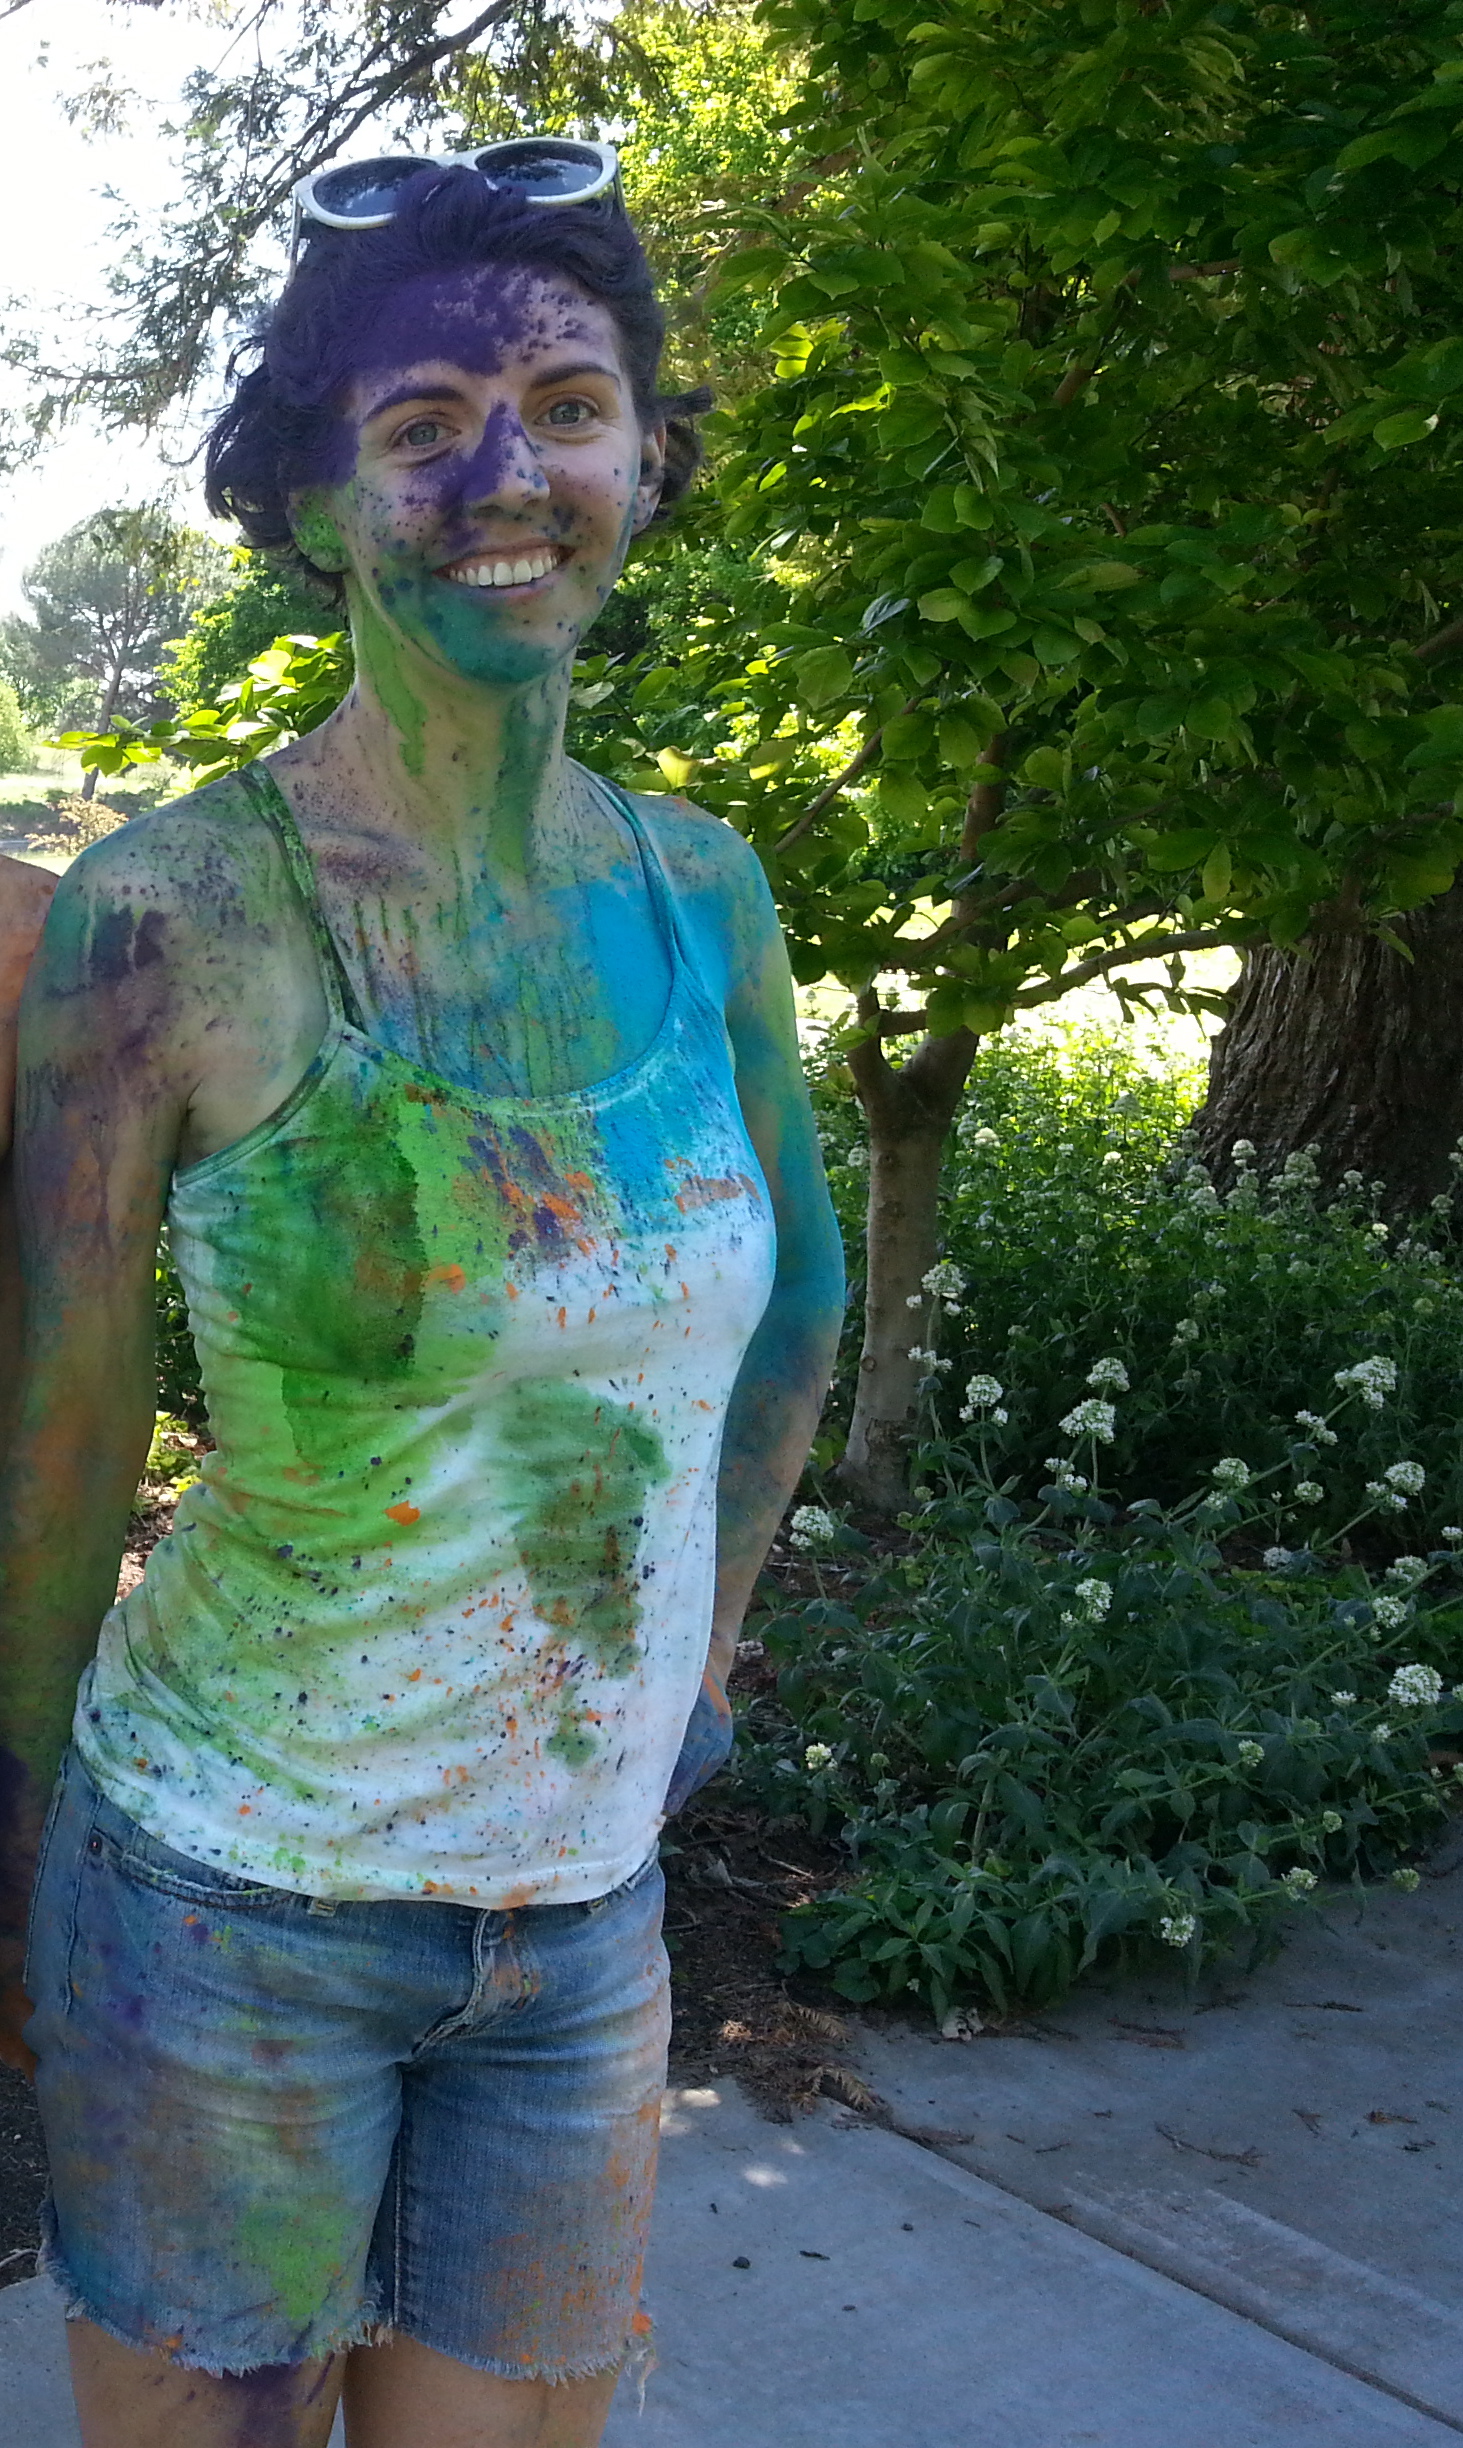
I think leggings can be a great inspiration for abstract costumes. If I had a chance, I would probably pair these paint splatter leggings I have with an actual paint splattered top.
this plus this
I hope these costumes inspire some epic Halloween 2014 creations of your own!
Happy First Day of Spring! To celebrate the Vernal Equinox, I give you three green knits, each re-imagined in some way and ready for transitional weather:
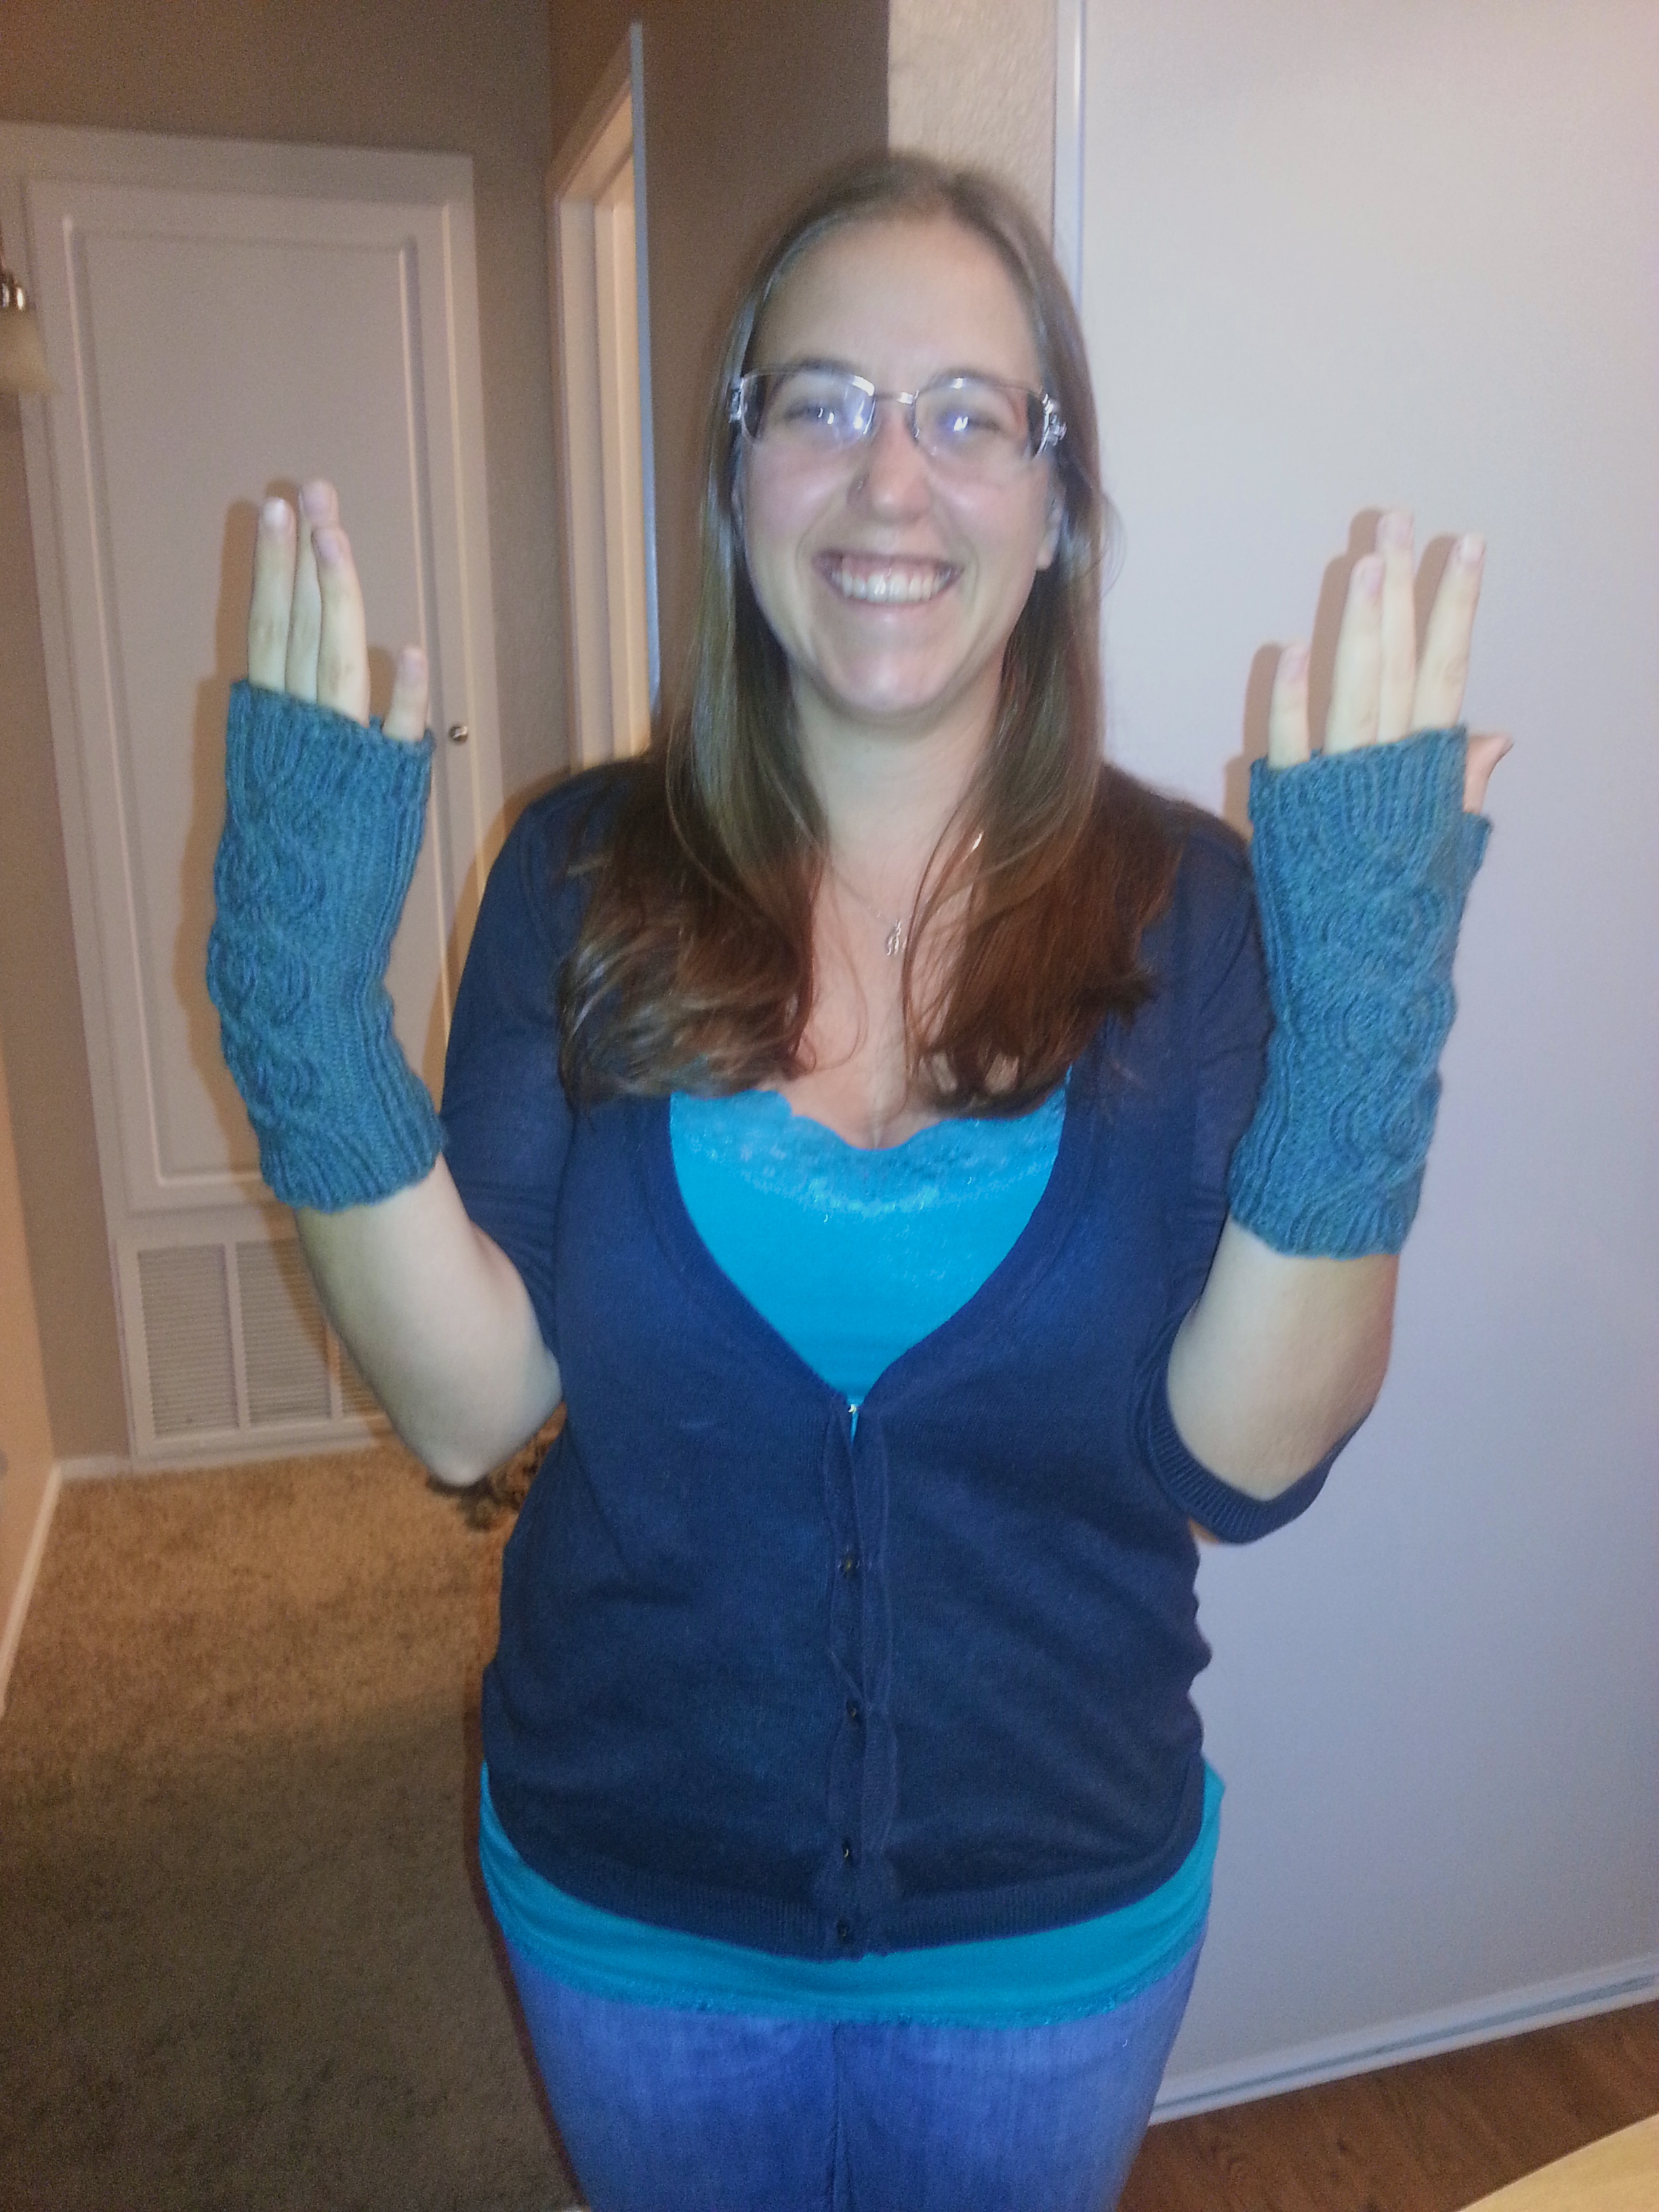
Fingerless mitts: Vancouver Fog
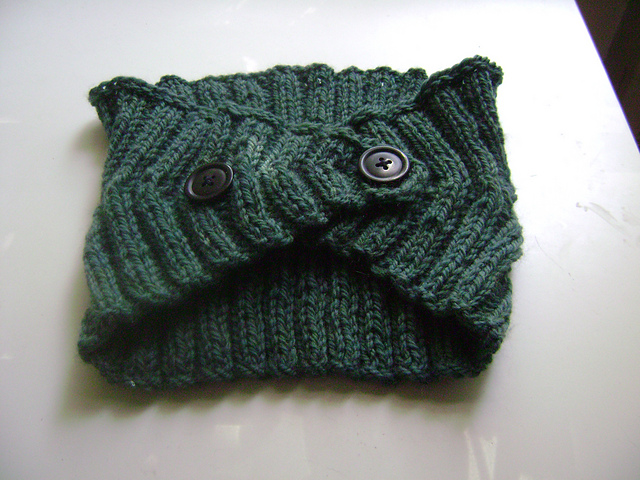
This is my version of Vancouver Fog by Jen Balfour. Fun fact: this soft, blue green yarn used to be a different knit entirely. A long time ago, back in the loose knitting days I’ve mentioned before, I knit Calorimetry from Knitty’s Winter 2006 issue. It came out poorly:
See how loose it was in the back? It barely stayed on my head, and that was before it stretched out. I even overlapped the ends and did two buttons to try to keep it in place, to no avail.
Fast forward a year or so and I was planning to make some fingerless mitts for a friend’s birthday. She chose the Vancouver Fog pattern, with its beautiful cable pattern, and I just knew that this was the right yarn for the job. So I frogged Calorimetry and started remaking this muted, spruce colored worsted weight yarn into hand warmers.
I remember being disappointed that there wasn’t a gauge for this project, but I had learned my lesson about my loose knitting—so instead of the recommended size 7 needles, I used size 3! I know! I also cast on 4 fewer stitched than recommended. Yes, I went that tight! But the results were spot on:
These fingerless mitts were a good fit, and I got to practice some cool cabling techniques. I’m quite pleased with my decision to frog the original pattern.
BEFOREAFTER
Fingerless mitts are great for those times when it’s too cool out for bare hands, but not cold enough for gloves!
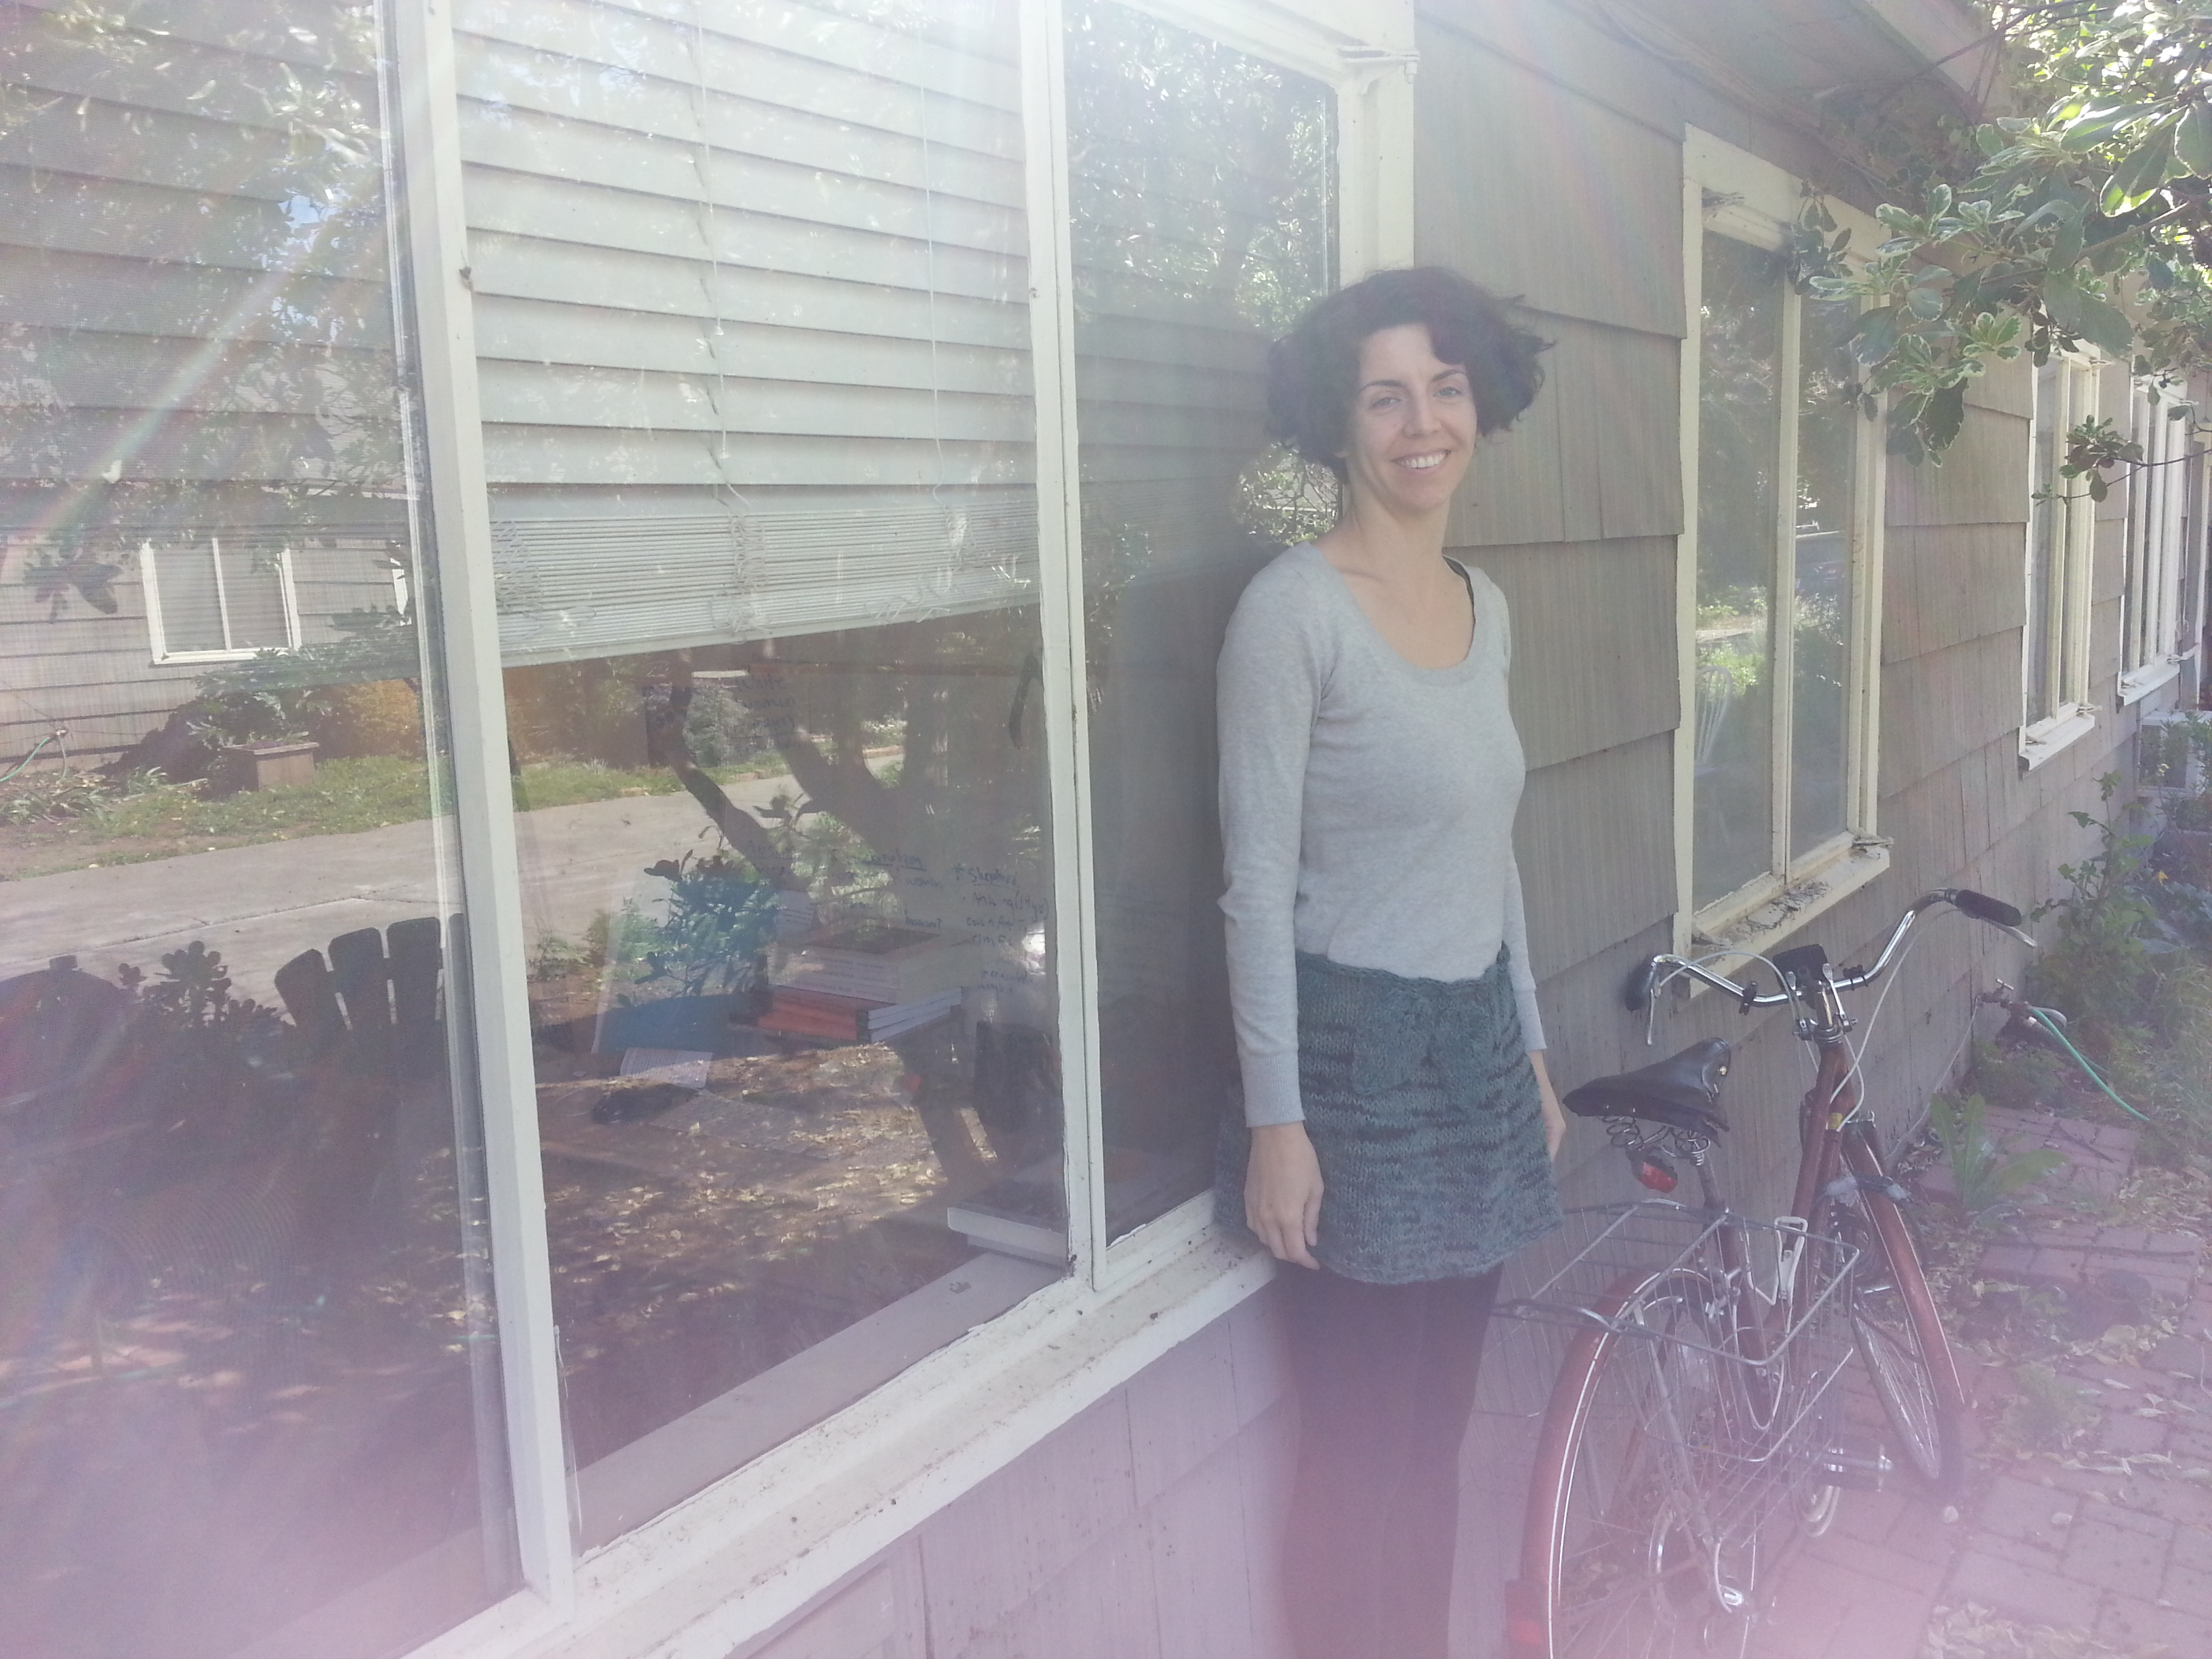
Leafy Skirt or Mini Cape: Entry Level Capelet
This is a really old project, but the loose knitting didn’t matter with this very simple garment. It’s the aptly named Entry Level Capelet by Haley Waxberg. It’s a good pattern for a hand dyed variegated yarn like this one. The color pooling was not even, but that gives it an interesting self-spiraling effect at the top. (side note: you can tell how old the photo below is by how long my hair was!)
However, I almost always wear my version in a different way now—as a skirt! The yarn was just a little too scratchy to be touching my arms/neck, so I made an I-cord and wove it through the top band, then tied the I-cord at my waist. I added some leaves because, you know, I love leaves—I have no idea where I got the pattern for them, but the standard knitted leaf pattern seen here.
I still wear this skirt fairly often—it’s great with a pair of leggings, and it’s nice when it’s just a little bit cool out.
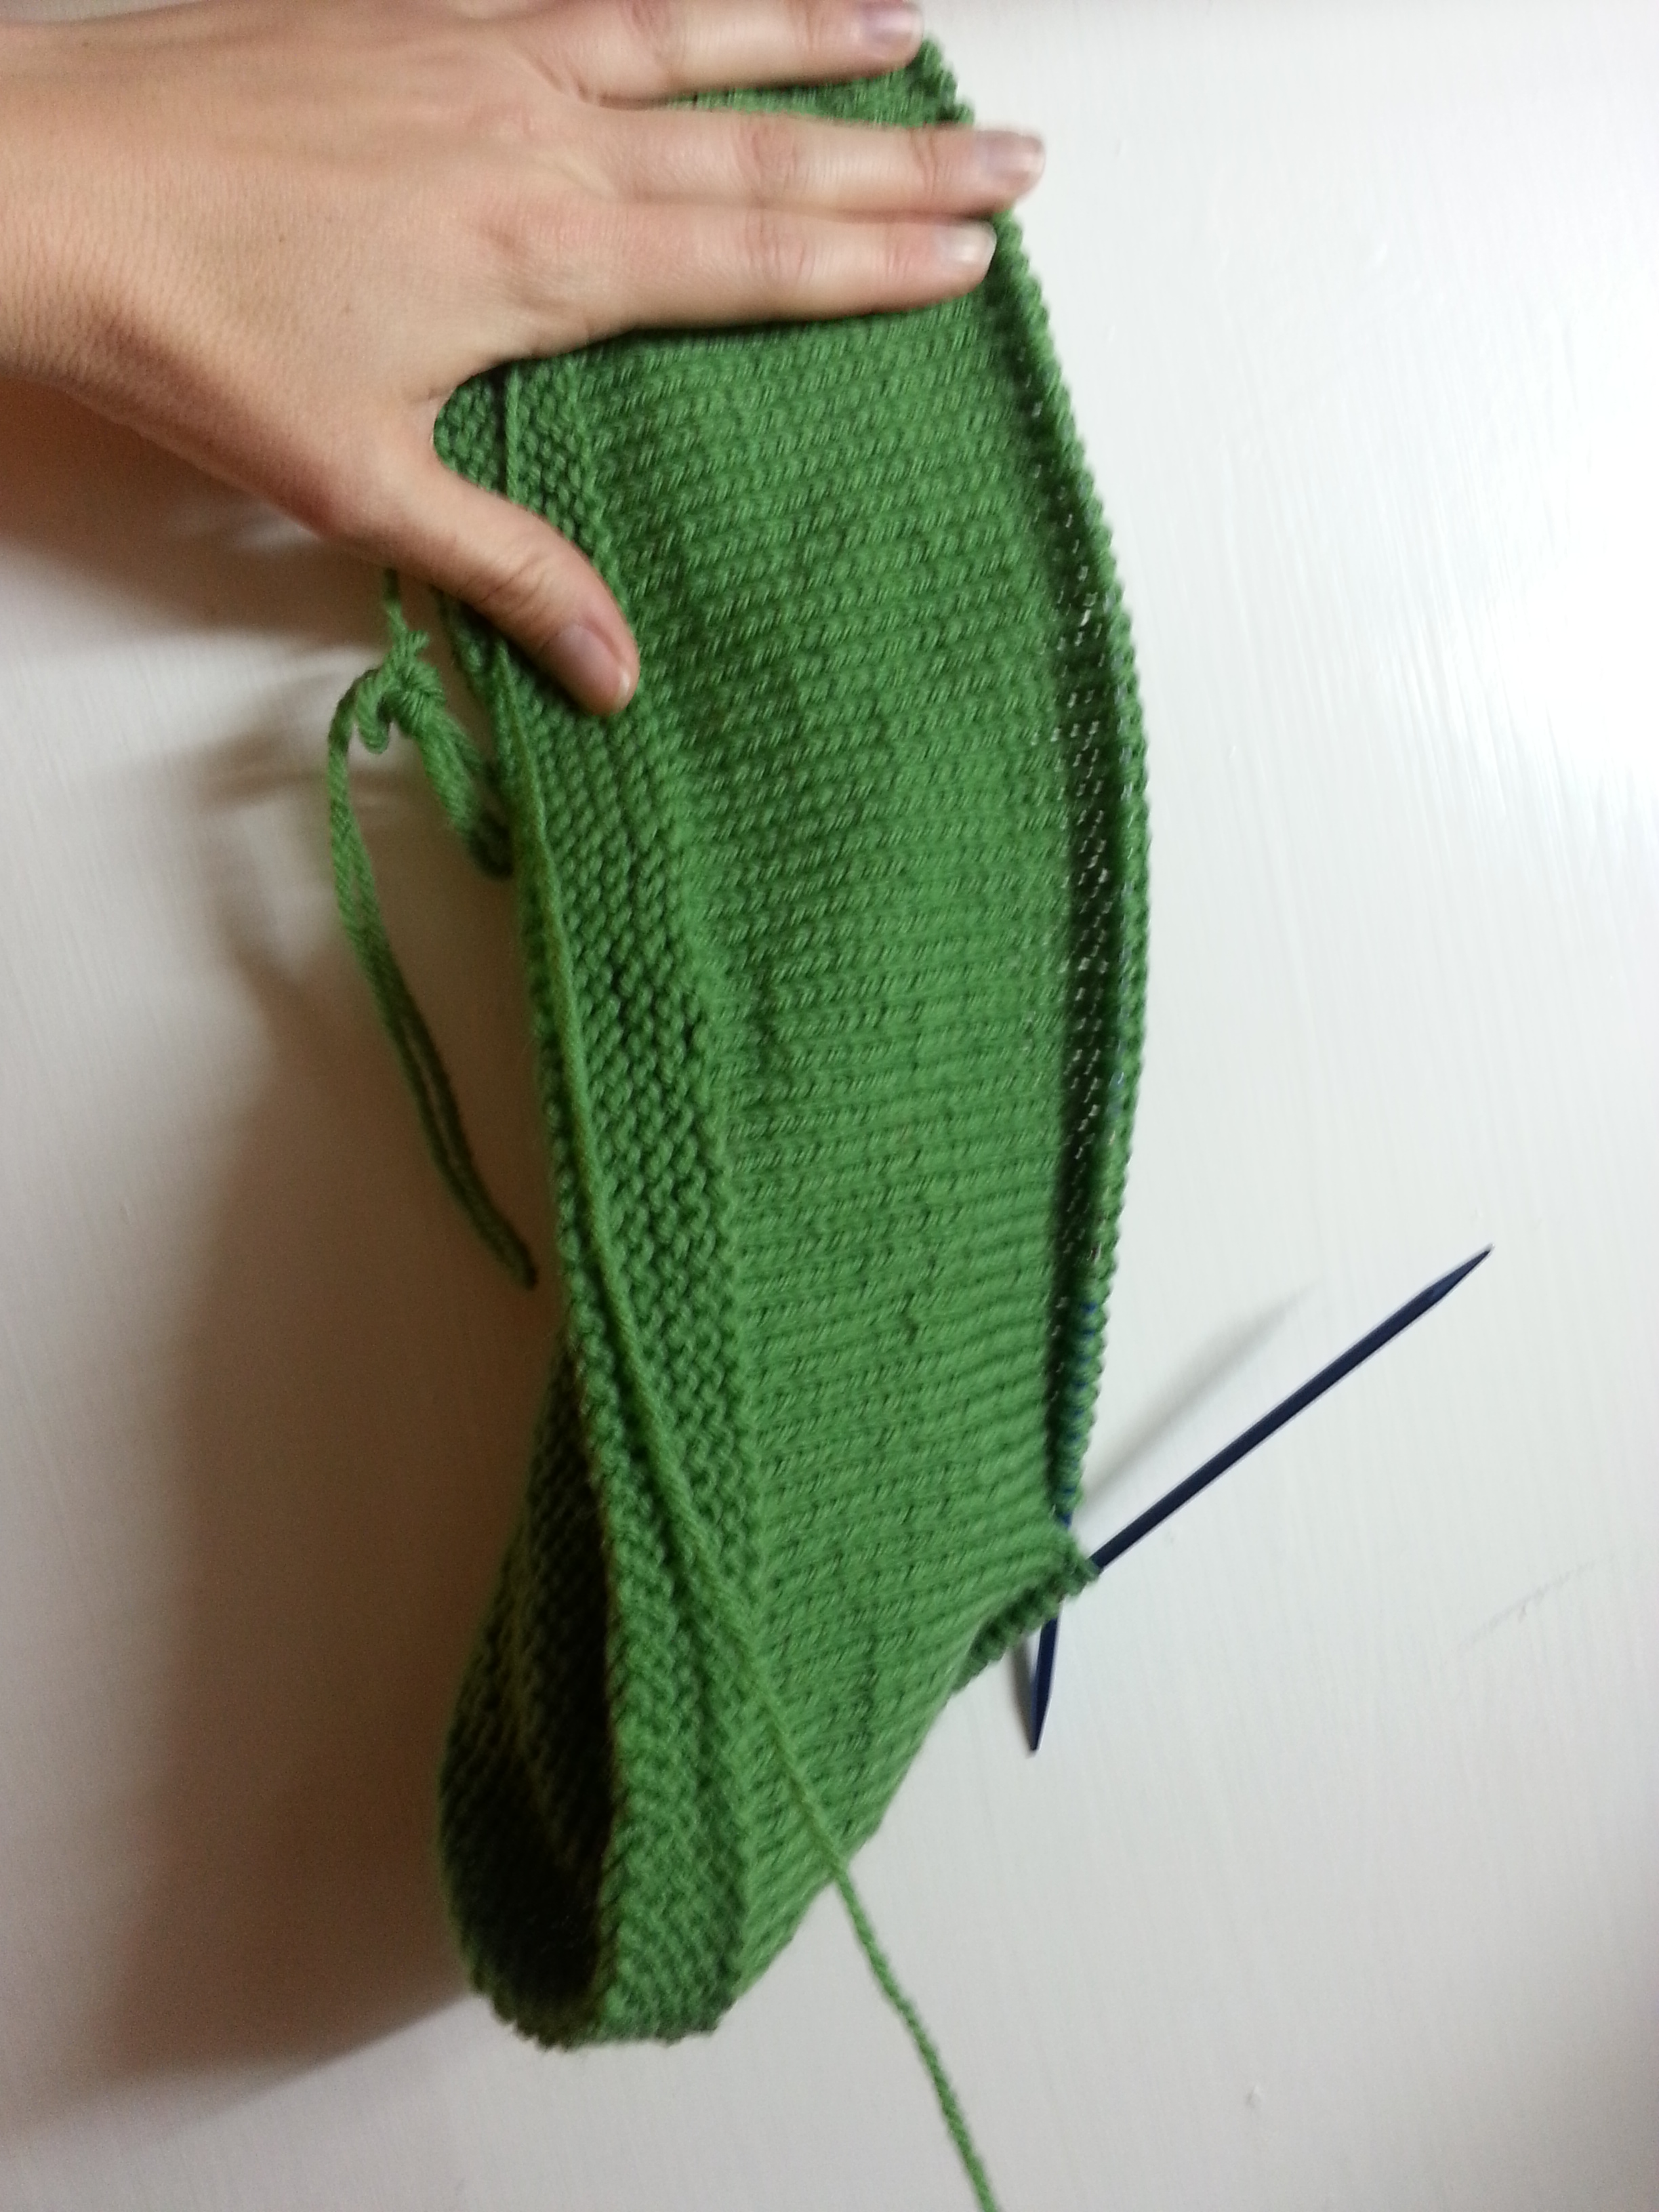
Sweater in Progress: Mrs. Darcy Cardigan
My final green project is still on the needles! It’s the Mrs. Darcy Cardigan by Mary Weaver in Knits that Fit (and unlike most of my knits, this one required checking out a book at the library).With a title like that, it’s only appropriate to do a lot of tweaks to the pattern, right? It may not be obvious from the photo above, but I’m making the arms much longer than the pattern calls for to accommodate my arms and shoulders. I wish I had known before I made these that to get the true twisted rib, others knitters knew to p1 to back on the wrong side, because the pattern doesn’t indicate this and the ribbing on the cuffs won’t look as sharp as it could.
I’ve since moved on to knitting the body. You’ll have to forgive the blurry action shot here, but at least it captures the true green of the yarn! (It’s Cascade 220, in, you guessed it, Spring Green.) I decided that since I have a long torso that is quite wide at the top, I’d use ravelry user wakenda’s modifications to get a gentler slope on the cardigan’s v neck, which I think will still be quite striking.
I’m always a little hesitant to blog about my works in progress, but this partway knit green cardigan is too verdant not to share, and cardigans are great for spring weather. Hopefully this post will inspire me to finish it soon!
*bonus postscript announcement* If you read this far, you might enjoy the fact that I recently added categories to the blog, and then went back and retroactively categorized every past post! I created the categories based on what I seem to write about most, so you can find similar posts without having to scroll through past years.
I’ve been wanting to do a follow up to my 2012 on quick winter knits and my 2013 procrastiknits post for a while now, and here it is! Between getting a cold last week and the 2014 Winter Olympics starting this week(ish), I’ve had a lot of time to whip up some projects. I think any of these would make great Ravellenic Games knits. (As a side note, if you have qualms about anything having to do with the Sochi Olympics, check out what Leethal is doing on her knitting blog. Pretty genius move.)
One of these projects really is Valentine’s Day themed, but I’m going to say that there’s something for everyone to love here, including a few things for those who don’t care for the holiday whatsoever. So without further ado, here are my finished objects: a racerback tank, neck collar, ear warmer, cowl and chapstick holder. All are free patterns available on ravelry!
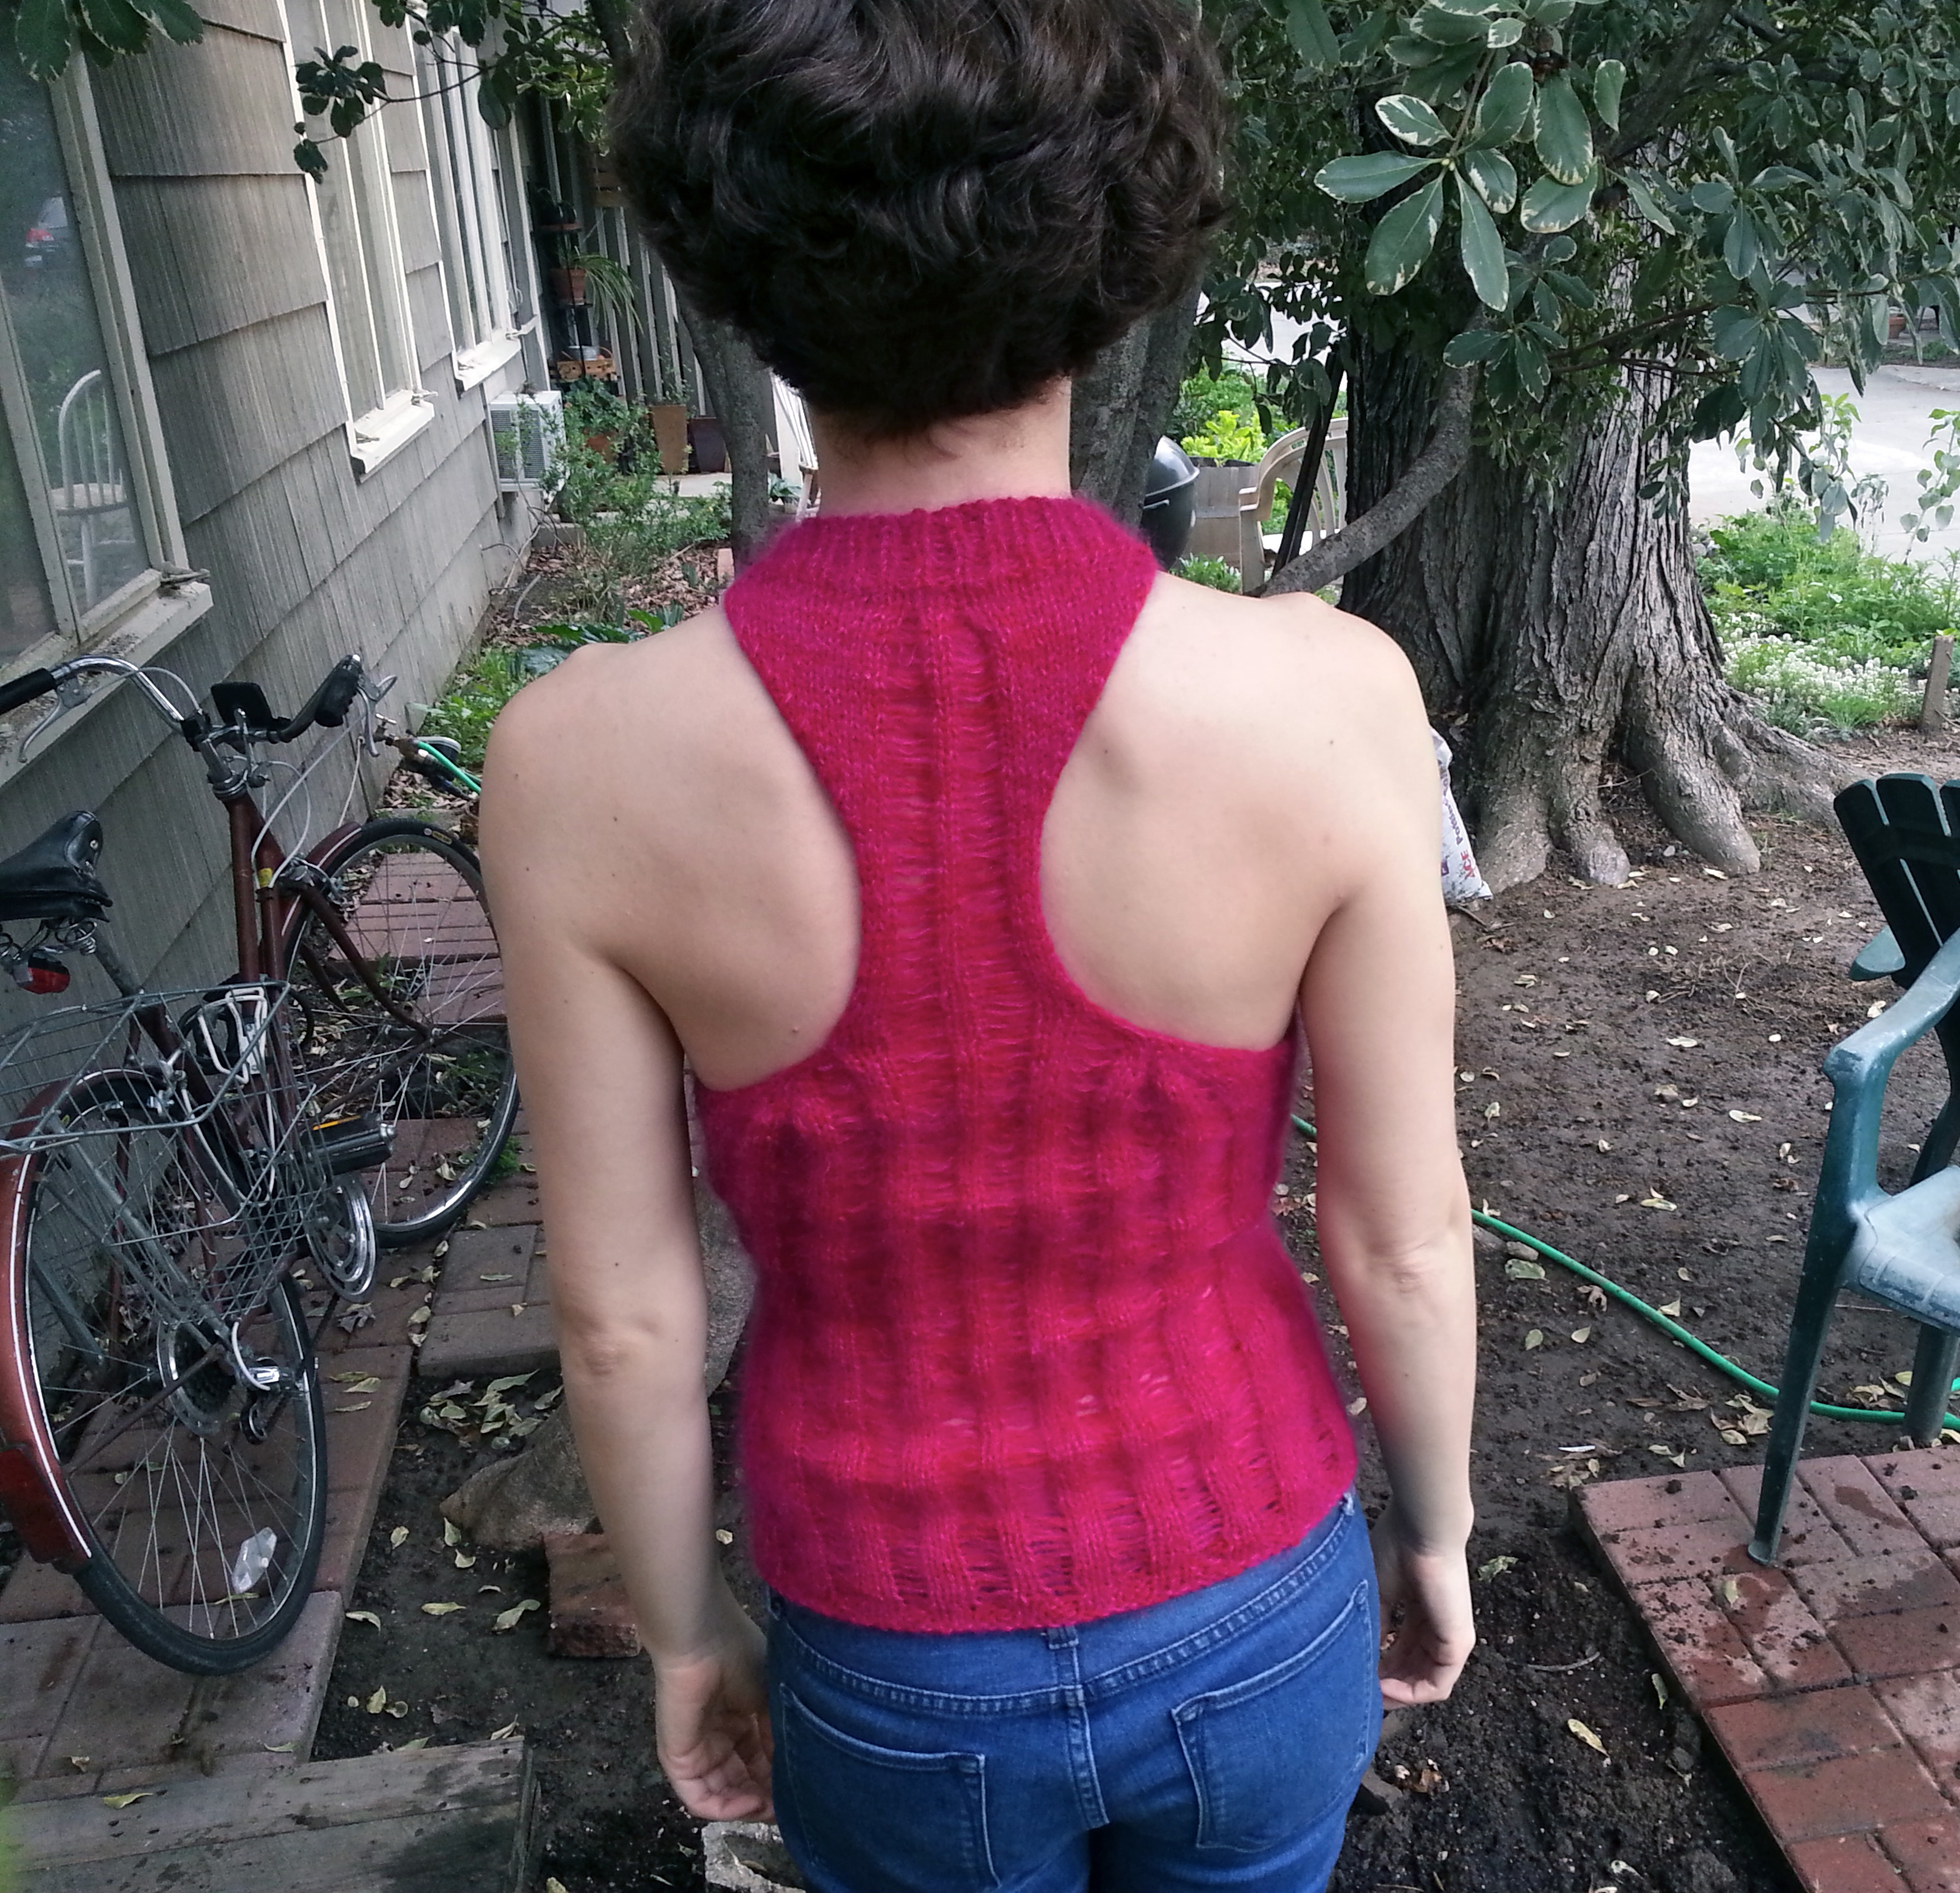
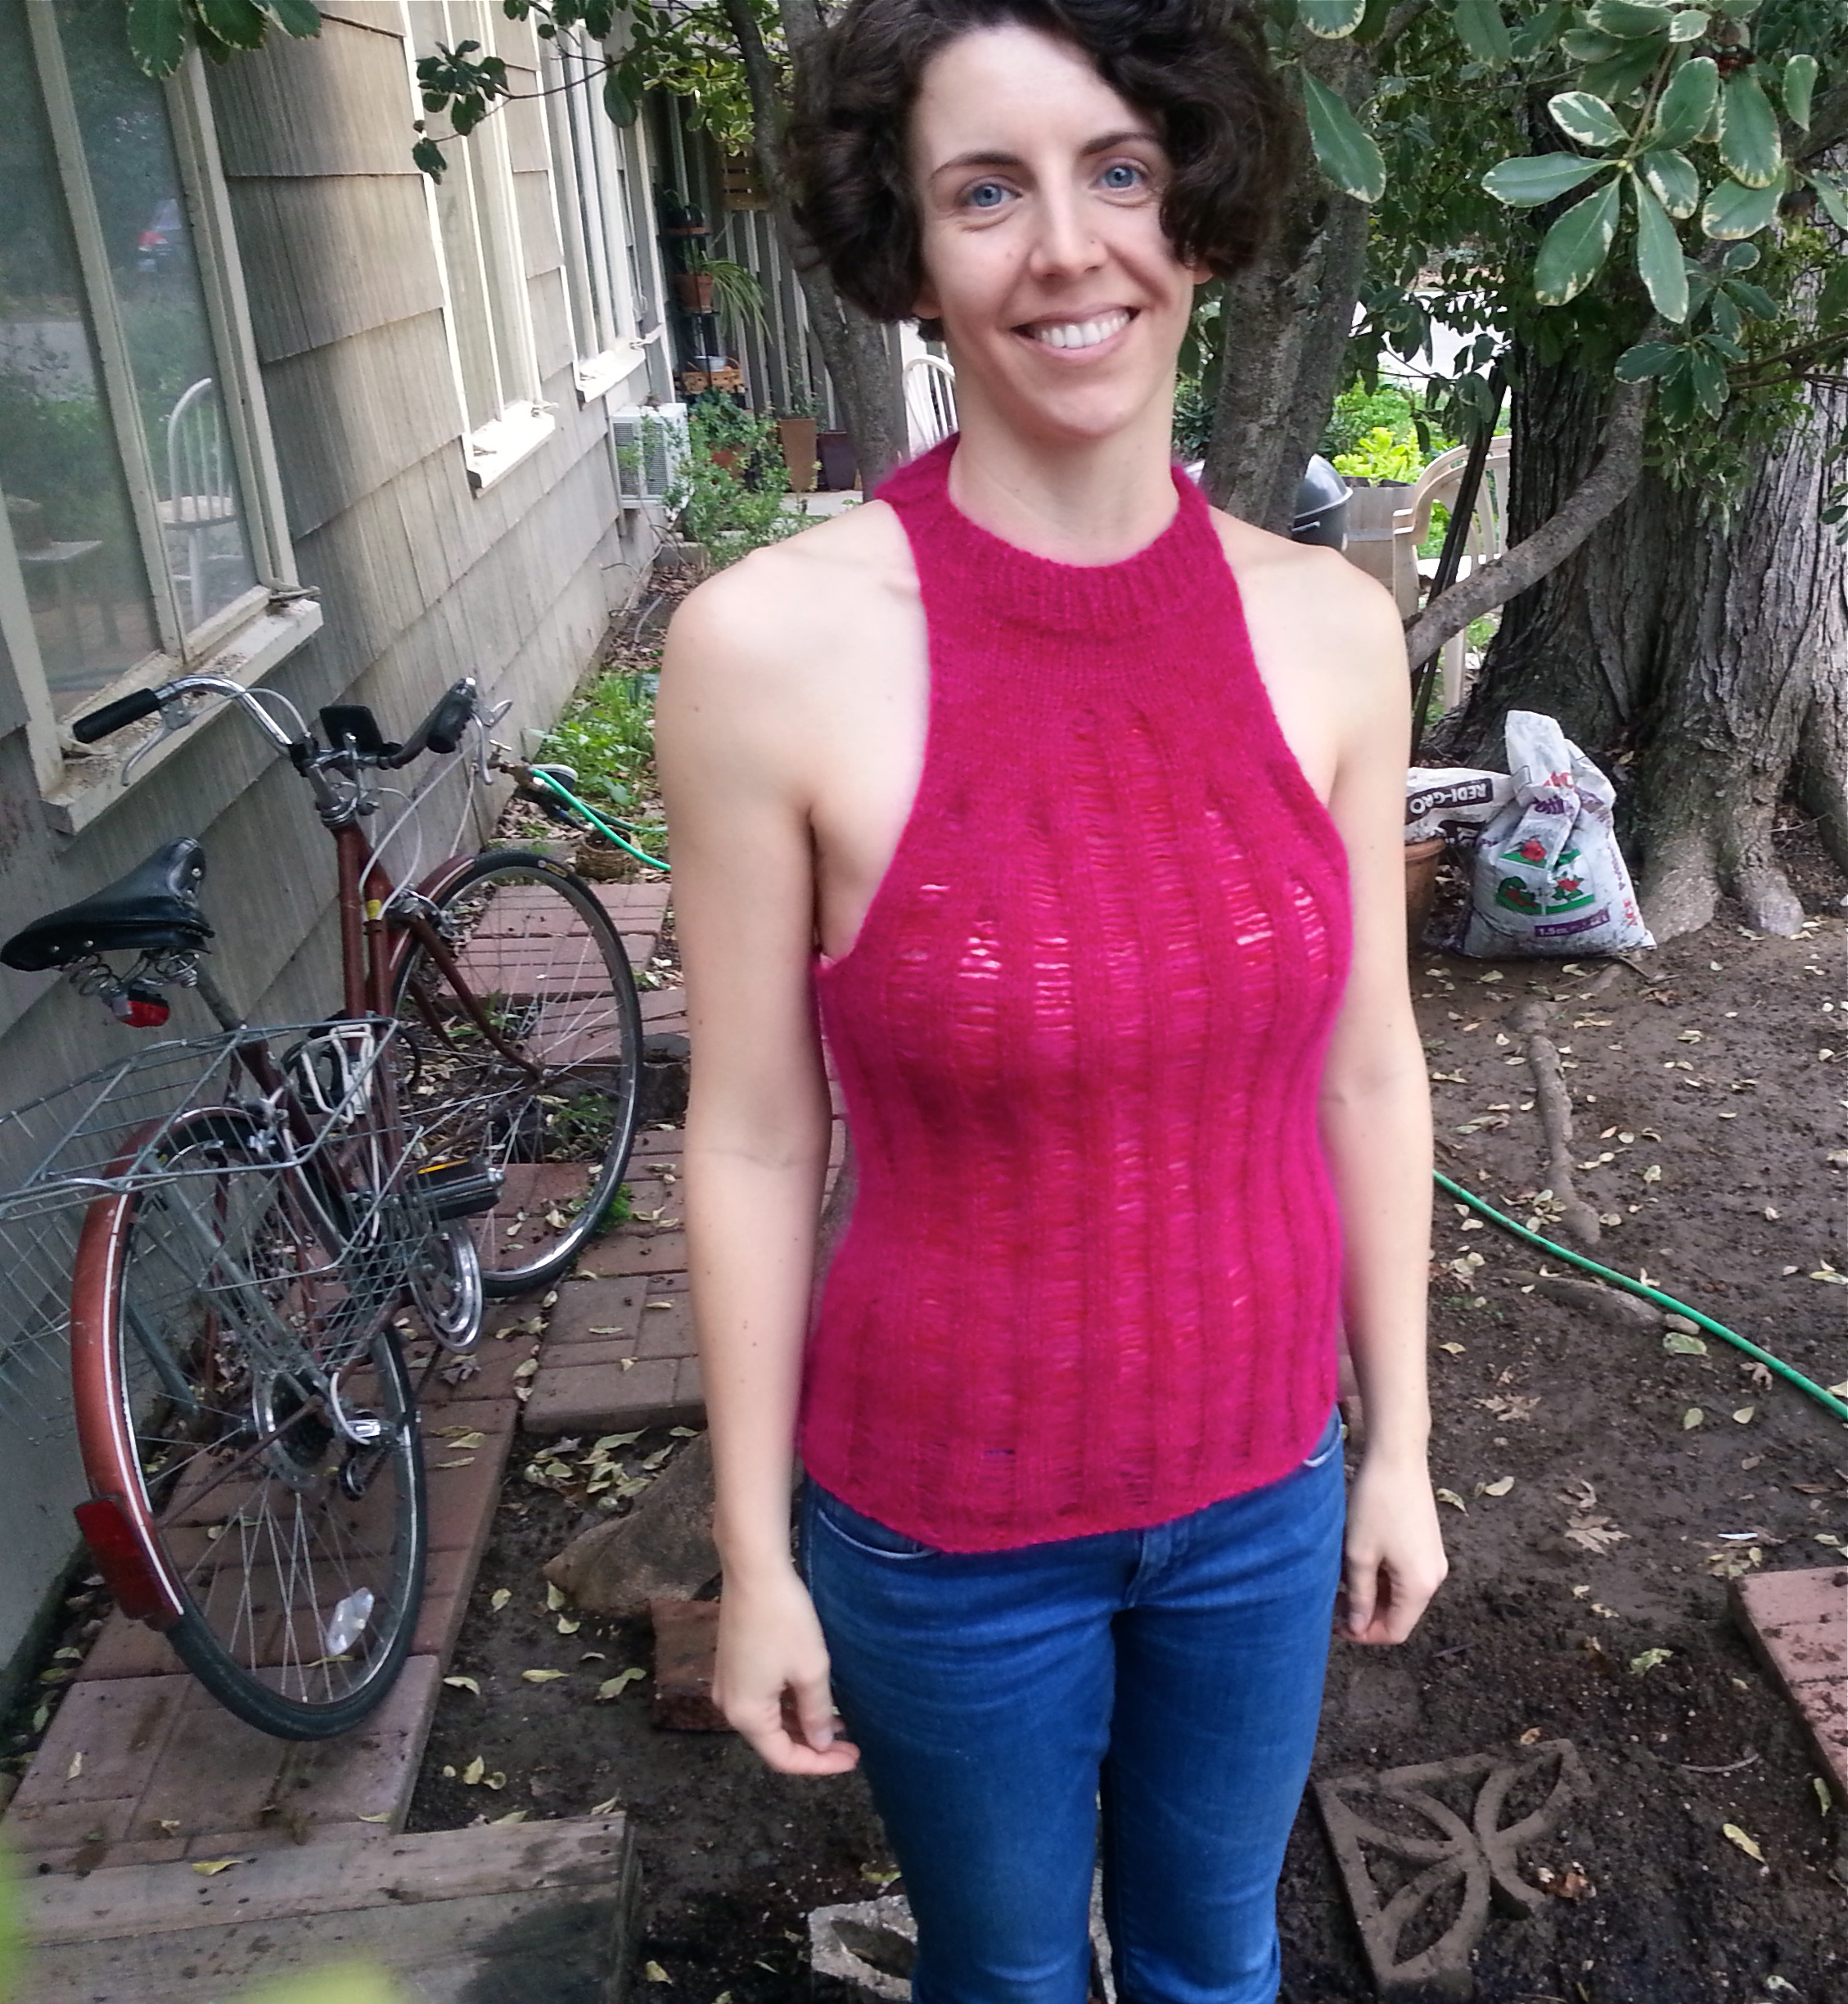
Pink Free Fall Tank Top
This Valentine’s Day, some good friends are throwing a dance party, and they encouraged us to dress for the occasion. Unfortunately, I don’t own any truly pink clothing. But instead of turing to the obvious solution (thrift stores, borrow something), I was like, “I bet I can knit something pink!” So that’s what I did.
This is my version of Annina Päivärinta’s Free Fall Tank. The amazing thing about this tank pattern is that it only take one skein! This is thanks to the drop stitch in the pattern, which I’d never tried before but loved.
This photos is probably the closest to the true color of this tank. To get this color, I held together one strand of sport weight red wool I recycled from a thrifted sweater with two strands of a hot pink, lace weight mohair yarn that I have literally had in my stash since my roommate in college gave it to me. I have no idea why I kept it, but I’m glad I did.
There aren’t a lot of photos of people wearing this tank on ravelry, and I can tell you why—when you knit it in one skein of cotton yarn as directed, the drop stitches make it really revealing. In my version, using three strands of fuzzy yarn, this is not as much the case unless you are looking rather closely.
There were a number of comments about the chart for this pattern by ravelry knitters, and I’ll admit, it is a tad confusing. I’d say its an intermediate skill pattern. I made a size small with a few mods based on their comments and my own measurements: stitch makers to mark all of the yarn overs, several extra inches of length, two stitches cast on at the bottoms of the drops instead of three, and an irregular rib at the bottom for three rounds. I’m really pleased with the results!
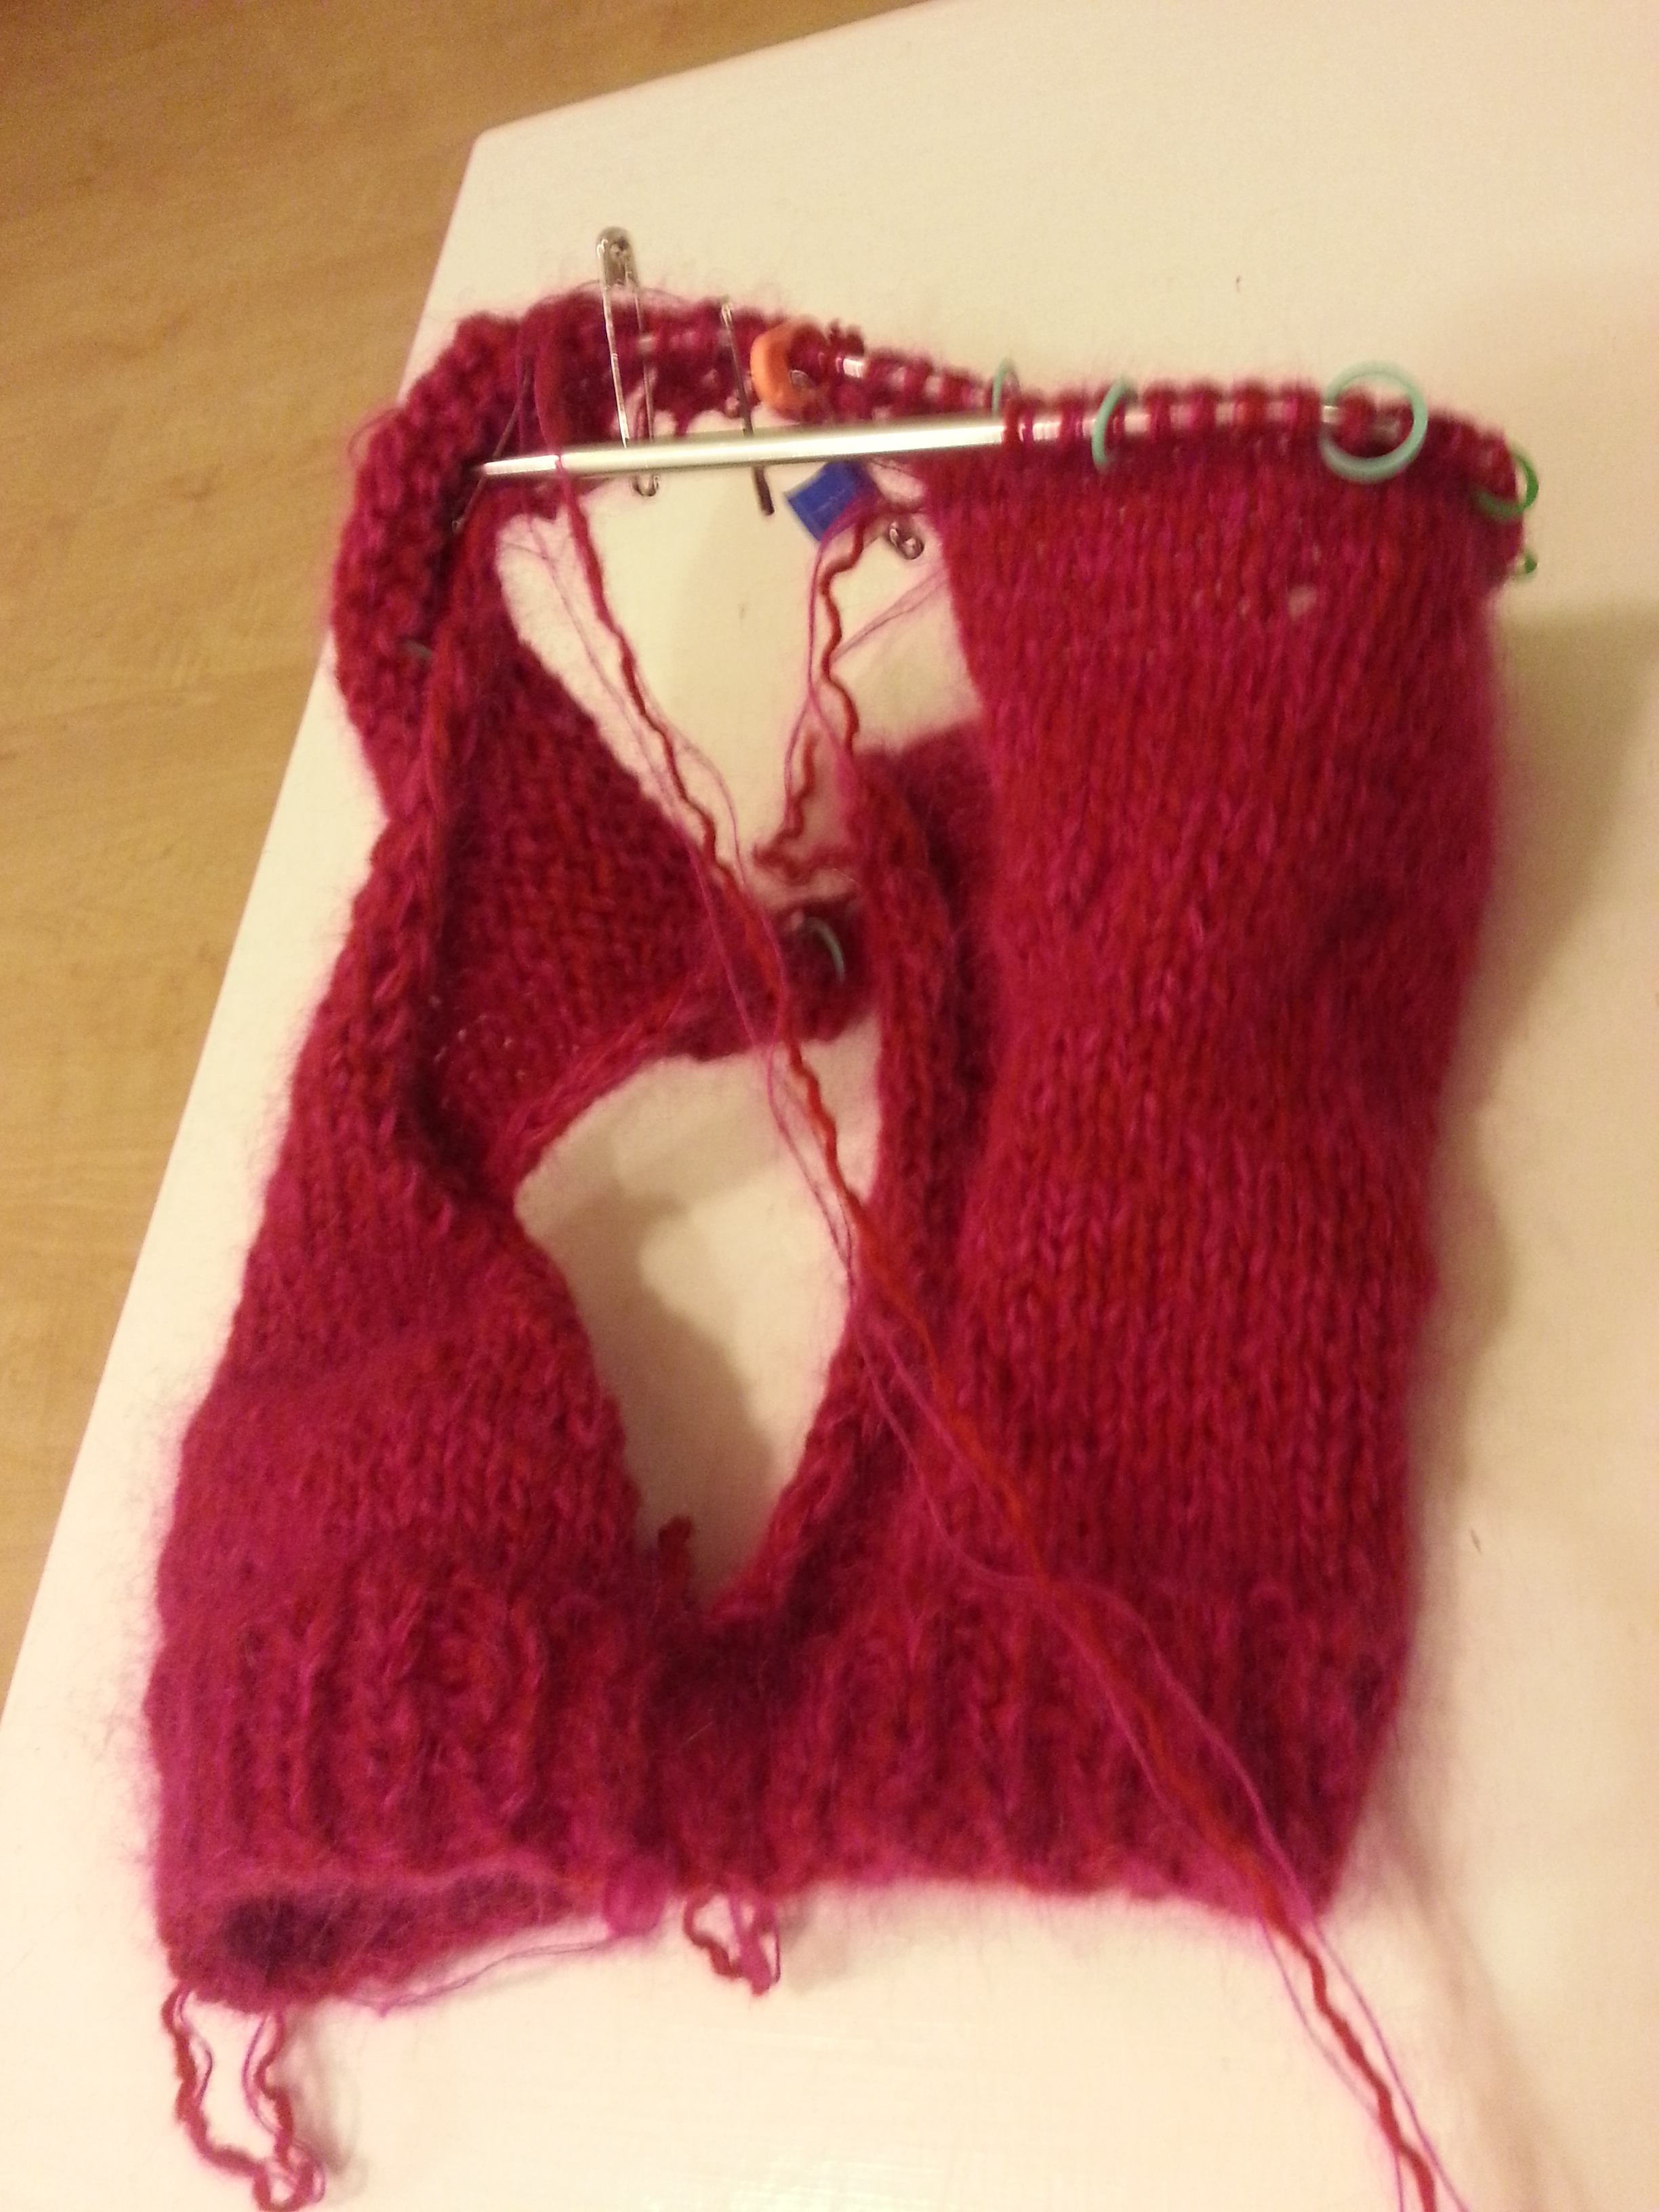
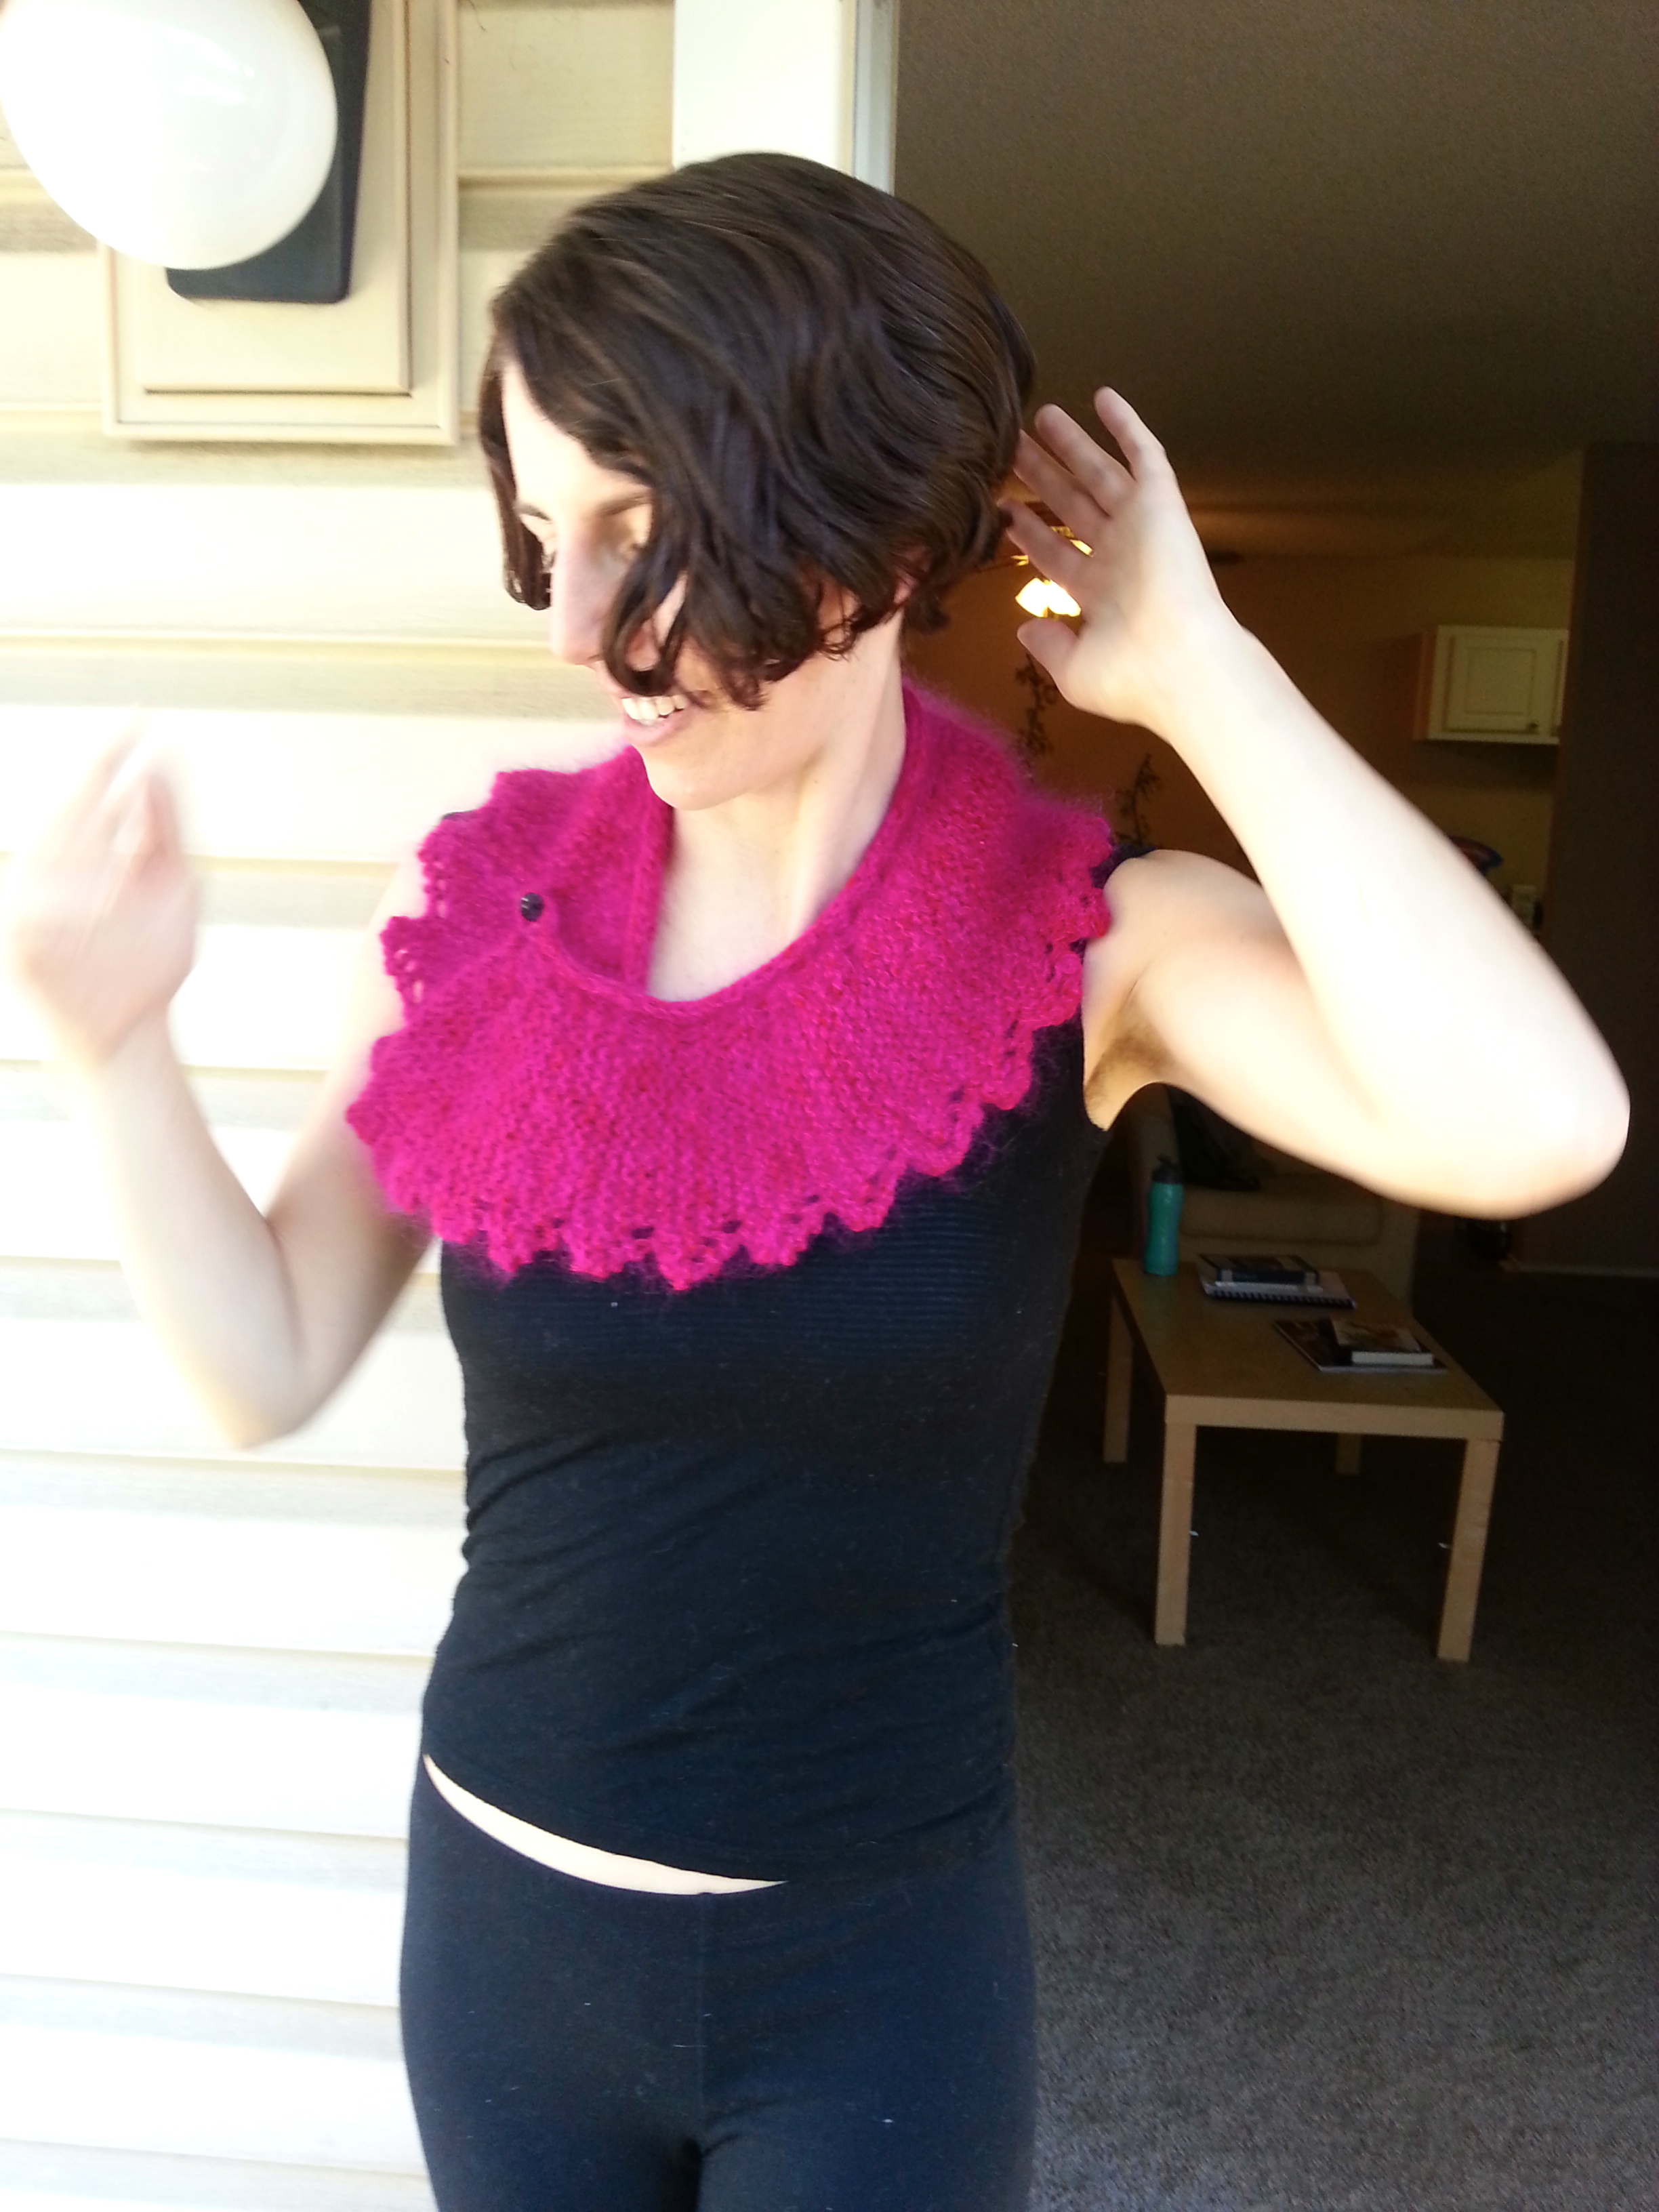
Pink Kink Collar
I made this quite a whole ago, but since it uses the same yarn combo as the free fall tank, it seems a good time to share it. The pattern is Kink by Jodie Gordon Lucas, featured in Knitty 2010.
This in-progress shot gives you a view of what the strands of yarn look like by themselves! It’s a pretty straightforward pattern that works with a variety of yarns and is not too difficult to memorize. You can also wear it in a number of ways, depending on how you attach your pin or button. I’m thinking about attaching another button so I can wear it differently. If you’re not ready to commit to a hot pink top, this is a good way to use a brightly colored yarn. I mainly wear this with neutral colors, especially black.
speaking of black…
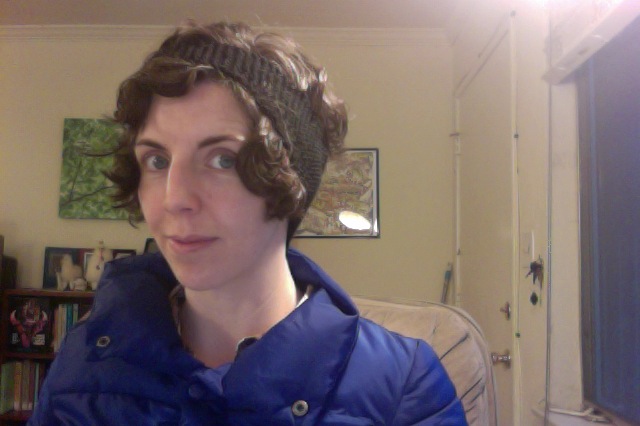
Black Ear Warmer
If you’re more the type to wear black on February 14, I’ve got two super easy projects for you. The first is this Ear Band pattern, appropriately titled Beginning Ear Warmer. I wanted the most straightforward pattern possible, and this garter stitch band was exactly that.
With my hair I can wear this two ways. My main reason for wanting a basic black ear warmer is for riding my bike—my ears get cold faster than anything else, and I wanted it to match anything I could possibly be wearing so that would never deter me from using it.
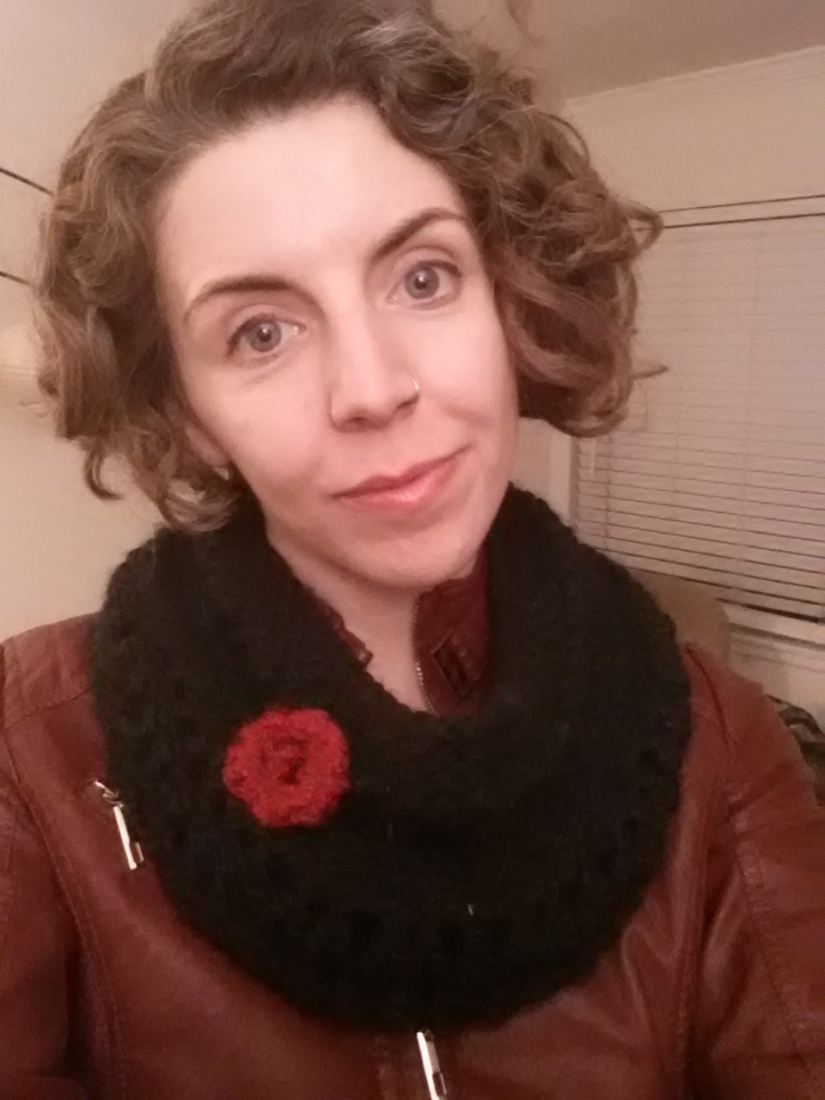
Black Drop Stitch Cowl
The quality of these photos doesn’t even capture how cool this cowl is (black objects + rushing to take photos = not the best idea). The pattern is Abi Gregorio’s Drop Stitch Cowl, which I became determined to knit after enjoying the drop stitch look on the free fall tank.
Most of the ravelery reviews insisted that this was a lightning fast knit, and they were right. I didn’t quite have enough yarn for the pattern, so in my version I used size 13 instead of size 15 needles, omitted one of the repeats ,and shortened two garter stitch sections. I would have loved if my cowl was taller and wider, but I’m really impressed that there was a pattern to use up my leftover, super bulky black yarn!
I’m thinking I will make this cowl again in a color when I get the chance.
Chaptstick Holder
This is the only quick knit that wasn’t for me. After showing my sonic screwdriver chapstick holder to friends, I got a request for a basic chaptstick holder that could attach to a harness during rock climbing. So I used Victoria Trauger’s Chapstick Holder pattern and made this. I could tell you about how in my version I made some mods to make it fit better (12 stitches around instead of 16, 6 stitches instead of 8 for the flap), or how I love the elephant button I used at the top. But mostly I want to tell you why this is related to Valentine’s Day knitting. I supposed it could be the connection between chapstick, lips, and kissing. But personally, all I could think when I was making this pattern in this color was, geez, this looks really…phallic.
Nevertheless, this chapstick holder does its job! I attached a key ring to the side and handed it off to its recipient at the rock climbing gym last night. Here’s a blurry action shot of the chaptsick holder on his harness.
And that concludes this edition of quick winter knits! ❤
With rain and freezing temperatures, it’s finally starting to feel like winter is coming—perfect weather for knitting. I’ve been working on some knitting projects, but I’ve also done a few things with yarn that require no needles or hooks at all. Yarn wrapping items is a great way to use up small amounts of special yarn, large amounts of lower quality yarn, and everything in between. Here’s what I’ve made:
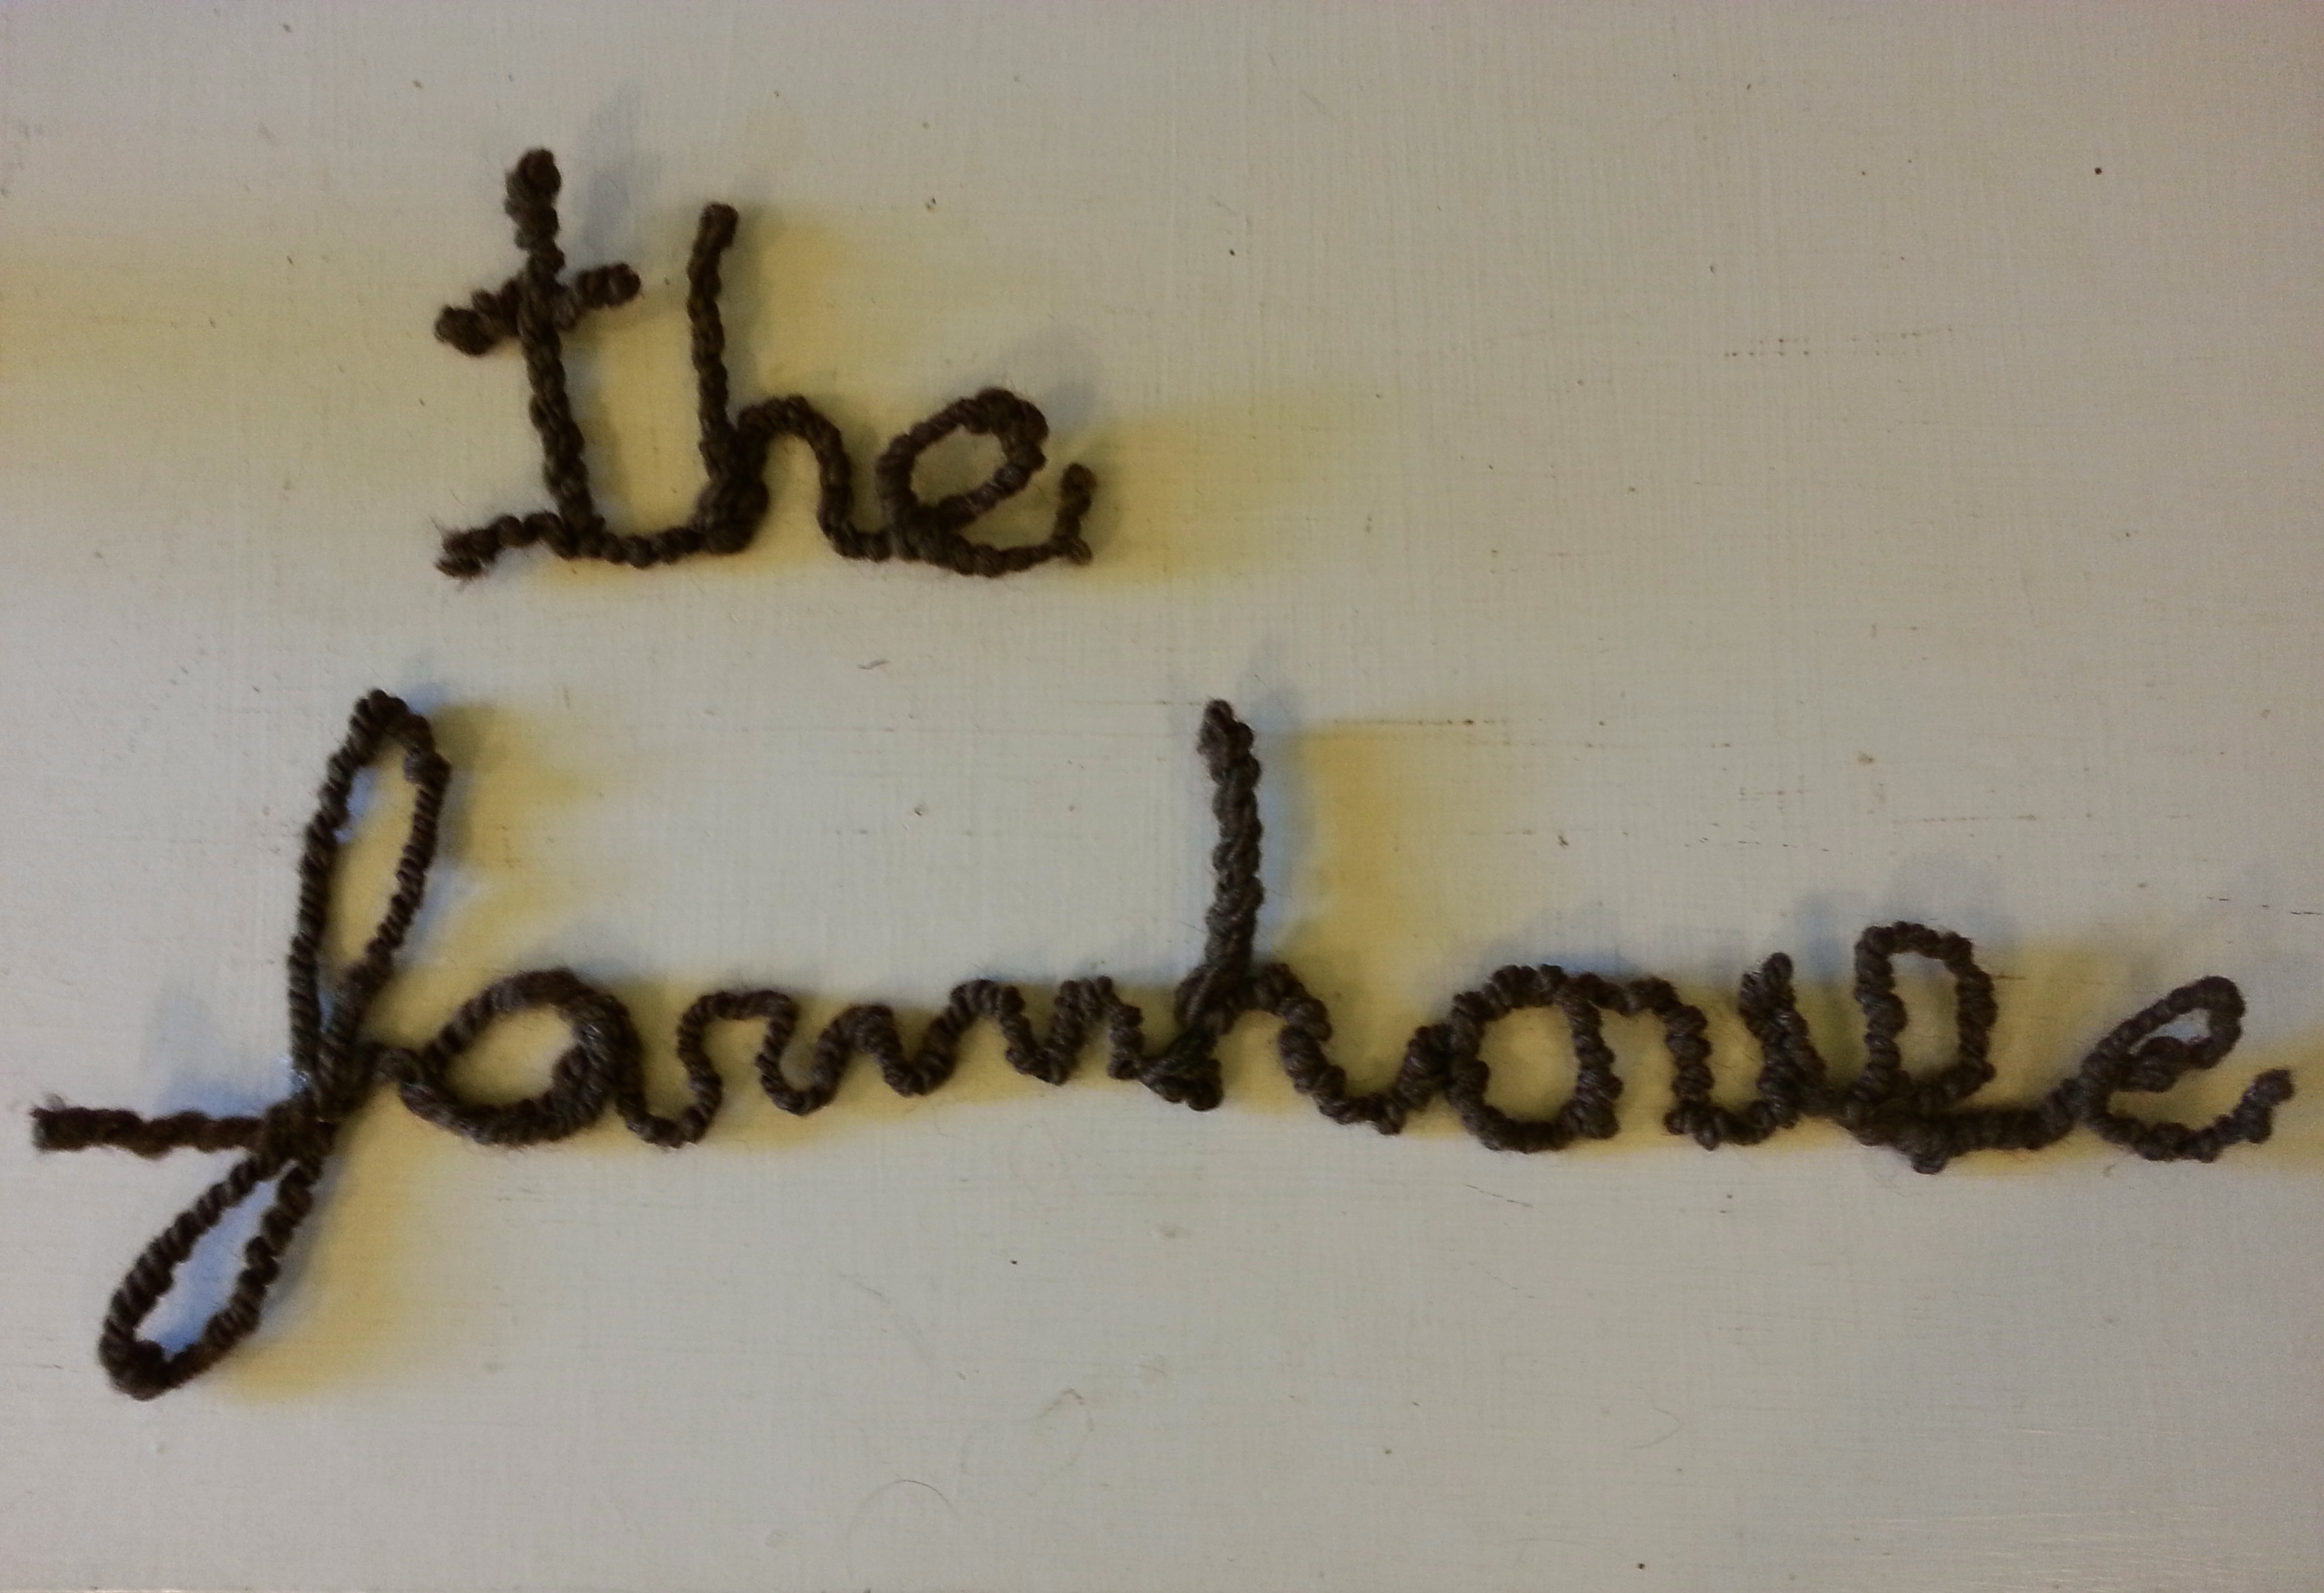
Yarn Words
materials: bendable wire that will hold its shape, yarn, binder clips, hot glue gun.
I got the idea to do some yarn wrapped words from this blog post. I made this as a a Thanksgivikah gift of sorts for (you guessed it) “the farmhouse,” a house of friends who were hosting a big dinner on that particular holiday. I was excited to finally have a use for the tiny amount of brown handspun yarn I’d made in my craft center spinning class back in Fall 2011!
I didn’t have the wire reinforced clothesline that the blog suggested using, so at first I tried using an old coat hanger. Not bendable enough, it turns out. Then I tried florist wire, which I do have on hand from making wreaths and evergreen boughs out of shrubbery in previous years. It worked! But since it was a little thin and just a bit too bendy, which made me worry that it would lose its shape, I doubled it.
I strongly suggest writing out the word you want to do in cursive on a piece of paper beforehand—it’s a lot easier to copy from a template than to do it on the fly. And definitely use binder clips to hold letters with a lot of wire overlapped in place. Hot glue the yarn to one end of the word and wrap tightly as you go. Hot glue any spots that seem like they’ll want to come loose. Considering the fact that I got Ds in cursive in grade school (it’s hard to get the slanting right as a lefty!), I’m pretty happy with the results of this project.
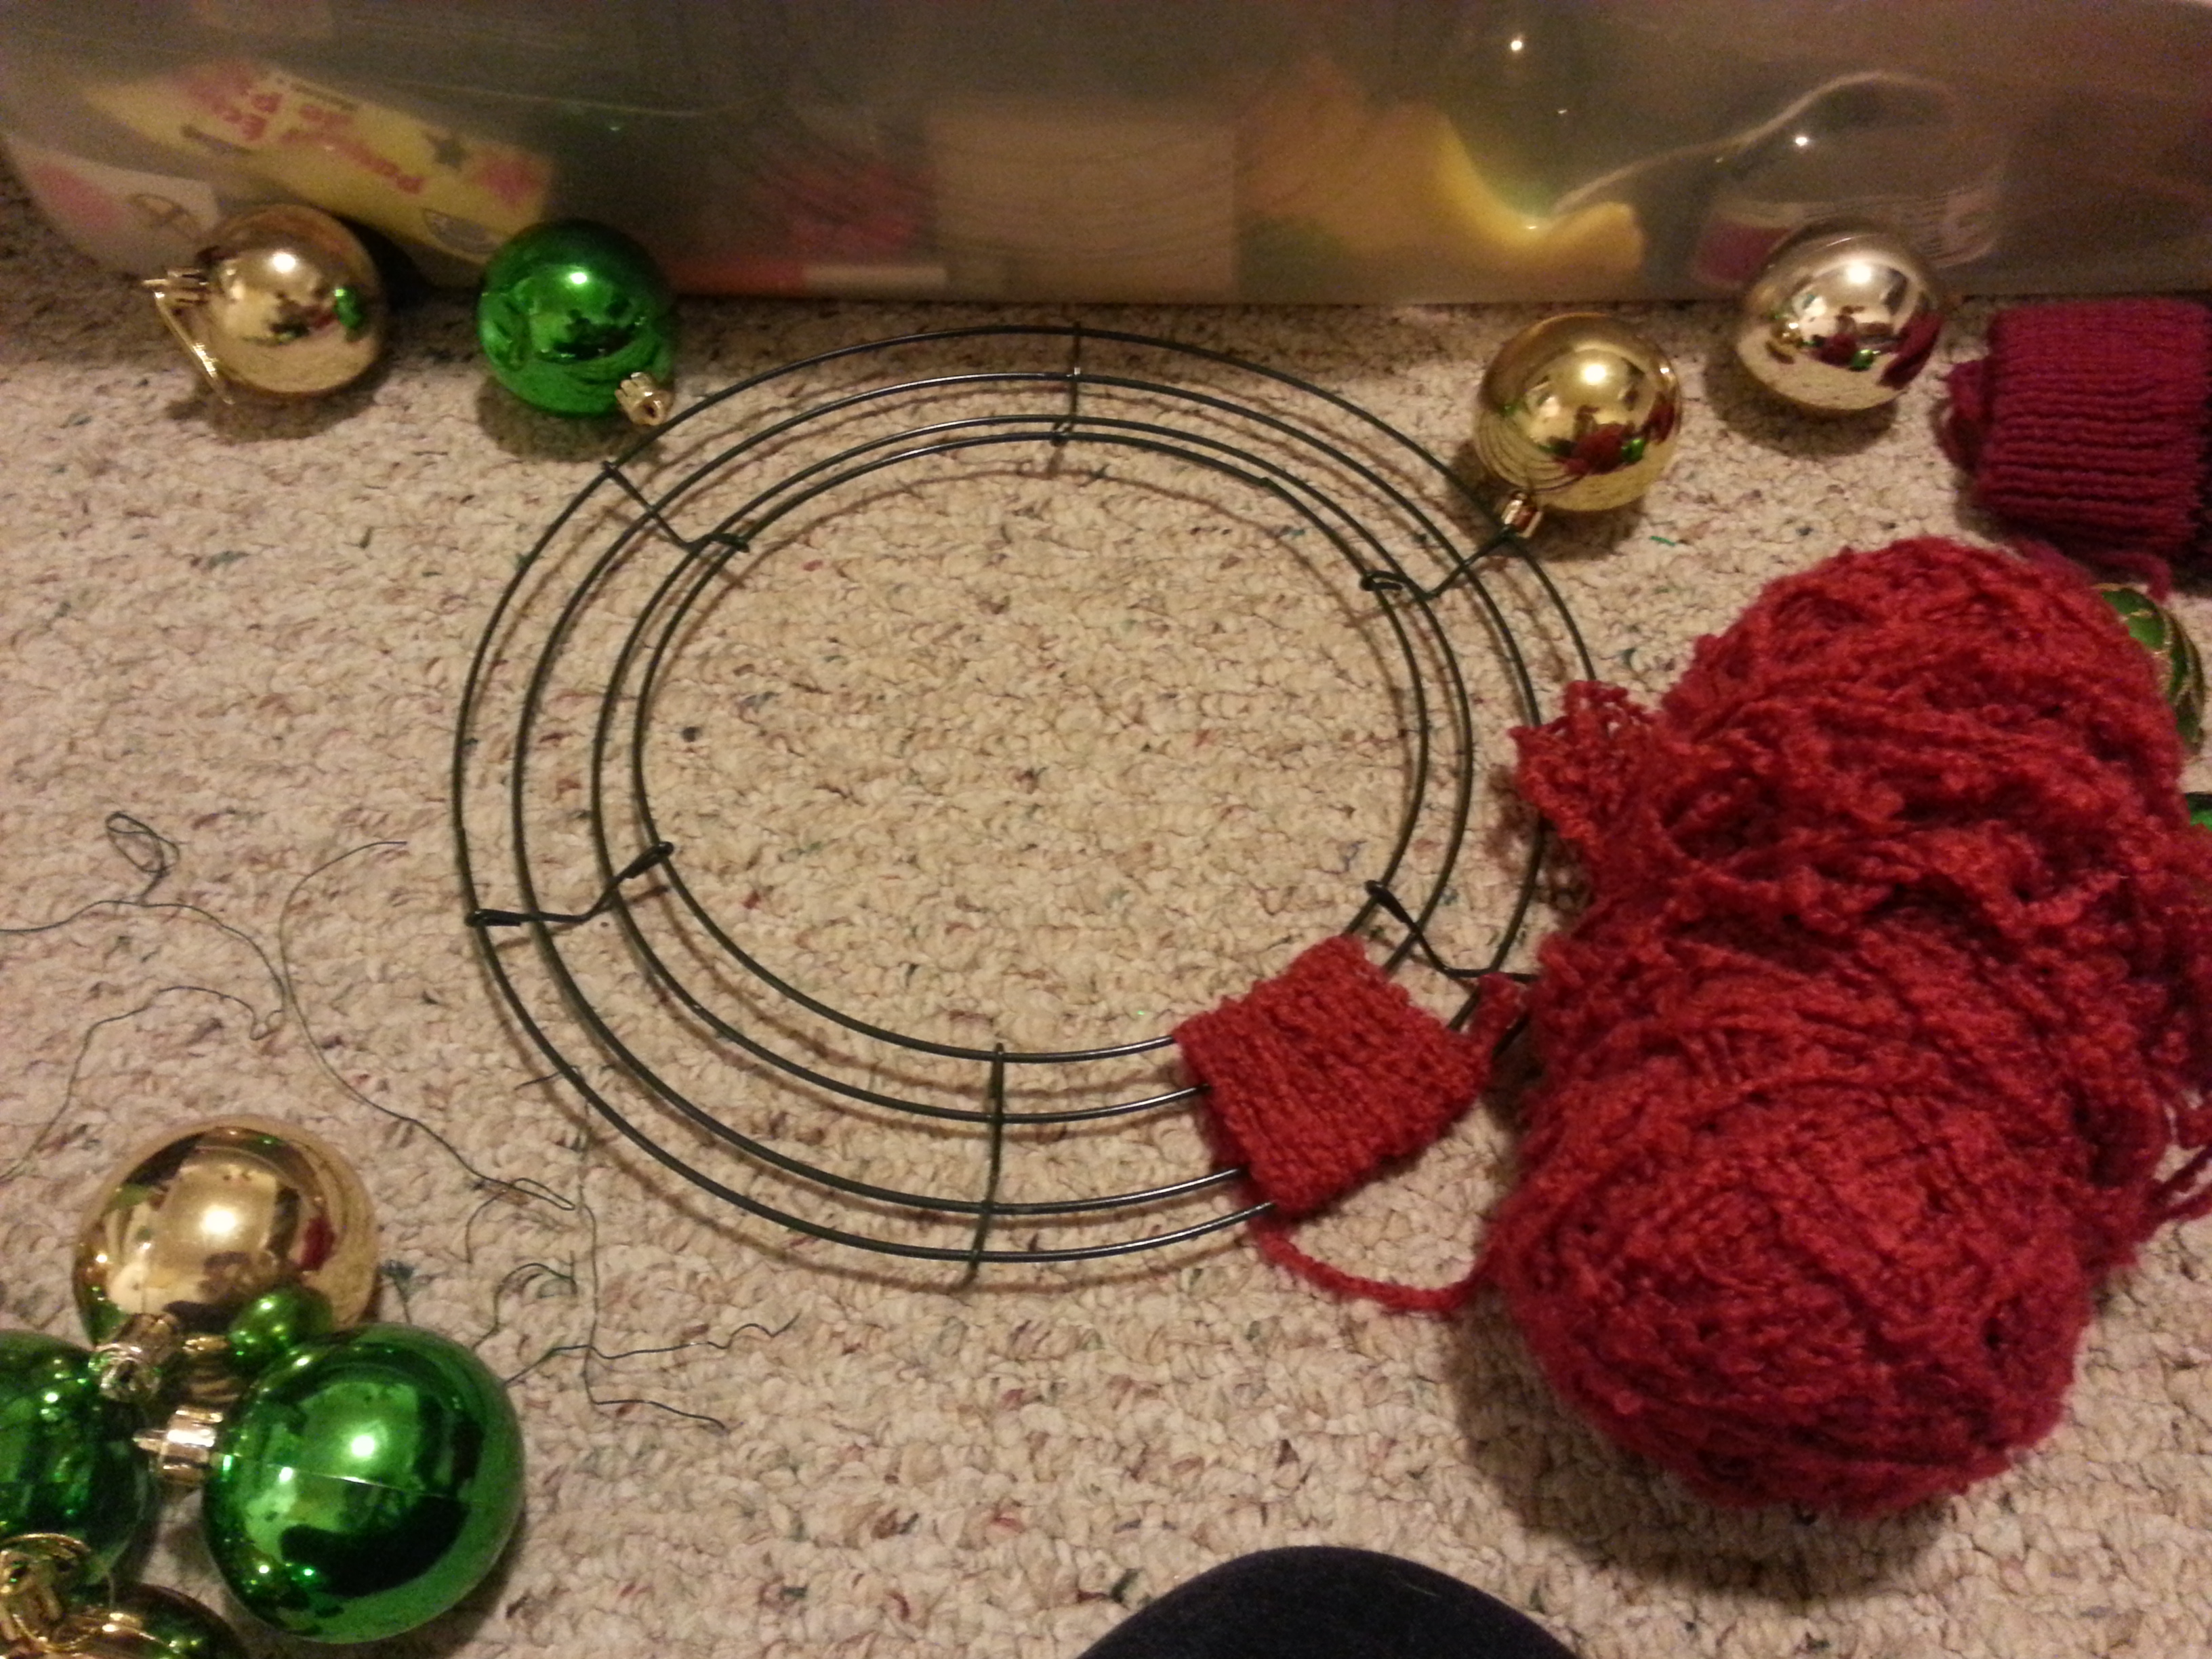
There are tons of tutorials out there for how to make a yarn wreath, most of them using a puffy, styrofoam wreath form. I didn’t look at any of them before I made this, however. Because this is pretty much the simplest project ever: wrap yarn around wreath form. When you are done, tuck the yarn end in the back. That’s it.
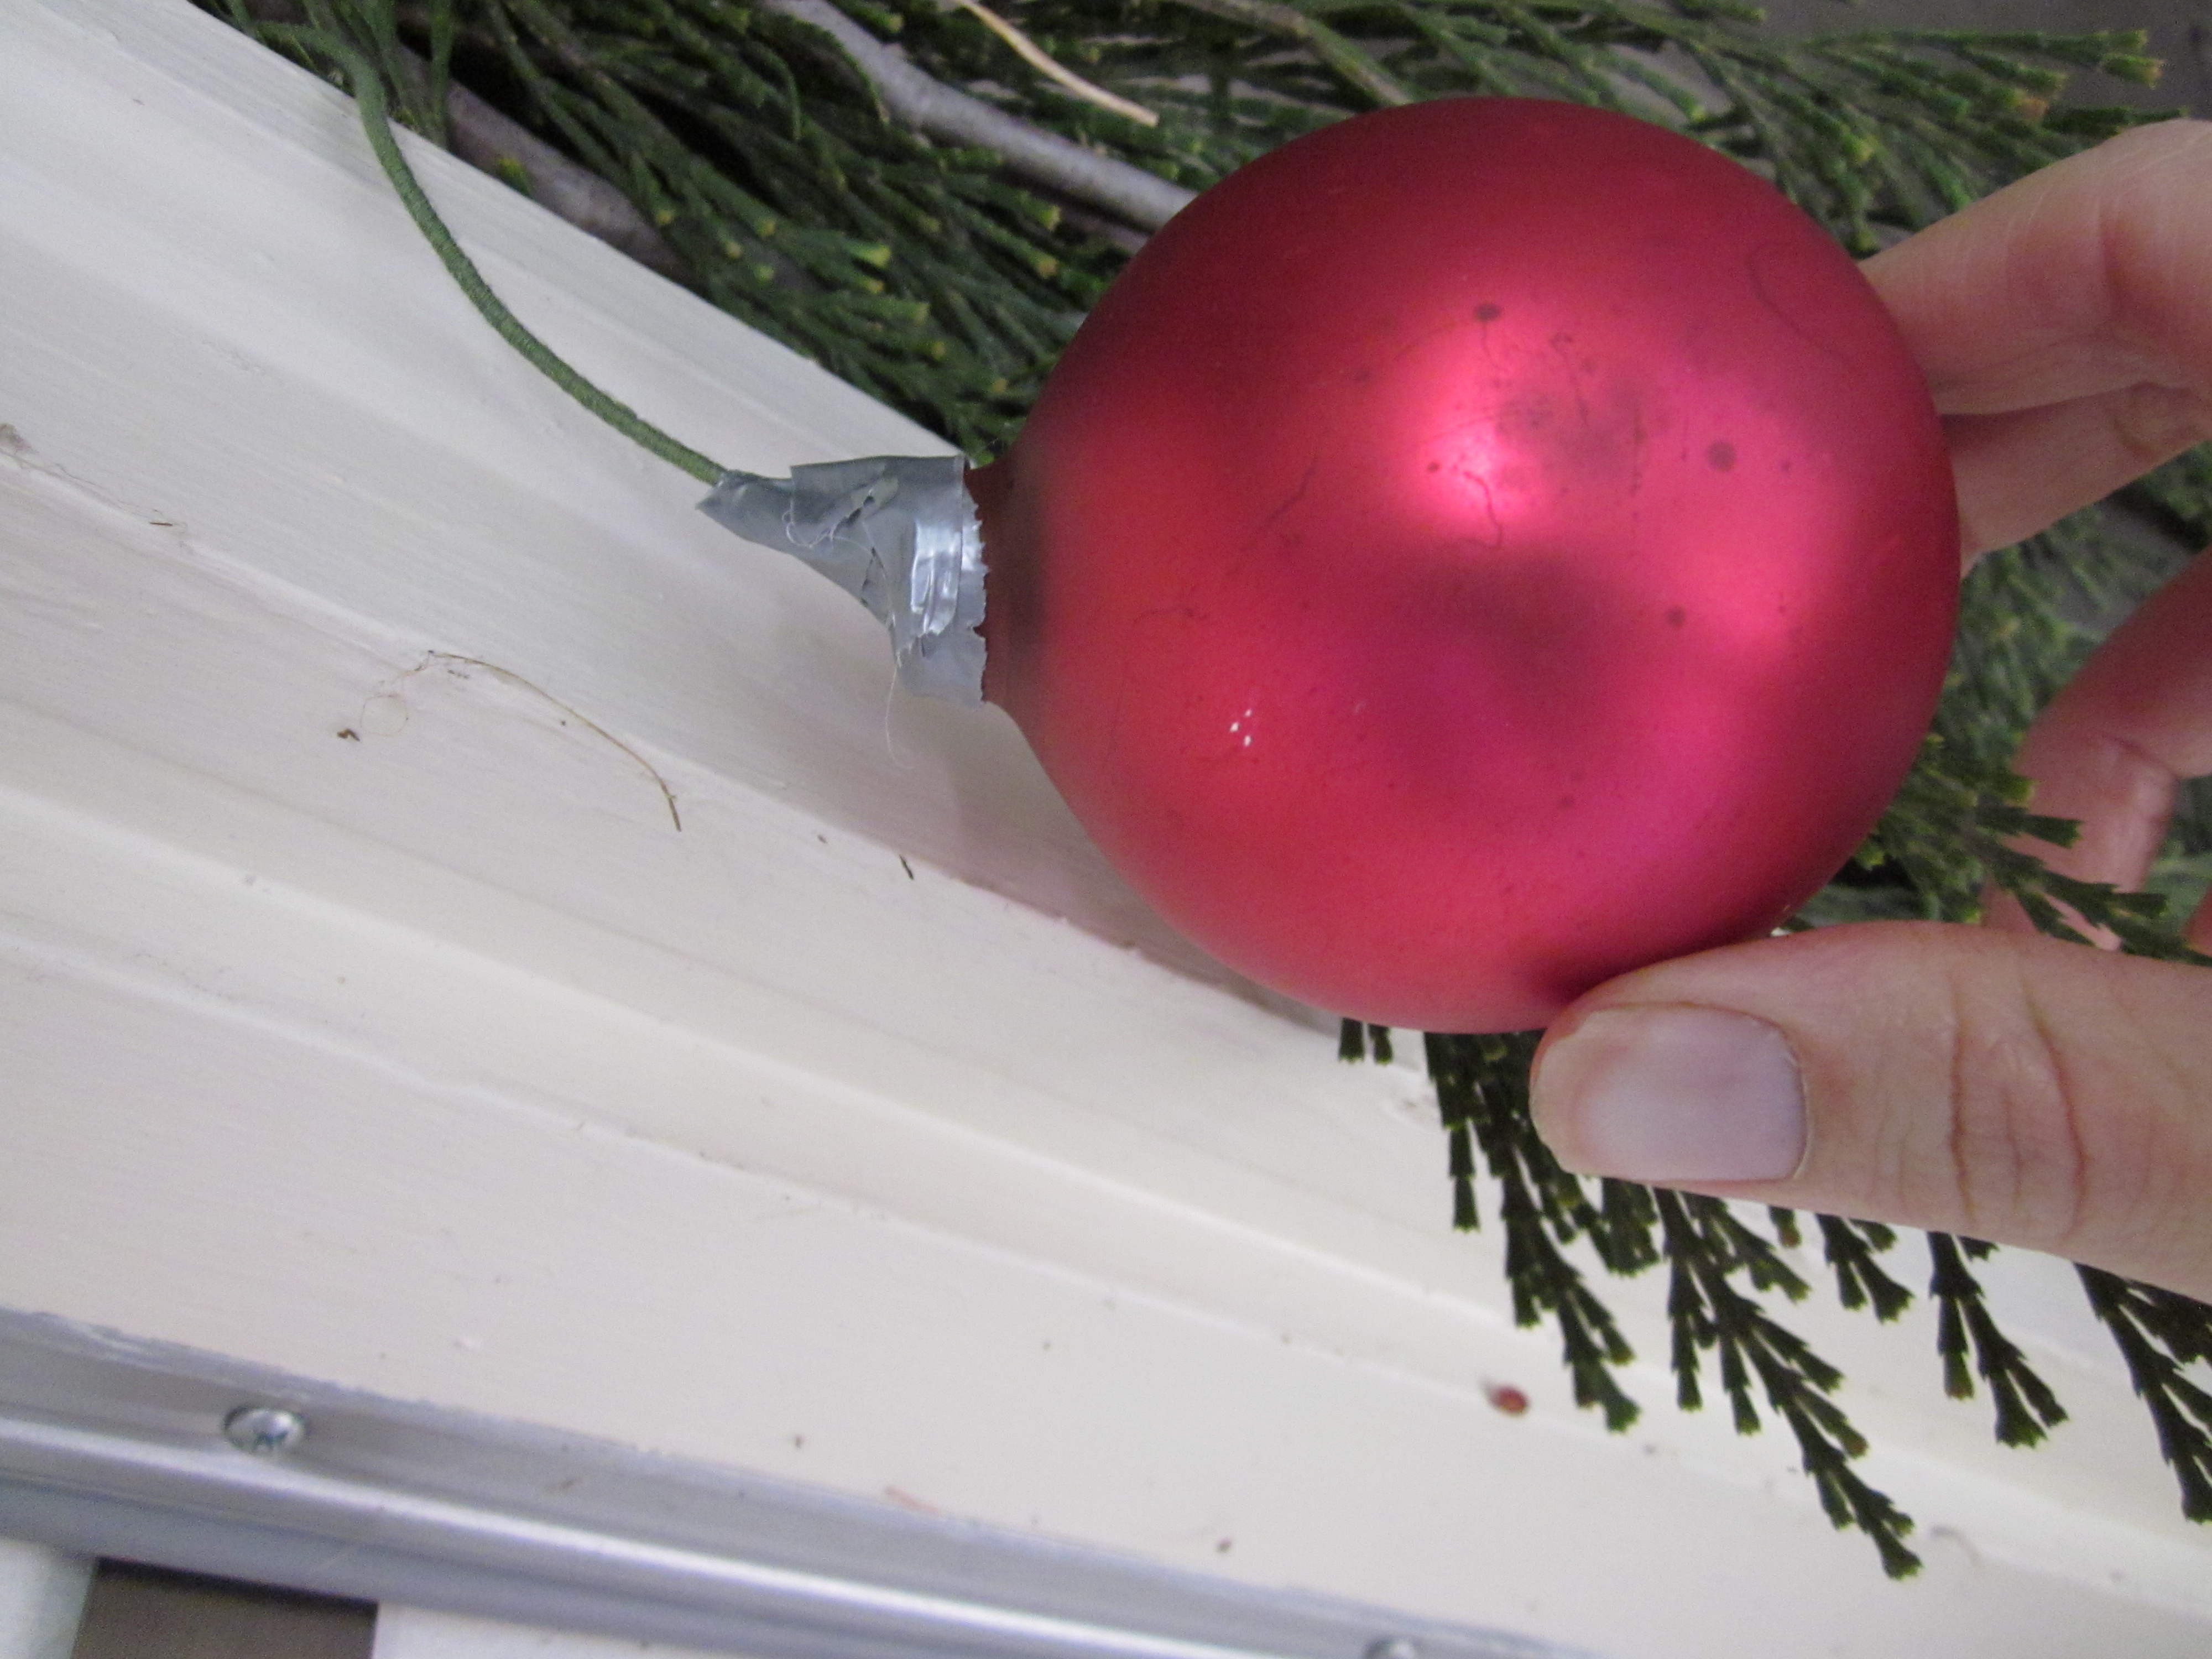
I used this red boucle yarn of unknown origin that was in my stash, which gave the wreath a nice texture. Since my wreath form is flat (it’s the same one I used in previous years to make evergreen wreaths), I added depth by attaching some bobble ornaments in the same color.
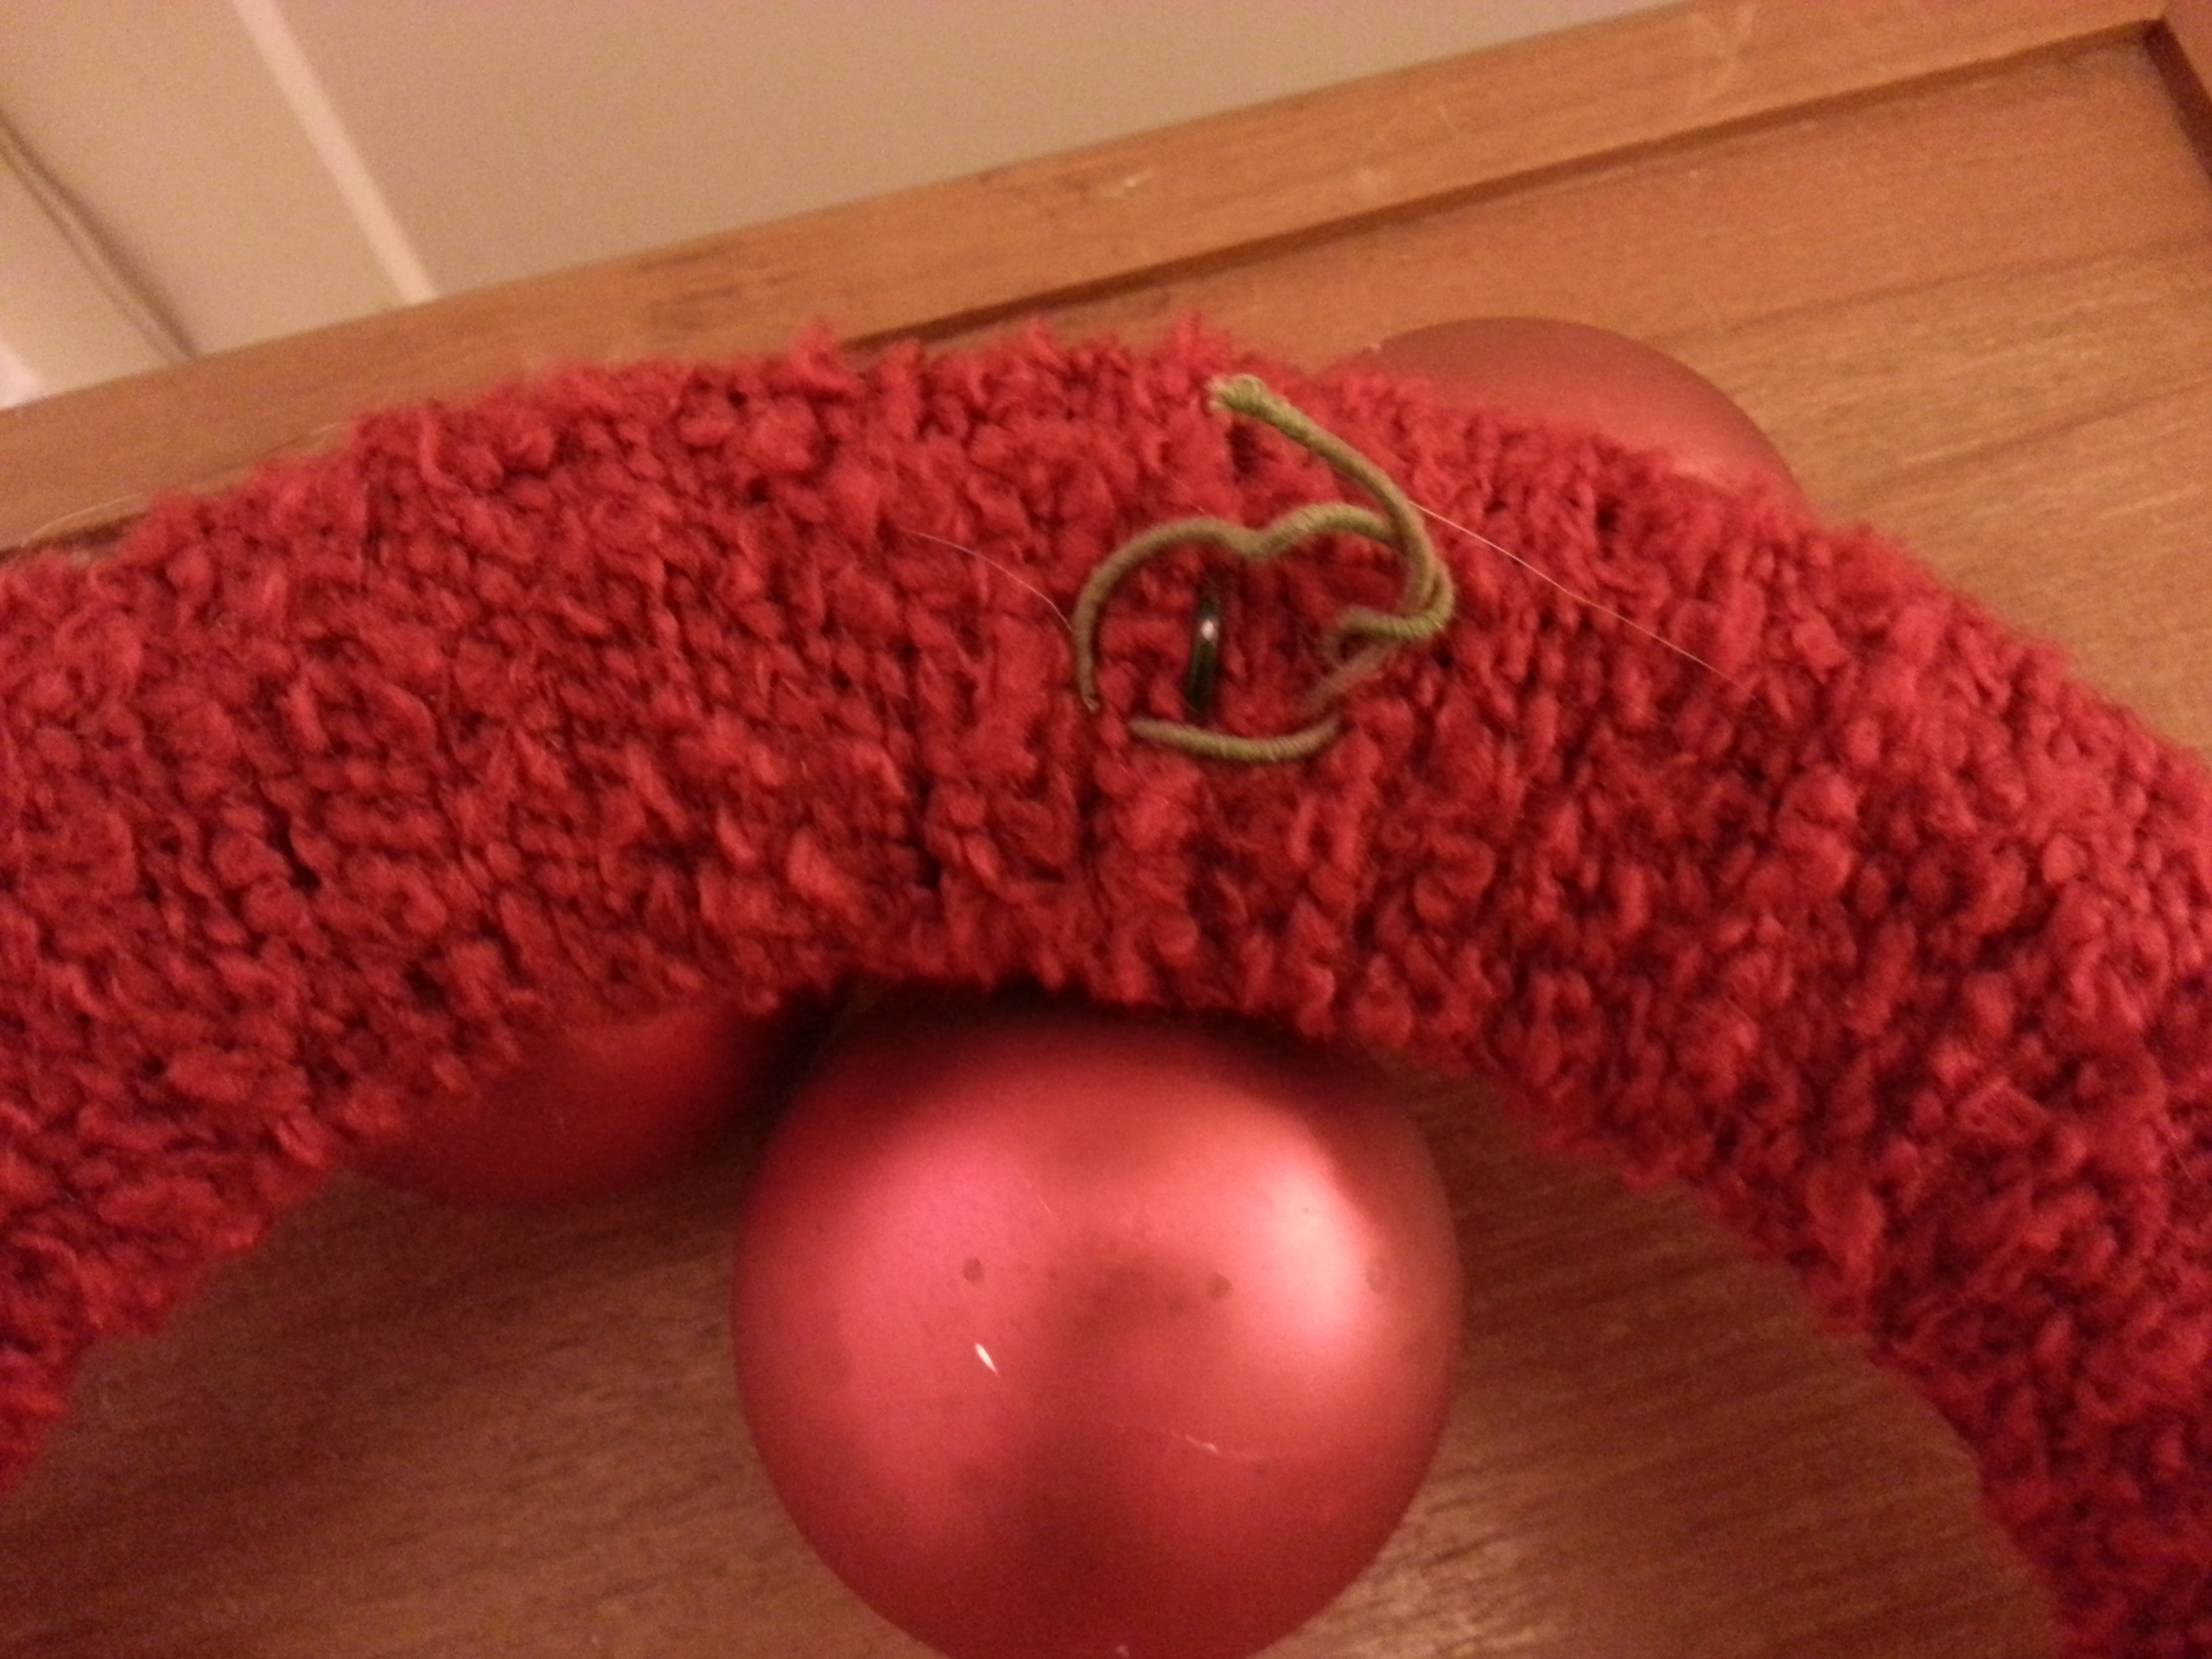
I described how to attach the florist wire to the top of the ornaments using duct tape in this post last year, and these are the exact same ones so they were already prepared. Here’s a photo of what they look like.
I added some red plastic holly berries mostly to cover up the duct tape that was still visible. The result was a very quick wreath that is really red. Here’s what it looks like on my door when all of my Christmas lights are working ( a rarity!):
Yarn Trees
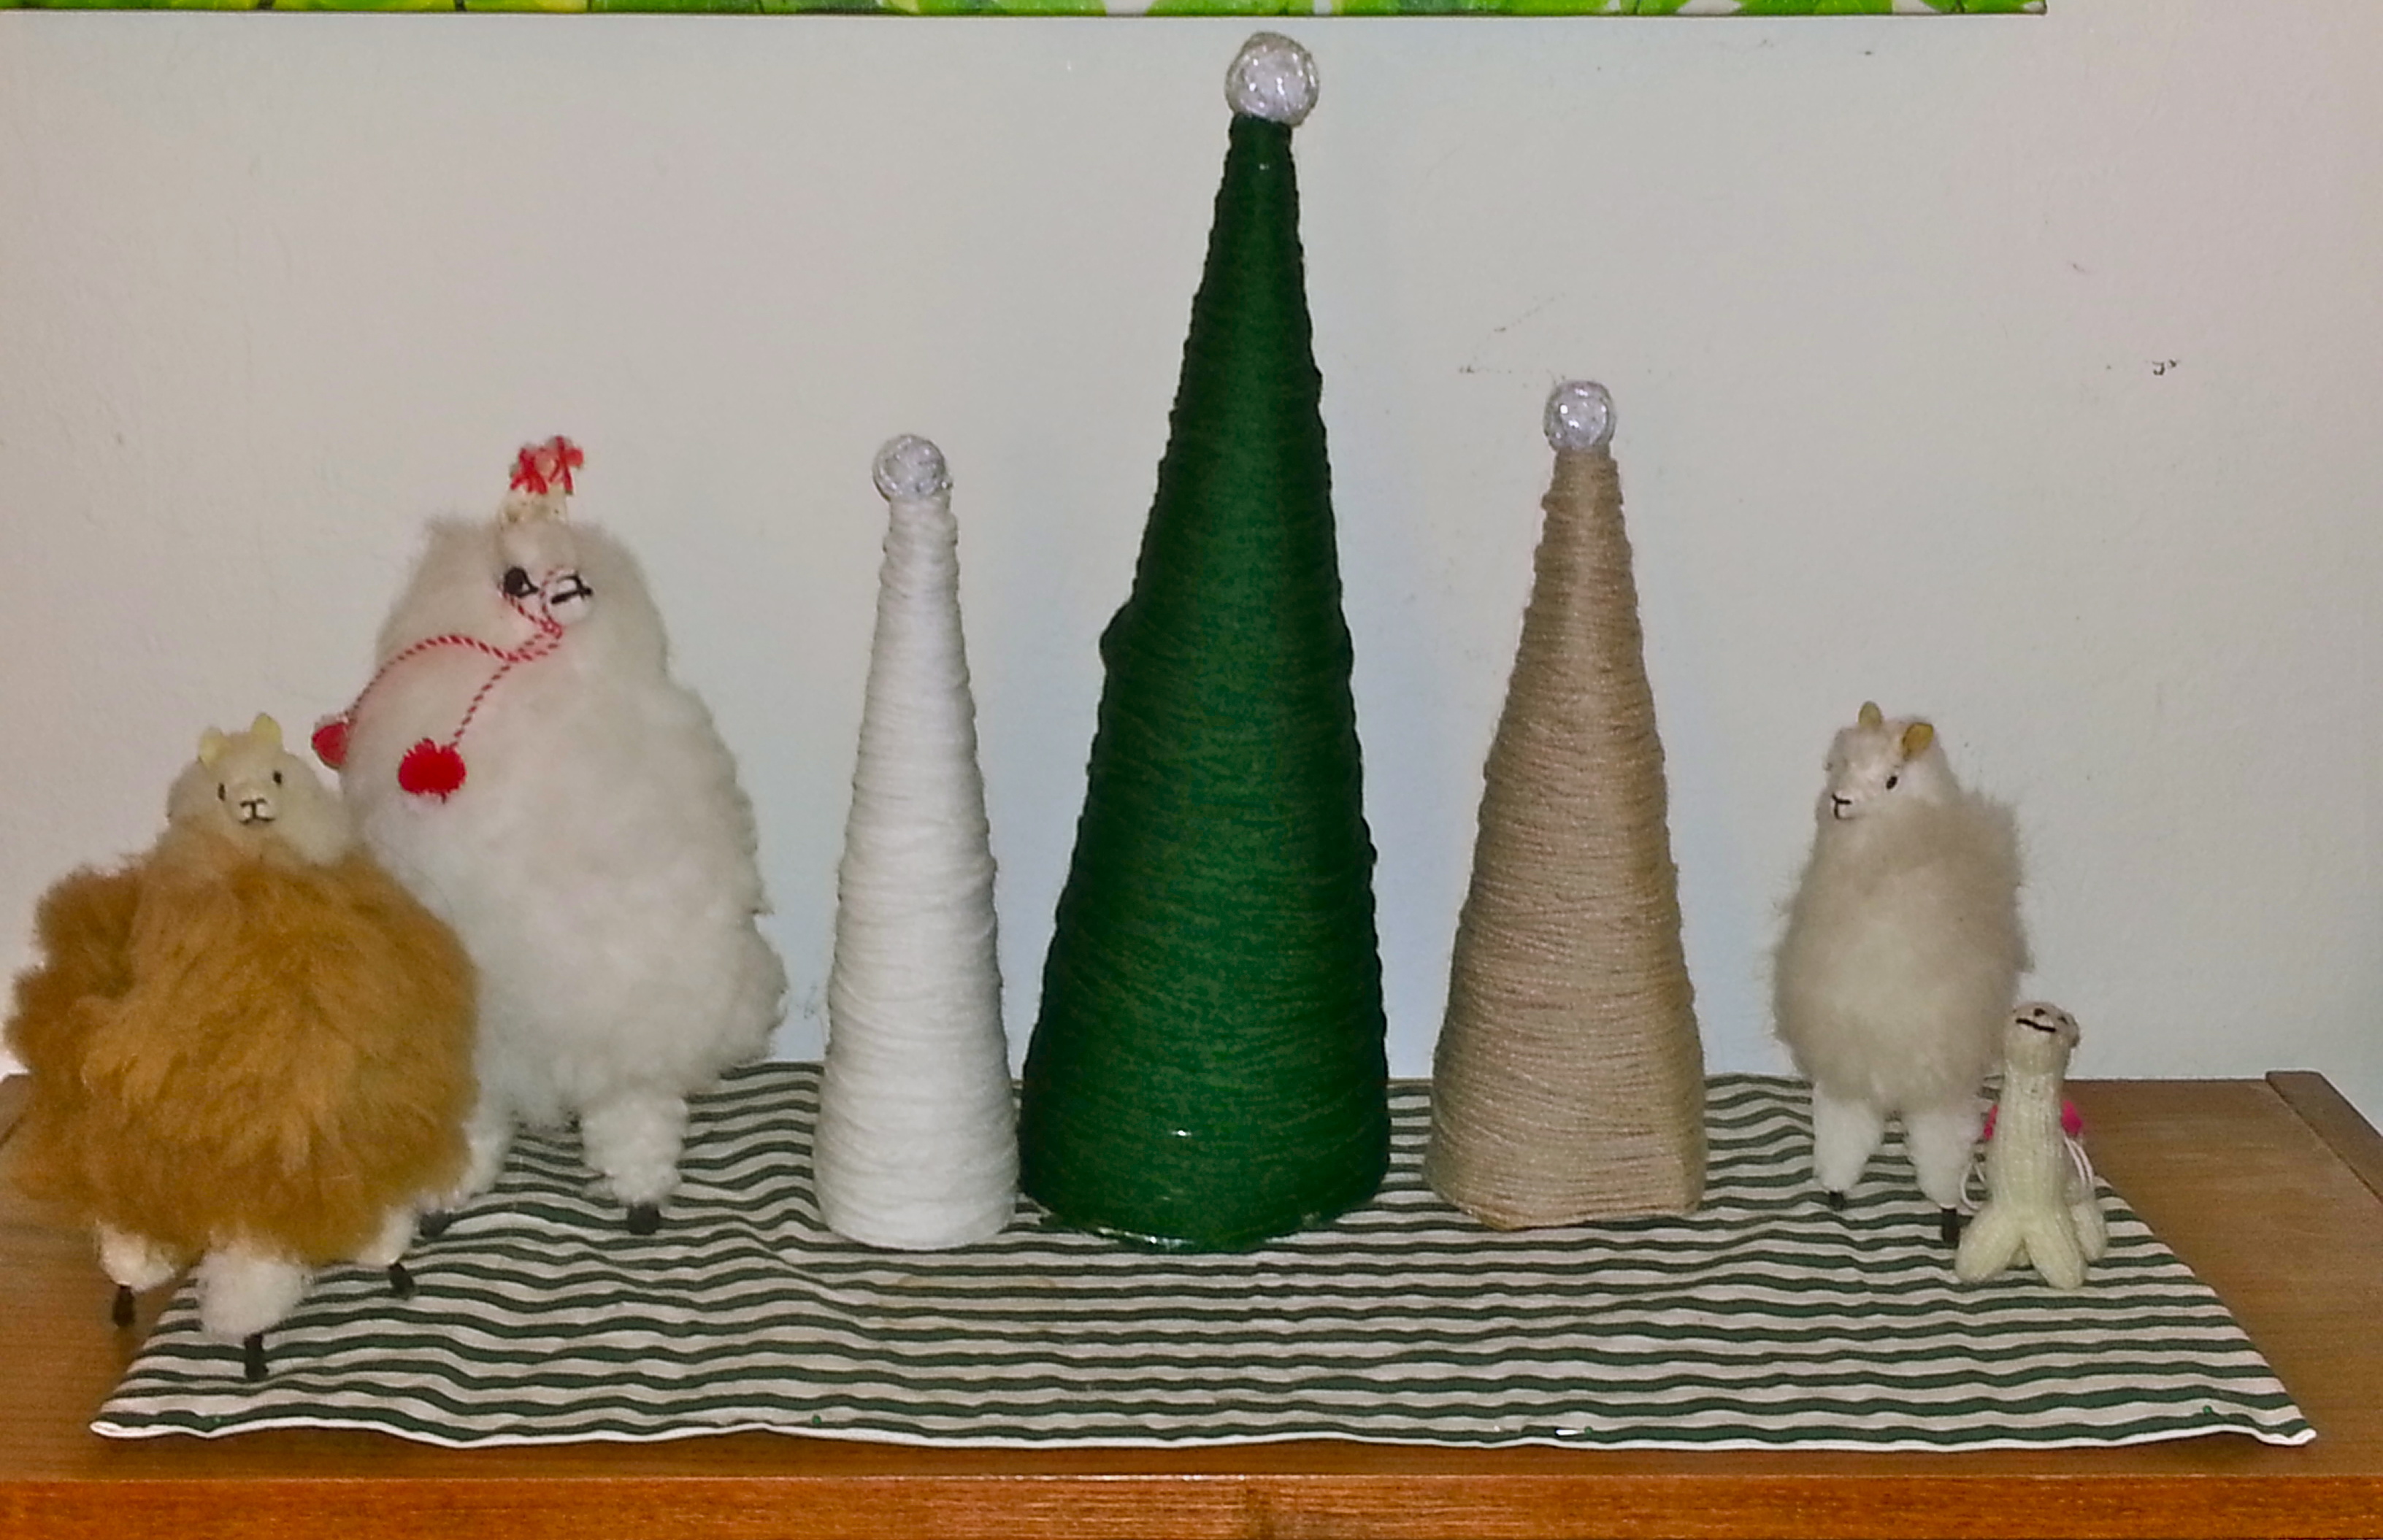
materials: cereal or other thin cardboard boxes, scissors, tape, yarn, hot glue gun. (optional: llamas or other animals to roam the forest of trees)
Once I did the first two projects, I was really wanting to do at least one more wrapped yarn thing, and I figured it might as well be Christmas themed. So when I saw this blog post, I figured why not? I even decided to do the same colors as the original blogger, though I did make some changes.
First step is to open your boxes, trim off excess edge flaps and roll them into cones. To get the come shape, try to pinch it more at one end. I only had one cereal box on hand, but I had two other boxes that were of similar quality and they worked fine. I duct taped mine in place and then trimmed the bottoms until they sat more or less flat on the ground.
Starting at the bottom, I taped the end of the yarn, wrapped it around to the top, hot glued it there, and then wrapped it all the way to the bottom again, and hot glued it around the very base of the tree. The yarn here is some old acrylic in what seemed like good tree colors.
Finally, I decided that my trees should have toppers, so I wound tiny balls of this sparkly silver yarn from my stash and hot glued them onto the tops. And, of course, added the Christmas llamas to the forest.
It’s almost Halloween, and you know what that means: COSTUMES!
If I had my way, every party would be a dress up party. Because when I was a little kid, every birthday party WAS a dress up party, with a theme, and with costumes. Occasionally I have continued this tradition, as I did this year with a reprisal of my Alice in Wonderland themed birthday party:
2nd grade Alice21st grade Alice
Now that it’s October and more people are looking at my Halloween costume post from last year, I figured it was time for another round of crafty costume ideas. Lucky for you, I’ve done my fair share of costuming in the last year! This time I’ve organized them into individual and group costume categories for you. But I realized they could just as easily be categorized as “weird takes on famous individuals” and “characters from well known novels.” Enjoy!
Historical Women With a Twist: Radioactive Marie Curie and Ballerina Annie Oakley
So I’m a fan of DIY historical costumes, especially for women. Whether it’s one of these bizarre vintage costumes from days of yore, or one of these awesome new interpretations from Take Back Halloween, I’m all for it. The latter website makes a great point that the vast majority of store bought women’s Halloween costumes fall into the “Sexy ______” category, limiting your options. But if you make a costume yourself, it can be whatever you want it to be.
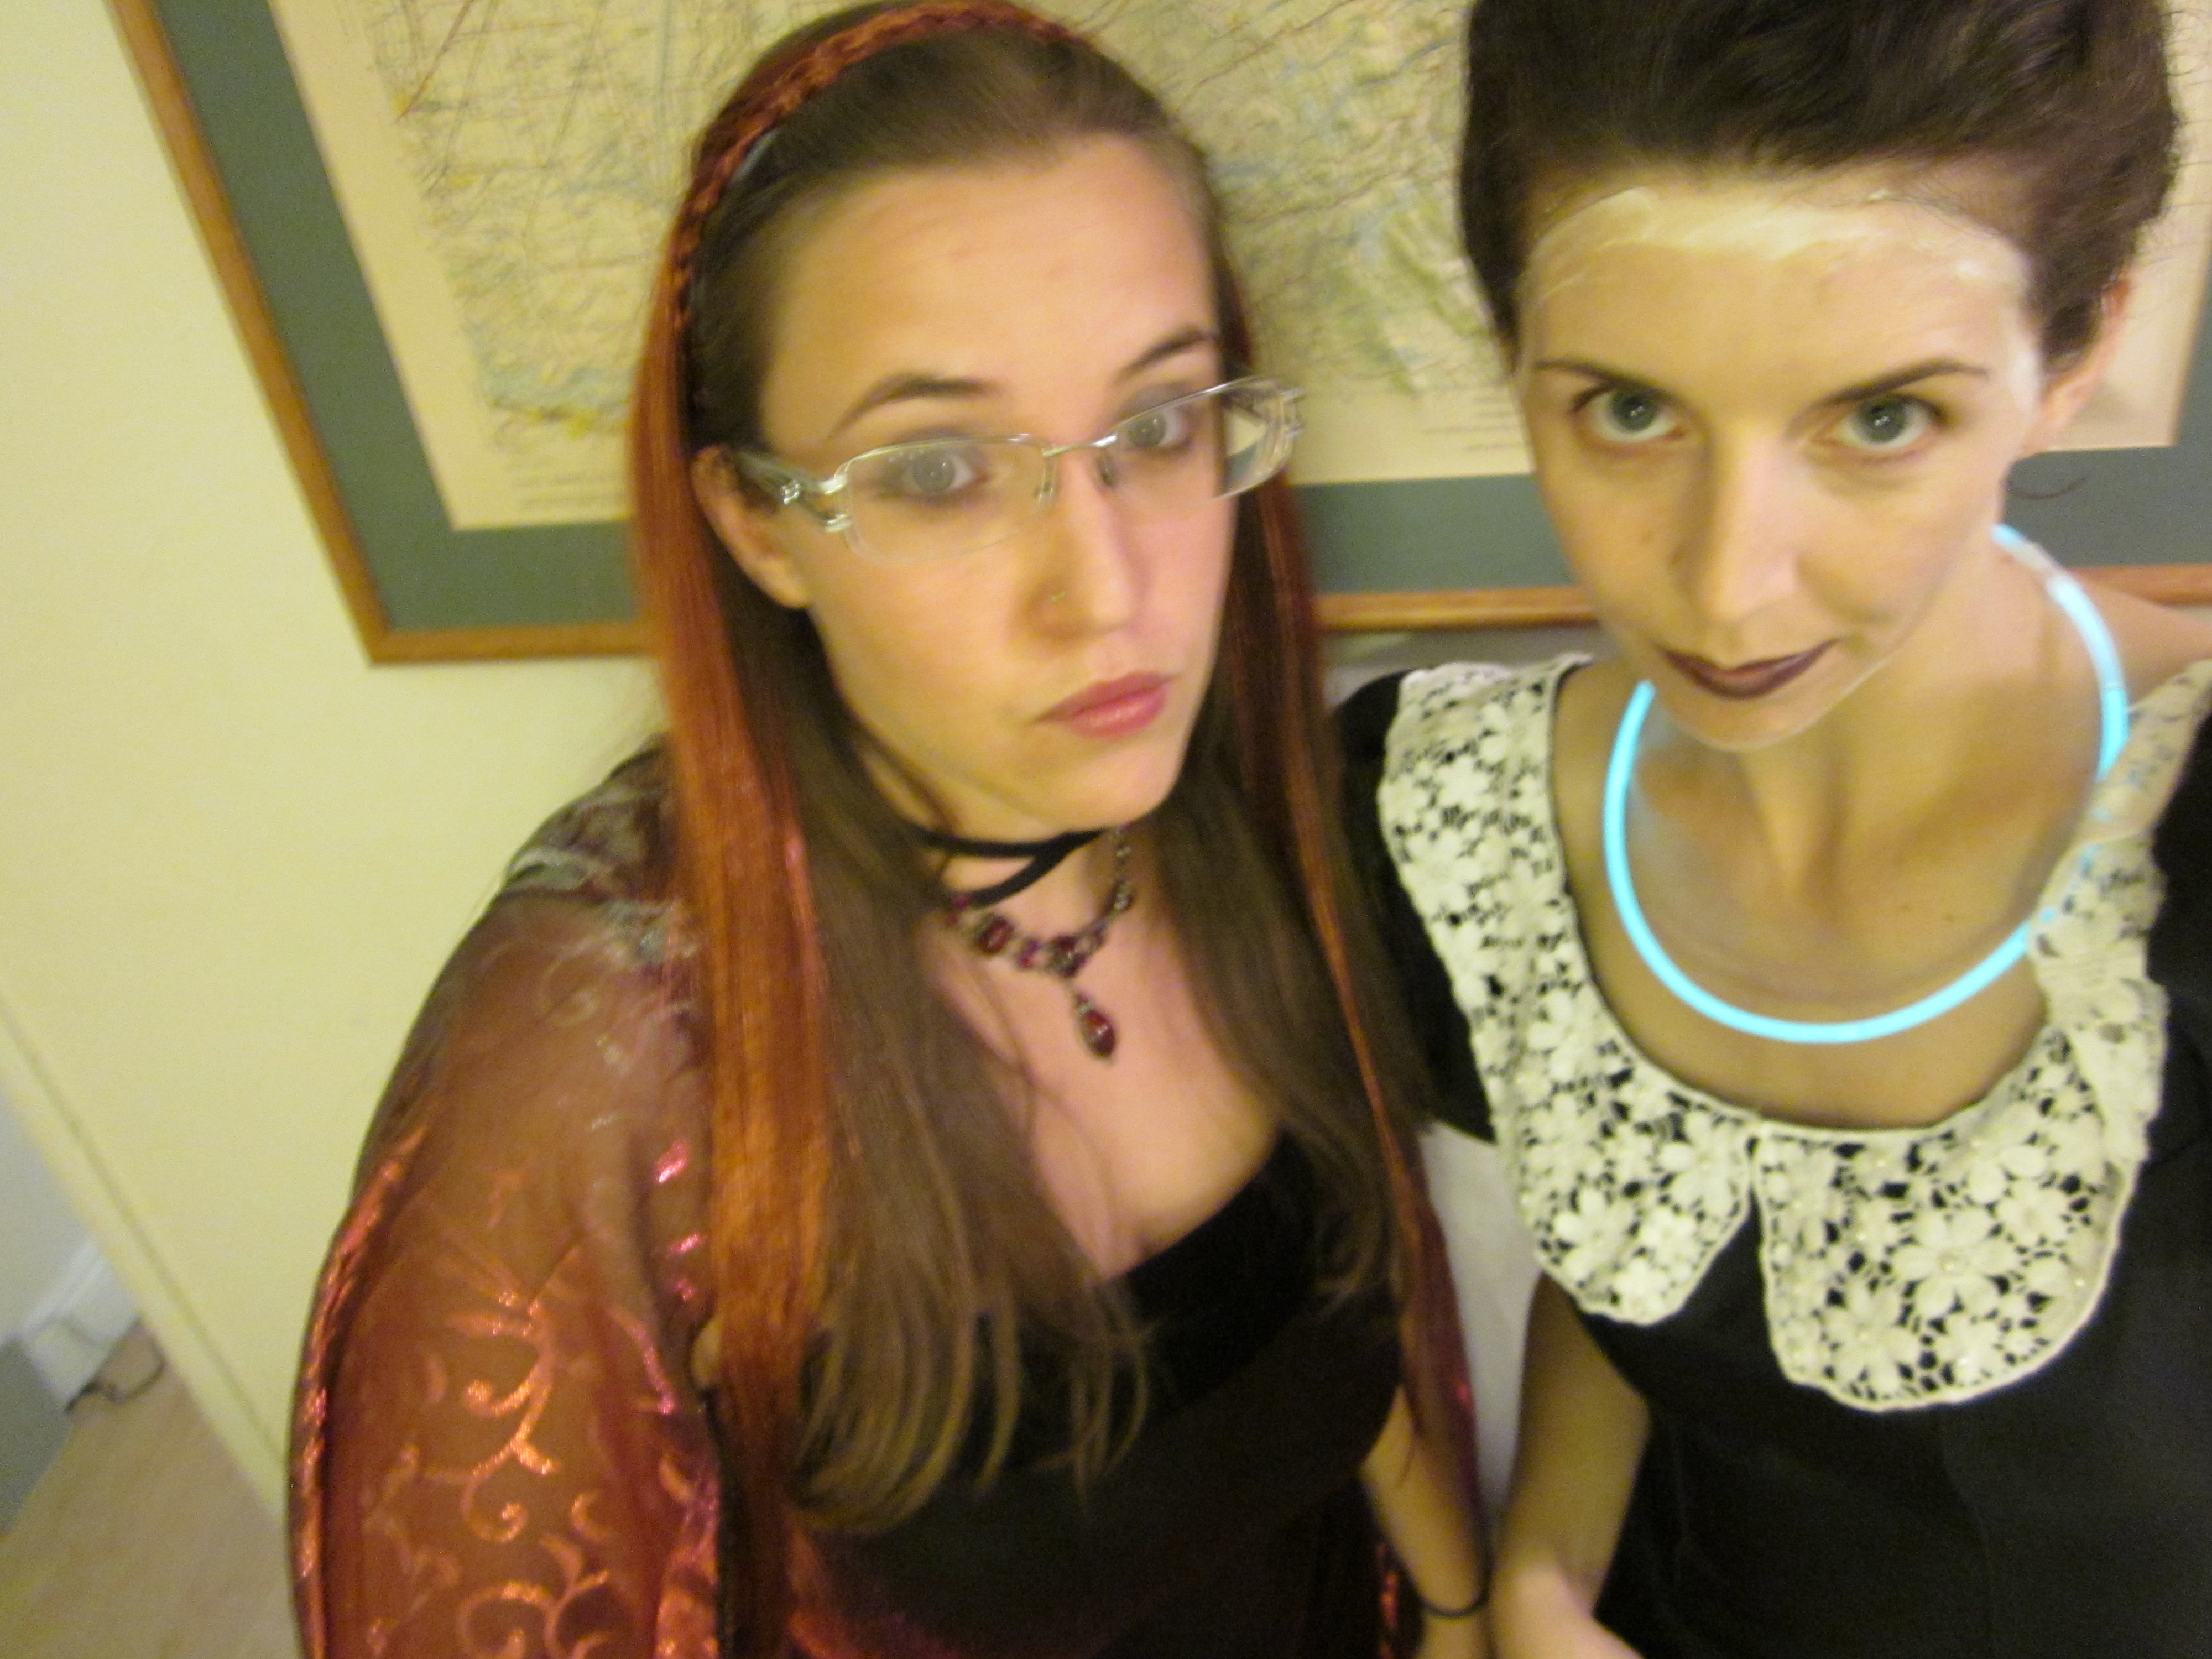
And for me, that means adding a twist to famous historical figures. Like being a glow-in-the dark version of physicist Marie Curie for Halloween last year.
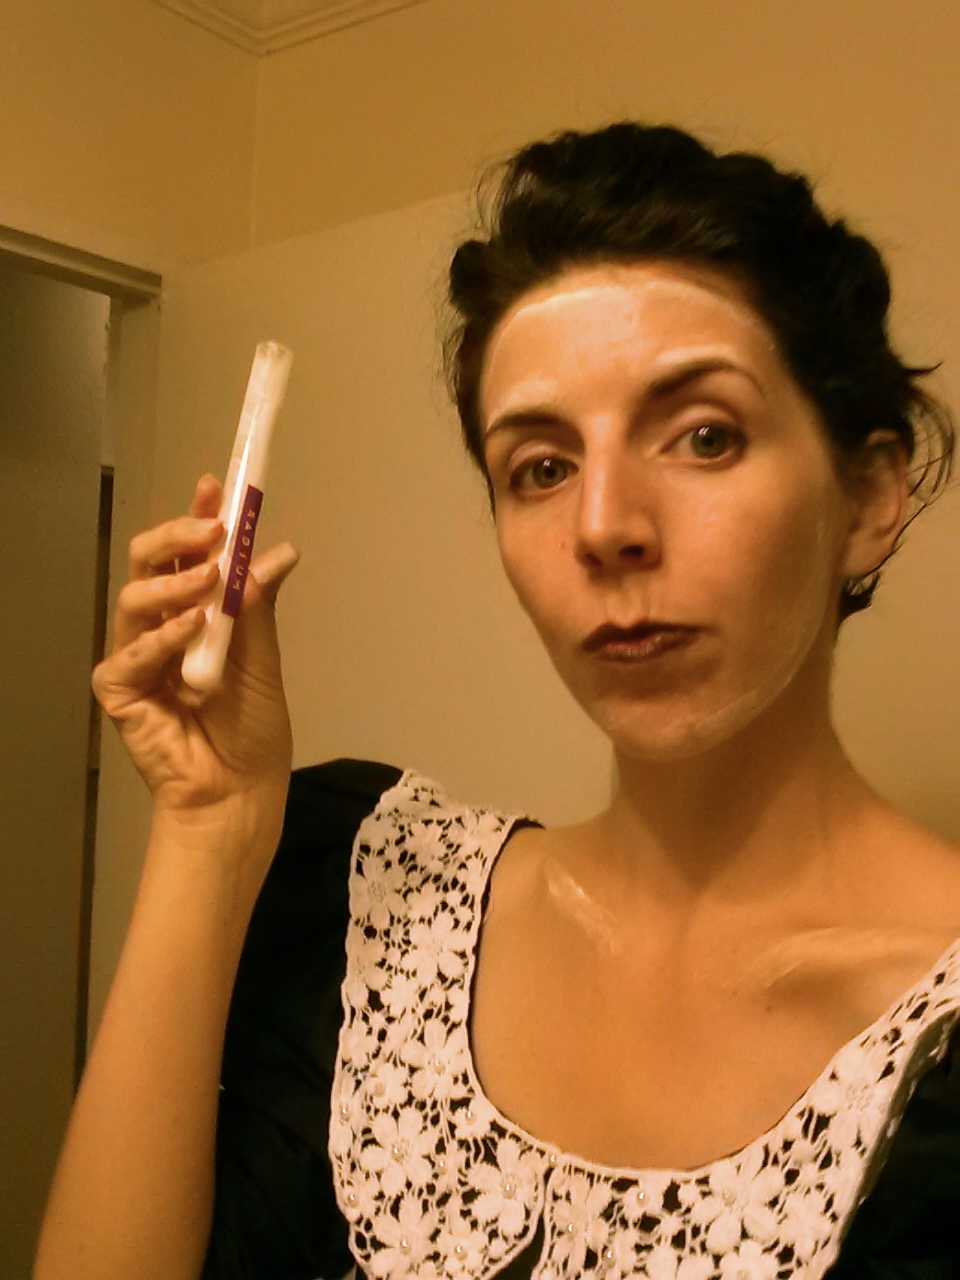
Marie Curie
Marie Curie was a Nobel Prize winning scientist who did groundbreaking research on radioactivity at the turn of the century. Her papers are still radioactive and she literally described seeing the tubes of radioactive material glow in the dark. Which meant I got to get all kinds of creative with my costume. First, I found this awesome black dress at a thrift store. I have no idea what it was in its past life, but the poofy sleeves and the full skirt were perfect for the time period. Next, I bought an attachable white lace collar on ebay and sewed it to the neckline of the dress. The clothing part was complete.
I actually wore this costume on two separate nights, and I did the make up and accessories a little different for each. The key was to make as much of me glow in the dark as possible. First, I needed my own test tube—I picked one up from a campus resale store, used glow-in-the-dark paint on the inside of it, and labeled it “radium.” For the rest of me, I used glow stick necklaces, glow in the dark face paint and green glow-in-the-dark nail polish. My recommendation is to get the nail polish at the drugstore if possible and the makeup from a Halloween store—the Halloween store version of the nail polish that came with the makeup in a kit was so clumpy it was unusable.
Seen here with Melisandre from Game of Thrones (see below for more of those costumes!), you can see that I had a thick line of makeup near my forehead. The make up has to be thick to show up, so I ended up just outlining the circle of my face instead of pasting it all over. I also recommend you have someone help you if you want a design on your body using the paint.
My dress had a dramatic open back so I had friends do designs there. The first night I went for a skeleton-like rib design and the second night I had the brilliant idea of using the radioactive symbol! It’s quite tricky to photograph these things, but we tried:
I had so much fun in this costume, especially when I found a blacklight!
Annie Oakley
Making the Marie Curie costume for Halloween inspired me the next time I was invited to a costumed dance party several months later. I had far less time to make this one happen, but I wanted to keep with my theme. I l also needed something I could dance in this time. So I came up with Ballerina Annie Oakley.
Annie Oakley was a famous sharpshooter in Buffalo Bill’s Wild West Show in the late nineteenth century. But I wasn’t about to bring a real firearm to a party. So I did the next best thing: I found me some gun tights.
You can get these on ebay for about $5. They totally made the outfit. And since they were tights, I figured, why not wear a tutu? So I borrowed this black leotard and tutu combo from a friend, who found it at a clothing swap. I already had the cowboy boots and the bandana, so all that remained to get was a hat and a western shirt.
Both the hat and the shirt came from the thrift store, but believe it or not the shirt required a fair amount of alteration. It was the best one they had (it even had snaps instead of buttons!) but it was a size or two bigger than me. So I took it in on the sides and a little in the seams and then tied it above the tutu to get the fit I wanted. It was worth it! And surprisingly I still wear the shirt quite a bit. Perhaps I’m a cowgirl at heart after all.
Lady David Bowie
Sometimes, the clothes simply make the costume. Other times, it’s all about the makeup. Especially when you are invited to a David Bowie themed birthday party. I present to you two female David Bowies.
This is David Bowie circa 1973, where we recreated the lightning bolt makeup from the Aladdin Sane album cover. You can buy Halloween makeup, but I used bright pink lipstick, dark teal eyeshadow, and black eyeliner. It stayed put really well, but be forewarned that your face may have some residual pink the next day! Not included but recommended: leather jacket and a bad ass expression.
This is David Bowie circa 1972 as Ziggy Stardust. The key to this look was a really good cream eyeshadow in gold, which I used for the circle as well as my lips. For my eyes I used the reddest blush I could find and some black eyeliner. There was no way I was going to be able to recreate any of Bowie’s amazing clothing from this era, but I did find a gold leggings/shrug set at a thrift store and a gold sparkly top that matched it.
GROUP COSTUMES
Game of Thrones
If you have a group of people who all want to do the same theme for Halloween, there are tons of great things you can DIY. Earlier this year, my friends and I did a team bike event that required having a group theme and costumes to go with it. We decided to be Team of Thrones.
From left to right: A wilding woman, Tyrion Lannister, Asha (Yara) Greyjoy, a Stark bannerman (with banner), Arya Stark, Khal Drogo, Danerys Targaryen, Cersei Lannister, Viserys Targaryen, Ygritte, and the Three Eyed Crow.
Unless you’ve been living under a rock/north of the wall this year, you’ve probably heard of the HBO show Game of Thrones, a TV show based on the epic fantasy novels of the Song of Ice and Fire series by George R. R. Martin. The best part about this show is that there are so many characters that you can get as obscure and outlandish as you want with your character and costume.
We obviously made some adaptations to be able to ride bikes on a rather hot spring day, but I think there were some rather creative costume elements here. To name just a few examples: the crow has little messages tied to her legs, Tyrion has little half shoes strapped to his knees, and Viserys covered her bike helmet with that giant golden crown.
I went as Asha Greyjoy (Yara in the TV series), Theon’s sister. I already had the black top, shorts and boots, all from thrift stores. I also happened to own a studded belt, sailing ship earrings and an octopus necklace…don’t ask me why on the last one but it worked beautifully. The little dirk knife and shield came from the dollar store, and I taped the Greyjoy sigil and motto, “We Do Not Sow” to the front of the shield. Also recommended: putting on the hardened face of a ironborn sea captain. (Showing off the forearm scar you got as a child helps too.)
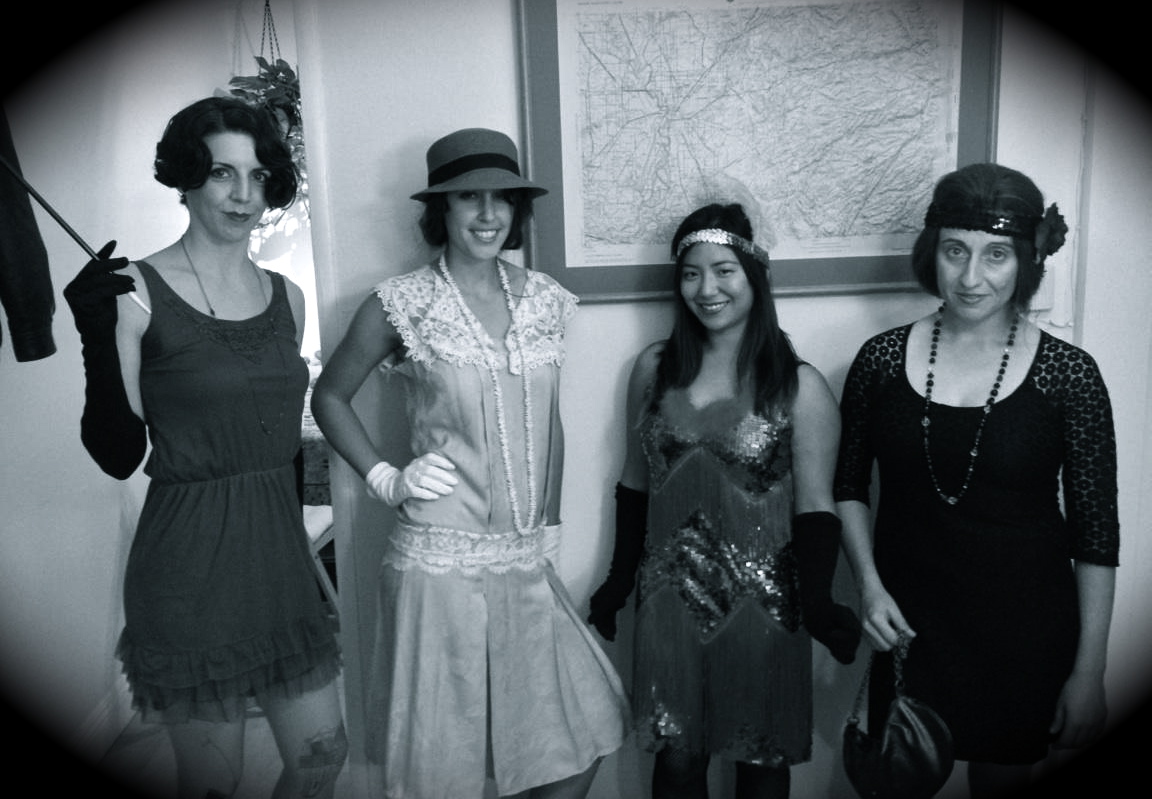
Gatsby Girls
Not up for fantasy novels? How about celebrating the Jazz Age novel The Great Gatsby with some roaring 20s costumes?
There’s plenty of inspiration in the new movie adaptation, but there’s actually quite a range of outfits that work for this era. All of the above dresses came from thrift stores, from the light pink drop waist dress with lace (it originally had long sleeves that she removed with a seam ripper) to the bright pink sequin flapper dress.
Accessories really help make these costumes work: among these four costumes we’ve got gloves, long beaded necklaces, hats, sequined headbands, feathers, flowers and even a cigarette holder (oh and the gun tights yet again!). Equally important is hair! You can’t really see it here but we’ve used two hair tutorials to get the styles of the 1920s, one that shows you how to fake a bob hairstyle if you have long hair and one that shows you how to create finger waves, which is a bit more challenging and works best with hair that already has a curl to it:
I tried to do the finger waves on myself, and I didn’t quite achieve the full look. I would really recommend that you have a friend who is good with hair do this on you. The nice thing is that both hair styles don’t require much in the way of equipment—for the fake bob you need a clip, a pony tail holder and some bobby pins. For the finger waves, you need gel, a comb, and bobby pins. That’s it! Combine with 1920s style make up, especially the “cupid’s bow” lips, for the full look.
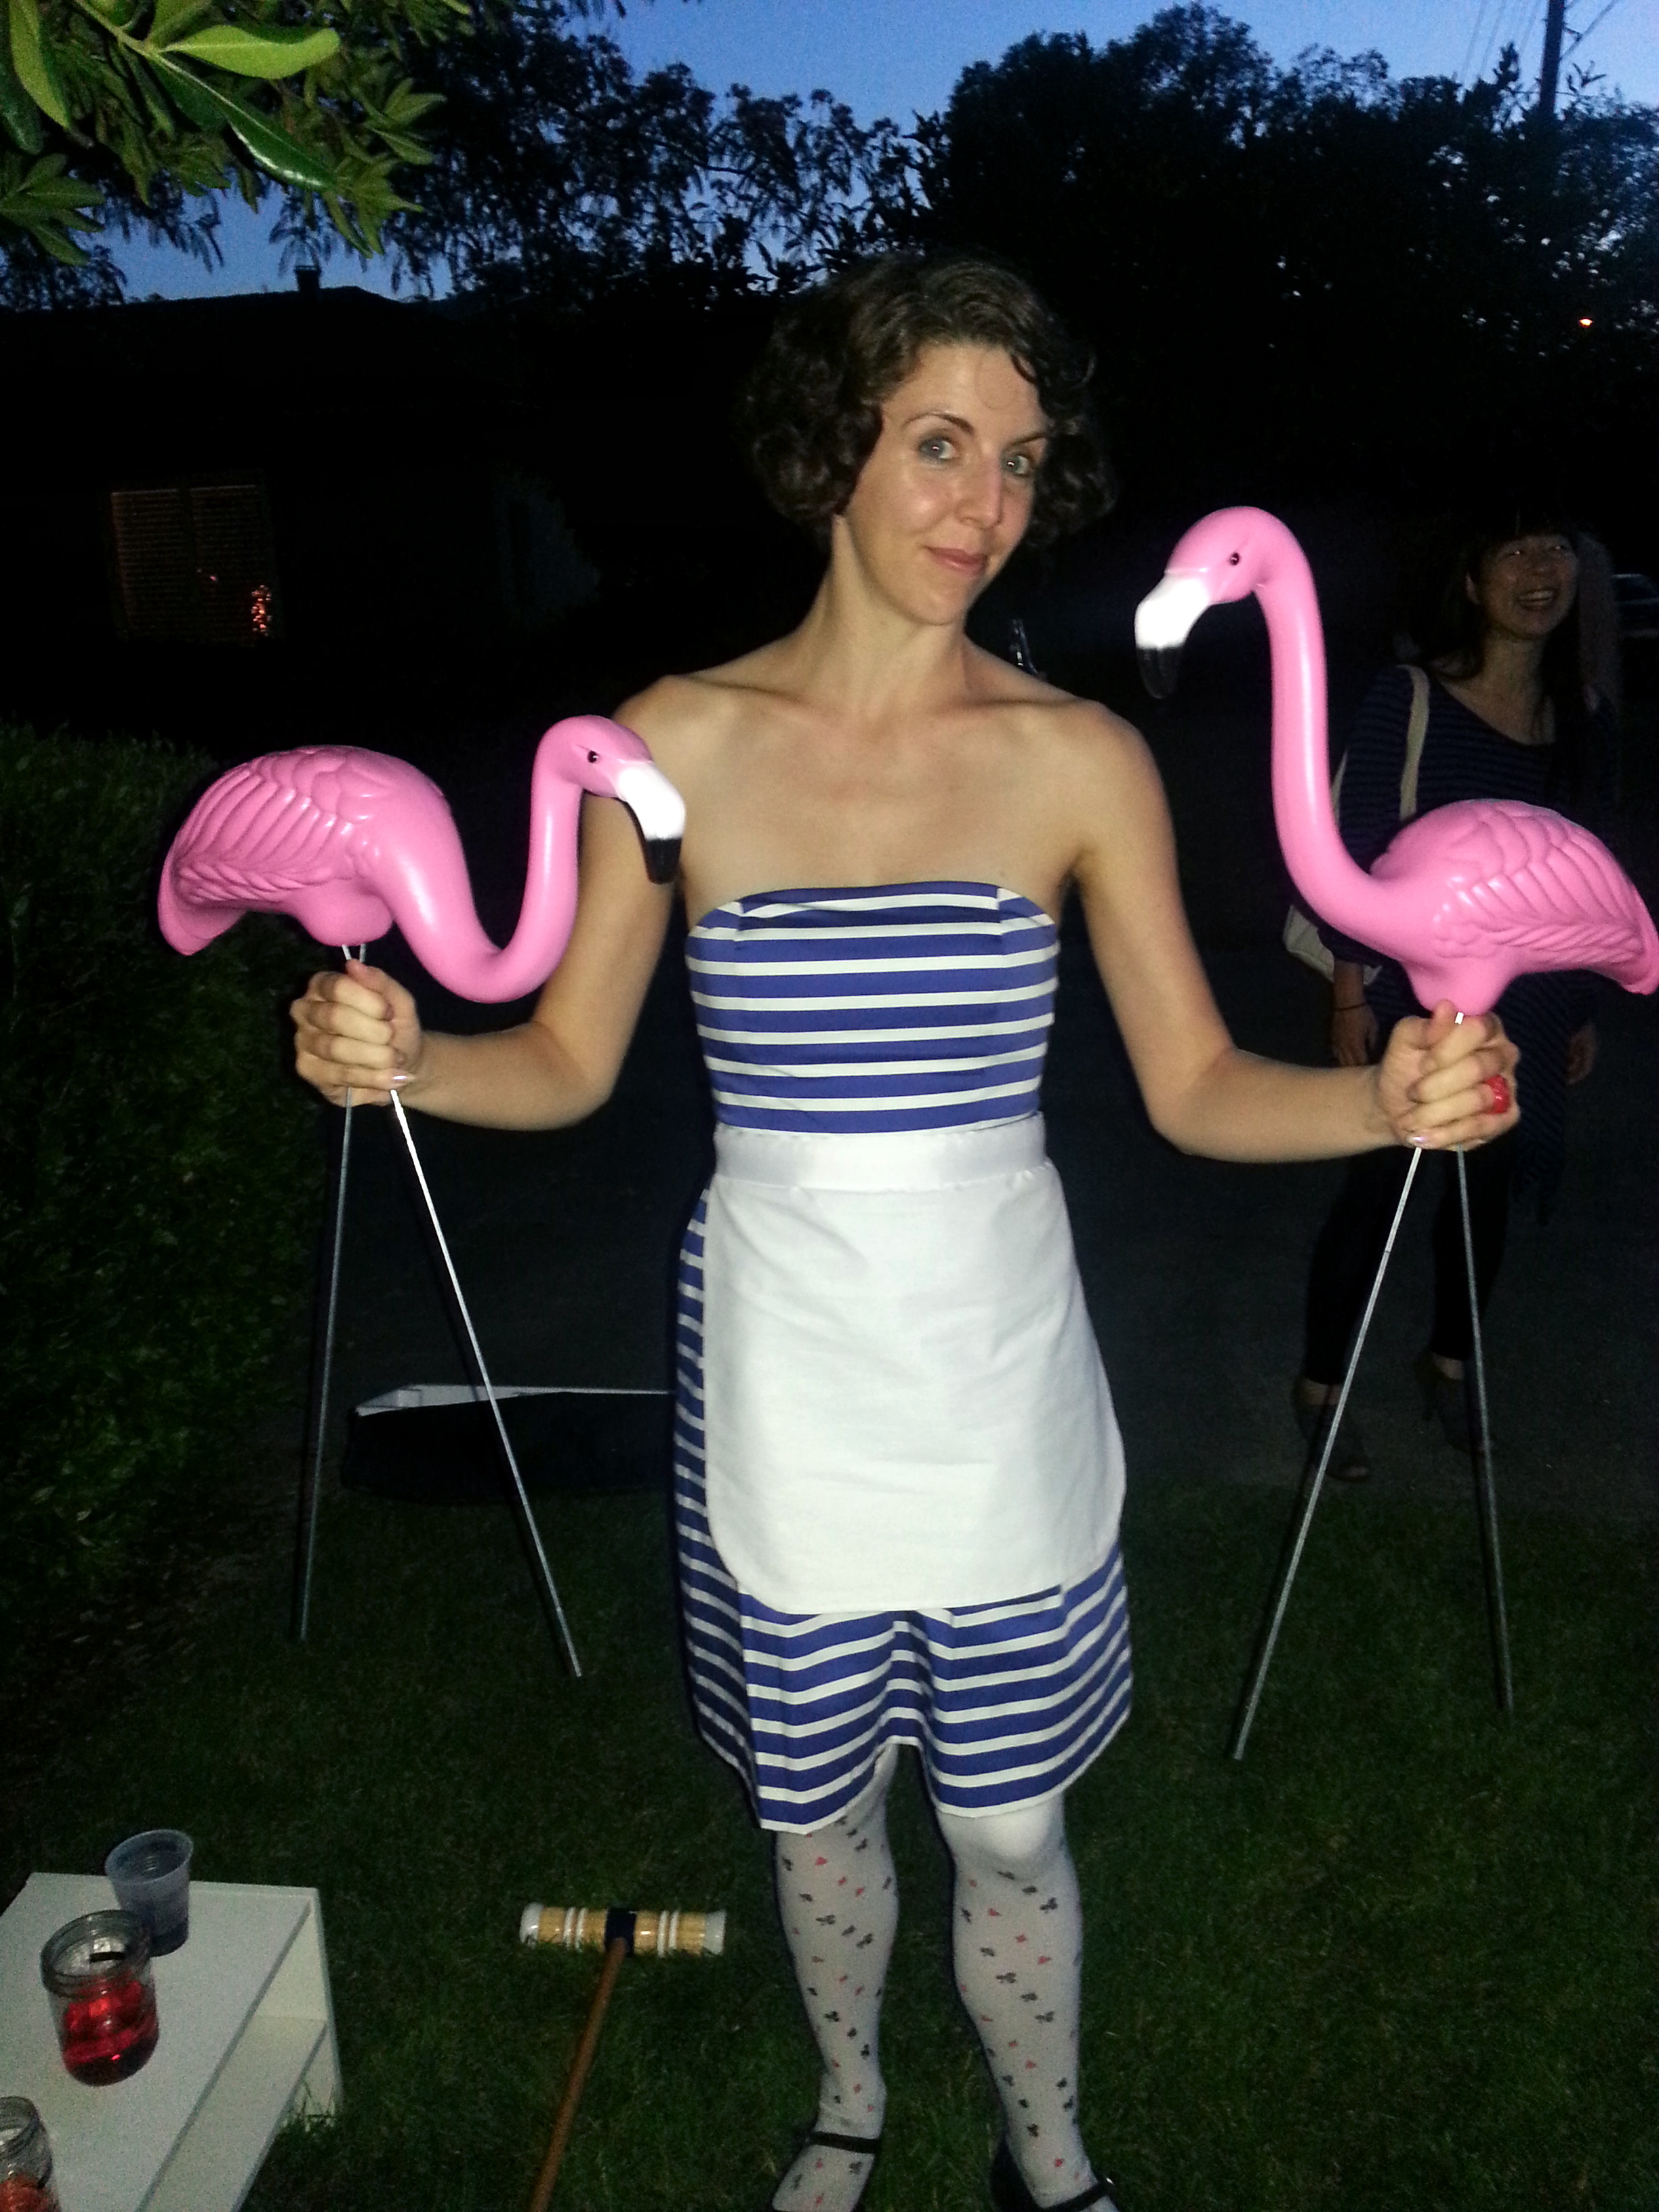
Alice in Wonderland
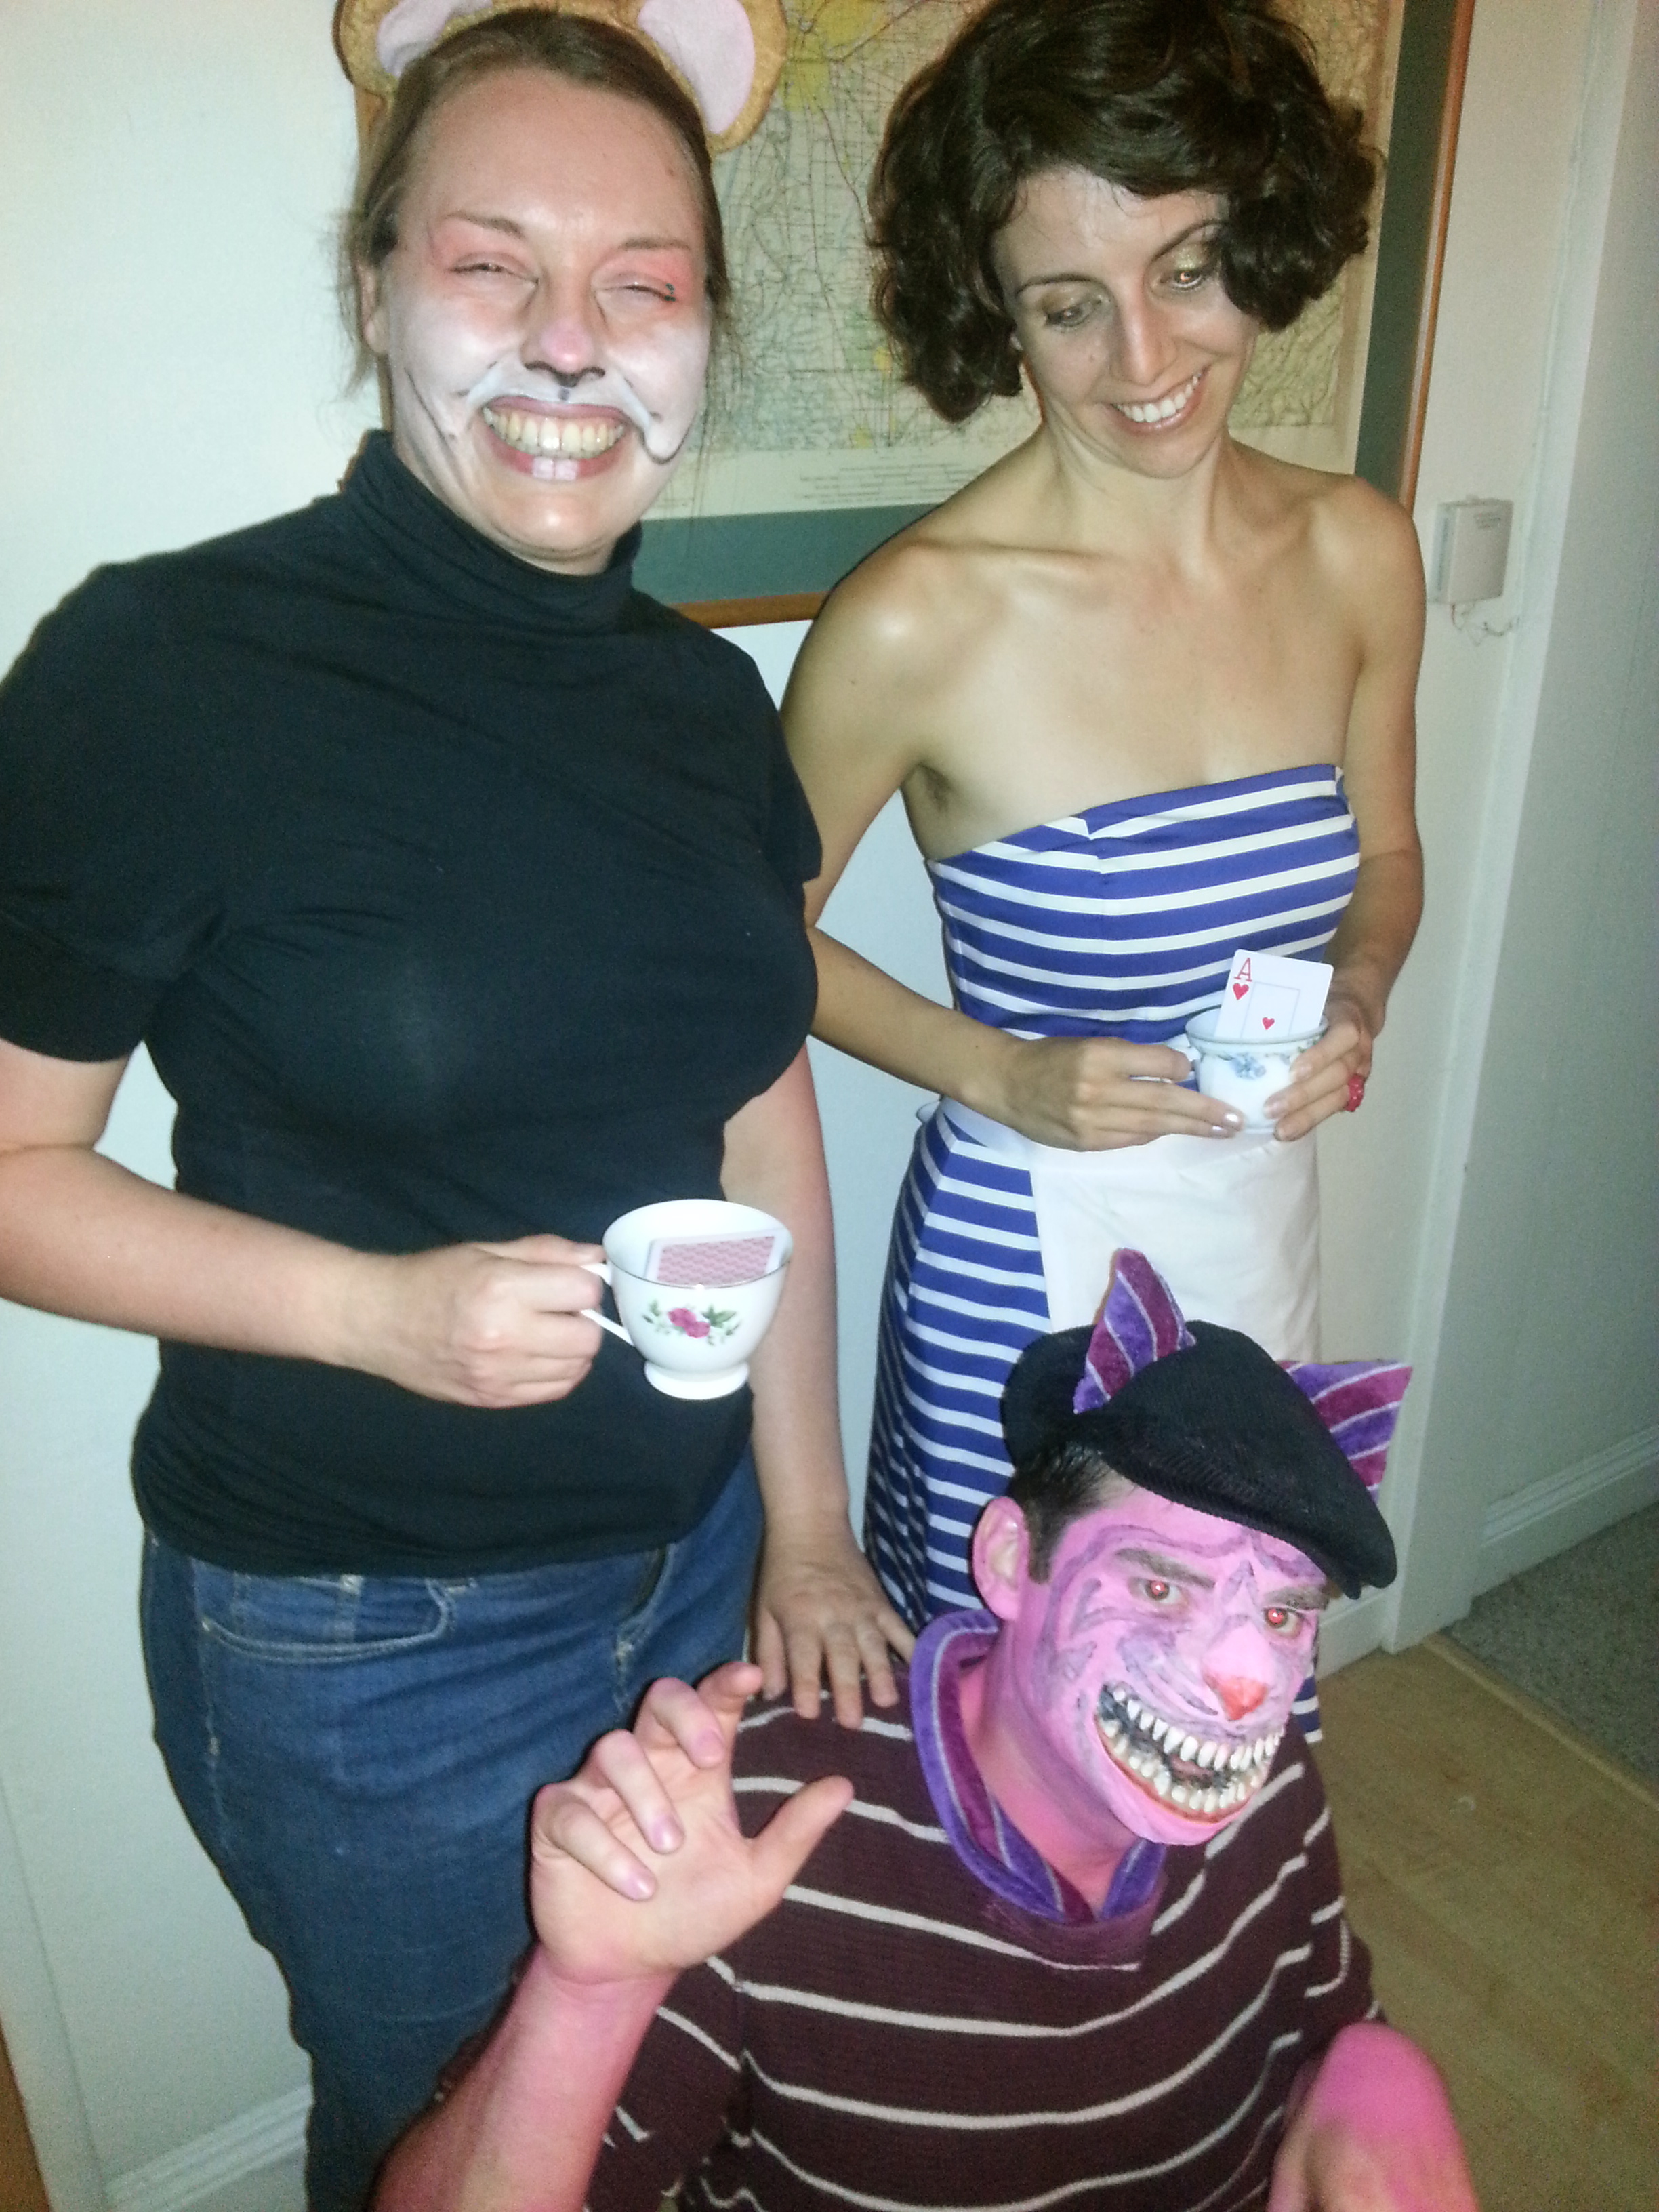
Last but not least, we have the Mad Hatters Tea Party!
Let’s start with Alice. I made this a low key costume since I knew I’d want to be comfortable all night. I used this strapless blue and white dress because it was a hot June evening, and paired it with these thigh high stockings that had card suits on them I got from a former roommate. The black Mary Jane shoes, red rose ring, and bow hair clip are things I’ve had forever, but they added a nice touch. I wanted to make a black bow out of ribbon, but I ran out of time.
I did, however, make the apron. To be honest, I didn’t use a pattern—I just tried on the dress, measured where I wanted the apron to come to, and used those measurements. The most similar free tutorial I’ve seen for how to make one like it is here. I used plain white muslin and a wide white ribbon instead of fabric to save time. I decided it should have rounded edges to match the top of my dress, and I think the effect worked nicely.
If you’re willing to take it a step further with face paint and/or prosthetics, you can go this route. The Dormouse combined mouse ears and a tail with Halloween makeup crayons to recreate the mouse face. The Cheshire Cat sewed his ears onto a hat, and used pink and purple face face paint for the stripes, but also attached some pretty awesome prosthetics.
Seen here with the Queen of Hearts, you can tell that this is a much more advanced costume project. But doable if you are adventurous! There’s actually two prosthetics, a cat nose and a grin, that he attached. He used spirit gum to attach the latex prosthetic to his face and liquid latex to blend the seam—you can get an idea for how to actually do this from this prosthetic nose tutorial. The effect, as you can see, is pretty remarkable.
.
And that’s all my costumes from the last year! I hope these can inspire you to come up with your own clever ideas—if they do, I’d love to see the results!


