Botanical Knits & Crafts, Original Knitting Patterns, Uncategorized

Nature Inspired Wedding Pillows

If I came to your nuptials in the last 2 years, you got a hand-knit pillow inspired by nature as a wedding gift.


Pillows are underrated knit gifts. They’re nice for the knitter, because they knit up quicker than a garment, use up stash yarn with ease, and require no sizing other than a gauge that will work with your choice of pillow form. And they’re nice for the recipient, because they can be personalized and heartfelt while still being functional.

Since I already blogged about the Lovebirds Owl Pillow, I’ll focus on the two others.

Twinning Trees

2017-10-06 23.04.57

Pattern:  Twining Trees by Sarah Bradberry (Ravelry link)

Yarn:  Cascade 220 wool, Spring Green (leftover from my Mrs. Darcy cardigan project)

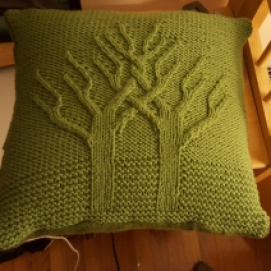
I had this beautiful pattern in my Ravelry queue for 5 years, just waiting for the right project! I love the intertwined cables— so fitting a gift for two people growing together.

I made this for J + K’s wedding, which took place at a Northern California winery and was just as green and beautiful. But the actual inspiration for the pillow was a road trip through Oregon this summer, with plenty of passenger seat time to work though all those cables. Despite the wildfire smoke, we saw lush greens everywhere.


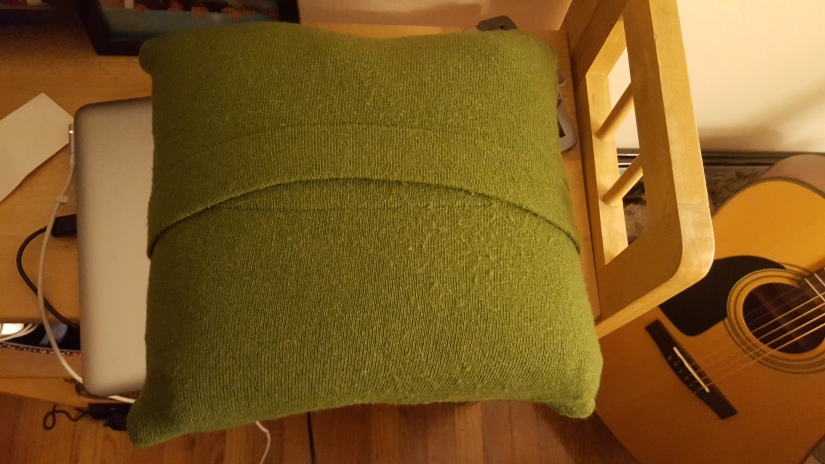
I have found that the best backing to a knit pillow is a repurposed sweater! This one was a green sweater tank in a matching shade. I pinned and cut two pieces to over on the reverse side, making it easy to slip it off the pillow form and wash it.


It’s a little tricky to sew through both pieces on my sewing machine, but the results are worth it.

2017-10-06 23.05.10

Bonus knit! J+K also requested quilt squares from guests for a wedding quilt, so of course I incorporated some knitting there too! My square was inspired by a summer afternoon of cherry picking that we had all recently enjoyed.


I used the “how to knit a flat circle” ravelry tutorial for this one, which I highly recommend.

Joshua Tree

IMG_5208

Pattern: My original design!

Yarn: All stash yarns—gray wool/mohair blend from stash, brown wool from my Owl Mittens, green from my repurposed Argyle Wall Hanging, and beige from my Katniss Cowl.

When I heard that A+M were getting married in Joshua Tree National Park, I knew what was going on their pillow! Only trouble was,  no such pattern existed! Cactus, sure, but no Joshua trees. I hadn’t been to the high desert for years, and couldn’t even remember if I’d seen one, so I looked at photos for inspiration to start. I eventually got to see the real thing! They were just as weird and majestic as I imagined—even more so at twilight.


I originally sketched a Joshua tree with many branches, but I had to scale it back to three for simplicity’s sake. I opted to keep the tree to one side, giving me room to add their initials and the year. If you make a pillow like this, take the time to sketch it out on a grid, to get an idea of the layout!

2017-11-21 22.13.13

Intarsia knitting worked best for this kind of colorwork, although I also did some stranding between the branched and the letters & numbers. I know that many knitters shy away from colorwork, but pillows are a perfect test project! It doesn’t have to stretch over a body or a head, so you can practice getting the right tension. Here’s the front and back of the complete piece.

2017-11-19 10.04.142017-11-19 10.04.26

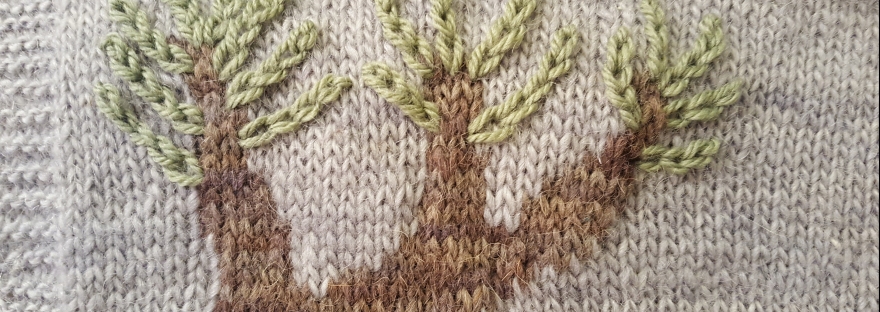
After poring over too many stitch dictionaries, I decided the easiest way to approximate the long pointy leaves was to do a crochet chain embroidery stitch on top of the completed work. That way, I could control the angle and give the tree a three-dimensional look. I followed a simple video tutorial (here) since crochet is not my forte.

2017-11-21 22.13.08

And of course, I used a gray sweater as a backing. This time, I chose a cardigan, so I could incorporate the buttons for easy removal.

2017-11-21 22.43.00I am quite happy with the way this pillow turned out. The muted color palate captured the feel of the high desert, and it matched A + M’s home decor!

IMG_5207

Botanical Knits & Crafts, Nerdy Knits & Crafts, Original Knitting Patterns, Tweaks & Alterations

Lovebirds: An Owl Pillow

What gift do you give to two crazy lovebirds (known to friends as the Owls) when they get married in a spectacular DIY ceremony in a field behind a farmhouse? Well, if you are me, you give them this:

2016-05-29 12.33.21-1

An Owl Pillow, complete with button eyes, a leafy tree, and the date of their wedding.

As with nearly all of my knitting projects, this one is cobbled together from several different patterns and adapted on the FLY. When a knit has to fit, I measure and gauge swatch and carefully plan everything out. When it doesn’t well—I WING it.

Pattern notes and bird puns below!

2016-05-24 11.02.52

To begin, I used this free calendar numbers chart to place the date at the bottom: 5 * 29 * 16. I was knitting from my stash, trying to use up the brown and green wool from Farmhouse Yarns that my aunt gave me nearly a decade ago (same yarn that I used for my Owl Mittens!). Since I had two dye lots of brown, I decided that the ground, tree and owls would be the darker brown, while the border and the sky would be the lighter brown. It worked. WHO is pretty good as guestimating yarn? I am.

2016-05-26 17.00.55

The main pattern I used was Dr. Owl from Rowan, which is available for free. But since I was doing colorwork and adding the date at the bottom. I had to make a lot of adjustments, let me tell you. The date at the bottom was stranded knitting, but the tree and the owls were intarsia. The leaves were knit separately and sewed on. And did I mention the original pattern is in the round and I knit this flat? Keeping track of all the various yarn balls and the altered stitches was not exactly a HOOT.

2016-05-28 12.10.45

Furthermore, I added a second owl to the pattern. I couldn’t have just one for a wedding pillow—I needed  a PARLIAMENT! When the piece was as tall as it was wide, I finished and blocked it. It was about 14 inches square—conveniently the size of a pillow form.

2016-05-29 12.34.24

2016-05-29 12.33.30

Sewing on the leaves and eyes was pretty easy and really made this piece SOAR. However, I had no time or yarn leftover to knit a second panel for the back, so it was off to the fabric store for a pillow form and some brown fabric remnants.

2016-05-29 12.33.48

Confession: I am a crappy seamstress. It’s just not really my thing most of the time. But I managed to get two wonky looking back panels, which are held together with velcro, so that the whole pillowcase can be removed for washing if necessary. And it OWL came together a few hours before the wedding!

2016-05-28 18.24.11

And there you have it. The flappy happy couple texted me later to say that they loved it—sometimes it’s risky to make a knitted gift without input from the recipients, but in this case it worked out.

As a side note, I didn’t realize just how long it had been since I posted in this blog! I was thinking it had been 2 or three months, but it’s more like 7. I’ve been teaching a lot of courses and I just don’t have the time on the weekends that I used to in grad school. But I have a few more little projects that I will share here in the future!

Activity Knits & Crafts, Original Knitting Patterns, Quick Knits & Crafts

The Quick and the Head: Knit Headbands!

Headbands! Lots of headbands. That’s what this post is about. Headbands with names. And possibly superpowers.

2015-03-30 17.24.02

(Forgive the lack of posts, I’ve been busy!)

Last summer, I knit my first headband. Then this winter, after finishing the green sweater, I reverted back to headband making. They are quicker than a big project, they are great for using up odd bits of yarn, and they’re great for playing with new designs. Most of these are my own patterns. Here’s how I made them, in the order that I made them.

Rocknasium

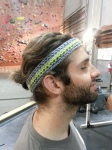
2014-07-25 10.55.35This is a multicolor garter stitch headband in cotton that gets a lot of use at the rock climbing gym. I knit it flat, in long rows on circular needles, then sewed the two short ends together. Make sure you use a stretchy cast-on and bind-off method. There isn’t a pattern besides knitting garter stitch, but you do need to measure your gauge and your head circumference so you can knit it in long rows and get the horizontal stripes. I’d recommend going a few inches down from your head size as it will stretch.

2014-07-25 10.53.36

The color pattern above is one row gray, one row orange, two rows green, one row orange, one row gray. The one below I made for a friend, and that one was two gray, one blue, two green, two gray, one blue, one gray. If you don’t want a break in the color stripe, you can knit them in the round or leave a yarn tail of each color and weave them in as I did.

2014-07-20 11.37.182014-07-20 11.39.442014-07-24 21.02.20

These are the easiest of headbands! And they will definitely help you with the crux of that overhung 5.11b project. This is just a fact.

Teenage Mutant Ninja Headband

2014-07-19 10.00.38The next headband I made was way more complicated! I got really into honeycomb brioche stitch and was determined to make a huge headband from it. The colors and the shapes somehow remind me of ninja turtles, hence the name. Bonus points if you know the names of the turtles who wore the orange and blue masks!*

2014-07-18 17.01.29

For this headband you will need three colors of cotton yarn and size 5 needles or whatever will get you a gauge of 8 stitches per inch unstretched/ 6.5 stretched. I know that’s kind of specific but that’s how I accounted for the fact that headbands have to stretch. If you have a smaller head you should adjust your gauge as needed. You’ll also need a crochet hook.

 CO 108 in Color A

r1 and r2: k

r3: Color B k1, sl 2 p wise, *k6, sl2. repeat from * to last st, k1

r4: p1, sl 2, *p6, sl2, repeat from * to last st, p 1

r5: repeat row 3 but carry Color A up the side

r6: repeat row 4

r7: repeat row 3

r 8: repeat row 4

r 9 and r 10: color A knit

r 11: k 5, sl 2, *k6, sl 2, repeat from * to last 5 sts, k5

Add Color C here and repeat. Cast off. Sew short ends together.

After casting off: Using a crochet hook and Color A, add a single chain stitch border to the edges. If your headband is seeming like it will be a bit loose, add some decreases (i.e. chain two knit stitches together) to tighten it up.

2014-07-18 18.09.44Your headband should look pretty wonky at this point—make sure to block it before wearing if it does! That’s how I got mine to lay flat.

2014-07-19 10.01.36

Wearing this headband will definitely give you the power to finally defeat Shredder with your mad katana/nunchuck skills …or, you know, keep your hair out of your face during zumba. One of the two.

*Answer: Michelangelo and Leonardo, respectively.

Jessa-Hannah Bluebell Poem

2015-03-21 18.29.13

This is another, smaller honeycomb brioche stitch headband. I started on this design nine months ago, but it took a long time and a fair number of mishaps for it to finally emerge in its complete form, hence the name (It comes from the last episode of  season 4 of Girls—spoiler warning!)

2015-03-21 18.31.43-2

 I used the same yarn and knitting needles as the big brioche headband, but knit it vertically and with just two colors. Make sure your colors work together! I had to start over when I realized my first, yellow version of this headband looked like a sickly easter egg.

Provisional Cast on: 15 sts in Color A

r1 and r 2: knit

r3:  With Color B, k 1, sl 1 p wise, k 3, sl 1*

r4: p 1, sl 1, p 3

r5: repeat row 3

r6: repeat row 4

r 7 and r8: With Color A, knit

r:9 With Color B k 3, sl 1 p wise, k 3*

r 10: p3, sl 1 pwise

r11: repeat row 9

r12: repeat row 10

You’ll need to join the two short ends to form a headband by ending either after a row 12 or a row 6. Provisional cast on will make it easiest. I used a three needle bind off. Once again, blocking will help the brioche honeycomb stitch look its best.

No matter what you do, the edges will still curl a bit. Overall, I like the pattern a lot, so I decided I can deal with some rolling of the edges. Or, as Hannah put it, “I can’t guarantee perfection, but I can guarantee intrigue.”

2015-03-21 18.29.34

This tiny brioche headband will not help you deliver your own baby or anything, but it will give you a new appreciation for the beauty of little things. What’s more magical than that?

Mahna Mahna

2015-03-21 18.41.31

This is one of the few patterns that is not my own! I used this free cabled headband pattern (also on ravelry). I won’t repost it here, but if you can handle a basic cable this headband will be no problem. I used my own unique yarn blend of two strands pink mohair, one strand recycle red sweater wool (heavily featured in my knit tank top in a previous post). Which is why I call this one Mahna Mahna, because it reminds me of the two Muppets from that one song.

2015-02-05 10.09.49

One of the nice things about making a wide cabled headband: it doubles as an earwarmer! This headband, like the Muppet song, will getting stuck in/on your head. It will give you the ability to feel warm and fuzzy even on a cold dreary day.

Minnesota

2015-03-03 10.01.06

These are two color linen stitch headbands! Linen stitch is fantastic for headbands because it lays nice and flat. These two are named Minnesota because that’s where they went to live.

I used Michelle Lewis’ linen stitch headband recipe, which seems rather underutilized, as a guide for these headbands. But since I was using two colors, this craftsy guide, especially the suggestion for how to avoid color pooling, was very helpful too.

The two-color linen stitch recipe:

Provisional cast on: even number of stitches in Color A

For your first ever row, skip to Row 2 (r 2) to avoid color pooling.

r 1: Knit 1, yarn front, slip 1, yarn back. repeat to end of the row

 r 2: Purl 1, yarn back, slip 1, yarn front. repeat to end of the row

Repeat these two rows with Color B, then repeat them with Color A, etc. When the headband is long enough, sew the ends together.

For the top headband, I used the same yarn and needles as most of the projects here. For the bottom headband, I used size 2 needles and two partial balls of a wool blend, self-striping sock yarn, which created a more intricate looking pattern.

2015-03-03 10.02.11These headbands will give you the ability to travel around the country and/or world having amazing adventures and connecting with inspirational people. Or they will give you the ability to get out of the house on a cold winter evening. Depending on what you need that day.

Heartbeats

2015-03-30 17.25.49I was all ready to write this post a week ago, but then I was like, you what I need to do? KNIT ANOTHER HEADBAND. So I did. I decided to call it Heartbeats, even though it has been pointed out to me the graph of a heartbeat does not follow this neat curve. I was inspired by the Jose Gonzalez cover of The Knife song “Heartbeats.”

I told myself to write down the pattern as I came up with it, but either I forgot or I misplaced it, so I’m going to reverse engineer it for you right now:

Heartbeats recipe:

Provisional Cast on 11 sts in Color A

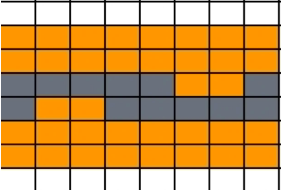
From here on, the three stitches on either edge are your border stitches—they will always be knit with the pattern Knit, Purl, Knit. The five middle stitches are stockinette and they will have the color work. Here is the chart:

Screen Shot 2015-04-11 at 2.01.42 PM

As you can tell, you need to make sure to finish at the end of a complete chart for your heartbeat to be…complete. And as always, you’ll need to block it well—especially since there is a lot of stockinette. But it looks really cool laid out flat!

20150328_115256This headband gives you the power of the heart—wherever that may take you and for whatever that is worth. (It seemed important to the Planeeters!) It may or may not help you sing like Jose Gonzalez.

2015-03-21 18.43.44

Hope you enjoyed these headband patterns!

Botanical Knits & Crafts, Original Knitting Patterns, Tweaks & Alterations

2015: Out with the New and In with the Old!

2015-01-11_154351The title of this post pretty much sums up my goals for the making of things in the coming year. At its most basic, “out with the new and in with the old” means as much as possible, I’m going to try to use what I’ve got on hand or what I can get second hand to knit, sew, costume, or otherwise craft, instead of buying new materials. Not exclusively, but as much as is feasible. I already do this a lot, but I wanted to be more intentional about it. (I promise this won’t become one of those smug greener-than-thou sort of projects. If I need to buy new buttons, I’ll buy some new freaking buttons!)

Here’s what this kind of making has looked like this month:

Creative Stash Knitting

challenge: How to knit with what you’ve got when your yarn doesn’t fit the pattern.

2015-01-11_162626When you have been knitting for many years, you develop a yarn stash. Extra yarn left over from previous projects, yarn that friends or family gifted you, yarn that you bought for a purpose never fulfilled—they all live in the stash. My stash lives in a small underbed storage box.

I’m trying to get even more inventive with the ways I can knit from my stash. This hat is one of those projects. I knit with small amounts of a wool-and-mohair-blend yarn I had in a few colors in my stash. I used the quick and very lovely pattern easy ombre slouch hat by Paul S Neary. Well, sort of. I weighed the yarn on a scale realized I did have enough of the green yarn to do the full pattern. So I just did the colorwork pattern until I ran out of green. And it still looks good.

The only disadvantage to this strategy is that I’m going to have to be flexible with the outcomes. My hat came out far less slouchy because I omitted extra rows of the pattern. I’m going to soak and block it, but it doesn’t seem to quite fit over the sheer volume of my hair now.

2015-01-11_162724

I think it may need to be a gift to someone else, and I’m ok with that.

Thrifted and Salvaged Crafts

challenge: How to make useful and beautiful things without buying new stuff.

2015-01-11_141850I think the hardest thing about trying not to buy new things is that I have to be patient. I have to forgo the instant gratification for the long game of keeping an eye out. It’s probably not a bad trait to work on. At any rate, being patient was what led me to find and refashion these chairs.

2015-01-11 12.38.25I had been using folding wood chairs in my kitchen for years when I spotted this guy and its twin at my dumpster. I hauled them inside just before a rainstorm. They were not in good shape. But my neighbor friend had assured me that wooden chairs with fabric covers are easy to re-cover.

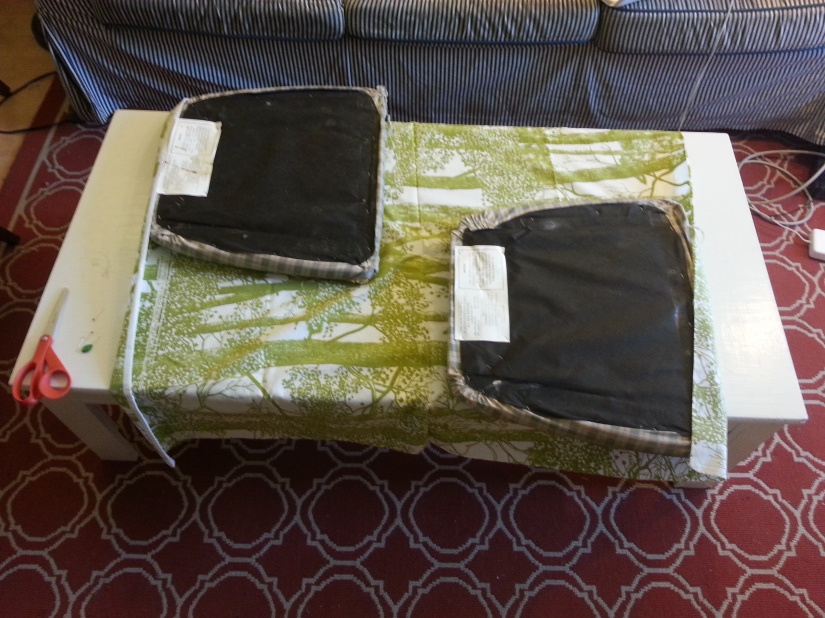
2015-01-11 12.39.34-1I found my “fabric” at the thrift store. It was a large pillowcase with a green tree print that I bought for 60 cents.

2015-01-11 12.38.432015-01-11 12.40.12

If you want to do this project, make sure you have a screwdriver that fits the screws on the underside of the chair, scissors, a staple gun, and enough staples. (I borrowed the staple gun and ran to the hardware store to get staples). A seam ripper and an iron are also handy if your fabric is being repurposed. And a flashlight or headlamp is a plus if your screws are hard to see.

2015-01-11_132940I didn’t “measure” exactly but I did make sure there was enough fabric to cover both seats.

2015-01-11_141331Stapling is the most fun part. Just make sure that you don’t cover up the holes where the screws are going to go back in.

2015-01-11_1528002015-01-11_1528082015-01-11_153222Screwing the whole thing back together is the most annoying part. Again, patience is key. Trim any excess fabric that is in your way.

2015-01-11_154512It’s kind of ridiculous that this whole project cost under a dollar, considering how much I like the end result.

Repurposing Unfinished Projects

challenge: How to revisit the incomplete objects from the past and find a place for them in the present.

2015-01-11_164450The dirty little secret of any maker of things is the UFO—the unfinished object. We all have at least one— a project that can’t be completed but also can’t be tossed. They are hidden away for weeks, months—or in my case, ten years.

If I am really going to go “out with the new and in with the old,” I have to revisit my UFOs. And I did. To do so, I first I had give up what I had planned for this piece to be back them and think about what it could be here and now.

2015-01-11_162953What you see here is the front piece of a completely imaginary argyle sweater. I knit it in 2005—specifically, in February and March during the weeks I was in the hospital after a really bad car accident. I must have asked someone to bring me some knitting needles and yarn from home, but I don’t remember. I do remember how I spent ages planning and designing and knitting this blue and green argyle pattern in my hospital bed while I was unable to walk. I was completely determined to knit myself a sweater.

2015-01-11_163006But this sweater was never going to exist, because I had no idea what I was doing. I was a beginning knitter and ravelry did not exist (neither did YouTube). You can see how my stitches were uneven, and how the blue and green yarns are thicker than the white yarn and did not stay flat. I also had no concept of how a sweater was constructed. And even I can’t make sense of my knitting notes now, although the argyle chart is pretty solid:

2015-01-17 11.40.36

2015-01-17 11.40.49So I knit this whole pseudo pattern, and then it sat, in a bag, doing nothing. As I got better at knitting, I became convinced it was unredeemable. It was a symbol of knitting failure. That is, until I rediscovered it while cleaning last weekend. This time it didn’t remind me of failure—I looked at it and remembered how much I had loved it and how it had been a bright spot in my life during a really dark time. I also still had the borrowed staple gun in my possession, and I had an idea.

2015-01-11_1633572015-01-11_163410

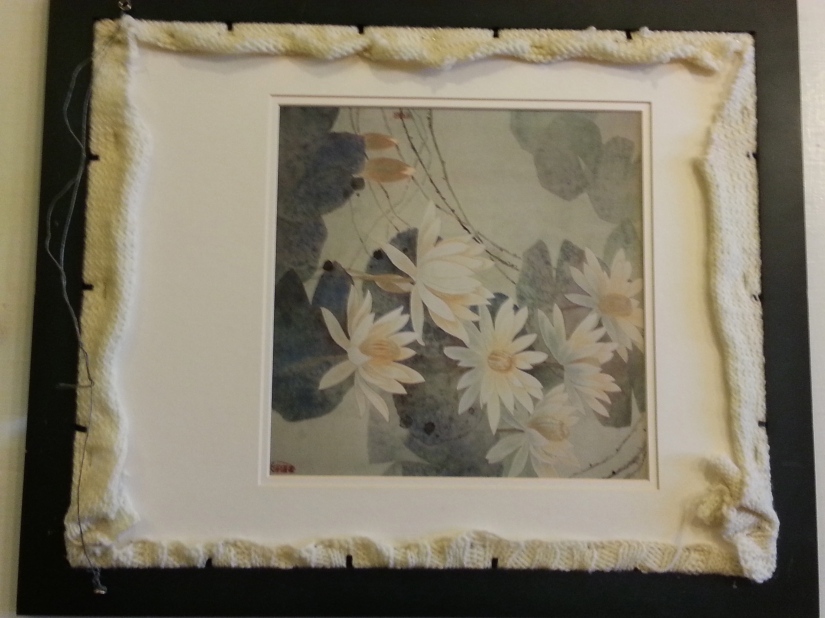
In keeping with “out with the new,” I went to the thrift store. I found a large framed image there for $2.50. The important thing about the frame was that had a removable back (those little black tabs around the back are always a good sign). I brought it home.

2015-01-11_164425I then lightly steam blocked the argyle piece, stretched it across what had been the print inside the frame, and stapled it into place. With some careful wiggling, I got it back into the frame and secured with the black tabs.

2015-01-11_172355Now my long abandoned argyle sweater project is a framed and mounted work of fiber art on my wall. And I can’t even describe how much joy I feel when I look up at it. Yes, I was crazy stubborn to try to design and knit my own sweater with no experience from a hospital bed. And yeah, it’s wonky and full of flaws. But I love it— I poured myself into it and I can see the beauty in it now. What was old suddenly looks new.


Original Knitting Patterns, Quick Knits & Crafts, Tweaks & Alterations

Knitting Recipe Remixes: Shetland Pony Drink Cozy + Handbook Fingerless Chevron Mitts

Recipes. I use them all the time in cooking—I’ll certainly be consulting a few for the Thanksgiving dishes I’m making next week. However, I usually see the ingredients and directions as more suggestions than mandates. And I often combine elements of different recipes to get the final results I am looking for. I like to remix my recipes.

Lately, that’s what I’ve been doing with my knitting as well. It’s finally knitting weather here in California, and I have been working on projects big and small. But I can’t resist remixing the recipes—combining elements of two patterns to get the finished object I really want. It’s one step above following a pattern with a few modifications, which is easy but can only transform the pattern so much. And it’s one step below writing your own pattern, which is great for creating exactly what you want but takes a lot of time and effort to do properly.

I’ve got two remixed knitting recipes for you. Both are small, relatively quick knits.  They all involve bits of colorwork, so they are perfect for stash busting. They also make great gifts—and you won’t find them anywhere else!

Shetland: The Pony Drink Cozy (ravelry)

2014-11-17 13.36.16

If you have not seen the video of Shetland Ponies Wearing Cardigan Sweaters, you should really go do so now. I’ll wait.

shetlandsweaters

My friend and fellow knitter, who loves shetland ponies and this video in particular, had a birthday recently. This was the gift I gave her.

Ingredients

20-25 yds main color, worsted weight

10-15 yds contrasting color, worsted weight

2-3 yds scraps of three colors for sweater, sock or lace weight

knitting needles (sz 7 or whatever gives you gauge)

tapestry needle (I used metal not plastic)

Patterns Used

f. pea’s beer cozy (raverlyblog)

Jóhanna Hjaltadóttir’s Hestapeysa sweater (ravelry, pdf)

Directions

The basic idea is to knit the beer cozy pattern FLAT with the pony chart from the sweater centered in the middle. Cast on 32 stitches and work in ribbing as directed for beer cozy. (I don’t have many in-progress shots but you can at least see how it looks flat):

2014-11-17 13.24.17

After work the ribbing from the beer cozy, start the pony chart. To center it, do some basic math:

32 (beer cozy width) – 18 (pony chart width) =14 stitches /2 = 7 stitches of main color on each side

Complete chart (I added one contrasting color stitch extra on the head to give it that shetland mane look). Add 3 more rows, then finish with top ribbing (if you skip these rows, the pony’s head gets squished into the ribbing). Bind off in ribbing and leave a 12-15 inch tail for sewing.

Thread your tapestry needle with one of the sweater yarn scraps (if you have different thicknesses of yarn, start with the thickest). Outline the outer edge of what will be the cardigan, stitching around the lower neck, partway down the front legs, and half way down the back. With the second color, stitch several parallel lines diagonally across the sweater. With the third color, stitch several lines perpendicular to the first set of lines. This will create the illusion of a sweater. Be careful to keep the tension on the yarn as even as possible, because the whole thing needs to stretch over a glass.

2014-11-17 13.35.21

Weave in and cut all the ends except the long main color one at the bind off edge. With tapestry needle, use kitchener stitch to connect the two edges of the beer cozy. Weave in and cut this end, then admire how your drink sweater is a pony wearing its own sweater!

Handbook: Fingerless Chevron Mitts (ravelry)

2014-11-19 15.33.39

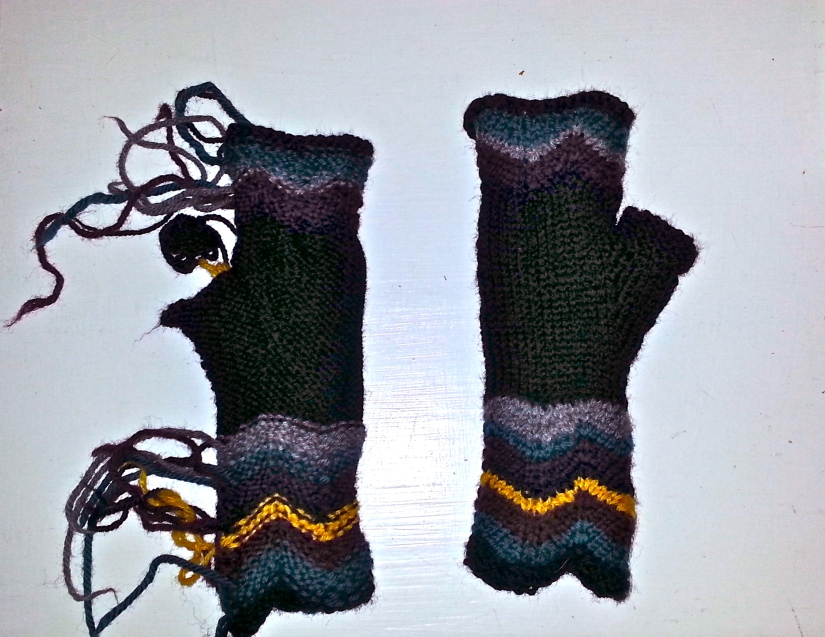
A few weekends ago, I went to this conference, where all of the presenters were contributors to an upcoming Oxford Handbook. As I listened to the presentations, I worked on these fingerless mitts. Much like publishing a handbook, with these fingerless mitts I had to take a lot of different pieces—different colors, different lengths—and try to blend them into a seamless finished product.

Ingredients

100-120 yds main color, worsted weight

5-20 yds each of four contrasting colors, worsted weight

double pointed needles (size 6 or whatever you need to obtain gauge)

tapestry needle and patience

Patterns used

Maggie Smith’s Fingerless Mitts (ravelry)

Kat Lewinski’s Those Zig-Zag Mittens (ravelry, blog)

Directions

Just a heads up—this recipe involves a lot of weaving in ends! But other than that its fast and satisfying. I had never done a chevron (zig zag) pattern before, and I really enjoyed it.

Before you cast on, decide how many chevron rows you want of each color and the order that you want them in. You may want to place strands of each yarn next to each other to see what you like best. Make sure to include at least one section of the main color!

Cast on—you can either cast on 44 stitches as the Zig Zag patterns says, OR you can cast on in a higher or lower multiple of 11 for bigger or smaller hands. Just know that chevron is very snug, so it can’t be too small as it won;t stretch as much as stockinette. I have small hands and I knit loosely, so I cast on 33 stitches and then did only three total repeats of the chevron pattern, not 4: (k2tog, k3, M1L, k1, M1R, k3, ssk).

Important tip! On the end of first round of a new color, knit in pattern to the last stitch, then grab the tail/non working yarn from where you joined the new color, and knit that together with the working yarn on the last stitch of that first round. It will help reducing the hole that tends to occur at the color change. (I didn’t figure this out until rather late in the knitting process.)

2014-11-19 15.35.14

After you switch back to main color, do one more round in the zig zag mitts pattern. Then switch back to the fingerless mitts pattern to make the thumb increases. But instead of doing increases until you get to the designated number of stitches as that pattern says, just add 14 to whatever number of stitches you started with. In my case, 33 + 14 = 47 stitches is when I did the bind off for the thumb.

Now you have a choice—you can increase or decrease your stitch count to a multiple of four and then do the ribbing at the top like the fingerless mitt pattern says, or you can keep your stitch count and do a small repeat the chevron stitch at the top instead. That’s what I did.

2014-11-19 15.35.28

If I had to do it over again, I might have begun the bind off a bit sooner. Just make sure to do several purl rows before you bind off, as knit stockinette will tend to curl. I haven’t blocked these yet so I’m hoping some of the curl in mine will come out.

Further option:I also added a few more rounds at the thumb—two knit rounds, four purl rounds, then bind off.

2014-11-19 15.34.20

Are you ready for the least fun part? Because While your fingerless mitt will look like this on the outside…

2014-11-18 23.34.07

It will look like this on the inside. So: get your tapestry needle and start weaving in all those ends. If there are any gaps occurring where you changed color, now is the time weave through those spots so they are less visible. Have patience, it will be worth it.

2014-11-19 15.35.07

I was too excited and I photographed these mitts before blocking—but look at those lovely colors! There’s something about chevron that looks classier than stripes. It’s nice to have a stash busting project that uses the leftover bits of colorful yarn that I love.


Nerdy Knits & Crafts, Original Knitting Patterns

NSFW: The Fantastically Phallic lip balm holder

(NSFW: The following post contains photos of a phallus made from yarn and as many phallic puns and double entendres as I could manage. You have been forewarned.)

It’s been a long time since my last post! Let’s skip the part where I explain how busy I’ve been, and get on to the gettin’ busy part—namely, the phallic lip balm holder. Also known as the penis lipgloss cozy. Also known as the chapdick. (I could go on, but you get the idea):

2014-09-13 15.41.58This project didn’t take too long (long!) to finish (finish!), mainly because I was really pressed for time. But I wanted to add a personalized touch (touch!) to my bachelorette party gift for a fellow knitter and crafter. Another friend suggested I knit something as a gift, and I recalled how my version of a chapstick holder that I blogged about back in February looked a bit like a tiny penis, thanks to the color of yarn I used. And so that became the inspiration for Phallicozy.

2014-09-13 15.41.10While I could have used a pattern, because there are some nice free knit patterns here and here as well as a nice free crochet one here, I decided to just wing it. It wasn’t too hard (hard!). I went with crochet instead of knitting and held the yarn double because I knew it would go faster and that the finished project would be thicker (thicker!) I tried to take notes as I went, but I am the worst at crochet patterns because I rarely read them, so they are rather vague.

I started with chaining 5 and making a circle, then increased in every stitch so that each round was 10. I kept crocheting in the round until it was about as tall as the lip gloss I was going to put inside it (put inside it!). Then I decreased every two stitches just before the end, which became the bottom (I wanted it to open at the top but it didn’t work with the shape of the lip gloss). For the testicular formation, I started with the same first two steps, then crocheted one round, then immediately decreased in every stitch in the next two rounds, finally pulling the yarn through the last few stitches at the top. I stuffed each with half a cotton ball, tied the family jewels together and sewed them securely the base. The final result was that it could stand erect (erect!) all by itself:

2014-09-13 15.41.31

If I’d had more time, I would have put a little more effort into the contouring and shaping of said member and figured out a way to give it a top opening. But as it is, I’m pleased with the results. It’s hard to go wrong with a chapdick!

Original Knitting Patterns, Quick Knits & Crafts

Thowback Thursday: Tank Top Tutorial

This post is a true throwback—it’s the first complete garment I ever knit! I made this tank top about 11 years ago, after several failed attempts at other items (a not-long-enough scarf, a hat so pointy even Peter Pan wouldn’t wear it). I didn’t even have a pattern! And yet somehow, it turned out well, and I still wear it to this day:

2014-07-08 10.05.45

I received this yarn (which has long since been discontinued) as a thank you gift for cat sitting while my hometown neighbors were in Italy on summer. I knit the tank top by taking my measurements, checking my gauge, and making up the rest as I went a long. I remember writing down a few important numbers on a sticky note, which has long since been lost. I have reverse engineered my own work (as best I can) so I can give you a tutorial on how to make it. It’s quite simple, knits up quickly, and shows off a variegated or multicolor yarn well. I’m calling it Piena Estate, which loosely translated means “high summer” or “midsummer” in Italian.

Piena Estate: a Tank Top Tutorial

2014-07-08 10.03.16

(Quick note—please ask my permission before reproducing any of the content here, and when you do, cite me as the source! I don’t mind sharing this pattern as long as it’s for non-commercial purposes.)

Materials

Yarn:  I believe I used close to 3 balls of Mondial  Il Cotone Mexico (50g and 100m per ball), a two ply-yarn that I think was probably sport weight  (60% acrylic, 35% cotton, 5% nylon). It looked like this:tank top yarn

My guess is that a variegated sock yarn or DK weight yarn could also work for this top, especially if it is a cotton blend. Yardage will depend on your measurements and your gauge.

One circular knitting needle, at least 24 inches long, size 6 (or size needed to obtain gauge)

Optional but recommended: two double pointed needles in the same size, which will make the I cord part go much faster.

needle and thread

Gauge

16 sts and  30 rows = 4 inch square. Since you calculate the number of stitches based on your gauge, it’s ok to have some variation here. The suggested gauge for this yarn was originally 18 sts and 25 rows for a 10cm (4.5in)  square, but I was a very loose knitter back in the day. Don’t knit too tightly on this one unless your yarn has a lot of stretch!

Directions

Casting on:

Take your measurements at your bust, waist, and wherever you want the hem of your tank top to hit. If your yarn has a good amount stretch as mine did, you won’t need to add to this, and you can even have a slight negative ease. Then make sure to measure the distance in length between these points too. I made this top short by my standards (12 inches total length in the body section), and the place where I wanted the hem to fall was about 30 inches, so I cast on 120 sts. I would suggest making a longer top if you think you have the yarn for it! If your cast on number of stitches is odd, add or subtract a stitch so that your ribbing will line up.

Ribbing: Join sts in the round and place a stitch marker (this will be the center front of the top). Knit in a 1×1 rib (k1, p1) for 1 inch (or more if you want a longer ribbing).

2014-07-08 10.09.36

Body: After the ribbing, you’ll knit every stitch in each round from here on out.

Wonky math time! This is when you have to decide how to shape the garment if you would like shaping for the waist and the bust, and decide how to spread out your decreases. For example, I wanted to decrease from 30 inches around at the hem to 26 inches around at the waist, and these were 6 inches apart (since I had the 1 inch ribbing, I was now 5 inches from the waist). So I wanted to decrease from my original 120 stitches to 104 stitches (26 x my gauge of 4 st per inch) over 5 inches. I needed to space out 16 decreases. Since I knew that 30 rows was 4 inches in my gauge, 32 rounds would be a little over 4 inches. 32 divided by 16 =2 decreases per round. So I knit a few rounds without any decreases, then started decreasing twice in each row after that until I was 6 inches from the hem of my top.

The math here is only guestimated because I did it so long ago (where did I put the decreases? I think on the sides, far from the center stitch marker, but I’m not certain).

Once you have made it to the waist, you’ll need to do the same wonky math to figure out how spread out your increases between the waist and the bust. By now I’m sure you’re a pro! And remember, the best thing about knitting a garment in the round is that you can transfer the working stitches onto some waste yarn and try it on as you go.

Once you have come to the bust, continue knitting in the round until the piece is long enough to fully cover your bust with the waist in the right place when tried on. (You can add some decreases near the top of the garment if that helps it fit better, I didn’t because I have a broad back and I wanted to keep the width). Cast off, making sure to take note of where your center stitch is.

2014-07-08 10.10.12

Straps: I did not have best technique for attaching my straps back then, so I have given instructions for what is the proper way to do it here.

Lay out your garment flat and find your front center marker. To place your straps, I suggest measuring the width at the top of the garment and dividing it into thirds. So if your top is 15 inches across, you have three sections of 5 inches each. The two outer thirds (the 5 inches on the left and 5 inches on the right) are where you will pick up stitches for the straps. The center marker should be in the middle of the middle 5 inches of the stitches.  I’ve tried to illustrate this below, with knitting needles marking the 5 inch sections:

2014-07-10 12.26.56

Pick up an even number of stitches within that left third of the front of the garment with the wrong side facing you. I ended up picking up 16 stitches which was about 4 inches not 5, because that looked better to me when I tried it on. Knit one row.

Starting with a right side row:  k2tog, k to last two stitches, ssk. Continue in this manner, decreasing two stitches in every row until you have 4 stitches remaining.

I cord:  To make the strap, do the following, switching to the double pointed needles if you have them.

Knit across, do NOT turn.

Slide stitches to the other point of the needle.

Knit across, do not turn, slide stitches to the other point of the needle.

Continue in this fashion, once again trying on the top as you go to see when the strap is long enough to attach to the back. It will probably about 15 to 18 inches from the picked up stitches (mine is 18 in, but I have a long upper torso). You can either attach this left strap to the corresponding  place on the back for a regular style tank top, or attach it to the opposite side of the back for the racer back style. I tried the regular way first, but the I cord straps rolled around too much for my liking, and it stayed in place much better when I switched to the racer back, which is what I recommend.

Once you have enough I cord, cast off, leaving a long enough tail to sew the end to the back of the garment.

Repeat the same process for the other strap. In the back my straps are attached about 7 inches apart. Then if you have made a racer back tank, take your needle and thread and stitch the I cords together where they cross. It’s not required but it really helps them stay in place. Weave in and trim all remaining ends.

2014-07-08 10.07.58

Hope you enjoyed the tutorial! Let me know if you find a good yarn to substitute for my discontinued one.

Activity Knits & Crafts, Original Knitting Patterns

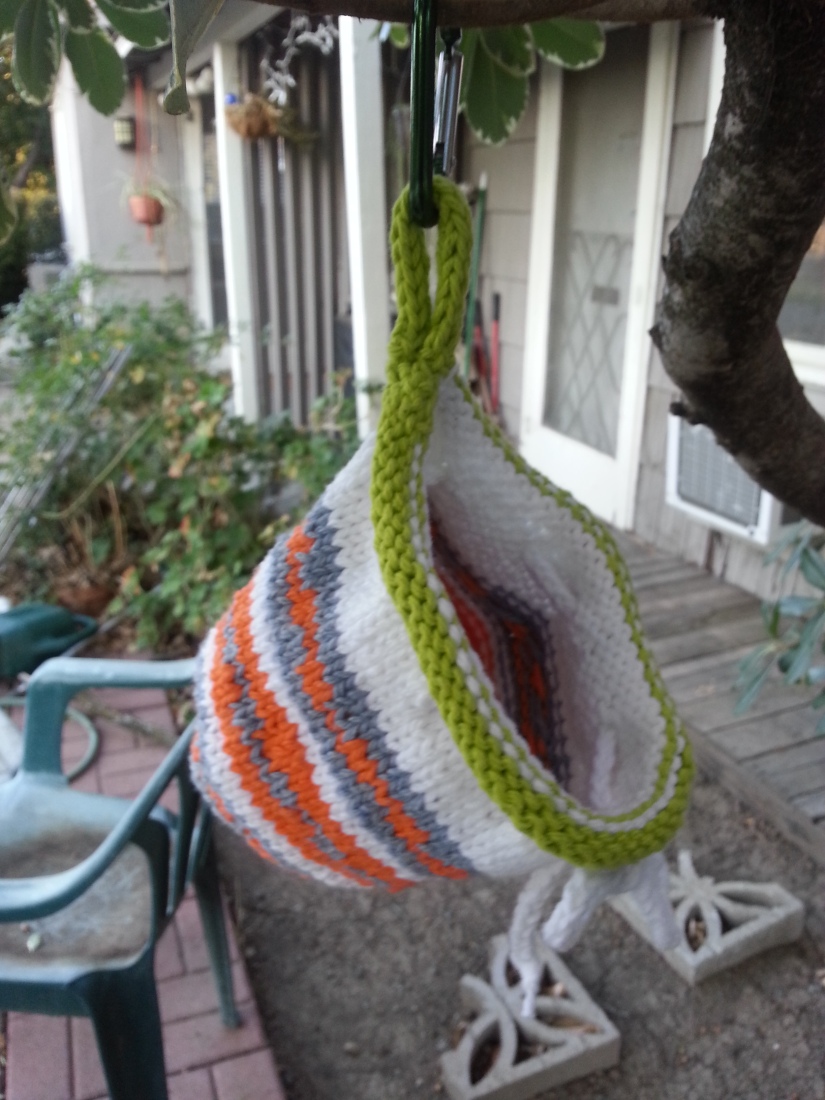
Beta: a chalk bag knitting pattern for rock climbers!

As promised, I have a new free pattern in my series of activity-related knitting. Last time it was a pattern for a colorful yoga mat bag. This time it’s pattern to make a uniquely colored chalk bag for rock climbing! Introducing, Beta:

2014-01-14 16.31.09

I tried rock climbing for the first time ever in a climbing gym about seven months ago. I was amazed at how much I liked it, and I’ve climbed there almost every week since June. I never thought of climbing as my kind of activity, but I love that it is both a mental and physical challenge. (A side benefit of the latter is that I have actually have some upper body strength now!)

2014-01-14 21.06.22

One of the things that climbers often have on their person is a chalk bag, as chalk can help you get a better grip on holds when your hands start to get sweaty. After seeing someone who had a crocheted chalk bag at the gym (she received it as a gift and didn’t know how it was made), I decided I had to knit my own. I also decided that it should match the other gear I use while top roping. So I wrote a pattern that incorporates the colors of my belay device, harness, and shoes, AND for good measure, loosely mirrors the pattern on the strap of my particular harness ( this one by Mammut) with stranded colorwork. You can kind of see all this in the photo above. Here’s a lovely (blurry) action shot of me “chalking up” with my new chalk bag:

2014-01-14 20.32.49

In climbing terms, ‘beta’ usually refers to descriptions of or advice about a particular route. I thought it was a fitting name for a knitting pattern like this one. I don’t expect that many people will want to replicate the exact colorwork that I have done, because it is so tailored to my climbing gear. But you can use this pattern as advice for how to make a chalk bag in whatever style and color you want.

[EDIT: I almost forgot to include some “in progress” pics!]

2013-12-29 11.07.052013-12-29 13.44.56

The only thing I don’t have good advice on is how much yarn you need, because I used leftovers from the Bernat Handicrafter Cotton that I had from making the yoga mat bag. I would guess that since skeins are 80 yds/50g each, to be on the safe side you’d want to have about 1/2 skein of white, 1/3 skein each of orange and grey, and 1/4 skein of green, but I did not measure or weigh my yarn so I am truly guessing. In the future I will try to take notes!

2014-01-14 16.31.22

I’m going to post the whole pattern below, but for the first time ever I have made a pattern into a free ravelry download, so if you are on ravelry, you can get the pattern there as well, and  post your own finished version!

Beta: A climber’s chalk bag pattern
Yarn: Worsted weight cotton yarn in white, green, gray, and orange
(this version was made with Bernat Handicrafter Cotton)
Materials:
One set of double pointed knitting needles, size 4
Yarn needle
Optional: stitch marker for start of round
Gauge:
18 stitches and 26 rows= 4 in. square.
Gauge is not super important as long as you can fit your hand inside the bag.
Chalk bag pattern
Cast on 56 stitches in green, divide onto four needles (14 stitches on each)
Round 1-4: knit
Rounds 5-8: switch to white, knit
Round 9: (k6, yo, k2tog), repeat to end of round
Rounds 10-13: knit
Colorwork section:
Rounds 14-21: Work Chart 1.
Chart 1
Chart 1

Rounds 22-29: Work Chart 2.

Chart 2
Chart 2
Rounds 30-37: Work Chart 1 again.
Decrease section:
Round 38: with white, knit
Round 39: (k2tog, k1) repeat until last two stitches remain, k2tog
Round 40: knit
Rounds 41-46: Repeat rounds 39 and 40 three times
Round 47: k2tog all around
At this point you should have about 6 stitches remaining.
Break yarn leaving a long tail, pull through remaining stitches. Weave in ends.
I-cord closure
With white yarn, cast two stitches onto a double pointed needle
Knit across, but do NOT turn. Slide stitches to the other point of the needle
Repeat until I-Cord is the desired length, approximately 30 inches.  Cast off.
Weave through the yarn over holes.
I-cord carabiner loop
Cast on 4 stitches in green, leaving a long tail (8-10 inches) for sewing
Knit an I-cord as for closure
When I-cord is 3 inches long, cast off stitches leaving another tail of yarn.
Using yarn needle, sew tails of yarn into the bag at the desired location.
 Liner options:
If you sew, you can make a fabric lining for the inside of the bag and stitch it in place. Otherwise, putting a zip closure plastic baggie inside or using a chalk ball will minimize the amount of chalk that falls out. A tighter gauge will also help loose chalk remain inside.

2014-01-14 16.32.42

 If you prefer written instructions to charts, I’ve typed them up below:
Chart 1 written out:
Round 14: knit
Rounds 15-16: switch to gray, knit
Round 17: (k1 orange, k2 gray, k5 orange), repeat to end of round, carrying floats in back
Round 18: (k5 orange, k2 gray, k1 orange), repeat to end of round, carrying floats in back
Rounds 19-20: with gray, knit
Round 21: switch to white, knit
 Chart 2 written out:

Round 22: knit

Rounds 23-24: switch to orange, knit

Round 25: (k5 gray, k2 orange, k1 gray), repeat to end of round, carrying floats in back

Round 26: (k5 gray, k2 orange, k1 gray), repeat to end of round, carrying floats in back

Rounds 27-28: with orange yarn, knit

Round 29: switch to white, knit

Abbreviations used:

k = knit,  yo =yarn over, k2tog =knit two together

As before, you must ask my permission before reproducing any of the content here, and when you do, cite me as the source!

2014-01-14 21.06.49

Happy Climbing!

Activity Knits & Crafts, Original Knitting Patterns, Tweaks & Alterations

Sunrise: a yoga mat bag knitting pattern

Happy 2014! I have been meaning to share this knitting pattern for a Yoga Mat Bag, and I figure the start of a new year is probably a great time to put it out there. (I’ve actually got a series of activity-related knits I’m planning to write about—stay tuned). I have done some yoga off and on for years, but this year but I hope to do even more. I think this pattern is perfect for (almost) mindless knitting on those cold January nights, and it will help you keep your New Years’ resolution to be more healthy—well ok, it may not actually help you do a sun salutation or attempt a headstand, but it might inspire and motivate you nevertheless.

Oh and did I mention this my first ever pattern??

2014-01-04 12.10.33

I never originally set out to make up my own patterns. I reasoned that it would be too much work. However, as I accumulated more years of knitting experience, I found that I was heavily modifying certain patterns. (I originally had this pattern up on ravelry as an extreme variation of this pattern but I now think mine is significantly different).

sunday yoga

I named this pattern Sunrise because that’s what the colors remind me of, and because last summer I went to an early morning yoga session in a park that was glorious, and it reminds me of then (yep, that’s me, yoga-ing on the grass). This began as a modification but morphed into my own design, particularly the color work.  It’s no masterpiece and it may have some errors, but I have decided to try and write it up, as a free pattern for you.

2013-10-01 14.29.28

Sunrise— A Yoga Mat Knitting Pattern

(Quick note—please ask my permission before reproducing any of the content here, and when you do, cite me as the source! I don’t mind sharing this pattern as long as it’s for non-commercial purposes.)

Materials: 

Bernat Handicrafter Cotton Solids & Denim (80 yds/50g each):

White (2 skeins), Tangerine, Hot Orange, Banana Yellow,  Stonewash, Hot Blue, Indigo ( 1 skein each)

One size 6 circular knitting needle (12 inches)  or double pointed needles (or size needed to obtain gauge)

yarn needle

 Gauge:

4.5 stitches per inch

To fit a yoga mat approximately 24 inches wide and 16 inches around when rolled up

Directions:

Cast on 35 stitches in White, leaving a long tail of yarn for later. Do not join yet.

Round 1: Knit into front and back of each stitch [70 stitches total]

Round 2: Purl

Round 3: Join in the round. Knit

Rounds 4-12: Knit

Round 13: Switch to Tangerine. Knit.

Rounds 14- 23: Knit

Round 24: Switch to White. Knit

Rounds 25-26: Knit

Round 27: Switch to Tangerine. Knit

Round 28: Knit

Round 29: Switch to White. knit.

Round 30-33: Knit

For remaining colors: repeat rounds 13-33. (The patter will be 11 rounds of color, 3 rounds white, 2 rounds color, 5 rounds white)

After doing this for 6 colors total, finish as follows:

Knit 5 rounds White

Eyelets: knit 2, yo, k2tog. Repeat until end of round.

Knit 3 rounds.

Cast off.

Weave in ends. Thread long tail of yarn from the beginning of the project through the cast on loops and draw together until tight. Secure end of yarn tail to the bag.

I-cord Drawstring:

Cast on three stitches.

Knit across, do NOT turn.

Slide stitches to the other point of the needle.

Knit across, do not turn, slide stitches to the other point of the needle.

Continue until you have 75-80 inches of I-cord. Cast off.

Thread one end of the drawstring through the eyelets at the top. Fasten both ends of the drawstring securely to the bottom of the bag.

2013-10-01 14.29.35

Notes:

  • I am a loose knitter, always have been. You may want to go up several needle sizes if you are a tight knitter.
  • This is a great project for using up small amounts of cotton yarn. I didn’t calculate how much I used of each skein but I don’t think it would be hard to adjust the pattern to the yarn you have on hand (a really conservative estimate of yardage would be maybe 280ish, based on other patterns?)
  • The coolest part of this design is that when you put on the strap, the bag cinches up at the top on its own. I can’t take credit for this idea, I’ve seen it on other yoga bags, but I figured out how to do it myself. Perfect for taking your yoga mat with you on a bicycle!