Tweaks & Alterations

Mustard Color Miette Cardigan

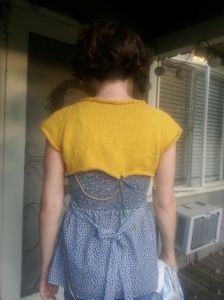
Last month, I finally finished the sweater I have been working on—just in time for Fall! Also, a near perfect color match for the yellow pear tomatoes in my garden. Always dress to match your produce, I say.

2016-08-29-12-13-51

The pattern is Andi Satterlund‘s Miette, which is available as a free Ravelry download. It’s a cropped cardigan with 3/4 sleeves and eyelete edging along the button, neck, and wristbands. It looks really fantastic over dresses:

2016-09-08-17-25-38

For once I used the recommended yarn for a pattern: Cascade Yarns Sierra (in the gold colorway, a cotton.wool blend, which is of course now discontinued. Right from the start, I made a major modification: I used the directions for the 42″ large to get a 34″ small with  gauge of a little over 5 st per inch. I was nervous about this approach, but other ravelers made it work, and it was clearly the right call.

2015-09-25 18.23.522015-09-25 18.24.01

I made several other modifications so the cardigan would fit me better. 1)  I cast on five stitches at the armholes for my shoulders. My last cardigan was a bit snug on my shoulders.  I also did waist shaping at the sides instead of bust darts, with a decrease of sl1st, knit, knit, k2tog beneath each armpit every 4th row.  I did bust darts on my  first cardigan, but I have since realized I really didn’t need them. Finally, I added one repeat of rows 70-80 for length, because I have a long torso and I didn’t need this cardigan to be super cropped.

2016-08-20-17-13-30

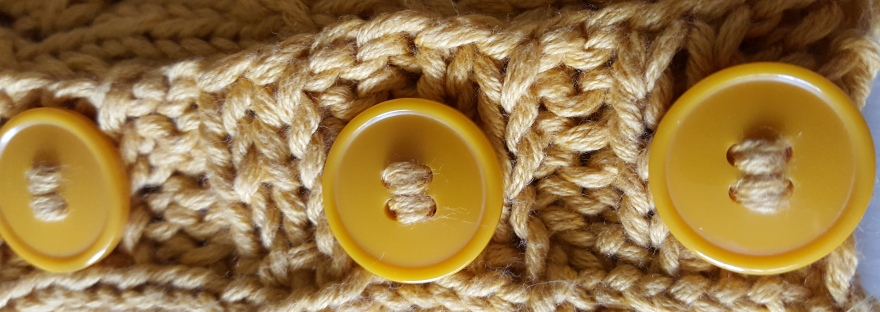
I was quite fortunate to find great buttons for this cardigan! They were 3/4” buttons instead of the recommended 5/8” but I wanted completely matching buttons, and these were the best ones. I used the same video tutorial to make sure they would be secure.

2016-08-22-10-03-02

After all of this work, it felt like the blocking took forever! I guess the cotton/wool blend yarn is not as fast to dry as some other yarns.

2016-08-22-10-02-49

I think this is my favorite sweater that I’ve made so far. And all though it took me a little over a year to finish, I got it done just in time for Autumn colors and cooler temperatures.

Here are more dorky photos of me wearing this great sweater:

2016-09-08-17-25-36

2016-09-08-17-25-18

I really like it.


Botanical Knits & Crafts, Nerdy Knits & Crafts, Original Knitting Patterns, Tweaks & Alterations

Lovebirds: An Owl Pillow

What gift do you give to two crazy lovebirds (known to friends as the Owls) when they get married in a spectacular DIY ceremony in a field behind a farmhouse? Well, if you are me, you give them this:

2016-05-29 12.33.21-1

An Owl Pillow, complete with button eyes, a leafy tree, and the date of their wedding.

As with nearly all of my knitting projects, this one is cobbled together from several different patterns and adapted on the FLY. When a knit has to fit, I measure and gauge swatch and carefully plan everything out. When it doesn’t well—I WING it.

Pattern notes and bird puns below!

2016-05-24 11.02.52

To begin, I used this free calendar numbers chart to place the date at the bottom: 5 * 29 * 16. I was knitting from my stash, trying to use up the brown and green wool from Farmhouse Yarns that my aunt gave me nearly a decade ago (same yarn that I used for my Owl Mittens!). Since I had two dye lots of brown, I decided that the ground, tree and owls would be the darker brown, while the border and the sky would be the lighter brown. It worked. WHO is pretty good as guestimating yarn? I am.

2016-05-26 17.00.55

The main pattern I used was Dr. Owl from Rowan, which is available for free. But since I was doing colorwork and adding the date at the bottom. I had to make a lot of adjustments, let me tell you. The date at the bottom was stranded knitting, but the tree and the owls were intarsia. The leaves were knit separately and sewed on. And did I mention the original pattern is in the round and I knit this flat? Keeping track of all the various yarn balls and the altered stitches was not exactly a HOOT.

2016-05-28 12.10.45

Furthermore, I added a second owl to the pattern. I couldn’t have just one for a wedding pillow—I needed  a PARLIAMENT! When the piece was as tall as it was wide, I finished and blocked it. It was about 14 inches square—conveniently the size of a pillow form.

2016-05-29 12.34.24

2016-05-29 12.33.30

Sewing on the leaves and eyes was pretty easy and really made this piece SOAR. However, I had no time or yarn leftover to knit a second panel for the back, so it was off to the fabric store for a pillow form and some brown fabric remnants.

2016-05-29 12.33.48

Confession: I am a crappy seamstress. It’s just not really my thing most of the time. But I managed to get two wonky looking back panels, which are held together with velcro, so that the whole pillowcase can be removed for washing if necessary. And it OWL came together a few hours before the wedding!

2016-05-28 18.24.11

And there you have it. The flappy happy couple texted me later to say that they loved it—sometimes it’s risky to make a knitted gift without input from the recipients, but in this case it worked out.

As a side note, I didn’t realize just how long it had been since I posted in this blog! I was thinking it had been 2 or three months, but it’s more like 7. I’ve been teaching a lot of courses and I just don’t have the time on the weekends that I used to in grad school. But I have a few more little projects that I will share here in the future!

Costumes, Nerdy Knits & Crafts, Tweaks & Alterations

Ten MORE of the nerdiest crafts I have made

Project #5 preview: My DNA is showing!

In 2012, I shared a list of the Top Ten nerdiest crafts I have made. Recently, I realized I have made enough nerdy crafts since then to have a second top ten list. (And who doesn’t love a good listicle? I am a total sucker for them.)

Here’s the list! I have written about most of these before, but #5 and #1 are brand new projects!

10. Harry Potter Cat Toy20120821_174144Details: Knit in August 2012 for a couchsurfing host, first blogged here, based on this pattern.

Nerd Alert: The recipient had two cats named Harry and Ron (brothers!), so of course their cat toy had to be knit in Gryffindor colors. I also gave it a mane, because of course I did.

Bonus Pics:

Harry caught the snitch, er, mouse in his mouth.

Honorable Mention: I recently knit a purple washcloth with the Knight Bus on it. Maybe the pattern did not turn out very visible…OR maybe, the Knight Bus cannot be seen with muggle eyes. You decide.

2015-01-19 14.42.54

9. Sweatered Shetland Pony Cozy

2014-11-17 13.24.17Details: Knit in November 2014 for a fellow knitting friend, blogged here, pattern details here.

Nerd Alert: Many knitters make sweaters. A select few knit sweaters for Shetland Ponies. But to my knowledge, I am the only one who had made a sweater for a knitted pony on a beer cozy.

Bonus Pics:

one pint of ale, please.

8. Katniss Cowl

2014-03-29 17.54.23Details: Knit in March 2014 for myself, blogged here, ravelry pattern notes here. Based on the cowl the main character wore in the second Hunger Games film.

Nerd Alert: Did I wear this to see the most recent Hunger Games  film? Yes, yes I did. Also, it’s still held together at the side with my cable needle.

Bonus Pics:

2014-03-29 17.59.072014-04-02 14.10.252014-04-02 14.06.47

7. TARDIS PillowTime And Relative Dimension In Spacebigger on the OTHER side!Details: Knit in December 2013 for my brother, blogged here, pattern details here.

Nerd Alert: You don’t have to be a Doctor Who fan to enjoy this pillow across all of time and space…but it helps. I blame/thank my brother for introducing me to the show. (Also—notice how it’s bigger on the other side!)

Bonus Pics:

just a little blue box

6. Adventure Time Washcloth

IMG_1935Details: Knit in December 2012 for my brother, blogged here, pattern from here.

Nerd Alert: Confession—I haven’t seen Adventure Time. I know this is Finn. His face is a little gray but he doesn’t seem to mind.

5. DNA Double Helix Legwarmers

2015-01-07 16.49.17Details: New project! Knit in January 2015, pattern details here.

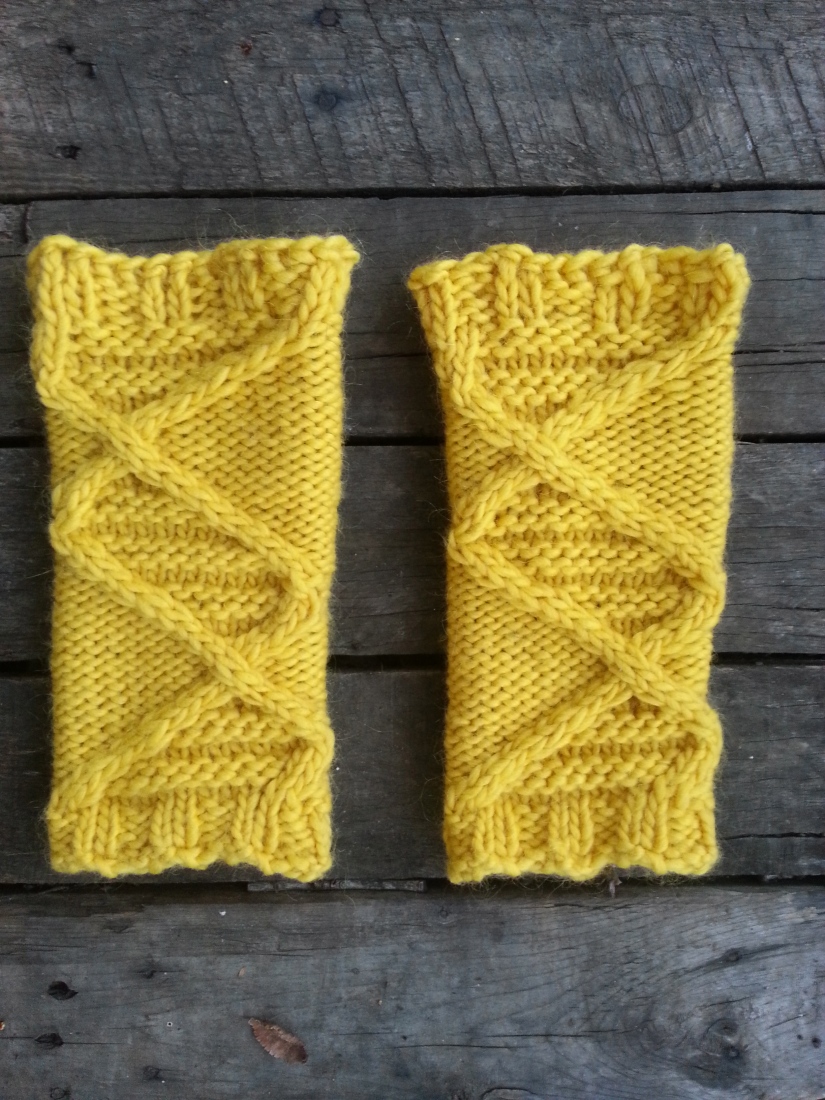
Nerd Alert: That’s right—that’s a double helix cable! Expertly charted, or so I have read. The original pattern was for a scarf, but I added some ribbing to the top and bottom, knit two of the pattern at a time, and stitched them together in the back to create legwarmers. (And yes—I wear these! To the gym! In public!)

Bonus Pics:

Bringing back the 80s.

2015-01-03 17.18.522015-01-06 17.44.352015-01-07 16.47.402015-01-07 16.49.32

4. Battlestar Galactica T-Shirt

2013-10-01 14.36.33Details: Made in August 2013 for myself.

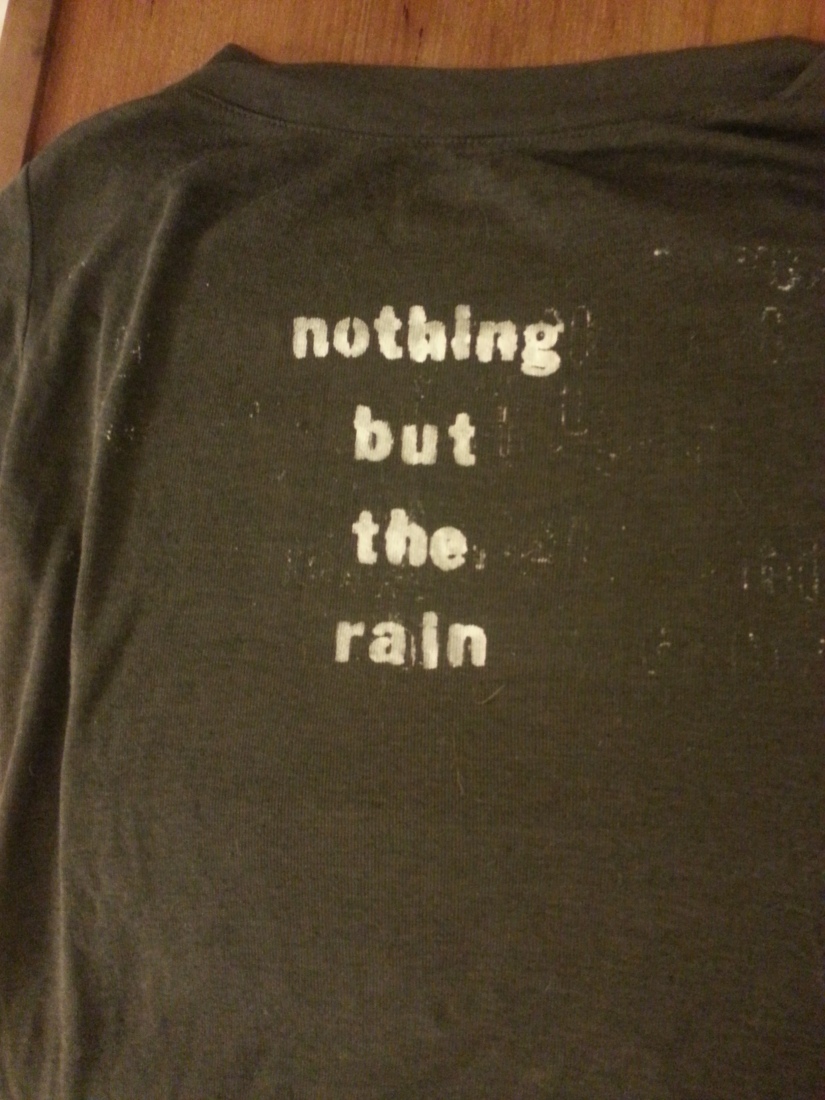
Nerd Alert: Not only did I stencil the signature phrase “So Say We All” from BSG onto a t-shirt—I also made a second shirt for my friend with the phrase “Nothing But the Rain,” an even more obscure reference. Nerdy stenciling at its best.

Bonus Pics:

Starbuck, what do you hear?

2013-09-05 11.55.452013-08-23 20.12.172013-08-23 20.33.092013-10-01 14.36.30

3. Sonic Screwdriver Chapstick Cozy

2014-01-22 10.54.33Details: Knit in January 2014 for myself, blogged here, pattern here.

Nerd Alert: Not only did I make Doctor Who’s sonic screwdriver to hold two chapsticks…I may have shown it to a cosplaying Tenth Doctor I ran into. Just saying.

2014-01-20 10.12.272014-01-19 22.04.122014-07-16 14.44.59

2. Cylon Potholder

20130101_113650Details: Knit in November 2012 for the friend who introduced me to Battlestar Galactica, blogged here, pattern here.

Nerd Alert: Before I saw BSG, I dismissed it as Top Gun with Robots in Space. That is, until my friend convinced me it was about much more than that (like the ethics of what it means to be human—I was sold) and I gave it a chance. To thank her for this, I made her a potholder that not only had a creepy red glowing cyclon “eye” but the words “FRACK” and rounded corners at the top. It’s a terrifying potholder. I’m that kind of friend.

1. The Dungeon Master’s D4 Dice Bag2014-12-21 14.33.06Details: New Project! Knit in December 2014 for my brother, pattern here.

Nerd Alert: I’ve never played Dungeon and Dragons, but my brother leads several D&D groups and has need of dice transportation! Not only did this project require maths to get the exact size of triangle, it also required sewing a zipper. I stitched the numbers in different embroidery threads to make it extra colorful!

Bonus Pics:

(You should be able to get an idea of how to sew the zipper in from these photos)

2014-12-19 17.27.422014-12-21 13.17.072014-12-21 13.21.072014-12-21 13.42.202014-12-21 14.33.30

While I enjoy making things for myself, the best part of being able to knit something nerdy is having something fun to give to the lovely nerdy people in my life. Here’s to ten more nerdy knits!

2014-12-25 10.18.50

Botanical Knits & Crafts, Original Knitting Patterns, Tweaks & Alterations

2015: Out with the New and In with the Old!

2015-01-11_154351The title of this post pretty much sums up my goals for the making of things in the coming year. At its most basic, “out with the new and in with the old” means as much as possible, I’m going to try to use what I’ve got on hand or what I can get second hand to knit, sew, costume, or otherwise craft, instead of buying new materials. Not exclusively, but as much as is feasible. I already do this a lot, but I wanted to be more intentional about it. (I promise this won’t become one of those smug greener-than-thou sort of projects. If I need to buy new buttons, I’ll buy some new freaking buttons!)

Here’s what this kind of making has looked like this month:

Creative Stash Knitting

challenge: How to knit with what you’ve got when your yarn doesn’t fit the pattern.

2015-01-11_162626When you have been knitting for many years, you develop a yarn stash. Extra yarn left over from previous projects, yarn that friends or family gifted you, yarn that you bought for a purpose never fulfilled—they all live in the stash. My stash lives in a small underbed storage box.

I’m trying to get even more inventive with the ways I can knit from my stash. This hat is one of those projects. I knit with small amounts of a wool-and-mohair-blend yarn I had in a few colors in my stash. I used the quick and very lovely pattern easy ombre slouch hat by Paul S Neary. Well, sort of. I weighed the yarn on a scale realized I did have enough of the green yarn to do the full pattern. So I just did the colorwork pattern until I ran out of green. And it still looks good.

The only disadvantage to this strategy is that I’m going to have to be flexible with the outcomes. My hat came out far less slouchy because I omitted extra rows of the pattern. I’m going to soak and block it, but it doesn’t seem to quite fit over the sheer volume of my hair now.

2015-01-11_162724

I think it may need to be a gift to someone else, and I’m ok with that.

Thrifted and Salvaged Crafts

challenge: How to make useful and beautiful things without buying new stuff.

2015-01-11_141850I think the hardest thing about trying not to buy new things is that I have to be patient. I have to forgo the instant gratification for the long game of keeping an eye out. It’s probably not a bad trait to work on. At any rate, being patient was what led me to find and refashion these chairs.

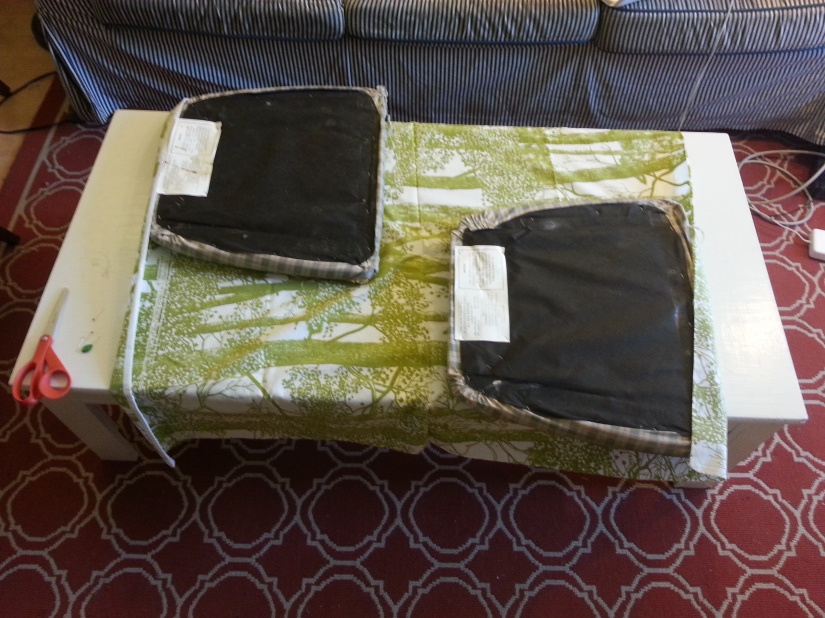
2015-01-11 12.38.25I had been using folding wood chairs in my kitchen for years when I spotted this guy and its twin at my dumpster. I hauled them inside just before a rainstorm. They were not in good shape. But my neighbor friend had assured me that wooden chairs with fabric covers are easy to re-cover.

2015-01-11 12.39.34-1I found my “fabric” at the thrift store. It was a large pillowcase with a green tree print that I bought for 60 cents.

2015-01-11 12.38.432015-01-11 12.40.12

If you want to do this project, make sure you have a screwdriver that fits the screws on the underside of the chair, scissors, a staple gun, and enough staples. (I borrowed the staple gun and ran to the hardware store to get staples). A seam ripper and an iron are also handy if your fabric is being repurposed. And a flashlight or headlamp is a plus if your screws are hard to see.

2015-01-11_132940I didn’t “measure” exactly but I did make sure there was enough fabric to cover both seats.

2015-01-11_141331Stapling is the most fun part. Just make sure that you don’t cover up the holes where the screws are going to go back in.

2015-01-11_1528002015-01-11_1528082015-01-11_153222Screwing the whole thing back together is the most annoying part. Again, patience is key. Trim any excess fabric that is in your way.

2015-01-11_154512It’s kind of ridiculous that this whole project cost under a dollar, considering how much I like the end result.

Repurposing Unfinished Projects

challenge: How to revisit the incomplete objects from the past and find a place for them in the present.

2015-01-11_164450The dirty little secret of any maker of things is the UFO—the unfinished object. We all have at least one— a project that can’t be completed but also can’t be tossed. They are hidden away for weeks, months—or in my case, ten years.

If I am really going to go “out with the new and in with the old,” I have to revisit my UFOs. And I did. To do so, I first I had give up what I had planned for this piece to be back them and think about what it could be here and now.

2015-01-11_162953What you see here is the front piece of a completely imaginary argyle sweater. I knit it in 2005—specifically, in February and March during the weeks I was in the hospital after a really bad car accident. I must have asked someone to bring me some knitting needles and yarn from home, but I don’t remember. I do remember how I spent ages planning and designing and knitting this blue and green argyle pattern in my hospital bed while I was unable to walk. I was completely determined to knit myself a sweater.

2015-01-11_163006But this sweater was never going to exist, because I had no idea what I was doing. I was a beginning knitter and ravelry did not exist (neither did YouTube). You can see how my stitches were uneven, and how the blue and green yarns are thicker than the white yarn and did not stay flat. I also had no concept of how a sweater was constructed. And even I can’t make sense of my knitting notes now, although the argyle chart is pretty solid:

2015-01-17 11.40.36

2015-01-17 11.40.49So I knit this whole pseudo pattern, and then it sat, in a bag, doing nothing. As I got better at knitting, I became convinced it was unredeemable. It was a symbol of knitting failure. That is, until I rediscovered it while cleaning last weekend. This time it didn’t remind me of failure—I looked at it and remembered how much I had loved it and how it had been a bright spot in my life during a really dark time. I also still had the borrowed staple gun in my possession, and I had an idea.

2015-01-11_1633572015-01-11_163410

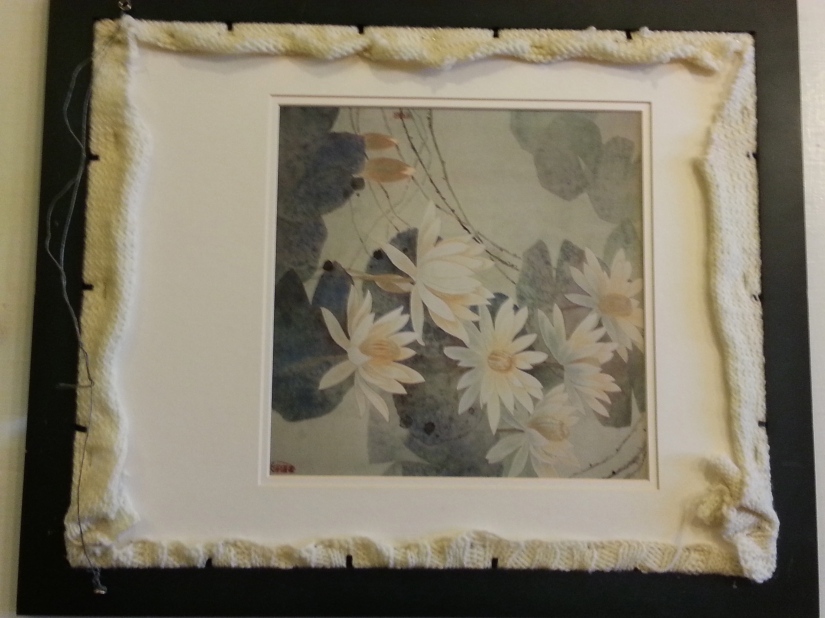
In keeping with “out with the new,” I went to the thrift store. I found a large framed image there for $2.50. The important thing about the frame was that had a removable back (those little black tabs around the back are always a good sign). I brought it home.

2015-01-11_164425I then lightly steam blocked the argyle piece, stretched it across what had been the print inside the frame, and stapled it into place. With some careful wiggling, I got it back into the frame and secured with the black tabs.

2015-01-11_172355Now my long abandoned argyle sweater project is a framed and mounted work of fiber art on my wall. And I can’t even describe how much joy I feel when I look up at it. Yes, I was crazy stubborn to try to design and knit my own sweater with no experience from a hospital bed. And yeah, it’s wonky and full of flaws. But I love it— I poured myself into it and I can see the beauty in it now. What was old suddenly looks new.


Tweaks & Alterations

The green cardigan of 2014

I knit a sweater! It took forever. But it’s finished and I love it.

2014-12-08 16.34.29

This is my version of the Mrs. Darcy cardigan. According to my ravelry project page, I started it on January 5, 2014. I sewed the final buttons on December 7, 2014.

2014-01-11 16.56.38 The post where I first described this sweater is here.

Everything went quickly at first. I finished the sleeves in January, but I stalled in February because I realized that I would need to modify this short, deep V neck cardigan to fit my long torso. I ended up using Wakenda’s modifications to the pattern. The funny thing is, her version looks very different from the original pattern—the V isn’t very deep. But I also added lots of extra length, so it actually ended up looking a lot like the original pattern!

2014-12-02 17.15.53

Here is it without buttons. I essentially made an extra long size small, blended to a medium nearing the shoulders. It used a little under 5 skeins of Cascade 220.

2014-12-07 22.23.27This was my first time ever sewing buttons onto knitting. I used this video tutorial and it helped quite a bit. You really have to make sure you compensate for the thickness of the sweater when you sew them on, especially if you make a cardigan that fits as snugly as this one. You also have to remove the cat before sewing them on. Obviously.

2014-12-07 23.37.16

Fun fact: since I’m a lefty knitter, the buttons are on the “wrong” side for a woman’s sweater! It’s knit in the round, you see. Yet another quirk of left-handed knitting.

2014-12-08 16.39.17

More pictures:

2014-12-08 16.31.59

from the front.

2014-12-08 16.33.36from the side.

2014-12-08 16.33.15

from the back.

2014-12-08 16.38.06

unbuttoned.

2014-12-08 16.39.29

detail of the bust darts I added (it does seem to improve the shaping) and construction of the shoulder. I had never done a bottom up sweater, so wakenda’s description of joining sleeves was much appreciated.

2014-12-08 16.39.44

I added an extra inch or so at the armpit when I seamed it together, mostly because when I started this sweater I did not have any muscle from climbing, but now I do, and those shoulders were gonna be tight (the forearms are a little snug, but that’s less of an issue).

2014-12-08 16.40.18

It takes me forever to finish a big knitting project like this, but I’m always happy with the results. Here’s to tacking another sweater in 2015!


Original Knitting Patterns, Quick Knits & Crafts, Tweaks & Alterations

Knitting Recipe Remixes: Shetland Pony Drink Cozy + Handbook Fingerless Chevron Mitts

Recipes. I use them all the time in cooking—I’ll certainly be consulting a few for the Thanksgiving dishes I’m making next week. However, I usually see the ingredients and directions as more suggestions than mandates. And I often combine elements of different recipes to get the final results I am looking for. I like to remix my recipes.

Lately, that’s what I’ve been doing with my knitting as well. It’s finally knitting weather here in California, and I have been working on projects big and small. But I can’t resist remixing the recipes—combining elements of two patterns to get the finished object I really want. It’s one step above following a pattern with a few modifications, which is easy but can only transform the pattern so much. And it’s one step below writing your own pattern, which is great for creating exactly what you want but takes a lot of time and effort to do properly.

I’ve got two remixed knitting recipes for you. Both are small, relatively quick knits.  They all involve bits of colorwork, so they are perfect for stash busting. They also make great gifts—and you won’t find them anywhere else!

Shetland: The Pony Drink Cozy (ravelry)

2014-11-17 13.36.16

If you have not seen the video of Shetland Ponies Wearing Cardigan Sweaters, you should really go do so now. I’ll wait.

shetlandsweaters

My friend and fellow knitter, who loves shetland ponies and this video in particular, had a birthday recently. This was the gift I gave her.

Ingredients

20-25 yds main color, worsted weight

10-15 yds contrasting color, worsted weight

2-3 yds scraps of three colors for sweater, sock or lace weight

knitting needles (sz 7 or whatever gives you gauge)

tapestry needle (I used metal not plastic)

Patterns Used

f. pea’s beer cozy (raverlyblog)

Jóhanna Hjaltadóttir’s Hestapeysa sweater (ravelry, pdf)

Directions

The basic idea is to knit the beer cozy pattern FLAT with the pony chart from the sweater centered in the middle. Cast on 32 stitches and work in ribbing as directed for beer cozy. (I don’t have many in-progress shots but you can at least see how it looks flat):

2014-11-17 13.24.17

After work the ribbing from the beer cozy, start the pony chart. To center it, do some basic math:

32 (beer cozy width) – 18 (pony chart width) =14 stitches /2 = 7 stitches of main color on each side

Complete chart (I added one contrasting color stitch extra on the head to give it that shetland mane look). Add 3 more rows, then finish with top ribbing (if you skip these rows, the pony’s head gets squished into the ribbing). Bind off in ribbing and leave a 12-15 inch tail for sewing.

Thread your tapestry needle with one of the sweater yarn scraps (if you have different thicknesses of yarn, start with the thickest). Outline the outer edge of what will be the cardigan, stitching around the lower neck, partway down the front legs, and half way down the back. With the second color, stitch several parallel lines diagonally across the sweater. With the third color, stitch several lines perpendicular to the first set of lines. This will create the illusion of a sweater. Be careful to keep the tension on the yarn as even as possible, because the whole thing needs to stretch over a glass.

2014-11-17 13.35.21

Weave in and cut all the ends except the long main color one at the bind off edge. With tapestry needle, use kitchener stitch to connect the two edges of the beer cozy. Weave in and cut this end, then admire how your drink sweater is a pony wearing its own sweater!

Handbook: Fingerless Chevron Mitts (ravelry)

2014-11-19 15.33.39

A few weekends ago, I went to this conference, where all of the presenters were contributors to an upcoming Oxford Handbook. As I listened to the presentations, I worked on these fingerless mitts. Much like publishing a handbook, with these fingerless mitts I had to take a lot of different pieces—different colors, different lengths—and try to blend them into a seamless finished product.

Ingredients

100-120 yds main color, worsted weight

5-20 yds each of four contrasting colors, worsted weight

double pointed needles (size 6 or whatever you need to obtain gauge)

tapestry needle and patience

Patterns used

Maggie Smith’s Fingerless Mitts (ravelry)

Kat Lewinski’s Those Zig-Zag Mittens (ravelry, blog)

Directions

Just a heads up—this recipe involves a lot of weaving in ends! But other than that its fast and satisfying. I had never done a chevron (zig zag) pattern before, and I really enjoyed it.

Before you cast on, decide how many chevron rows you want of each color and the order that you want them in. You may want to place strands of each yarn next to each other to see what you like best. Make sure to include at least one section of the main color!

Cast on—you can either cast on 44 stitches as the Zig Zag patterns says, OR you can cast on in a higher or lower multiple of 11 for bigger or smaller hands. Just know that chevron is very snug, so it can’t be too small as it won;t stretch as much as stockinette. I have small hands and I knit loosely, so I cast on 33 stitches and then did only three total repeats of the chevron pattern, not 4: (k2tog, k3, M1L, k1, M1R, k3, ssk).

Important tip! On the end of first round of a new color, knit in pattern to the last stitch, then grab the tail/non working yarn from where you joined the new color, and knit that together with the working yarn on the last stitch of that first round. It will help reducing the hole that tends to occur at the color change. (I didn’t figure this out until rather late in the knitting process.)

2014-11-19 15.35.14

After you switch back to main color, do one more round in the zig zag mitts pattern. Then switch back to the fingerless mitts pattern to make the thumb increases. But instead of doing increases until you get to the designated number of stitches as that pattern says, just add 14 to whatever number of stitches you started with. In my case, 33 + 14 = 47 stitches is when I did the bind off for the thumb.

Now you have a choice—you can increase or decrease your stitch count to a multiple of four and then do the ribbing at the top like the fingerless mitt pattern says, or you can keep your stitch count and do a small repeat the chevron stitch at the top instead. That’s what I did.

2014-11-19 15.35.28

If I had to do it over again, I might have begun the bind off a bit sooner. Just make sure to do several purl rows before you bind off, as knit stockinette will tend to curl. I haven’t blocked these yet so I’m hoping some of the curl in mine will come out.

Further option:I also added a few more rounds at the thumb—two knit rounds, four purl rounds, then bind off.

2014-11-19 15.34.20

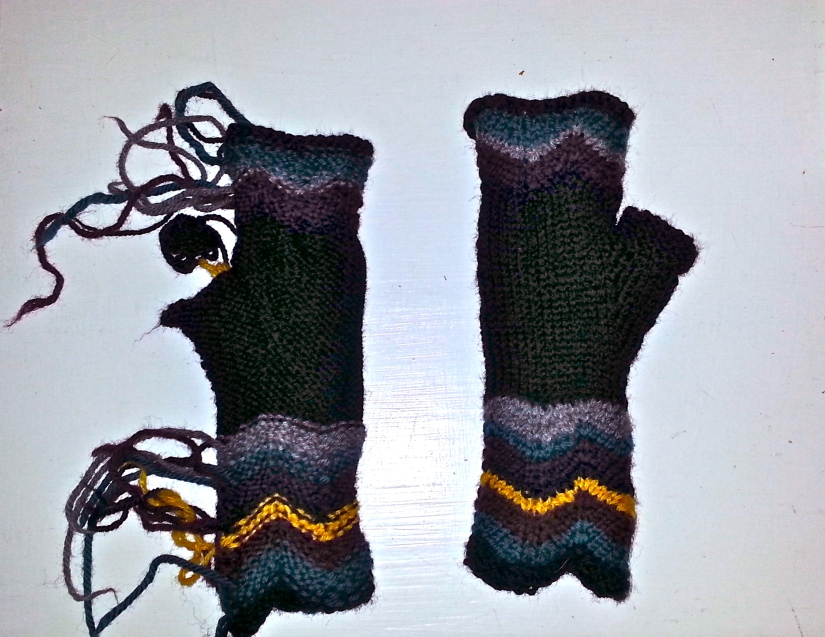
Are you ready for the least fun part? Because While your fingerless mitt will look like this on the outside…
2014-11-18 23.34.07

It will look like this on the inside. So: get your tapestry needle and start weaving in all those ends. If there are any gaps occurring where you changed color, now is the time weave through those spots so they are less visible. Have patience, it will be worth it.

2014-11-19 15.35.07

I was too excited and I photographed these mitts before blocking—but look at those lovely colors! There’s something about chevron that looks classier than stripes. It’s nice to have a stash busting project that uses the leftover bits of colorful yarn that I love.


Costumes, Nerdy Knits & Crafts, Tweaks & Alterations

Katniss Cowl: A Hunger Games Knit

Last week I finally finished my version of The Huntress Cowl by LollyKnits! Here is the finished item, which resembles nothing so much as knitted armor:

2014-03-29 17.54.23

I knew that I wanted to knit some incarnation of this piece since I saw Hunger Games: Catching Fire back in December. Non-knitters might not recall what Katniss Everdeen wore in the opening scenes (images here and here), but knitters were all over it.

2014-03-29 17.58.04

I started this project way back during the Ravellenic Games, but it felt like the odds were not in my favor—that is, it took forever to complete it to my liking. However, the two biggest issues with the fit ended up canceling each other out, which left me with a garment I’m actually quite happy with.

My Huntress Cowl

When I started this project, the charcoal gray colorway in the recommended type of Lion Brand yarn was long sold out, so I went with oatmeal instead. I then had to do a lot of adjusting to account for my loose knitting gauge and my long torso. I had never knit in herringbone stitch before and the pattern gives gauge in stockinette, so I wasn’t sure if my swatch was accurate.

cowl in progress

I ended up casting on 60 stitches on size 15 needles instead of 44 stitches on size 17s, and decreasing every other row to get longer, wider triangles for the front and back piece. However, this made the triangles way too long, so when I had about 30 stitches left I started decreasing on every row.

2014-02-27 12.10.06

Pro-tip: After wet blocking, you can tell that your item is dry when the cat decides to sleep on it. You can’t quite see it in this photo, but the piece that Jo is sleeping on came out a little bigger than the other one, because I got better at herringbone stitch as I went along. It worked out fine in the end though.


For the neck piece, I decided to use a make a different version from the original by using a tutorial called the Hob’s Collar. I just wasn’t sure about having a super stiff rope collar in a knitted cowl. The image tutorial has detailed instructions, but it basically walks you through weaving the yarn around three circles of fabric, cut from a small shirt.

2014-02-26 16.35.082014-02-26 16.46.482014-02-26 17.15.252014-02-26 21.03.27

I ended up cutting up two shirts, one teal and one white, because my fabric was so thin. I think it worked best to have a white shirt because it makes it harder to see any parts that I didn’t completely cover with yarn. The results looked pretty great! The main downside was that it was even floppier than I imagined—it didn’t really hold this shape when it was around my neck.

2014-02-26 21.02.35

I was running low on yarn at this point, so after picking up stitches around this neck piece, I only increased to 80 stitches for the shoulder connecting piece, even though I have very broad shoulders. And even with loose knitting, it was very tight.

Soooo then I let these three pieces linger in my project bag for like two weeks. I am not a fan of seaming, and knowing that I had some wonky pieces to put together discouraged me. But guess what? When I finally picked up the sewing needle, I realized that I could tuck most of the shoulder piece stitches UNDER the collar, it would make the collar stiffer and take up most of the portion that was tight on my shoulders. There was still plenty of length in the triangles for the whole garment to work. So that is exactly what I did. I did end up sewing some rather wide triangles to a narrow collar, but it worked out pretty well.

2014-03-29 17.59.07

Above, I’m wearing the cowl with the larger triangle in the back. Below I’m wearing it with the larger triangle in the front. I think it works both ways, but I prefer the slightly larger triangle in the back.

2014-04-02 14.06.47


In both photos I’m using a cable needle to pin the pieces under my arm. At first it was because I was traveling and that was all I had, but now I kind of like it. When I wear it with the bigger side in front, I have to overlap the pieces differently to get a good fit.

2014-04-02 14.10.25

I had hardly any yarn left when I finished seaming, so if you’re going to make major adjustments bear that in mind! I realize that it’s Spring now and no one is really making wintry knit objects, but it was cool and rainy last week so I got to wear this more than once. If you’re willing to make the adjustments, it can be a really fun piece to wear!

2014-03-29 17.54.45


Botanical Knits & Crafts, Holiday Knits & Crafts, Tweaks & Alterations

Green Knits for Spring, Remixed

Happy First Day of Spring! To celebrate the Vernal Equinox, I give you three green knits, each re-imagined in some way and ready for transitional weather:

2012-11-15 23.20.122014-03-17 11.02.262014-01-11 16.56.38

Fingerless mitts: Vancouver Fog

2012-11-15 23.21.59

This is my version of Vancouver Fog by Jen Balfour. Fun fact: this soft, blue green yarn used to be a different knit entirely. A long time ago, back in the loose knitting days I’ve mentioned before, I knit Calorimetry from Knitty’s Winter 2006 issue. It came out poorly:

DSC03420

See how loose it was in the back? It barely stayed on my head, and that was before it stretched out. I even overlapped the ends and did two buttons to try to keep it in place, to no avail.

DSC03415_medium2

Fast forward a year or so and I was planning to make some fingerless mitts for a friend’s birthday. She chose the Vancouver Fog pattern, with its beautiful cable pattern, and I just knew that this was the right yarn for the job. So I frogged Calorimetry and started remaking this muted, spruce colored worsted weight yarn into hand warmers.

Photo on 10-13-12 at 9.42 AM

I remember being disappointed that there wasn’t a gauge for this project, but I had learned my lesson about my loose knitting—so instead of the recommended size 7 needles, I used size 3! I know! I also cast on 4 fewer stitched than recommended. Yes, I went that tight! But the results were spot on:

2012-11-15 23.21.06

These fingerless mitts were a good fit, and I got to practice some cool cabling techniques. I’m quite pleased with my decision to frog the original pattern.

BEFORE
BEFORE
AFTER
AFTER

Fingerless mitts are great for those times when it’s too cool out for bare hands, but not cold enough for gloves!

Leafy Skirt or Mini Cape: Entry Level Capelet

2014-03-17 11.02.26

This is a really old project, but the loose knitting didn’t matter with this very simple garment. It’s the aptly named Entry Level Capelet by Haley Waxberg. It’s a good pattern for a hand dyed variegated yarn like this one. The color pooling was not even, but that gives it an interesting self-spiraling effect at the top. (side note: you can tell how old the photo below is by how long my hair was!)

DSCF0354_medium2

However, I almost always wear my version in a different way now—as a skirt! The yarn was just a little too scratchy to be touching my arms/neck, so I made an I-cord and wove it through the top band, then tied the I-cord at my waist. I added some leaves because, you know, I love leaves—I have no idea where I got the pattern for them, but the standard knitted leaf pattern seen here.

2014-03-17 11.04.37

I still wear this skirt fairly often—it’s great with a pair of leggings, and it’s nice when it’s just a little bit cool out.

2014-03-17 11.05.33

Sweater in Progress: Mrs. Darcy Cardigan

2014-01-11 16.56.38

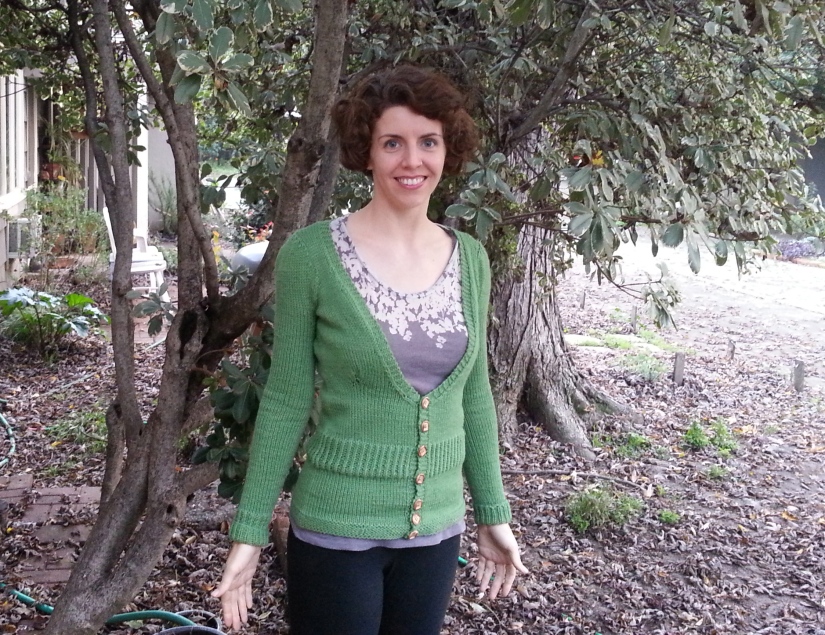
My final green project is still on the needles! It’s the Mrs. Darcy Cardigan by Mary Weaver in Knits that Fit (and unlike most of my knits, this one required checking out a book at the library).With a title like that, it’s only appropriate to do a lot of tweaks to the pattern, right? It may not be obvious from the photo above, but I’m making the arms much longer than the pattern calls for to accommodate my arms and shoulders. I wish I had known before I made these that to get the true twisted rib, others knitters knew to p1 to back on the wrong side, because the pattern doesn’t indicate this and the ribbing on the cuffs won’t look as sharp as it could.
2014-03-19 22.19.10

I’ve since moved on to knitting the body. You’ll have to forgive the blurry action shot here, but at least it captures the true green of the yarn! (It’s Cascade 220, in, you guessed it, Spring Green.) I decided that since I have a long torso that is quite wide at the top, I’d use ravelry user wakenda’s modifications to get a gentler slope on the cardigan’s v neck, which I think will still be quite striking.

2014-03-19 22.19.40

I’m always a little hesitant to blog about my works in progress, but this partway knit green cardigan is too verdant not to share, and cardigans are great for spring weather. Hopefully this post will inspire me to finish it soon!

*bonus postscript announcement* If you read this far, you might enjoy the fact that I recently added categories to the blog, and then went back and retroactively categorized every past post! I created the categories based on what I seem to write about most, so you can find similar posts without having to scroll through past years.

Tweaks & Alterations

First Attempt at Felting!

I made a gray felted cap—check it out!

2014-02-23 16.54.33

I’ve been putting off the final seaming on my latest knitting project (The Huntress Cowl worn by Katniss in the second Hunger Games movie), so instead I’m going to share my first ever felted item with you. Doing so requires me to reveal the kind of project I never thought I would share on this blog: a bad finished object. That’s right—I’m going to show you a total flop, and how I turned it into a perfect fit.

Confessions of a Loose Knitter

Way back in the summer of 2009, while I was on a research trip in Southern California, I pulled out a ball of gray yarn, size 9 needles, and knit up  Couvercle, a brimmed hat from the summer 2008 issue of Knitty. It turned out way too big:

Photo 290

It stretched out even further after these photos were taken. Some of my errors were those many novice knitters might make—for example, I used a heavy worsted weight wool yarn instead of a bulky cotton yarn like the pattern called for, because I was away from home and wanted to use the yarn I’d brought. Rookie mistake. But even if I’d used the appropriate weight and fiber of yarn, my hat would have still turned out too big —because, as I have since learned, I Am A Loose Knitter.
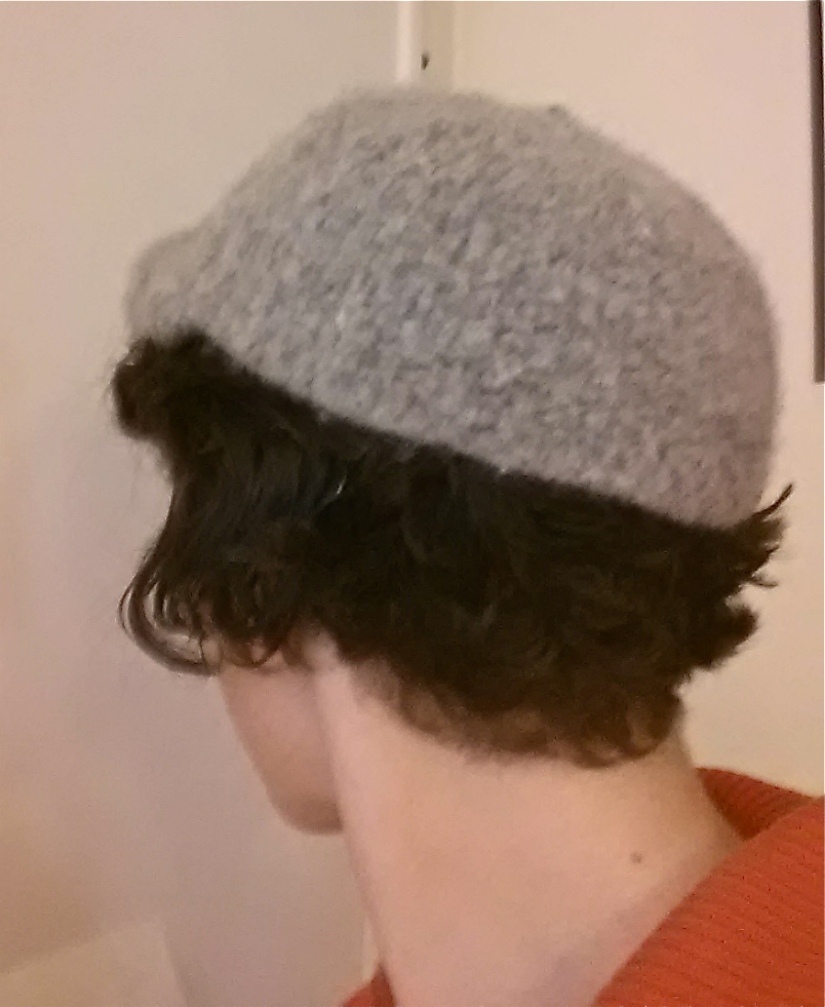
Photo 291Photo 293

While I hear a lot more about people who are Tight Knitters, I know there are some of us out there who knit loosely. I was a Loose Knitter for quite some time before I figured out that I needed to make some significant adjustments to get the right fit on things. The easiest solutions for me are to go down a needle size or two (or three), always do a gauge swatch, and pick the smaller of two options when I’m in between sizes.These aren’t failsafes of course—I can’t tell you how many gauge swatches I’ve done that seemed like they fit the pattern specs, only to knit the thing and find it stretching out quite a bit over time. But at least I have learned!

The thing is, I still have some finished objects from the early Loose Knitting days. like this Couvercle hat. And since I hated to see it go to waste, I decided it was the perfect chance to try out felting.

The Felting Process

Technically, since that hat was already knitted, the technique I used here is called “fulling.” There are lots of tutorials out there on this process, but the ones I used for reference here are this one from Knitty and this one from Luscious Gracious Studios. I decided to do the washing machine method as opposed to the hand felting process, which worked well because it took quite a while. As per the instructions, I used the hottest water and the lowest water level setting, an old pair of jeans, and a small amount of liquid soap (Method brand in my case). I put the hat in a pillow case and safety pinned it shut to keep the extra fibers from escaping and clogging the washer (fold the top over at least twice before you do this!). And then I put on a timer and checked the hat every 5 minutes until it was how I wanted it, resetting the washer to the beginning of the cycle as needed it to keep it from going through the spin cycle. Here’s what it looked like at each stage:

2013-11-03 14.56.35 After 10 min.

I forgot to take a photo at the first check (5 minutes) but believe me, the hat was even bigger than you see here. This can be disconcerting  when you’re trying to shrink something, but rest assured that in the beginning of the process, it is normal!

2013-11-03 15.08.22After 15 min.

So the hat was still huge at this point, but the spaces between the stitches were getting smaller. A good sign. Also, I should mention that at every check in I pulled any errant bits of wool out of the washer—just be careful as the water is quite hot.

2013-11-03 15.17.56After 20 min.

The hat was getting noticeable smaller and thicker at this point, and it was also trying really hard to escape its pillowcase. I was also worried it would felt to itself and not leave an opening for my head, as I’ve heard can occasionally happen. So at this point I pinned the top center of the hat to the inside of the pillowcase. It worked! Though it did have an unintended consequence, as you shall see.

2013-11-03 15.28.39After 25 min.

Still shrinking very slowly here, where I got a nice shot of the brim. If I had it to do over again, I would have added some more length to the brim because I really like that feature of the hat and it shrunk too.

2013-11-03 15.37.05After 30 min.

Finally getting close! By this point the hat was thick and fuzzy, it just needed to be a little bit smaller. I let it go through the last  five minutes, then allowed the washer to go through the rinse cycle and a little bit of the spin cycle before I pulled it out.

2013-11-03 16.00.38 After 40 min.

Here was the end result! The thickness and the size were now exactly what I wanted. I had a little bit of trouble removing the safety pin however, as the hat had begun to felt around it! That’s why, in the first photo of this post, you can see a little nubbin at the top—that’s where I finally pulled out the safety pin.

To make sure that the hat retained its proper hat shape, I put it over a bowl to roughly mimic my head shape and let it dry that way. I didn’t time the drying process but it was definitely dry in 48 hours.

The Finished Cap

2014-02-23 16.42.37

This hat is actually closer to the intended size of the pattern than my loosely knit one. Since it is a little bit smaller and doesn’t have the stretch of knitting, I usually use a bobby pin or two to keep it in place.

2014-02-23 16.44.25

I count this project as a successful retooling of an unsuccessful knit, as I only wore the original hat out once in 4 years, but I’ve already worn this felted version several times.

2014-02-23 16.45.372014-02-23 16.46.16

I had to do this project at a friend’s house, since the washing machines in my complex are expensive and do not have the best settings for getting hot water and low water levels. I will definitely be doing this again though— I already have another felting project in mind. I’m excited to potentially reclaim more of the stretched out finished objects of my earlier Loose Knitting days.

Nerdy Knits & Crafts, Quick Knits & Crafts, Tweaks & Alterations

Sonic Screwdriver Chapstick Holder!

My blog reached 10,000 views today! To celebrate, I’m sharing details about my most recent finished object—the 10th Doctor’s sonic screwdriver, which I have conveniently modified to serve as a chapstick holder!

2014-01-22 10.54.33


(Yeah, that’s right, because making a TARRIS pillow was not enough whovian knitting for me…)

This project is a modification of a modification of an original pattern for a Doctor Who sonic screwdriver. That pattern was for the sonic used by the 11th Doctor (Matt Smith), which is different in shape and size. I found this modification from user Cordetta on ravelry that changed the colors and some of the shape to be more like that of the 10th Doctor (David Tennant), which is what I wanted. I have to give a lot of props to her mod for helping me out! But I had to modify it even further to make it shorter and tighter to fit two chapsticks with just a little room on the ends.

To be honest, when I finished this project it was late and I did not record every single detail of my knitting. But I wrote down enough to tell you approximately how I did it.

2014-01-19 22.04.12

10th Doctor’s Sonic Chapstick Holder

materials:
-size 3 double pointed needles (set of 4), yarn needle.
-worsted weight yarn in black, dark gray, light gray, and blue
Cast on 9 sts in black, divide over three needles, and join to knit in the round, being careful not to twist stitches.
Rnds 1-2: k all sts
Rnds 3-5: p all sts
Rnds 6-10: p all sts
Rnds 11-12: k 1 grey, p 2 black*
Change to dark gray
Rnd 13: k all sts
Rnd 14: k1, m1, k to end of rnd (10sts)
Rnd 15: k all sts
Rnd 16: k5, m1, k to end of rnd (11sts)
Rnd 17: k all sts
Rnd 18: k9, m1, k to end of rnd (12sts)
Rnd 19: k all sts
Rnd 20: k2, m1, k to end of rnd (13sts)
Rnd 21: k all sts
Rnd 22: k7, m1, k to end of rnd (14sts)
Change to light gray
Rnd 23-35: k all sts
Rnd 36: k1, k2tog, k 2, k2tog repeat to end of rnd (11sts)
Rnd 37: k2, k2tog, k5, k2tog, k to end of rnd (10sts) 
Change to dark gray
Rnd 38: k all sts
Rnds 39-44: k1, p1, repeat to end of round
Rnd 45: p all sts*
Change to blue
Rnd 46: k all sts
Rnds 47-49: p all sts
Rnd 50: k3, k2tog, k3, k2tog (8 sts)
Cast off loosely.
With blue yarn and yarn needle, stitch a straight line lengthwise up the light gray section.
2014-01-20 10.12.27

*if you haven’t done colorwork before, consider skipping these two rounds and going straight to the gray section, it’s kind of annoying to do. If you chose to do it (I promise, it looks cool!), be careful to move the black yarn to the inside of the work at the end of the last round.

**at this point, if you want to weave any of the ends into the inside of the tube, do it now! It will be too tight to turn it inside out after the final section.

As always, remember that my gauge is looser than most—use your own tube of lip balm as a guide. The way I made mine, both ends are open but they are tighter than the middle section, so the chapstick naturally remains inside until I push it out. I’m sure there are ways you could make a closure at the top or bottom, but I found I didn’t need it.

The sonic screwdriver chapstick holder—it doesn’t work on wood or deadbolts, but it does work on dry lips!