Original Knitting Patterns, Quick Knits & Crafts, Tweaks & Alterations

Knitting Recipe Remixes: Shetland Pony Drink Cozy + Handbook Fingerless Chevron Mitts

Recipes. I use them all the time in cooking—I’ll certainly be consulting a few for the Thanksgiving dishes I’m making next week. However, I usually see the ingredients and directions as more suggestions than mandates. And I often combine elements of different recipes to get the final results I am looking for. I like to remix my recipes.

Lately, that’s what I’ve been doing with my knitting as well. It’s finally knitting weather here in California, and I have been working on projects big and small. But I can’t resist remixing the recipes—combining elements of two patterns to get the finished object I really want. It’s one step above following a pattern with a few modifications, which is easy but can only transform the pattern so much. And it’s one step below writing your own pattern, which is great for creating exactly what you want but takes a lot of time and effort to do properly.

I’ve got two remixed knitting recipes for you. Both are small, relatively quick knits.  They all involve bits of colorwork, so they are perfect for stash busting. They also make great gifts—and you won’t find them anywhere else!

Shetland: The Pony Drink Cozy (ravelry)

2014-11-17 13.36.16

If you have not seen the video of Shetland Ponies Wearing Cardigan Sweaters, you should really go do so now. I’ll wait.

shetlandsweaters

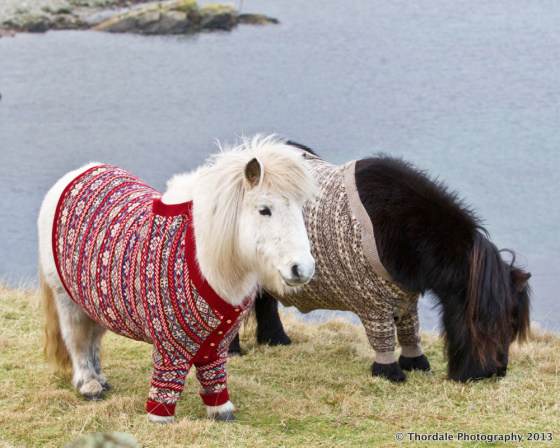
My friend and fellow knitter, who loves shetland ponies and this video in particular, had a birthday recently. This was the gift I gave her.

Ingredients

20-25 yds main color, worsted weight

10-15 yds contrasting color, worsted weight

2-3 yds scraps of three colors for sweater, sock or lace weight

knitting needles (sz 7 or whatever gives you gauge)

tapestry needle (I used metal not plastic)

Patterns Used

f. pea’s beer cozy (raverlyblog)

Jóhanna Hjaltadóttir’s Hestapeysa sweater (ravelry, pdf)

Directions

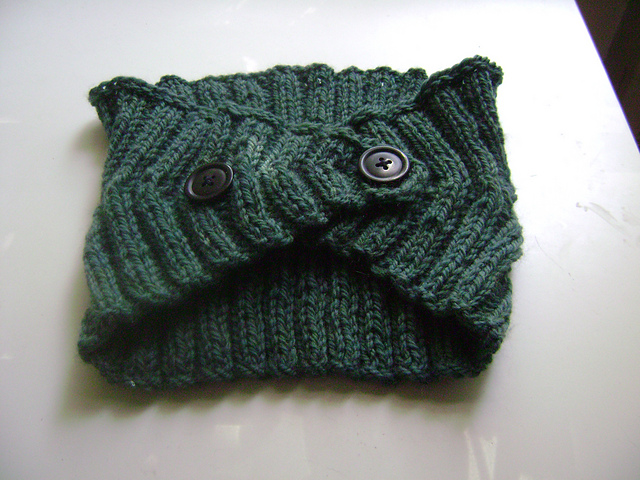
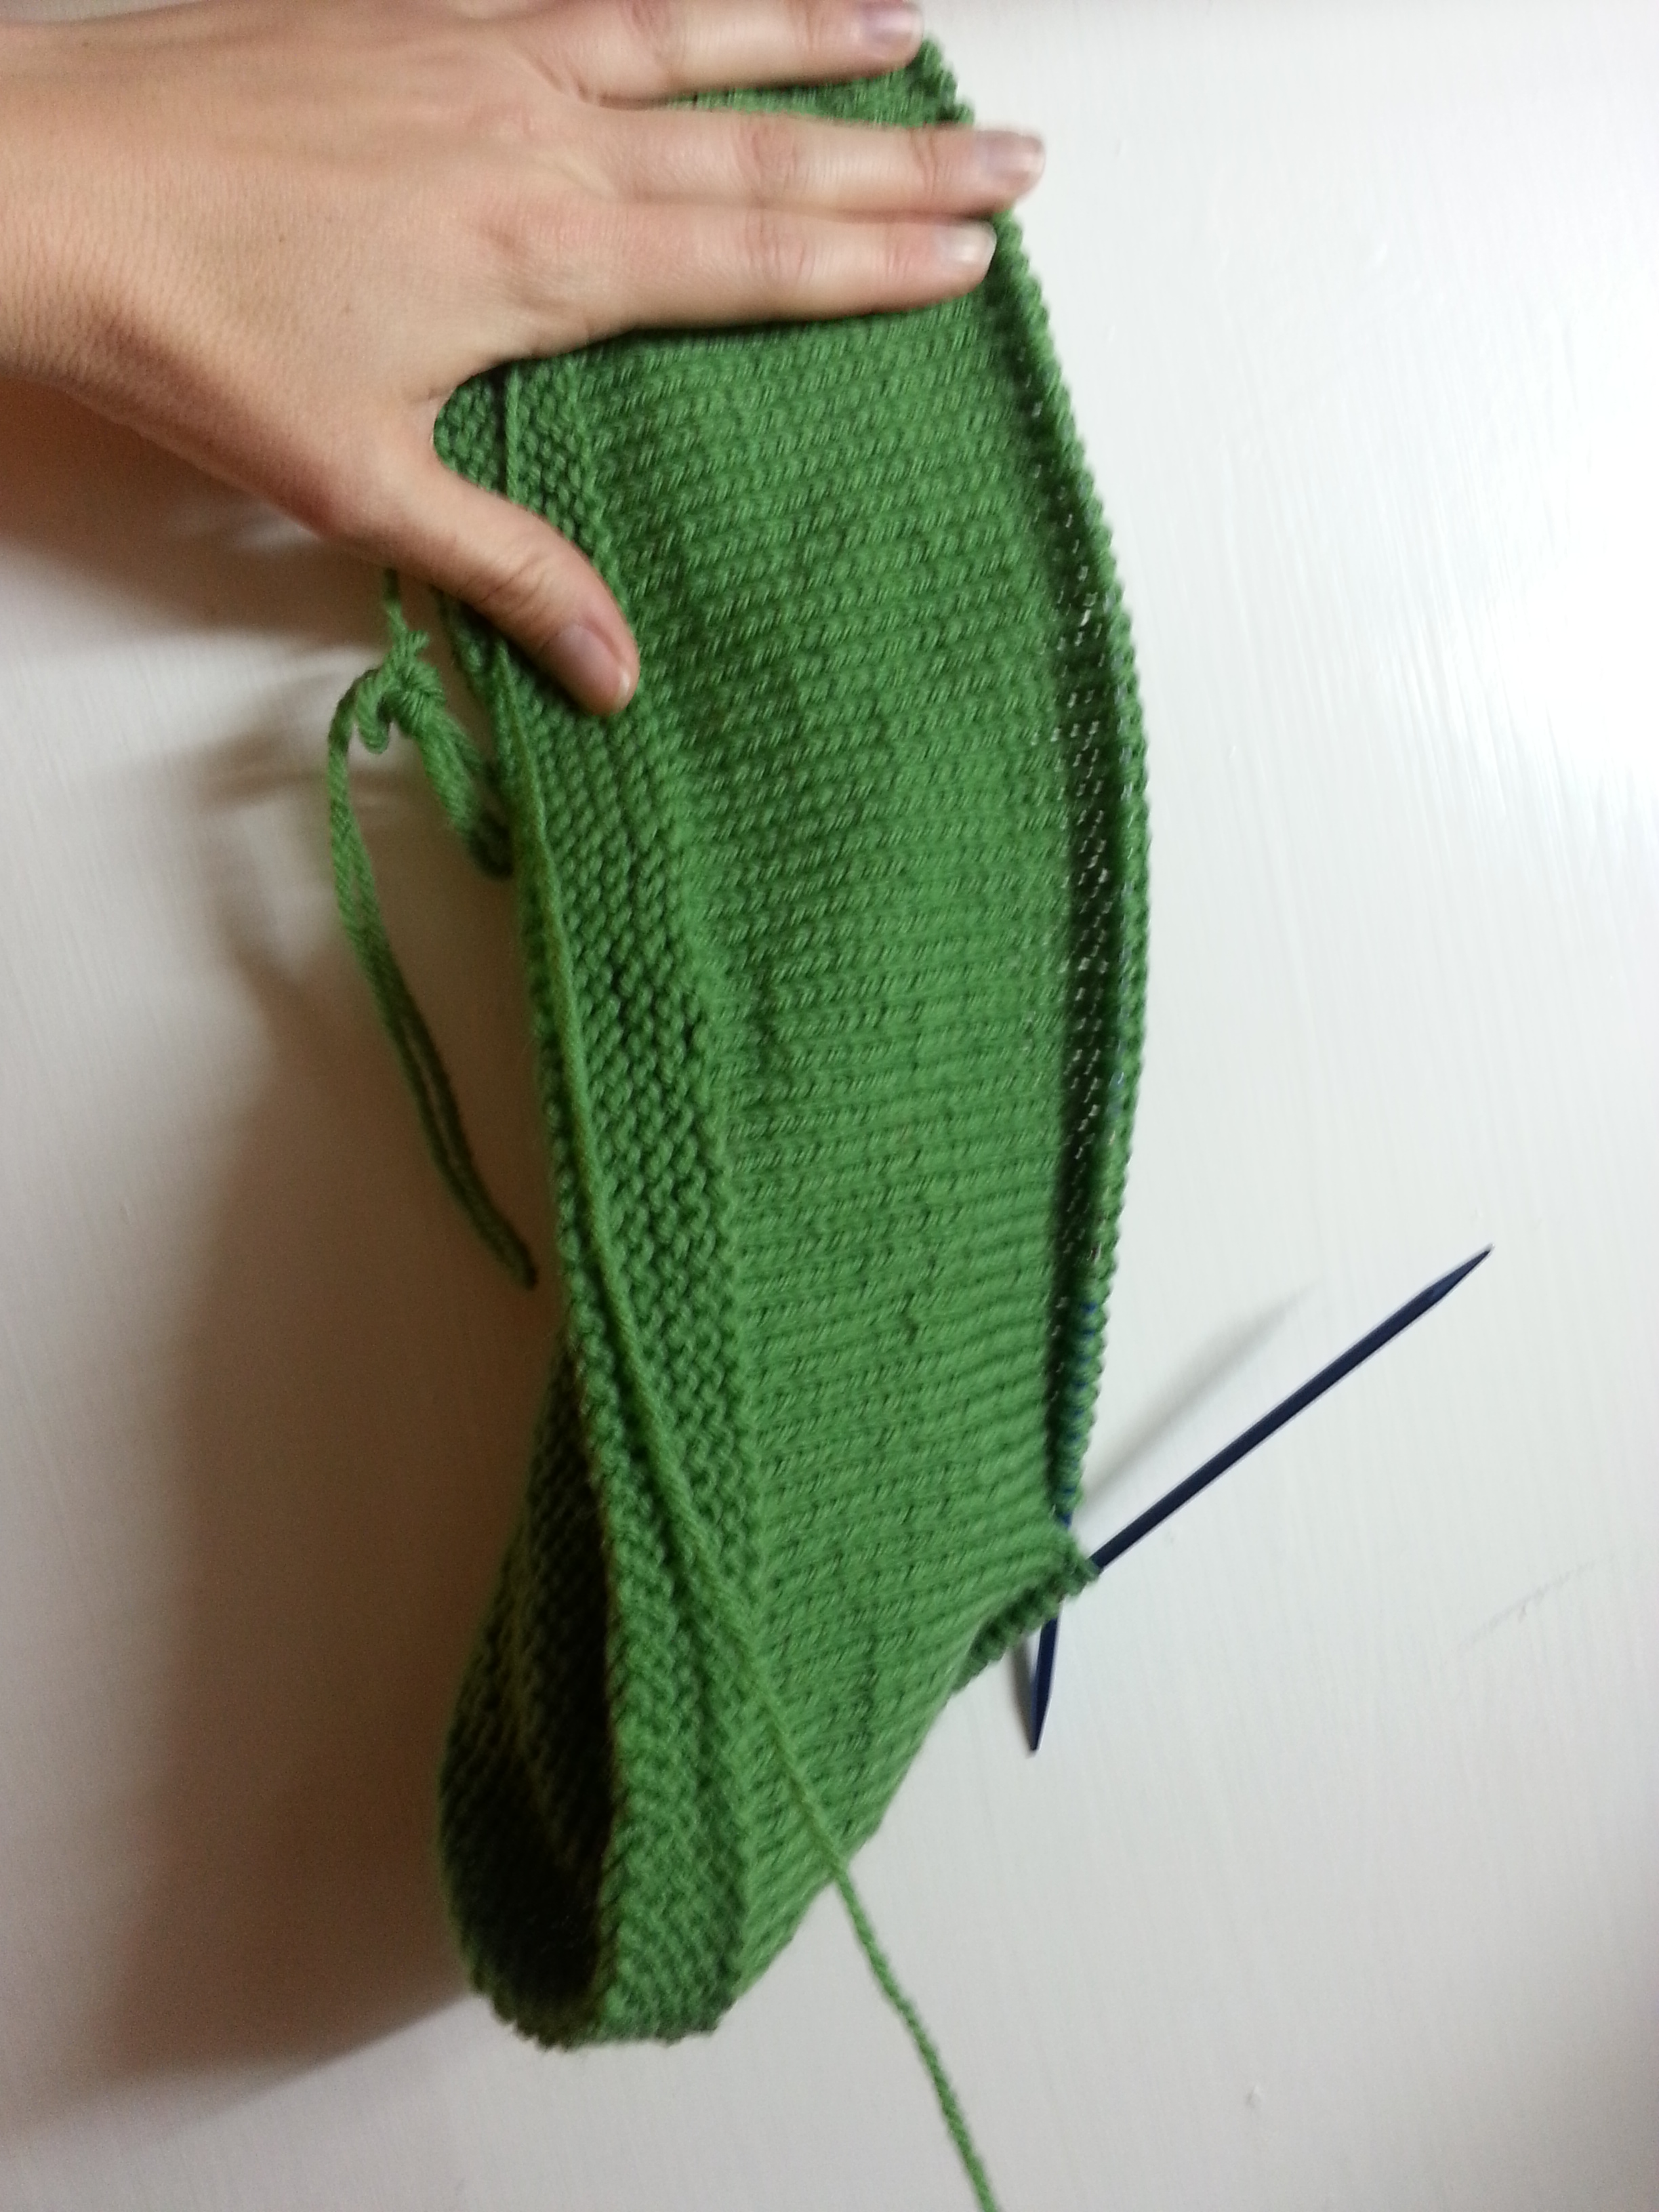
The basic idea is to knit the beer cozy pattern FLAT with the pony chart from the sweater centered in the middle. Cast on 32 stitches and work in ribbing as directed for beer cozy. (I don’t have many in-progress shots but you can at least see how it looks flat):

2014-11-17 13.24.17

After work the ribbing from the beer cozy, start the pony chart. To center it, do some basic math:

32 (beer cozy width) – 18 (pony chart width) =14 stitches /2 = 7 stitches of main color on each side

Complete chart (I added one contrasting color stitch extra on the head to give it that shetland mane look). Add 3 more rows, then finish with top ribbing (if you skip these rows, the pony’s head gets squished into the ribbing). Bind off in ribbing and leave a 12-15 inch tail for sewing.

Thread your tapestry needle with one of the sweater yarn scraps (if you have different thicknesses of yarn, start with the thickest). Outline the outer edge of what will be the cardigan, stitching around the lower neck, partway down the front legs, and half way down the back. With the second color, stitch several parallel lines diagonally across the sweater. With the third color, stitch several lines perpendicular to the first set of lines. This will create the illusion of a sweater. Be careful to keep the tension on the yarn as even as possible, because the whole thing needs to stretch over a glass.

2014-11-17 13.35.21

Weave in and cut all the ends except the long main color one at the bind off edge. With tapestry needle, use kitchener stitch to connect the two edges of the beer cozy. Weave in and cut this end, then admire how your drink sweater is a pony wearing its own sweater!

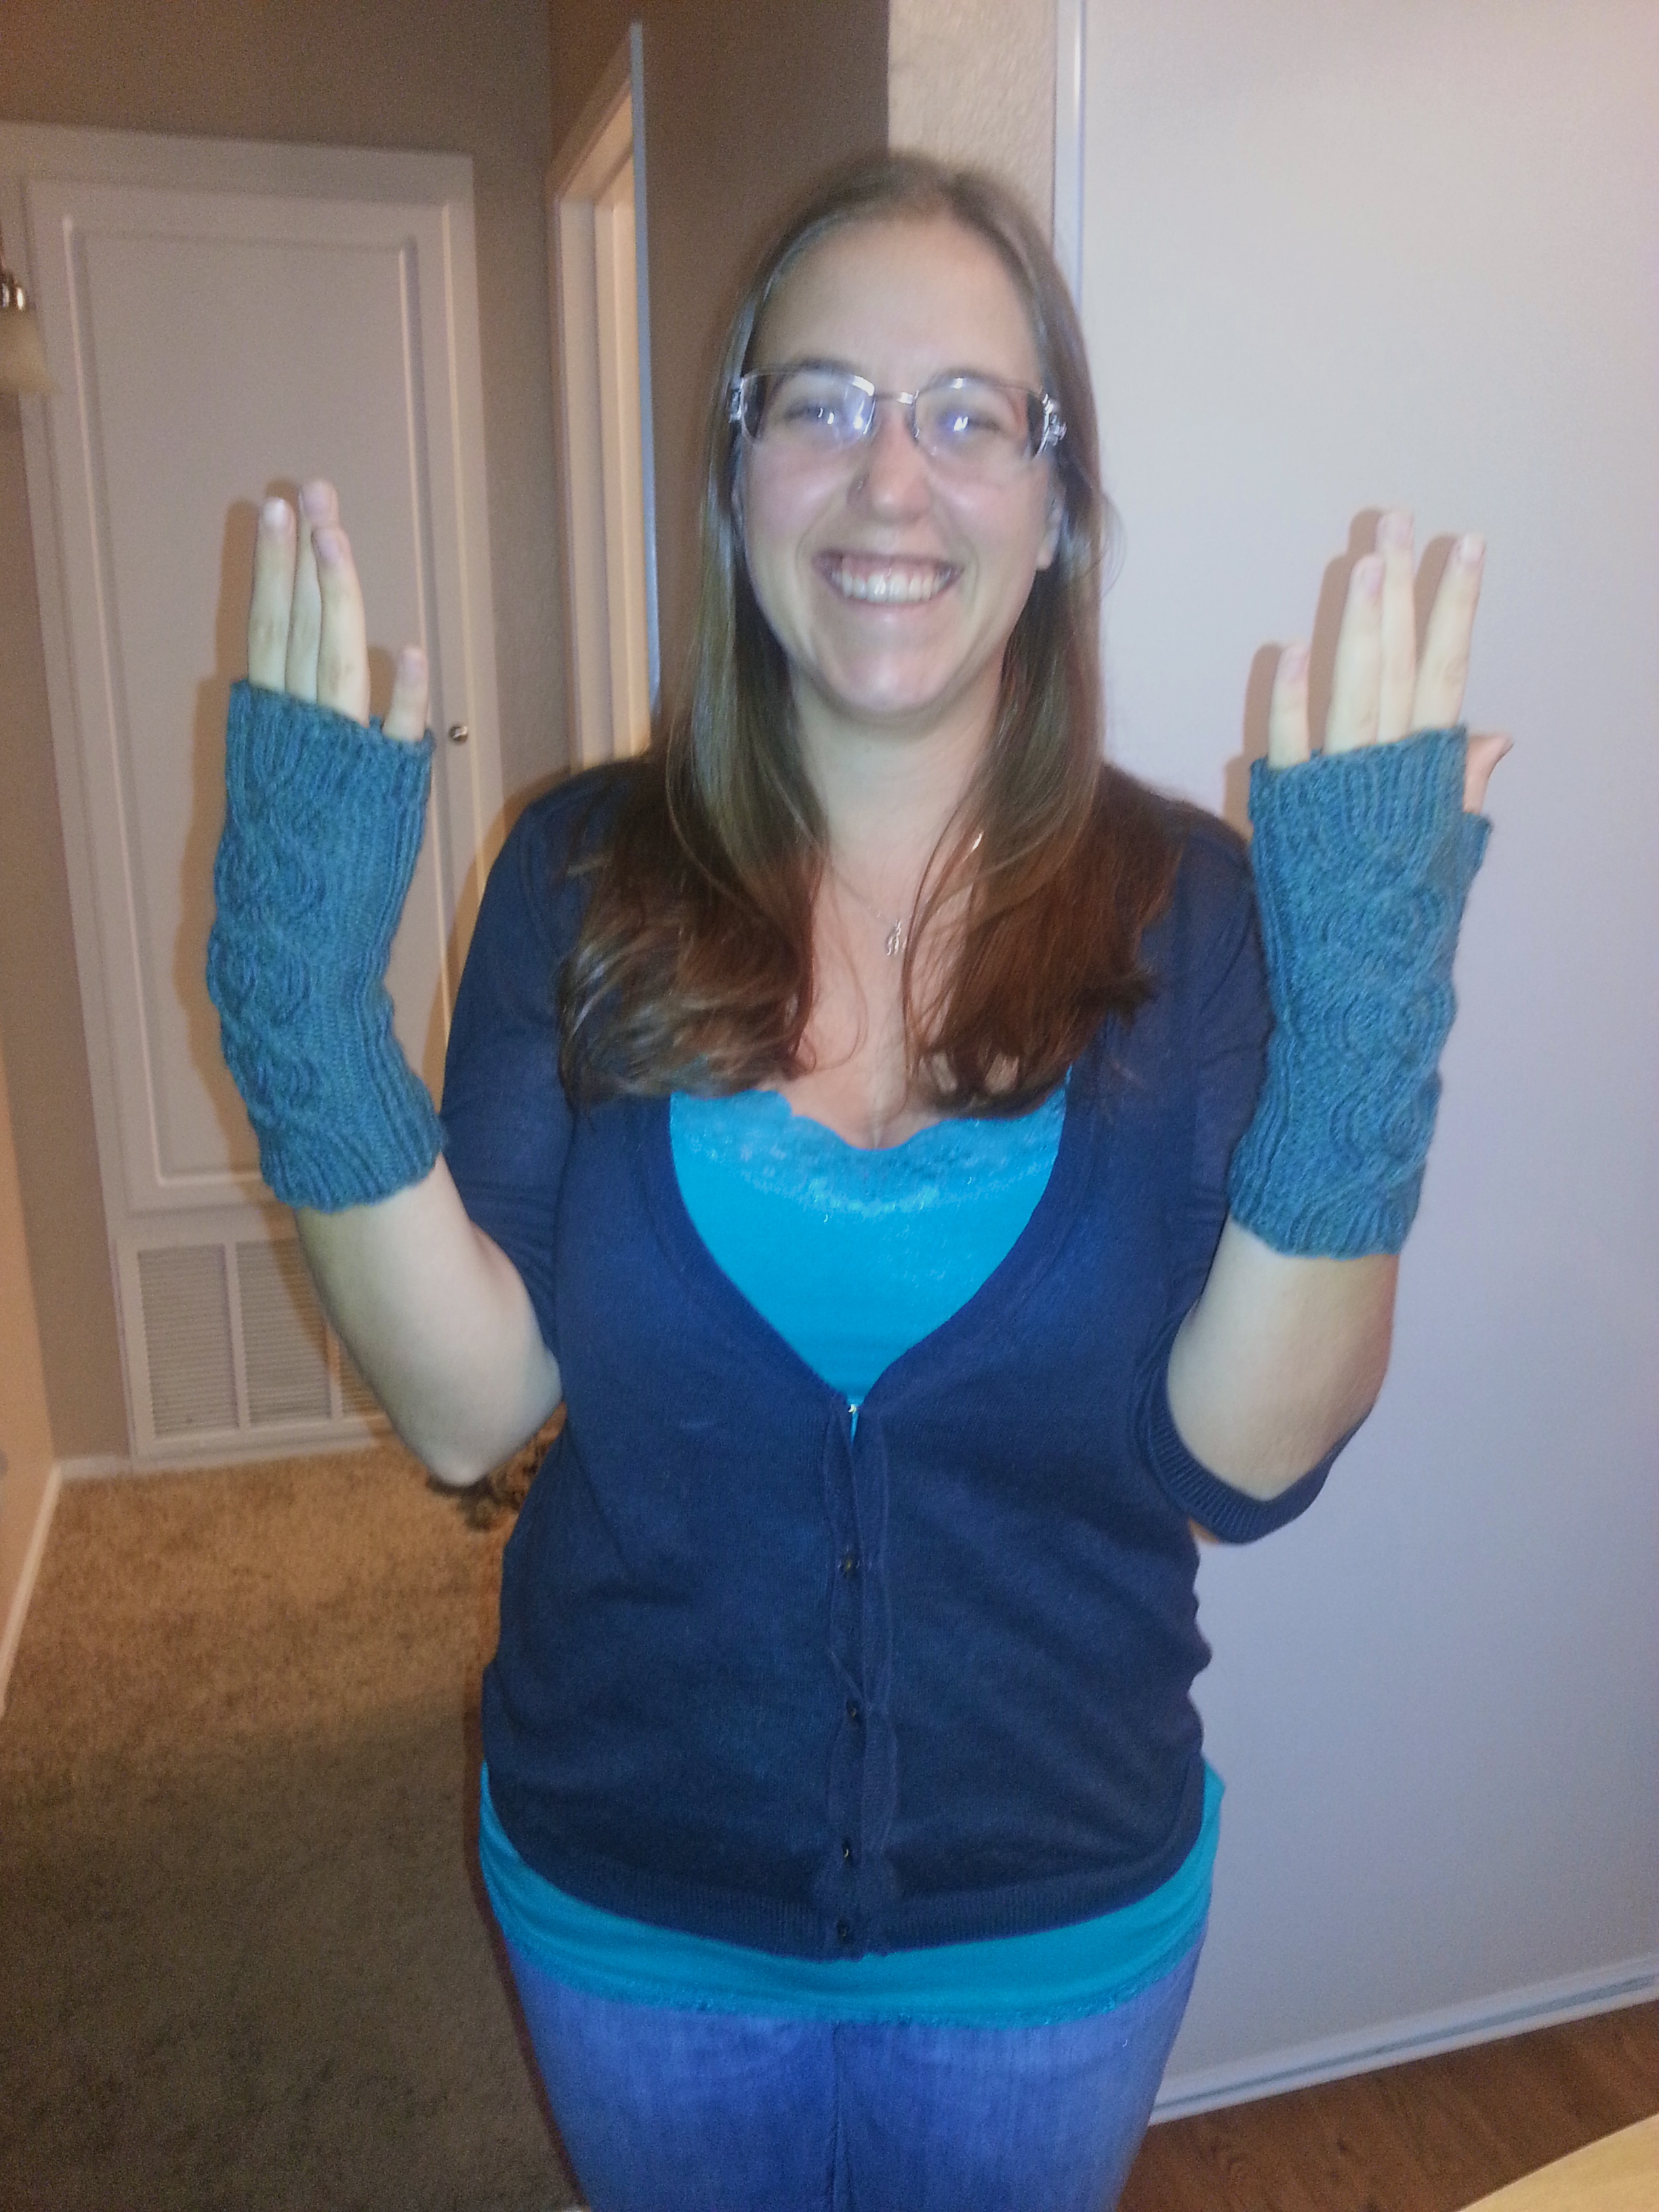
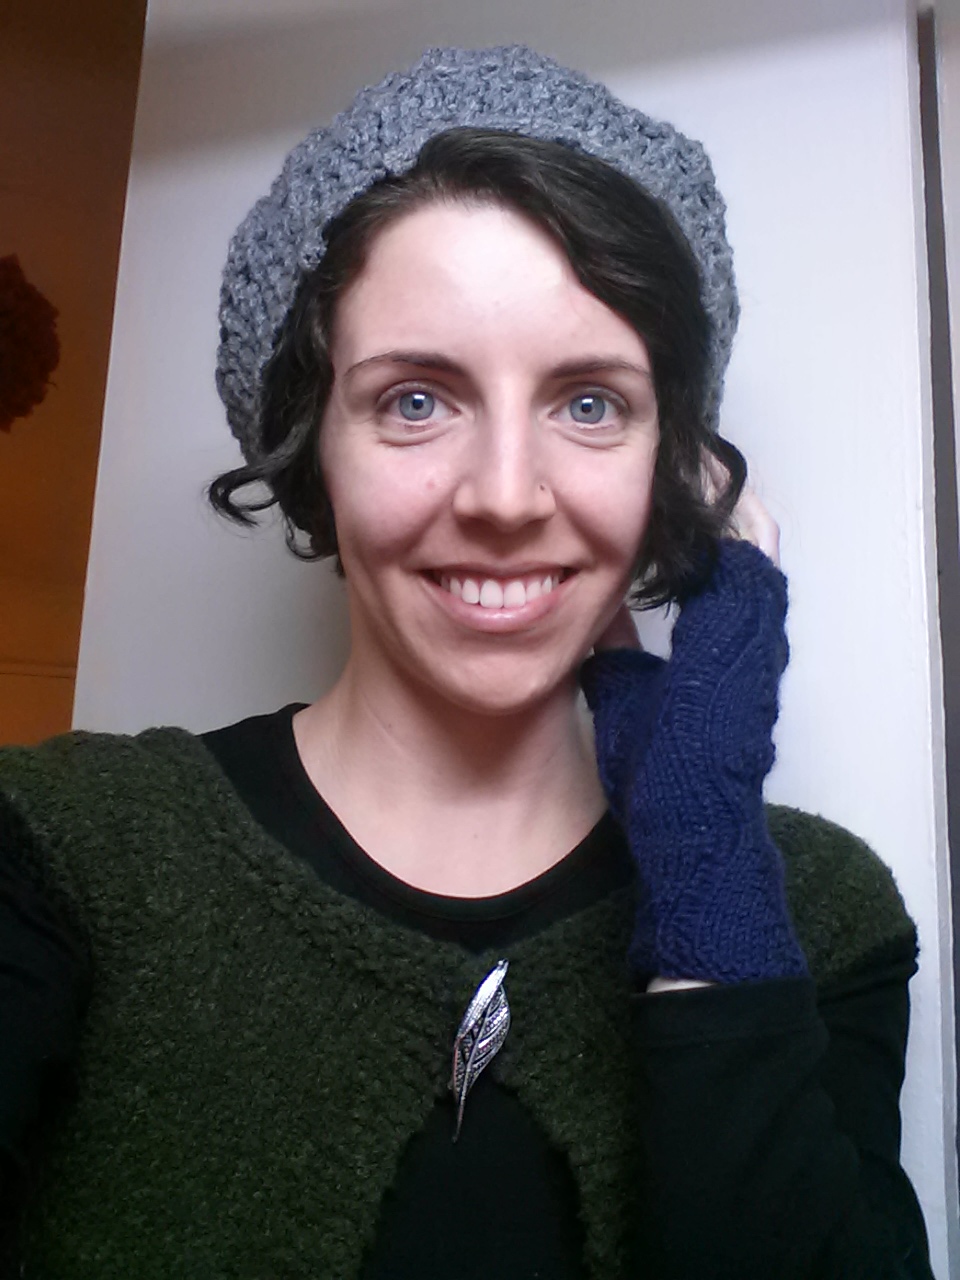
Handbook: Fingerless Chevron Mitts (ravelry)

2014-11-19 15.33.39

A few weekends ago, I went to this conference, where all of the presenters were contributors to an upcoming Oxford Handbook. As I listened to the presentations, I worked on these fingerless mitts. Much like publishing a handbook, with these fingerless mitts I had to take a lot of different pieces—different colors, different lengths—and try to blend them into a seamless finished product.

Ingredients

100-120 yds main color, worsted weight

5-20 yds each of four contrasting colors, worsted weight

double pointed needles (size 6 or whatever you need to obtain gauge)

tapestry needle and patience

Patterns used

Maggie Smith’s Fingerless Mitts (ravelry)

Kat Lewinski’s Those Zig-Zag Mittens (ravelry, blog)

Directions

Just a heads up—this recipe involves a lot of weaving in ends! But other than that its fast and satisfying. I had never done a chevron (zig zag) pattern before, and I really enjoyed it.

Before you cast on, decide how many chevron rows you want of each color and the order that you want them in. You may want to place strands of each yarn next to each other to see what you like best. Make sure to include at least one section of the main color!

Cast on—you can either cast on 44 stitches as the Zig Zag patterns says, OR you can cast on in a higher or lower multiple of 11 for bigger or smaller hands. Just know that chevron is very snug, so it can’t be too small as it won;t stretch as much as stockinette. I have small hands and I knit loosely, so I cast on 33 stitches and then did only three total repeats of the chevron pattern, not 4: (k2tog, k3, M1L, k1, M1R, k3, ssk).

Important tip! On the end of first round of a new color, knit in pattern to the last stitch, then grab the tail/non working yarn from where you joined the new color, and knit that together with the working yarn on the last stitch of that first round. It will help reducing the hole that tends to occur at the color change. (I didn’t figure this out until rather late in the knitting process.)

2014-11-19 15.35.14

After you switch back to main color, do one more round in the zig zag mitts pattern. Then switch back to the fingerless mitts pattern to make the thumb increases. But instead of doing increases until you get to the designated number of stitches as that pattern says, just add 14 to whatever number of stitches you started with. In my case, 33 + 14 = 47 stitches is when I did the bind off for the thumb.

Now you have a choice—you can increase or decrease your stitch count to a multiple of four and then do the ribbing at the top like the fingerless mitt pattern says, or you can keep your stitch count and do a small repeat the chevron stitch at the top instead. That’s what I did.

2014-11-19 15.35.28

If I had to do it over again, I might have begun the bind off a bit sooner. Just make sure to do several purl rows before you bind off, as knit stockinette will tend to curl. I haven’t blocked these yet so I’m hoping some of the curl in mine will come out.

Further option:I also added a few more rounds at the thumb—two knit rounds, four purl rounds, then bind off.

2014-11-19 15.34.20

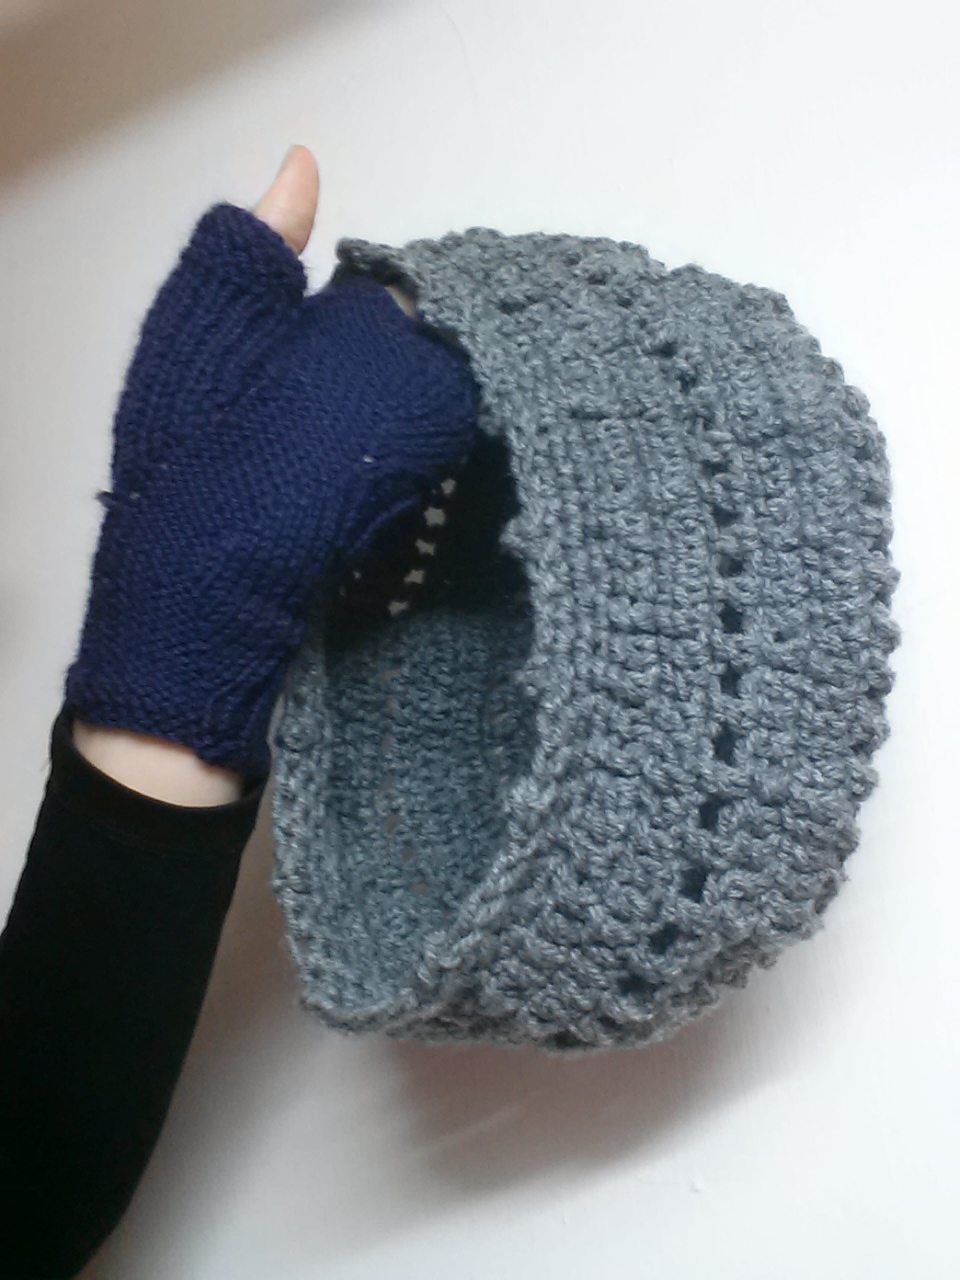
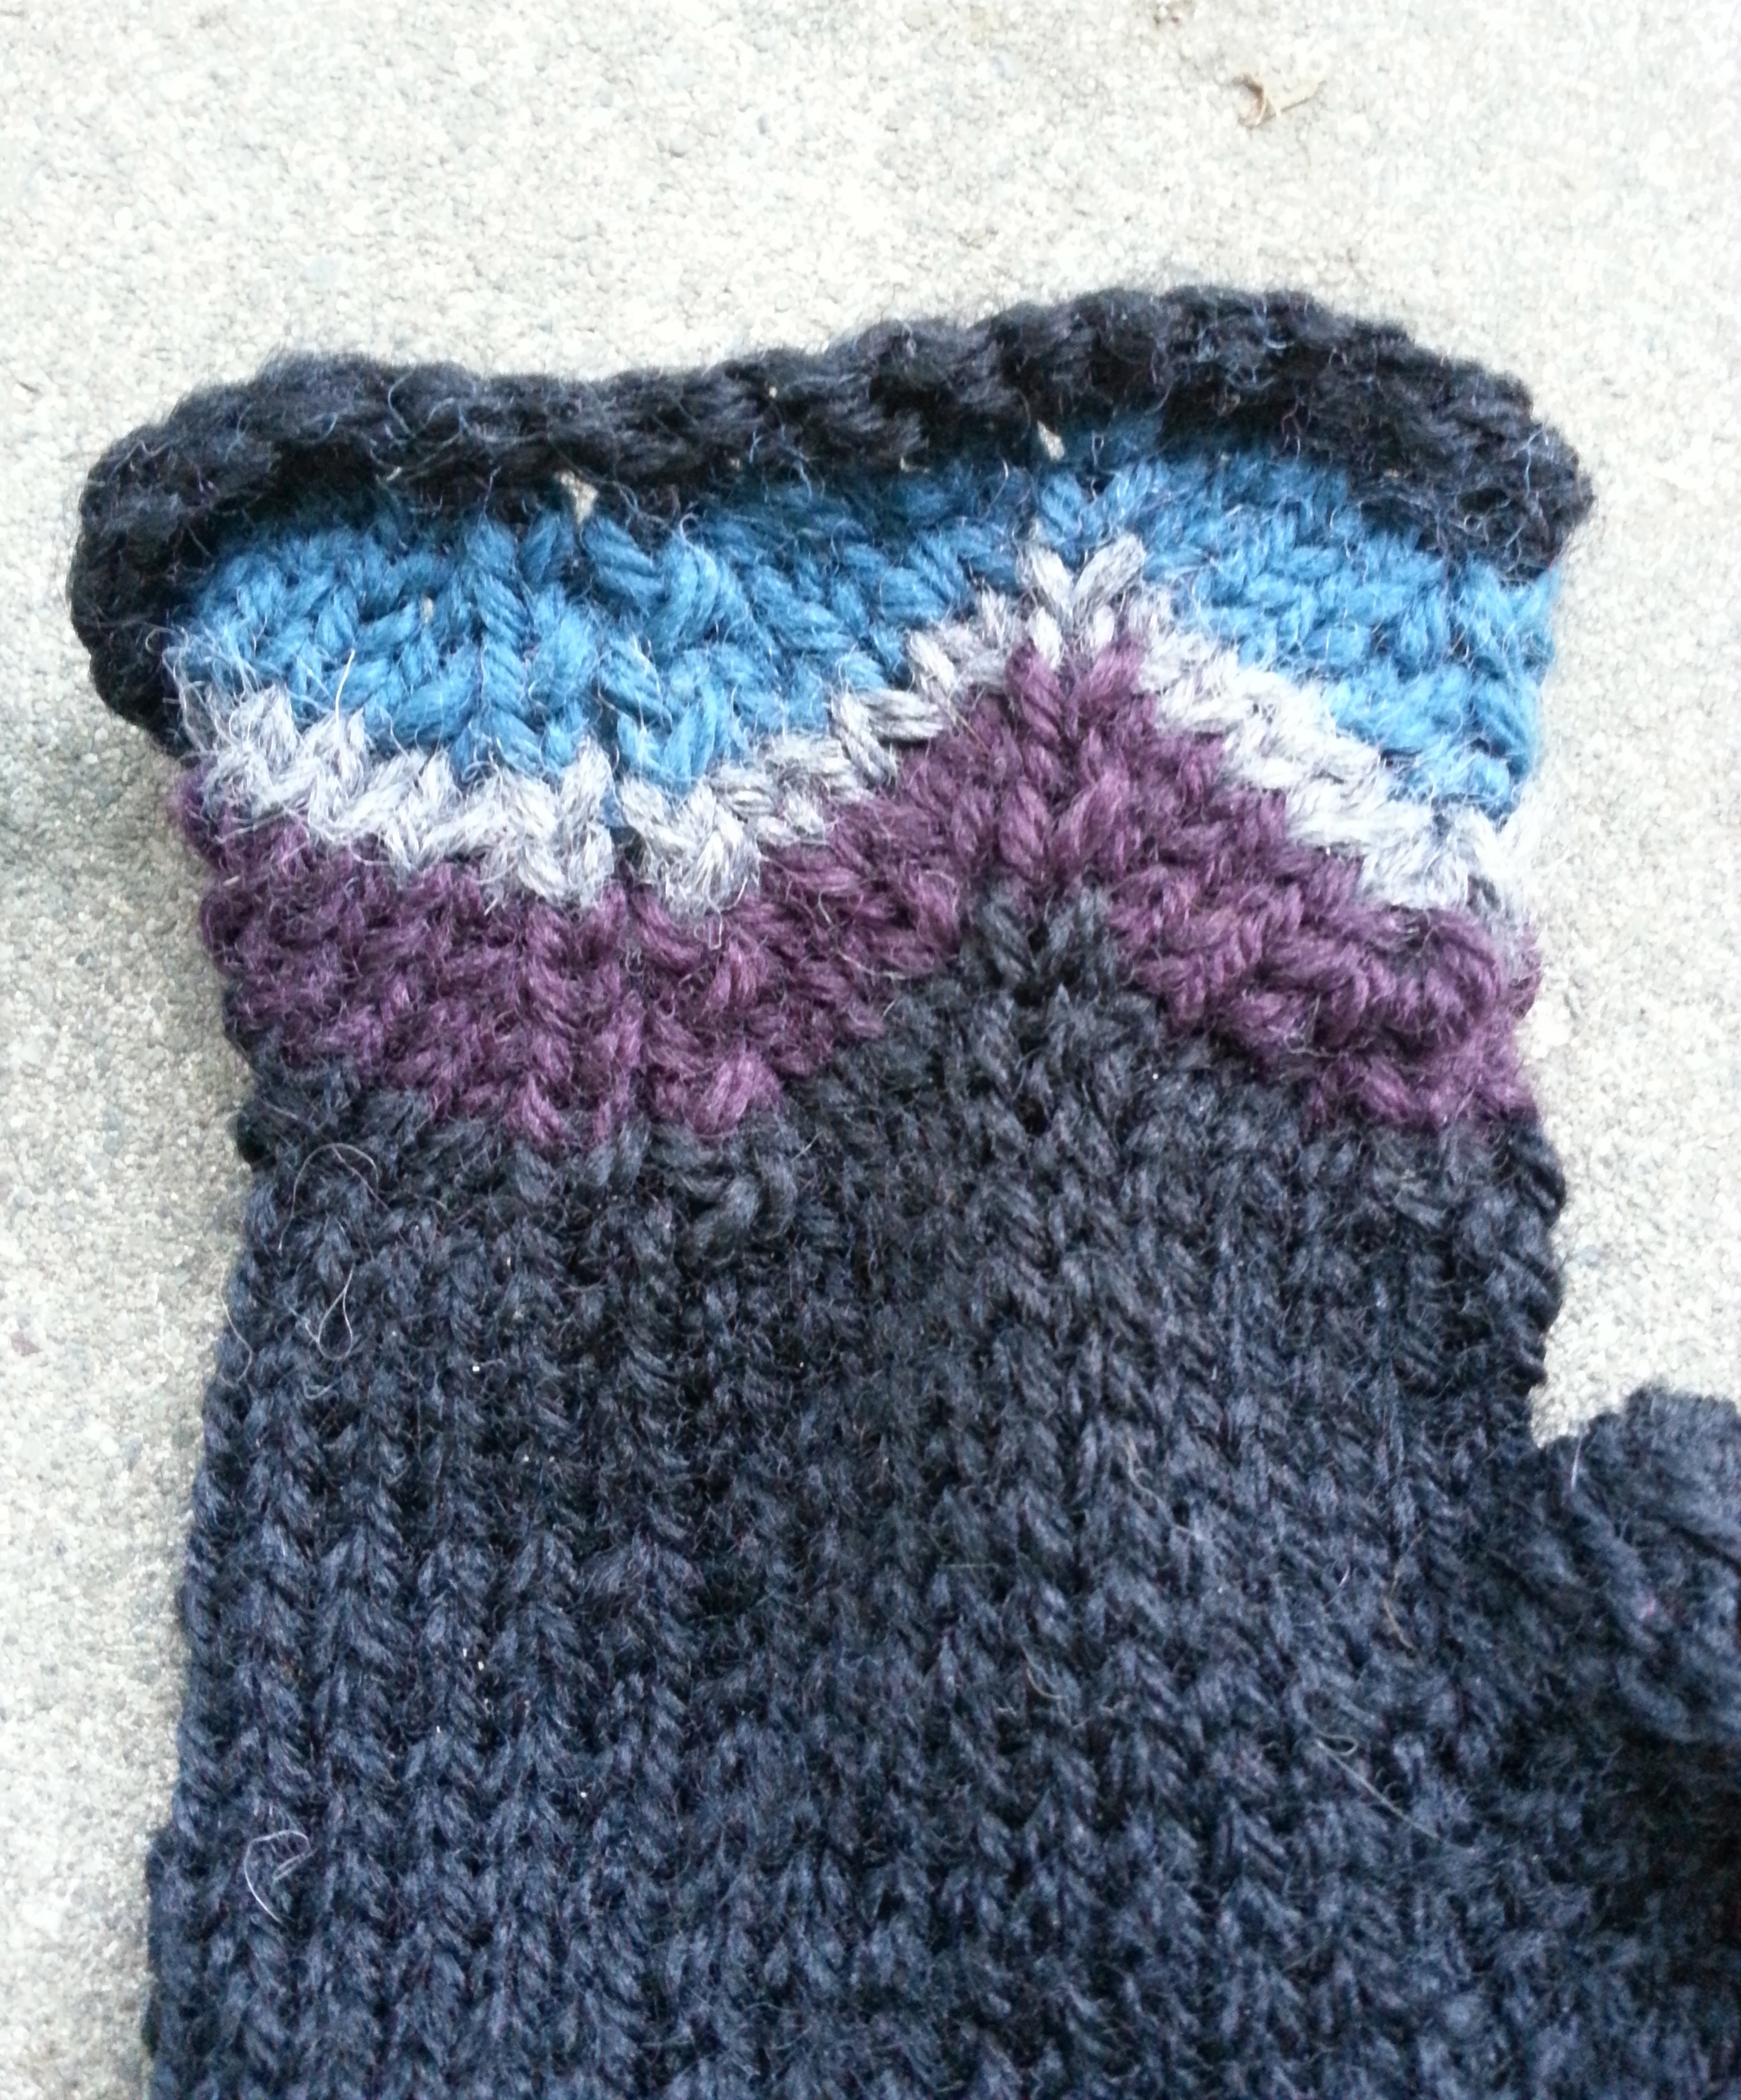
Are you ready for the least fun part? Because While your fingerless mitt will look like this on the outside…

2014-11-18 23.34.07

It will look like this on the inside. So: get your tapestry needle and start weaving in all those ends. If there are any gaps occurring where you changed color, now is the time weave through those spots so they are less visible. Have patience, it will be worth it.

2014-11-19 15.35.07

I was too excited and I photographed these mitts before blocking—but look at those lovely colors! There’s something about chevron that looks classier than stripes. It’s nice to have a stash busting project that uses the leftover bits of colorful yarn that I love.


Botanical Knits & Crafts, Holiday Knits & Crafts, Tweaks & Alterations

Green Knits for Spring, Remixed

Happy First Day of Spring! To celebrate the Vernal Equinox, I give you three green knits, each re-imagined in some way and ready for transitional weather:

2012-11-15 23.20.122014-03-17 11.02.262014-01-11 16.56.38

Fingerless mitts: Vancouver Fog

2012-11-15 23.21.59

This is my version of Vancouver Fog by Jen Balfour. Fun fact: this soft, blue green yarn used to be a different knit entirely. A long time ago, back in the loose knitting days I’ve mentioned before, I knit Calorimetry from Knitty’s Winter 2006 issue. It came out poorly:

DSC03420

See how loose it was in the back? It barely stayed on my head, and that was before it stretched out. I even overlapped the ends and did two buttons to try to keep it in place, to no avail.

DSC03415_medium2

Fast forward a year or so and I was planning to make some fingerless mitts for a friend’s birthday. She chose the Vancouver Fog pattern, with its beautiful cable pattern, and I just knew that this was the right yarn for the job. So I frogged Calorimetry and started remaking this muted, spruce colored worsted weight yarn into hand warmers.

Photo on 10-13-12 at 9.42 AM

I remember being disappointed that there wasn’t a gauge for this project, but I had learned my lesson about my loose knitting—so instead of the recommended size 7 needles, I used size 3! I know! I also cast on 4 fewer stitched than recommended. Yes, I went that tight! But the results were spot on:

2012-11-15 23.21.06

These fingerless mitts were a good fit, and I got to practice some cool cabling techniques. I’m quite pleased with my decision to frog the original pattern.

BEFORE
BEFORE
AFTER
AFTER

Fingerless mitts are great for those times when it’s too cool out for bare hands, but not cold enough for gloves!

Leafy Skirt or Mini Cape: Entry Level Capelet

2014-03-17 11.02.26

This is a really old project, but the loose knitting didn’t matter with this very simple garment. It’s the aptly named Entry Level Capelet by Haley Waxberg. It’s a good pattern for a hand dyed variegated yarn like this one. The color pooling was not even, but that gives it an interesting self-spiraling effect at the top. (side note: you can tell how old the photo below is by how long my hair was!)

DSCF0354_medium2

However, I almost always wear my version in a different way now—as a skirt! The yarn was just a little too scratchy to be touching my arms/neck, so I made an I-cord and wove it through the top band, then tied the I-cord at my waist. I added some leaves because, you know, I love leaves—I have no idea where I got the pattern for them, but the standard knitted leaf pattern seen here.

2014-03-17 11.04.37

I still wear this skirt fairly often—it’s great with a pair of leggings, and it’s nice when it’s just a little bit cool out.

2014-03-17 11.05.33

Sweater in Progress: Mrs. Darcy Cardigan

2014-01-11 16.56.38

My final green project is still on the needles! It’s the Mrs. Darcy Cardigan by Mary Weaver in Knits that Fit (and unlike most of my knits, this one required checking out a book at the library).With a title like that, it’s only appropriate to do a lot of tweaks to the pattern, right? It may not be obvious from the photo above, but I’m making the arms much longer than the pattern calls for to accommodate my arms and shoulders. I wish I had known before I made these that to get the true twisted rib, others knitters knew to p1 to back on the wrong side, because the pattern doesn’t indicate this and the ribbing on the cuffs won’t look as sharp as it could.

2014-03-19 22.19.10

I’ve since moved on to knitting the body. You’ll have to forgive the blurry action shot here, but at least it captures the true green of the yarn! (It’s Cascade 220, in, you guessed it, Spring Green.) I decided that since I have a long torso that is quite wide at the top, I’d use ravelry user wakenda’s modifications to get a gentler slope on the cardigan’s v neck, which I think will still be quite striking.

2014-03-19 22.19.40

I’m always a little hesitant to blog about my works in progress, but this partway knit green cardigan is too verdant not to share, and cardigans are great for spring weather. Hopefully this post will inspire me to finish it soon!

*bonus postscript announcement* If you read this far, you might enjoy the fact that I recently added categories to the blog, and then went back and retroactively categorized every past post! I created the categories based on what I seem to write about most, so you can find similar posts without having to scroll through past years.

Quick Knits & Crafts

November Knits: Stash Edition

November in the Northern Hemisphere seems to be when knitting season kicks into high gear. If you’re a super productive knitter, you’ve probably finished your Socktober socks and moved on to your sweater for National Knit a Sweater Month (aka NaKniSweMo) and your holiday gift projects. Unless you are like me, in which case you are simply looking at your stash and thinking “I am sort of cold. Can I make something from this yarn to make me less cold?” The answer, of course, is yes. Here are three (free!) patterns for the things I think I’ll be wearing a lot this month to keep warm.

2013-11-03 17.54.53

(p.s. I realize the title of this post is a little misleading— one of these projects is actually crochet, and I did not make any of them in November—I am simply planning to wear them this month. But I wanted the alleteration!)

1. Half a Cardi

2013-10-01 14.30.50

I actually made this little cropped short-sleeve cardigan three years ago but I seem to get use out of it every fall. The pattern here is Half a-Cardi by Patti Gonsalves. It’s a great chance to try out a top down raglan style if you haven’t already. It knits up pretty quickly too.  I usually wear it over a black tank top or long sleeve shirt with the leaf pin to keep it connected at the top. It adds an extra layer without adding too much bulk.

You’ll notice that my half a-cardi is shorter than some of the others on ravelry, and that it has a contrasting black band at the hem and sleeves. That’s because I knit this with a completely unknown yarn that someone had given me. I’m not even sure what kind it is—it’s kind of chenille like, kind of boucle like. I love the color. When I ran out of yarn a bit shy of my target length, I added the garter stitch bands in black.

2013-10-01 14.30.552013-10-01 14.31.40

This is the eternal problem with stash knitting—if you don’t have the label and you didn’t get to measure how much might be missing from a skein, it can be a little tricky to predict if you have enough. I thought I had the 260 yards required to make the smallest size, but it didn’t quite make it.

However, I am still a firm believer in knitting from the yarn the you already have, whether it’s left over from another project or gifted to you from a friend. I try to focus on stash knitting as much as possible not only because I am a proponent of not wasting what I have, but also because it makes me more creative in choosing and executing projects.

2. Onda su Onda Fingerless Mitts

2013-10-01 14.38.12

I call these my Purple Wave fingerless mitts, though maybe I should have called them Purple Pain because that’s what they were to knit. I think it was a combination of many factors, including knitting on an airplane, using some rather old yarn, and difficulty reading the chart (it’s a left handed knitting problem for me). However, in then end I definitely will be using these!

2013-10-01 14.39.162013-10-01 14.38.15

The pattern is Onda su Onda by Annalisa Dinoe. So far these have been great for riding my bike when it’s a bit too chilly for my hands but not so cold that I actually need gloves. I think I may need to make another pair of fingerless mittens or gloves just so I don’t wear these ones out too quickly.

3. Slouchy Crochet Hat

2013-11-03 17.53.10

I made a version of this hat five years ago and I absolutely loved it. I loved it so much that even though I never crochet and only had cheap acrylic yarn and the wrong size hook handy, I made this gray version for myself the other week.

2013-11-03 17.52.272013-11-03 17.49.35

The pattern is a little tricky to find—it has no name so far as I can tell, but it was posted in this craftster forum by BendyBones. As you can see it’s a slouchy hat with some open work mixed in. The pattern doesn’t include instructions for the picot border, but you can learn how to do it by watching a video like this one.

My original hat, pictured below, was a bit more slouchy and had larger picot edging—as I said, at the time I actually used the right size crochet hook. On the gray hat, I had to repeat several rounds to get the correct size for my head.

This is a pretty good crochet pattern for a knitter—it’s fairly straightforward. I don’t do much crocheting, but I learned a little bit when I was a kid and there are some times when it’s really useful. I think crochet’s thickness makes it especially suited to hats. I like both versions of this hat because they keep my head warm but I don’t get too hot thanks to the natural vents. Also, the hats are loose enough so that I can wear them over damp hair without getting hat head. Win-win.

2013-11-03 17.47.08

Quick Knits & Crafts

quick winter knits

Today’s post will be dedicated to following quick winter knits that I made in January*: a scarf, a hat, a headband/earwarmer, and fingerless mitts:

*Ok, I actually made the scarf in January 2010. But it was still in January!

It’s hard to believe that it is still winter, because it sure didn’t feel like February in Nor Cal this week, where the temperature hit 75 degrees. We’re back to the usual 50s during the day, 30s-40s at night now, but the nice weather made me really excited for spring! Just look at the daffodils that came up behind my apartment:


In spite of the warm days, most of the knits I’ve been finishing lately are definitely for winter. I’ve been trying to use up what I’m sure most knitters have in their stash— skeins of weird yarns. I’ve got a lot of yarn that other people have given to me over the years. It can be a challenge to figure out how to use it. In my case, the yarns in question have textures and colors that are not what I’m used to working with. But I’m trying to destash, so I took up the challenge!  With the help of Ravelry I found three free patterns that I liked (in addition to scarf one that I made up).  Please note that all links below require a (free) ravelry subscription to fully view. [Bonus: the only photos I have of the yarn before I knit it feature Jo the cat.]

Patterns 1 and 2: Canto, the thick and thin red yarn

I received nearly three ball of this yarn from a friend in 2008. For two years, I simply used it as decoration, as you can see in the photo. Then in January 2010, I got bored and cast 11 stitches onto size 13 needles and knit until it seemed like a good scarf length. It’s quite bulky in the thick parts, so 11 stitches was a good width.

But I still had a significant amount left over. I love the color, so this winter I searched ravelry to see what else I could do with it. Turns out, yarns like this just don’t look good in anything but really simple patterns. Once I realized this, I settled on the Overnight Hat.

I made the small/medium version and it turned out great. True to its name, this was a really quick hat: I made it while watching several episodes of Parks and Recreation. The funny thing is, I get more compliments on this hat than any other I’ve made. The thick and think texture makes it look more complicated than it it. Of course, the color helps too—putting these items two side by side is visually intense!

Patterns 3 and 4: unidentified multicolor yarn

My other yarn was even more of a mystery to me—I still don’t know what brand it is, or exactly how much if it I had. I believe I got this from a friend in 2010. All I knew about it was that it was thick, soft, and had seemingly random color changes in marled gray, black and brown. Jo thought it was the best cat pillow ever:

I tried several patterns before hitting on the first one that actually looked good with this yarn—the Vanessa Headband.

As you can see from this admittedly blurry photo, I made the thin version, though I’d love to try the wide version too. I’m really bad at remembering where I am in a cable pattern, but it was also a pretty quick knit. I usually wear it with the all gray side facing the front. Depending on how much my hair has grown out, I can either wear it as a headband proper or as an earwarmer—which is actually quite useful when riding a bike in the early morning hours of winter.

To use up the rest of the yarn, I eventually settled for modifying the pattern for Gradient Mitts.

I made the small on size 10 needles and the fit turned out perfect—I’m getting better at adjusting for bulky yarns and my own loose gauge. I didn’t do the gradient color pattern, but I did pick these because they looked good in odd color combinations on ravelry. I knew that no matter what, I was going to get two completely different looking mitts, thanks to the weird color pooling of the yarn. So with a little bit of planning, I divided the yarn into two balls and held them together double stranded while I knit—this helped break up some of the color pooling. Finally, I added half thumbs to the pattern by picking up stitches around the thumb holes—I found that my poor thumbs were just too cold while riding a bike or driving with these on. But now that I’ve done that, I really like them.

So those are my quick winter knits! I have one more I’m working on, but it’s not done yet, so I’ll save it for another time. And if anyone knows of any other free, quick winter knitting patterns, send them my way before it gets too warm!