Costumes, Nerdy Knits & Crafts, Uncategorized

Hobbitses!

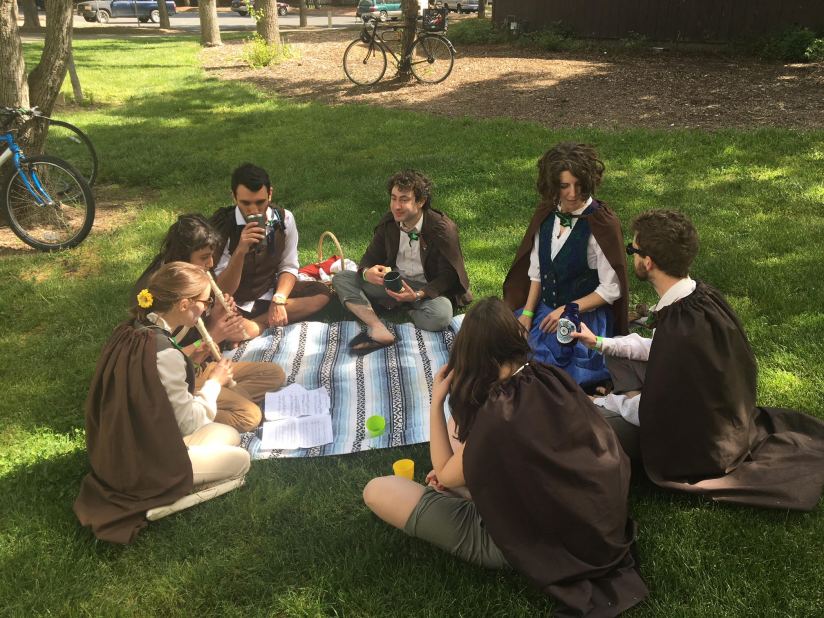
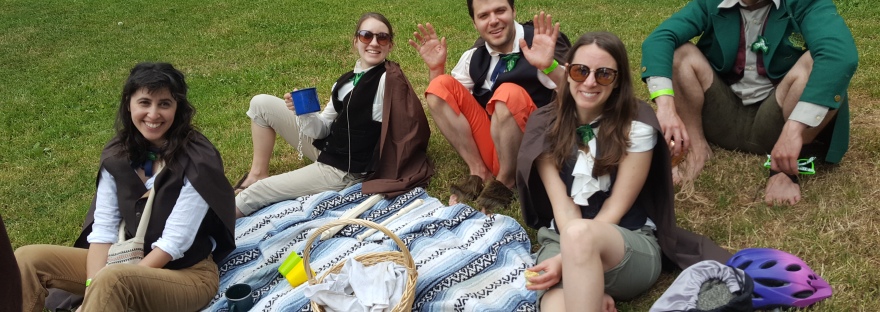
It’s another Tour d’Davis craft post! Several years ago, we were team Oregon Trail. Last year, we were sheep. This year, we did our costumed bicycle tour of town as Hobbits! We enjoyed breakfast, second breakfast, elevensies, and ales while frolicking in the Shire:

hobbits Tour 2018

Hobbit craft!

Every team member wore three handcrafted items: a cloak, a leaf pin, and a pair of furry sandals. Pro tip: take photos from above to create the appearance of hobbity sized humans!

2018-04-28 10.21.42

I sewed the cloaks for our team on my sewing machine, making a drawstring hem for the ribbon at the top of each. These costumes only had to last the day, so they were very simple brown cloaks! They were about 3/4 length because we needed to be able to ride bicycles (aka horses) in them.

Next up: leaf pins. Allie designed them out of felt, pipe cleaners, and glitter glue. We made our own and fastened them to our cloaks.

2018-04-24 15.46.29

And last but not least: furry feet! Most of the team used fake fur glued to flip flops. I had to be a weirdo hobbit and use MY OWN HAIR. I happened to be getting a hair cut that week—my hairdresser thought it was funny and asked to see photos of the final result.

I used my sewing machine and some scrap fabric to sew a tube of fabric around my sandals, then used hot glue to attach the hair. I know they are a bit much, but hey! Hobbit Realism.

We were each responsible for our own hobbit clothing, and that mainly meant one thing: a vest! Vests from thrift stores. Vests from costume stores. Vests over white peasant shirts. Say yest to the vest.

*Picnic Break* (tea, scones, and picnic blanket were provided throughout the tour!)

hobbits1

The Shire

We also created our very own Shire, decorated for the festivities. After all, it was Bilbo Baggins’ Eleventy-First birthday! Bunting and signs greeted all of our welcome visitors. We served them delicious vegetarian shepherd’s pie at this spot:

2018-04-28 12.44.04

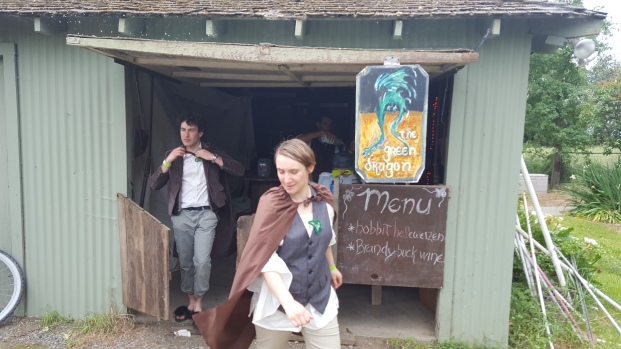
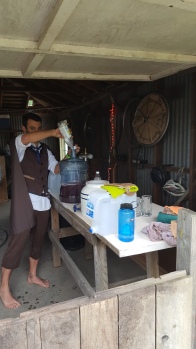
And since no hobbit meal would be complete without a pint to wash it down, several halflings converted the garage into the Green Dragon Inn, complete with Lisa’s amazing, hand-painted signage!

And last but certainly not least: a hobbit hole! This geodesic dome (which took a lot of teamwork to set up) got the Shire treatment with green tarps, a window, a sign, and Allie’s handmade bright yellow door. The door knob came from a jar lid!

2018-04-28 12.52.26

The inside was as cozy as could be!2018-04-28 12.53.14

Last but not least, we welcomed guests by playing “Concerning Hobbits” from The Lord of the Rings soundtrack on flute and recorder:

hobbits2

hobbits 3

I hope this inspires your own halfling-themed crafting!

Activity Knits & Crafts, Botanical Knits & Crafts, Costumes, Quick Knits & Crafts

Knitting for bikes, crafting for sheep

Ever wanted to knit a sweater for your bicycle?

Have I got the project for ewe!

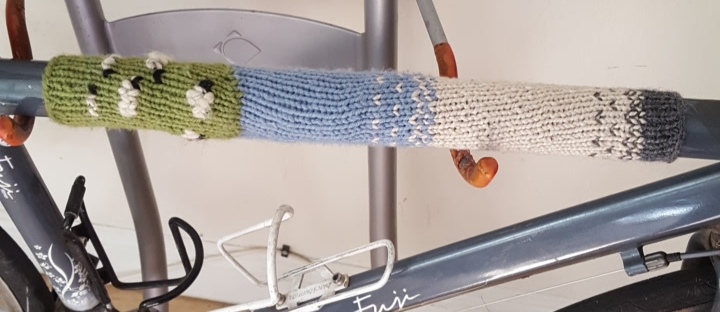
2017-05-06 16.36.30 Last weekend was Tour d’Davis, where my flock and I celebrated this costumed bicycle tour of town with our “yarnbombed” bikes. I am particularly proud of creating this countryside scene for my top tube, complete with sheep grazing on the hillside and a matching pouch for my cellphone. The entire thing is my own design. I call this cozy pattern Pastoral.

2017-04-27 22.29.24If you want to do this project on your own bicycle, you’re in luck—it has a very low baaaa-r to entry. All yarn used here was leftover from other projects:

Materials: Scrap yarn, knitting needles, yarn sewing needle (or crochet hook), measuring tape, binder clips or clothes pins, and imagination!

Instructions: Measure your top tube width and length, then check your knitting gauge for an exact fit. You can also eyeball it for an approximate fit that works pretty well too. Cast on in the most creative colors you can find! Stockinette stitch works well. When binding off, leaving a long tail so that you can sew it around the top tube. Use the binder clips or clothespins to hold the knitting in place as you sew up the seam. Don’t worry too much about the neatness of the seam, or weaving in ends, as neither are that visible.

2017-04-27 20.16.43

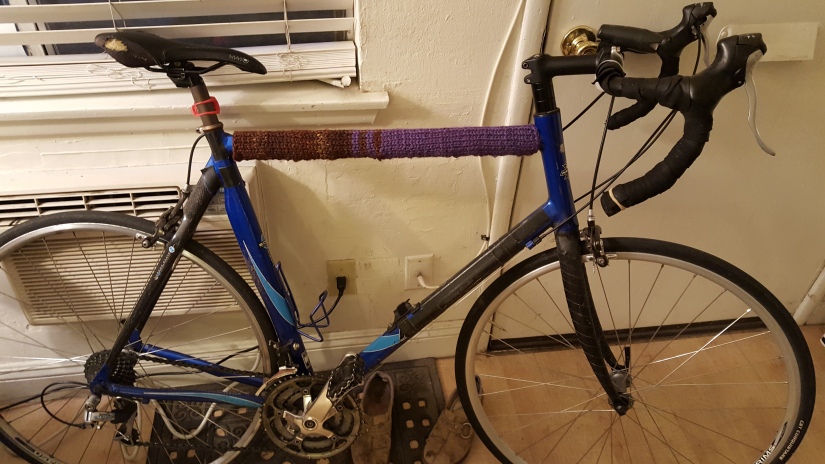
Colorways and patterns of the bicycle cozies above, from left to right: Unicorn, Dark Unicorn, UCD, and Co-Op Stripe (not pictured: Captain Picard, a red and black pattern). Below is Rogue One, my first bicycle cozy.

2017-04-16 19.53.42

Some of these cozies went to Team Sheep bicycles, but a few lucky cyclists on the tour got the extras!

2017-04-29 15.59.15

Several of my fellow sheep team members likewise rocked their yarn creations throughout the day! Here’s a shot of most of our yarn creations before installation:

IMG_4862

Many of these were for bicycle decorating, but we also did some yarnbombing, aka public yarn art instillations at stops along the Tour:

IMG_4897

Some on craft crew even did some more knitting and crocheting during the tour!

sheep3

So much goes into hosting our stop for the event, from the food and drink prep, to game design, to structure set up— I wish could capture all the creativity that goes on behind the scenes. But since I was on craft crew, I mainly have photos of our costumes and other sheep-themed decorations.

2017-04-29 09.52.02

If you want to be a cheap sheep, be a cotton ball sheep! We hot glued cotton balls onto T-shirts for the main part of our costume.

Materials: white T-shirts, cotton balls, hot glue guns and hot glue, cardboard to place in between shirt layers.

2017-03-31 13.22.41

Instructions: Glue cotton balls to your shirt! You can do them in neat rows or in a more natural fashion. Just don’t burn your fingers. Also, be patient, it takes an hour or more.

2017-03-31 13.23.09-1

When you have finished a shirt, it’s time for sheepy accessories:

2017-04-29 16.19.21We searched through DIY sheep ear tutorials on the internet to come up with a simple head piece. Not baa-d, right?

Materials: Wide plastic headbands, white and black felt, white duct tape, cotton balls, and hot glue.

Instructions: The best order of operations is to hot glue the ear felts together, pinch at base, tape the ears to the headband, then hot glue cotton balls on the top. If you’re making a lot of these, cut ear templates out of cardboard first!

2017-04-14 19.42.11

I didn’t get great photos of all the other costume details, but you can see in my photo that we had bell necklaces, sheep face makeup (black eyeliner), and ear tags (paper gift tags cut down to size and hot glued on). I also made black poster board hooves at the last minute, which didn’t last that long on the bicycles!sheep1

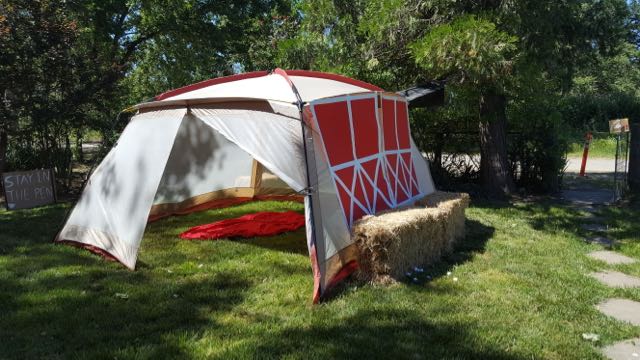
All the white duct tape also had another important use: it went towards the creation of the red and white barn doors! 2017-04-29 14.59.18

Materials: four red poster boards, one roll of white duct tape, and a buddy.

Instructions: Lay out the boards so they overlap. Tape together horizontally and then vertically, using a friend to help hold the tape straight. Outline the entire door in white tape. Add the Xs at the bottom last.

sheep2

I hope this inspires many a bicycle cozy and sheep costume! (And if you need even more sheep patterns, check out the Baa-ble hat I made last winter.)


Costumes, Nerdy Knits & Crafts, Tweaks & Alterations

Ten MORE of the nerdiest crafts I have made

Project #5 preview: My DNA is showing!

In 2012, I shared a list of the Top Ten nerdiest crafts I have made. Recently, I realized I have made enough nerdy crafts since then to have a second top ten list. (And who doesn’t love a good listicle? I am a total sucker for them.)

Here’s the list! I have written about most of these before, but #5 and #1 are brand new projects!

10. Harry Potter Cat Toy20120821_174144Details: Knit in August 2012 for a couchsurfing host, first blogged here, based on this pattern.

Nerd Alert: The recipient had two cats named Harry and Ron (brothers!), so of course their cat toy had to be knit in Gryffindor colors. I also gave it a mane, because of course I did.

Bonus Pics:

Harry caught the snitch, er, mouse in his mouth.

Honorable Mention: I recently knit a purple washcloth with the Knight Bus on it. Maybe the pattern did not turn out very visible…OR maybe, the Knight Bus cannot be seen with muggle eyes. You decide.

2015-01-19 14.42.54

9. Sweatered Shetland Pony Cozy

2014-11-17 13.24.17Details: Knit in November 2014 for a fellow knitting friend, blogged here, pattern details here.

Nerd Alert: Many knitters make sweaters. A select few knit sweaters for Shetland Ponies. But to my knowledge, I am the only one who had made a sweater for a knitted pony on a beer cozy.

Bonus Pics:

one pint of ale, please.

8. Katniss Cowl

2014-03-29 17.54.23Details: Knit in March 2014 for myself, blogged here, ravelry pattern notes here. Based on the cowl the main character wore in the second Hunger Games film.

Nerd Alert: Did I wear this to see the most recent Hunger Games  film? Yes, yes I did. Also, it’s still held together at the side with my cable needle.

Bonus Pics:

2014-03-29 17.59.072014-04-02 14.10.252014-04-02 14.06.47

7. TARDIS PillowTime And Relative Dimension In Spacebigger on the OTHER side!Details: Knit in December 2013 for my brother, blogged here, pattern details here.

Nerd Alert: You don’t have to be a Doctor Who fan to enjoy this pillow across all of time and space…but it helps. I blame/thank my brother for introducing me to the show. (Also—notice how it’s bigger on the other side!)

Bonus Pics:

just a little blue box

6. Adventure Time Washcloth

IMG_1935Details: Knit in December 2012 for my brother, blogged here, pattern from here.

Nerd Alert: Confession—I haven’t seen Adventure Time. I know this is Finn. His face is a little gray but he doesn’t seem to mind.

5. DNA Double Helix Legwarmers

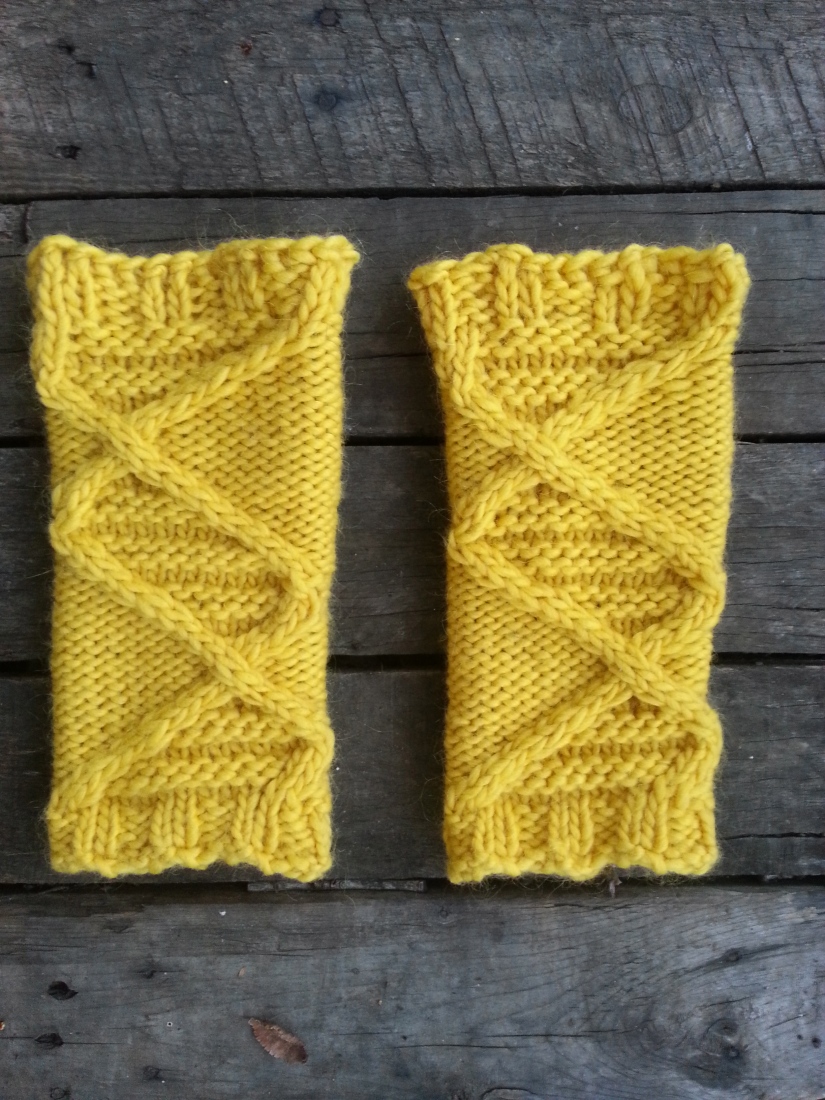
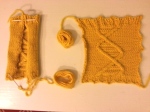
2015-01-07 16.49.17Details: New project! Knit in January 2015, pattern details here.

Nerd Alert: That’s right—that’s a double helix cable! Expertly charted, or so I have read. The original pattern was for a scarf, but I added some ribbing to the top and bottom, knit two of the pattern at a time, and stitched them together in the back to create legwarmers. (And yes—I wear these! To the gym! In public!)

Bonus Pics:

Bringing back the 80s.

2015-01-03 17.18.522015-01-06 17.44.352015-01-07 16.47.402015-01-07 16.49.32

4. Battlestar Galactica T-Shirt

2013-10-01 14.36.33Details: Made in August 2013 for myself.

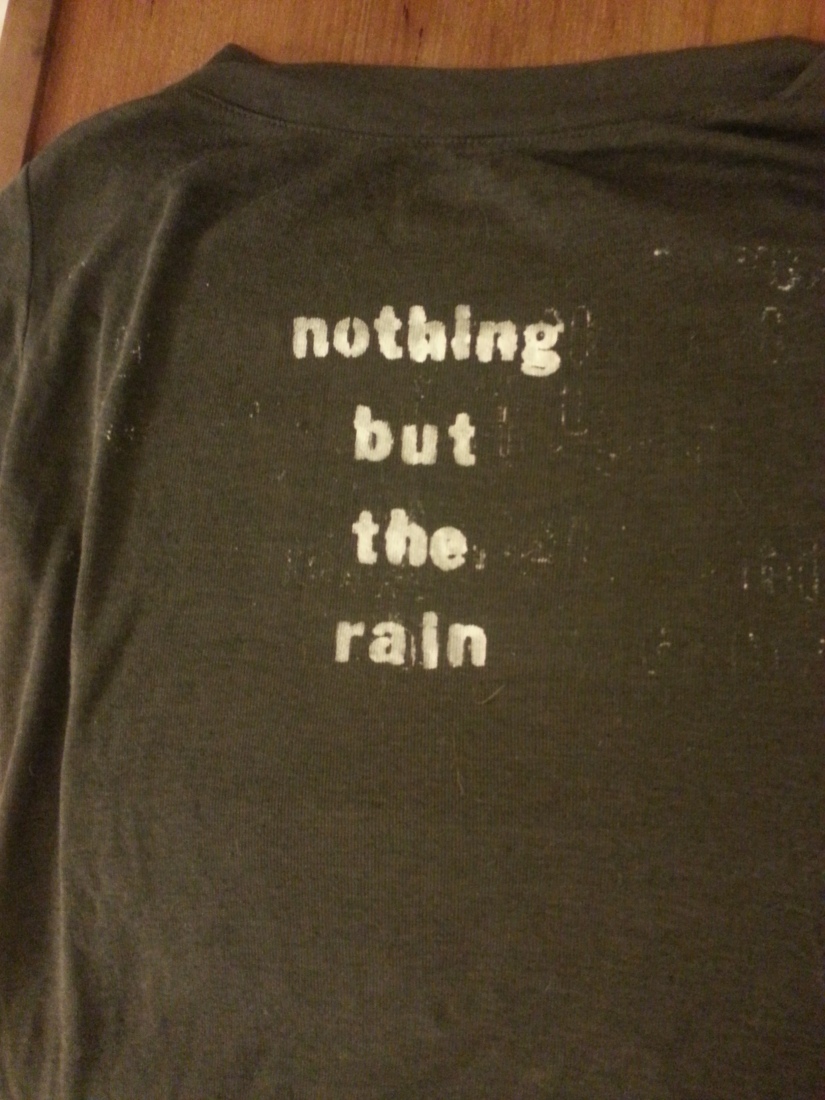
Nerd Alert: Not only did I stencil the signature phrase “So Say We All” from BSG onto a t-shirt—I also made a second shirt for my friend with the phrase “Nothing But the Rain,” an even more obscure reference. Nerdy stenciling at its best.

Bonus Pics:

Starbuck, what do you hear?

2013-09-05 11.55.452013-08-23 20.12.172013-08-23 20.33.092013-10-01 14.36.30

3. Sonic Screwdriver Chapstick Cozy

2014-01-22 10.54.33Details: Knit in January 2014 for myself, blogged here, pattern here.

Nerd Alert: Not only did I make Doctor Who’s sonic screwdriver to hold two chapsticks…I may have shown it to a cosplaying Tenth Doctor I ran into. Just saying.

2014-01-20 10.12.272014-01-19 22.04.122014-07-16 14.44.59

2. Cylon Potholder

20130101_113650Details: Knit in November 2012 for the friend who introduced me to Battlestar Galactica, blogged here, pattern here.

Nerd Alert: Before I saw BSG, I dismissed it as Top Gun with Robots in Space. That is, until my friend convinced me it was about much more than that (like the ethics of what it means to be human—I was sold) and I gave it a chance. To thank her for this, I made her a potholder that not only had a creepy red glowing cyclon “eye” but the words “FRACK” and rounded corners at the top. It’s a terrifying potholder. I’m that kind of friend.

1. The Dungeon Master’s D4 Dice Bag2014-12-21 14.33.06Details: New Project! Knit in December 2014 for my brother, pattern here.

Nerd Alert: I’ve never played Dungeon and Dragons, but my brother leads several D&D groups and has need of dice transportation! Not only did this project require maths to get the exact size of triangle, it also required sewing a zipper. I stitched the numbers in different embroidery threads to make it extra colorful!

Bonus Pics:

(You should be able to get an idea of how to sew the zipper in from these photos)

2014-12-19 17.27.422014-12-21 13.17.072014-12-21 13.21.072014-12-21 13.42.202014-12-21 14.33.30

While I enjoy making things for myself, the best part of being able to knit something nerdy is having something fun to give to the lovely nerdy people in my life. Here’s to ten more nerdy knits!

2014-12-25 10.18.50

Costumes, Historical Knits & Crafts, Holiday Knits & Crafts, Nerdy Knits & Crafts, Uncategorized

Costume Extravaganza: DIY Halloween for 2014

It’s that time of year again—Halloween! The perfect holiday for those who love to craftily construct homemade costumes. The holiday for those of us who never got too old to play dress up:

Me and my little bro as pint-sized cowboys

The DIY Halloween costume post has become a little bit of a tradition for me. In my 2012 Halloween costume post, I shared four fun DIY costume ideas (not including those from my top ten nerdiest crafts post), including Patty Mayonnaise, Princess Peach, Holly Golightly and a Carrot. In my 2013 Halloween costume post, I shared six more playful costumes, some for individuals like Radioactive Marie Curie, Ballerina Annie Oakley, and Lady David Bowie, as well as some for groups like Alice in Wonderland, Game of Thrones, and The Great Gatsby.

This year, my focus is on fun, kick a$$, and easy DIY costumes for ladies. Every October, there are news stories about how store bought Halloween costumes for women (and increasingly girls) are pretty much all “Sexy Fill-in-the-Blank.” No problem if that’s what you’re looking for—but now it’s basically the only option out there. On the other hand, every year there are news stories about the amazing DIY costume ideas out there—which are fantastic, but often take a lot of time and/or money to make. This blog post covers the middle ground! So without further ado, here are 6 costume ideas in three categories.

HISTORICAL COSTUMES

The Ghost of Amelia Earheart

2013-10-31 23.03.26 - Version 2In keeping with the creepy-versions-of-historical-women theme of several previous costumes, this was my Halloween costume last year. Famous female pilot Amelia Earheart was the first woman aviator to fly across the Atlantic Ocean. She disappeared without a trace while flying across the Pacific Ocean in 1937. She still haunts people’s imaginations—which is why she makes a perfect ghost.

2013-10-26 21.30.01Most of this costume consisted of clothing I already had—a button-up white blouse, gray scarf, tan pants, brown boots and a brown faux leather jacket. The two items I had to purchase were the aviator hat and the googles. I got both online for relatively cheap—both were found on ebay for about $10. (Apologies for the blurry mirror photo).

2013-10-26 21.30.14Since I wore this costume to two different parties, so I had some time to work on the ghost makeup. The first time I did it very subtle, as in the close up above—white powder on my face, light gray eyeshadow around my eyes, and black lipstick. But the next time, I went for a more ghoulish, undead look.

Photo on 10-31-13 at 7.53 PM #2Here I used black and dark gray eyeshadow and black eyeliner around my eyes, with the light gray eyeshadow on my cheeks. It was a much more dramatic look, kind of like an easier version of the grayscale makeup I’ve seen people do. I like this version better.

2013-10-31 20.54.19This was easily my favorite photo from the party. And the costume was a hit!

Thanksgiving Pilgrim

Photo on 11-23-13 at 1.18 AM #3If you don’t mind skipping ahead one holiday, you too can be a Pilgrim. I realize that pilgrim women wore bonnets and dresses, but I really wanted to wear the buckle hat, so I did.

2013-11-22 15.34.52This costume does require a little bit of sewing. But you only need a small amount of white fabric (felt for the least sewing) and an old shoe lace. You can make a quick collar pattern by folding your felt in half (if it’s fabric, make sure there are two layers of it, then fold in half), then finding a shirt or dress with a neckline that fits you well and folding that in half too. Trace the line of the neck and extend the shoulder line as far as you would like it (the longer the line, the bigger the collar). Then trace a one-quarter circle from the shoulder line to the fabric fold. There’s a good tutorial here.

2013-11-22 15.06.34If you used felt, just sew the shoulder seams together, cut the shoelace in half, and sew it to the corners of the collar at the neck. If you used doubled over fabric, bear with me, I’m bad at sewing descriptions and I did this a year ago. Basically you’ll have four pieces of fabric, you need to sew them into two facings. Sew the shoulder seams for each pair together so that you have two complete collars facings. Put them right sides together and sew those collars together around the edges, except for the inner curved neckline. Turn right side in and press. Turn neckline hem about 1/2 inch in and press. Top stitch together, leaving 1/2 inch open spaces at the corners, then thread the shoelace in one opening and out the other.

2013-11-23 14.01.42Now for the hat and shoes! You’ll need construction paper (or large pieces of foam sheet paper), an X-acto knife or scissors, and tape. I used a wide brimmed black felt hat to start. I cut two rectangles of black construction paper and taped them together at an angle and placed that over the top to make it look more like a Pilgrim’s hat. I then cut a rectangle out of yellow foam paper, cut a smaller rectangle out of the center, and taped it to the hat as a buckle.

Photo on 11-23-13 at 1.18 AM #4Make two more buckles and tape them to some black shoes (Mary Janes work well). I paired all of this with some simple clothing I already had—white tights, white socks, knee length black shorts and a black long sleeve t-shirt.

2013-11-22 22.56.11Don’t forget to make a hand turkey! Mine is crossing a busy street, as the local turkeys are wont to do.

additional ideas:

I already blogged about our live action Oregon Trail game, but the prairie girl outfit is another good historical costume! Your Laura-Ingalls-Wilder-loving-inner-ten-year-old will be proud of you for making your own bonnet.

2014-05-01 22.28.182014-05-03 12.09.37 - Version 2

NERDY COSTUMES

River Song 

2014-10-18 13.10.33I am a total sucker for the cheesy wonderfulness that is Doctor Who, as you probably know from previous posts. But a realistic costume for his fellow time traveling troublemaker River Song was not in the cards for me—her original parachute style dress is outrageously expensive now. So this is my version.

2014-07-16 14.39.29First, the dress. I really wanted to make one that looked like hers, but my sewing skills are not that advanced. Instead I found one in a similar color with the same zipper style neckline on ebay for about $12. It took some searching and it’s a bit loose on me, but you know. I like to think my hair makes up for it.

2014-07-16 14.44.59Now of course, the most important DIY part of this costume is my sonic screwdriver. This is my own original pattern for a sonic screwdriver chapstick holder, which you can find right here! Alternately, you could also just hold a banana like I did in the first photo (and for any fans who point out she wore a different dress when she had the banana…this is probably not the cosplay website you were looking for). Or you could buy or make your very own TARDIS journal—there’s a great tutorial for making one here.

2014-10-18 13.24.56The only other accessories you really need are some brown boots, black tights (not pictured because it’s still like 80 degrees here), and a wide studded belt. I faked it here with the two brown belts put together. A brown gun holster would also be a nice touch.

Ensign Ro

2014-10-18 13.56.32Any other Stark Trek TNG fans out there? Casual viewers may not know this character, but I always had a soft spot for Ensign Ro Laren. I’ll admit, I threw this costume together last minute because I discovered I still had the uniform top in my costume box. I’ve had it since I was like 12! (I’m not sure whether to be slightly proud or slightly embarrassed by this). It doesn’t quite fit as well as it used to, but it works.

2014-10-18 13.53.482014-10-18 13.53.282014-10-18 13.58.26

I had some fun making her Bajoran earpiece for this costume. I used a broken necklace, a regular pierced earring and a clip on earring to recreate it. I also made a pip for the collar of my uniform using a thumb tack and an earring backing, just as I did when I was 12. I didn’t get too elaborate with the Bajoran nose—I just used eyeshadow in two different shades of brown to create the illusion of creases.

2014-10-18 13.55.09Truth: I was not quite ready to take photos of myself outside in this, so excuse the blurry mirror photo. This is just to show the rest of the outfit (black leggings, black boots). If I’d had more time I would have straightened my hair and tried to find a red headband. At least there are some stars in the background!

additional costume ideas:

If you can knit the Hunger Games Cowl fast enough, you could be Katnis Everdeen! Bonus: it would be a warm and cozy costume.

2014-03-29 17.54.232014-03-29 17.59.072014-03-29 17.56.39

ABSTRACT COSTUMES

Anatomical Heart

2014-03-08 19.05.57Sometimes, I like to attempt non-humanoid costumes. I was particularly pleased with this interpretation of the human heart. Since veins and arteries are often depicted in blues and reds in anatomical drawings, I went with that theme. I painted dots in blue eyeshadow and red lipstick on my forehead, with an earring of each color. Then I found some children’s tights in a discount bin at Target in blue and red. I cut off the feet and stuck one arm in each, tying them together behind my back to form a sort of shrug. It stayed put surprisingly well.

2014-03-08 19.05.19Recognize the top? It’s was my Valentine’s Day party Free Fall Tank. It’s a quick pattern that you could totally finish before Oct. 31. I thought it worked well for the heart costume too. The red belt and the black tutu…well, that was more to make it more costume-y for the party. But check out the tights!

2014-03-08 19.06.20These were the tights that actually inspired the whole costume. Ebay tights are the best.

2014-03-08 21.04.31You should know that I served lots of donuts dressed like this. I doubt anyone knew what it was supposed to be, but I knew what it was. In my heart.

Christmas Tree

2013-12-15 02.05.43As I promised that some of these costumes would be very easy, this final idea is one that I executed in about 30 minutes. Technically this was for an ugly sweater party around Christmas time, but it works just as well for the October holiday.

2013-12-15 02.05.12Remember the foam sheets I mentioned for the Pilgrim costume? I got a bag of odd sized ones from the dollar store, and cut them into squares. I used all the green ones to create a Christmas tree with a brown one for a stump, then found some sparkly ones in different colors to be the gifts below. I used duct tape to adhere them to an old sweater and wore it with my brightest red pants.

68877_10101285046722953_685670951_nYou could always go as a grumpy Christmas elf too.

additional ideas:

I think leggings can be a great inspiration for abstract costumes. If I had a chance, I would probably pair these paint splatter leggings I have with an actual paint splattered top.

this 2014-04-06 13.09.322014-04-06 15.23.28 plus this 2014-09-05 22.35.23


I hope these costumes inspire some epic Halloween 2014 creations of your own!

Costumes, Historical Knits & Crafts, Nerdy Knits & Crafts

The Oregon Trail game of your childhood, DIY style!

If you were in elementary school in the United States any time in the past, oh I don’t know, 40 years, you probably played the Oregon Trail computer game. The most old school version looked something like this: River Crossing at Big Blue

Several weeks ago, a group of my friends and I got the chance to recreate part of that Oregon Trail gaming experience, in live action form, for about 200 people (all grown ups, mind you!). And of course, we took a do-it-yourself approach to the task. Join me on an image-heavy DIY journey full of Bison Hunting, River Fording, Dying of Dysentery, and more! 1782479_10152423001246354_2419330697076540521_o

The Setting First, a little bit of background. We were part of an all-day event that could best be described as a moving/progressive party, with costumes, on bicycles. Everyone was in teams, the teams had themes (hence the co-ordinated costumes), and at each place we stopped for food and drink, one team hosted and the other teams competed in games. So as Team Oregon Trail, we needed to provide food, drinks, games, and of course, ambiance for our guests.

Since we were hosting at a rather rustic venue down an unpaved road, we took advantage of the opportunity to make it part of the trail, with painted cardboard signposts and gravestones: 2014-05-02 19.42.06 2014-05-02 19.40.46 2014-05-02 19.37.41

I’m so bummed I didn’t get a close up of the headstones, because I figured out a really cool way to make them look like stone: I found this speckled stone spray paint! I used gray primer and then gray stone spray paint, then we pasted printouts with epitaphs on them in courier font. To stick them in the ground, we taped them to those little signal flags—the kind you see to mark gas or water lines in construction sites—and pushed the metal parts into the ground.

Then of course, for the travelers who made it through alive, we needed a watering hole. So we made a bar! 2014-05-01 17.24.17

Using the backing of a warped bookshelf that was left at the dumpster and some acrylic black paint, we created this sign. Making the sign involved looking at some Old West style fonts online, blocking and sketching them out onto the wood, and filling it in with paintbrushes.

2014-05-02 19.21.03

Some of out team members had a tall table that was already rather DIY to begin with (the top was an old door), so we nailed the sign to the front of it.

2014-05-03 12.00.03

It made for a great bar! Not pictured is the table off to the right with lemonade and water. (If you were to re-create this event for children, I’d suggest sticking to those).

2014-05-03 12.32.08

2014-05-02 21.03.10

For food, we had chili, cornbread, chips, watermelon, and trail mix (the last was my idea—I couldn’t resist the pun!) Have you ever wondered what chili for 200 people looks like? Would you believe that this isn’t even all of it??

The Activities  We debated what our official game should be for some time, but in the end, we decided that it would be hunting. Just like in the Oregon Trail game, you would have to shoot at pixelated animals. But with a twist! (or to be more exact, a twister.)

But first, a look at the animals:

2014-05-12 11.31.30

2014-05-02 19.46.43

We had a rabbit, a bison, a deer, a squirrel, and a bird. All of them were done on cardboard with either acrylic paints or markers. For the pixelated style, they were filled in with squares of color instead of smooth lines.

2014-05-02 20.11.05

2014-05-02 20.11.312014-05-02 19.43.05

Ironically, from a distance they looked normal! They were attached with string to poles out in a field, kind of like a laundry line, but with animals.

2014-05-03 12.25.02

The actual “hunting”  game required players to shoot the animals with airsoft guns from a distance. To add an element of challenge to this game of skill, my idea was to add some possible handicaps based on all the bad things that can happen to in you in the original game—like dysentery, for example. Players from the competing teams had to spin the twister spinner and see if they would have to shoot with a handicap. There were eight such things that could happen, so I put all of them onto a twister spinner with my label maker, and then made list of their handicaps:

2014-05-02 19.47.28

Whenever possible, I made them roughly correspond to the disease or injury—for dysentery, you had to squat while shooting.

2014-05-03 12.25.38

But since not all 200 people could play the hunting game, we had a few other activities. First up: Fording the river!

2014-05-03 12.23.30

We made the “river” out of two blue tarps, held down by rocks on the sides (we changed the layout a little bit after the photo below to make it a wider river).We left out a sign, a few pieces of cardboard, and instructions for getting across (you can only have as many pieces of cardboard as you have people on the water, and everyone has to be in the river before the first person can reach the other side):

2014-05-02 20.05.28

Then we pretty much let people fend for themselves and do whatever they wanted. They could just play it like a version of “the floor is lava” and have a good time. I think everyone made it across safely…

2014-05-03 12.33.26

…But for those who wanted to see how they died on the Oregon Trail (and who didn’t?) we had the Wagon Wheel O’Death:

10330508_2405945231432_957716917925018948_n

The Wagon Wheel O’Death was exactly what it sounded like. It was made from an actual bike wheel (minus the tire and tube), mounted in the center to a piece of wood, which allowed it to spin freely. Each of the eight wedges (brown paper painted with acrylic paint) had one of the ways you could die on the Oregon Trail on it.

2014-05-02 19.46.31

2014-05-03 12.23.47

Anyone could spin the rim of the wheel, and whatever the rattlesnake’s tail (i.e. the quick release lever) pointed to, that was how they died. And then they got a sticker! A really cool sticker.2014-05-25 22.17.29

Wanted to know how I died on the Oregon Trail? Now you know.

 The Costumes  No Oregon Trail game would be complete without travelers and their means of transport! Humans and bikes both underwent some nifty transformations in preparation for the journey. Here’s most of our crew at the start of the day:

1524353_10152423001011354_482348430029231463_o

My costume included a bonnet, a dress, an apron, and a cotton corset top and shorts underneath (which came in handy because it was a hot day!)

2014-05-01 22.28.18

The dress was a thrift store dress that I altered—I wish I had take a before picture. It had long sleeves and huge, ugly silver button and trimming on the waist and wrists. I took off the buttons and trim, shortened the sleeves, and used the sleeve material to add a single hidden pocket to the full skirt.

2014-04-30 17.58.05

I sewed the bonnet myself, using scrap fabric and this tutorial a friend showed me. It was pretty useful, although it’s helpful to have some minimal sewing knowledge, like using interfacing and such. The tutorial only really lacks descriptions for two parts: how much and what kind of elastic to use (I used 6 to 7 inches of 1/2 inch elastic, guessing from the tutorial photos) and how to match the head part to the bonnet brim. To do that you need to do a basting (loose) stitch around the head piece, pull the ends of that threat to gather it, and then line it up with brim, so it looks like this:

2014-04-29 23.37.092014-04-29 23.37.19

I made mine a bit too big (I went a little bigger than the suggested dimension because I have thick hair),but it worked. I opted for ribbon ties instead of fabric ones.

2014-05-03 10.25.07

Bonnets were a popular choice for the Oregon Trail team! The one on the left in the above photo was also homemade. Our assortment of bonnets and western hats proved quite practical in the heat.

Some of also stayed out of the sun under covered wagon bikes!

10382123_10103102274793253_6345158705518214501_o

10317809_10103102274962913_8887227195104037651_o

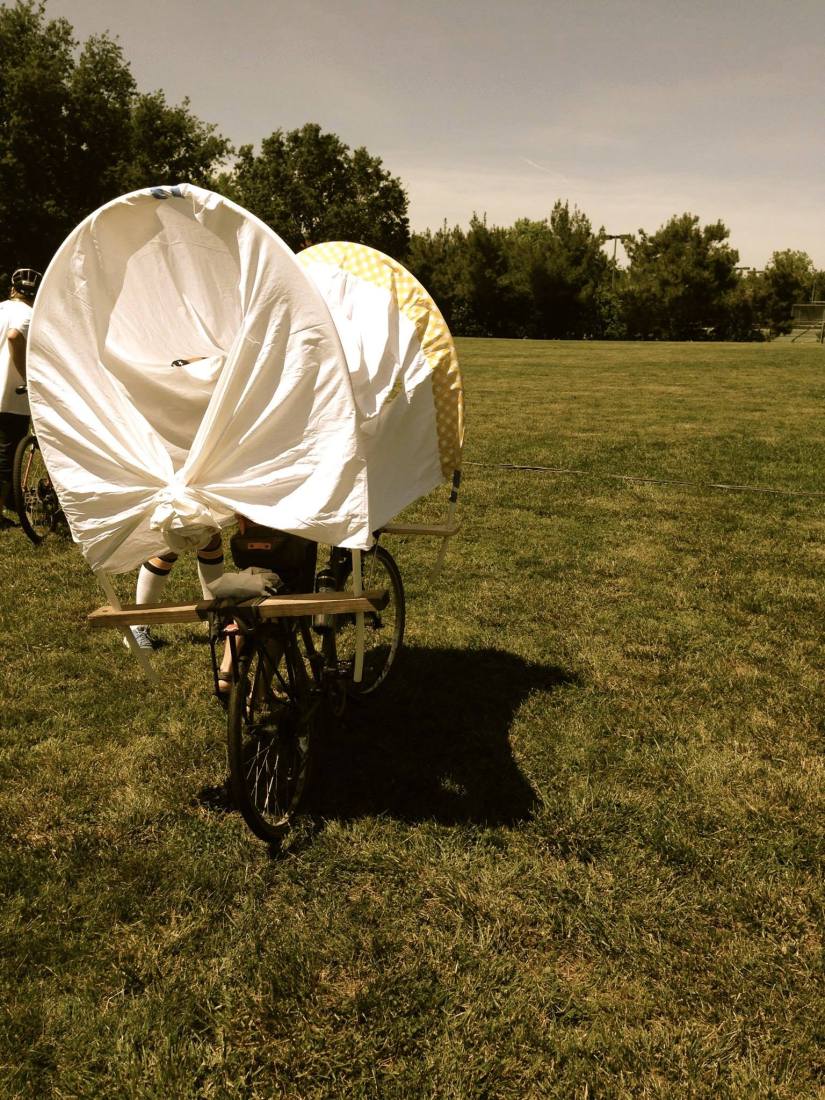
The covered wagon bikes certainly made us stand out. I was not directly involved in their creation, but I can describe some of their basic construction. For bikes that had back baskets/racks and straight handlebars, the wagons were attached directly with clamps. For those that didn’t, two by fours attached to the bike held the wagon frame in place (a special, large drill bit was needed to drill a hole large enough for the wagon frame to fit):

10264071_10103102274039763_3635522649387505989_o

10257251_10103102274488863_4520575390980139602_o

I should point out here that the bloomers above were also home made from a sheet! Anyway, the wagon frames were made from flexible thin plastic tubing. If you want to try this, you’d probably want to play around with different types of flexible PVC pipe—the tubing we had was freely available to us, but it was rather thin and not that sturdy, and the wagon frames tended to list to one side after a while.
1504471_10103102279543733_2043966733327771208_o

The wagon coveres were sewn from sheets. The front end had a casing a little wider than the tubing, kind of like what you would sew for a curtain rod. The back was simply gathered together. We discovered that they needed some vents in the sides so that the wind wouldn’t make cycling too difficult for the cyclist inside (I think it also helped with visibility on the sides somewhat). We also had a mini version of the wagon on one of the bicycle baskets:

2014-05-03 13.13.51

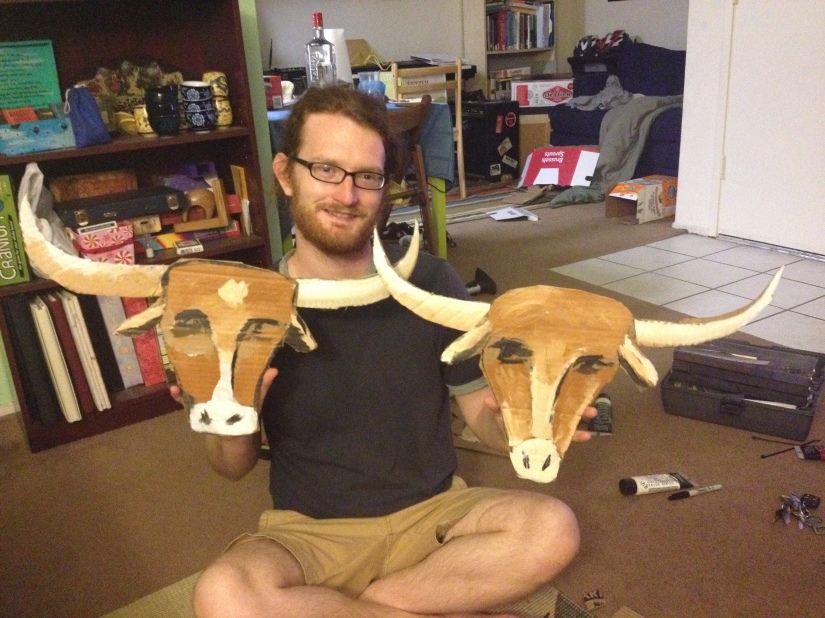
No wagon train would be complete without some beasts of burden! Some of us decorated our bicycles as oxen or horses using paint and cardboard (and one of our team members dressed as an ox as well!).  We all made these separately, so there was a lot of variety in appearance.  Some of them were realistic, like these oxen, Oxford Comma and Margaret Thatcher:
2014-05-02 22.46.45

And some of them were very simple and cartoony, like my oxen, Oxnard and his buddy (I forget if we named him—I call him Ollie Oxen Free):

2014-05-01 13.11.34

We even had a pixelated horse!

IMG951678

We also got a few real life tumbleweeds from nearby fields and attached them behind bikes with string:

10321523_10103102279184453_3580585545826617831_o

2014-05-03 11.34.12

Putting this event together was a lot of work, but it was also a ton of fun. It gave me a whole new appreciation of how talented my friends are in arts, crafts, and DIY endeavors! Here’s to Team Oregon Trail 2014!

2014-05-03 14.19.15

Costumes, Nerdy Knits & Crafts, Tweaks & Alterations

Katniss Cowl: A Hunger Games Knit

Last week I finally finished my version of The Huntress Cowl by LollyKnits! Here is the finished item, which resembles nothing so much as knitted armor:

2014-03-29 17.54.23

I knew that I wanted to knit some incarnation of this piece since I saw Hunger Games: Catching Fire back in December. Non-knitters might not recall what Katniss Everdeen wore in the opening scenes (images here and here), but knitters were all over it.

2014-03-29 17.58.04

I started this project way back during the Ravellenic Games, but it felt like the odds were not in my favor—that is, it took forever to complete it to my liking. However, the two biggest issues with the fit ended up canceling each other out, which left me with a garment I’m actually quite happy with.

My Huntress Cowl

When I started this project, the charcoal gray colorway in the recommended type of Lion Brand yarn was long sold out, so I went with oatmeal instead. I then had to do a lot of adjusting to account for my loose knitting gauge and my long torso. I had never knit in herringbone stitch before and the pattern gives gauge in stockinette, so I wasn’t sure if my swatch was accurate.

cowl in progress

I ended up casting on 60 stitches on size 15 needles instead of 44 stitches on size 17s, and decreasing every other row to get longer, wider triangles for the front and back piece. However, this made the triangles way too long, so when I had about 30 stitches left I started decreasing on every row.

2014-02-27 12.10.06

Pro-tip: After wet blocking, you can tell that your item is dry when the cat decides to sleep on it. You can’t quite see it in this photo, but the piece that Jo is sleeping on came out a little bigger than the other one, because I got better at herringbone stitch as I went along. It worked out fine in the end though.


For the neck piece, I decided to use a make a different version from the original by using a tutorial called the Hob’s Collar. I just wasn’t sure about having a super stiff rope collar in a knitted cowl. The image tutorial has detailed instructions, but it basically walks you through weaving the yarn around three circles of fabric, cut from a small shirt.

2014-02-26 16.35.082014-02-26 16.46.482014-02-26 17.15.252014-02-26 21.03.27

I ended up cutting up two shirts, one teal and one white, because my fabric was so thin. I think it worked best to have a white shirt because it makes it harder to see any parts that I didn’t completely cover with yarn. The results looked pretty great! The main downside was that it was even floppier than I imagined—it didn’t really hold this shape when it was around my neck.

2014-02-26 21.02.35

I was running low on yarn at this point, so after picking up stitches around this neck piece, I only increased to 80 stitches for the shoulder connecting piece, even though I have very broad shoulders. And even with loose knitting, it was very tight.

Soooo then I let these three pieces linger in my project bag for like two weeks. I am not a fan of seaming, and knowing that I had some wonky pieces to put together discouraged me. But guess what? When I finally picked up the sewing needle, I realized that I could tuck most of the shoulder piece stitches UNDER the collar, it would make the collar stiffer and take up most of the portion that was tight on my shoulders. There was still plenty of length in the triangles for the whole garment to work. So that is exactly what I did. I did end up sewing some rather wide triangles to a narrow collar, but it worked out pretty well.

2014-03-29 17.59.07

Above, I’m wearing the cowl with the larger triangle in the back. Below I’m wearing it with the larger triangle in the front. I think it works both ways, but I prefer the slightly larger triangle in the back.

2014-04-02 14.06.47


In both photos I’m using a cable needle to pin the pieces under my arm. At first it was because I was traveling and that was all I had, but now I kind of like it. When I wear it with the bigger side in front, I have to overlap the pieces differently to get a good fit.

2014-04-02 14.10.25

I had hardly any yarn left when I finished seaming, so if you’re going to make major adjustments bear that in mind! I realize that it’s Spring now and no one is really making wintry knit objects, but it was cool and rainy last week so I got to wear this more than once. If you’re willing to make the adjustments, it can be a really fun piece to wear!

2014-03-29 17.54.45


Costumes, Historical Knits & Crafts, Holiday Knits & Crafts, Nerdy Knits & Crafts

DIY Halloween costume ideas

It’s almost Halloween, and you know what that means: COSTUMES!

If I had my way, every party would be a dress up party. Because when I was a little kid, every birthday party WAS a dress up party, with a theme, and with costumes. Occasionally I have continued this tradition, as I did this year with a reprisal of my Alice in Wonderland themed birthday party:

2nd grade Alice
2nd grade Alice
21st grade Alice
21st grade Alice

Now that it’s October and more people are looking at my Halloween costume post from last year, I figured it was time for another round of crafty costume ideas. Lucky for you, I’ve done my fair share of costuming in the last year! This time I’ve organized them into individual and group costume categories for you. But I realized they could just as easily be categorized as “weird takes on famous individuals” and “characters from well known novels.” Enjoy!

(edit: There’s now a 2014 DIY Halloween costumes post as well!)

INDIVIDUAL COSTUMES

Historical Women With a Twist: Radioactive Marie Curie and Ballerina Annie Oakley

So I’m a fan of DIY historical costumes, especially for women. Whether it’s one of these bizarre vintage costumes from days of yore, or one of these awesome new interpretations from Take Back Halloween, I’m all for it. The latter website makes a great point that the vast majority of store bought women’s Halloween costumes fall into the “Sexy ______” category, limiting your options. But if you make a costume yourself, it can be whatever you want it to be.

And for me, that means adding a twist to famous historical figures. Like being a glow-in-the dark version of physicist Marie Curie for Halloween last year.

Marie Curie

IMG_1823

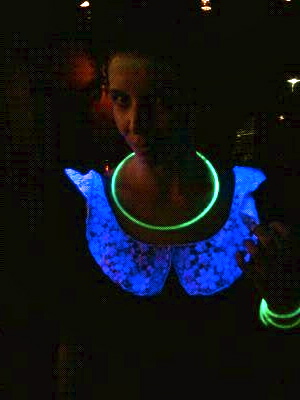
Marie Curie was a Nobel Prize winning scientist who did groundbreaking research on radioactivity at the turn of the century. Her papers are still radioactive and she literally described seeing the tubes of radioactive material glow in the dark. Which meant I got to get all kinds of creative with my costume. First, I found this awesome black dress at a thrift store. I have no idea what it was in its past life, but the poofy sleeves and the full skirt were perfect for the time period. Next, I bought an attachable white lace collar on ebay and sewed it to the neckline of the dress. The clothing part was complete.

20121027_205151IMG_1876

I actually wore this costume on two separate nights, and I did the make up and accessories a little different for each. The key was to make as much of me glow in the dark as possible. First, I needed my own test tube—I picked one up from a campus resale store, used glow-in-the-dark paint on the inside of it, and labeled it “radium.” For the rest of me, I used glow stick necklaces, glow in the dark face paint and green glow-in-the-dark nail polish. My recommendation is to get the nail polish at the drugstore if possible and the makeup from a Halloween store—the Halloween store version of the nail polish that came with the makeup in a kit was so clumpy it was unusable.

IMG_1872

Seen here with Melisandre from Game of Thrones (see below for more of those costumes!), you can see that I had a thick line of makeup near my forehead. The make up has to be thick to show up, so I ended up just outlining the circle of my face instead of pasting it all over. I also recommend you have someone help you if you want a design on your body using the paint.

IMG_1826

My dress had a dramatic open back so I had friends do designs there. The first night I went for a skeleton-like rib design and the second night I had the brilliant idea of using the radioactive symbol! It’s quite tricky to photograph these things, but we tried:

IMG_1833

IMG_1870I had so much fun in this costume, especially when I found a blacklight!

2012-10-319522.55.57

Annie Oakley

Making the Marie Curie costume for Halloween inspired me the next time I was invited to a costumed dance party several months later. I had far less time to make this one happen, but I wanted to keep with my theme. I l also needed something I could dance in this time. So I came up with Ballerina Annie Oakley.

darksparkle4 - Version 2

Annie Oakley was a famous sharpshooter in Buffalo Bill’s Wild West Show in the late nineteenth century. But I wasn’t about to bring a real firearm to a party. So I did the next best thing: I found me some gun tights.

ballerina annie oakley 3

You can get these on ebay for about $5. They totally made the outfit. And since they were tights, I figured, why not wear a tutu? So I borrowed this black leotard and tutu combo from a friend, who found it at a clothing swap. I already had the cowboy boots and the bandana, so all that remained to get was a hat and a western shirt.

ballerina annie oakley

Both the hat and the shirt came from the thrift store, but believe it or not the shirt required a fair amount of alteration. It was the best one they had (it even had snaps instead of buttons!) but it was a size or two bigger than me. So I took it in on the sides and a little in the seams and then tied it above the tutu to get the fit I wanted. It was worth it! And surprisingly I still wear the shirt quite a bit. Perhaps I’m a cowgirl at heart after all.

Lady David Bowie

Sometimes, the clothes simply make the costume. Other times, it’s all about the makeup. Especially when you are invited to a David Bowie themed birthday party. I present to you two female David Bowies.

IMG_1952

This is David Bowie circa 1973, where we recreated the lightning bolt makeup from the Aladdin Sane album cover. You can buy Halloween makeup, but I used bright pink lipstick, dark teal eyeshadow, and black eyeliner. It stayed put really well, but be forewarned that your face may have some residual pink the next day! Not included but recommended: leather jacket and a bad ass expression.

IMG_1975 - Version 2

This is David Bowie circa 1972 as Ziggy Stardust. The key to this look was a really good cream eyeshadow in gold, which I used for the circle as well as my lips. For my eyes I used the reddest blush I could find and some black eyeliner. There was no way I was going to be able to recreate any of Bowie’s amazing clothing from this era, but I did find a gold leggings/shrug set at a thrift store and a gold sparkly top that matched it.

GROUP COSTUMES 

Game of Thrones

If you have a group of people who all want to do the same theme for Halloween, there are tons of great things you can DIY. Earlier this year, my friends and I did a team bike event that required having a group theme and costumes to go with it. We decided to be Team of Thrones.

team of thrones

From left to right: A wilding woman, Tyrion Lannister, Asha (Yara) Greyjoy, a Stark bannerman (with banner), Arya Stark, Khal Drogo, Danerys Targaryen, Cersei Lannister, Viserys Targaryen, Ygritte, and the Three Eyed Crow.

Unless you’ve been living under a rock/north of the wall this year, you’ve probably heard of the HBO show Game of Thrones, a TV show based on the epic fantasy novels of the Song of Ice and Fire series  by George R. R. Martin. The best part about this show is that there are so many characters that you can get as obscure and outlandish as you want with your character and costume.

We obviously made some adaptations to be able to ride bikes on a rather hot spring day, but I think there were some rather creative costume elements here. To name just a few examples: the crow has little messages tied to her legs, Tyrion has little half shoes strapped to his knees, and Viserys covered her bike helmet with that giant golden crown.

20130427_114617_6

I went as Asha Greyjoy (Yara in the TV series), Theon’s sister. I already had the black top, shorts and boots, all from thrift stores. I also happened to own a studded belt, sailing ship earrings and an octopus necklace…don’t ask me why on the last one but it worked beautifully. The little dirk knife and shield came from the dollar store, and I taped the Greyjoy sigil and motto, “We Do Not Sow” to the front of the shield. Also recommended: putting on the hardened face of a ironborn sea captain. (Showing off the forearm scar you got as a child helps too.)

Gatsby Girls

Not up for fantasy novels? How about celebrating the Jazz Age novel The Great Gatsby with some roaring 20s costumes?

IMG_2047

There’s plenty of inspiration in the new movie adaptation, but there’s actually quite a range of outfits that work for this era. All of the above dresses came from thrift stores, from the light pink drop waist dress with lace (it originally had long sleeves that she removed with a seam ripper) to the bright pink sequin flapper dress.

IMG_0751

Accessories really help make these costumes work: among these four costumes we’ve got gloves, long beaded necklaces, hats, sequined headbands, feathers, flowers and even a cigarette holder (oh and the gun tights yet again!). Equally important is hair! You can’t really see it here but we’ve used two hair tutorials to get the styles of the 1920s, one that shows you how to fake a bob hairstyle if you have long hair and one that shows you how to create finger waves, which is a bit more challenging and works best with hair that already has a curl to it:

Photo on 10-5-13 at 4.26 PMPhoto on 10-5-13 at 4.26 PM #2

I tried to do the finger waves on myself, and I didn’t quite achieve the full look. I would really recommend that you have a friend who is good with hair do this on you. The nice thing is that both hair styles don’t require much in the way of equipment—for the fake bob you need a clip, a pony tail holder and some bobby pins. For the finger waves, you need gel, a comb, and bobby pins. That’s it! Combine with 1920s style make up, especially the “cupid’s bow” lips, for the full look.

2013-10-05 23.04.44 - Version 2

Alice in Wonderland

Last but not least, we have the Mad Hatters Tea Party!

2013-06-12 20.40.17

Let’s start with Alice. I made this a low key costume since I knew I’d want to be comfortable all night. I used this strapless blue and white dress because it was a hot June evening, and paired it with these thigh high stockings that had card suits on them I got from a former roommate. The black Mary Jane shoes, red rose ring, and bow hair clip are things I’ve had forever, but they added a nice touch. I wanted to make a black bow out of ribbon, but I ran out of time.

I did, however, make the apron. To be honest, I didn’t use a pattern—I just tried on the dress, measured where I wanted the apron to come to, and used those measurements. The most similar free tutorial I’ve seen for how to make one like it is here. I used plain white muslin and a wide white ribbon instead of fabric to save time. I decided it should have rounded edges to match the top of my dress, and I think the effect worked nicely.

2013-06-12 23.01.53

If you’re willing to take it a step further with face paint and/or prosthetics, you can go this route. The Dormouse combined mouse ears and a tail with Halloween makeup crayons to recreate the mouse face. The Cheshire Cat sewed his ears onto a hat, and used pink and purple face face paint for the stripes, but also attached some pretty awesome prosthetics.

983596_10151626683702510_692270529_n

Seen here with the Queen of Hearts, you can tell that this is a much more advanced costume project. But doable if you are adventurous! There’s actually two prosthetics, a cat nose and a grin, that he attached. He used spirit gum to attach the latex prosthetic to his face and liquid latex to blend the seam—you can get an idea for how to actually do this from this prosthetic nose tutorial. The effect, as you can see, is pretty remarkable.

.2013-06-12 23.24.58

And that’s all my costumes from the last year! I hope these can inspire you to come up with your own clever ideas—if they do, I’d love to see the results!

Costumes, Holiday Knits & Crafts, Nerdy Knits & Crafts, Quick Knits & Crafts

More craft, less witch: Halloween costumes and creations!

It’s almost Halloween—aka the I-get-to-make-a-new-costume holiday! Dressing up has been fun for pretty much as long as I can remember…

Yes, that’s me as Rainbow Brite, a homemade costume! More about those below.

Anyway, in the last week I have been stumbling across some creepily good Halloween crafts on the internets and

drawing inspiration from my previous Halloween creations as I come up with a costume for this year. Have a look!


Bats! Spider webs! Ghosts!

I don’t usually do Halloween crafts, but when I found this bat pattern I had decided I wanted to make it. It’s quick, it uses up cheap yarn, and it makes me giggle when I look at my window.

I think they look best from a distance, but here they are next to another bit of seasonal decor (i.e. my door stop).

If I had even more time I would probably be making a few other items. The first is this spiderweb scarf. I don’t do much crochet, but with this video tutorial  I think I could remind myself how to wield a hook. But what I’d really love to try is just about any pattern out of a ghost-inspired knitting book I heard about on this blog post (really like that blog btw).  It’s called Ghosts: historiographies, cultural manifestations, and the knits they’ve inspired. First of all, how could I not love a knitting book with “historiographies” in the title? Also, the patterns look really lovely, especially Calavera Catrina. The weather has just turned chilly here and a spooky bonnet would be really nice right about now.

Costume Creations!

But of course, what I’m most excited about are costumes!

I realized that when I posted about the top ten nerdiest craft I’d made, three of them were actually Halloween costumes: Ash Ketchum gloves, Bjork’s swan dress, and Daenerys Targaryen’s dragon Drogon:

Guess what? Those are not the only homemade Halloween costume photos I have. And since I love looking at the costumes other people make, I’m going to share a few of mine with you, along with their pros and cons about things like how comfortable it was to wear and whether or not others recognized what I was. For your convenience I’ve also divided them up between costumes I planned and costumes I put together at the last minute. Hope you get some ideas!

Costumes I made in advance 

If you have at least a week or two and you are willing to put in some effort, you too can make bizarre homemade costumes!

1. A Carrot

Pros: Orange top and skirt were easy to sew—Just two tubes with elastic at the top. Repurposed a hula skirt from an older costume, so I didn’t have to buy anything for the carrot top part.

Cons: No one knew what I was! Ok, granted, the green top didn’t stand up all carrot top like, but still. One guy thought I was asparagus. Also, I was with Edward Scissors hands at the time, which is admittedly an even more awesome costume to look at (I didn’t make that one, but I did do his makeup). Weight of the green “hair” became uncomfortable after a while.

Unrelated downside—I was sick that year, and so the only thing in my cup was saltwater to gargle. I don’t like missing an opportunity to dress up.

2. Holly Golightly 

Pros:  People recognized my costume right away (well, at least “Breakfast at Tiffany’s!”). Worked great with my hair when it was long enough to put up. Already owned the black dress (thanks concert band!) and the costume jewelry (thanks grandma!). Very comfortable to wear.

Cons: Not many! I suppose you may want to nix the cigarette holder if you’re dressing up around kids. Since I don’t smoke I had to borrow a cigarette to get the above photo.

3. Patti Mayonnaise 

Pros:  No sewing required! I found the blue shirt and some pink sweats at the thrift store, cut the pink sweats into circles, and used a steam iron and double sided fusible webbing to stick them to the shirt. Nice and warm to walk around in. Also works as a couples or group costume if you have a Doug Funnie, Skeeter Valentine, etc! (Not included—woodland fairy friend or dude who photobombs you pictures)

Cons: Only a few—wigs are not usually cheap (this was a man’s wig which was somewhat less expensive) and I could not truly mimic her orange skin tone. The dots were a bit stiff. And I suppose you need to watched Nickelodeon in the 90s to know the show Doug. Still one of my favorites!

4. Gadget Hackwrench

Pros: I got to wear a purple jumpsuit, a wig, mouse ears AND goggles! From my face you can tell it was a fun get up to wear. I got a purple sheet and the sewing patterns from the thrift store, and the goggles from the clearance aisle at the end of summer (yes sometimes I start planning my costume early).

Cons: Fewer people recognized my Gadget costume as being from  Chip n’ Dale Rescue Rangers  (I didn’t think about the fact that the show was not on TV for that long). And many things to wear=more things to buy. I wanted to make more of the things like my ears but I ran out of time because of the sewing (see work in progress shot). Sewing was tricky because I combined two patterns (sleeveless jumpsuit + collared blouse) and then I altered that further to make the legs slim, etc. Final result: I could not lift my arms above my head without giving myself an extreme wedgie. So not exactly the most comfortable costume!

Costumes that I put together at the last minute

If you have a day (or maybe just a few hours) to figure out a good costume, you can still come up with something interesting-ish.

1. Cheshire Cat

Pros: Yet again all I had to sew was a shirt and tube top—you can sew fabric into tubes very quickly! In this case I was going to an Alice in Wonderland themed party and remembered that I had some fabric that looked like the Cheshire Cat’s stripes. Too bad you can’t see the tail here! Ears are made from origami paper. Pictured with the Queen of Hearts.

Cons: Besides the fact that I only have terrible photos of me with my eyes half closed, the only real downside was that I was cold. But I am usually cold.

2. A sad hipster

Pros: Our friends got such a kick out of this! At the time I owned the black wig and had a roommate whose accessories were perfect in that oh-so-emo kind of way, so nothing was bought or altered, just repurposed. Of course, sad hipster boy is wearing girls clothes too…the tighter the better.

Cons: No one else besides our friends knew we were dressed up for Halloween…everyone else just thought we were a real hipster couple. Now that should really make you cry.

3. Gender Bender

Pros: Don’t normally dress as a man? If so, you may be surprised to find you probably have everything you need minus an accessory or two (the tie was mine but the pipe was not). Can be super comfy.

Cons: Don’t normally dress as a woman? Good luck finding a dress than fits, putting on nylons without ripping them, applying  makeup, and/or walking in heels. If you can do all this and be comfortable, you must let me know how!

4. Princess Peach

Pros: You know how brides say you can totally wear that bridesmaid dress again, but you totally can’t because it always looks like a bridesmaid dress? This is one instance where I did figure out how to wear it again—at a Ninetendo costume party. Crown and necklace are made out of construction paper.

Cons: No cons! It was the perfect last minute costume for the party.

Costumes, Nerdy Knits & Crafts, Tweaks & Alterations

Top ten nerdiest crafts that I have made

Two nights ago I finished my custom fit raglan sweater! Ok, so I still have to weave in the ends and steam block it, but basically it is done. It’s definitely the best fitting article of knitting I’ve made so far—pics to come! Now, of course, I’m trying to pick a new craft project. Crafts are how I unwind after doing work, so although it is counterintuitive, I need them more when I’m busy than when I’m not.

In looking back over what crafts I’ve already made, I began to notice a pattern—I love to craft nerdy things! That’s right—if you’d find it on Geekcrafts, I’d probably want to make it.  Fantasy, sci fi, video games, tech, or obscure pop culture, apparently I’ve dabbled in it all, either in crafts for myself or for someone I know. I have enough that I can actually make a list of my top ten favorites. So here they are, in order from “aww, how dorky is that” to “LOL I can’t believe you actually made that.”

10. Pokemon’s Ash Ketchum gloves

The only reason that these are number ten is because, by themselves, fingerless two toned green gloves can look pretty normal. But if you add a certain red and white hat…

Then suddenly, you gotta catch ’em all.

I made these for Keith’s Halloween costume the other year (nerdy costumes I’ve made could be a whole post by themselves). I bought the slightly stretchy dark green fabric from JoAnn’s and used light green felt and black velcro from my sewing stash.

Improviser that I am, I didn’t look at any glove patterns. If I had, I’m pretty sure I would have discovered that its easier to make a separate thumb piece rather than putting in darts in a whole piece. Oh well. I thought the velcro cuff part was a clever way of using the felt in a way that require it to stretch over the hand.

9. Apple logo iPod cozy

This was one of my first successes knitting with a chart—and it was a chart of the iconic apple logo. As you may be able to tell by the iPod in the picture, I made this a number of years ago—one of my early geek knits! I wanted to take a better photo but alas, I don’t know where this cozy ended up. It was the perferct size for the older iPods. You can see the button hole at the top of the photo—on the back I added a retro green fabric covered button. I didn’t use a pattern for the cozy, but I did check my gauge to make sure it would fit. Knit on straight size 1 needles I believe. Pretty sure I learned kitchener stitch (video link) to sew up the sides.  So many memories!

8. Bjork’s swan dress

Out of all the costumes I’ve made, this replica of Icelandic singer Bjork’s 2001 Oscars dress is the one I am most proud of.

Perhaps it’s not typical nerdery, but let me tell you, it’s usually a pop culture junky who is the first to figure out who I am at a party (since Bjork wore it over a decade ago, it seems to have fallen away from public memory somewhat). I have now worn it on at least three separate occasions—the photo above was the most recent, at a Rock Star costume party (with bonus Pikachu in the background!) Below are some previous Halloween photos:

I made this audacious avian outfit from a $10 thrift store dress. I suppose it might have been a wedding dress, though I suspect it was a quinceanera dress. It was strapless and had seven tiered layers of white tulle. Seven! I chopped off the bottom ones and used that along with polyfill, black foam, orange cotton and a black button to fashion the swan top. Finally, I sewed a pale colored camisole that matched my skin tone to the top.

My mom helped a lot on this one—there were so many layers to sew through!

7. Game of Thrones house sigil coasters

My newest strain of crafting nerdery has been influence by all things George R.R. Martin —in this case, the HBO series Game of Thones.

This Christmas I made my brother coasters depicting the sigils and official house words. I used this awesome craftster tutorial to learn how to use the paint pen on ceramic surfaces—heat set them and the paint won’t wash off! Plain white tiles with felt feet on the bottom make nice coasters that don’t scratch tables.  I only made two because my paint pen was running out. If you’re an architecture nerd, you may like the Frank Lloyd Wright designs I did on coasters for my mom even more.

6. LOL Cat baby blanket

If you thought I would bypass internet meme geekiness, think again!

This is one of my favorite modifcations. I used the free pattern for a bunny blanket buddy, but I shortened the ears. Then I used a crochet hook to write “O HAI” on the front, in a true, I can has cheezburger style. I wish I’d know about duplicate stitch then, because I think it would have lined up better for the words, but on the whole I’m pleased with the results. I did this as part of a craft swap, so to go along with the blanket, I made magnetic poetry with the kind of words you see in lolcat images using my printer, thin magnetic strips, and laminated cat photos for refrigerator meme action.

5. NES Controller stencil shirt

I love me some old school video games. And so does my brother. Which I why I made him this shirt.

Every so often I get the urge to learn a new craft, and this was one of them. I used the excellent tutorial from stencilry to learn how to mix acrylic paint with fabric medium use it on a disposable freezer paper stencil. Like the coasters, you can heat set the paint so it is washable. I’m pretty sure I downloaded the Nintendo controller image from the same website’s gallery of stencils, but I don’t know what folder it was in so if you want it you’ll have to hunt around. The hardest part of this was doing those red A and B buttons—getting the red paint to fill in those circles evenly was challenge. But then again, so was sharing a Nintendo with my brother back in the 90s! I still have it, by the way, and it works.

4.Drogon the Dragon Game of Thrones scarf

Another Song of Ice and Fire craft!  This one is wearable, but you do so at your own risk.

(Spolier alert if you haven’t read the books or watched the series!)

Drogon is one of Daenery’s three dragons.  In the books it says that when he was little, he perched on Dany’s shoulder. So of course for my Halloween costume, I had to knit a dragon scarf. What a pain in the neck (pun intended). I used this dragon scarf pattern because it was free, even though many ravelry reviewers said it was fiddly. They were right—you knit all the pieces separately and then sew them together. Ugh. And, since my scarf was black, it was really tricky to see where to sew. Also, all the cool patterning on Drogon’s back gets lost in all that black. However, I am proud of some parts. I used a drop spindle to ply two different color red yarns together to get the exact shade I wanted for his mouth. Also, I had Keith cut the eyes and teeth out of felt for me. The original dragon eyes and mouth look dopey, but this little guy is positively scary. It’s great if you are Daenerys, but if you are a regular person wearing Drogon, I’d keep an eye on him.

3. Flight of the Conchords stencil shirt

This t-shirt makes it into the top three because not only is it from song by the kings of  nerd-dom,  New Zealand duo Flight of the Conchords—it’s a shirt that is only featured in the music video version of their song “Business Time.” You won’t get the reference from a different version of the song. And even then, you only notice it if you look closely about halfway through the song (I’ve cued the link above to the correct moment. I guess I should add a NSFW warning if you chose to watch it past the 2 minute mark, even though they blurred  things out…)

I made this t-shirt at the same time that I made the NES controller stencil. It was a birthday/Christmas gift for my friend Ali. I even made sure to get the font as close as possible to the original, which is a nice touch. And of course, it’s a baggy gray shirt just like the one in the video. The only thing I didn’t do was put a stain on it like the lyrics described (you can only take these things so far). As I recall, she thought it was pretty sweet.

2. A Dance With Dragons by George R.R. Martin book safe

Yet another George R.R. Martin craft? Oh yes it is!


This was a graduation gift for Keith, and it was really two gifts in one. First of course, was the craft you see above: a hollowed out book dressed up to look like the latest from the Song of Ice and Fire fantasy series. In order to get a large enough hard cover book to make it realistic, I went to the thrift store and bought a Tom Clancy novel when their books were on sale (it was about 50 cents). Then I hollowed out the inside using this tutorial as a guide. It wasn’t too bad, but it did take a while with my wimpy exacto knife. I printed out a copy of the cover for A Dance with Dragons on some printer paper to make the dust jacket—it fit rather well if I do say so myself.

The second part of the gift you can see from the folded paper inside the hollow book—a receipt for the order of the real A Dance With Dragons book. When he graduated, the book was not due out for another month or so. I thought this was a clever way to present a tangible gift when the actual gift happened to be on pre-order.

1. “Bake it So” aka the Star Trek TNG oven mitt

Of all the geeky crafts I’ve made, this one takes the cake—and it literally could pull said cake out of a hot oven.

This oven mitt is a pun on Capitan Jean-Luc Picard’s famous phrase “Make it So” from Star Trek: The Next Generation (now streaming on Netflix, fyi). I was a kid when that show was on the air and I totally loved it. When I re-watched some episodes with some friends many years later, we decide that if Captain Picard ever had any kitchen accessories, they would have to say “bake it so” on them. So of course, I had to make an oven mitt with the phrase.

The mitt is exactly what it looks like—dark blue letters cut from scrap material, zig zag stitched onto the front of a light blue oven mitt. I remember that I had to rip the seam of that oven mit from the bottom up to the thumb in order to get it to fit over the arm of the sewing machine. If I had it to do over I would have probably added interfacing to the letters to keep them from fraying or getting out of shape. But overall, I am really proud of my extremely nerdy accessory.

And that’s the end of the nerdy craft list—now, on to find some new geeky projects!