In the last year, I did three home decor projects for our apartment: a window shade, a rag rug, and two bench cushions.
Here, I will evaluate each craft in the style of Missy Elliott’s “Work It.” (Yes, the post title is a Missy Elliott reference)
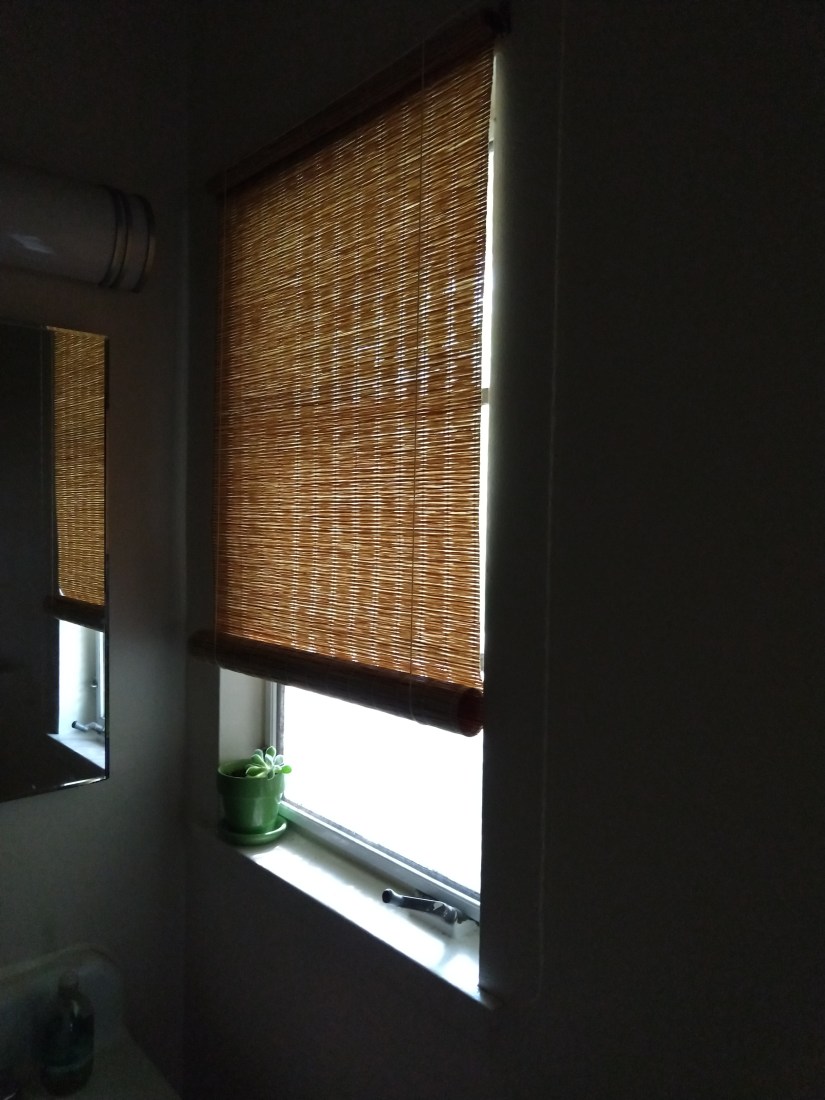
Roll-up paper window shade
Worth it? Yes.
I spent about $3 to purchase the paper panel curtain from a thrift store and the screw eyes from the hardware store. The panel curtain is Anno Stra from Ikea but it looks like they don’t carry it anymore—they have similar panels for about $10. I already had the string on hand.
Time wise, it only took me about 15 to 20 minutes, start to finish.
Work it.
I watched several videos to get ideas for installation. Ultimately I went with Bob Bee’s DIY Roll Up Blinds as my model. Screw eyes and string work well for a lightweight panel, and the paper curtain rolls up with ease.
There are two main differences between my window shade and the video version. One, instead of a wood piece at the top, I incorporated the cardboard tube at the end of the panel roll to keep things, well, rolling. Two, instead of using zip ties at the top, I used a staple gun to staple to panel to the cardboard roll. It faces the wall, so it won’t be visible.
Put my thing down flip it and reverse it.
I like how the shade provides privacy (bathroom faces a busy street) while still letting in a lot of natural light. Here it is in the dark:
Sheet yarn rag rug
Worth it? No.
I’m happy with the end result, but there is no way I would make this rug again.
Sure, the cost was right—I already owned this Full-sized fitted sheet and I wasn’t going to use it again after it ripped in the wash. But it was time consuming and not at all fun to knit.
Work it.
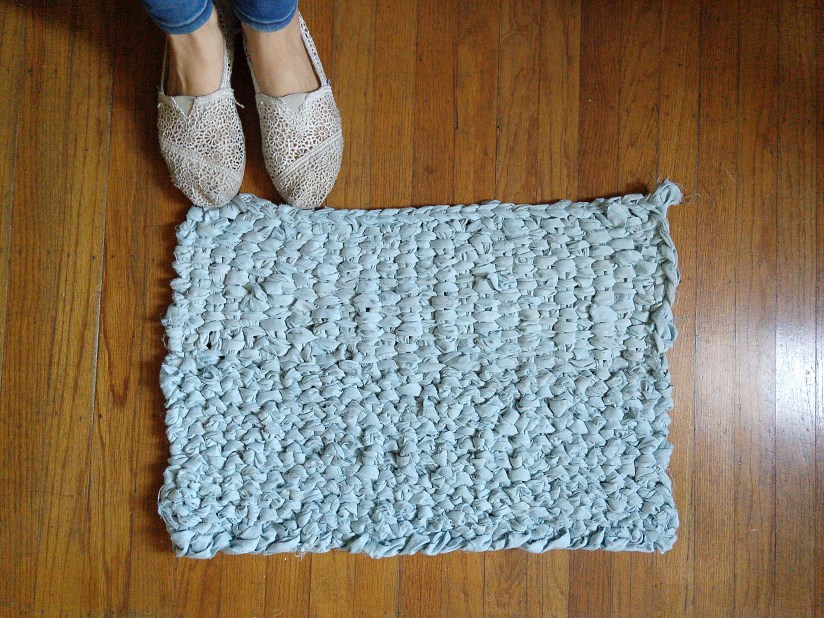
Cutting up a sheet into strips and winding it into a continuous ball takes a surprising amount work. There are plenty of video tutorials for making continuous strips (here’s one with a kitty!). But it took me almost two hours. I don’t have a rotary cutter, and I was using a fitted sheet so I had to work around the gathered corners. When I took the above photo, I still thought I might do a second sheet. I did not.
I tried several crochet and knit stitches before deciding that linen stitch would make a nice, woven, flat surface for a rug that wouldn’t curl. But it’s a time consuming stitch, and the weight of the rug on the huge needles slowed me down. I had trouble keeping the yarn on the needles, and I had to cut a lot of little threads that unravelled and gummed up the stitches.
Put my thing down flip it and reverse it.
Look closely at this photo. Notice that the top half doesn’t match the bottom. That’s because at some point half way through, I started the next row of linen stitch on the wrong side. And so I made the second half backwards. Ti esrever dna ti pilf, nwod gniht ym tup indeed.
I think it looks alright, as the switch happens right in the middle. But one side of the stitch is smoother than the other, and when I stand on it in bare feet, only half of my feet are on the smooth side.
Fabric bench cushions
Worth it? Yes.
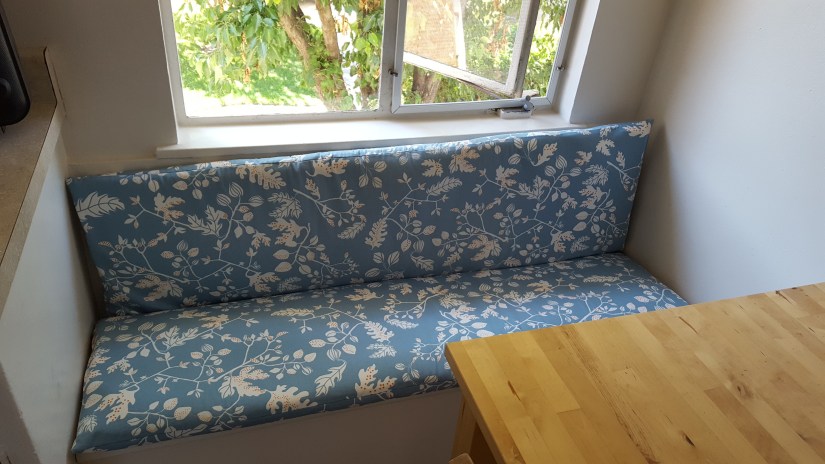
When moving into an apartment with a built-in kitchen bench, I knew I wanted to sew removable, custom-fit bench cushions. I’m glad I did.
I didn’t purchase anything to make them, as I’ve had this Ikea fabric for ages. I sewed these last year, just a few days before moving. I think it took me about four hours.
Work it.
After measuring the bench, I cut up an old foam mattress topper to the exact dimensions to create a kind of pillow form. Then I followed a simple pattern in my Sewing 101 book to make zippered “pillows” to fit. I even had red and blue zippers to match the fabric.
Here’s the only caveat. The foam mattress topper I used is a little too squishy. It provides only light cushioning. And getting the pillow forms inside the cushions was a challenge to say the least. I don’t remove them often. So those zippers don’t see much use.
Put my thing down flip it and reverse it.
On the bright side, when the cushions get a bit misshapen, I just flip them over or swap the top one for the bottom one.
Here’s one last photo of the bench cushions, along with a bird print pillow and tree print chair I also made.
TL;DR . If you’re going to work it, make sure it’s worth it. If you put your thing down flip it and reverse it, try to make sure you do so intentionally!
It’s that time of year again—Halloween! The perfect holiday for those who love to craftily construct homemade costumes. The holiday for those of us who never got too old to play dress up:
Me and my little bro as pint-sized cowboys
The DIY Halloween costume post has become a little bit of a tradition for me. In my 2012 Halloween costume post, I shared four fun DIY costume ideas (not including those from my top ten nerdiest crafts post), including Patty Mayonnaise, Princess Peach, Holly Golightly and a Carrot. In my 2013 Halloween costume post, I shared six more playful costumes, some for individuals like Radioactive Marie Curie, Ballerina Annie Oakley, and Lady David Bowie, as well as some for groups like Alice in Wonderland, Game of Thrones, and The Great Gatsby.
This year, my focus is on fun, kick a$$, and easy DIY costumes for ladies. Every October, there are news stories about how store bought Halloween costumes for women (and increasingly girls) are pretty much all “Sexy Fill-in-the-Blank.” No problem if that’s what you’re looking for—but now it’s basically the only option out there. On the other hand, every year there are news stories about the amazing DIY costume ideas out there—which are fantastic, but often take a lot of time and/or money to make. This blog post covers the middle ground! So without further ado, here are 6 costume ideas in three categories.
HISTORICAL COSTUMES
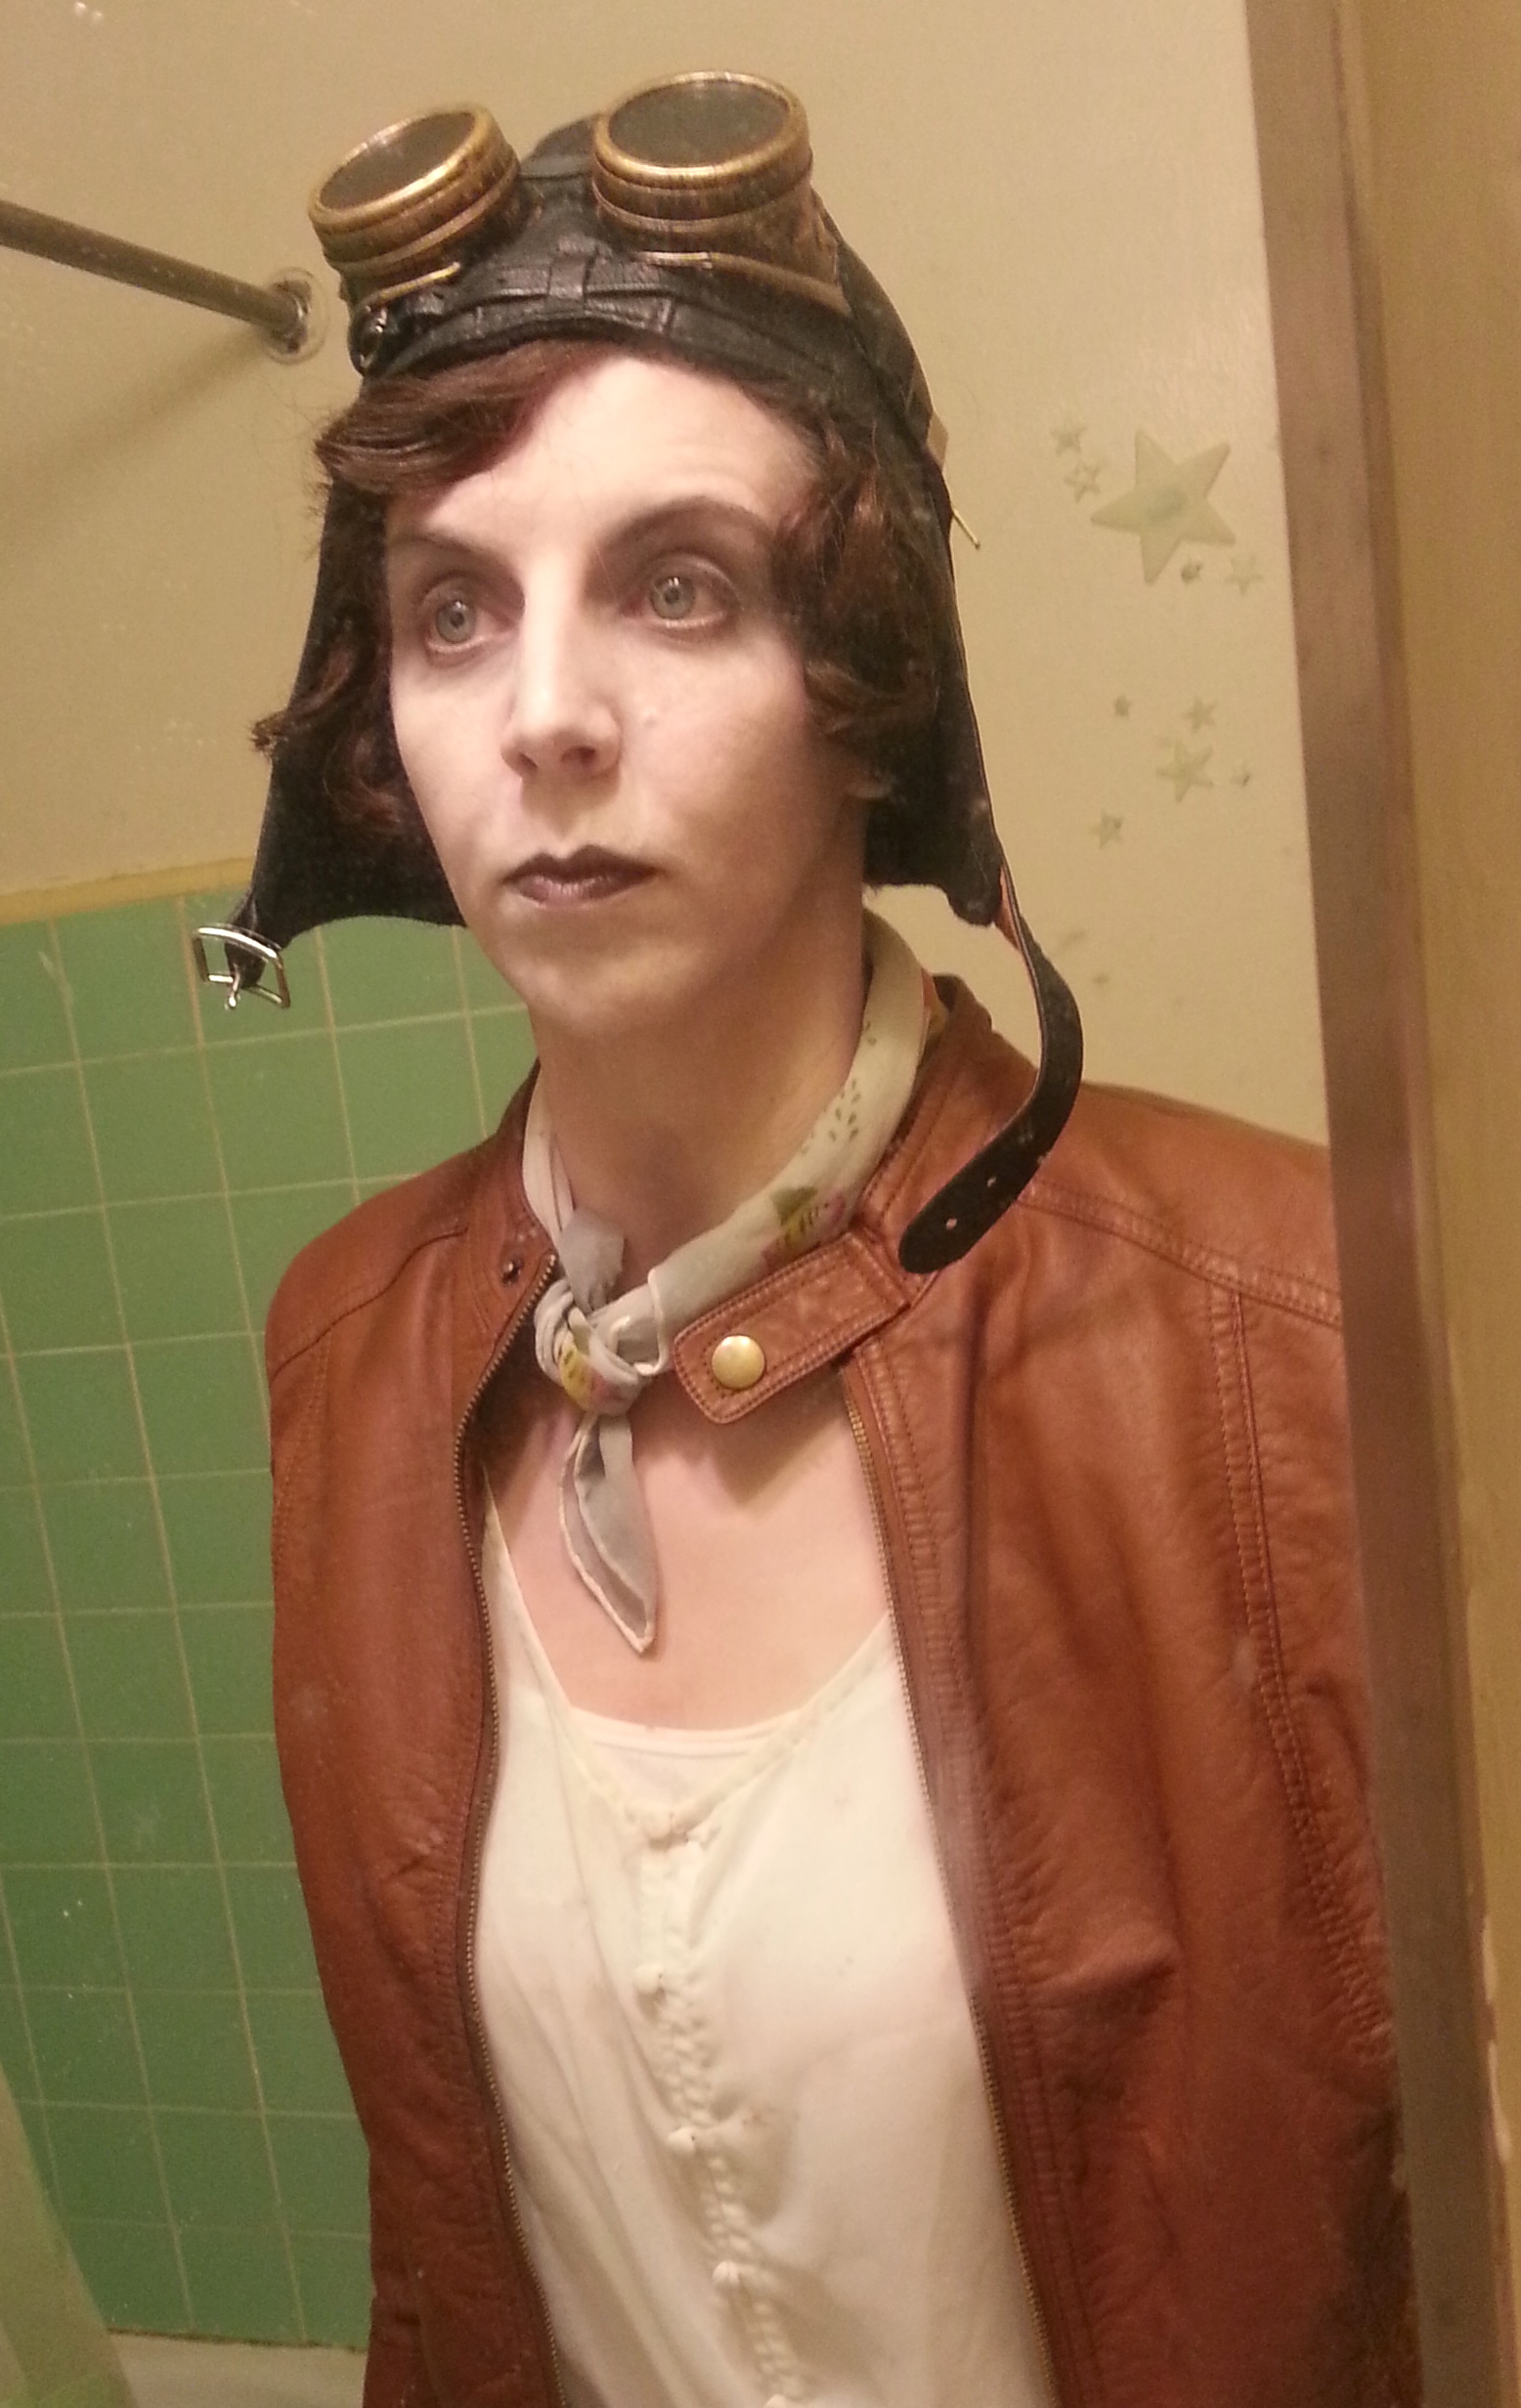
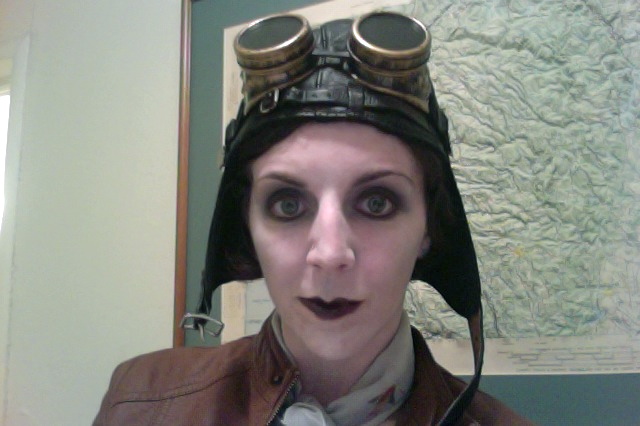
The Ghost of Amelia Earheart
In keeping with the creepy-versions-of-historical-women theme of several previous costumes, this was my Halloween costume last year. Famous female pilot Amelia Earheart was the first woman aviator to fly across the Atlantic Ocean. She disappeared without a trace while flying across the Pacific Ocean in 1937. She still haunts people’s imaginations—which is why she makes a perfect ghost.
Most of this costume consisted of clothing I already had—a button-up white blouse, gray scarf, tan pants, brown boots and a brown faux leather jacket. The two items I had to purchase were the aviator hat and the googles. I got both online for relatively cheap—both were found on ebay for about $10. (Apologies for the blurry mirror photo).
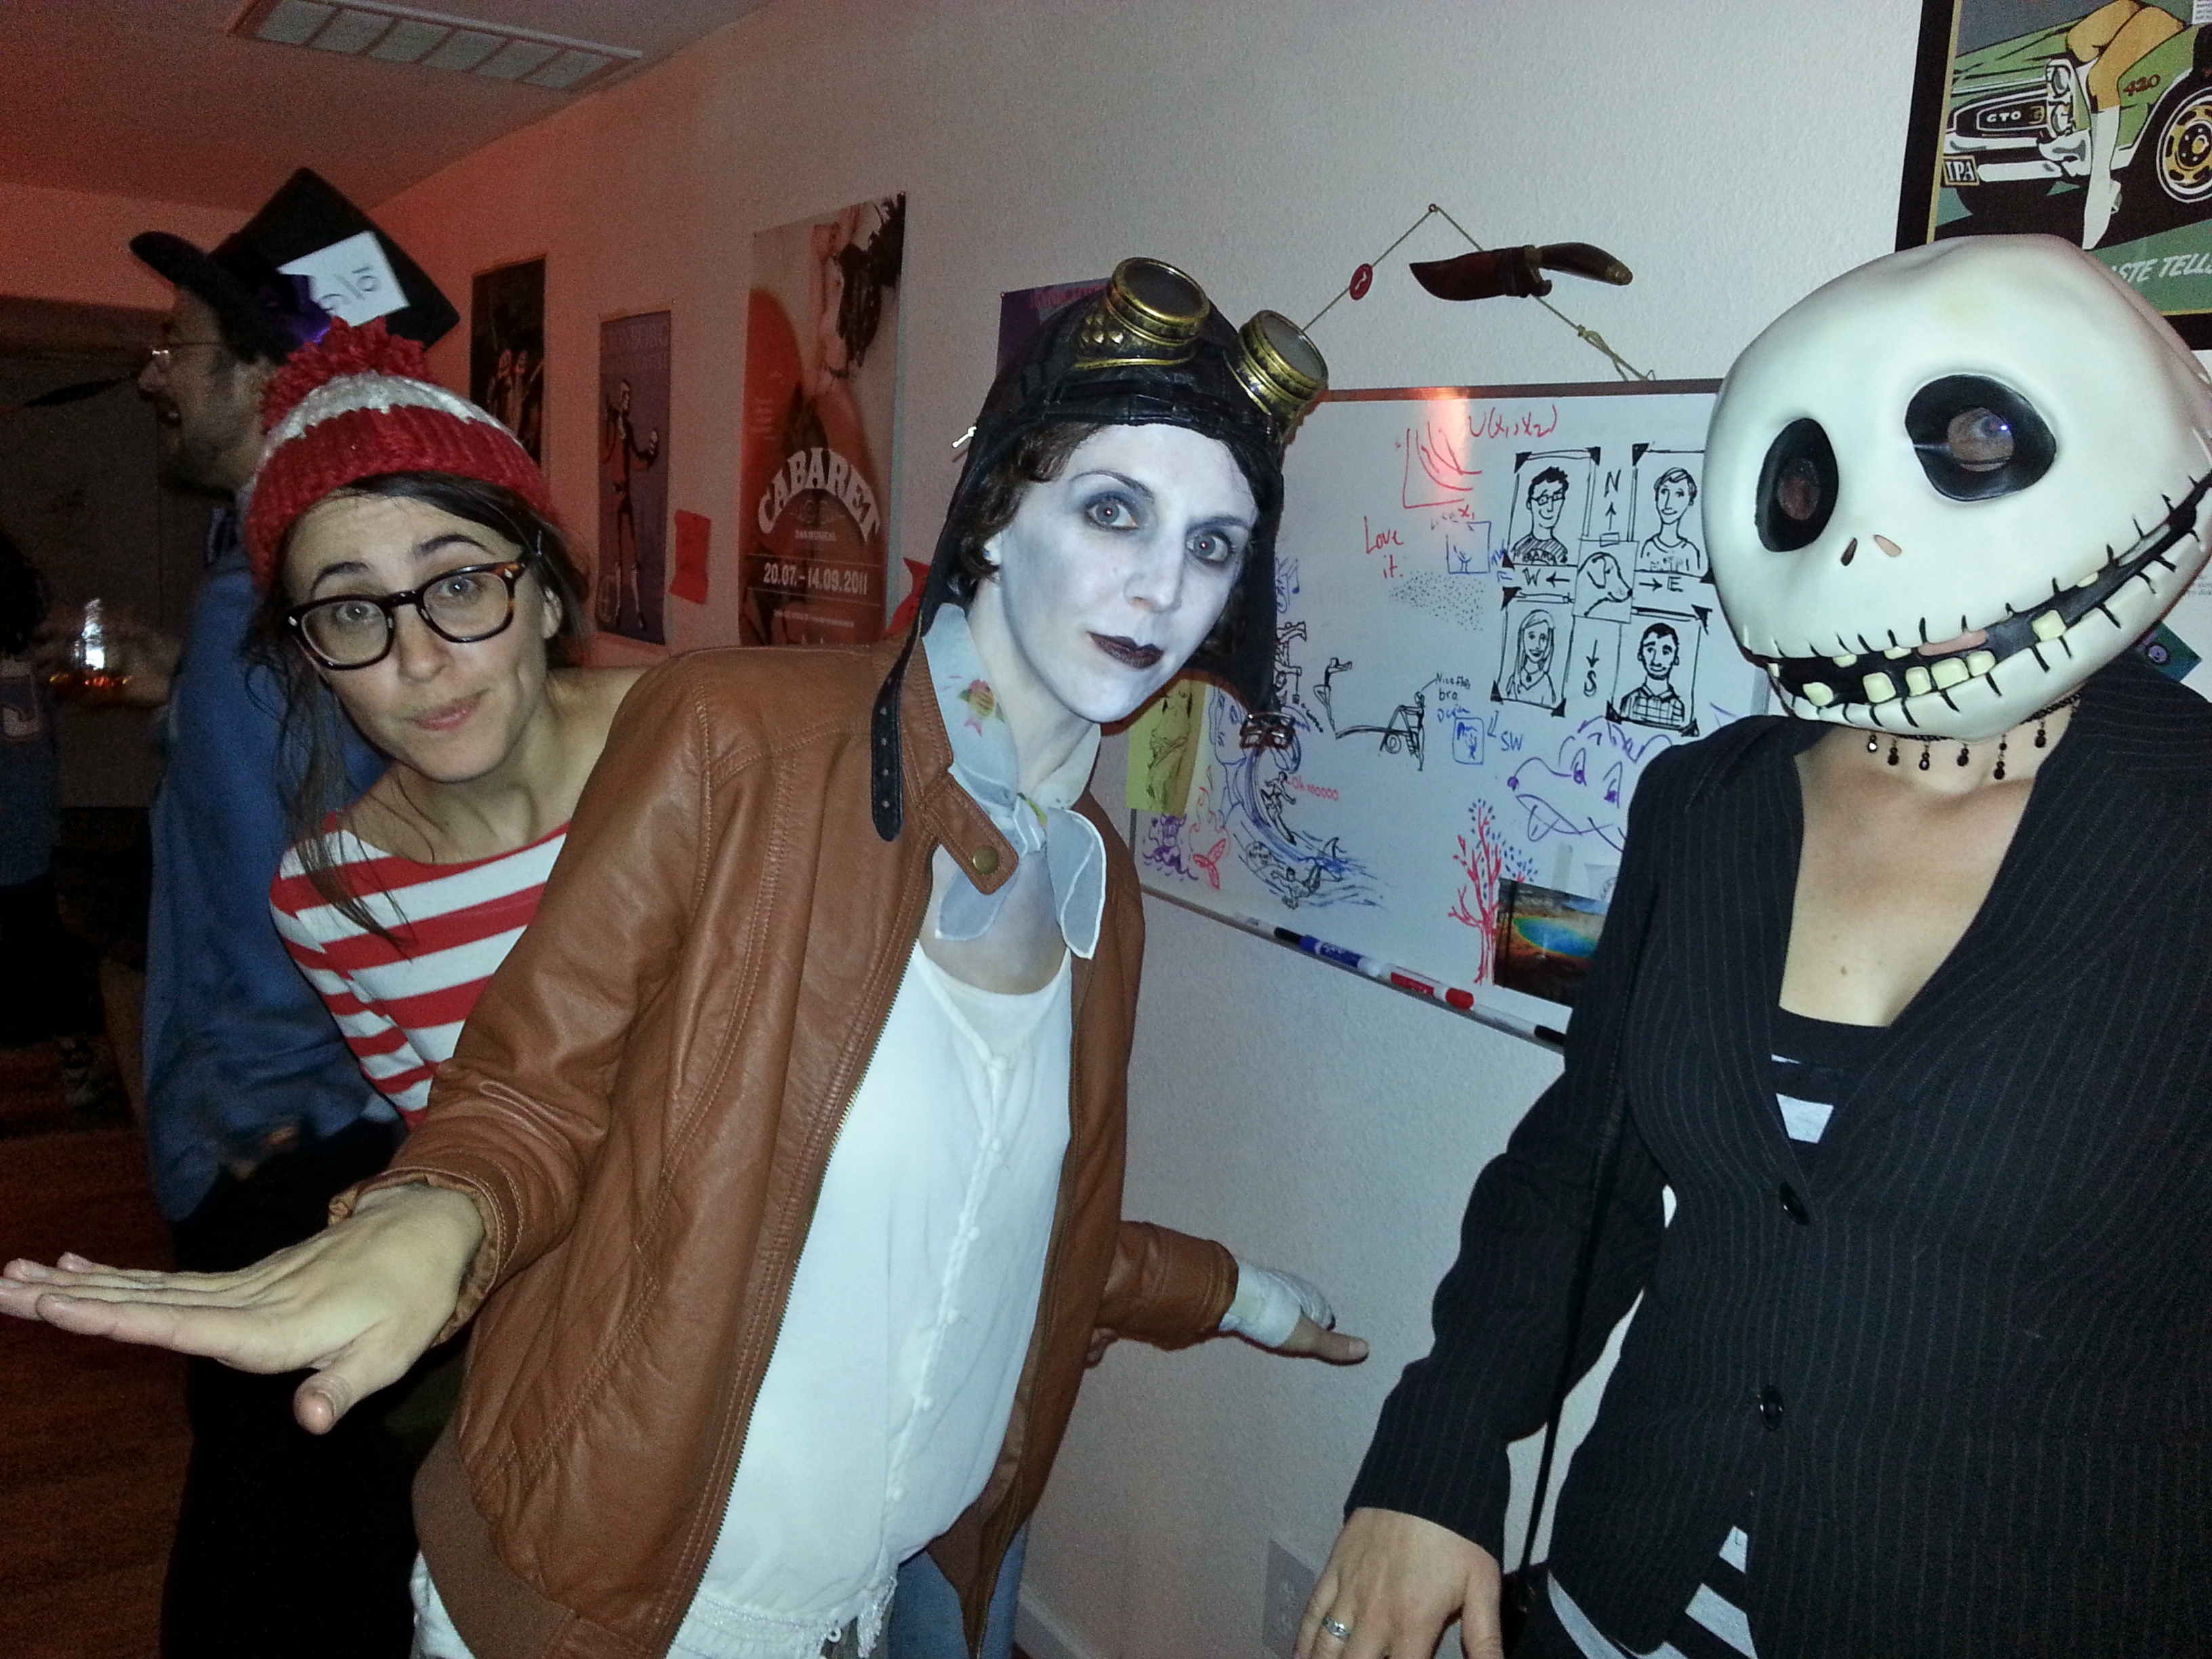
Since I wore this costume to two different parties, so I had some time to work on the ghost makeup. The first time I did it very subtle, as in the close up above—white powder on my face, light gray eyeshadow around my eyes, and black lipstick. But the next time, I went for a more ghoulish, undead look.
Here I used black and dark gray eyeshadow and black eyeliner around my eyes, with the light gray eyeshadow on my cheeks. It was a much more dramatic look, kind of like an easier version of the grayscale makeup I’ve seen people do. I like this version better.
This was easily my favorite photo from the party. And the costume was a hit!
Thanksgiving Pilgrim
If you don’t mind skipping ahead one holiday, you too can be a Pilgrim. I realize that pilgrim women wore bonnets and dresses, but I really wanted to wear the buckle hat, so I did.
This costume does require a little bit of sewing. But you only need a small amount of white fabric (felt for the least sewing) and an old shoe lace. You can make a quick collar pattern by folding your felt in half (if it’s fabric, make sure there are two layers of it, then fold in half), then finding a shirt or dress with a neckline that fits you well and folding that in half too. Trace the line of the neck and extend the shoulder line as far as you would like it (the longer the line, the bigger the collar). Then trace a one-quarter circle from the shoulder line to the fabric fold. There’s a good tutorial here.
If you used felt, just sew the shoulder seams together, cut the shoelace in half, and sew it to the corners of the collar at the neck. If you used doubled over fabric, bear with me, I’m bad at sewing descriptions and I did this a year ago. Basically you’ll have four pieces of fabric, you need to sew them into two facings. Sew the shoulder seams for each pair together so that you have two complete collars facings. Put them right sides together and sew those collars together around the edges, except for the inner curved neckline. Turn right side in and press. Turn neckline hem about 1/2 inch in and press. Top stitch together, leaving 1/2 inch open spaces at the corners, then thread the shoelace in one opening and out the other.
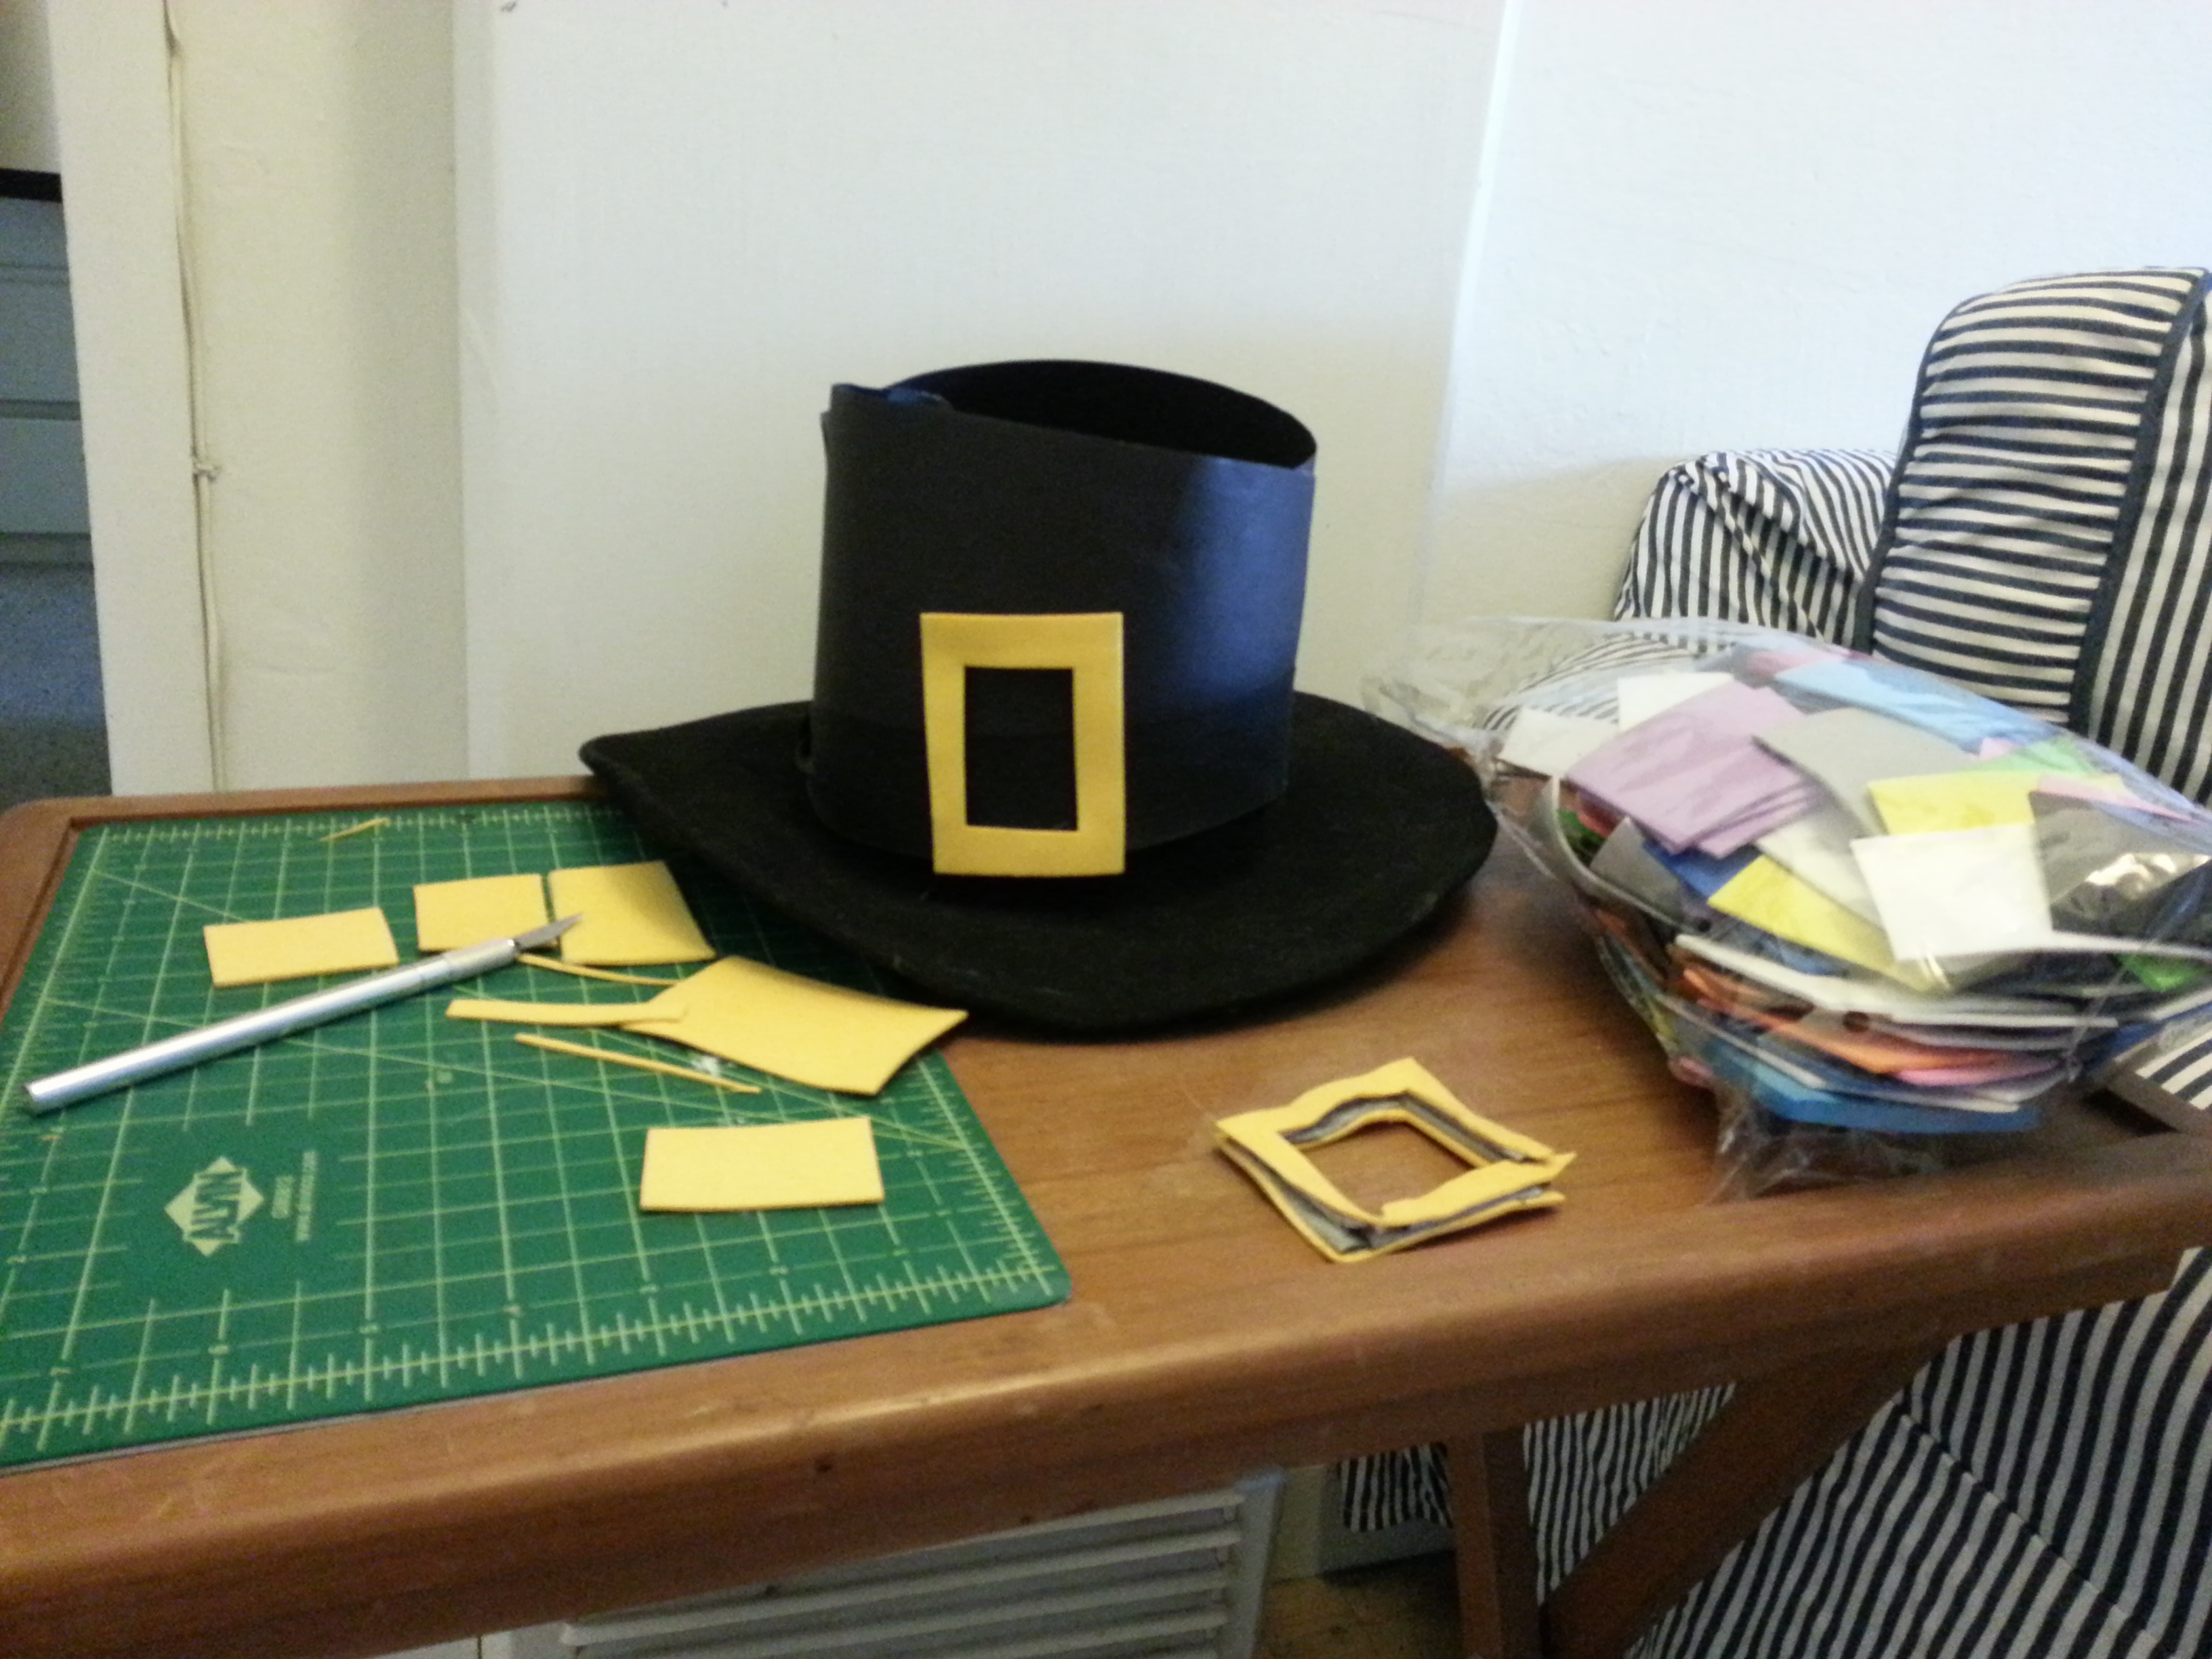
Now for the hat and shoes! You’ll need construction paper (or large pieces of foam sheet paper), an X-acto knife or scissors, and tape. I used a wide brimmed black felt hat to start. I cut two rectangles of black construction paper and taped them together at an angle and placed that over the top to make it look more like a Pilgrim’s hat. I then cut a rectangle out of yellow foam paper, cut a smaller rectangle out of the center, and taped it to the hat as a buckle.
Make two more buckles and tape them to some black shoes (Mary Janes work well). I paired all of this with some simple clothing I already had—white tights, white socks, knee length black shorts and a black long sleeve t-shirt.
Don’t forget to make a hand turkey! Mine is crossing a busy street, as the local turkeys are wont to do.
additional ideas:
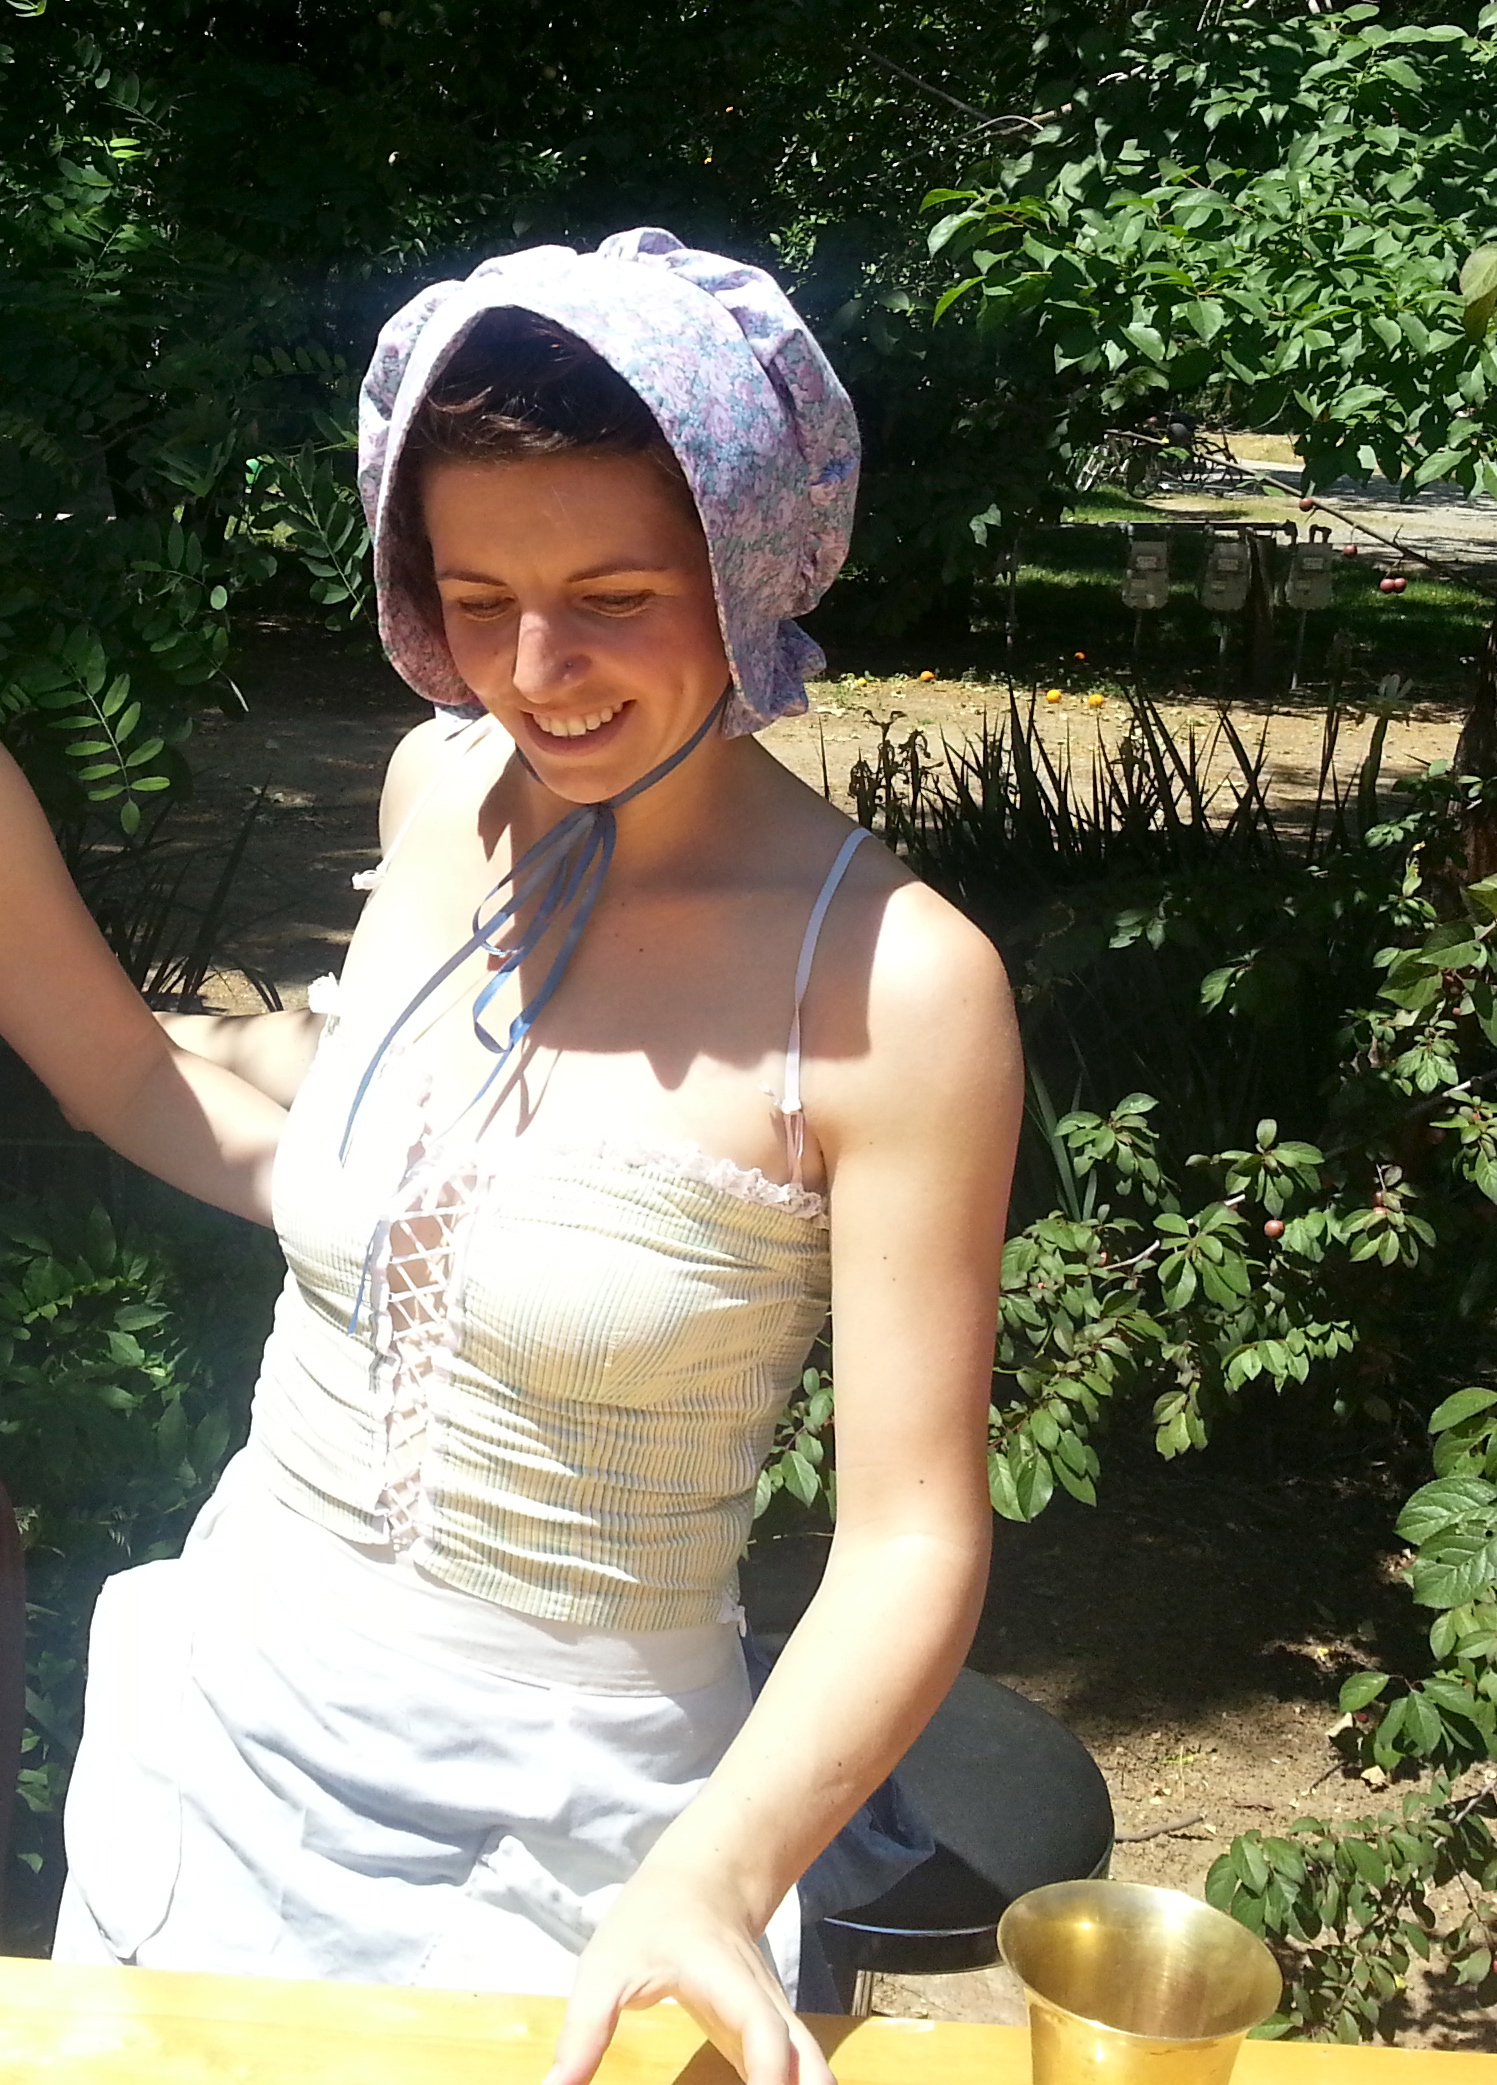
I already blogged about our live action Oregon Trail game, but the prairie girl outfit is another good historical costume! Your Laura-Ingalls-Wilder-loving-inner-ten-year-old will be proud of you for making your own bonnet.
NERDY COSTUMES
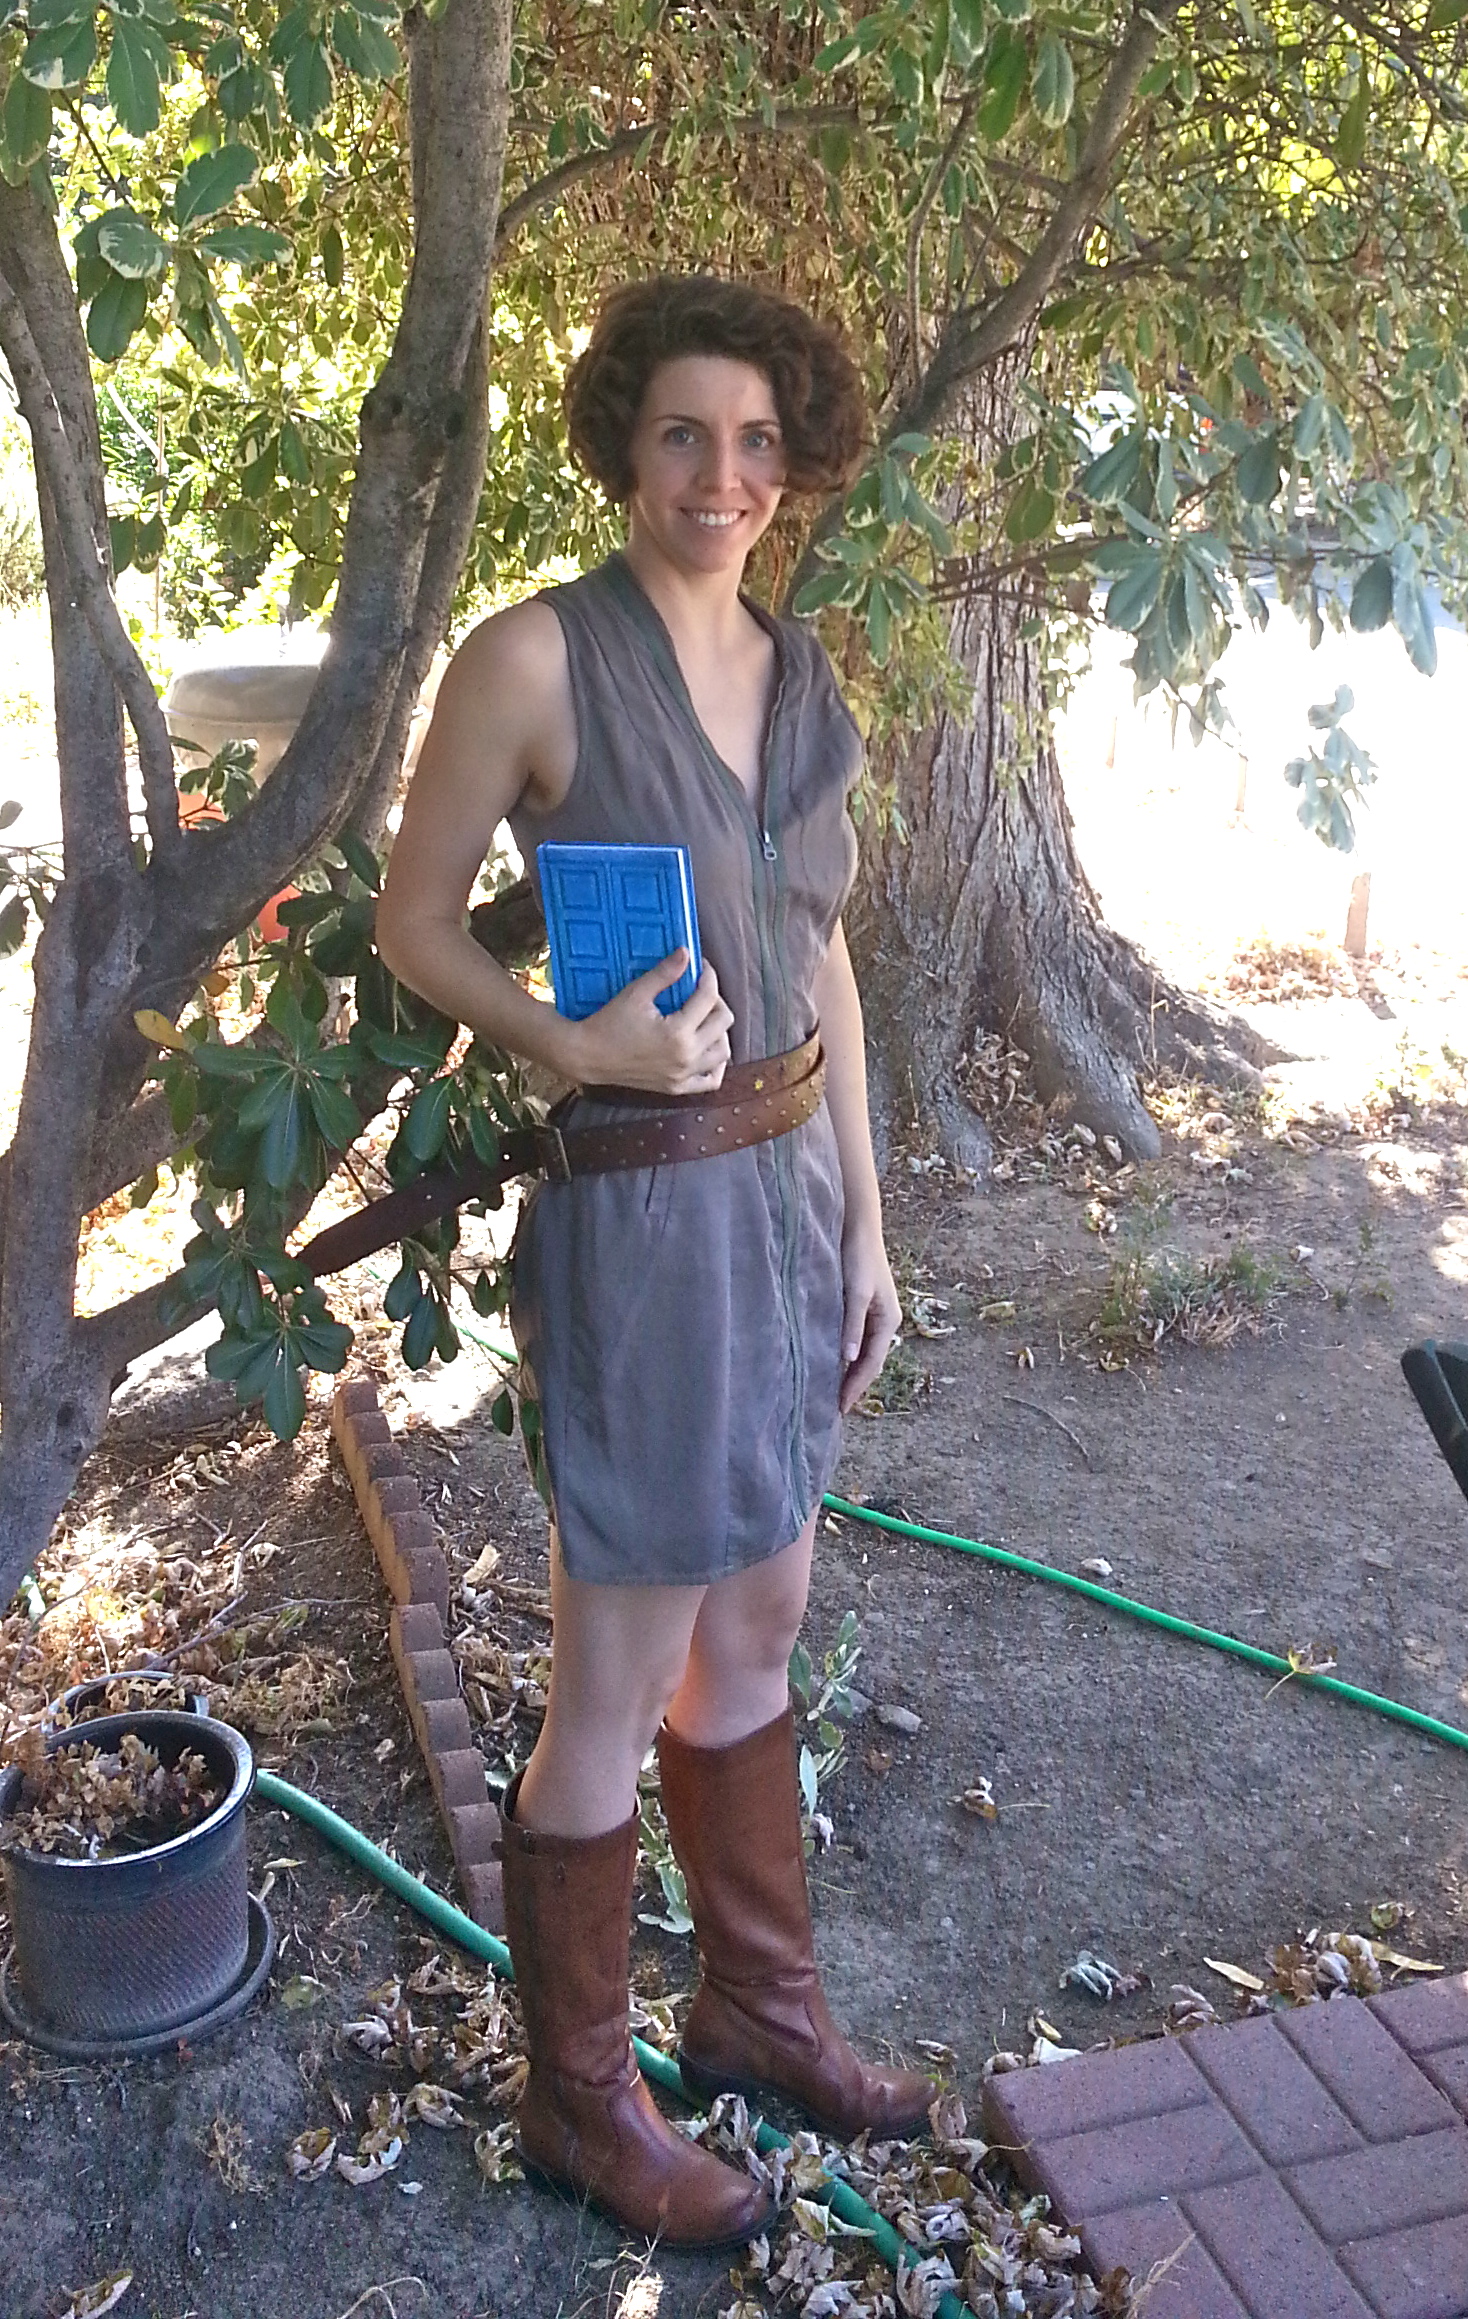
River Song
I am a total sucker for the cheesy wonderfulness that is Doctor Who, as you probably know from previous posts. But a realistic costume for his fellow time traveling troublemaker River Song was not in the cards for me—her original parachute style dress is outrageously expensive now. So this is my version.
First, the dress. I really wanted to make one that looked like hers, but my sewing skills are not that advanced. Instead I found one in a similar color with the same zipper style neckline on ebay for about $12. It took some searching and it’s a bit loose on me, but you know. I like to think my hair makes up for it.
Now of course, the most important DIY part of this costume is my sonic screwdriver. This is my own original pattern for a sonic screwdriver chapstick holder, which you can find right here! Alternately, you could also just hold a banana like I did in the first photo (and for any fans who point out she wore a different dress when she had the banana…this is probably not the cosplay website you were looking for). Or you could buy or make your very own TARDIS journal—there’s a great tutorial for making one here.
The only other accessories you really need are some brown boots, black tights (not pictured because it’s still like 80 degrees here), and a wide studded belt. I faked it here with the two brown belts put together. A brown gun holster would also be a nice touch.
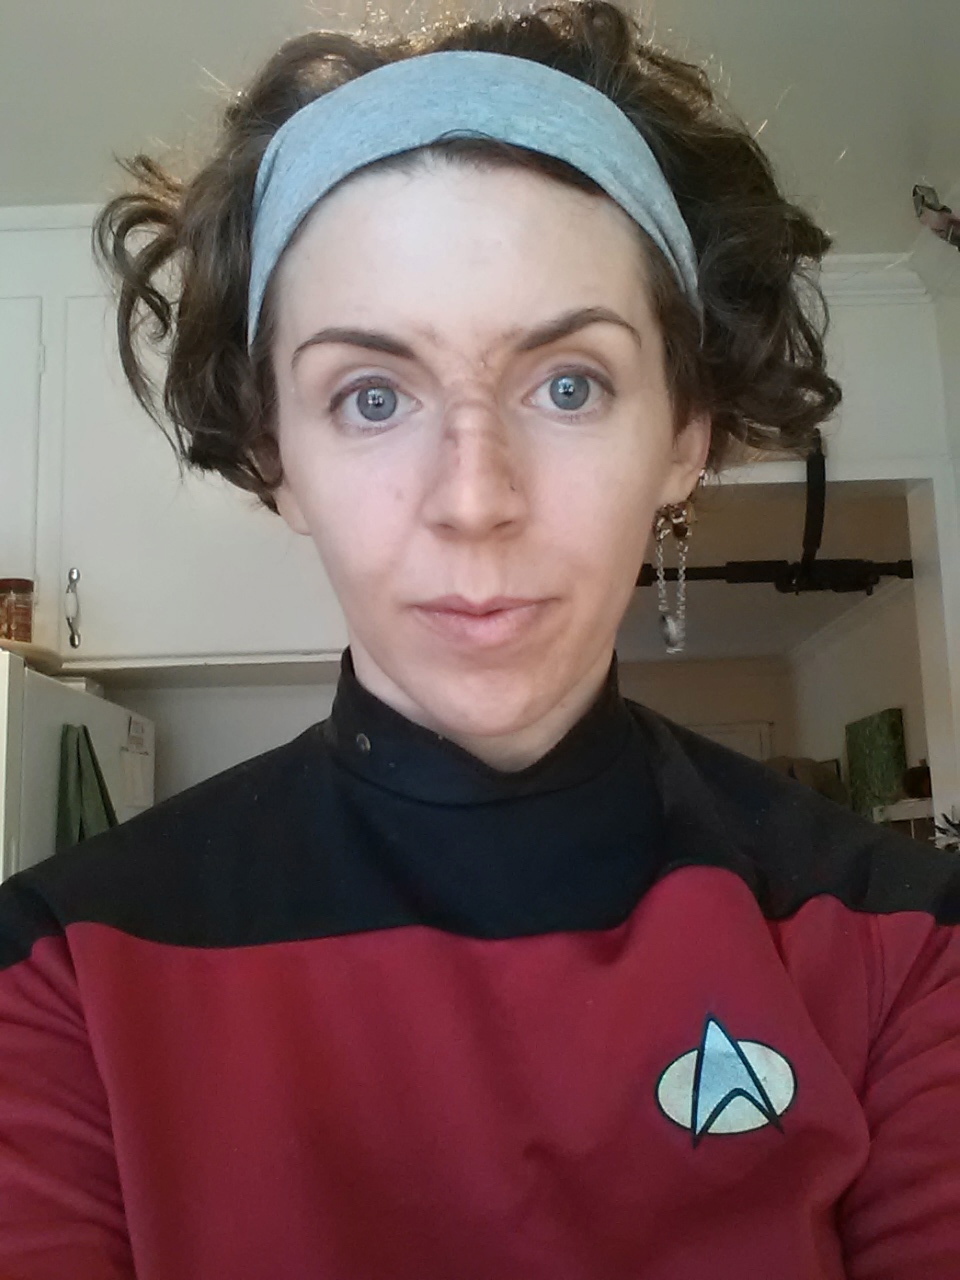
Ensign Ro
Any other Stark Trek TNG fans out there? Casual viewers may not know this character, but I always had a soft spot for Ensign Ro Laren. I’ll admit, I threw this costume together last minute because I discovered I still had the uniform top in my costume box. I’ve had it since I was like 12! (I’m not sure whether to be slightly proud or slightly embarrassed by this). It doesn’t quite fit as well as it used to, but it works.
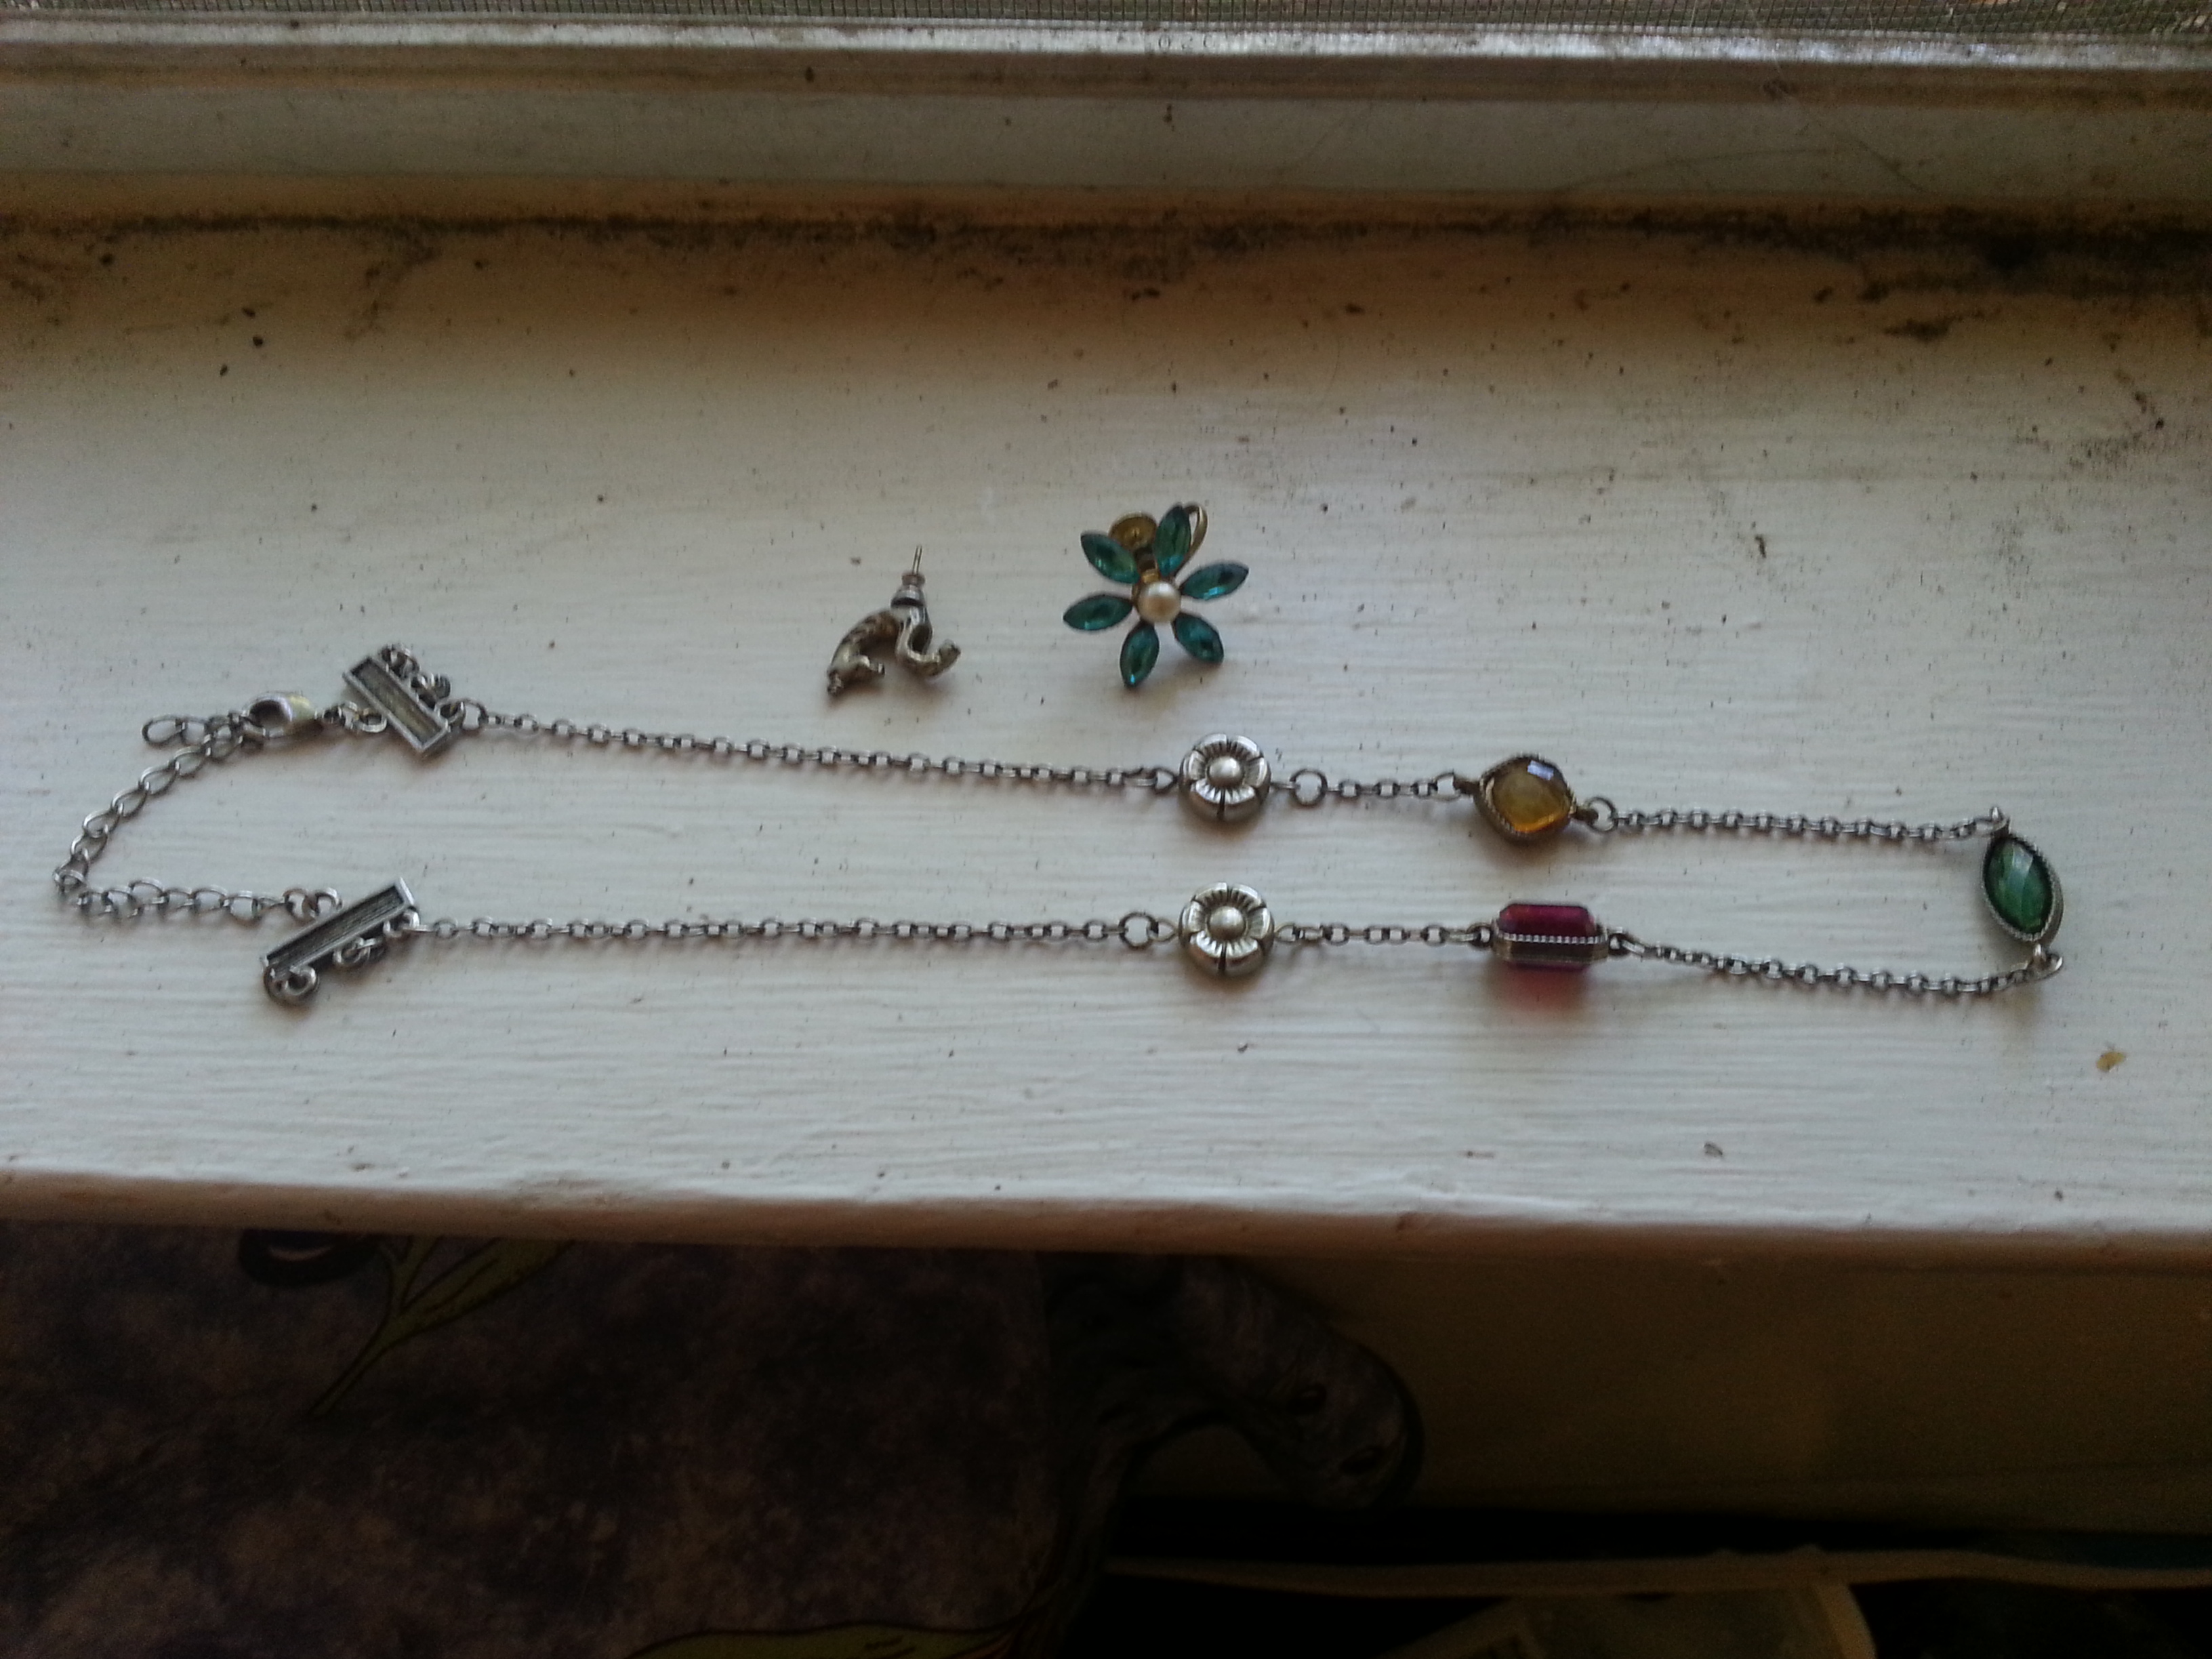
I had some fun making her Bajoran earpiece for this costume. I used a broken necklace, a regular pierced earring and a clip on earring to recreate it. I also made a pip for the collar of my uniform using a thumb tack and an earring backing, just as I did when I was 12. I didn’t get too elaborate with the Bajoran nose—I just used eyeshadow in two different shades of brown to create the illusion of creases.
Truth: I was not quite ready to take photos of myself outside in this, so excuse the blurry mirror photo. This is just to show the rest of the outfit (black leggings, black boots). If I’d had more time I would have straightened my hair and tried to find a red headband. At least there are some stars in the background!
additional costume ideas:
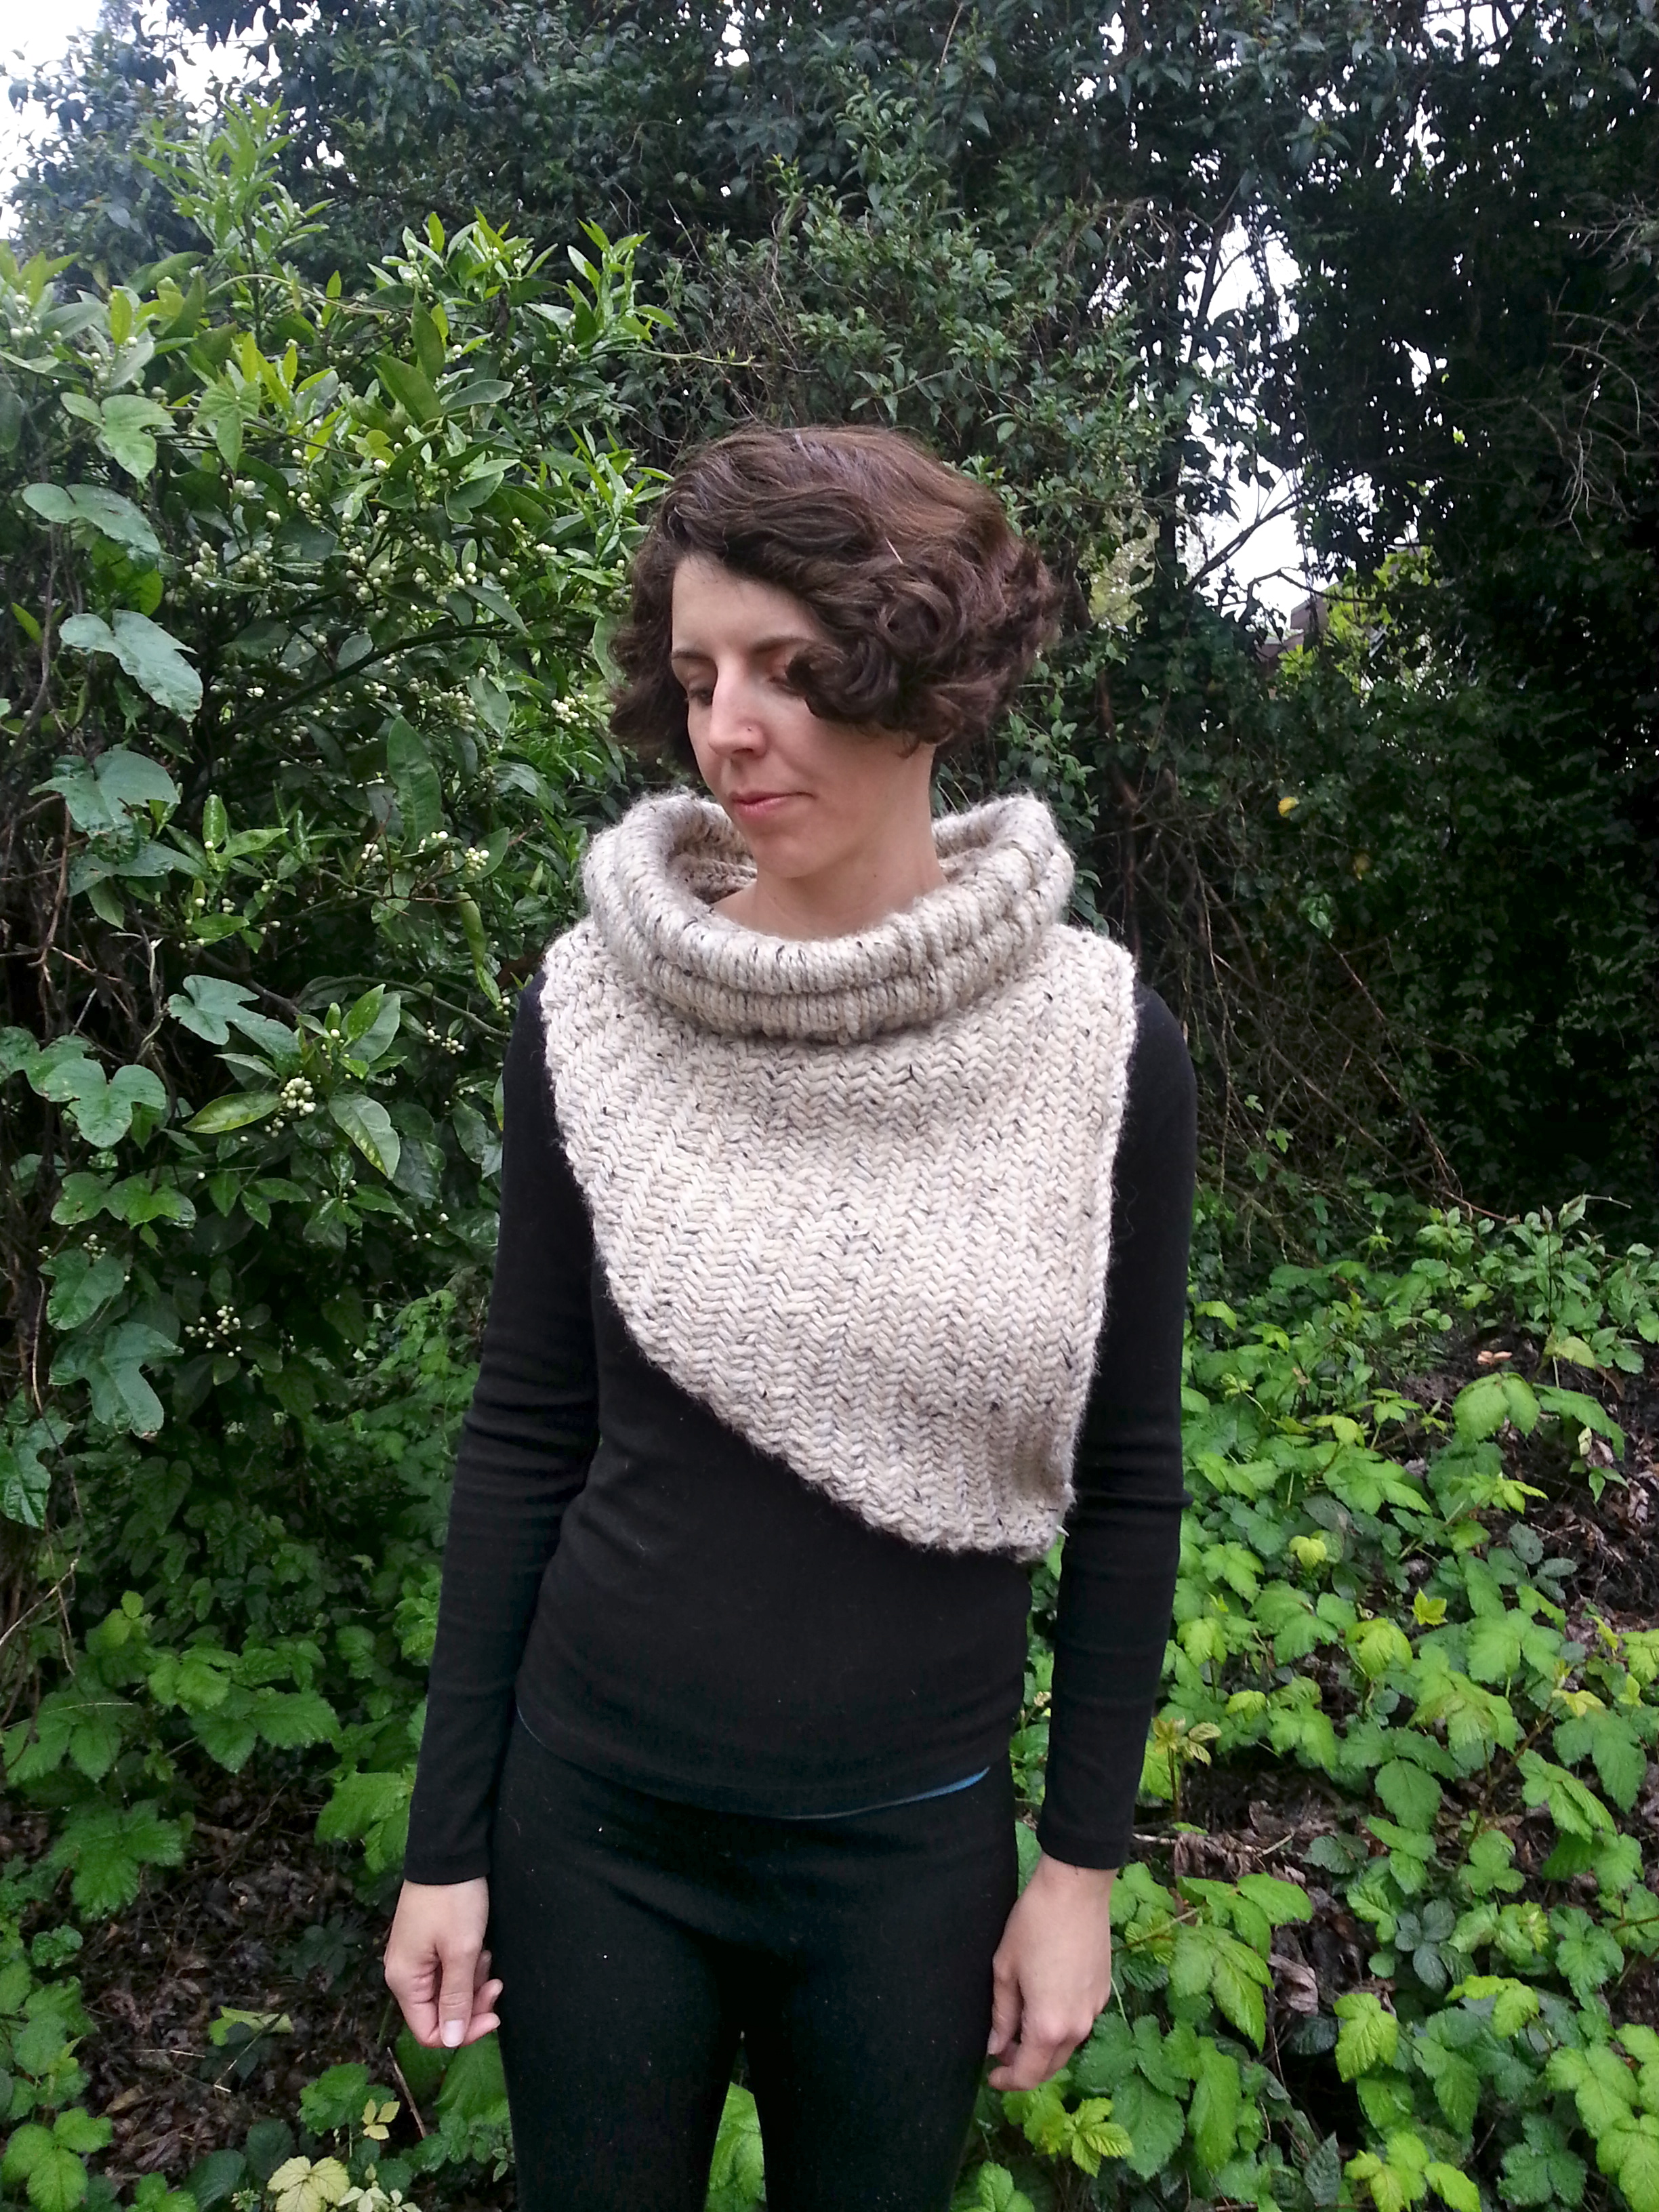
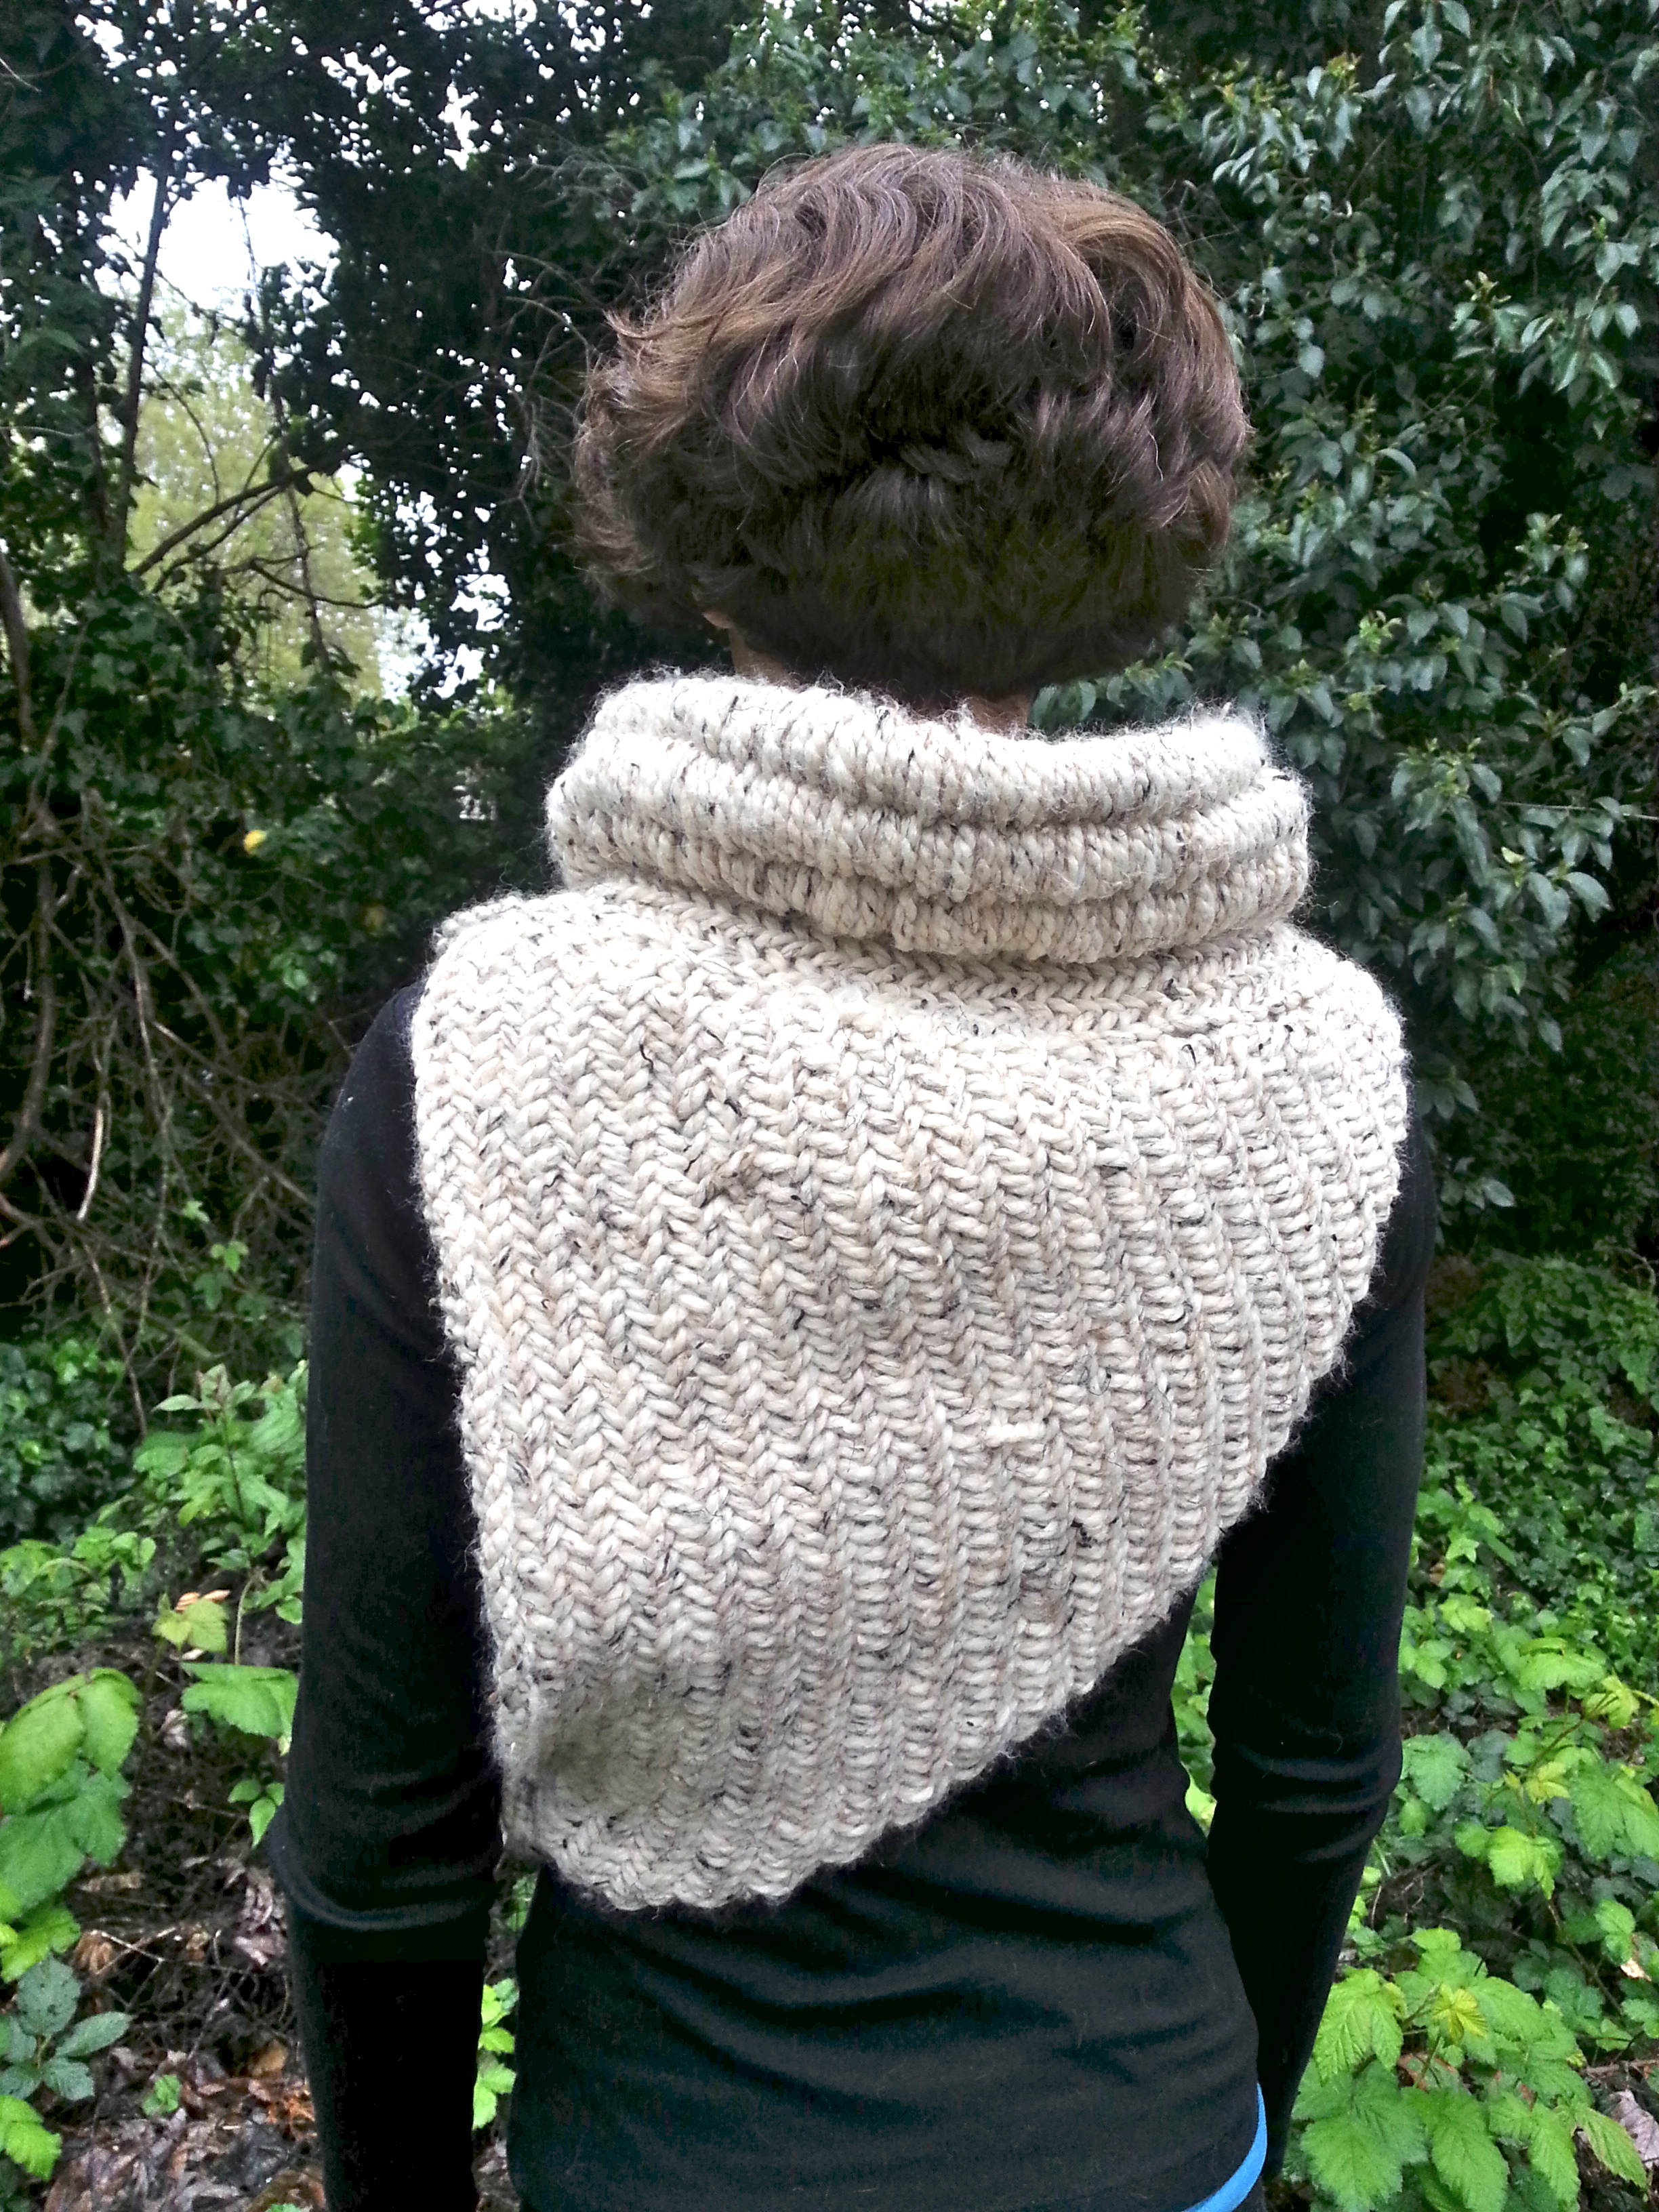
If you can knit the Hunger Games Cowl fast enough, you could be Katnis Everdeen! Bonus: it would be a warm and cozy costume.
ABSTRACT COSTUMES
Anatomical Heart
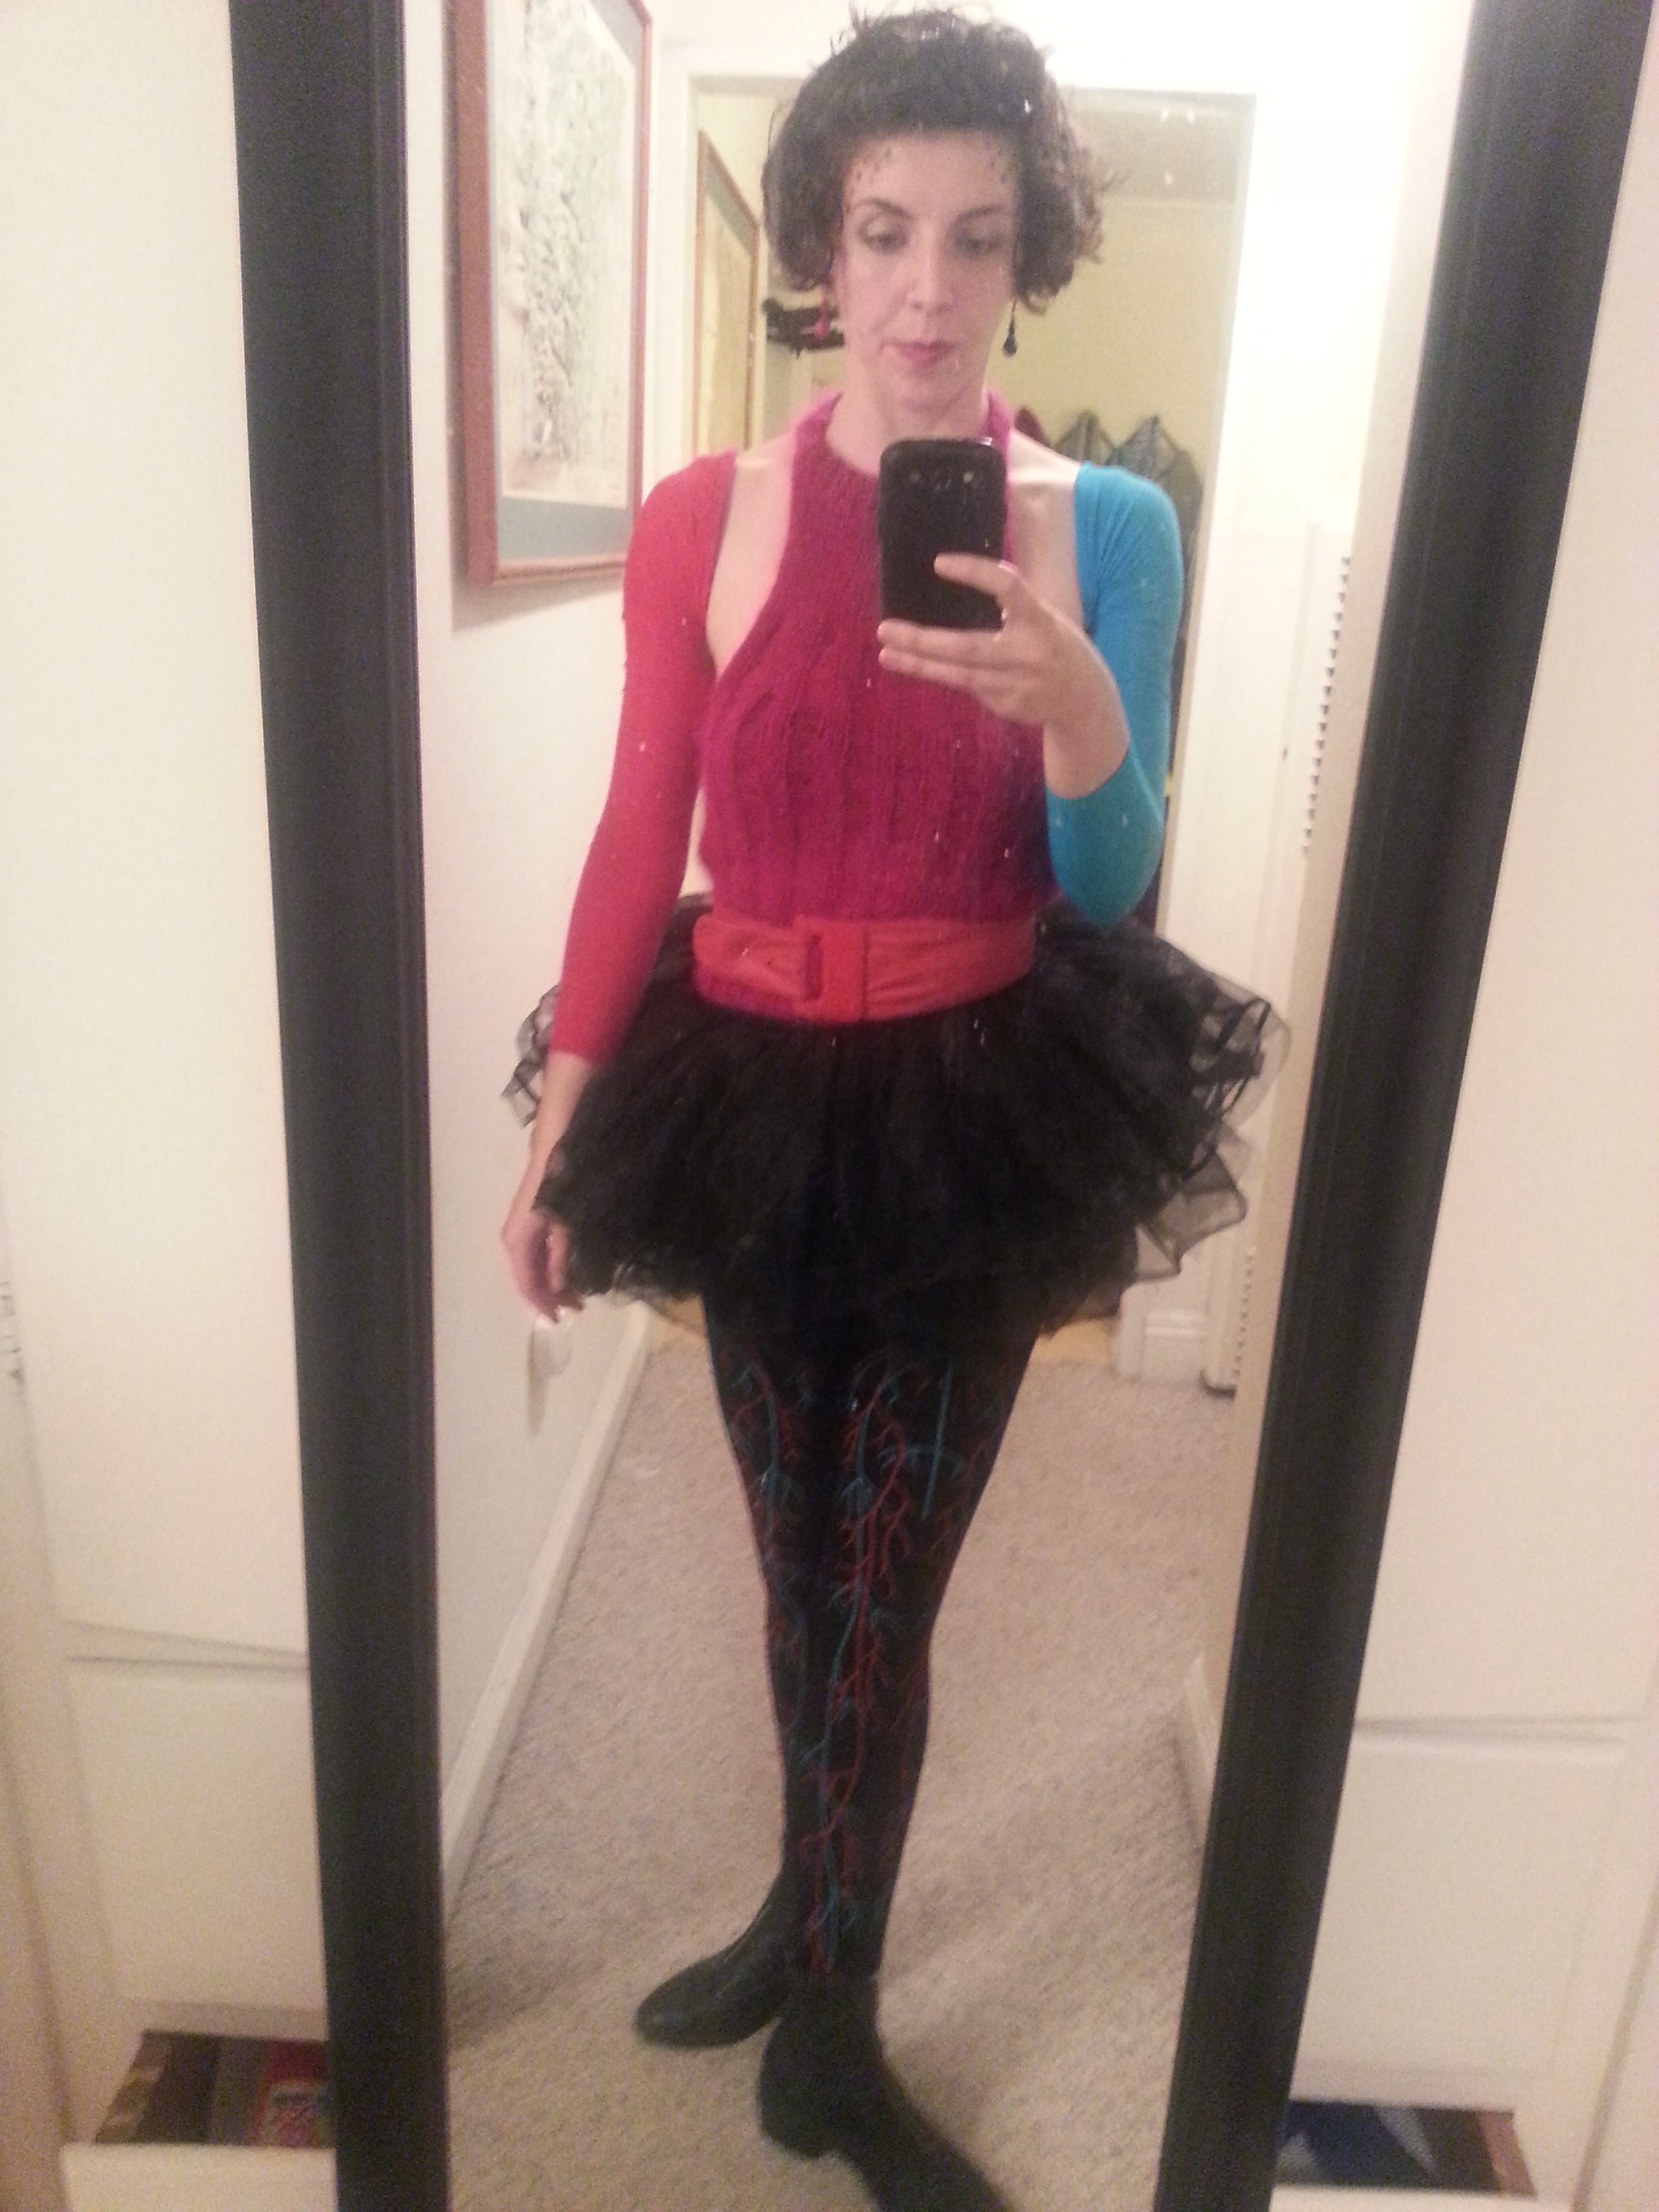
Sometimes, I like to attempt non-humanoid costumes. I was particularly pleased with this interpretation of the human heart. Since veins and arteries are often depicted in blues and reds in anatomical drawings, I went with that theme. I painted dots in blue eyeshadow and red lipstick on my forehead, with an earring of each color. Then I found some children’s tights in a discount bin at Target in blue and red. I cut off the feet and stuck one arm in each, tying them together behind my back to form a sort of shrug. It stayed put surprisingly well.
Recognize the top? It’s was my Valentine’s Day party Free Fall Tank. It’s a quick pattern that you could totally finish before Oct. 31. I thought it worked well for the heart costume too. The red belt and the black tutu…well, that was more to make it more costume-y for the party. But check out the tights!
These were the tights that actually inspired the whole costume. Ebay tights are the best.
You should know that I served lots of donuts dressed like this. I doubt anyone knew what it was supposed to be, but I knew what it was. In my heart.
Christmas Tree
As I promised that some of these costumes would be very easy, this final idea is one that I executed in about 30 minutes. Technically this was for an ugly sweater party around Christmas time, but it works just as well for the October holiday.
Remember the foam sheets I mentioned for the Pilgrim costume? I got a bag of odd sized ones from the dollar store, and cut them into squares. I used all the green ones to create a Christmas tree with a brown one for a stump, then found some sparkly ones in different colors to be the gifts below. I used duct tape to adhere them to an old sweater and wore it with my brightest red pants.
You could always go as a grumpy Christmas elf too.
additional ideas:
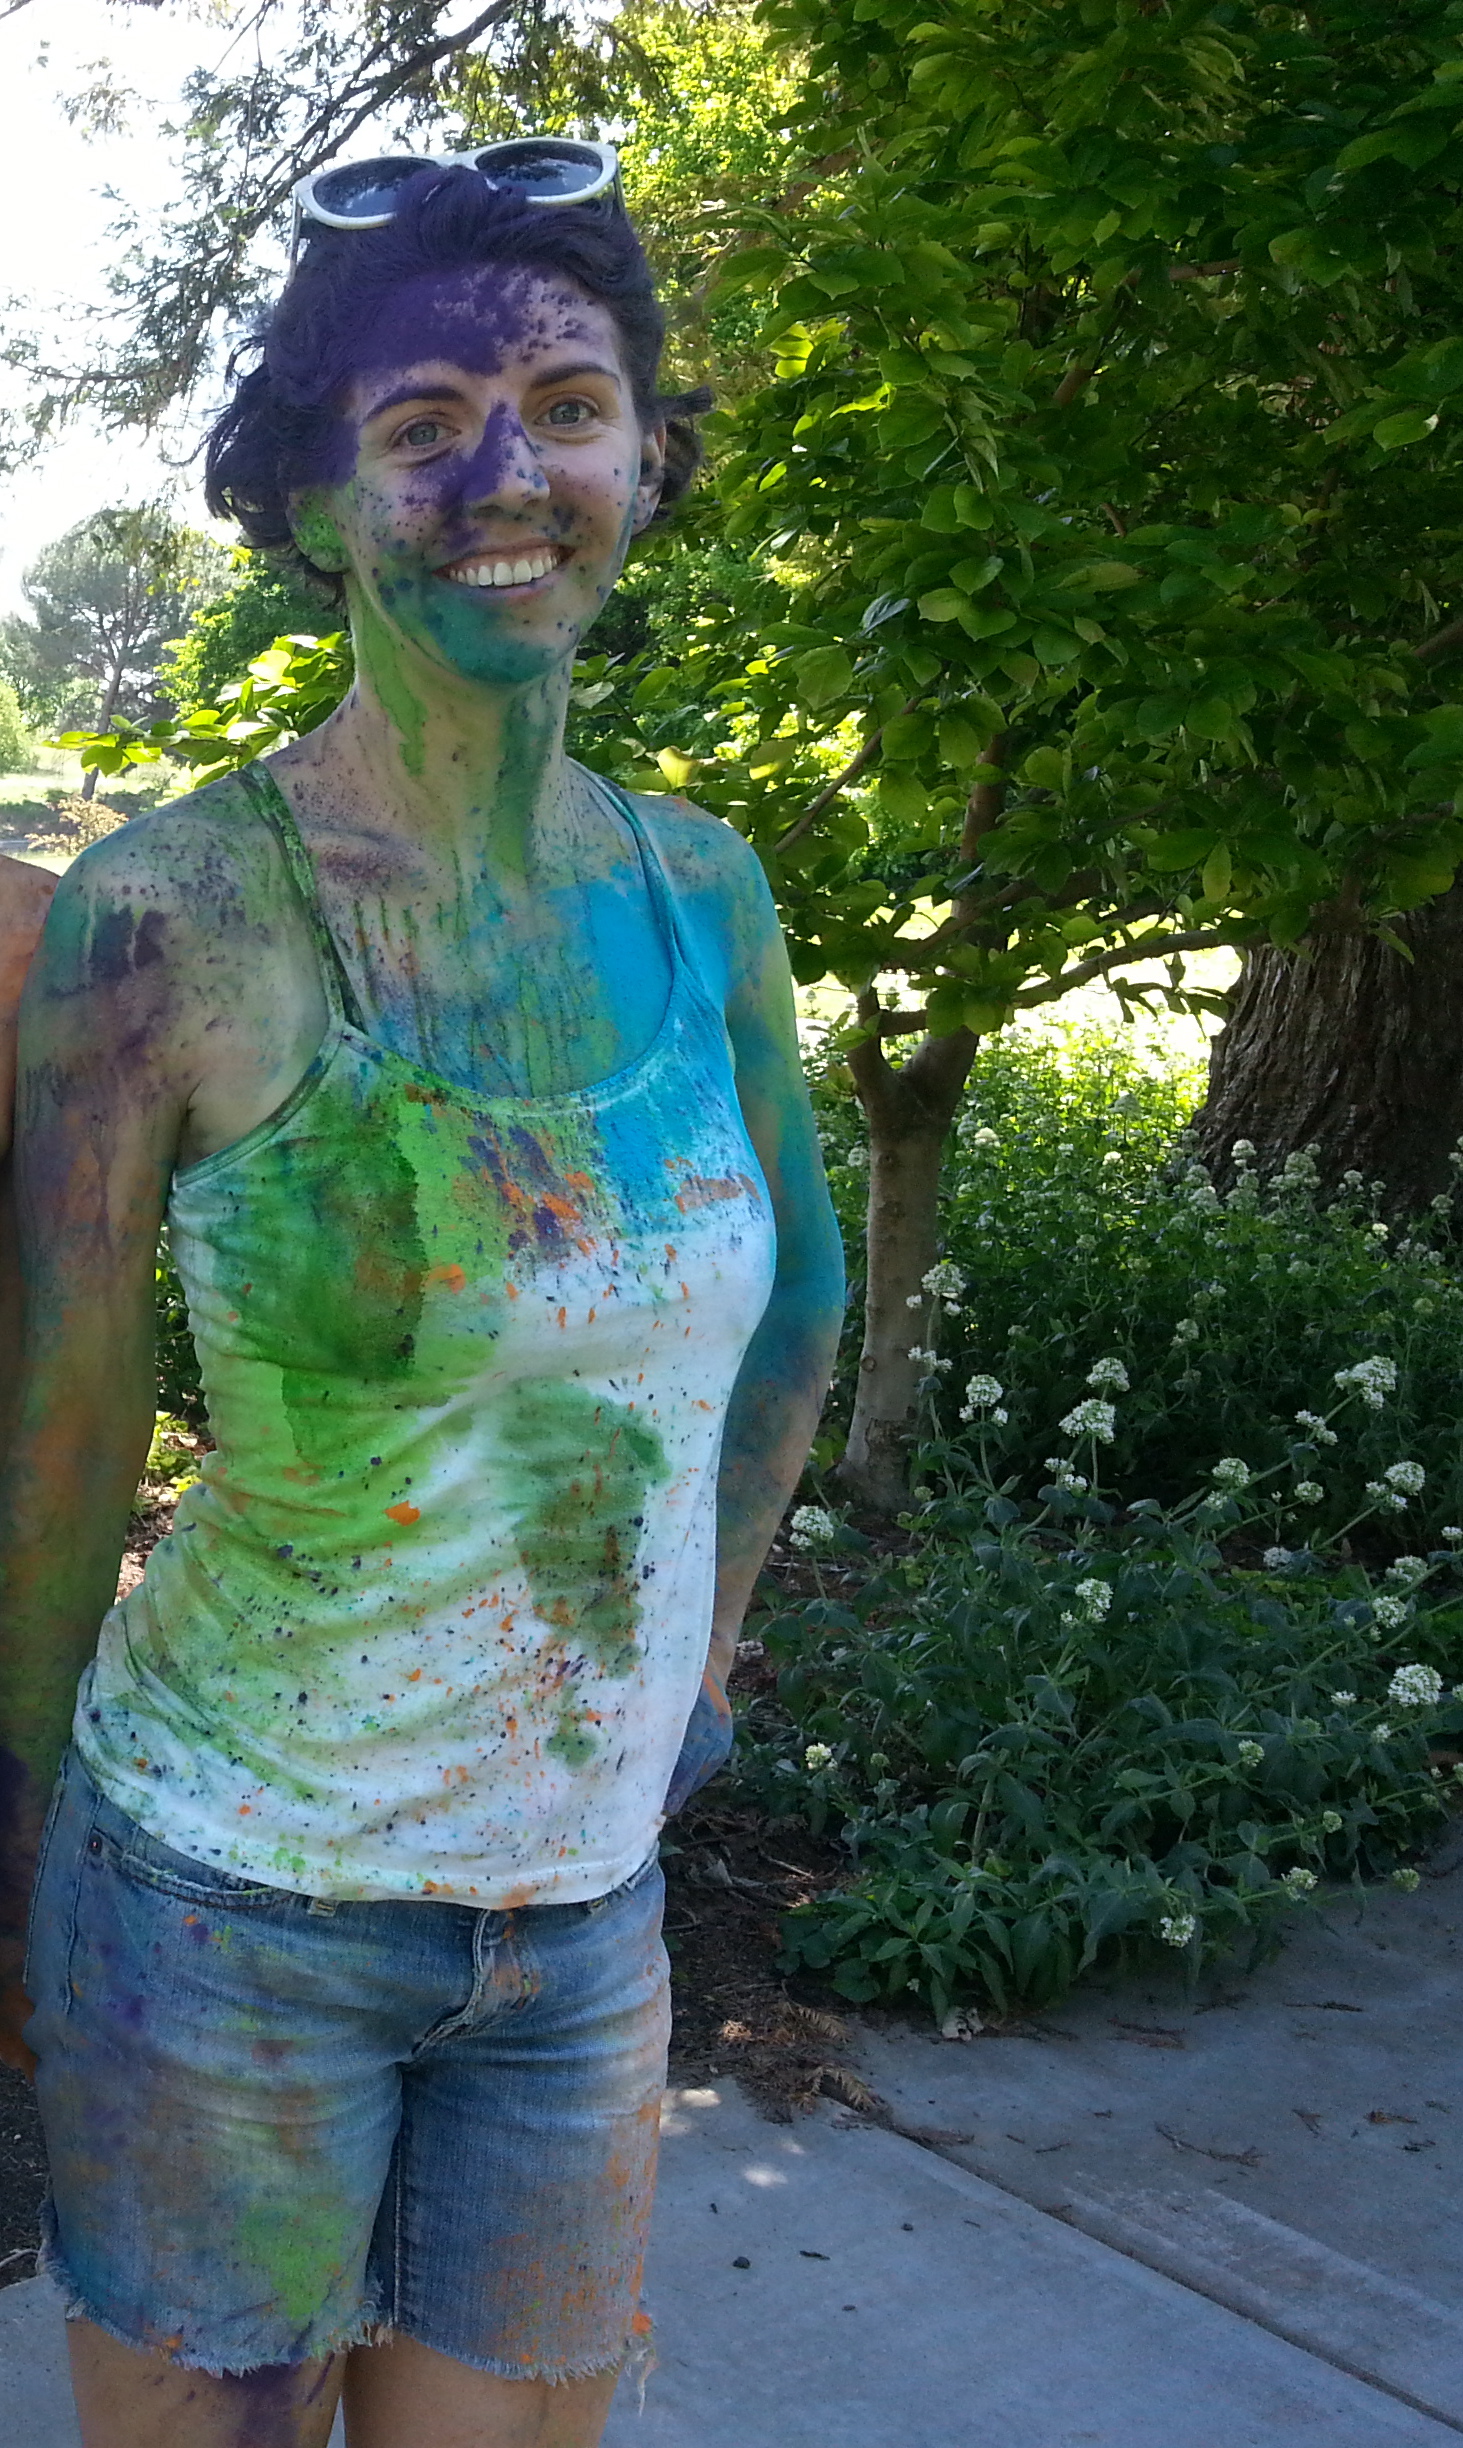
I think leggings can be a great inspiration for abstract costumes. If I had a chance, I would probably pair these paint splatter leggings I have with an actual paint splattered top.
this plus this
I hope these costumes inspire some epic Halloween 2014 creations of your own!
This summer, I took four old t-shirts and transformed them with stencils, cut outs, or both. I even altered the basic structure of two of them to get the fit I wanted. And thanks to my lovely friend, I now have pictures of myself wearing them. So if you want a DIY run down of how to cut, slash, and paint your way to a unique T, read on. (Bonus: Battlestar Galactica references ahead!)
Stencils
Let’s start with the least destructive activity—paint. If you read my post on nerdy crafts, you’ll notice I’m not new to stenciling. On that post I linked to the tutorial on stencilry that I use, but I’ll give you the short version here.
One of the easiest ways to make a clean stencil is to use the freezer paper method. First, pick a stencil image—in this case “So Say We All,” the “amen” of the Battlestar Galactica universe, in an appropriate font. Be sure to read the tutorial section on islands and bridges to make sure your image will work as a stencil—as you can see above, I had to add back in the “islands” in the middle of the “O” and “A” to keep the letters looking correct. Buy freezer paper, cut it to the size of paper your printer will accept, and print your stencil onto the non glossy side (some wrangling with the printer may be required). Cut out the stencil with an X-acto knife, and then with a dry iron, iron it directly onto the shirt.
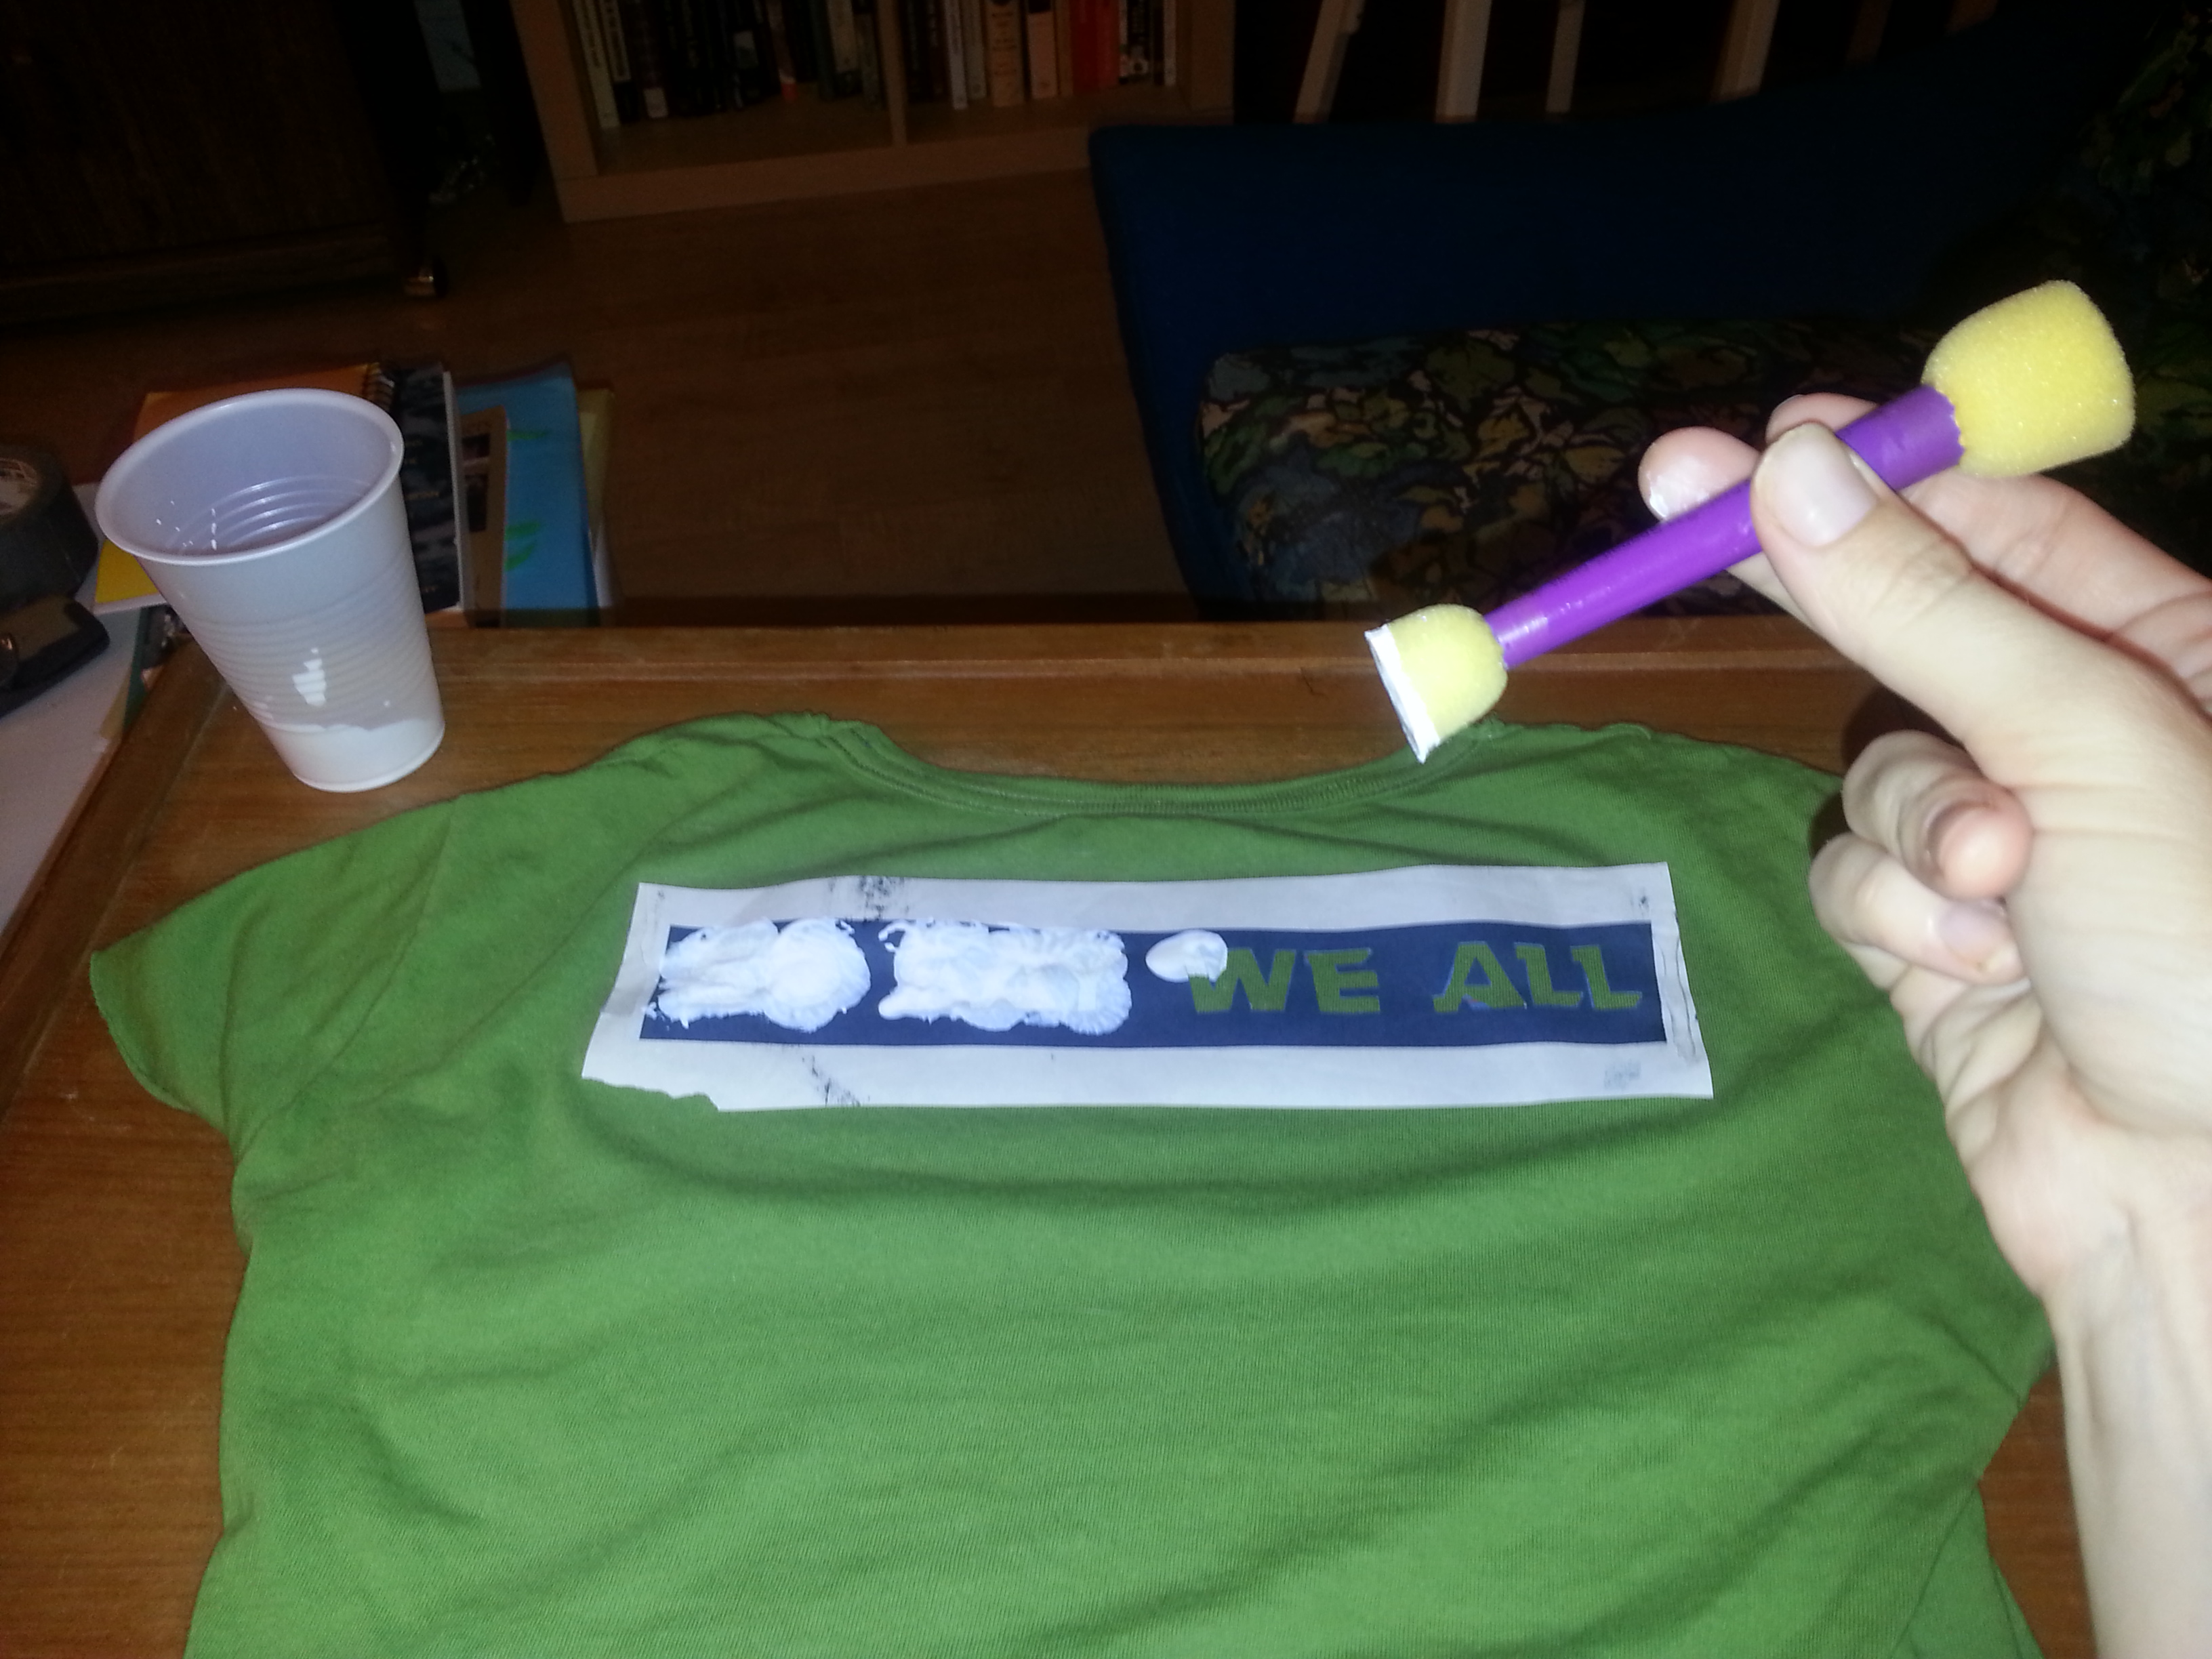
For the painting part, mix your preferred color of acrylic paint with fabric medium according to the directions on the bottle, then paint onto the stencil with a sponge or a brush. Make sure to put something between the layers of the shirt so the paint doesn’t soak through (and not cardboard, because I’ve notice the paint will stick to it—I used my X-Acto knife cutting pad). Let dry completely before removing the stencil, then follow the fabric medium directions for heat setting and washing the shirt so that the stencil will be permanent and clean.
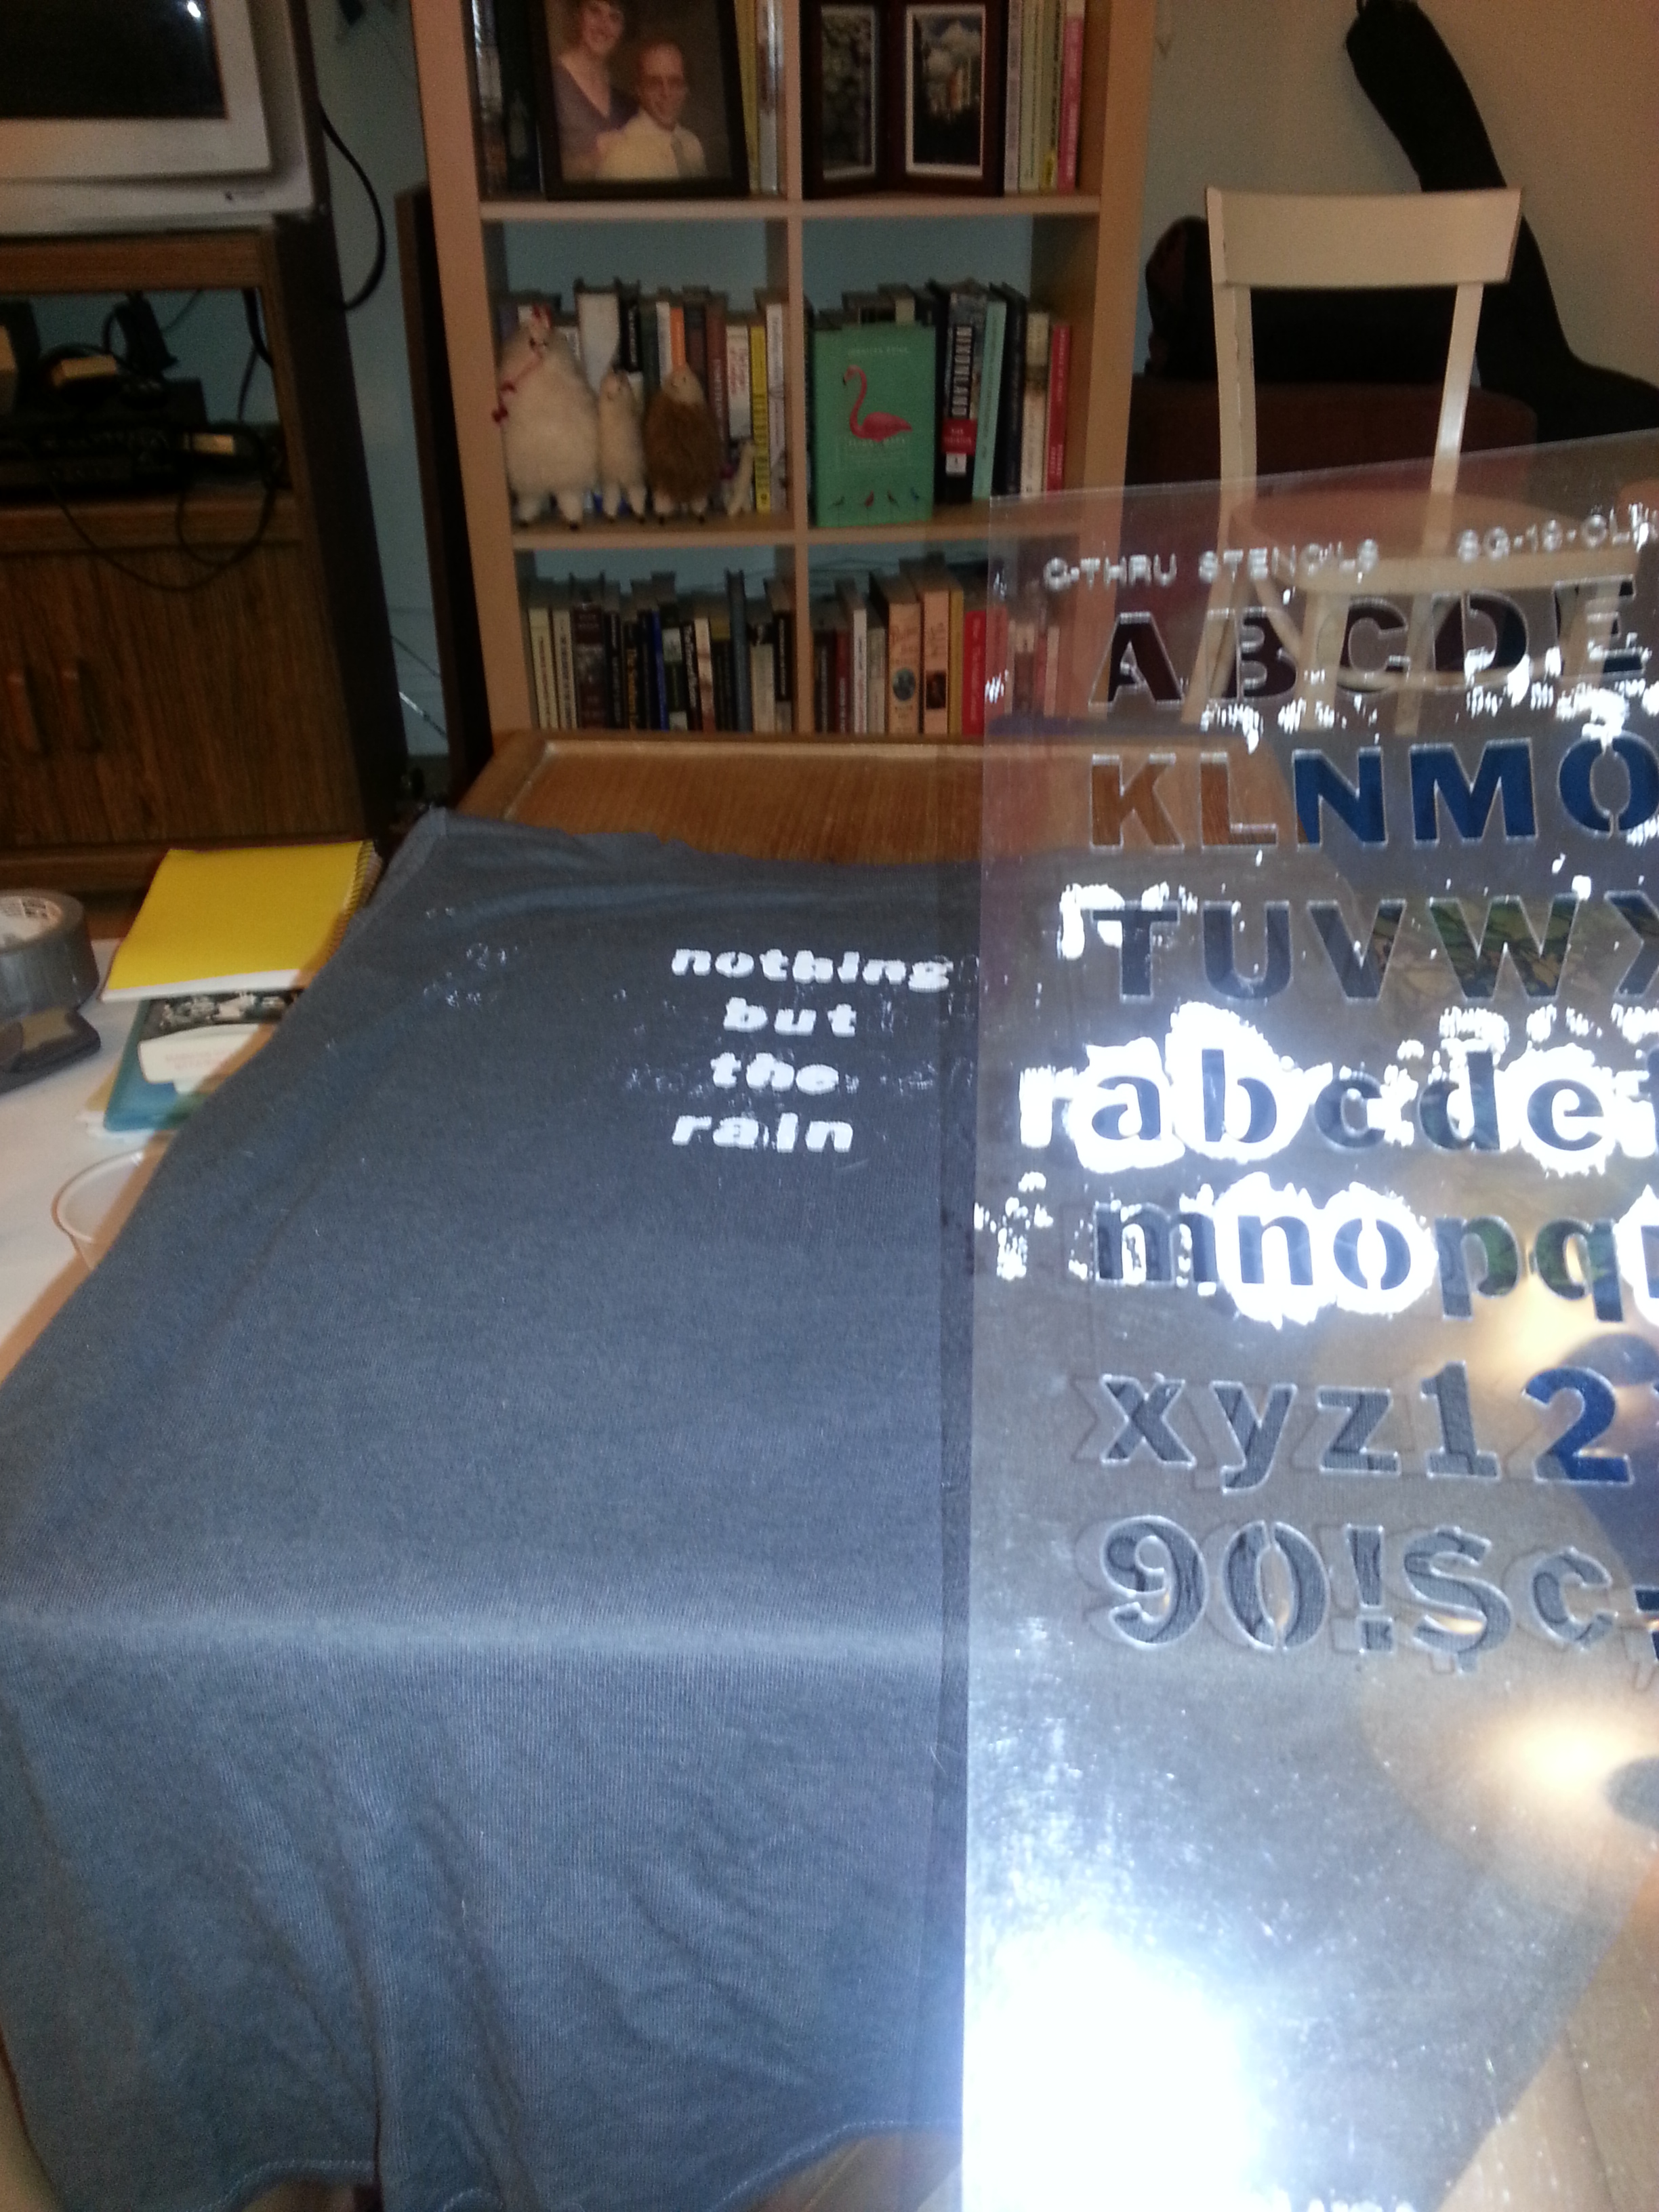
The process is somewhat similar if you have a permanent stencil, like this plastic alphabet one I used to make the phrase “Nothing But the Rain”—yet another BSG reference (its the phrase said by Starbuck to Captain Adama). The only difference here is being careful about getting paint everywhere when you move the stencil—I decided I didn’t care about the mess because I liked the splattered look, but you can decide for yourself.
The last option is to just trace simple shapes directly onto the stencil paper and then cut those out—that’s the easiest option, and it’s what I did on my pink shirt when I wanted to use up the last of the paint I mixed. I did a pattern of triangles to match the cut outs on the back of the shirt.
Cut Outs
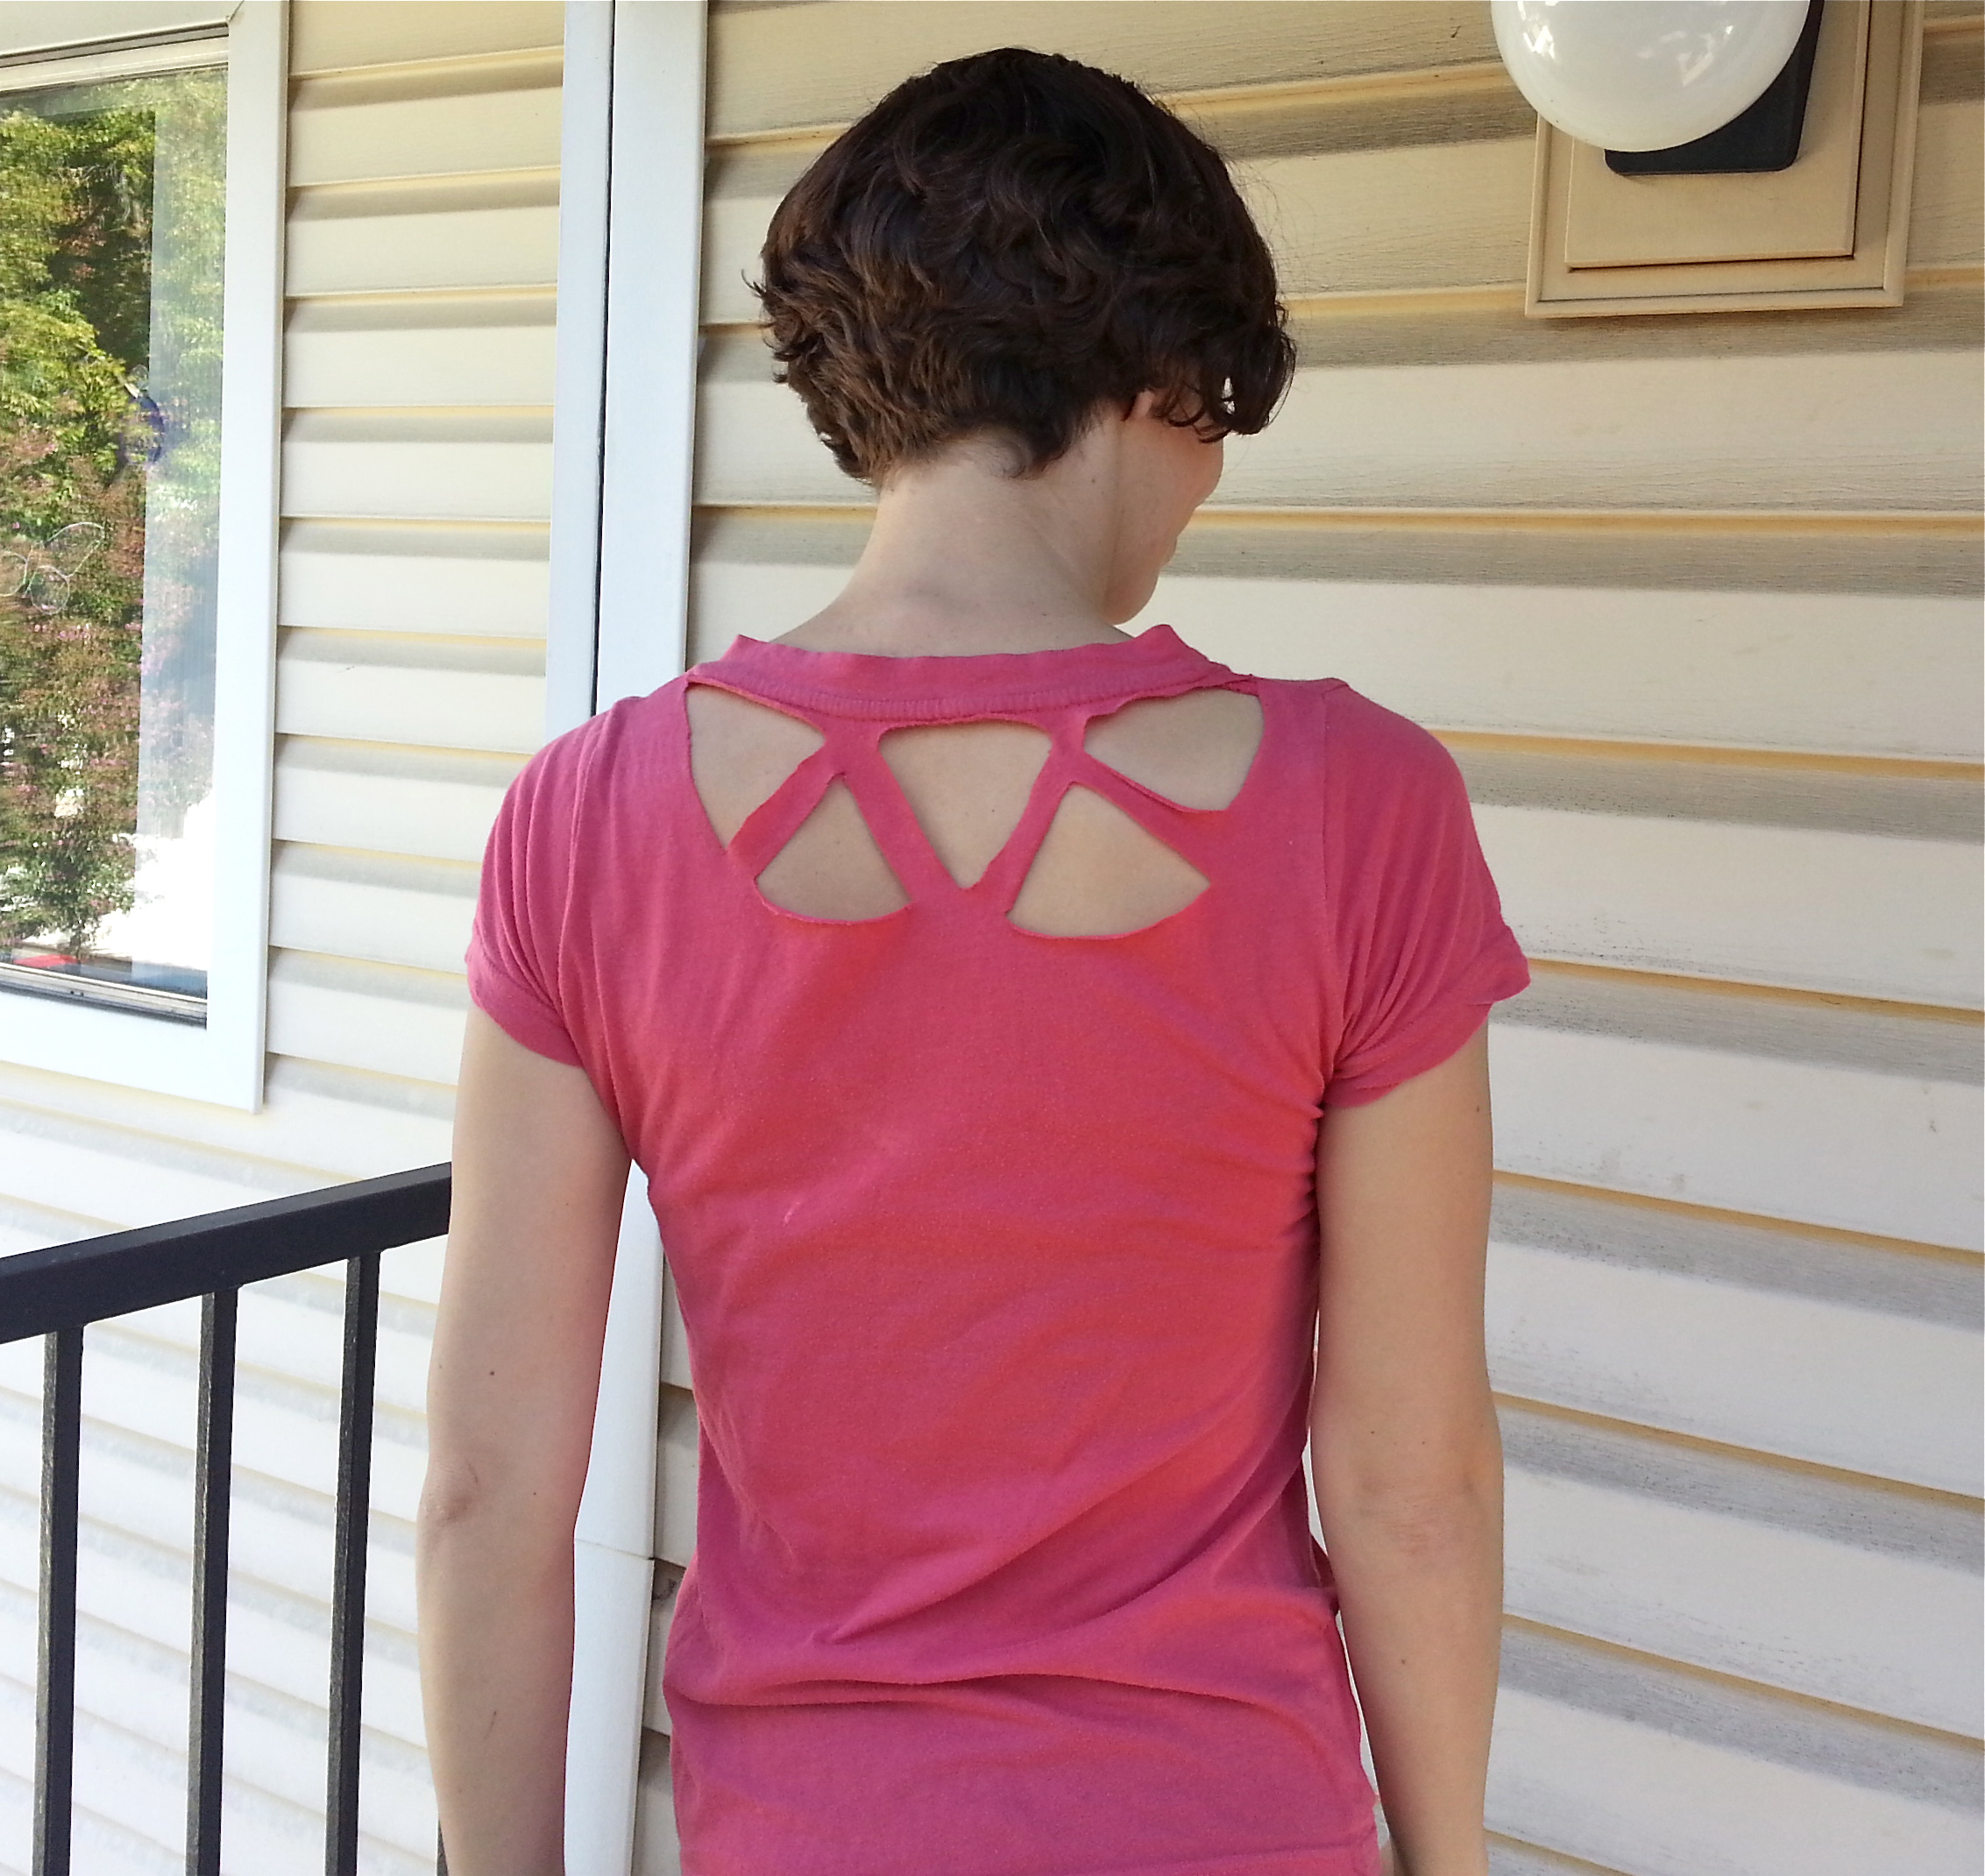
I had a strong urge to do something “destructive” to a few of the shirts I had. This pink shirt, for example, which my friend promptly dubbed the pink triangle (i thought she was referencing the Weezer song but she was not!). This shirt had been abandoned in my laundry room lost and found box for months, so it became the first guinea pig for my cut out and stenciling experiments.
I don’t have any in-progress shots for the cut outs, but here’s what I did. First I looked at some photos and tutorials online for some inspiration—this listicle of cut outs has some great images, and photos # 5, 21 and 22 intrigued me. I decided to do a simplified version of the triangle cut outs from photo # 22. That one unfortunately had no tutorial, so I decided to make a triangle template, trace it onto the shirt with chalk, and then cut it out with scissors. I did the stencils later with the same template.
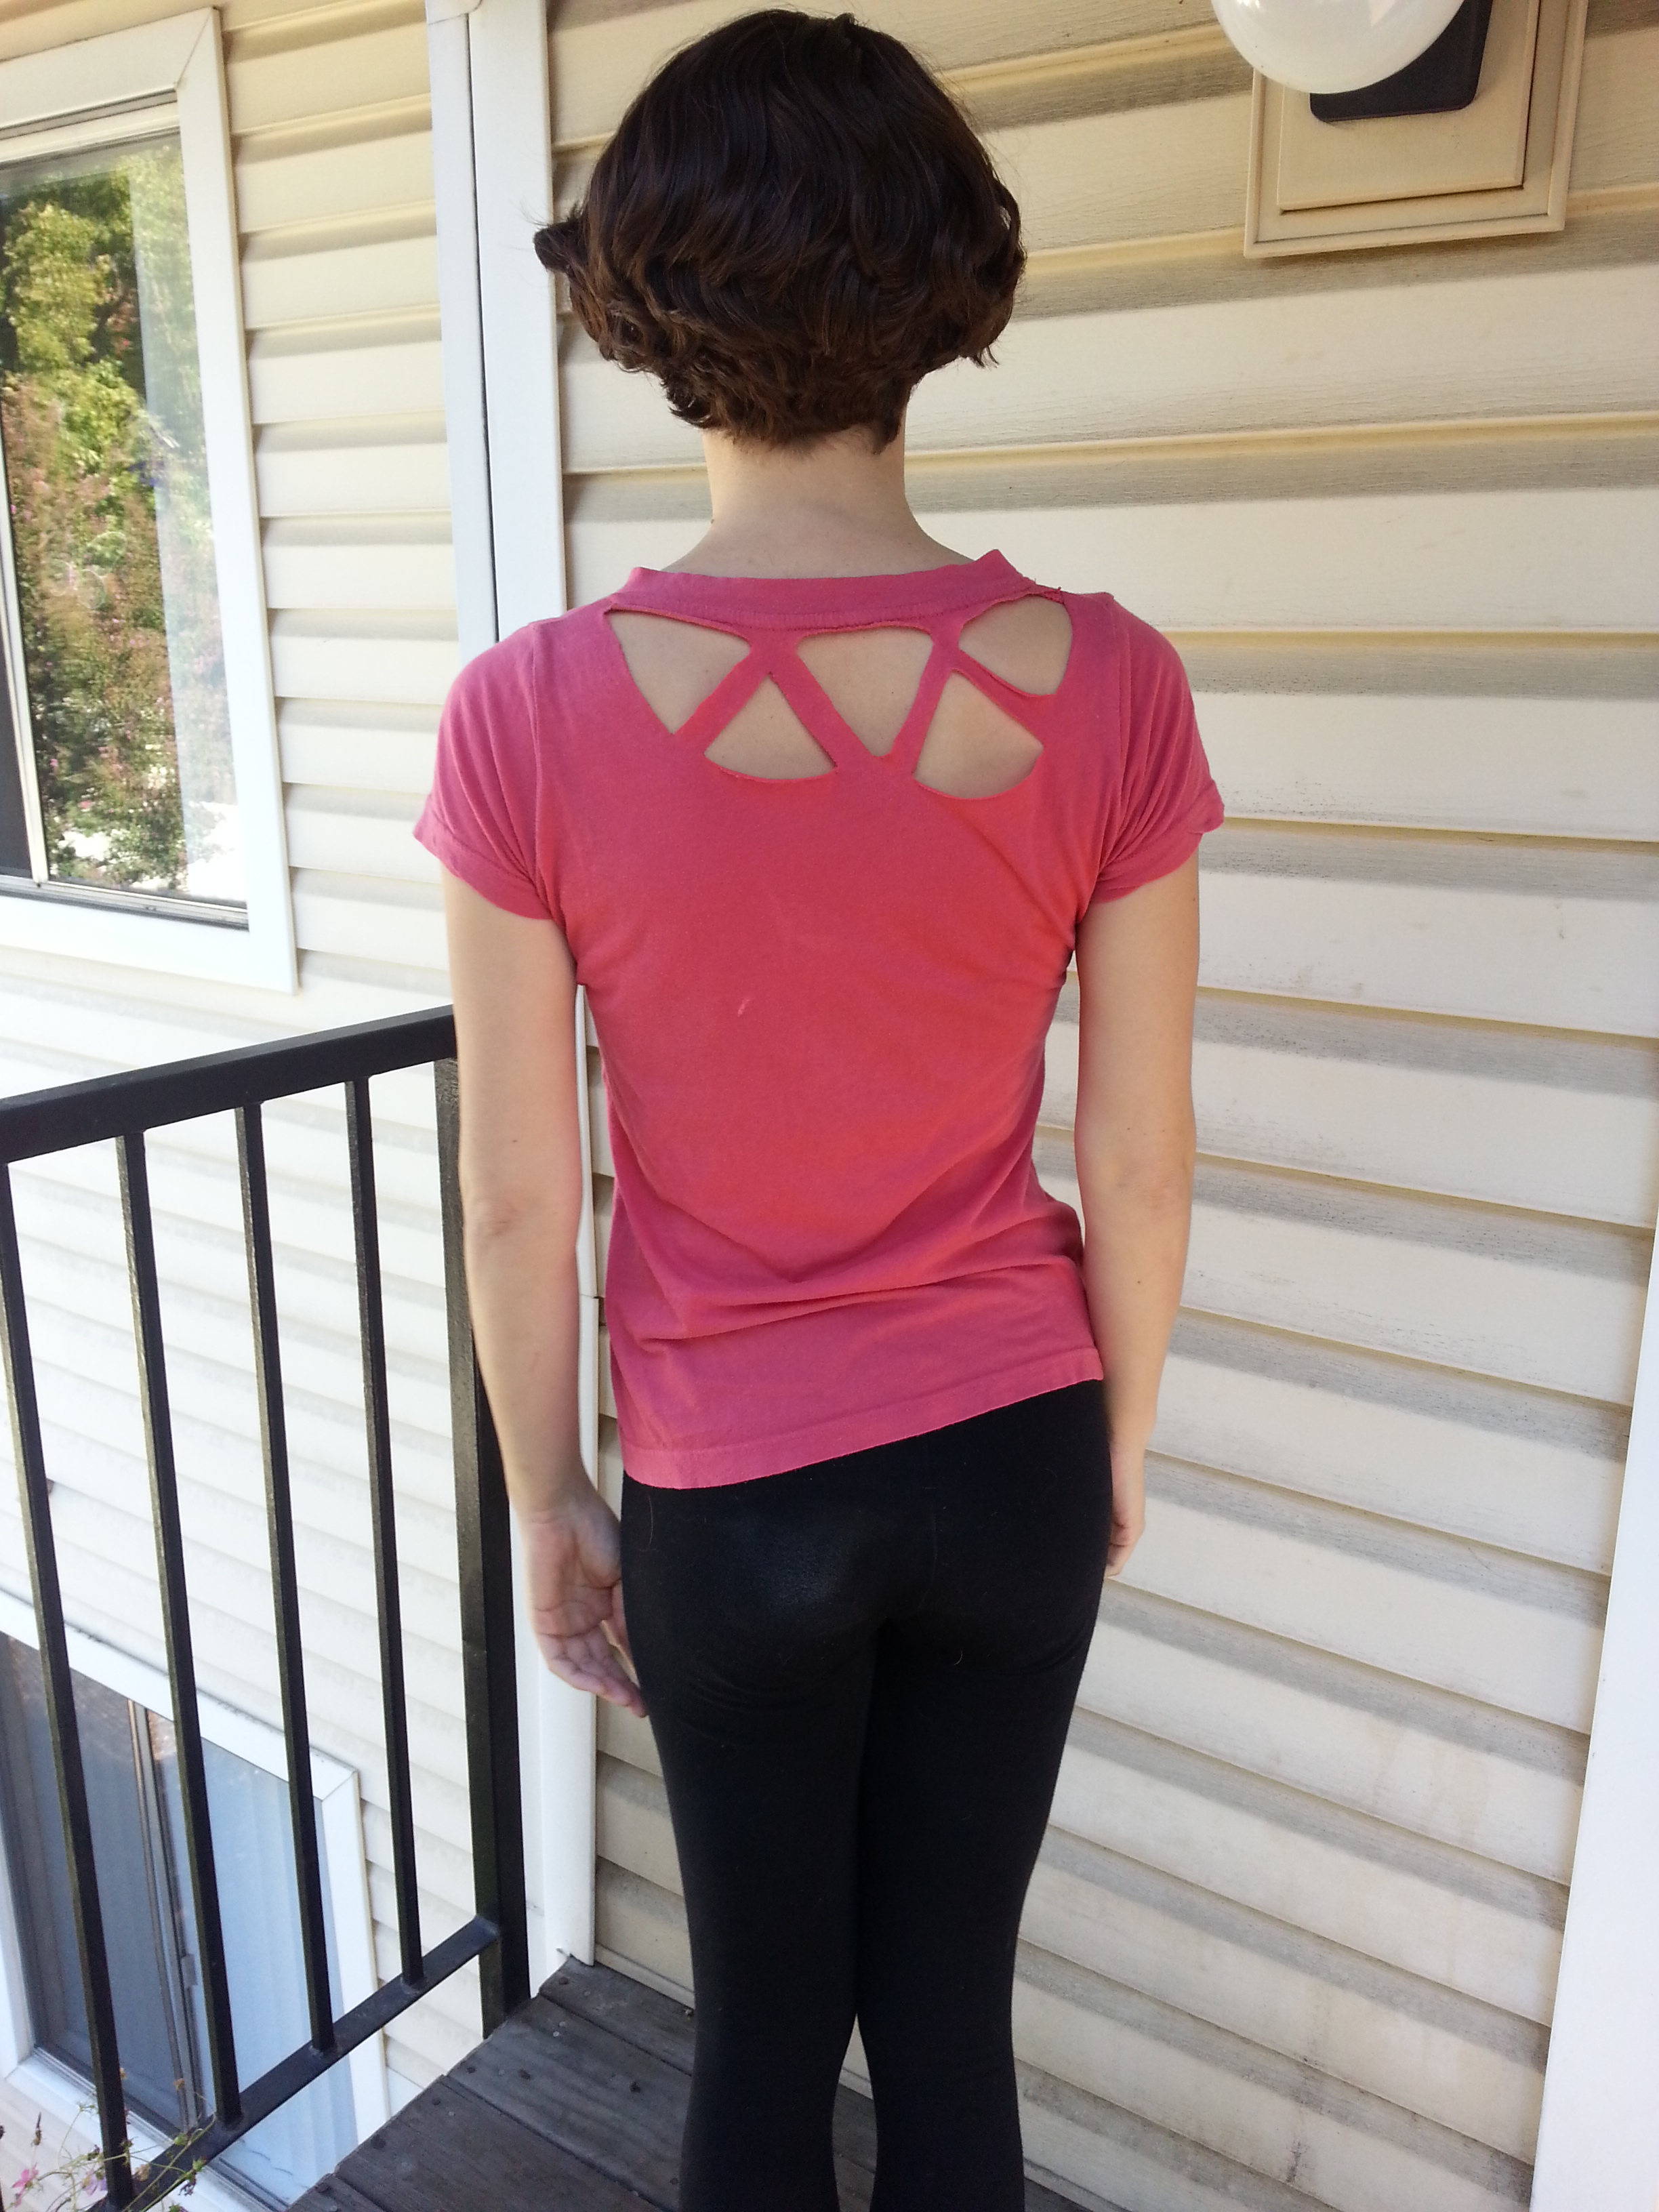
This mostly worked, but it was tricky to get the triangles all the same size and shape with scissors. So when I tried it on another t-shirt, I used my X-Acto knife to cut them out. Much easier! I think it works especially well for straight lines.
I love the way that you can play with the placement of cut outs—for example, you can place them to reveal another shirt underneath and play with the contrast of colors and patterns. I think someday I’d like to attempt one of these two designs, especially the tree one.
Fit Alterations
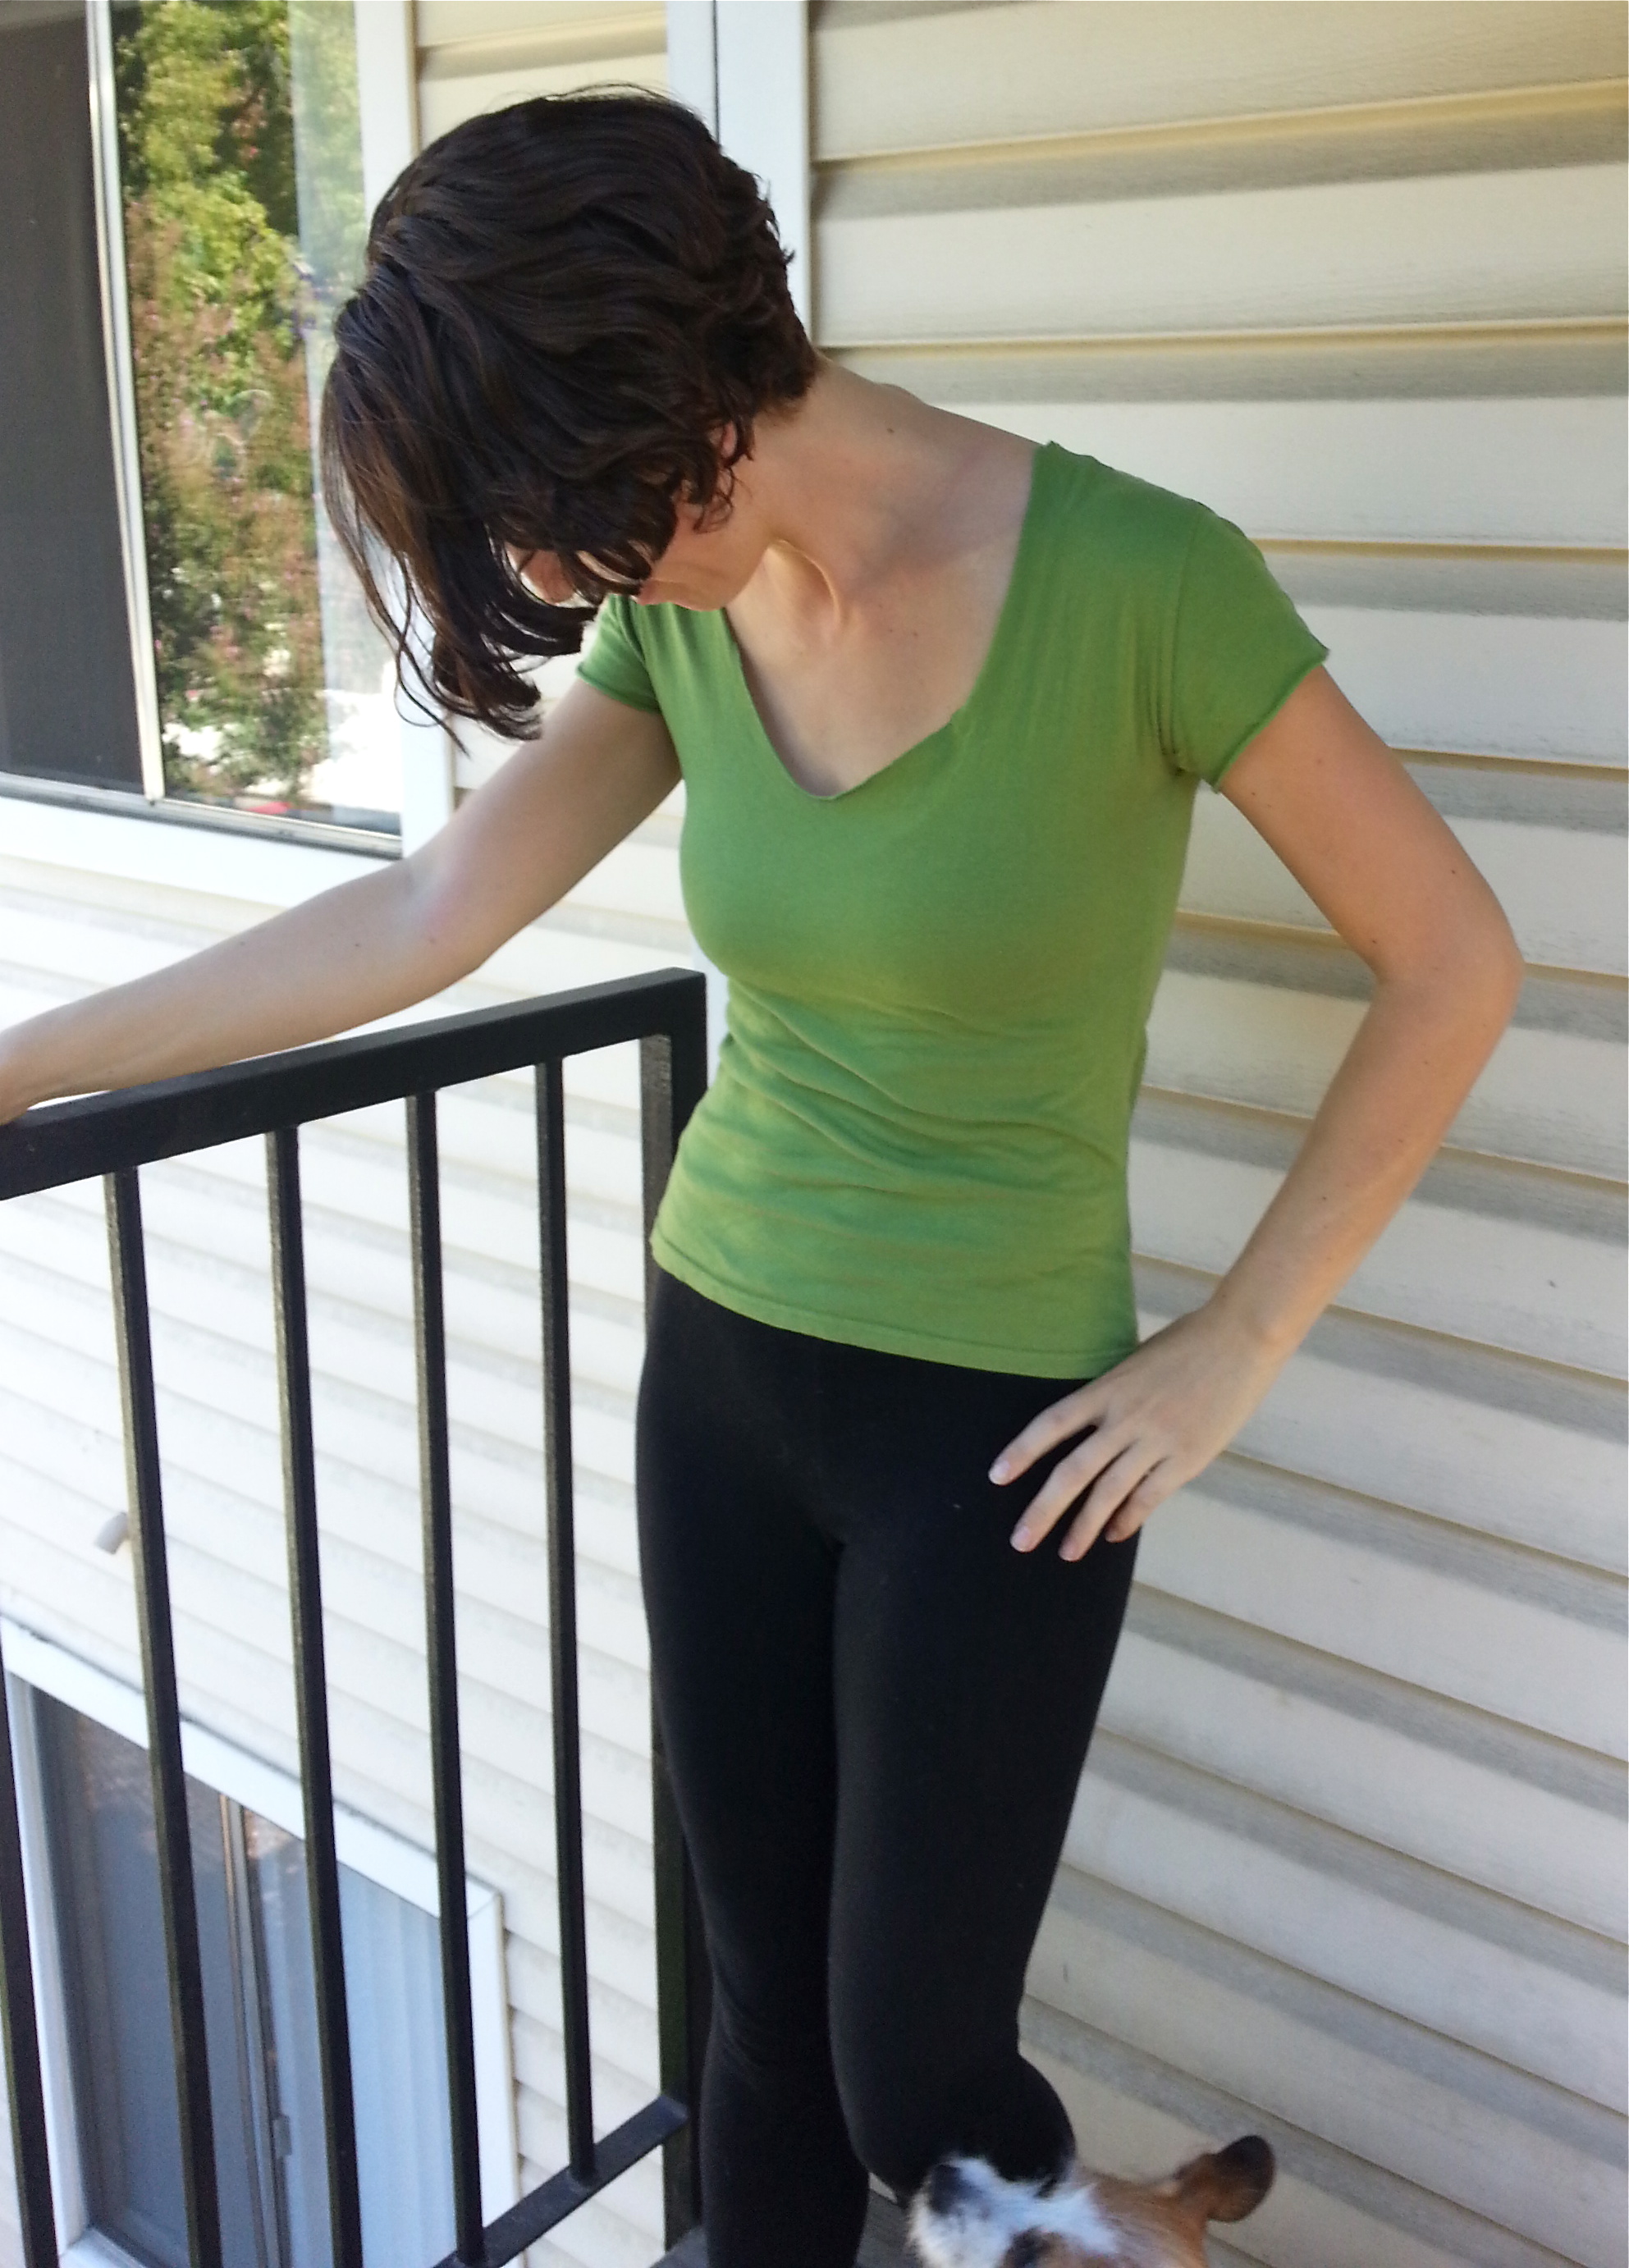
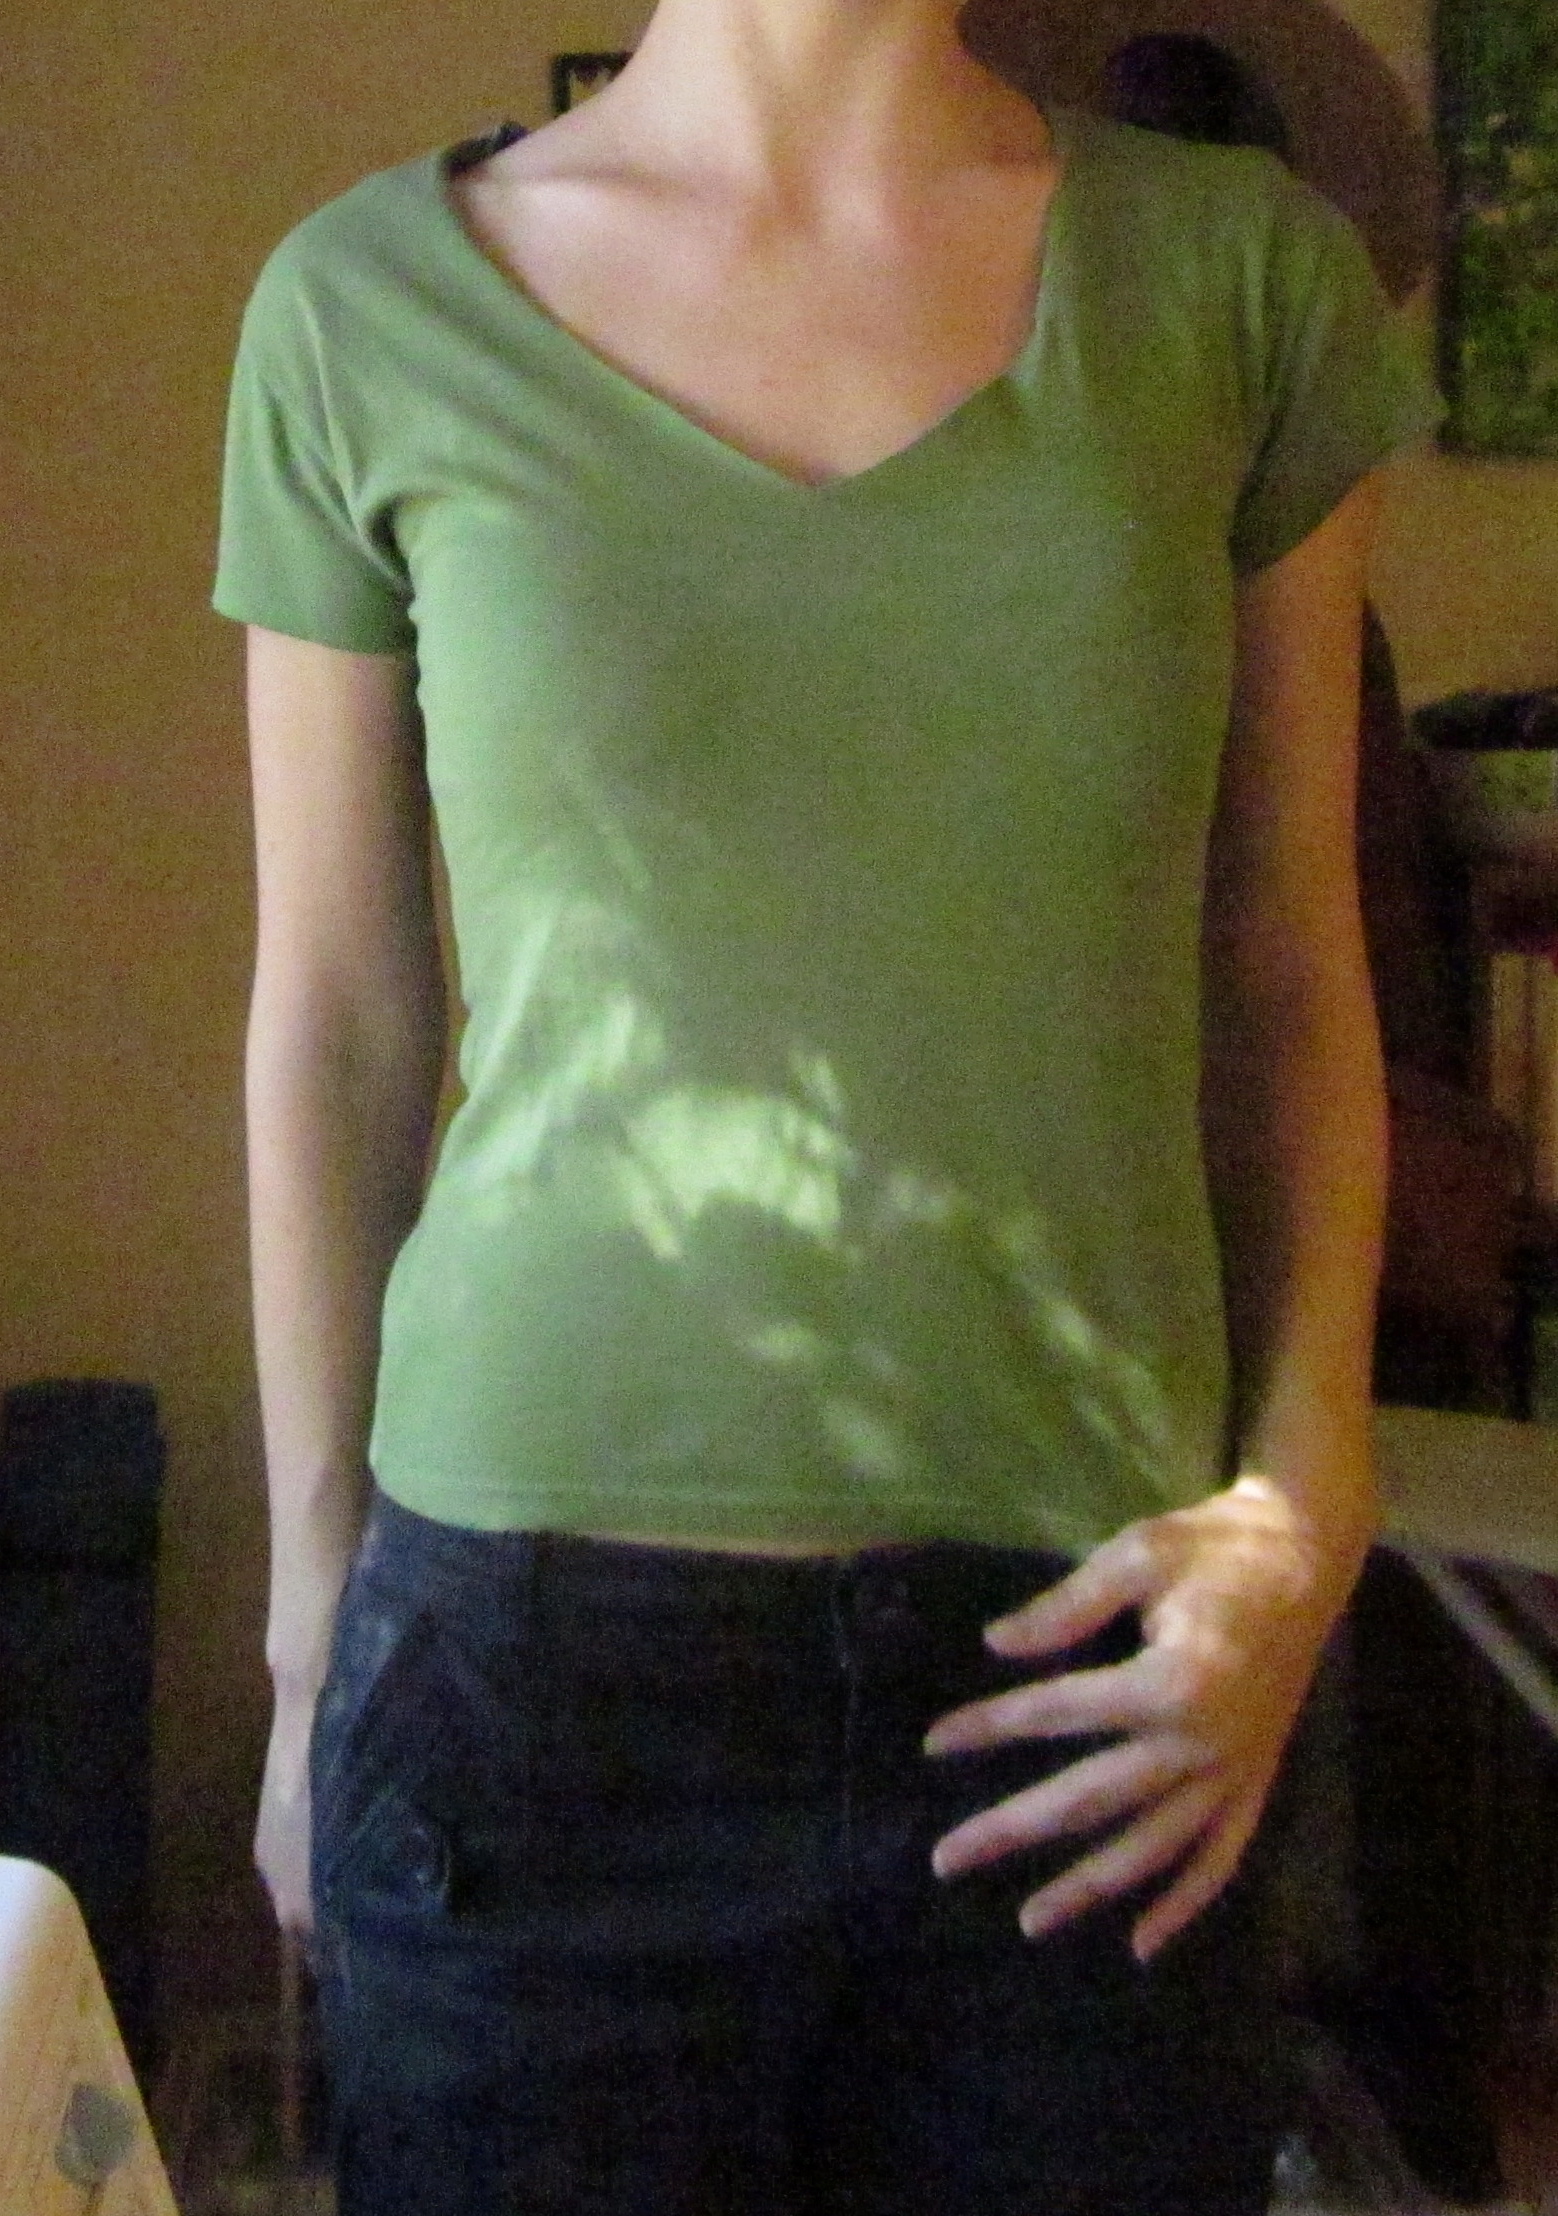
One of the most basic DIY t-shirt projects is also the one that requires the most patience and skill (and a sewing machine)—changing the fit and cut of a shirt. The above tank top used to be a men’s size medium crew neck tee that I found in a free pile. The green shirt below that I stenciled on was a boy’s size large crew neck t-shirt, also from a free pile. There are many tutorials out there for doing this, but I am going to show you the easier way I know.
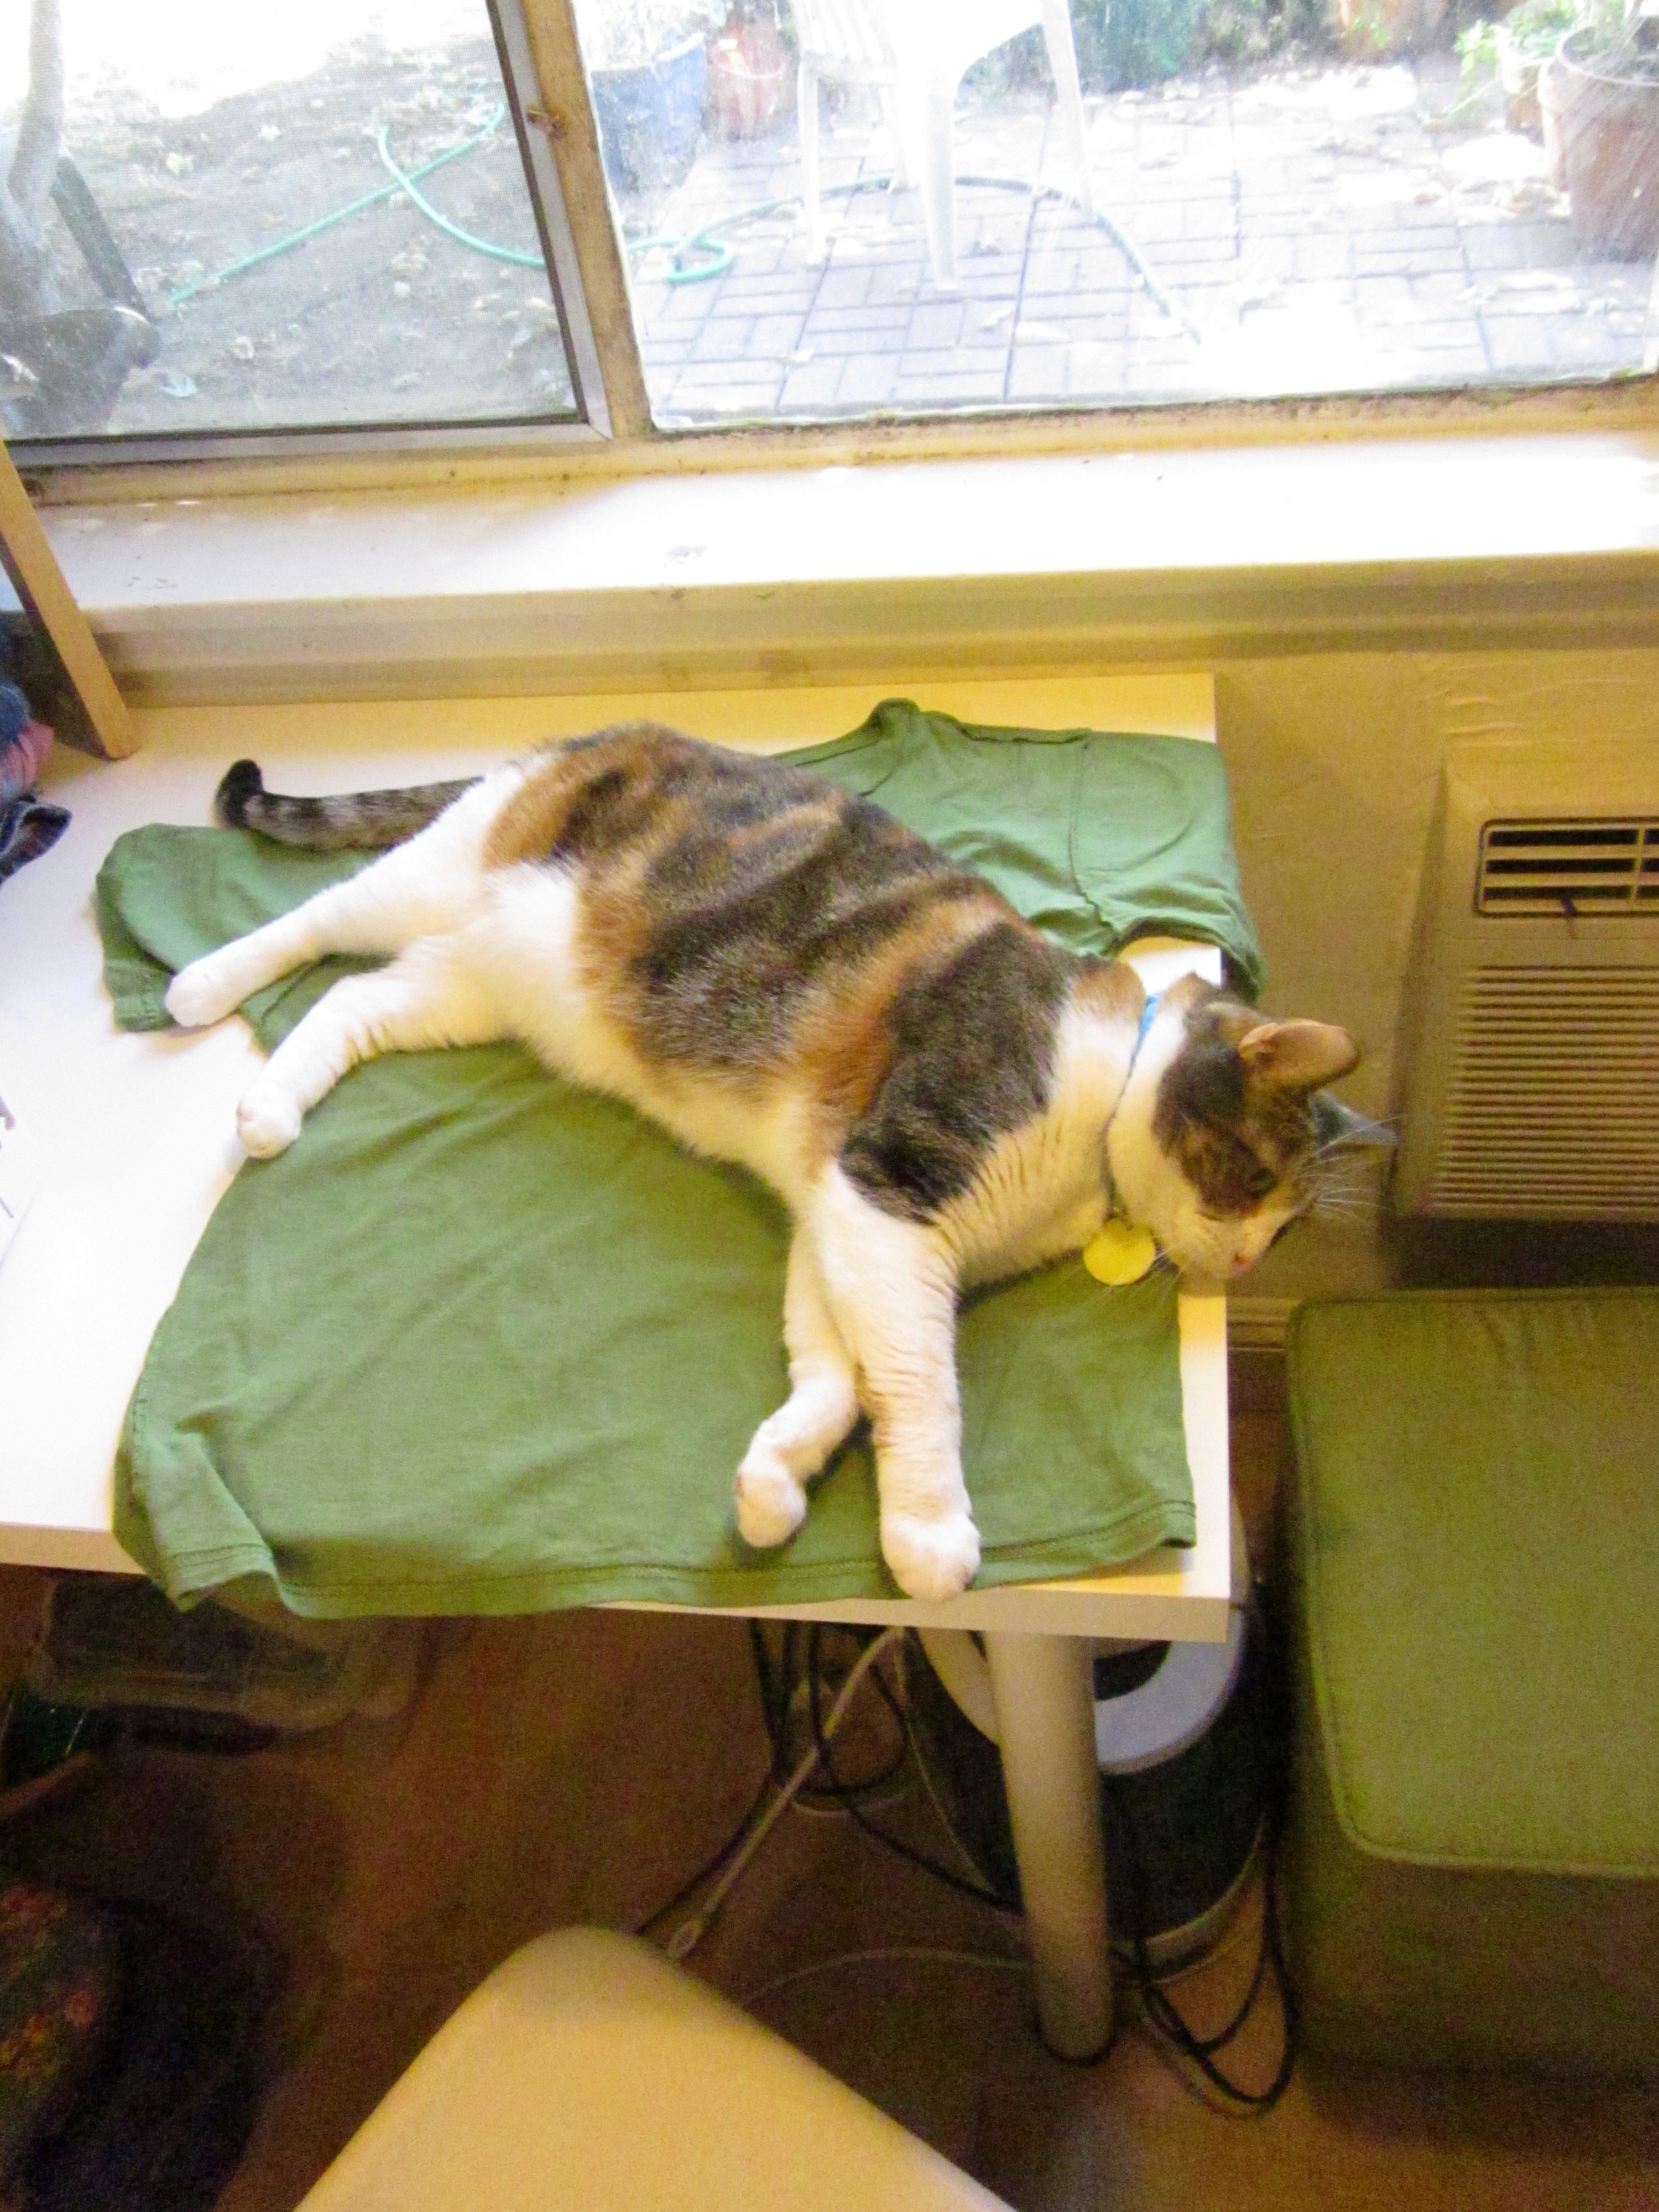
First, you need to start with a clean t-shirt that is larger than you want it to be ( in this case, green shirt). Your’e also going to need a smaller t-shirt that fits you well that will act as a template (here it’s the blue shirt). Both need to be true t-shirts—those made from the kind of material that doesn’t unravel if you leave raw cut edges, and that’s important. It’s also a good idea that they have about the same amount of elasticity—if one is super stretchy and the other has no stretch, the end result may be a poor fit.
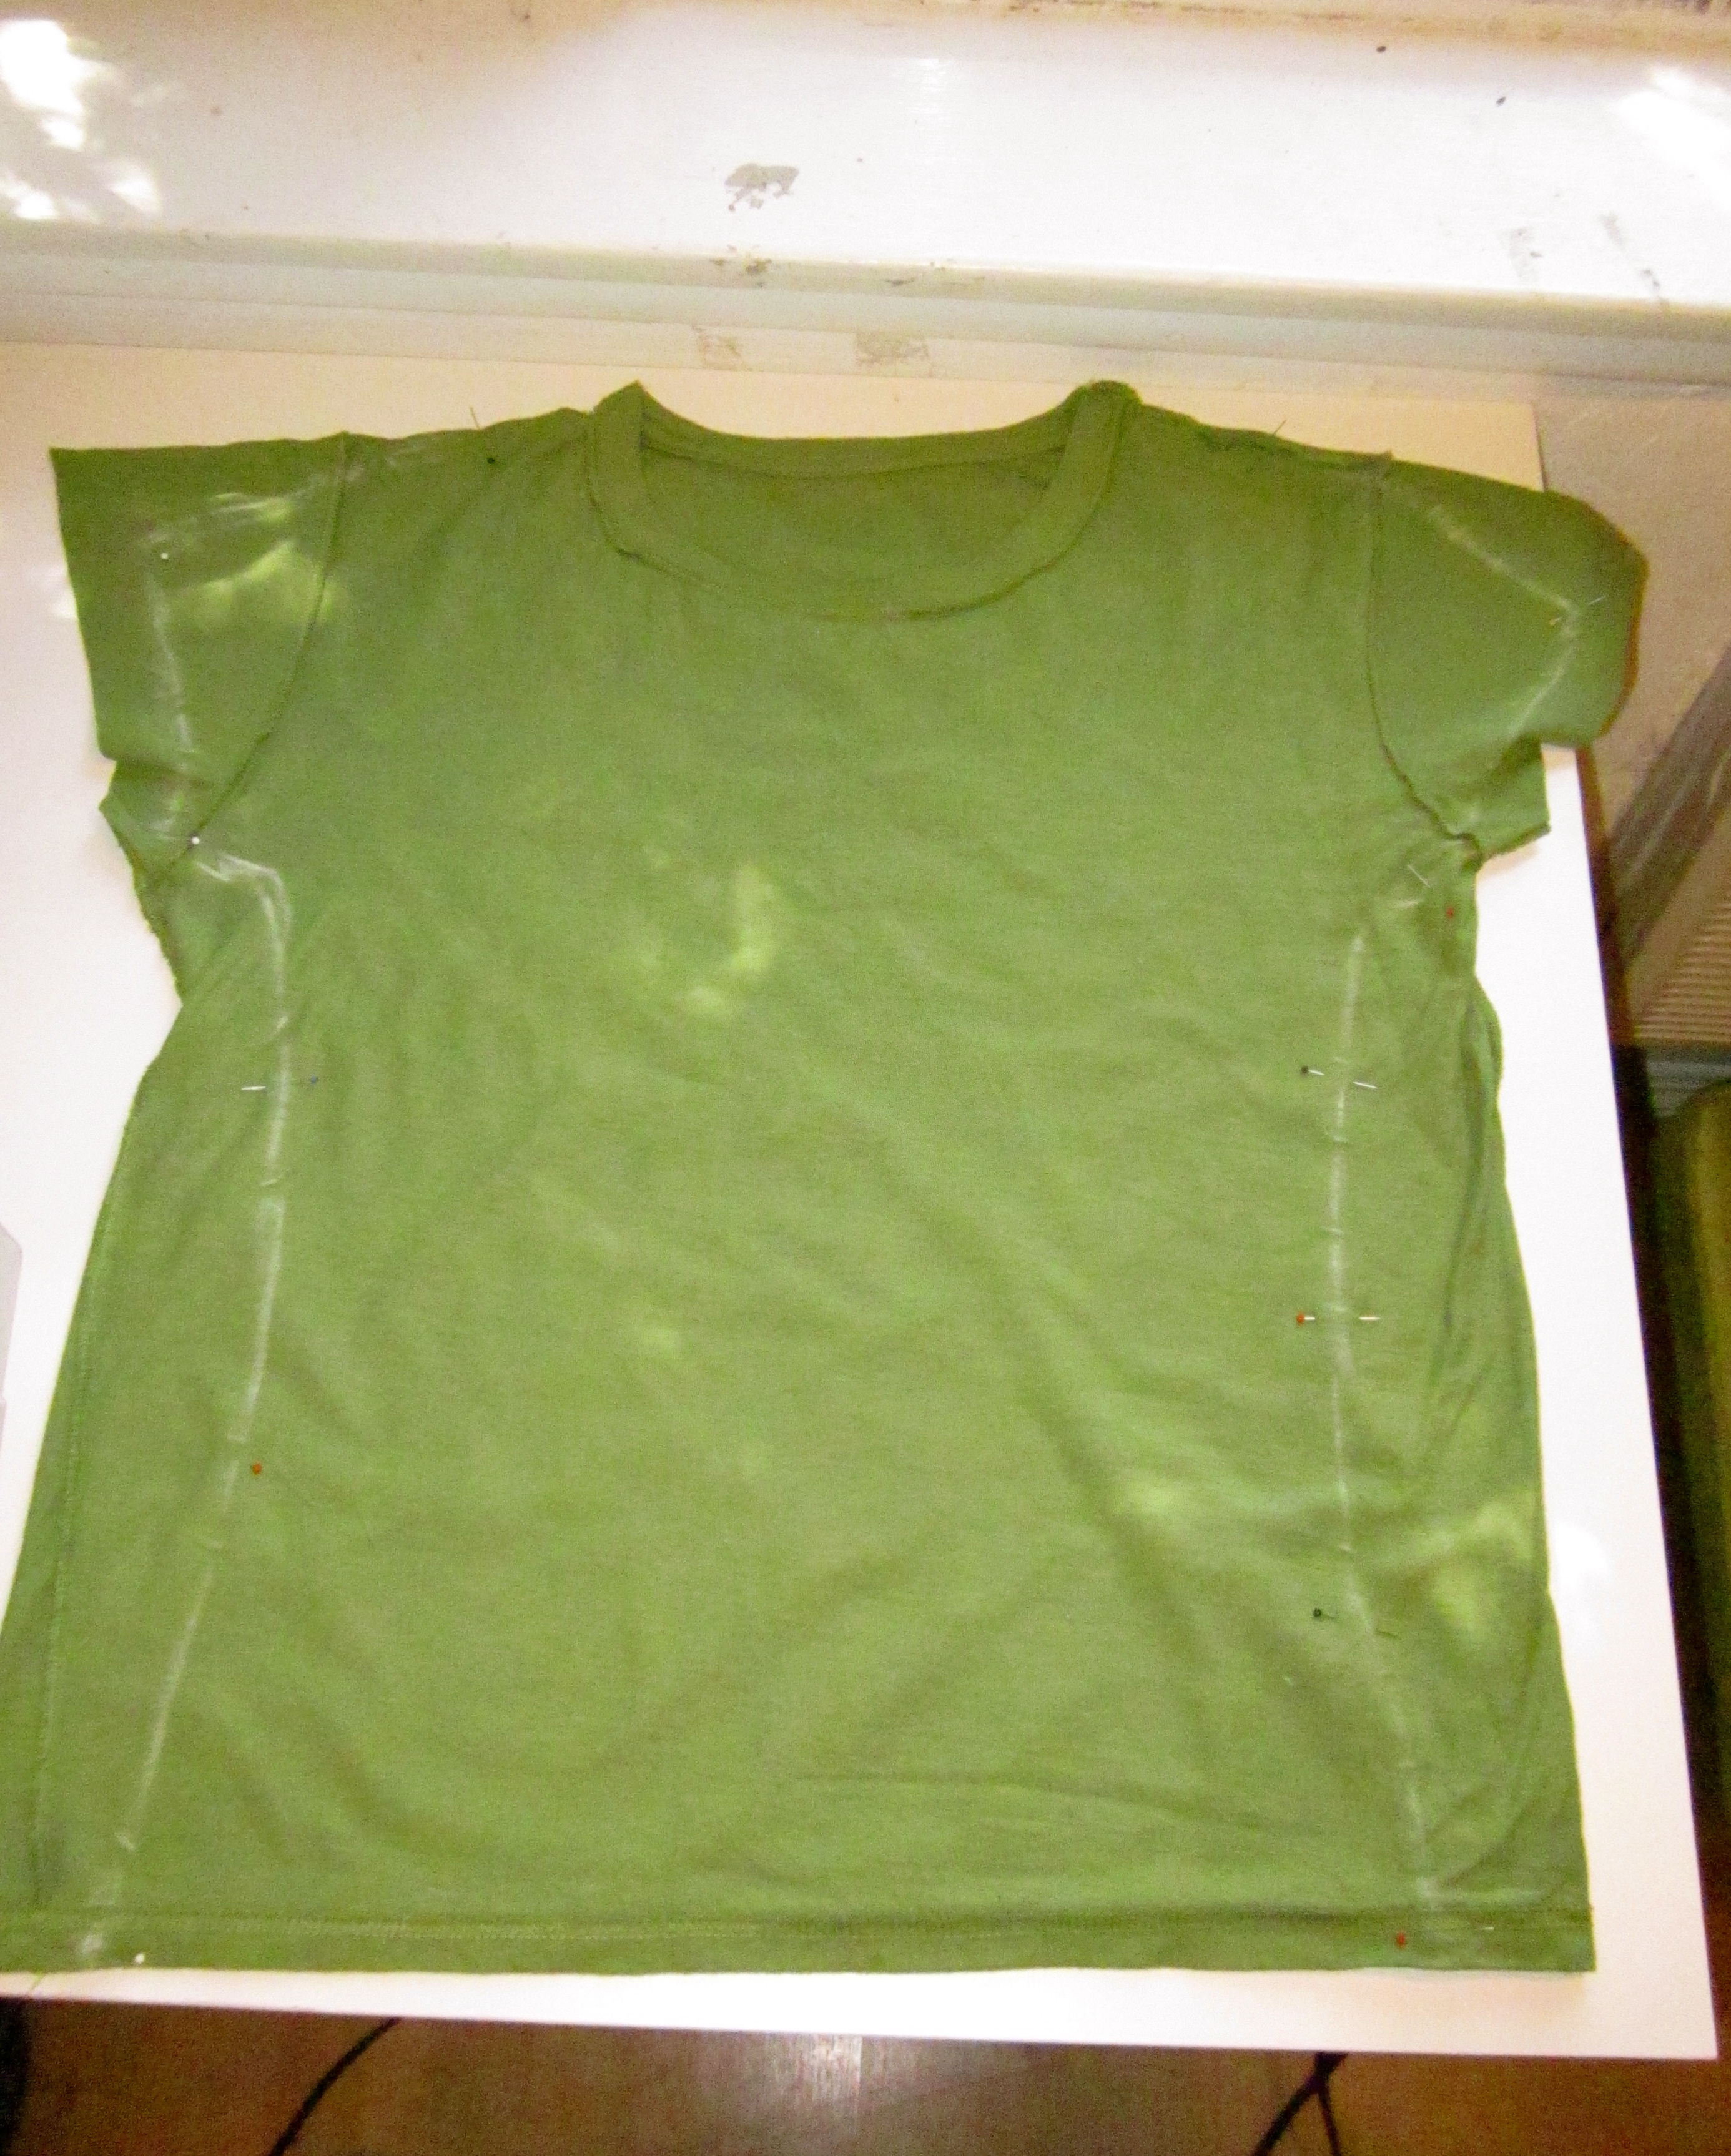
Iron out any wrinkles and lay the larger shirt on a flat surface, then place the template shirt on top of it (remove cat if necessary). Line up the top seams and trace the outline of the template shirt on top.
Pin the fabric together at the chalk edges and sew along that line using a matching color thread. After sewing, try it on once to be sure it’s not too tight, then trim the excess fabric off, and shorten the sleeves if necessary.
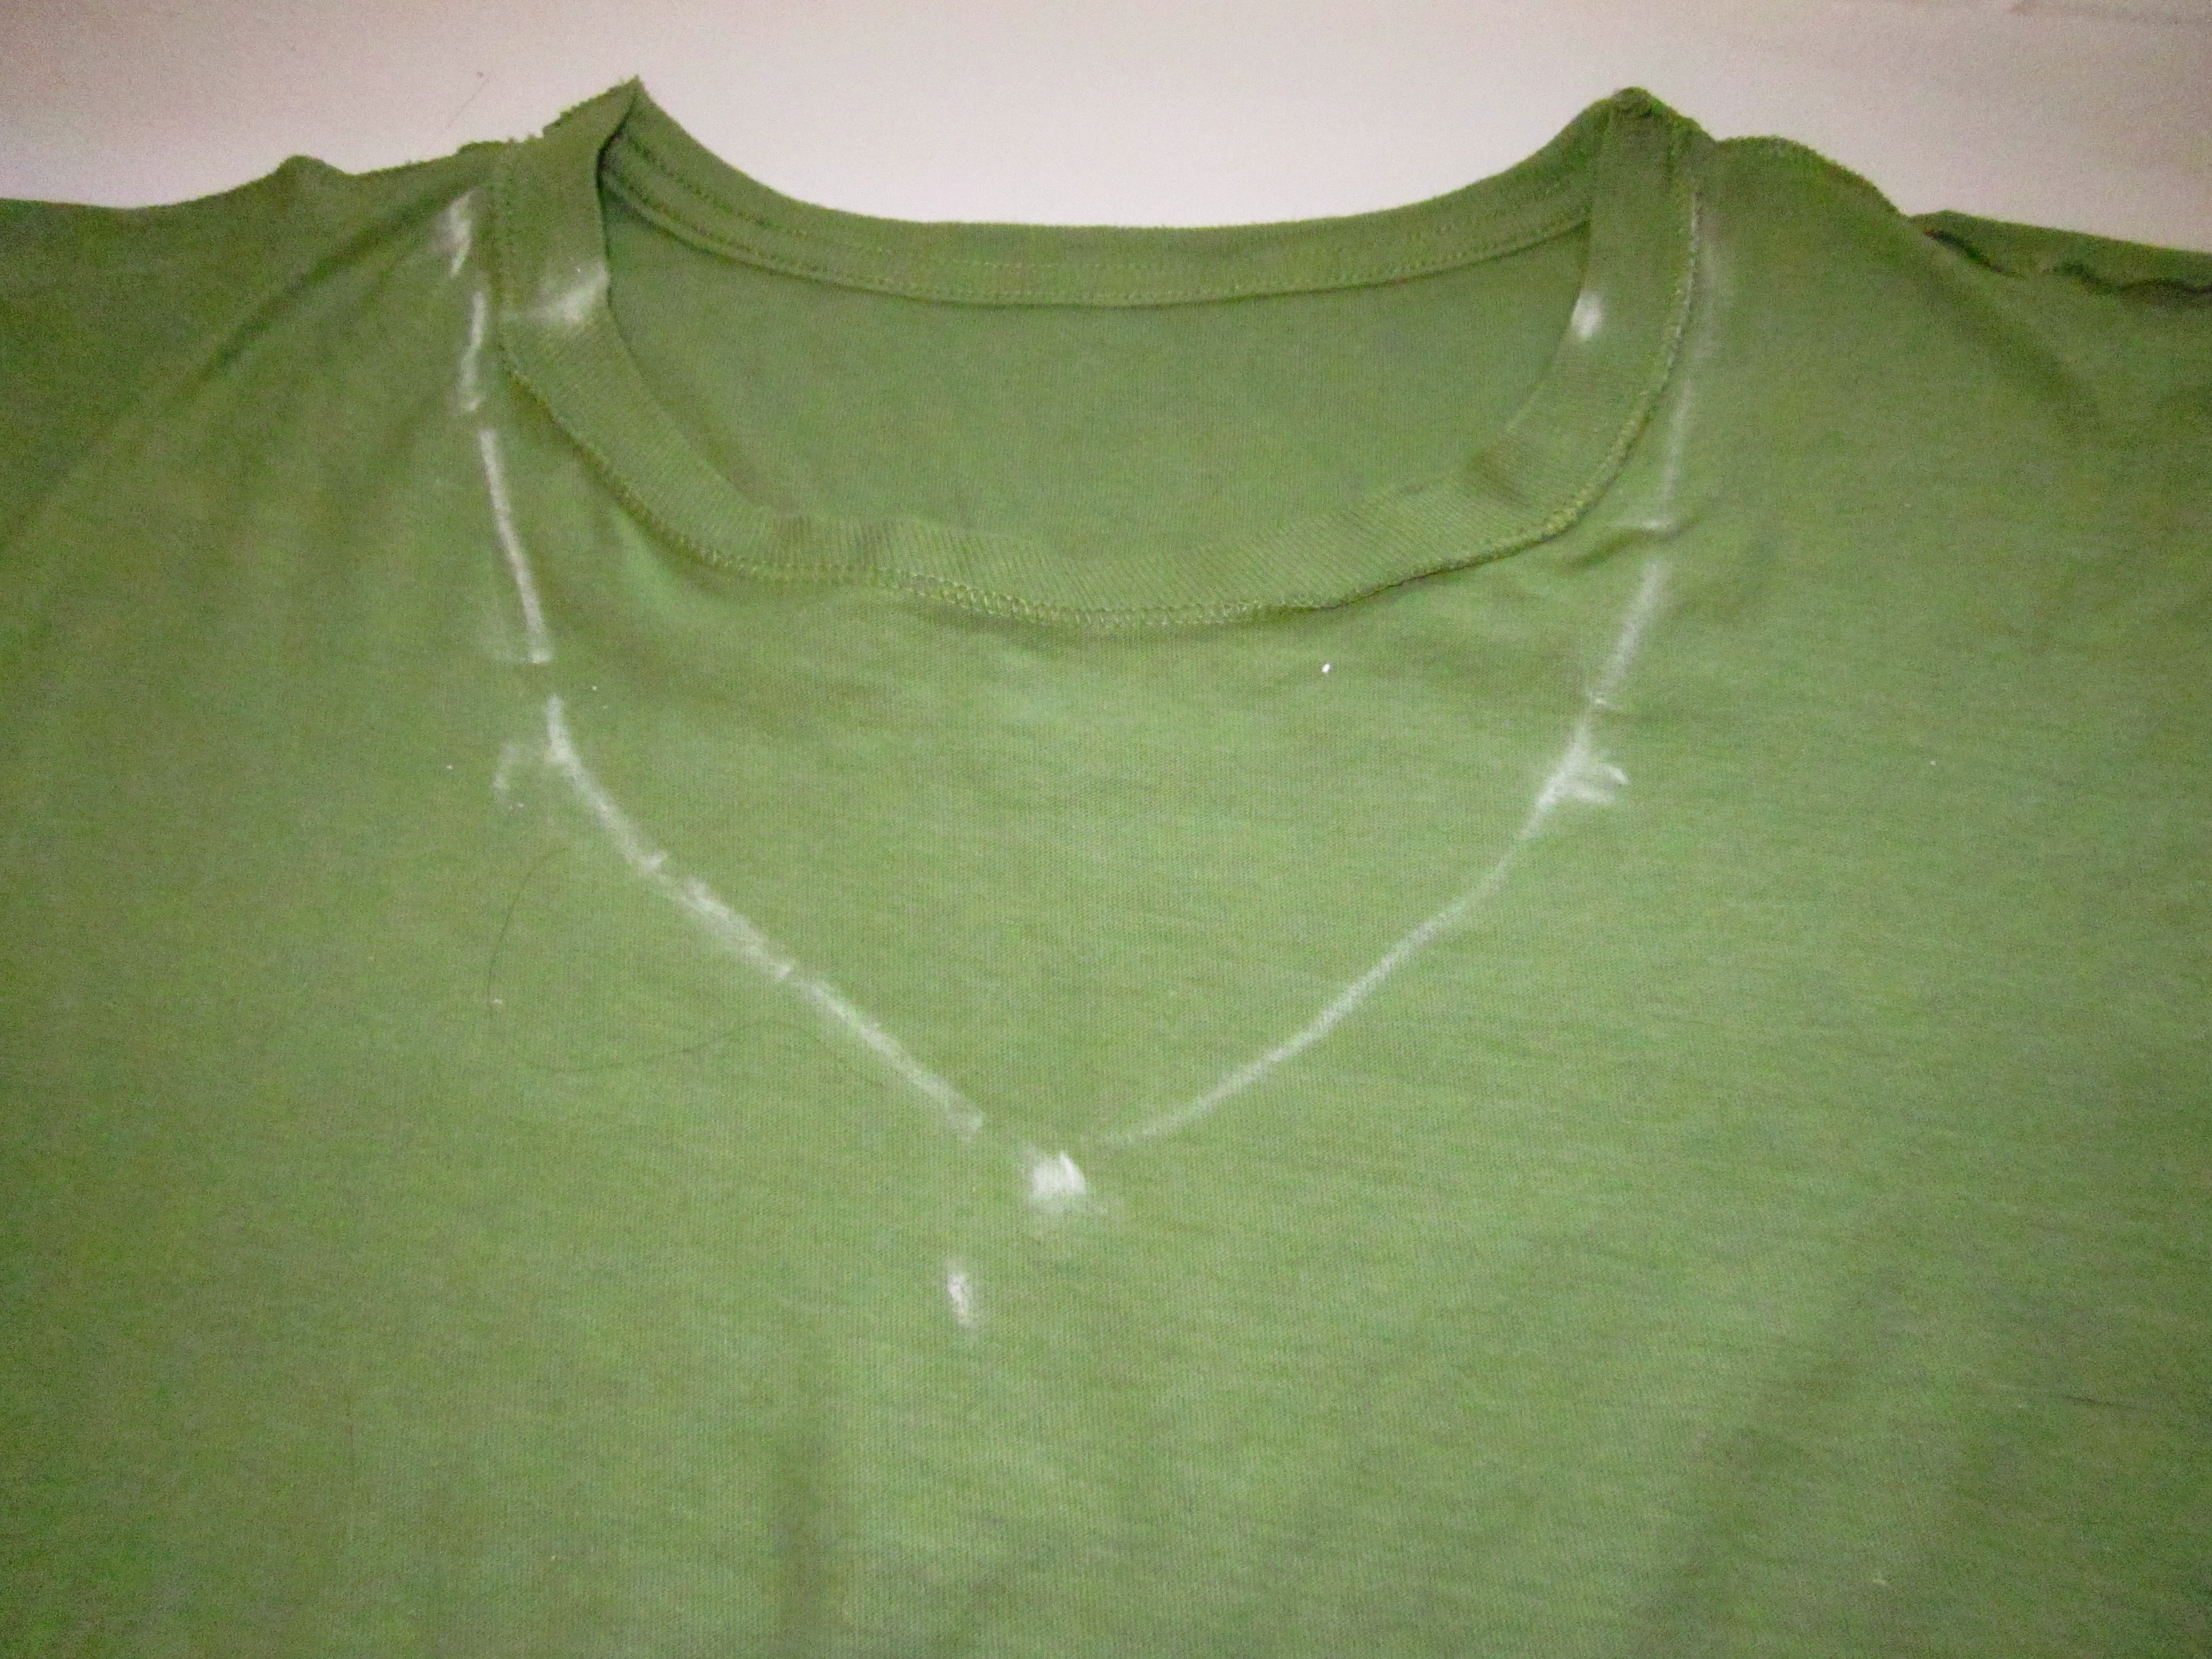
If the front and back necks are different, you now need to cut out the neck. You can either eyeball it or place the template shirt inside the other shirt and use pins to trace it by feel.
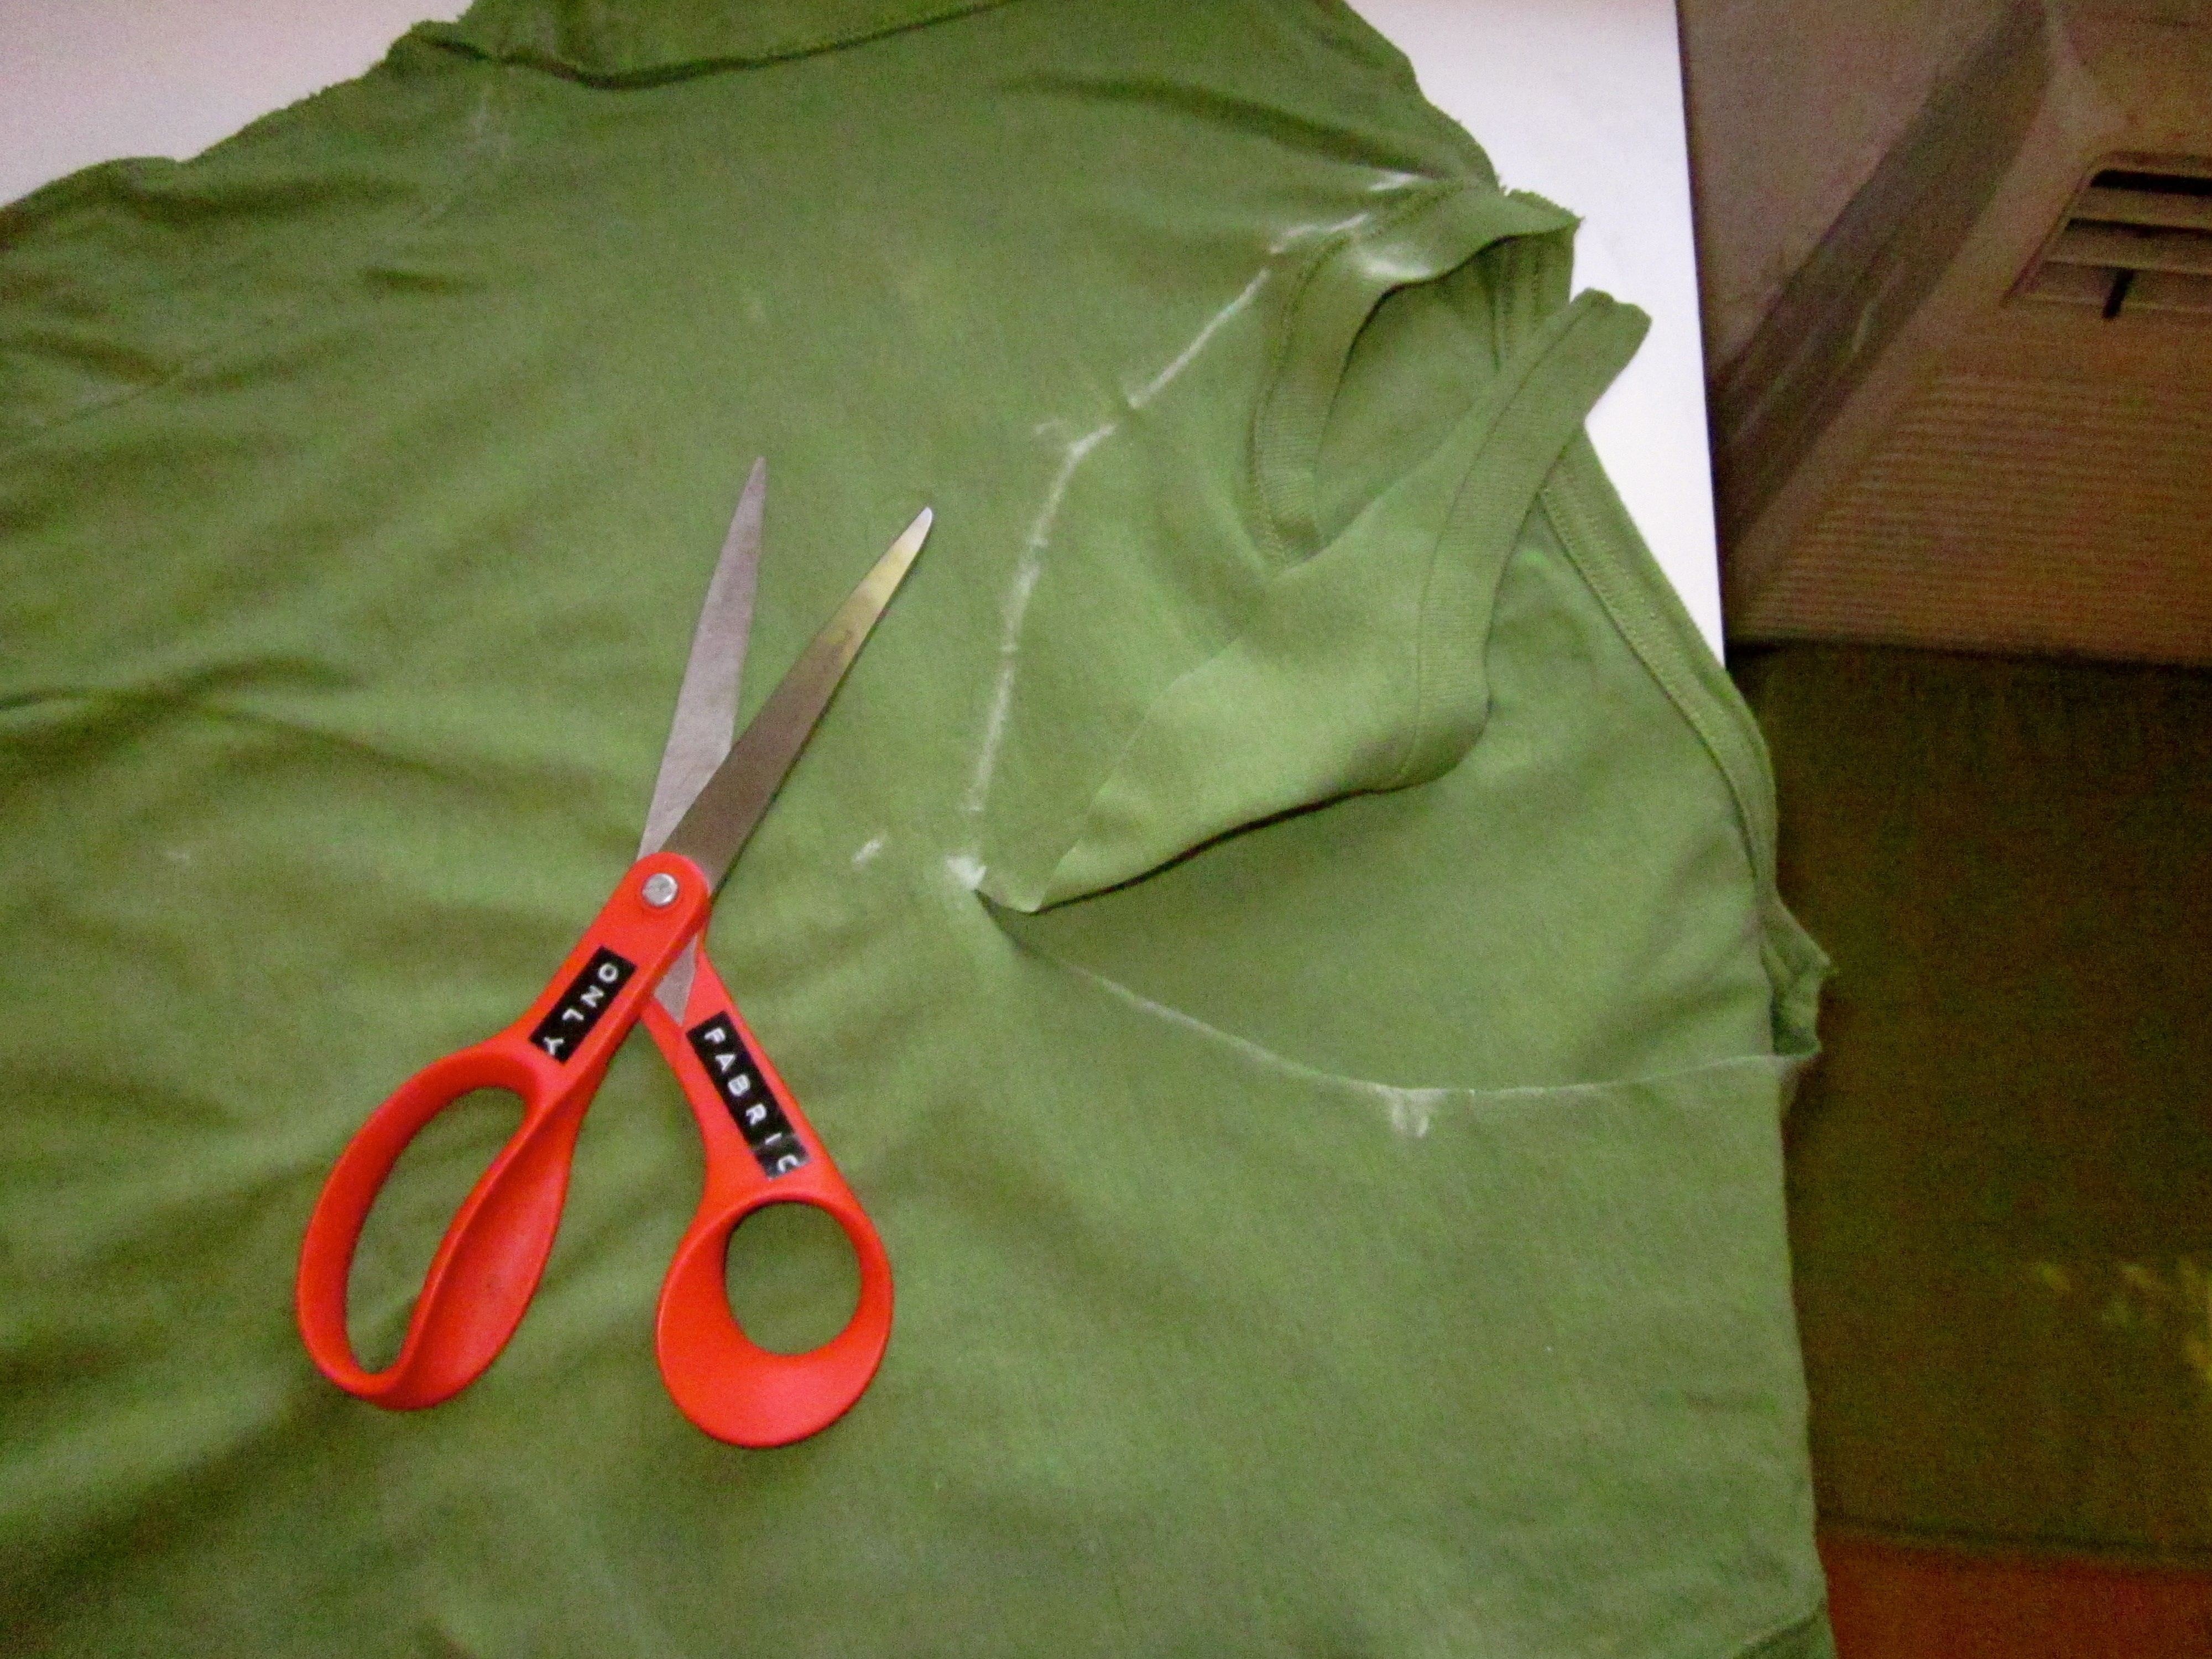
Cut out the neckline with some good sharp scissors.
…and try on the finished product!
Making the tank top was even easier—the front and the back of the shirt had identical necklines, and I cut out the sleeves entirely. I first used this technique years ago making my very first re-fit, cut up, stenciled tank top, which you can see below. The stencil was an homage to my very first pair of lefty scissors, which I’ve had since I was a kid and still own. That’s right—I’ve been cutting it up Lefty style since first grade.
Let me know if you use any of these techniques to (de)construct your own t-shirts! I’d love to see the results.
It’s almost Halloween—aka the I-get-to-make-a-new-costume holiday! Dressing up has been fun for pretty much as long as I can remember…
Yes, that’s me as Rainbow Brite, a homemade costume! More about those below.
Anyway, in the last week I have been stumbling across some creepily good Halloween crafts on the internets and
drawing inspiration from my previous Halloween creations as I come up with a costume for this year. Have a look!
Bats! Spider webs! Ghosts!
I don’t usually do Halloween crafts, but when I found this bat pattern I had decided I wanted to make it. It’s quick, it uses up cheap yarn, and it makes me giggle when I look at my window.
I think they look best from a distance, but here they are next to another bit of seasonal decor (i.e. my door stop).
If I had even more time I would probably be making a few other items. The first is this spiderweb scarf. I don’t do much crochet, but with this video tutorial I think I could remind myself how to wield a hook. But what I’d really love to try is just about any pattern out of a ghost-inspired knitting book I heard about on this blog post (really like that blog btw). It’s called Ghosts: historiographies, cultural manifestations, and the knits they’ve inspired. First of all, how could I not love a knitting book with “historiographies” in the title? Also, the patterns look really lovely, especially Calavera Catrina. The weather has just turned chilly here and a spooky bonnet would be really nice right about now.
Costume Creations!
But of course, what I’m most excited about are costumes!
I realized that when I posted about the top ten nerdiest craft I’d made, three of them were actually Halloween costumes: Ash Ketchum gloves, Bjork’s swan dress, and Daenerys Targaryen’s dragon Drogon:
Guess what? Those are not the only homemade Halloween costume photos I have. And since I love looking at the costumes other people make, I’m going to share a few of mine with you, along with their pros and cons about things like how comfortable it was to wear and whether or not others recognized what I was. For your convenience I’ve also divided them up between costumes I planned and costumes I put together at the last minute. Hope you get some ideas!
Costumes I made in advance
If you have at least a week or two and you are willing to put in some effort, you too can make bizarre homemade costumes!
1. A Carrot
Pros: Orange top and skirt were easy to sew—Just two tubes with elastic at the top. Repurposed a hula skirt from an older costume, so I didn’t have to buy anything for the carrot top part.
Cons: No one knew what I was! Ok, granted, the green top didn’t stand up all carrot top like, but still. One guy thought I was asparagus. Also, I was with Edward Scissors hands at the time, which is admittedly an even more awesome costume to look at (I didn’t make that one, but I did do his makeup). Weight of the green “hair” became uncomfortable after a while.
Unrelated downside—I was sick that year, and so the only thing in my cup was saltwater to gargle. I don’t like missing an opportunity to dress up.
2. Holly Golightly
Pros: People recognized my costume right away (well, at least “Breakfast at Tiffany’s!”). Worked great with my hair when it was long enough to put up. Already owned the black dress (thanks concert band!) and the costume jewelry (thanks grandma!). Very comfortable to wear.
Cons: Not many! I suppose you may want to nix the cigarette holder if you’re dressing up around kids. Since I don’t smoke I had to borrow a cigarette to get the above photo.
3. Patti Mayonnaise
Pros: No sewing required! I found the blue shirt and some pink sweats at the thrift store, cut the pink sweats into circles, and used a steam iron and double sided fusible webbing to stick them to the shirt. Nice and warm to walk around in. Also works as a couples or group costume if you have a Doug Funnie, Skeeter Valentine, etc! (Not included—woodland fairy friend or dude who photobombs you pictures)
Cons: Only a few—wigs are not usually cheap (this was a man’s wig which was somewhat less expensive) and I could not truly mimic her orange skin tone. The dots were a bit stiff. And I suppose you need to watched Nickelodeon in the 90s to know the show Doug. Still one of my favorites!
4. Gadget Hackwrench
Pros: I got to wear a purple jumpsuit, a wig, mouse ears AND goggles! From my face you can tell it was a fun get up to wear. I got a purple sheet and the sewing patterns from the thrift store, and the goggles from the clearance aisle at the end of summer (yes sometimes I start planning my costume early).
Cons: Fewer people recognized my Gadget costume as being from Chip n’ Dale Rescue Rangers (I didn’t think about the fact that the show was not on TV for that long). And many things to wear=more things to buy. I wanted to make more of the things like my ears but I ran out of time because of the sewing (see work in progress shot). Sewing was tricky because I combined two patterns (sleeveless jumpsuit + collared blouse) and then I altered that further to make the legs slim, etc. Final result: I could not lift my arms above my head without giving myself an extreme wedgie. So not exactly the most comfortable costume!
Costumes that I put together at the last minute
If you have a day (or maybe just a few hours) to figure out a good costume, you can still come up with something interesting-ish.
1. Cheshire Cat
Pros: Yet again all I had to sew was a shirt and tube top—you can sew fabric into tubes very quickly! In this case I was going to an Alice in Wonderland themed party and remembered that I had some fabric that looked like the Cheshire Cat’s stripes. Too bad you can’t see the tail here! Ears are made from origami paper. Pictured with the Queen of Hearts.
Cons: Besides the fact that I only have terrible photos of me with my eyes half closed, the only real downside was that I was cold. But I am usually cold.
2. A sad hipster
Pros: Our friends got such a kick out of this! At the time I owned the black wig and had a roommate whose accessories were perfect in that oh-so-emo kind of way, so nothing was bought or altered, just repurposed. Of course, sad hipster boy is wearing girls clothes too…the tighter the better.
Cons: No one else besides our friends knew we were dressed up for Halloween…everyone else just thought we were a real hipster couple. Now that should really make you cry.
3. Gender Bender
Pros: Don’t normally dress as a man? If so, you may be surprised to find you probably have everything you need minus an accessory or two (the tie was mine but the pipe was not). Can be super comfy.
Cons: Don’t normally dress as a woman? Good luck finding a dress than fits, putting on nylons without ripping them, applying makeup, and/or walking in heels. If you can do all this and be comfortable, you must let me know how!
4. Princess Peach
Pros: You know how brides say you can totally wear that bridesmaid dress again, but you totally can’t because it always looks like a bridesmaid dress? This is one instance where I did figure out how to wear it again—at a Ninetendo costume party. Crown and necklace are made out of construction paper.
Cons: No cons! It was the perfect last minute costume for the party.
Two nights ago I finished my custom fit raglan sweater! Ok, so I still have to weave in the ends and steam block it, but basically it is done. It’s definitely the best fitting article of knitting I’ve made so far—pics to come! Now, of course, I’m trying to pick a new craft project. Crafts are how I unwind after doing work, so although it is counterintuitive, I need them more when I’m busy than when I’m not.
In looking back over what crafts I’ve already made, I began to notice a pattern—I love to craft nerdy things! That’s right—if you’d find it on Geekcrafts, I’d probably want to make it. Fantasy, sci fi, video games, tech, or obscure pop culture, apparently I’ve dabbled in it all, either in crafts for myself or for someone I know. I have enough that I can actually make a list of my top ten favorites. So here they are, in order from “aww, how dorky is that” to “LOL I can’t believe you actually made that.”
10. Pokemon’s Ash Ketchum gloves
The only reason that these are number ten is because, by themselves, fingerless two toned green gloves can look pretty normal. But if you add a certain red and white hat…
Then suddenly, you gotta catch ’em all.
I made these for Keith’s Halloween costume the other year (nerdy costumes I’ve made could be a whole post by themselves). I bought the slightly stretchy dark green fabric from JoAnn’s and used light green felt and black velcro from my sewing stash.
Improviser that I am, I didn’t look at any glove patterns. If I had, I’m pretty sure I would have discovered that its easier to make a separate thumb piece rather than putting in darts in a whole piece. Oh well. I thought the velcro cuff part was a clever way of using the felt in a way that require it to stretch over the hand.
9. Apple logo iPod cozy
This was one of my first successes knitting with a chart—and it was a chart of the iconic apple logo. As you may be able to tell by the iPod in the picture, I made this a number of years ago—one of my early geek knits! I wanted to take a better photo but alas, I don’t know where this cozy ended up. It was the perferct size for the older iPods. You can see the button hole at the top of the photo—on the back I added a retro green fabric covered button. I didn’t use a pattern for the cozy, but I did check my gauge to make sure it would fit. Knit on straight size 1 needles I believe. Pretty sure I learned kitchener stitch (video link) to sew up the sides. So many memories!
8. Bjork’s swan dress
Out of all the costumes I’ve made, this replica of Icelandic singer Bjork’s 2001 Oscars dress is the one I am most proud of.
Perhaps it’s not typical nerdery, but let me tell you, it’s usually a pop culture junky who is the first to figure out who I am at a party (since Bjork wore it over a decade ago, it seems to have fallen away from public memory somewhat). I have now worn it on at least three separate occasions—the photo above was the most recent, at a Rock Star costume party (with bonus Pikachu in the background!) Below are some previous Halloween photos:
I made this audacious avian outfit from a $10 thrift store dress. I suppose it might have been a wedding dress, though I suspect it was a quinceanera dress. It was strapless and had seven tiered layers of white tulle. Seven! I chopped off the bottom ones and used that along with polyfill, black foam, orange cotton and a black button to fashion the swan top. Finally, I sewed a pale colored camisole that matched my skin tone to the top.
My mom helped a lot on this one—there were so many layers to sew through!
7. Game of Thrones house sigil coasters
My newest strain of crafting nerdery has been influence by all things George R.R. Martin —in this case, the HBO series Game of Thones.
This Christmas I made my brother coasters depicting the sigils and official house words. I used this awesome craftster tutorial to learn how to use the paint pen on ceramic surfaces—heat set them and the paint won’t wash off! Plain white tiles with felt feet on the bottom make nice coasters that don’t scratch tables. I only made two because my paint pen was running out. If you’re an architecture nerd, you may like the Frank Lloyd Wright designs I did on coasters for my mom even more.
6. LOL Cat baby blanket
If you thought I would bypass internet meme geekiness, think again!
This is one of my favorite modifcations. I used the free pattern for a bunny blanket buddy, but I shortened the ears. Then I used a crochet hook to write “O HAI” on the front, in a true, I can has cheezburger style. I wish I’d know about duplicate stitch then, because I think it would have lined up better for the words, but on the whole I’m pleased with the results. I did this as part of a craft swap, so to go along with the blanket, I made magnetic poetry with the kind of words you see in lolcat images using my printer, thin magnetic strips, and laminated cat photos for refrigerator meme action.
5. NES Controller stencil shirt
I love me some old school video games. And so does my brother. Which I why I made him this shirt.
Every so often I get the urge to learn a new craft, and this was one of them. I used the excellent tutorial from stencilry to learn how to mix acrylic paint with fabric medium use it on a disposable freezer paper stencil. Like the coasters, you can heat set the paint so it is washable. I’m pretty sure I downloaded the Nintendo controller image from the same website’s gallery of stencils, but I don’t know what folder it was in so if you want it you’ll have to hunt around. The hardest part of this was doing those red A and B buttons—getting the red paint to fill in those circles evenly was challenge. But then again, so was sharing a Nintendo with my brother back in the 90s! I still have it, by the way, and it works.
4.Drogon the Dragon Game of Thrones scarf
Another Song of Ice and Fire craft! This one is wearable, but you do so at your own risk.
(Spolier alert if you haven’t read the books or watched the series!)
Drogon is one of Daenery’s three dragons. In the books it says that when he was little, he perched on Dany’s shoulder. So of course for my Halloween costume, I had to knit a dragon scarf. What a pain in the neck (pun intended). I used this dragon scarf pattern because it was free, even though many ravelry reviewers said it was fiddly. They were right—you knit all the pieces separately and then sew them together. Ugh. And, since my scarf was black, it was really tricky to see where to sew. Also, all the cool patterning on Drogon’s back gets lost in all that black. However, I am proud of some parts. I used a drop spindle to ply two different color red yarns together to get the exact shade I wanted for his mouth. Also, I had Keith cut the eyes and teeth out of felt for me. The original dragon eyes and mouth look dopey, but this little guy is positively scary. It’s great if you are Daenerys, but if you are a regular person wearing Drogon, I’d keep an eye on him.
3. Flight of the Conchords stencil shirt
This t-shirt makes it into the top three because not only is it from song by the kings of nerd-dom, New Zealand duo Flight of the Conchords—it’s a shirt that is only featured in the music video version of their song “Business Time.” You won’t get the reference from a different version of the song. And even then, you only notice it if you look closely about halfway through the song (I’ve cued the link above to the correct moment. I guess I should add a NSFW warning if you chose to watch it past the 2 minute mark, even though they blurred things out…)
I made this t-shirt at the same time that I made the NES controller stencil. It was a birthday/Christmas gift for my friend Ali. I even made sure to get the font as close as possible to the original, which is a nice touch. And of course, it’s a baggy gray shirt just like the one in the video. The only thing I didn’t do was put a stain on it like the lyrics described (you can only take these things so far). As I recall, she thought it was pretty sweet.
2. A Dance With Dragons by George R.R. Martin book safe
Yet another George R.R. Martin craft? Oh yes it is!
This was a graduation gift for Keith, and it was really two gifts in one. First of course, was the craft you see above: a hollowed out book dressed up to look like the latest from the Song of Ice and Fire fantasy series. In order to get a large enough hard cover book to make it realistic, I went to the thrift store and bought a Tom Clancy novel when their books were on sale (it was about 50 cents). Then I hollowed out the inside using this tutorial as a guide. It wasn’t too bad, but it did take a while with my wimpy exacto knife. I printed out a copy of the cover for A Dance with Dragons on some printer paper to make the dust jacket—it fit rather well if I do say so myself.
The second part of the gift you can see from the folded paper inside the hollow book—a receipt for the order of the realA Dance With Dragons book. When he graduated, the book was not due out for another month or so. I thought this was a clever way to present a tangible gift when the actual gift happened to be on pre-order.
1. “Bake it So” aka the Star Trek TNG oven mitt
Of all the geeky crafts I’ve made, this one takes the cake—and it literally could pull said cake out of a hot oven.
This oven mitt is a pun on Capitan Jean-Luc Picard’s famous phrase “Make it So” from Star Trek: The Next Generation (now streaming on Netflix, fyi). I was a kid when that show was on the air and I totally loved it. When I re-watched some episodes with some friends many years later, we decide that if Captain Picard ever had any kitchen accessories, they would have to say “bake it so” on them. So of course, I had to make an oven mitt with the phrase.
The mitt is exactly what it looks like—dark blue letters cut from scrap material, zig zag stitched onto the front of a light blue oven mitt. I remember that I had to rip the seam of that oven mit from the bottom up to the thumb in order to get it to fit over the arm of the sewing machine. If I had it to do over I would have probably added interfacing to the letters to keep them from fraying or getting out of shape. But overall, I am really proud of my extremely nerdy accessory.
And that’s the end of the nerdy craft list—now, on to find some new geeky projects!


 Cutting up a sheet into strips and winding it into a continuous ball takes a surprising amount work. There are plenty of video tutorials for making continuous strips (here’s one with a kitty!). But it took me almost two hours. I don’t have a rotary cutter, and I was using a fitted sheet so I had to work around the gathered corners. When I took the above photo, I still thought I might do a second sheet. I did not.


