Botanical Knits & Crafts, Original Knitting Patterns, Uncategorized

Nature Inspired Wedding Pillows

If I came to your nuptials in the last 2 years, you got a hand-knit pillow inspired by nature as a wedding gift.


Pillows are underrated knit gifts. They’re nice for the knitter, because they knit up quicker than a garment, use up stash yarn with ease, and require no sizing other than a gauge that will work with your choice of pillow form. And they’re nice for the recipient, because they can be personalized and heartfelt while still being functional.

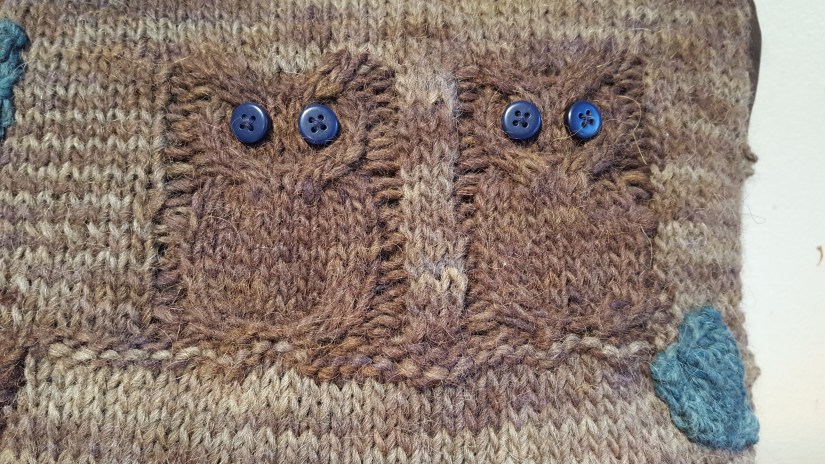
Since I already blogged about the Lovebirds Owl Pillow, I’ll focus on the two others.
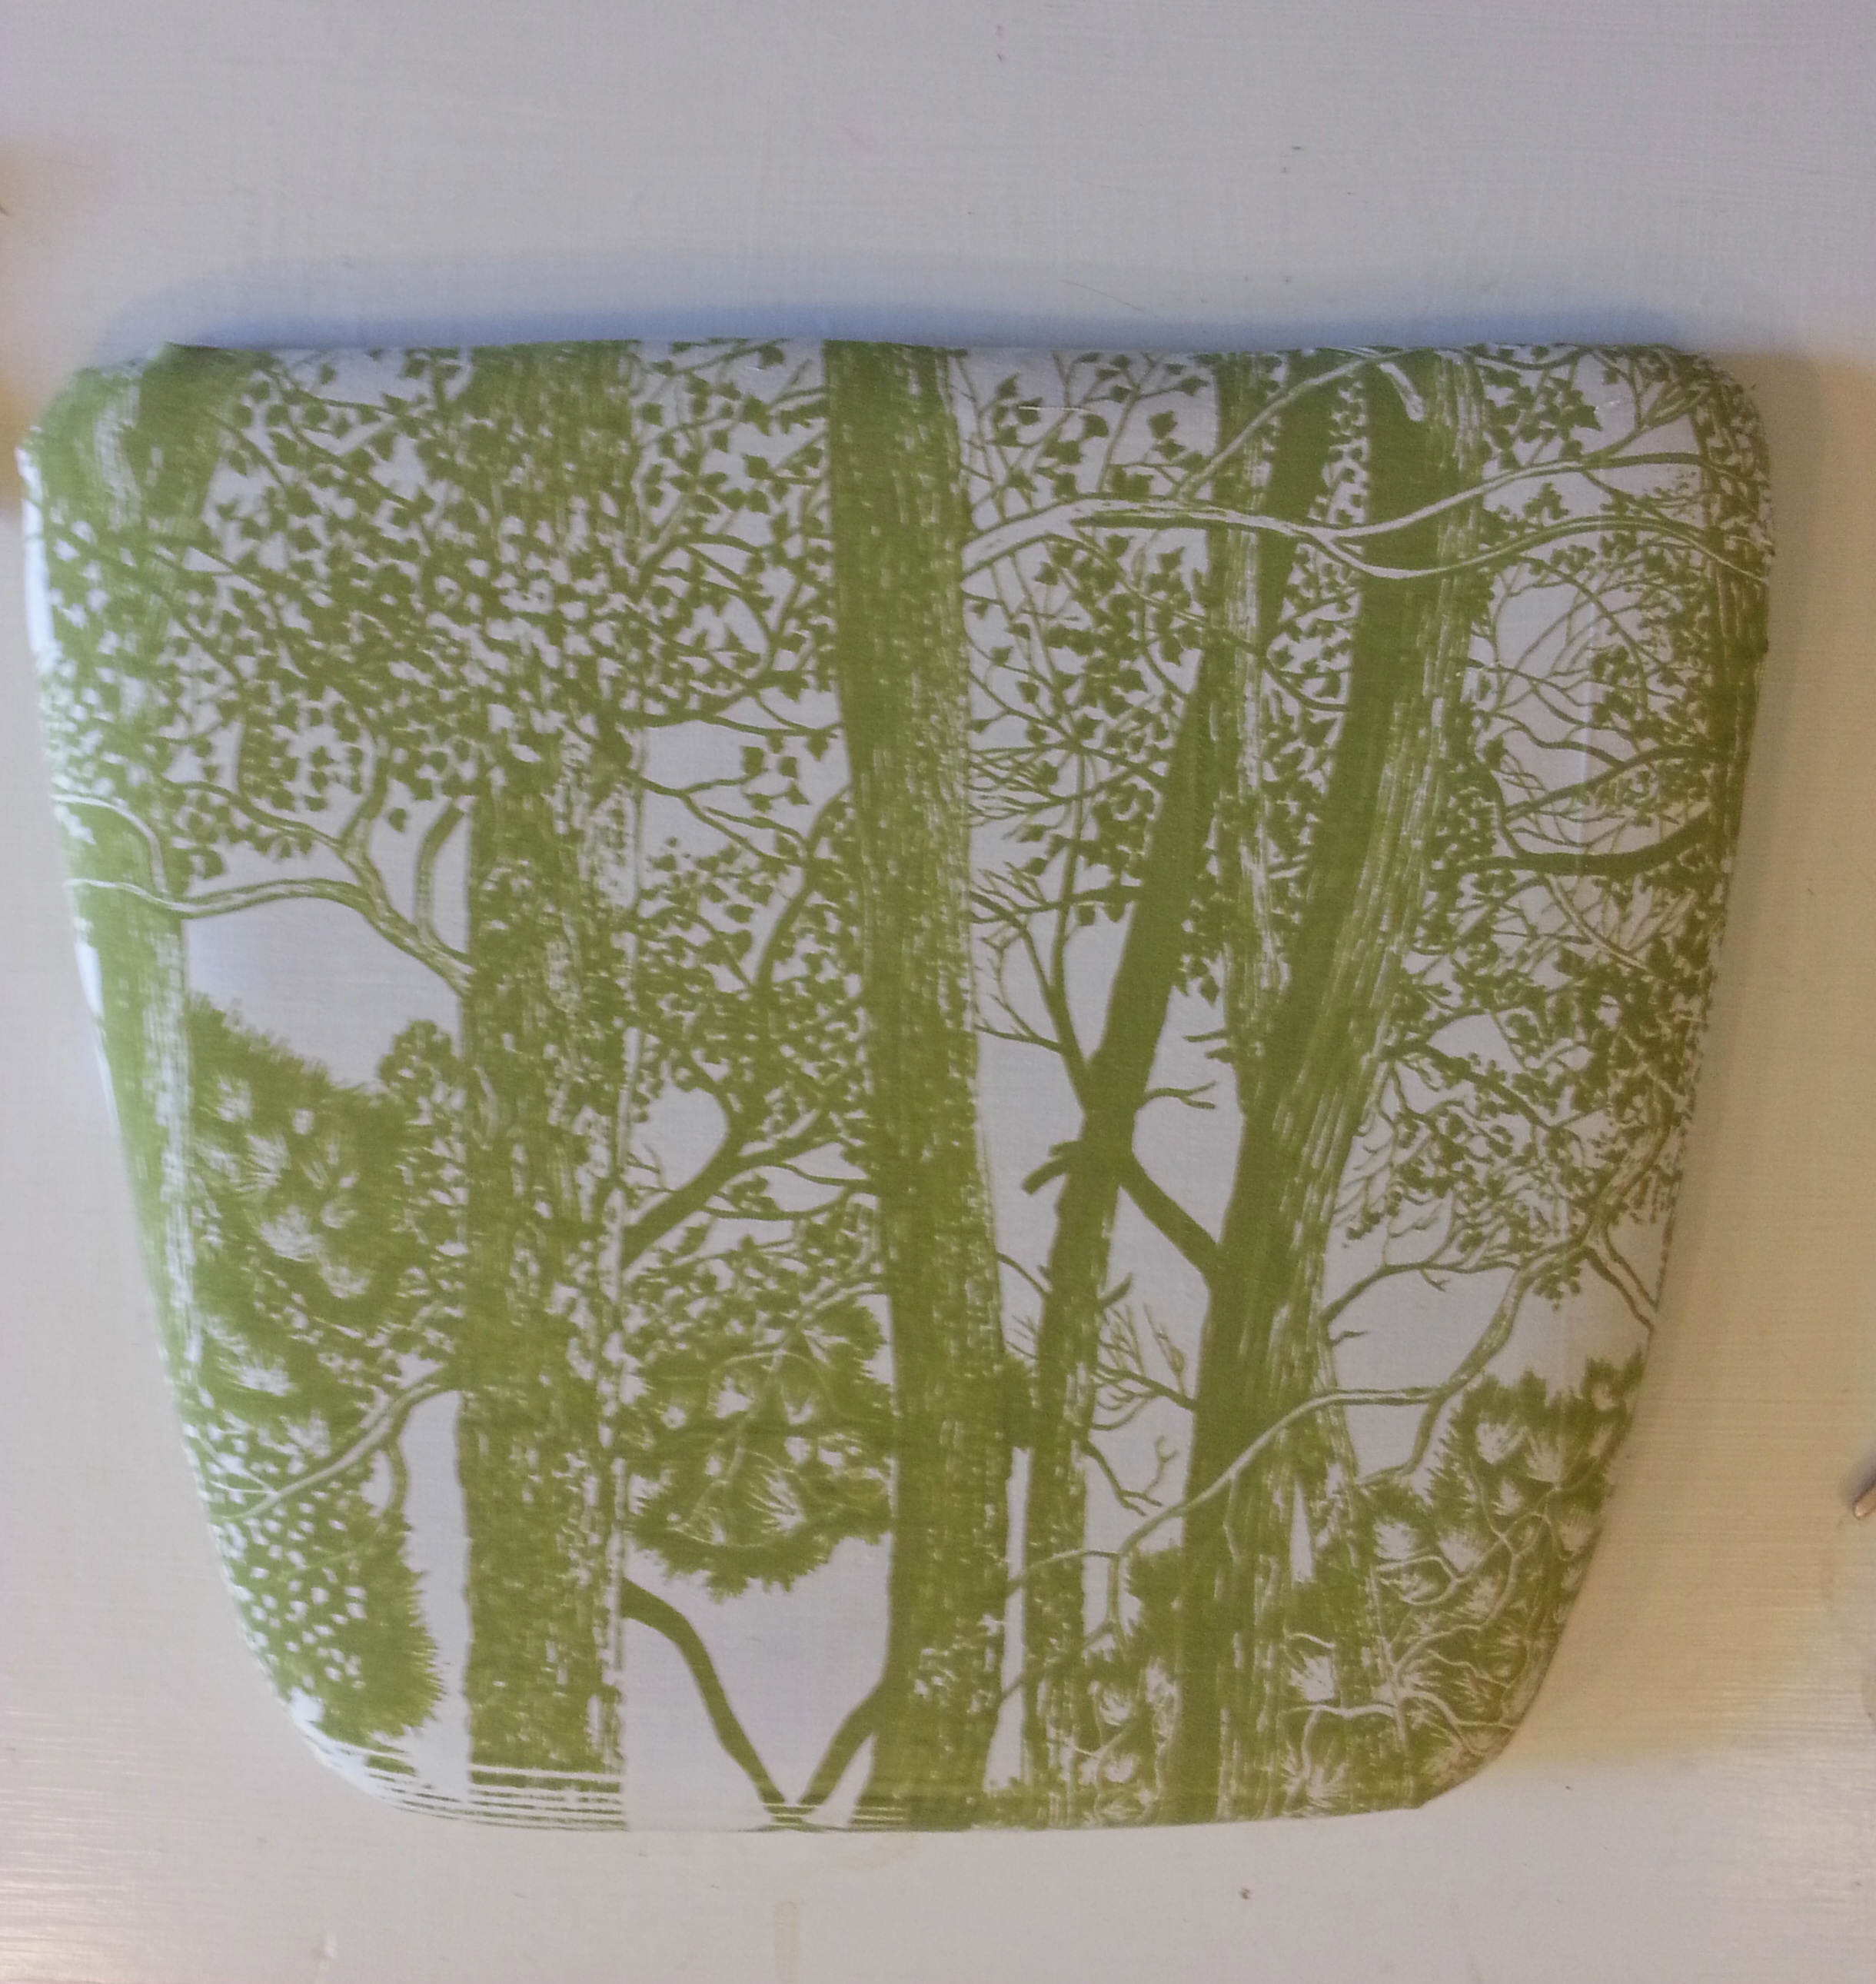
Twinning Trees

2017-10-06 23.04.57

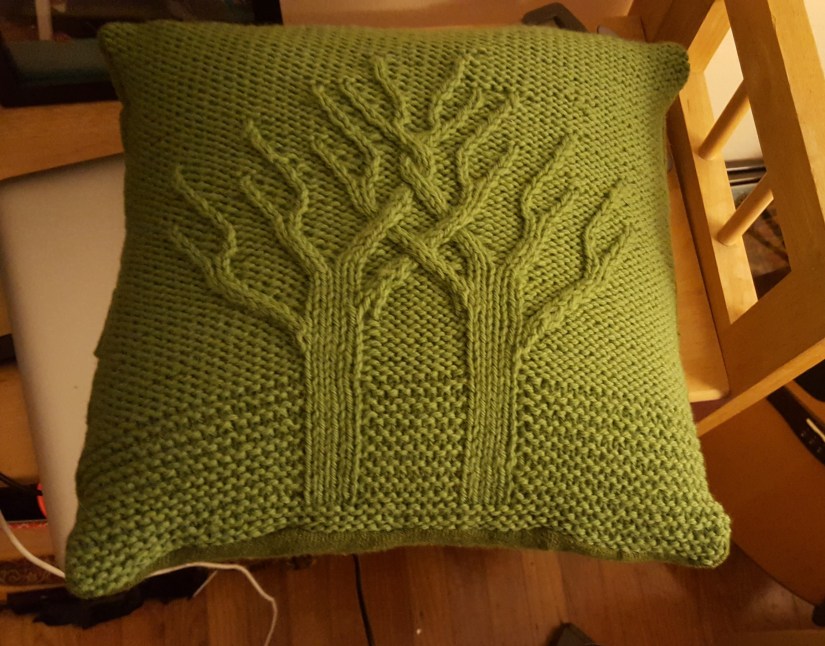
Pattern:  Twining Trees by Sarah Bradberry (Ravelry link)

Yarn:  Cascade 220 wool, Spring Green (leftover from my Mrs. Darcy cardigan project)

I had this beautiful pattern in my Ravelry queue for 5 years, just waiting for the right project! I love the intertwined cables— so fitting a gift for two people growing together.

I made this for J + K’s wedding, which took place at a Northern California winery and was just as green and beautiful. But the actual inspiration for the pillow was a road trip through Oregon this summer, with plenty of passenger seat time to work though all those cables. Despite the wildfire smoke, we saw lush greens everywhere.


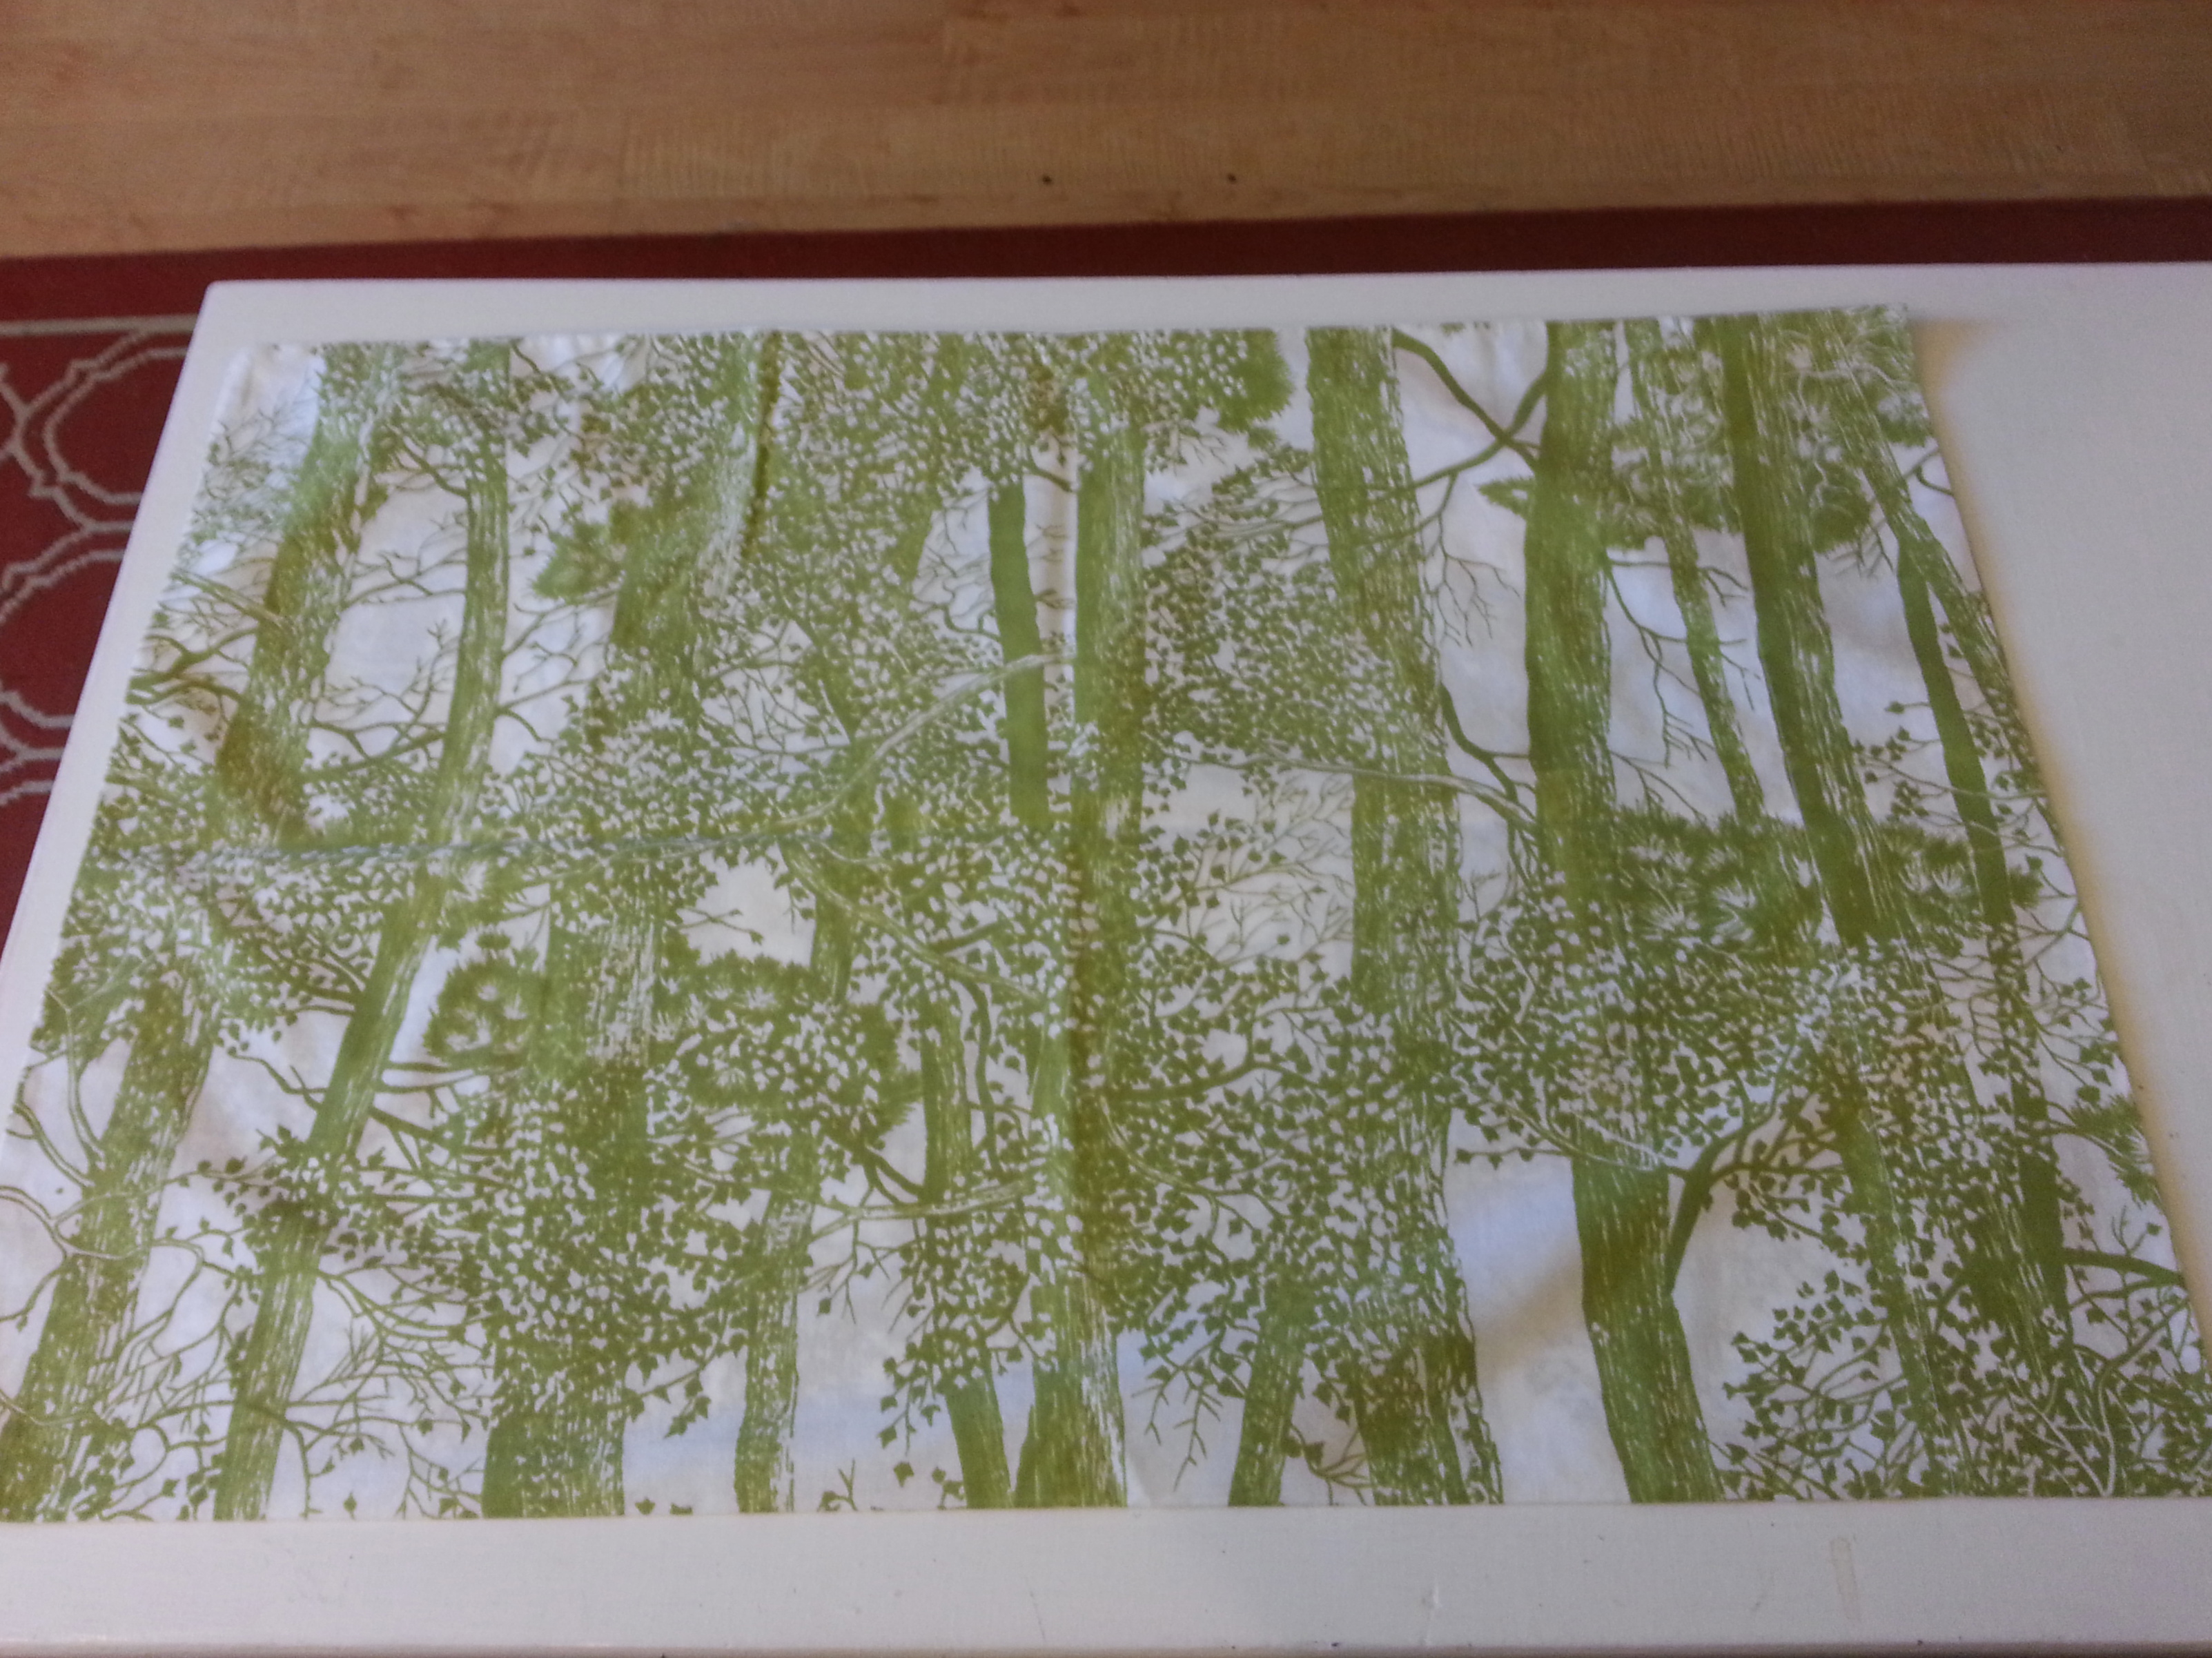
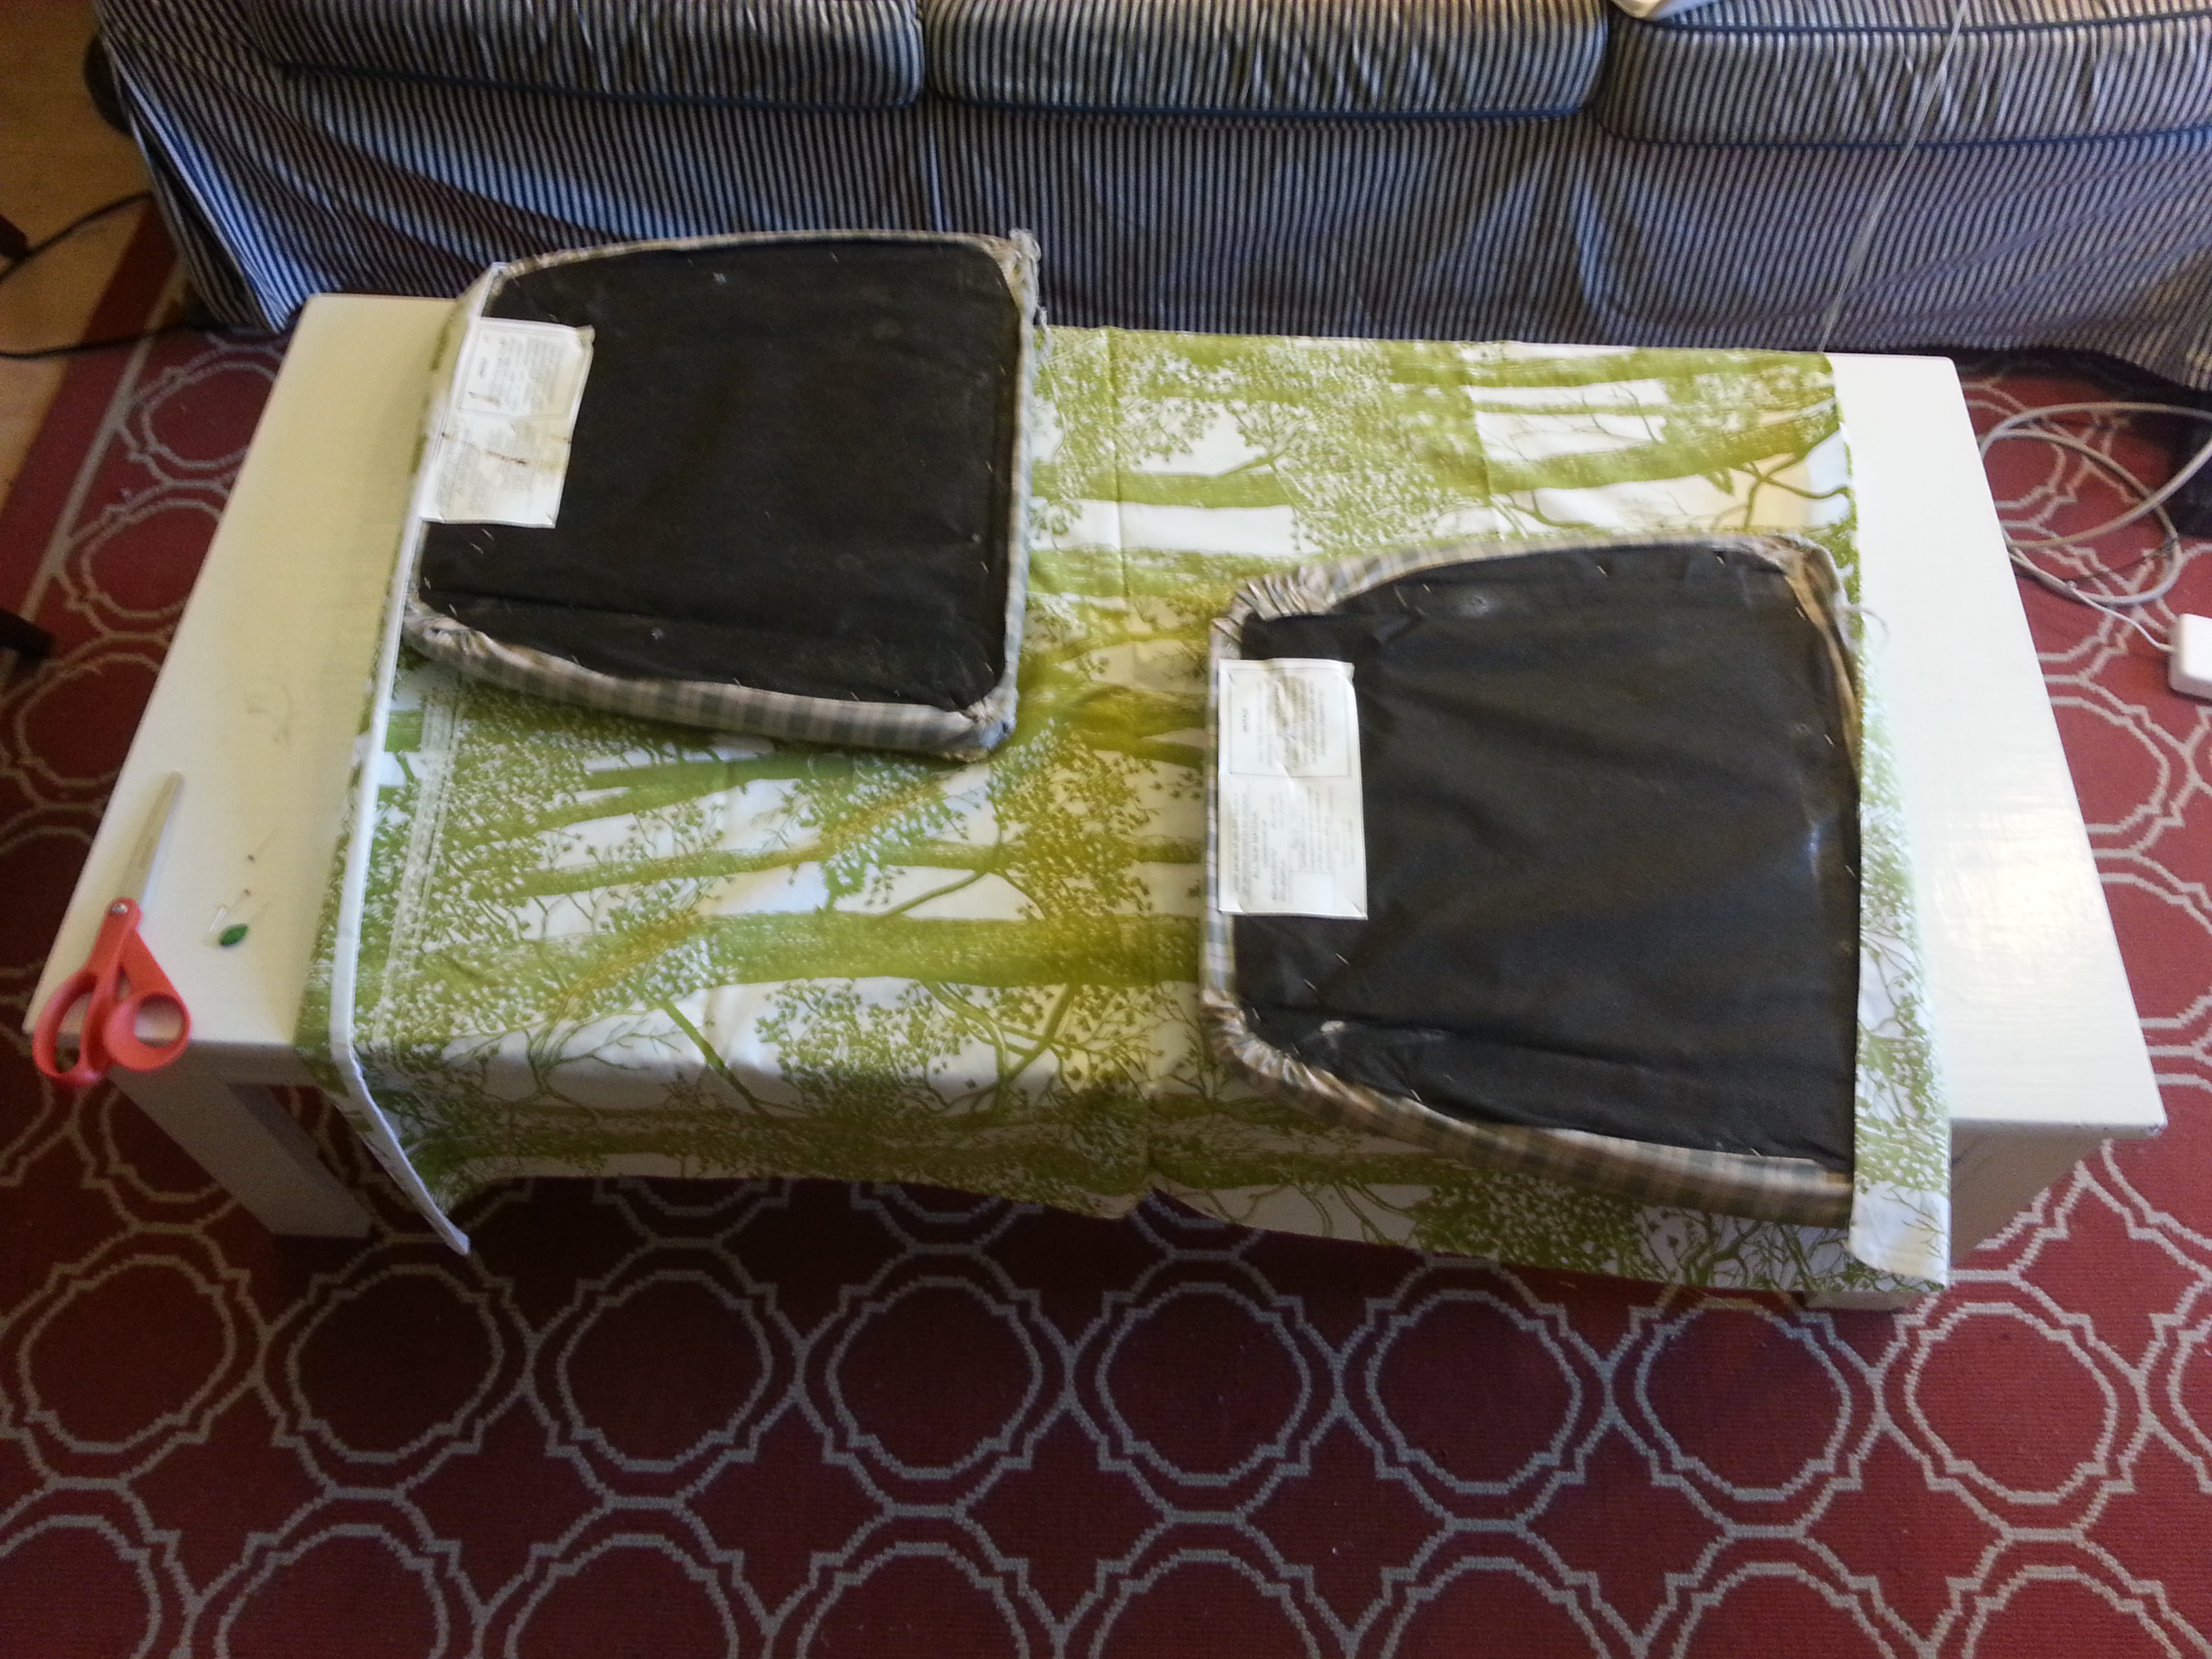
I have found that the best backing to a knit pillow is a repurposed sweater! This one was a green sweater tank in a matching shade. I pinned and cut two pieces to over on the reverse side, making it easy to slip it off the pillow form and wash it.


It’s a little tricky to sew through both pieces on my sewing machine, but the results are worth it.

2017-10-06 23.05.10

Bonus knit! J+K also requested quilt squares from guests for a wedding quilt, so of course I incorporated some knitting there too! My square was inspired by a summer afternoon of cherry picking that we had all recently enjoyed.


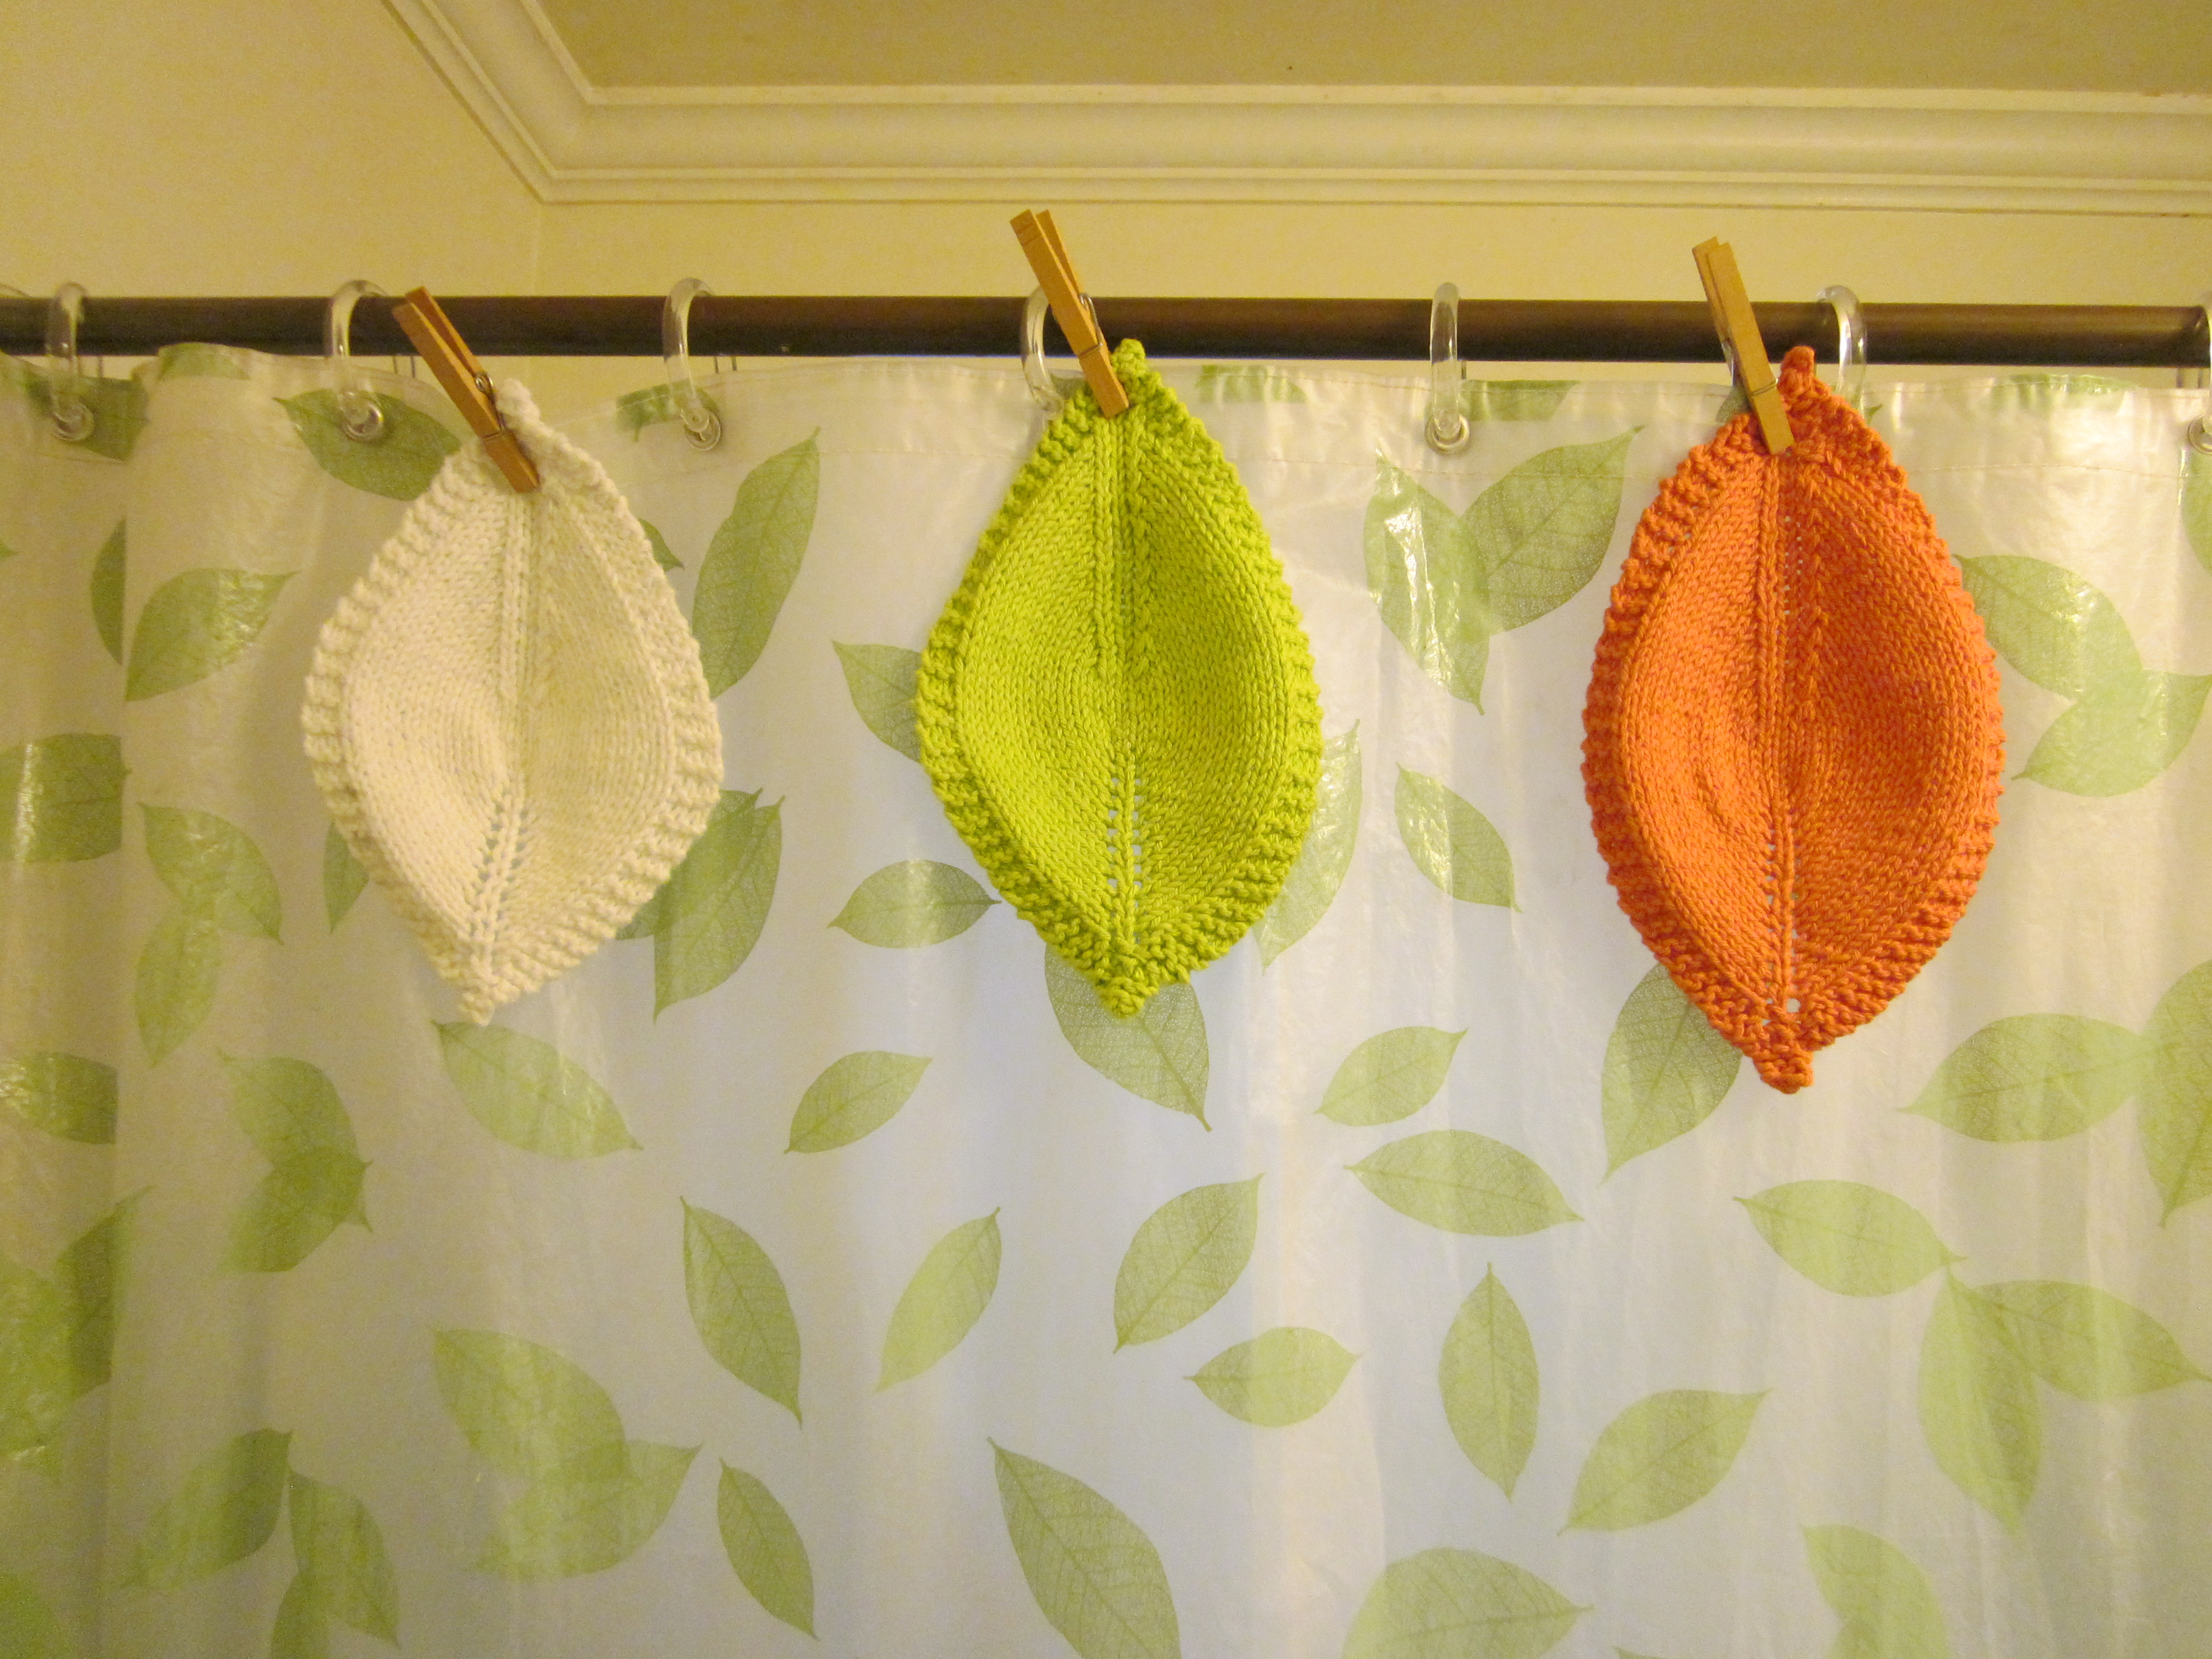
I used the “how to knit a flat circle” ravelry tutorial for this one, which I highly recommend.
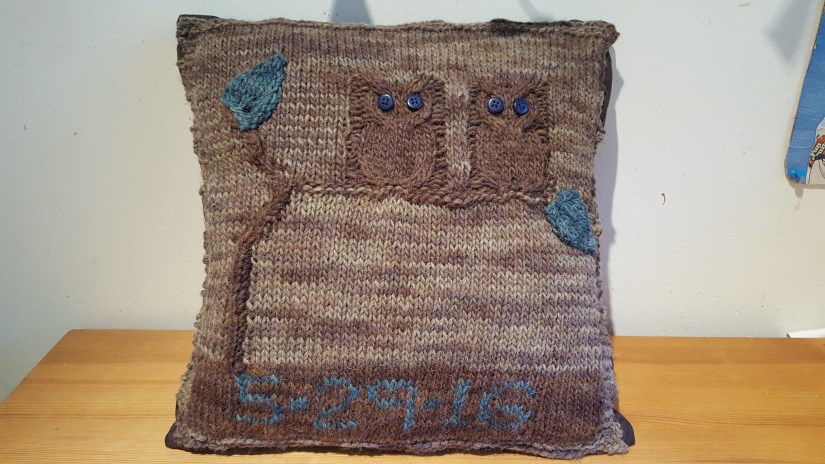
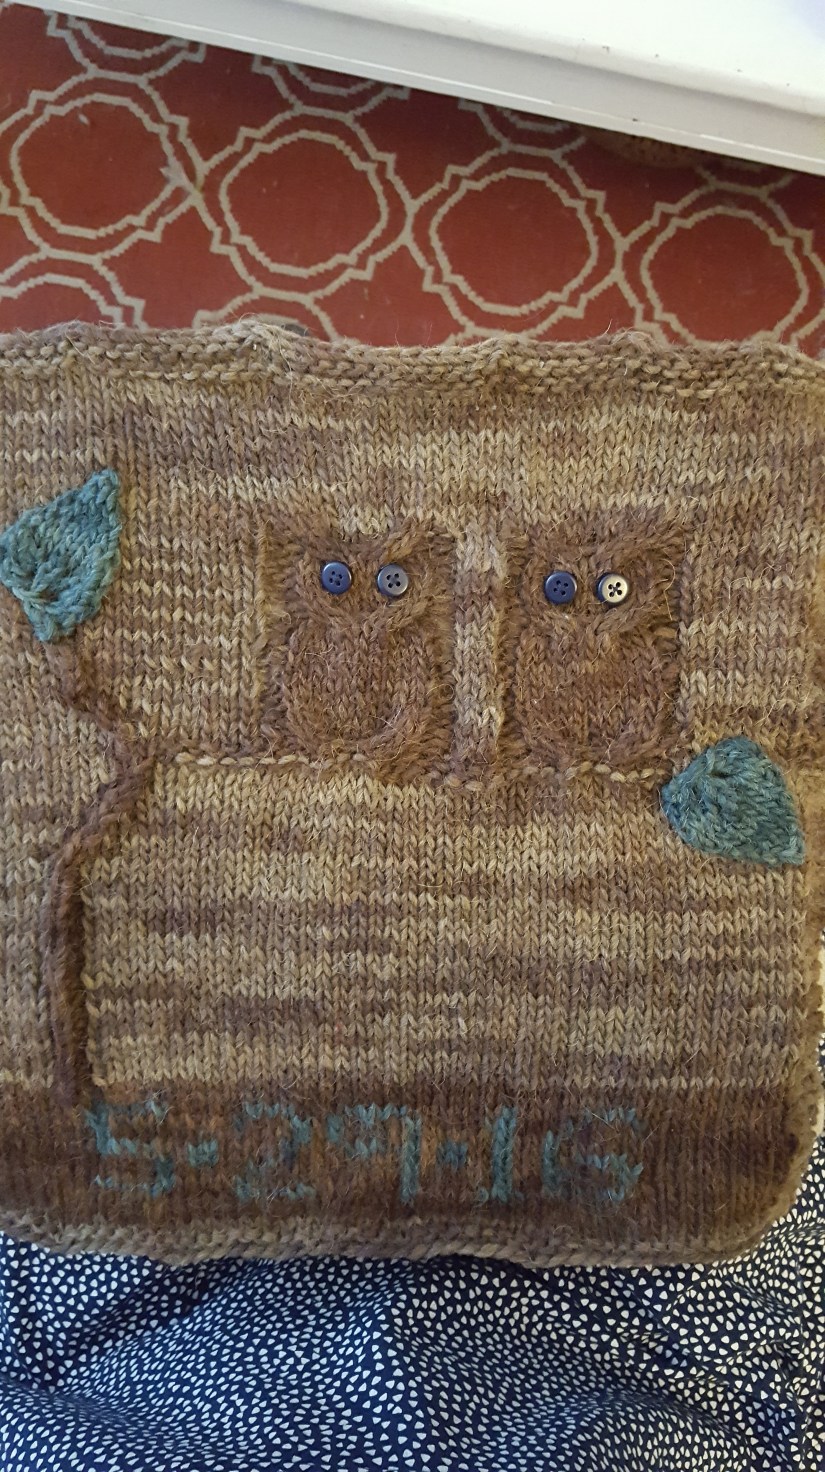
Joshua Tree

IMG_5208

Pattern: My original design!

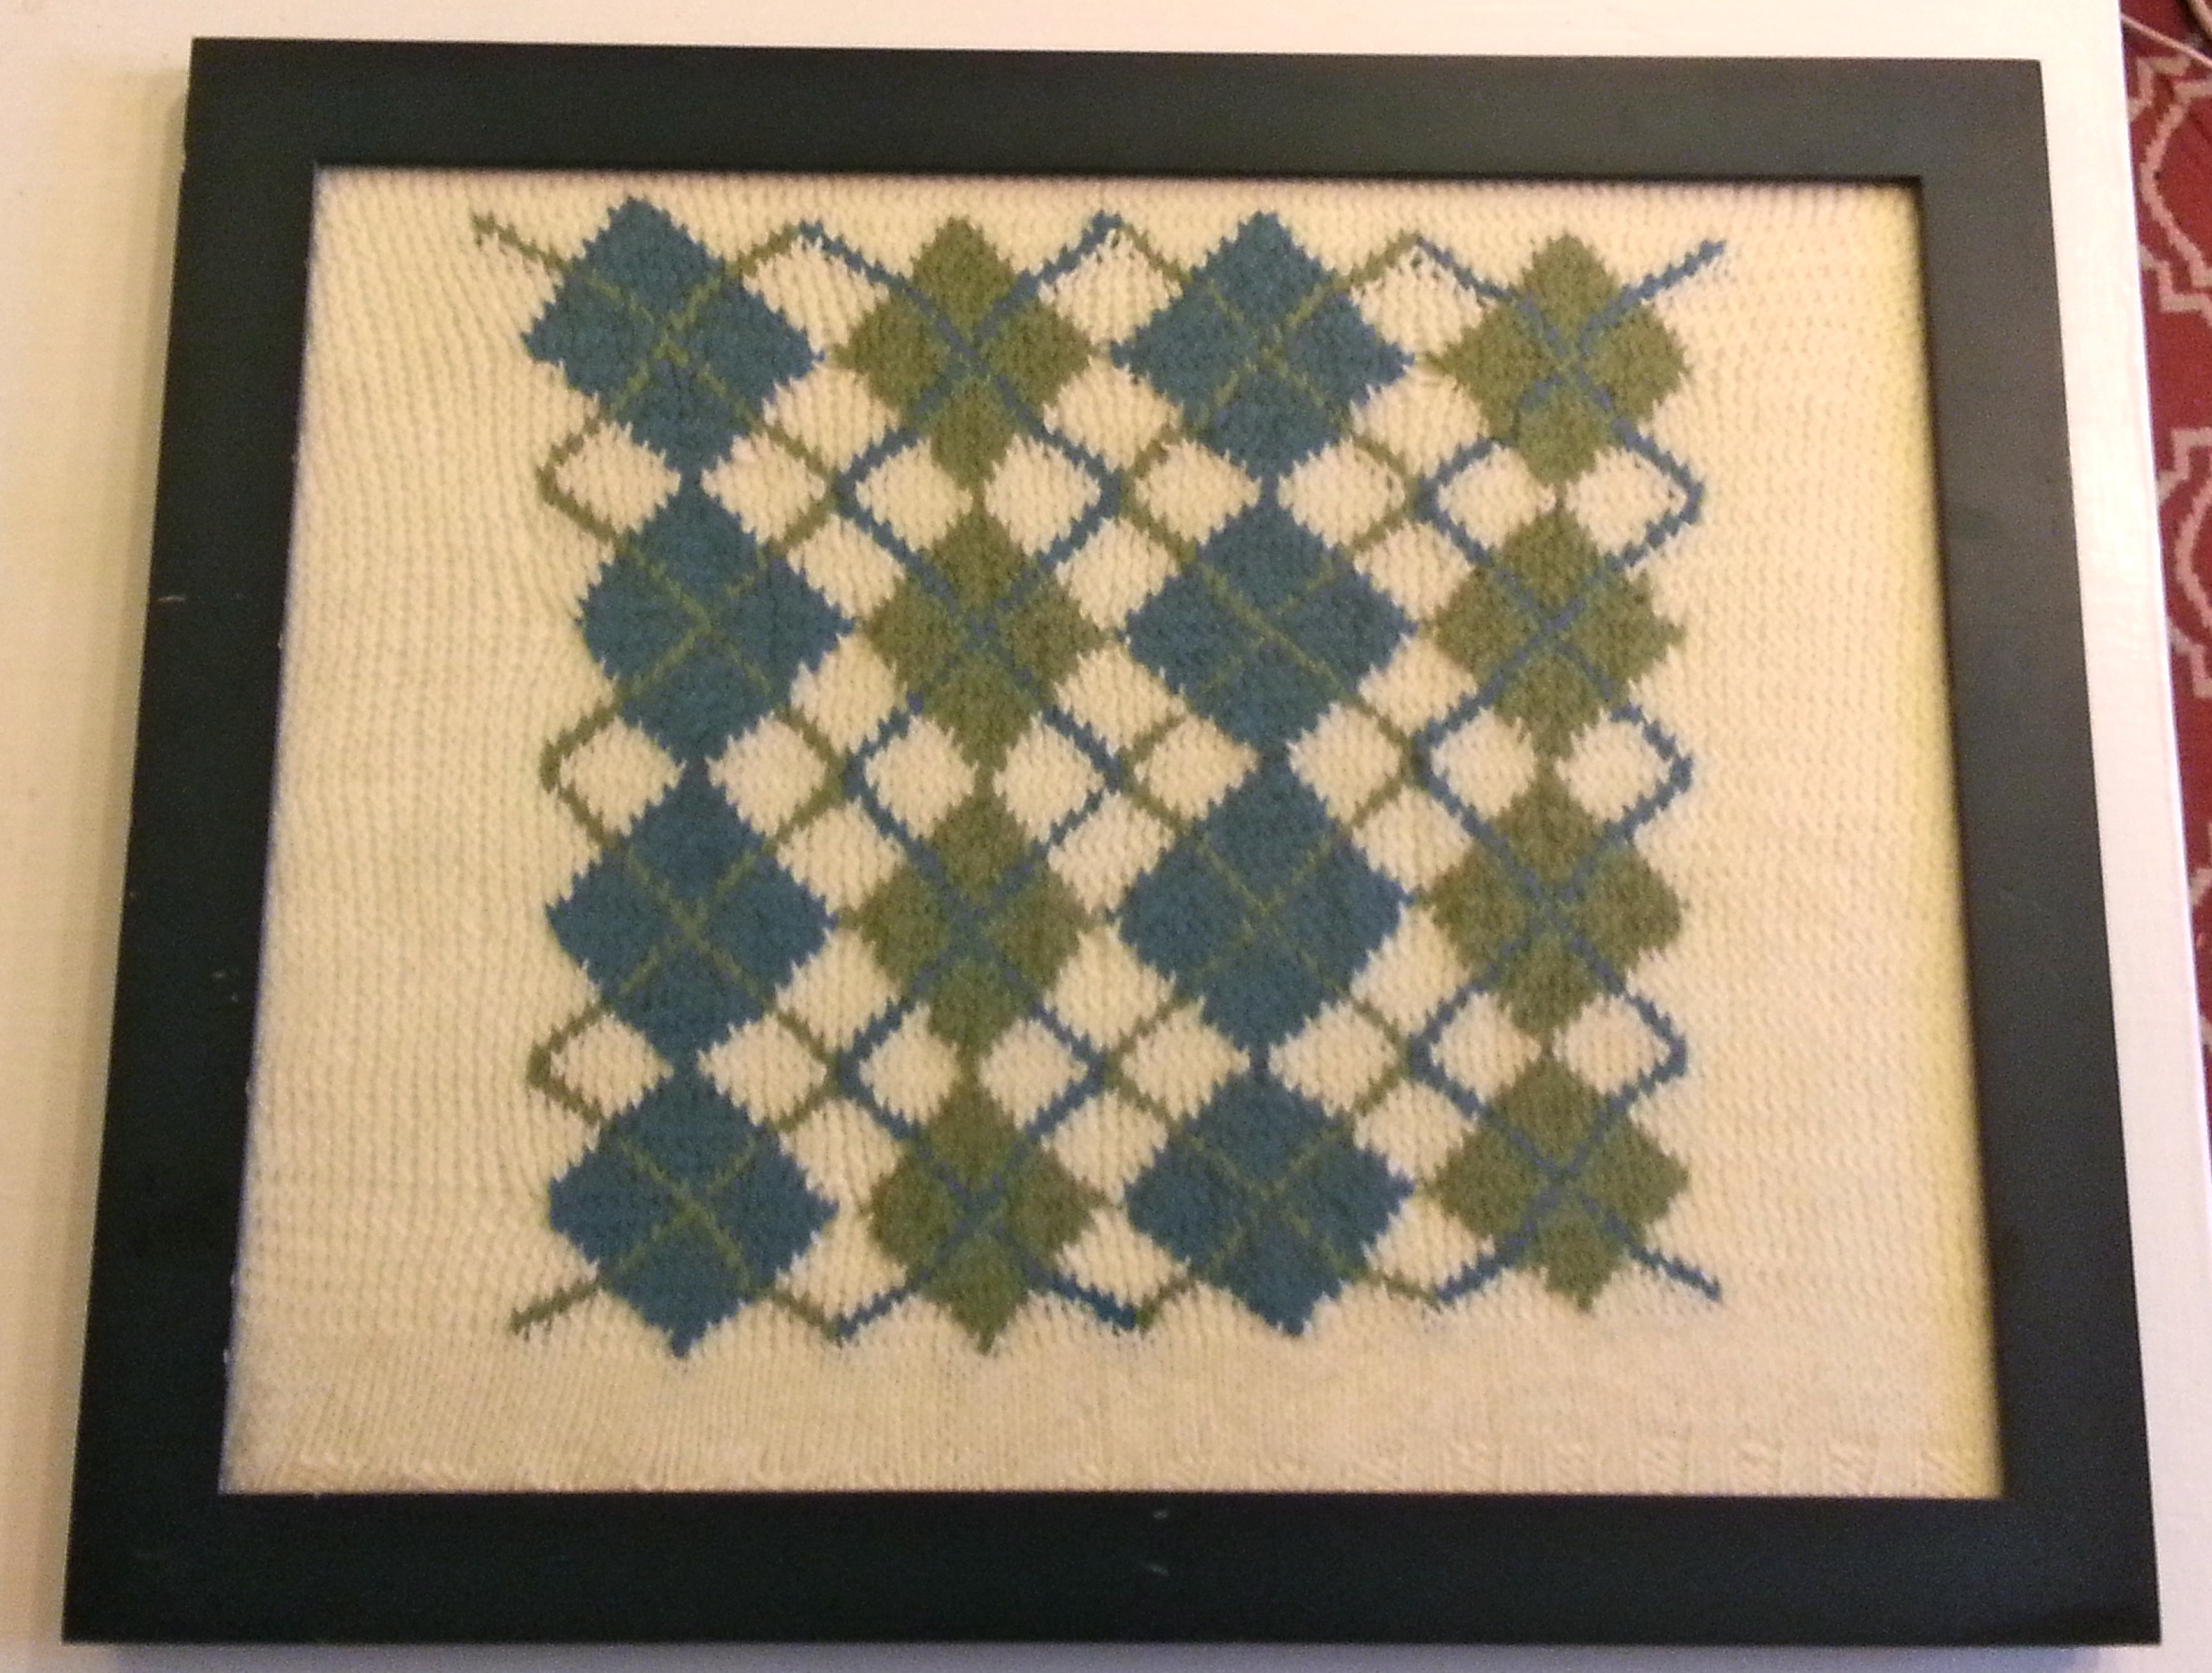
Yarn: All stash yarns—gray wool/mohair blend from stash, brown wool from my Owl Mittens, green from my repurposed Argyle Wall Hanging, and beige from my Katniss Cowl.

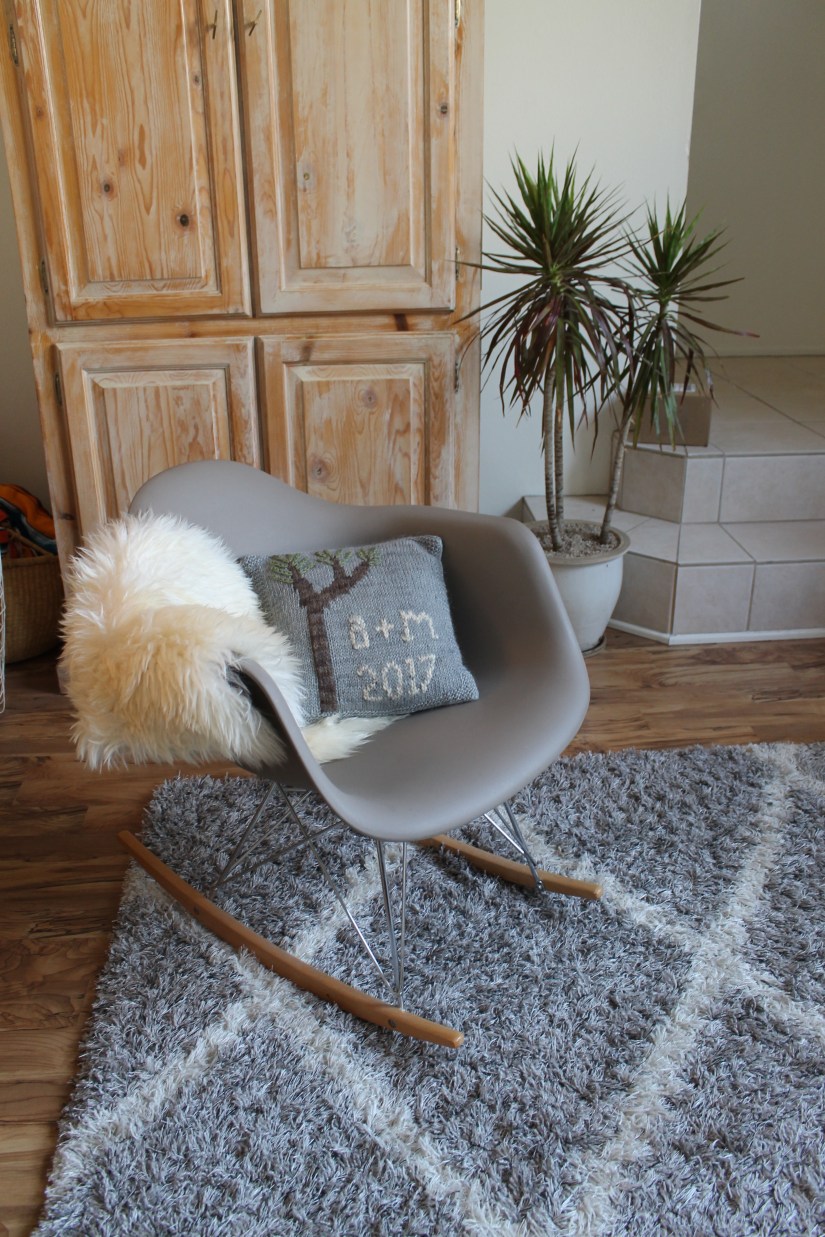
When I heard that A+M were getting married in Joshua Tree National Park, I knew what was going on their pillow! Only trouble was,  no such pattern existed! Cactus, sure, but no Joshua trees. I hadn’t been to the high desert for years, and couldn’t even remember if I’d seen one, so I looked at photos for inspiration to start. I eventually got to see the real thing! They were just as weird and majestic as I imagined—even more so at twilight.


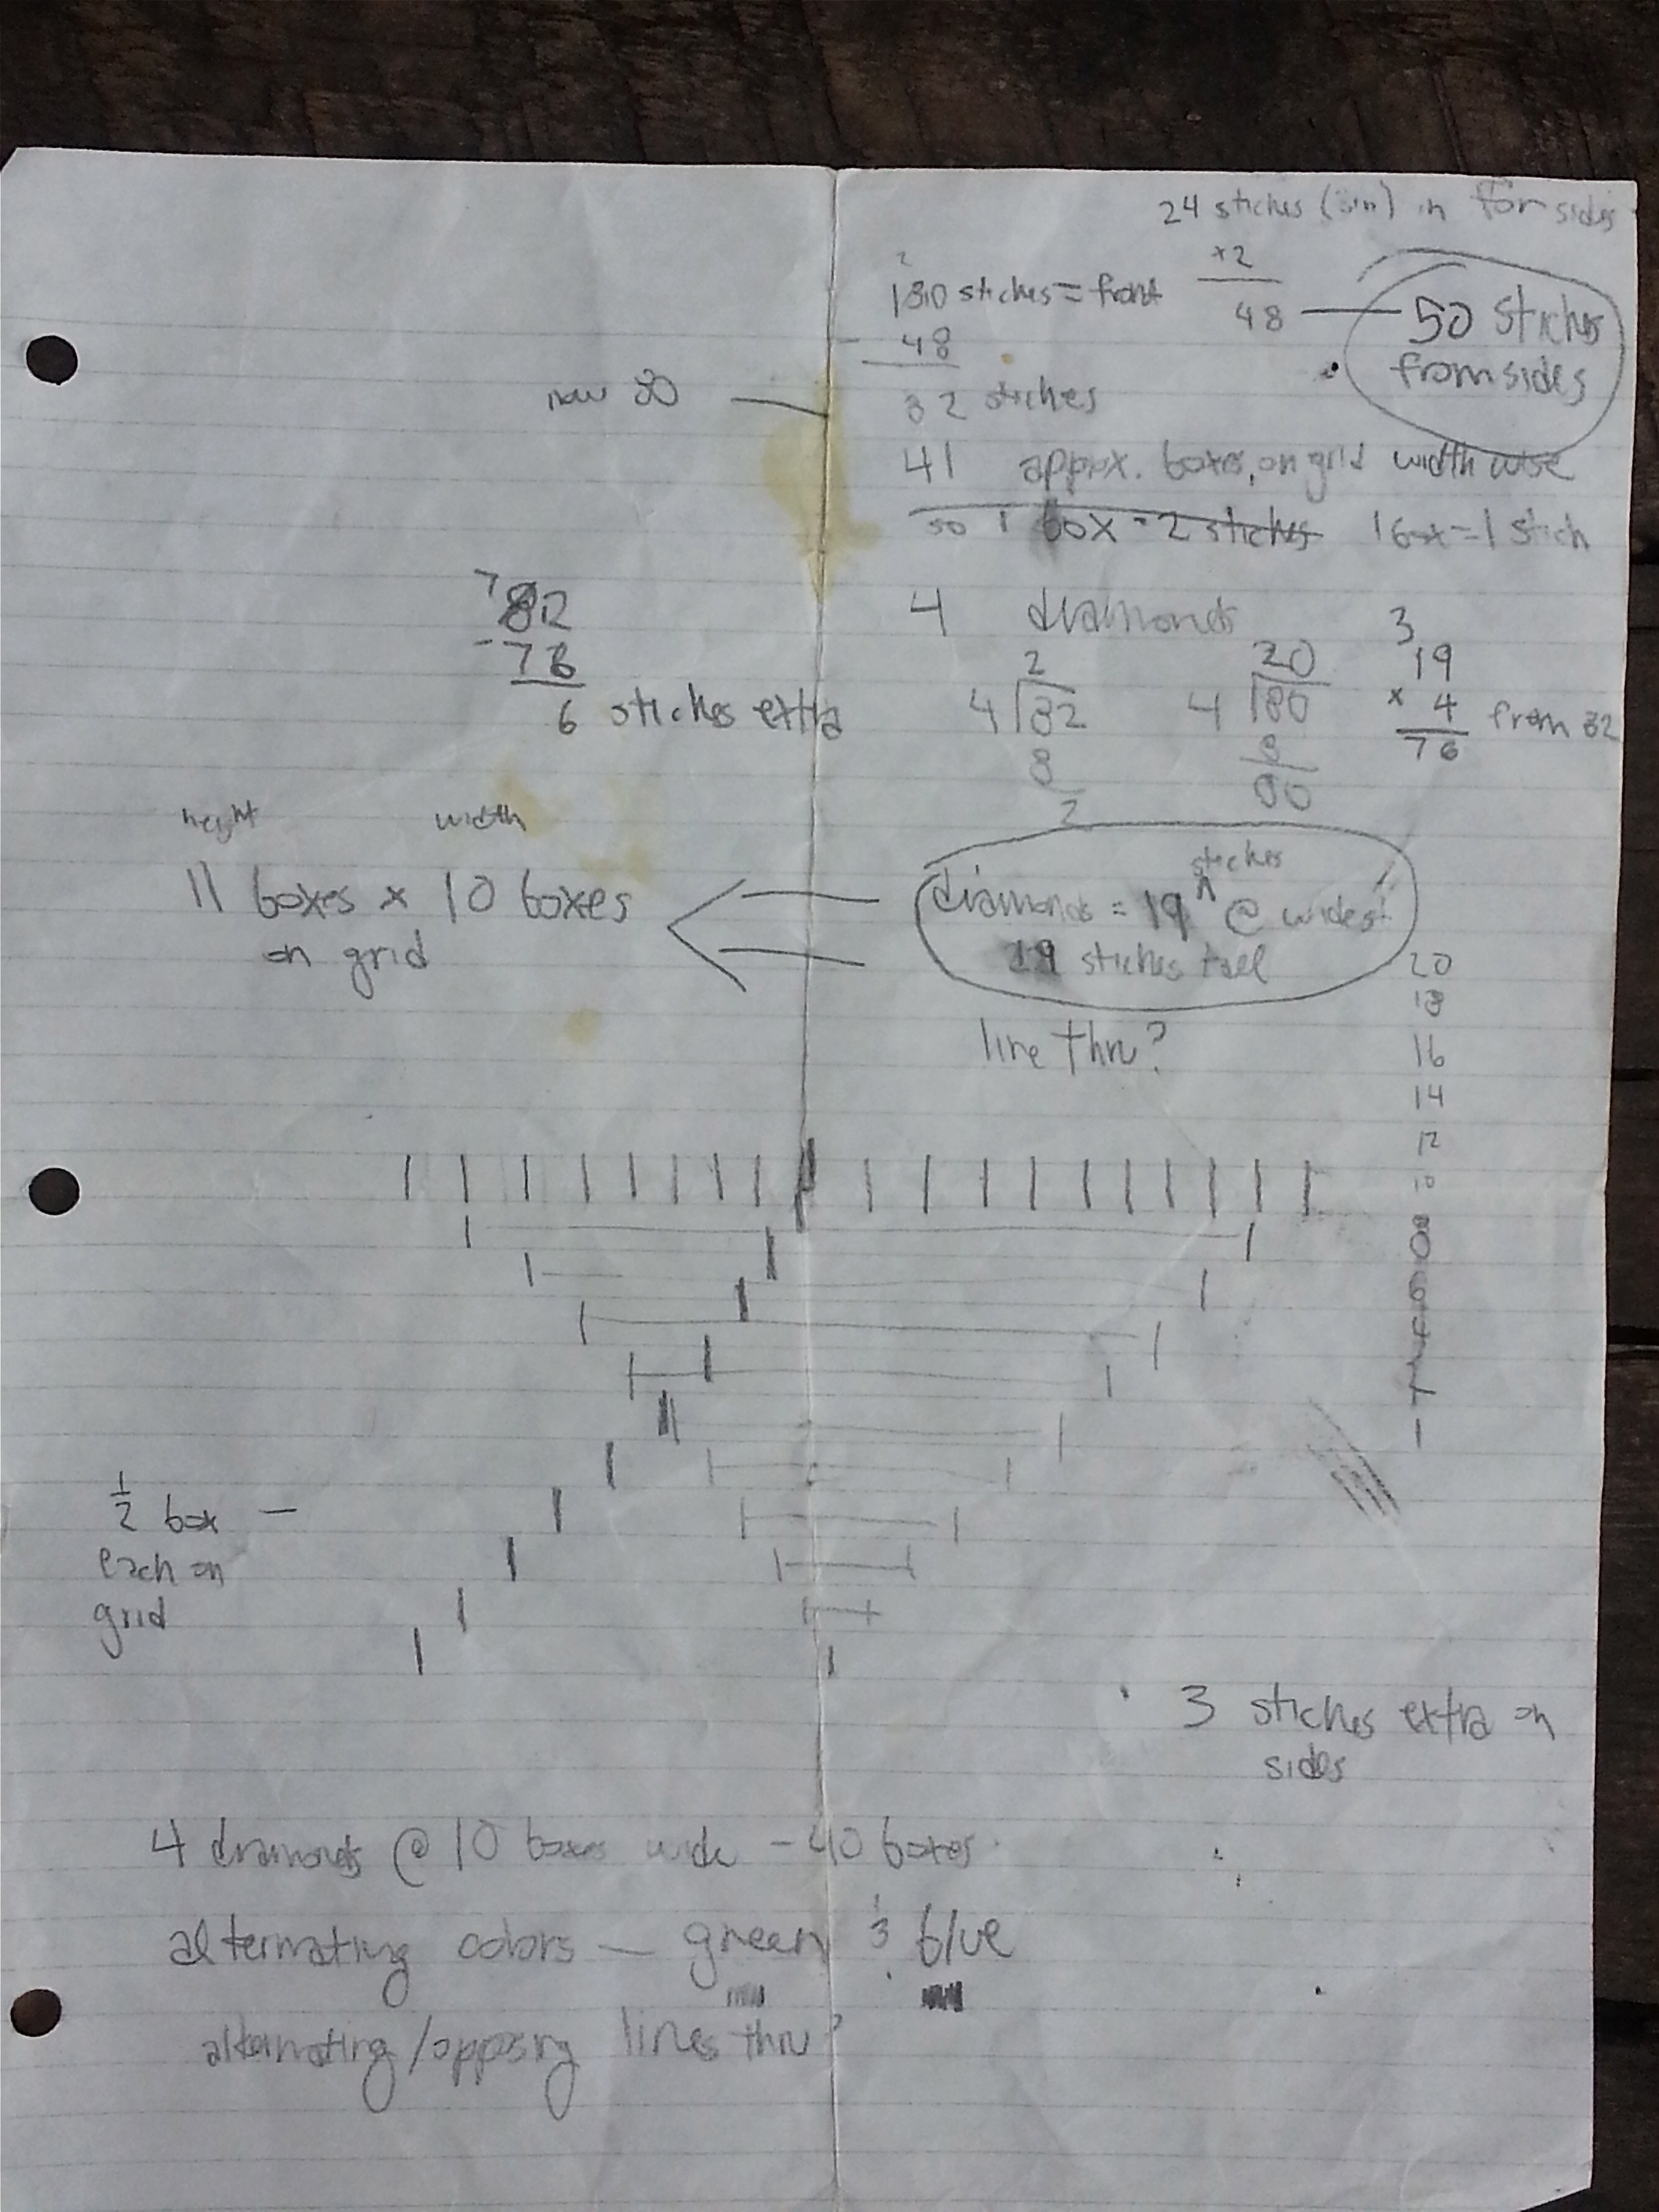
I originally sketched a Joshua tree with many branches, but I had to scale it back to three for simplicity’s sake. I opted to keep the tree to one side, giving me room to add their initials and the year. If you make a pillow like this, take the time to sketch it out on a grid, to get an idea of the layout!

2017-11-21 22.13.13

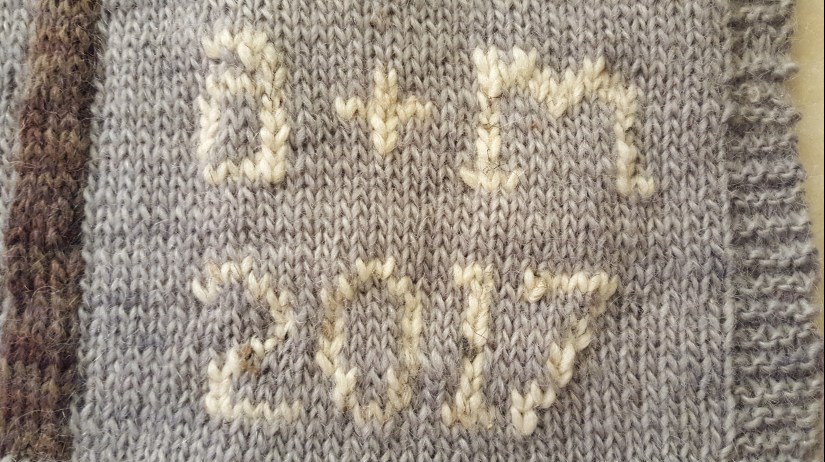
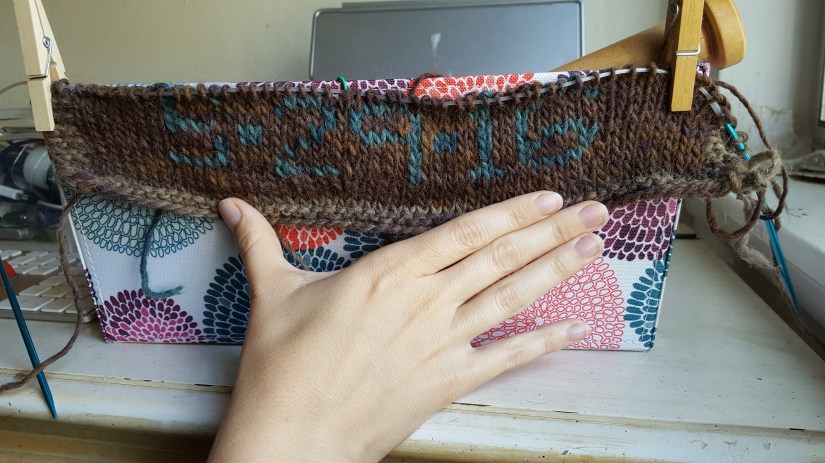
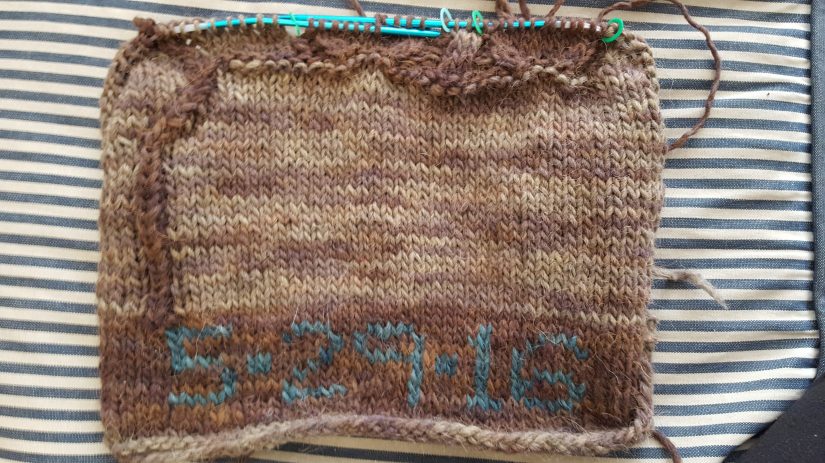
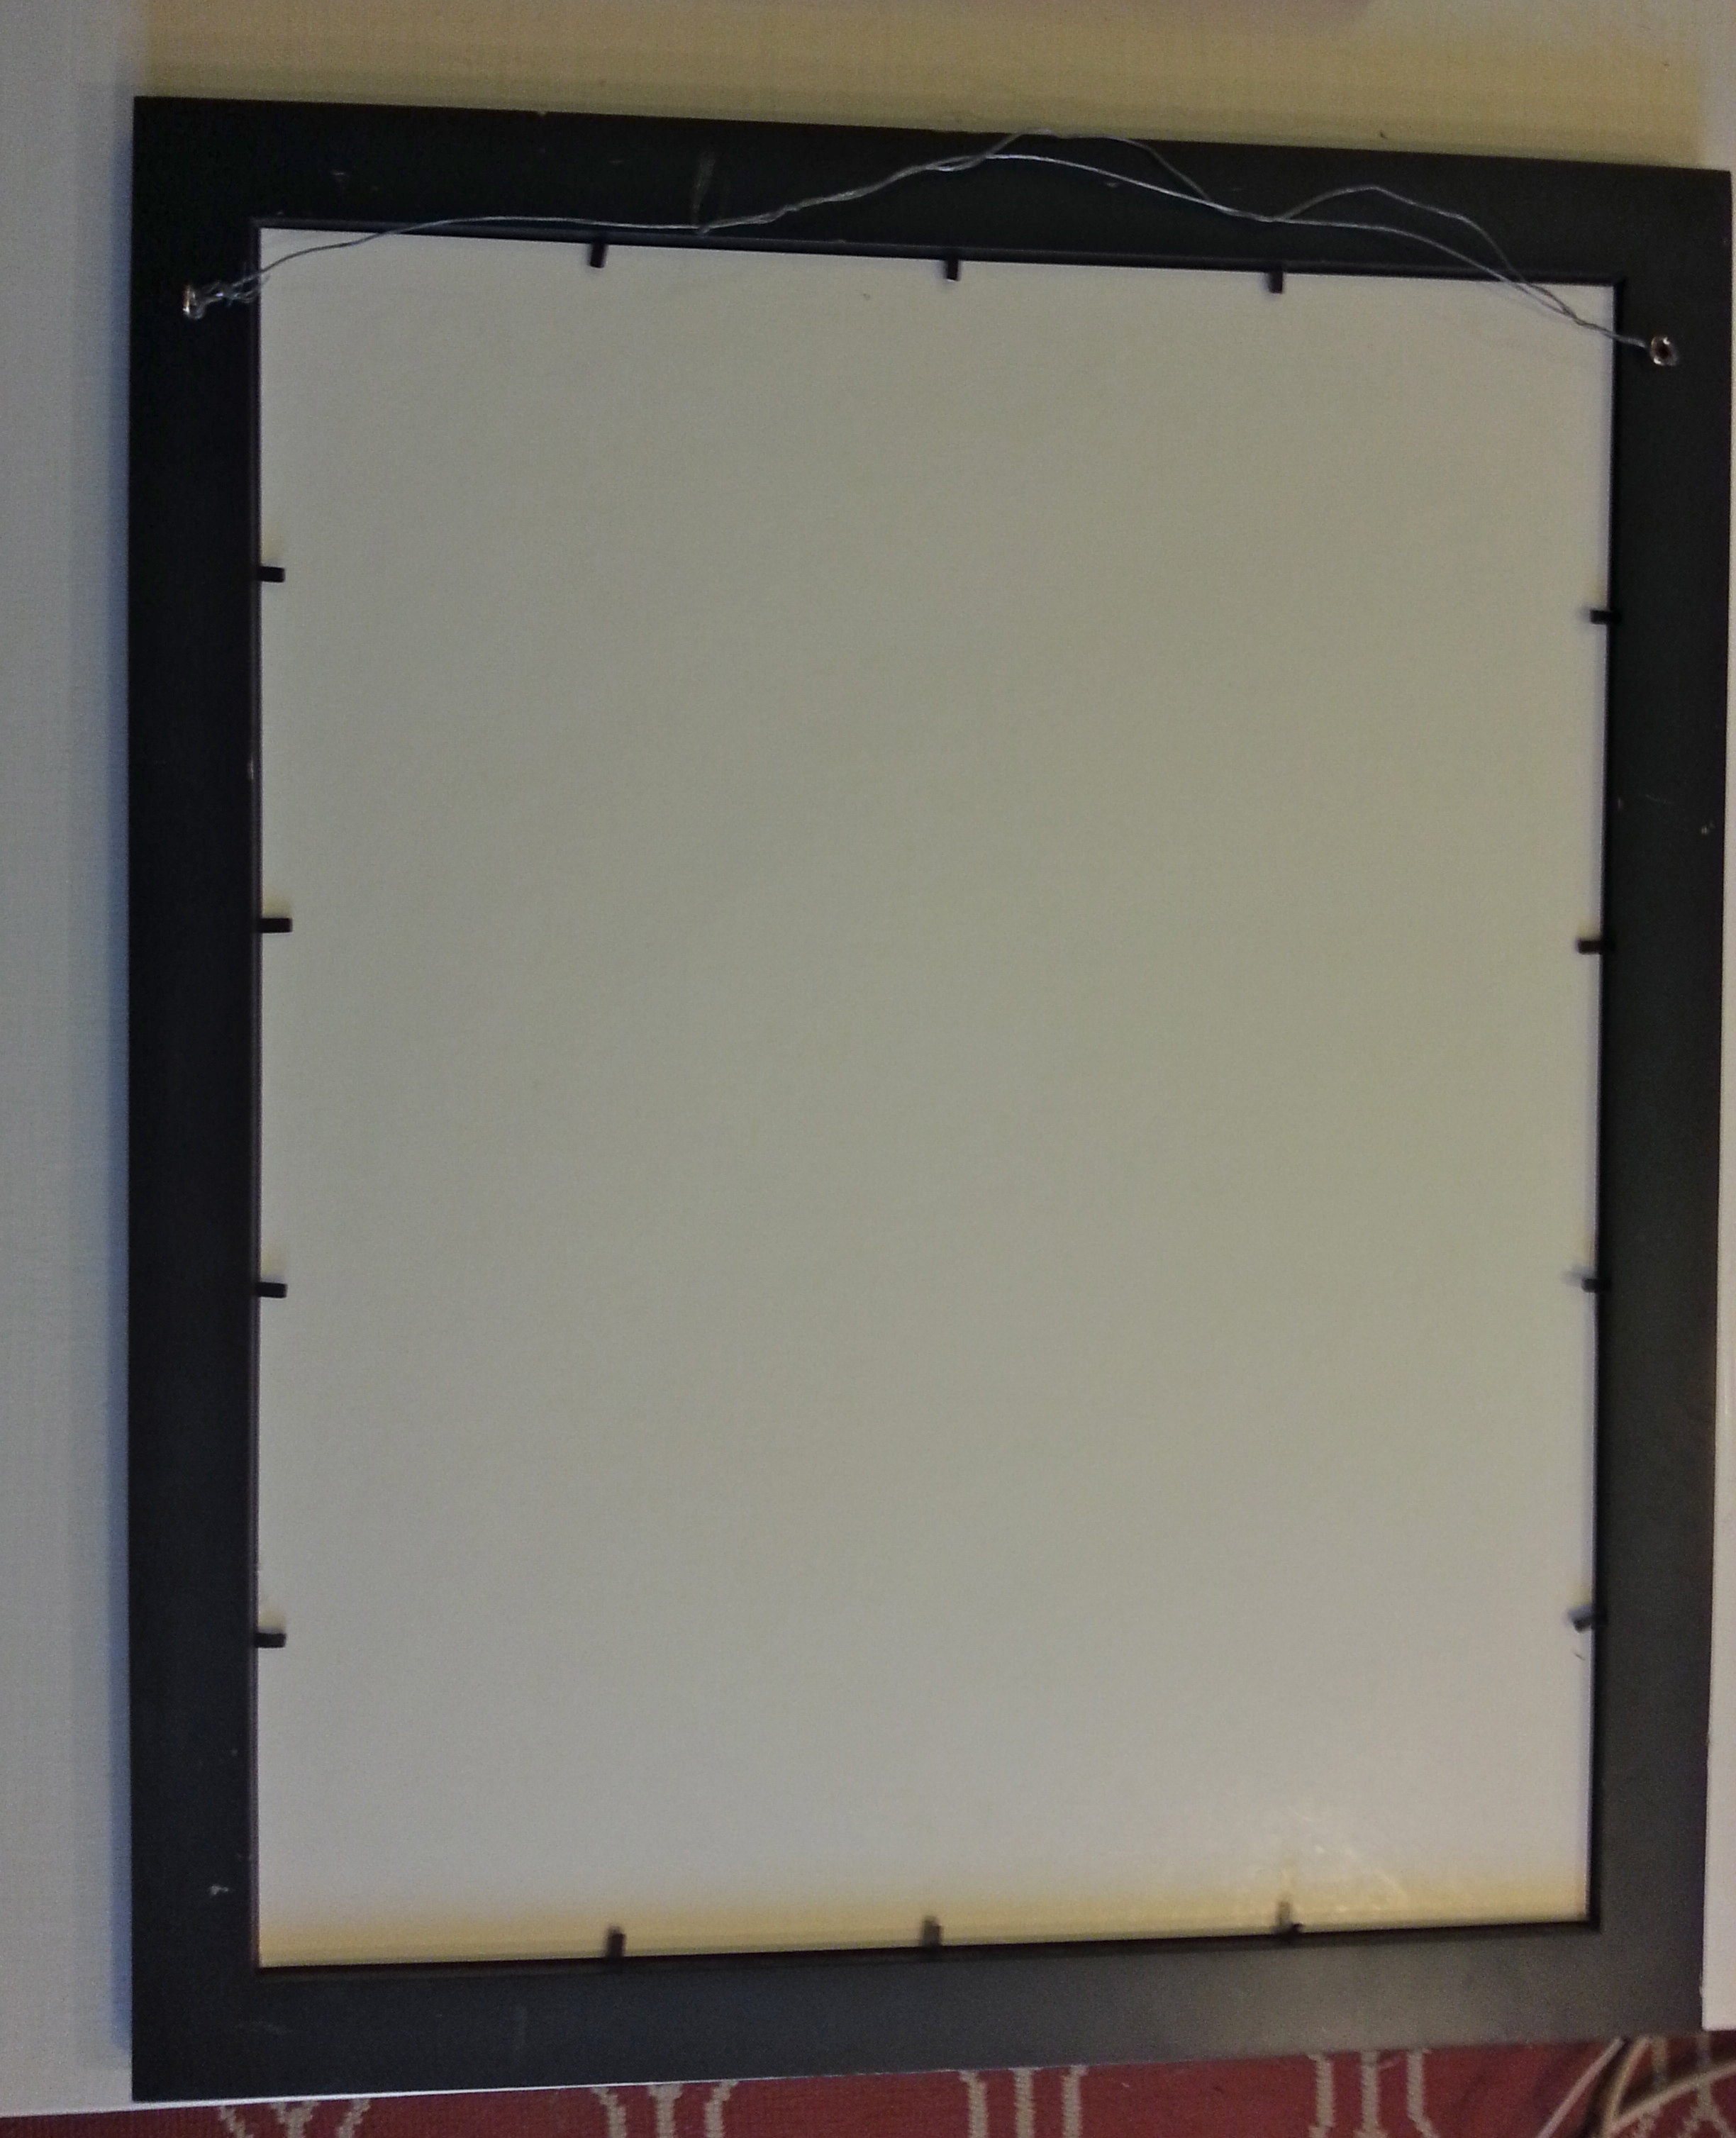
Intarsia knitting worked best for this kind of colorwork, although I also did some stranding between the branched and the letters & numbers. I know that many knitters shy away from colorwork, but pillows are a perfect test project! It doesn’t have to stretch over a body or a head, so you can practice getting the right tension. Here’s the front and back of the complete piece.

2017-11-19 10.04.142017-11-19 10.04.26

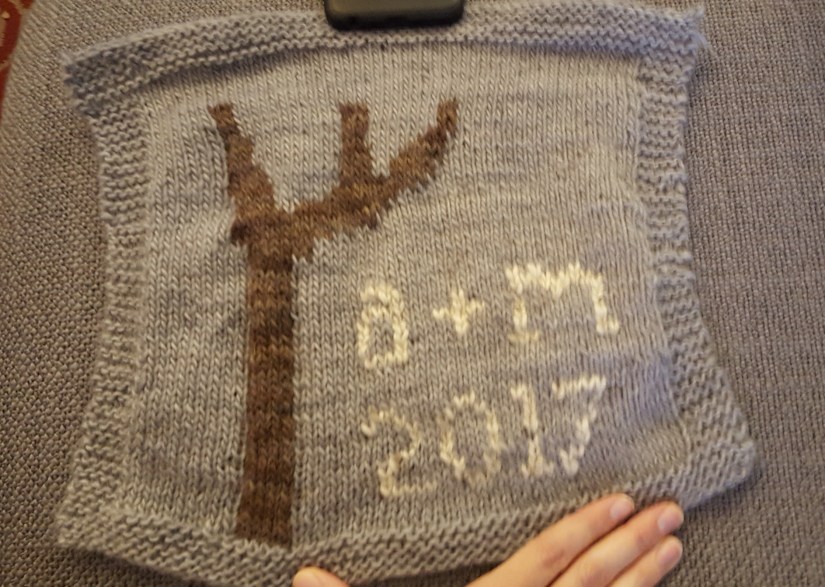
After poring over too many stitch dictionaries, I decided the easiest way to approximate the long pointy leaves was to do a crochet chain embroidery stitch on top of the completed work. That way, I could control the angle and give the tree a three-dimensional look. I followed a simple video tutorial (here) since crochet is not my forte.

2017-11-21 22.13.08

And of course, I used a gray sweater as a backing. This time, I chose a cardigan, so I could incorporate the buttons for easy removal.

2017-11-21 22.43.00I am quite happy with the way this pillow turned out. The muted color palate captured the feel of the high desert, and it matched A + M’s home decor!

IMG_5207

Activity Knits & Crafts, Botanical Knits & Crafts, Costumes, Quick Knits & Crafts

Knitting for bikes, crafting for sheep

Ever wanted to knit a sweater for your bicycle?

Have I got the project for ewe!

2017-05-06 16.36.30 
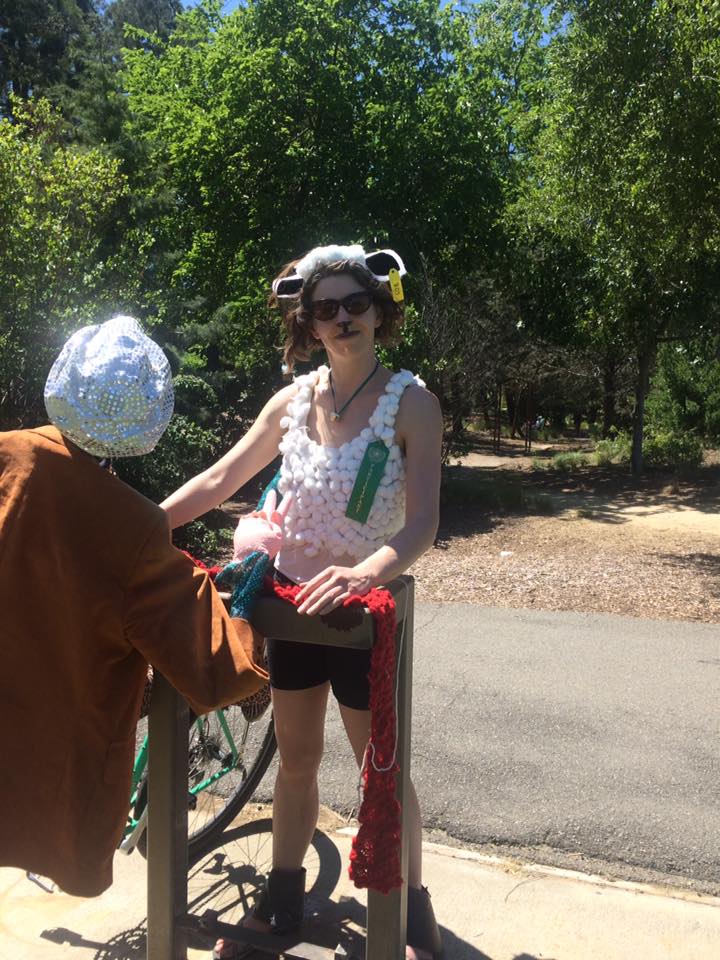
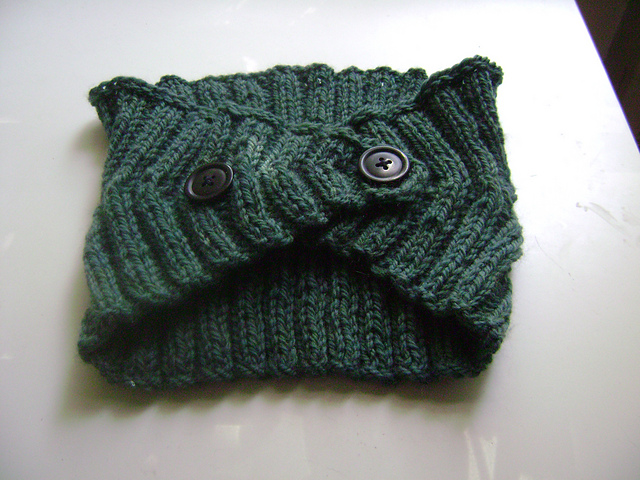
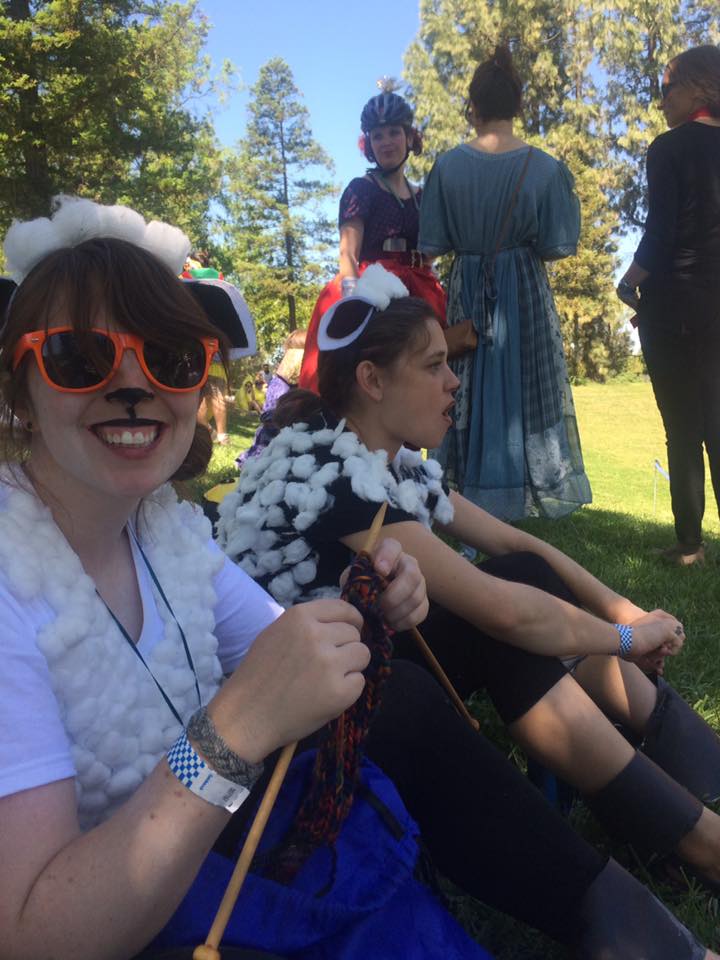
Last weekend was Tour d’Davis, where my flock and I celebrated this costumed bicycle tour of town with our “yarnbombed” bikes. I am particularly proud of creating this countryside scene for my top tube, complete with sheep grazing on the hillside and a matching pouch for my cellphone. The entire thing is my own design. I call this cozy pattern Pastoral.

2017-04-27 22.29.24
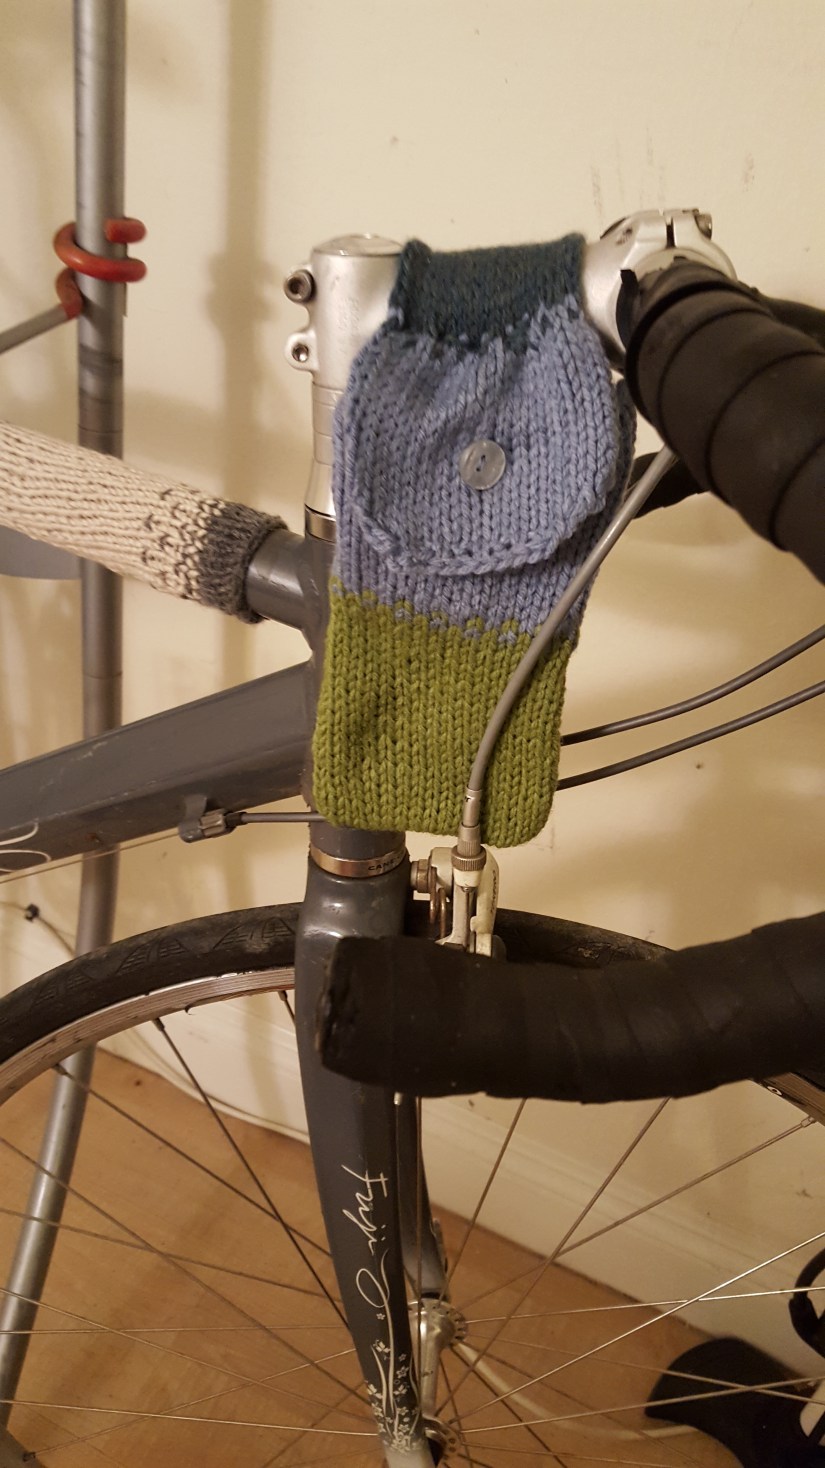
If you want to do this project on your own bicycle, you’re in luck—it has a very low baaaa-r to entry. All yarn used here was leftover from other projects:

Materials: Scrap yarn, knitting needles, yarn sewing needle (or crochet hook), measuring tape, binder clips or clothes pins, and imagination!

Instructions: Measure your top tube width and length, then check your knitting gauge for an exact fit. You can also eyeball it for an approximate fit that works pretty well too. Cast on in the most creative colors you can find! Stockinette stitch works well. When binding off, leaving a long tail so that you can sew it around the top tube. Use the binder clips or clothespins to hold the knitting in place as you sew up the seam. Don’t worry too much about the neatness of the seam, or weaving in ends, as neither are that visible.

2017-04-27 20.16.43

Colorways and patterns of the bicycle cozies above, from left to right: Unicorn, Dark Unicorn, UCD, and Co-Op Stripe (not pictured: Captain Picard, a red and black pattern). Below is Rogue One, my first bicycle cozy.

2017-04-16 19.53.42

Some of these cozies went to Team Sheep bicycles, but a few lucky cyclists on the tour got the extras!

2017-04-29 15.59.15

Several of my fellow sheep team members likewise rocked their yarn creations throughout the day! Here’s a shot of most of our yarn creations before installation:

IMG_4862

Many of these were for bicycle decorating, but we also did some yarnbombing, aka public yarn art instillations at stops along the Tour:

IMG_4897

Some on craft crew even did some more knitting and crocheting during the tour!

sheep3

So much goes into hosting our stop for the event, from the food and drink prep, to game design, to structure set up— I wish could capture all the creativity that goes on behind the scenes. But since I was on craft crew, I mainly have photos of our costumes and other sheep-themed decorations.

2017-04-29 09.52.02

If you want to be a cheap sheep, be a cotton ball sheep! We hot glued cotton balls onto T-shirts for the main part of our costume.

Materials: white T-shirts, cotton balls, hot glue guns and hot glue, cardboard to place in between shirt layers.

2017-03-31 13.22.41

Instructions: Glue cotton balls to your shirt! You can do them in neat rows or in a more natural fashion. Just don’t burn your fingers. Also, be patient, it takes an hour or more.

2017-03-31 13.23.09-1

When you have finished a shirt, it’s time for sheepy accessories:

2017-04-29 16.19.21We searched through DIY sheep ear tutorials on the internet to come up with a simple head piece. Not baa-d, right?

Materials: Wide plastic headbands, white and black felt, white duct tape, cotton balls, and hot glue.

Instructions: The best order of operations is to hot glue the ear felts together, pinch at base, tape the ears to the headband, then hot glue cotton balls on the top. If you’re making a lot of these, cut ear templates out of cardboard first!

2017-04-14 19.42.11

I didn’t get great photos of all the other costume details, but you can see in my photo that we had bell necklaces, sheep face makeup (black eyeliner), and ear tags (paper gift tags cut down to size and hot glued on). I also made black poster board hooves at the last minute, which didn’t last that long on the bicycles!sheep1

All the white duct tape also had another important use: it went towards the creation of the red and white barn doors! 2017-04-29 14.59.18

Materials: four red poster boards, one roll of white duct tape, and a buddy.

Instructions: Lay out the boards so they overlap. Tape together horizontally and then vertically, using a friend to help hold the tape straight. Outline the entire door in white tape. Add the Xs at the bottom last.

sheep2

I hope this inspires many a bicycle cozy and sheep costume! (And if you need even more sheep patterns, check out the Baa-ble hat I made last winter.)


Botanical Knits & Crafts, Nerdy Knits & Crafts, Original Knitting Patterns, Tweaks & Alterations

Lovebirds: An Owl Pillow

What gift do you give to two crazy lovebirds (known to friends as the Owls) when they get married in a spectacular DIY ceremony in a field behind a farmhouse? Well, if you are me, you give them this:

2016-05-29 12.33.21-1

An Owl Pillow, complete with button eyes, a leafy tree, and the date of their wedding.

As with nearly all of my knitting projects, this one is cobbled together from several different patterns and adapted on the FLY. When a knit has to fit, I measure and gauge swatch and carefully plan everything out. When it doesn’t well—I WING it.

Pattern notes and bird puns below!

2016-05-24 11.02.52

To begin, I used this free calendar numbers chart to place the date at the bottom: 5 * 29 * 16. I was knitting from my stash, trying to use up the brown and green wool from Farmhouse Yarns that my aunt gave me nearly a decade ago (same yarn that I used for my Owl Mittens!). Since I had two dye lots of brown, I decided that the ground, tree and owls would be the darker brown, while the border and the sky would be the lighter brown. It worked. WHO is pretty good as guestimating yarn? I am.

2016-05-26 17.00.55

The main pattern I used was Dr. Owl from Rowan, which is available for free. But since I was doing colorwork and adding the date at the bottom. I had to make a lot of adjustments, let me tell you. The date at the bottom was stranded knitting, but the tree and the owls were intarsia. The leaves were knit separately and sewed on. And did I mention the original pattern is in the round and I knit this flat? Keeping track of all the various yarn balls and the altered stitches was not exactly a HOOT.

2016-05-28 12.10.45

Furthermore, I added a second owl to the pattern. I couldn’t have just one for a wedding pillow—I needed  a PARLIAMENT! When the piece was as tall as it was wide, I finished and blocked it. It was about 14 inches square—conveniently the size of a pillow form.

2016-05-29 12.34.24

2016-05-29 12.33.30

Sewing on the leaves and eyes was pretty easy and really made this piece SOAR. However, I had no time or yarn leftover to knit a second panel for the back, so it was off to the fabric store for a pillow form and some brown fabric remnants.

2016-05-29 12.33.48

Confession: I am a crappy seamstress. It’s just not really my thing most of the time. But I managed to get two wonky looking back panels, which are held together with velcro, so that the whole pillowcase can be removed for washing if necessary. And it OWL came together a few hours before the wedding!

2016-05-28 18.24.11

And there you have it. The flappy happy couple texted me later to say that they loved it—sometimes it’s risky to make a knitted gift without input from the recipients, but in this case it worked out.

As a side note, I didn’t realize just how long it had been since I posted in this blog! I was thinking it had been 2 or three months, but it’s more like 7. I’ve been teaching a lot of courses and I just don’t have the time on the weekends that I used to in grad school. But I have a few more little projects that I will share here in the future!

Botanical Knits & Crafts, Original Knitting Patterns, Tweaks & Alterations

2015: Out with the New and In with the Old!

2015-01-11_154351The title of this post pretty much sums up my goals for the making of things in the coming year. At its most basic, “out with the new and in with the old” means as much as possible, I’m going to try to use what I’ve got on hand or what I can get second hand to knit, sew, costume, or otherwise craft, instead of buying new materials. Not exclusively, but as much as is feasible. I already do this a lot, but I wanted to be more intentional about it. (I promise this won’t become one of those smug greener-than-thou sort of projects. If I need to buy new buttons, I’ll buy some new freaking buttons!)

Here’s what this kind of making has looked like this month:

Creative Stash Knitting

challenge: How to knit with what you’ve got when your yarn doesn’t fit the pattern.

2015-01-11_162626When you have been knitting for many years, you develop a yarn stash. Extra yarn left over from previous projects, yarn that friends or family gifted you, yarn that you bought for a purpose never fulfilled—they all live in the stash. My stash lives in a small underbed storage box.

I’m trying to get even more inventive with the ways I can knit from my stash. This hat is one of those projects. I knit with small amounts of a wool-and-mohair-blend yarn I had in a few colors in my stash. I used the quick and very lovely pattern easy ombre slouch hat by Paul S Neary. Well, sort of. I weighed the yarn on a scale realized I did have enough of the green yarn to do the full pattern. So I just did the colorwork pattern until I ran out of green. And it still looks good.

The only disadvantage to this strategy is that I’m going to have to be flexible with the outcomes. My hat came out far less slouchy because I omitted extra rows of the pattern. I’m going to soak and block it, but it doesn’t seem to quite fit over the sheer volume of my hair now.

2015-01-11_162724

I think it may need to be a gift to someone else, and I’m ok with that.

Thrifted and Salvaged Crafts

challenge: How to make useful and beautiful things without buying new stuff.

2015-01-11_141850I think the hardest thing about trying not to buy new things is that I have to be patient. I have to forgo the instant gratification for the long game of keeping an eye out. It’s probably not a bad trait to work on. At any rate, being patient was what led me to find and refashion these chairs.

2015-01-11 12.38.25I had been using folding wood chairs in my kitchen for years when I spotted this guy and its twin at my dumpster. I hauled them inside just before a rainstorm. They were not in good shape. But my neighbor friend had assured me that wooden chairs with fabric covers are easy to re-cover.

2015-01-11 12.39.34-1I found my “fabric” at the thrift store. It was a large pillowcase with a green tree print that I bought for 60 cents.

2015-01-11 12.38.432015-01-11 12.40.12

If you want to do this project, make sure you have a screwdriver that fits the screws on the underside of the chair, scissors, a staple gun, and enough staples. (I borrowed the staple gun and ran to the hardware store to get staples). A seam ripper and an iron are also handy if your fabric is being repurposed. And a flashlight or headlamp is a plus if your screws are hard to see.

2015-01-11_132940I didn’t “measure” exactly but I did make sure there was enough fabric to cover both seats.

2015-01-11_141331Stapling is the most fun part. Just make sure that you don’t cover up the holes where the screws are going to go back in.

2015-01-11_1528002015-01-11_1528082015-01-11_153222Screwing the whole thing back together is the most annoying part. Again, patience is key. Trim any excess fabric that is in your way.

2015-01-11_154512It’s kind of ridiculous that this whole project cost under a dollar, considering how much I like the end result.

Repurposing Unfinished Projects

challenge: How to revisit the incomplete objects from the past and find a place for them in the present.

2015-01-11_164450The dirty little secret of any maker of things is the UFO—the unfinished object. We all have at least one— a project that can’t be completed but also can’t be tossed. They are hidden away for weeks, months—or in my case, ten years.

If I am really going to go “out with the new and in with the old,” I have to revisit my UFOs. And I did. To do so, I first I had give up what I had planned for this piece to be back them and think about what it could be here and now.

2015-01-11_162953What you see here is the front piece of a completely imaginary argyle sweater. I knit it in 2005—specifically, in February and March during the weeks I was in the hospital after a really bad car accident. I must have asked someone to bring me some knitting needles and yarn from home, but I don’t remember. I do remember how I spent ages planning and designing and knitting this blue and green argyle pattern in my hospital bed while I was unable to walk. I was completely determined to knit myself a sweater.

2015-01-11_163006But this sweater was never going to exist, because I had no idea what I was doing. I was a beginning knitter and ravelry did not exist (neither did YouTube). You can see how my stitches were uneven, and how the blue and green yarns are thicker than the white yarn and did not stay flat. I also had no concept of how a sweater was constructed. And even I can’t make sense of my knitting notes now, although the argyle chart is pretty solid:

2015-01-17 11.40.36

2015-01-17 11.40.49So I knit this whole pseudo pattern, and then it sat, in a bag, doing nothing. As I got better at knitting, I became convinced it was unredeemable. It was a symbol of knitting failure. That is, until I rediscovered it while cleaning last weekend. This time it didn’t remind me of failure—I looked at it and remembered how much I had loved it and how it had been a bright spot in my life during a really dark time. I also still had the borrowed staple gun in my possession, and I had an idea.

2015-01-11_1633572015-01-11_163410

In keeping with “out with the new,” I went to the thrift store. I found a large framed image there for $2.50. The important thing about the frame was that had a removable back (those little black tabs around the back are always a good sign). I brought it home.

2015-01-11_164425I then lightly steam blocked the argyle piece, stretched it across what had been the print inside the frame, and stapled it into place. With some careful wiggling, I got it back into the frame and secured with the black tabs.

2015-01-11_172355Now my long abandoned argyle sweater project is a framed and mounted work of fiber art on my wall. And I can’t even describe how much joy I feel when I look up at it. Yes, I was crazy stubborn to try to design and knit my own sweater with no experience from a hospital bed. And yeah, it’s wonky and full of flaws. But I love it— I poured myself into it and I can see the beauty in it now. What was old suddenly looks new.


Botanical Knits & Crafts, Holiday Knits & Crafts, Tweaks & Alterations

Green Knits for Spring, Remixed

Happy First Day of Spring! To celebrate the Vernal Equinox, I give you three green knits, each re-imagined in some way and ready for transitional weather:

2012-11-15 23.20.122014-03-17 11.02.262014-01-11 16.56.38

Fingerless mitts: Vancouver Fog

2012-11-15 23.21.59

This is my version of Vancouver Fog by Jen Balfour. Fun fact: this soft, blue green yarn used to be a different knit entirely. A long time ago, back in the loose knitting days I’ve mentioned before, I knit Calorimetry from Knitty’s Winter 2006 issue. It came out poorly:

DSC03420

See how loose it was in the back? It barely stayed on my head, and that was before it stretched out. I even overlapped the ends and did two buttons to try to keep it in place, to no avail.

DSC03415_medium2

Fast forward a year or so and I was planning to make some fingerless mitts for a friend’s birthday. She chose the Vancouver Fog pattern, with its beautiful cable pattern, and I just knew that this was the right yarn for the job. So I frogged Calorimetry and started remaking this muted, spruce colored worsted weight yarn into hand warmers.

Photo on 10-13-12 at 9.42 AM

I remember being disappointed that there wasn’t a gauge for this project, but I had learned my lesson about my loose knitting—so instead of the recommended size 7 needles, I used size 3! I know! I also cast on 4 fewer stitched than recommended. Yes, I went that tight! But the results were spot on:

2012-11-15 23.21.06

These fingerless mitts were a good fit, and I got to practice some cool cabling techniques. I’m quite pleased with my decision to frog the original pattern.

BEFORE
BEFORE
AFTER
AFTER

Fingerless mitts are great for those times when it’s too cool out for bare hands, but not cold enough for gloves!

Leafy Skirt or Mini Cape: Entry Level Capelet

2014-03-17 11.02.26

This is a really old project, but the loose knitting didn’t matter with this very simple garment. It’s the aptly named Entry Level Capelet by Haley Waxberg. It’s a good pattern for a hand dyed variegated yarn like this one. The color pooling was not even, but that gives it an interesting self-spiraling effect at the top. (side note: you can tell how old the photo below is by how long my hair was!)

DSCF0354_medium2

However, I almost always wear my version in a different way now—as a skirt! The yarn was just a little too scratchy to be touching my arms/neck, so I made an I-cord and wove it through the top band, then tied the I-cord at my waist. I added some leaves because, you know, I love leaves—I have no idea where I got the pattern for them, but the standard knitted leaf pattern seen here.

2014-03-17 11.04.37

I still wear this skirt fairly often—it’s great with a pair of leggings, and it’s nice when it’s just a little bit cool out.

2014-03-17 11.05.33

Sweater in Progress: Mrs. Darcy Cardigan

2014-01-11 16.56.38

My final green project is still on the needles! It’s the Mrs. Darcy Cardigan by Mary Weaver in Knits that Fit (and unlike most of my knits, this one required checking out a book at the library).With a title like that, it’s only appropriate to do a lot of tweaks to the pattern, right? It may not be obvious from the photo above, but I’m making the arms much longer than the pattern calls for to accommodate my arms and shoulders. I wish I had known before I made these that to get the true twisted rib, others knitters knew to p1 to back on the wrong side, because the pattern doesn’t indicate this and the ribbing on the cuffs won’t look as sharp as it could.

2014-03-19 22.19.10

I’ve since moved on to knitting the body. You’ll have to forgive the blurry action shot here, but at least it captures the true green of the yarn! (It’s Cascade 220, in, you guessed it, Spring Green.) I decided that since I have a long torso that is quite wide at the top, I’d use ravelry user wakenda’s modifications to get a gentler slope on the cardigan’s v neck, which I think will still be quite striking.

2014-03-19 22.19.40

I’m always a little hesitant to blog about my works in progress, but this partway knit green cardigan is too verdant not to share, and cardigans are great for spring weather. Hopefully this post will inspire me to finish it soon!

*bonus postscript announcement* If you read this far, you might enjoy the fact that I recently added categories to the blog, and then went back and retroactively categorized every past post! I created the categories based on what I seem to write about most, so you can find similar posts without having to scroll through past years.

Botanical Knits & Crafts, Quick Knits & Crafts

Leafy washcloths

Greetings. You’ll have to forgive the lack of posts over the summer, but teaching my first college class did not give me a lot of extra time for blogging. I did, however, finish some crafts! I’ll need to find someone to help my photograph some of the more wearable ones, but in the meantime, I give you three leaf washcloths:

IMG_2409


It came to my attention earlier this summer that I only own three washcloths, and one of those was slowly disintegrating. As you can imagine, they were always dirty. The easy solution would be to buy  a new pack of washcloths at the store. The knitter’s solution, however, was to make some in a cool pattern.

IMG_2410IMG_2412

If you’ve read other posts on this blog, you may have noticed I have a penchant for leaves. Last year I made a gray leaves shawlette scarf, a pair of peacock colored fern lace socks, and I even painted leaves on the square bowls I made in ceramics class. So of course, when I found a leaf shaped pattern for washcloths, it was my first choice.

This were a pretty easy knit—it required some attention, but I was able to watch a movie while making them once I got the hang of the pattern.  They curl a bit even after blocking—and I’m not sure why the orange leaf turned out larger than the rest! I used the same Bernat Handicrafter Cotton Solids & Denim yarn that I used for the washcloths, dish towels and pot holders that I made for Christmas gifts last year. I ordered a few balls since then because I was running low on some of the colors I liked, but I didn’t end up using them all.

IMG_2408IMG_2407

As you’ll notice, the leaf washcloths look right at home in my bathroom, where I already have a leaf print shower curtain and leaves on the bathmat. Yay for serendipitous consistency!

The leftover cotton yarn from this and my earlier projects will probably going into the making of this yoga bag pattern, since I think it would be a great use of a bunch of odds and ends to make some colorful stripes. Hopefully that will be yet another quick knit.


Botanical Knits & Crafts

Gray autumn leaves: a shawlette scarf

I finished my other leaf-themed knitting project: Saroyan, the scarf-ish shawllette!I’m pleased with how this project came out. It’s somewhere between a tapered scarf and a shawl, which is great because I didn’t quite know what I wanted. I just wanted leaves.

My earlier hunch that light gray would be a good color for this pattern ended up being correct— the leaf edge stands out really well.

 The only modifications I made were adding two extra repeats in the middle section to make it a wee bit longer. I definitely made some small errors in a few places, but they’re not visible unless you are me so I will spare you the details.

These photos come from last weekend, when my friend and I took a walk around Village Homes, meandering among the scraggly late summer gardens and early fall fruit trees. It was a lovely autumn day.

My friend Sarah was nice enough to take a these photos of me wearing Saroyan. Which was awesome. (This must be what an actual photo shoot for a knitting magazine feels like).

As it turns out, all of her candid shots (when I did not think she was taking a photo) were way better than the ones where I was posing!  Well, except for this one I took, which I mainly include so you can see the leaf earrings I was wearing. That is all.


Botanical Knits & Crafts, Quick Knits & Crafts, Tweaks & Alterations

Socks, Bows and Cuffs

Socks!

I finally finished my fern lace socks! Just in time for Autumn too. Of course, it’s still in the 90s here, so it’s not quite sock weather. I’m hoping that will change soon.

It is really difficult to photograph one’s own feet wearing socks…let’s just say you need some flexibility. Anyway, I’m quite happy with how they turned out. It’s difficult to do justice to this color, which a fellow knitter described as “peacock.” It is quite vibrant, and looks either more green or more blue depending on the light.

Overall I’m happy with the way the pattern turned out. I already wrote about the sock pattern(s) I used in an earlier post, so I don’t have a lot to add. It did take a while for me to get the hang of lace knitting, but even with the few errors I know are in there, I think it looks great.

For me, the key to lace knitting was a) lots of stitch markers and b) patience. I broke two of my double pointed bamboo needles while making these socks before I figured out that second point.

As you may have noticed, I changed the top banner of my blog to knitted pumpkins in honor of Fall (free ravelry pattern here; I also wrote about making them last November). Since it is my favorite season, I  figured I would include two other smaller knitting projects that I’ve made in appropriately autumnal colors.

Bows!

Around this time last year, I saw the pattern for this moss stitch bow headband on A Common Thread and decided it was the perfect quick project. I also liked that it would give me a chance to use the very small amount of burnt orange yarn I had in my stash.

I think if I made it again I’d make it a little smaller—I have short hair and this is a big bow. But I do like that I can shape the bow to have it either lay flat against my head or stand up a bit.

The band does not show up as well with wavy hair, but there are actually three individual strands made with a crochet hook. You can either scrunch them together or separate them out depending on your preference.

Cuffs!

I really thought I posted this project before, but it looks like I didn’t —which is fine, because the colors are the most fall like of all.

This is the Pretty Twisted pattern  from Knitty’s first fall 2011 issue (free, of course). I made the “framed” version (the light teal one in their photo) and finished it with a two-toned wooden button.

This was a great way to use up a small bit of sock yarn in colors I liked. The linen stitch does a great job of lying flat and looking bracelet-like. However, I think next time I would use a yarn that is not so marled, because that kind of detail seems to get lost in the stitch.

I think the idea of a twisted loop pulled through a hole and then over the button is quite clever. It’s a nice detail without a lot of added work.

Sometime soon, I will post photos of other fall knitting projects—my leaves scarf (75% done), my custom fit raglan sweater (100% done, it’s just too hot to wear!) and my blue ombre cowl made from the black bean dyed yarn (95% done—it was finished but blocking it messed up the shape so I need to make a few adjustments)!


Botanical Knits & Crafts

Glazed and confused: my first attempt at ceramics

This summer, I tried my hand at a new craft: ceramics.

I learned quite a bit along the way, but the main thing I learned was patience. This art form clearly takes a lot of time, skill and effort to master, not to mention a real artist’s eye if you want to make something beautiful. For noobs, that means a lot of flops. But the flops sometimes turn out to be endearing in their own way. If you can let go of perfectionism (and you must), it can even be kind of fun.

The specific class I took at the Craft Center was titled functional handwares. Translation: no wheel throwing, just handbuilding, and making things that are useful, not just decorative. I still have a few items to finish up, but here are the things I made, in the order I made them.

First batch

medium teal bowl:

This is a pinch pot—made, as you could guess, by pinching a ball of clay into a shape. While it didn’t come out even, I’m happy with the size of it, and I like the base. I also was pretty pleased with the glaze color for these two.

small teal bowl with leaves:

This is a coil pot, made by rolling out long thin pieces of clay and coiling them on top of each other to form the object. I did not like this technique as much—I didn’t much care for the rolling nor the blending required to make it. I did experiment with carving a leaf design into this pot, which you can just barely see.

winter tree:

Ok, so this wasn’t actually something I learned in class. Our instructor was gone during the second week, so I came into the studio, on my own. I saw that someone had built a little clay tree, and I basically copied it, albeit poorly. However, the cool thing about it is that I found a way to make it functional as a jewelry holder—right now it is on my dresser, with rings on its branches. I hope I get a chance to try this cool brown glaze again!

small periwinkle mug:

Ok—not my best work but I’m showing you anyway. This was the first mug I built, using slabs rolled out with a slab roller. I underestimated the size here—I’m told there is a 15% size shrinkage when you fire items, which made this mug child sized. It was also the first thing I ever glazed, and the glaze I chose was super thick–you can see the line where it overlapped when I dipped it.

large blue mug:

On the other hand, this mug is one my favorite things I’ve made so far. It felt gigantic when I built it but with the shrinkage it turned out to be a good size. The lines I carved out of the body are subtle but give it a nice shape, and the handle and rim on this one are less wonky. Also the glaze turned out great—a lovely color and the right thickness. I am drinking tea out of this mug right now.

“yellow” woodgrain impression bowl:


This was my first attempt at three things—shaping on a plaster mold, using a clay stamp(?), and underglazing. The shaping went ok except for the corner that droops. Keeping all the square shape does kind of make this look like an ashtray though. The clay stamp or whatever it is called turned out great—I love the woodgrain. However, the yellow underglaze I used did not turn out at all. Maybe I just put it on to thin? I used a clear glaze over it and really it just looks white. But I like it anyway.

blue and orange woodgrain pet bowls:

Combining a lot techniques here, I tried to make some short, thick bowls about the size of a food and water dish for a cat (or small dog?). I used the underglazes again here, and discovered that the colors come out very differently. I was not expecting such a deep blue or such a pale orange. Nevertheless I like them. Now I just need to find someone with a pet to give them to who doesn’t mind their homemade quirks, as my cat has an automatic feeder and waterer (we are both happier that way).

square bowls with leaves:

These are probably my favorite thing I’ve made so far. I did the wider one first, trying to get the hang of the technique—you have to measure and cut a square piece precisely, and then you have to cut kite shaped pieces out of the corners, then you reconnect the corners. Getting them to turn out even takes some skill.

The leaves are my favorite. I painted them before the first firing, then scraped out the design in the middle. The clear glaze lets the design shine through.


blue yarn bowl:

This is another piece that didn’t turn out as planned, and still worked great. Also, I’m combining two crafts here!

If you’re not familiar with the concept of a yarn bowl, the basic idea is this—when you pull from a ball of yarn as you are knitting (especially if it is not a center pull ball), the ball is going to roll around all over the place. However, if you can keep it stationary, knitting can commence without said ball rolling (sorry, yarn chasing cats of the world). A bowl with hole or a cutaway to pull yarn through provides this function.

So my yarn bowl turned out a bit, well, funky. First, the cut out part dried in an awkward way, separating at an angle. Then I was in a hurry to glaze it because they were doing the last glaze firings before closing the craft center for three weeks, and the blue glaze had not been stirred in many days. The result is a really swirly uneven glazing. If I’d know what to do then, I probably just could have dipped the not-well-glazed half into the glaze again. But since this is not a bowl that I will be holding or using for food items, I don’t really mind it. It even looks kinda cool, with the right mindset.

I doubt that ceramics will become a new craft in my life in the way that knitting is—after all, it takes a lot more equipment (kilns!) to actually do it. But it was a really fascinating artform to learn—and I wouldn’t mind trying my hand at a wheel eventually. After I find places for all these ceramic objects in my apartment anyway.


Botanical Knits & Crafts, Nerdy Knits & Crafts, Quick Knits & Crafts, Tweaks & Alterations

Olympics knitting: ferns, leaves, and a pirate mouse

I have been watching the 2012 London Summer Olympics most nights these past two weeks, and despite the annoyances of the NBC selective and delayed broadcasts, it’s been pretty riveting. It’s also been a good time to get a crap ton knitting done.

Some people do this officially—on Ravelry  there’s the “Ravellenic Games” group, knitters who start and finish complete projects during the Olympics. It has over 12,000 members. I do my knitting a lot more haphazardly and unofficially, but I do get some stitches done. Let me to show you.

Fern Lace Socks (50% done)


These were flying off my (admittedly tiny) needles in June and July. I’m using the Custom Toe Up Sock Generator from knitty because if there’s one thing I have learned about knitting, it’s this—when fit counts, use maths. Lots of maths. If you don’t want to do the calculations, there’s even a toe up sock pattern generator that will do it for you. All you have to do is input your foot measurements, needle size, and stitches per inch. The result of a customized pattern is a really well fit sock:

And yes, I know, I have ridiculously high arches—I have dancer feet. Anyway, the trouble with this pattern actually came when I tried to add a fern lace stitch to the top part. After about five attempts I realized two things—the pattern was really confusing, and it almost certainly contained errors. It was from a 1970s booklet after all. So I looked around and found this alternative fern lace pattern that happened to be for a sock of the exact same number of stitches as my custom pattern. It’s not as cool looking as the original one but it is straightforward and error free:


Leafy Scarf (30% done)

This tapered scarf is called Saroyan. It’s a really excellent pattern so far—quite adaptable, simple but pretty, and an unusual shape for a scarf. I did not intend to start yet another knitting project, but I found that the lace socks were too difficult to knit while talking to anyone. Since I do work on my projects at knitting groups, I need to have something I can knit while I interact with humans. The only part where I really have to pay attention is the edge of leaves. I have a thing for leaves.

Pirate Mouse Cat Toy (100% done)

As if these two patterns weren’t enough, yesterday I had the urge to knit a cat toy. And so I did. An awesome one:

This is Captain Cat Battler, a pirate mouse cat toy. I do not know what possessed me, but when I saw it, I had to make it. It’s a quick project to knit, though sewing it up takes a little bit more time. The pattern writers have exactly the sense of humor you’d expect from people who like pirates and cats. The pattern is free, but it was designed for the Battersea Dogs and Cats Home, an animal rescue charity in London, and you can donate your knitted mouse (or your pounds sterling) to help their cats. The only change I made was to add an I-Cord tail (the original tail was just a strand of yarn…which I figured would be destroyed instantly).

I loved this pattern. But what did the resident cat, Josephine, think of it? Let’s see…

I’d say they’re pretty much best friends now. Yarrr.