Activity Knits & Crafts, Botanical Knits & Crafts, Costumes, Quick Knits & Crafts

Knitting for bikes, crafting for sheep

Ever wanted to knit a sweater for your bicycle?

Have I got the project for ewe!

2017-05-06 16.36.30 
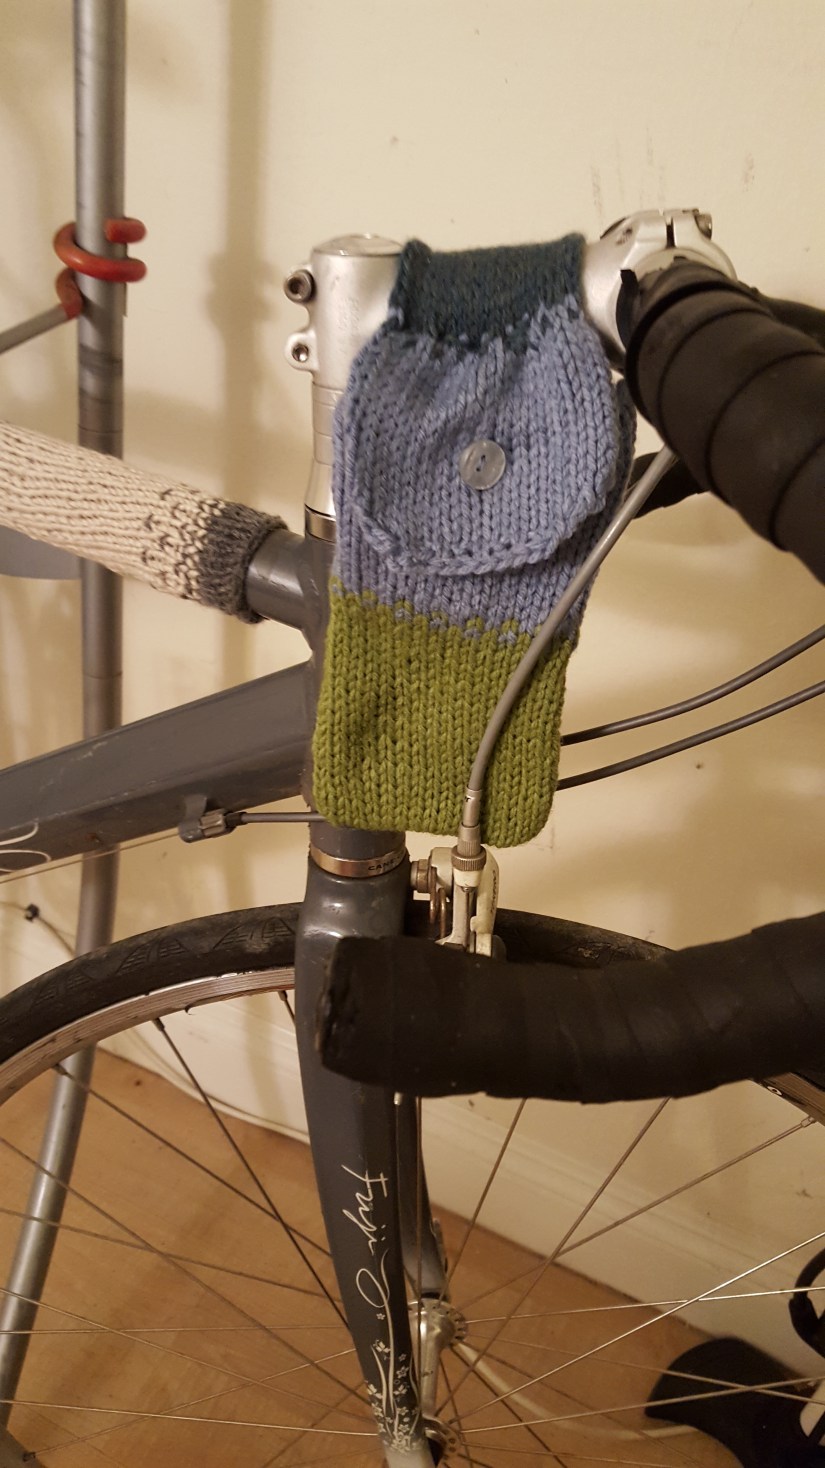
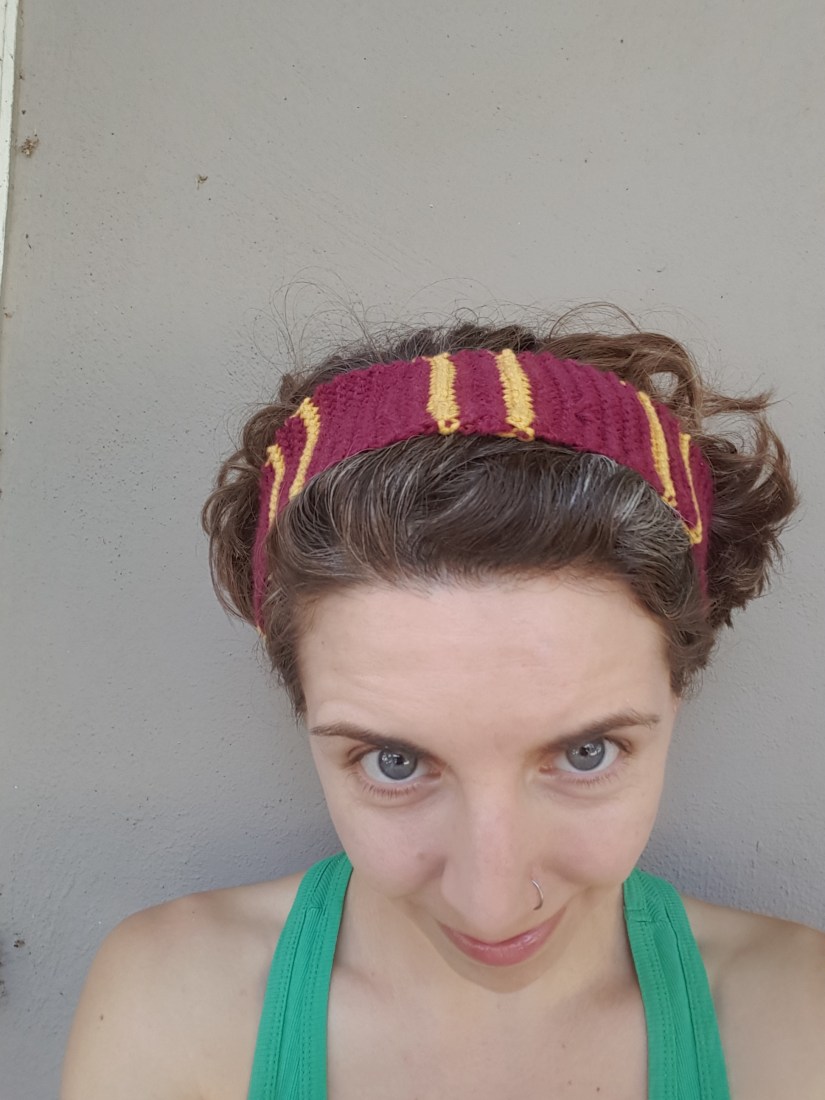
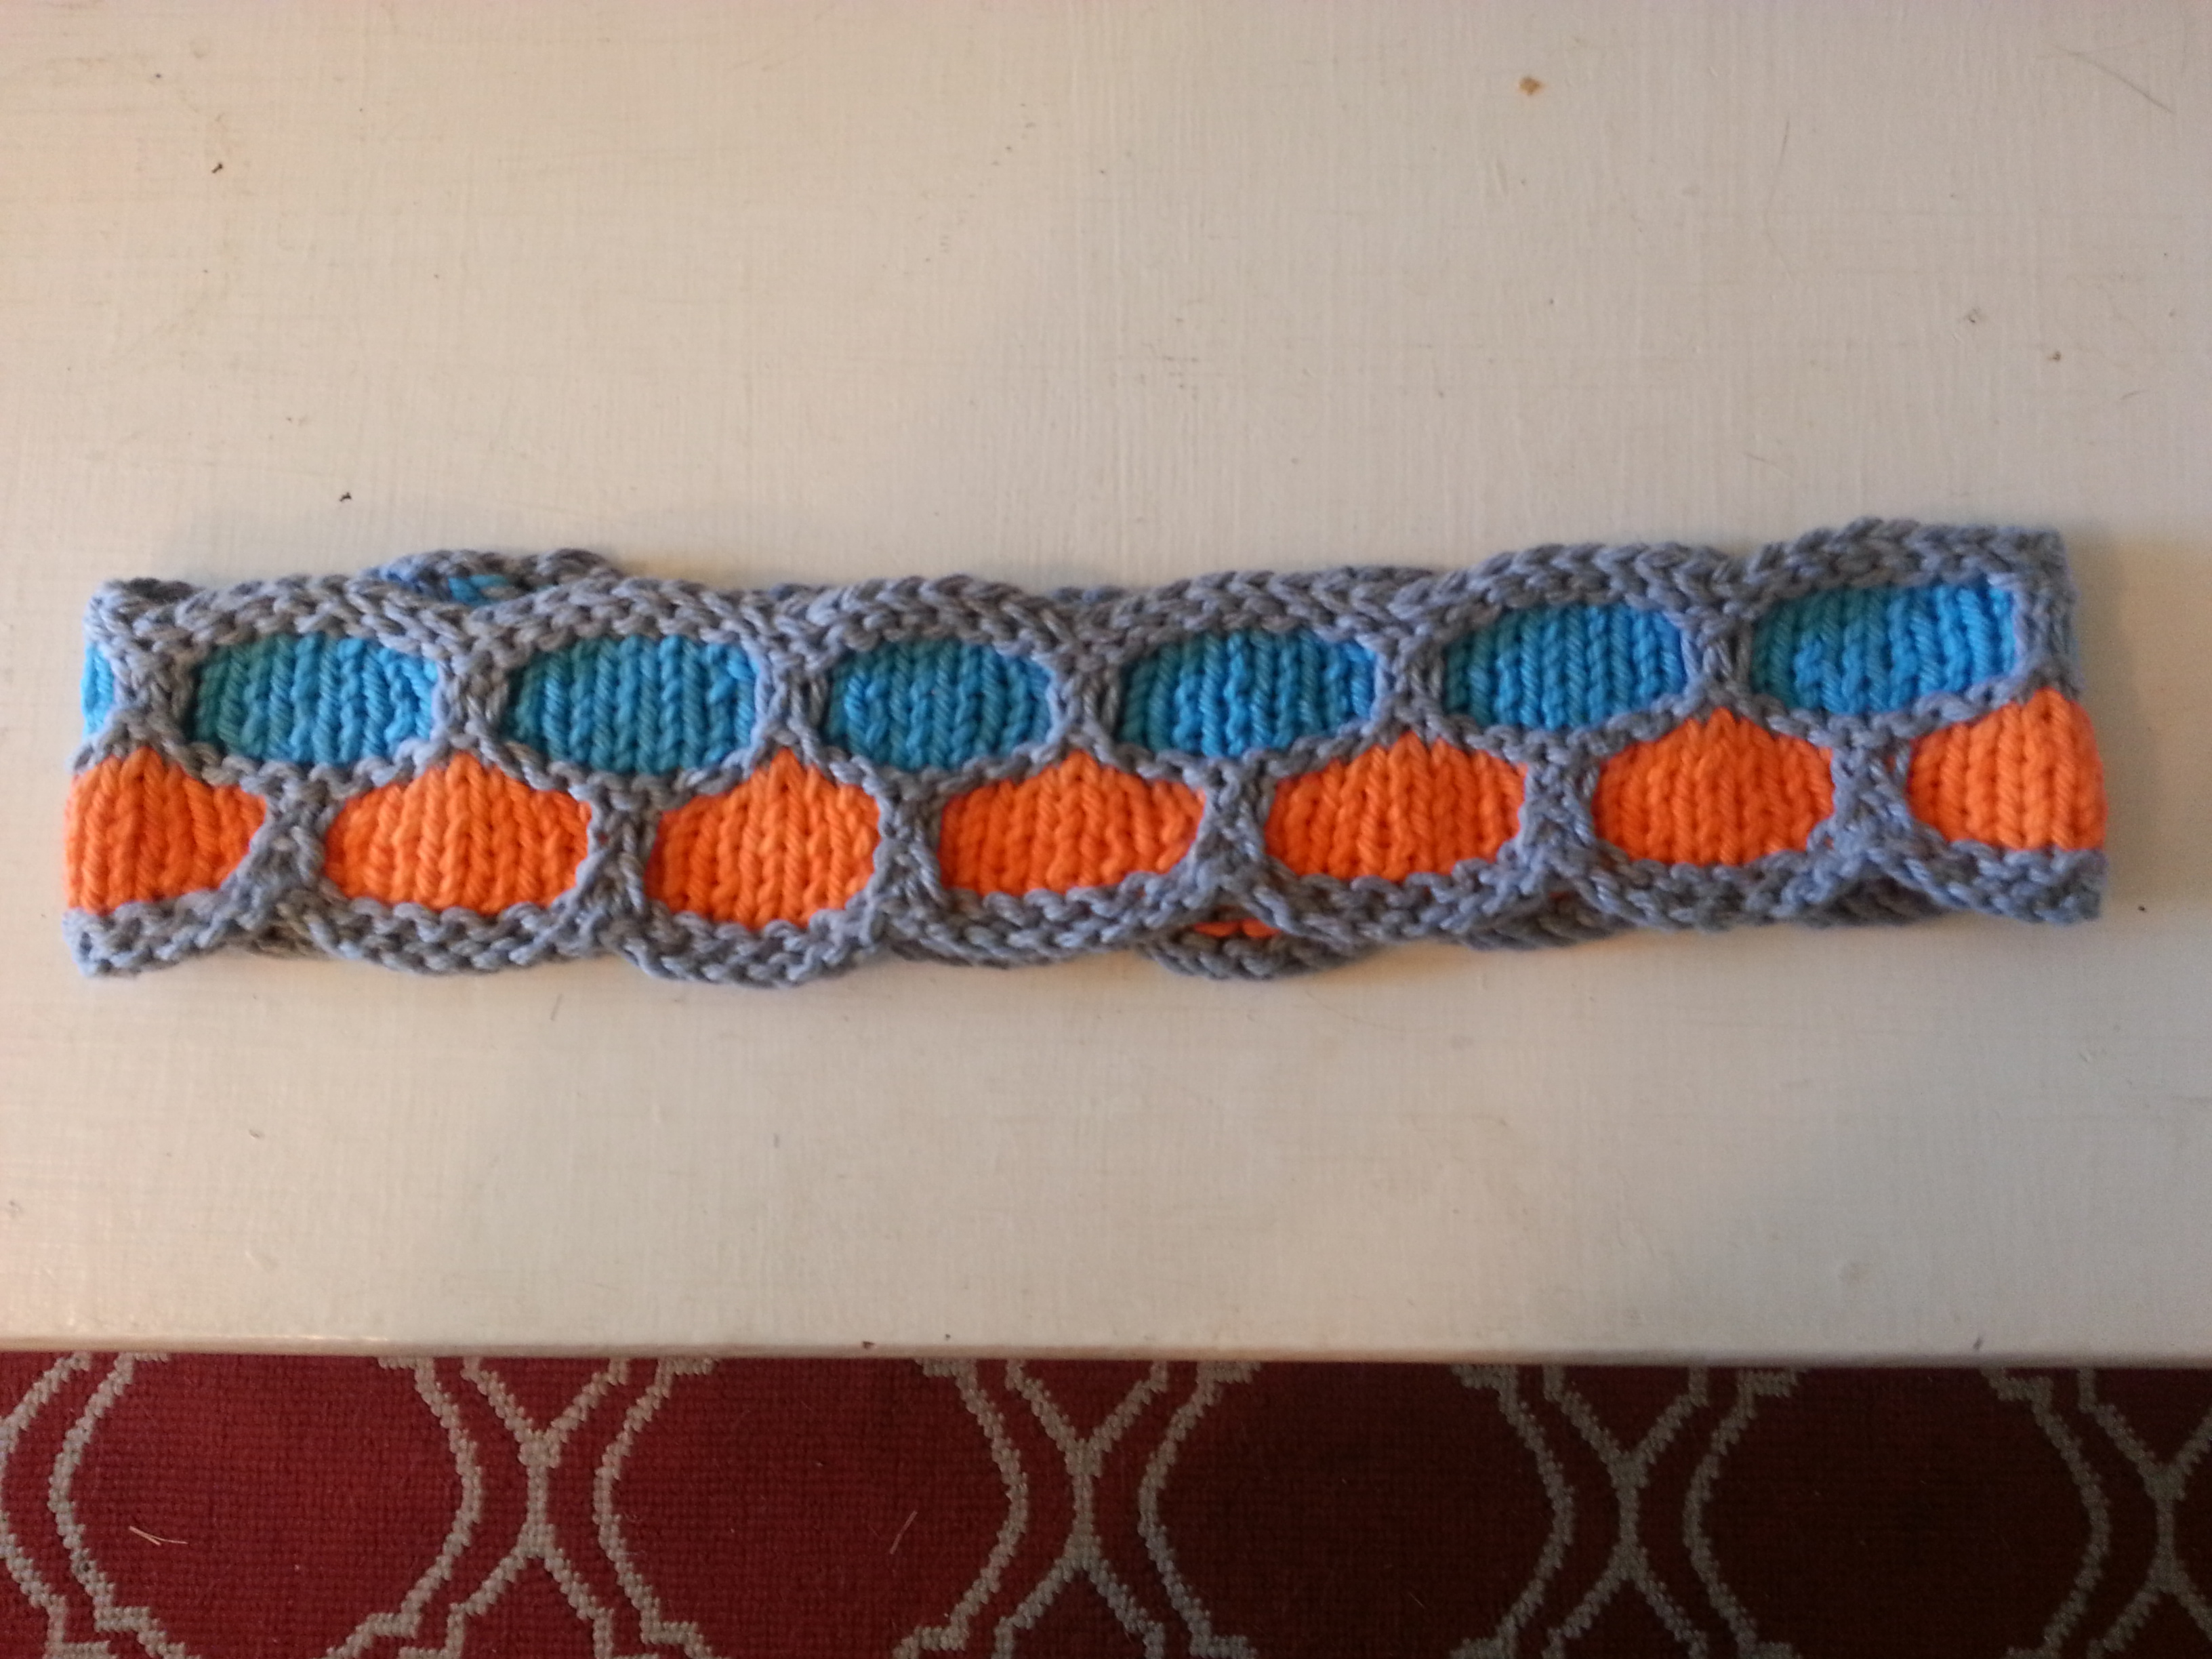
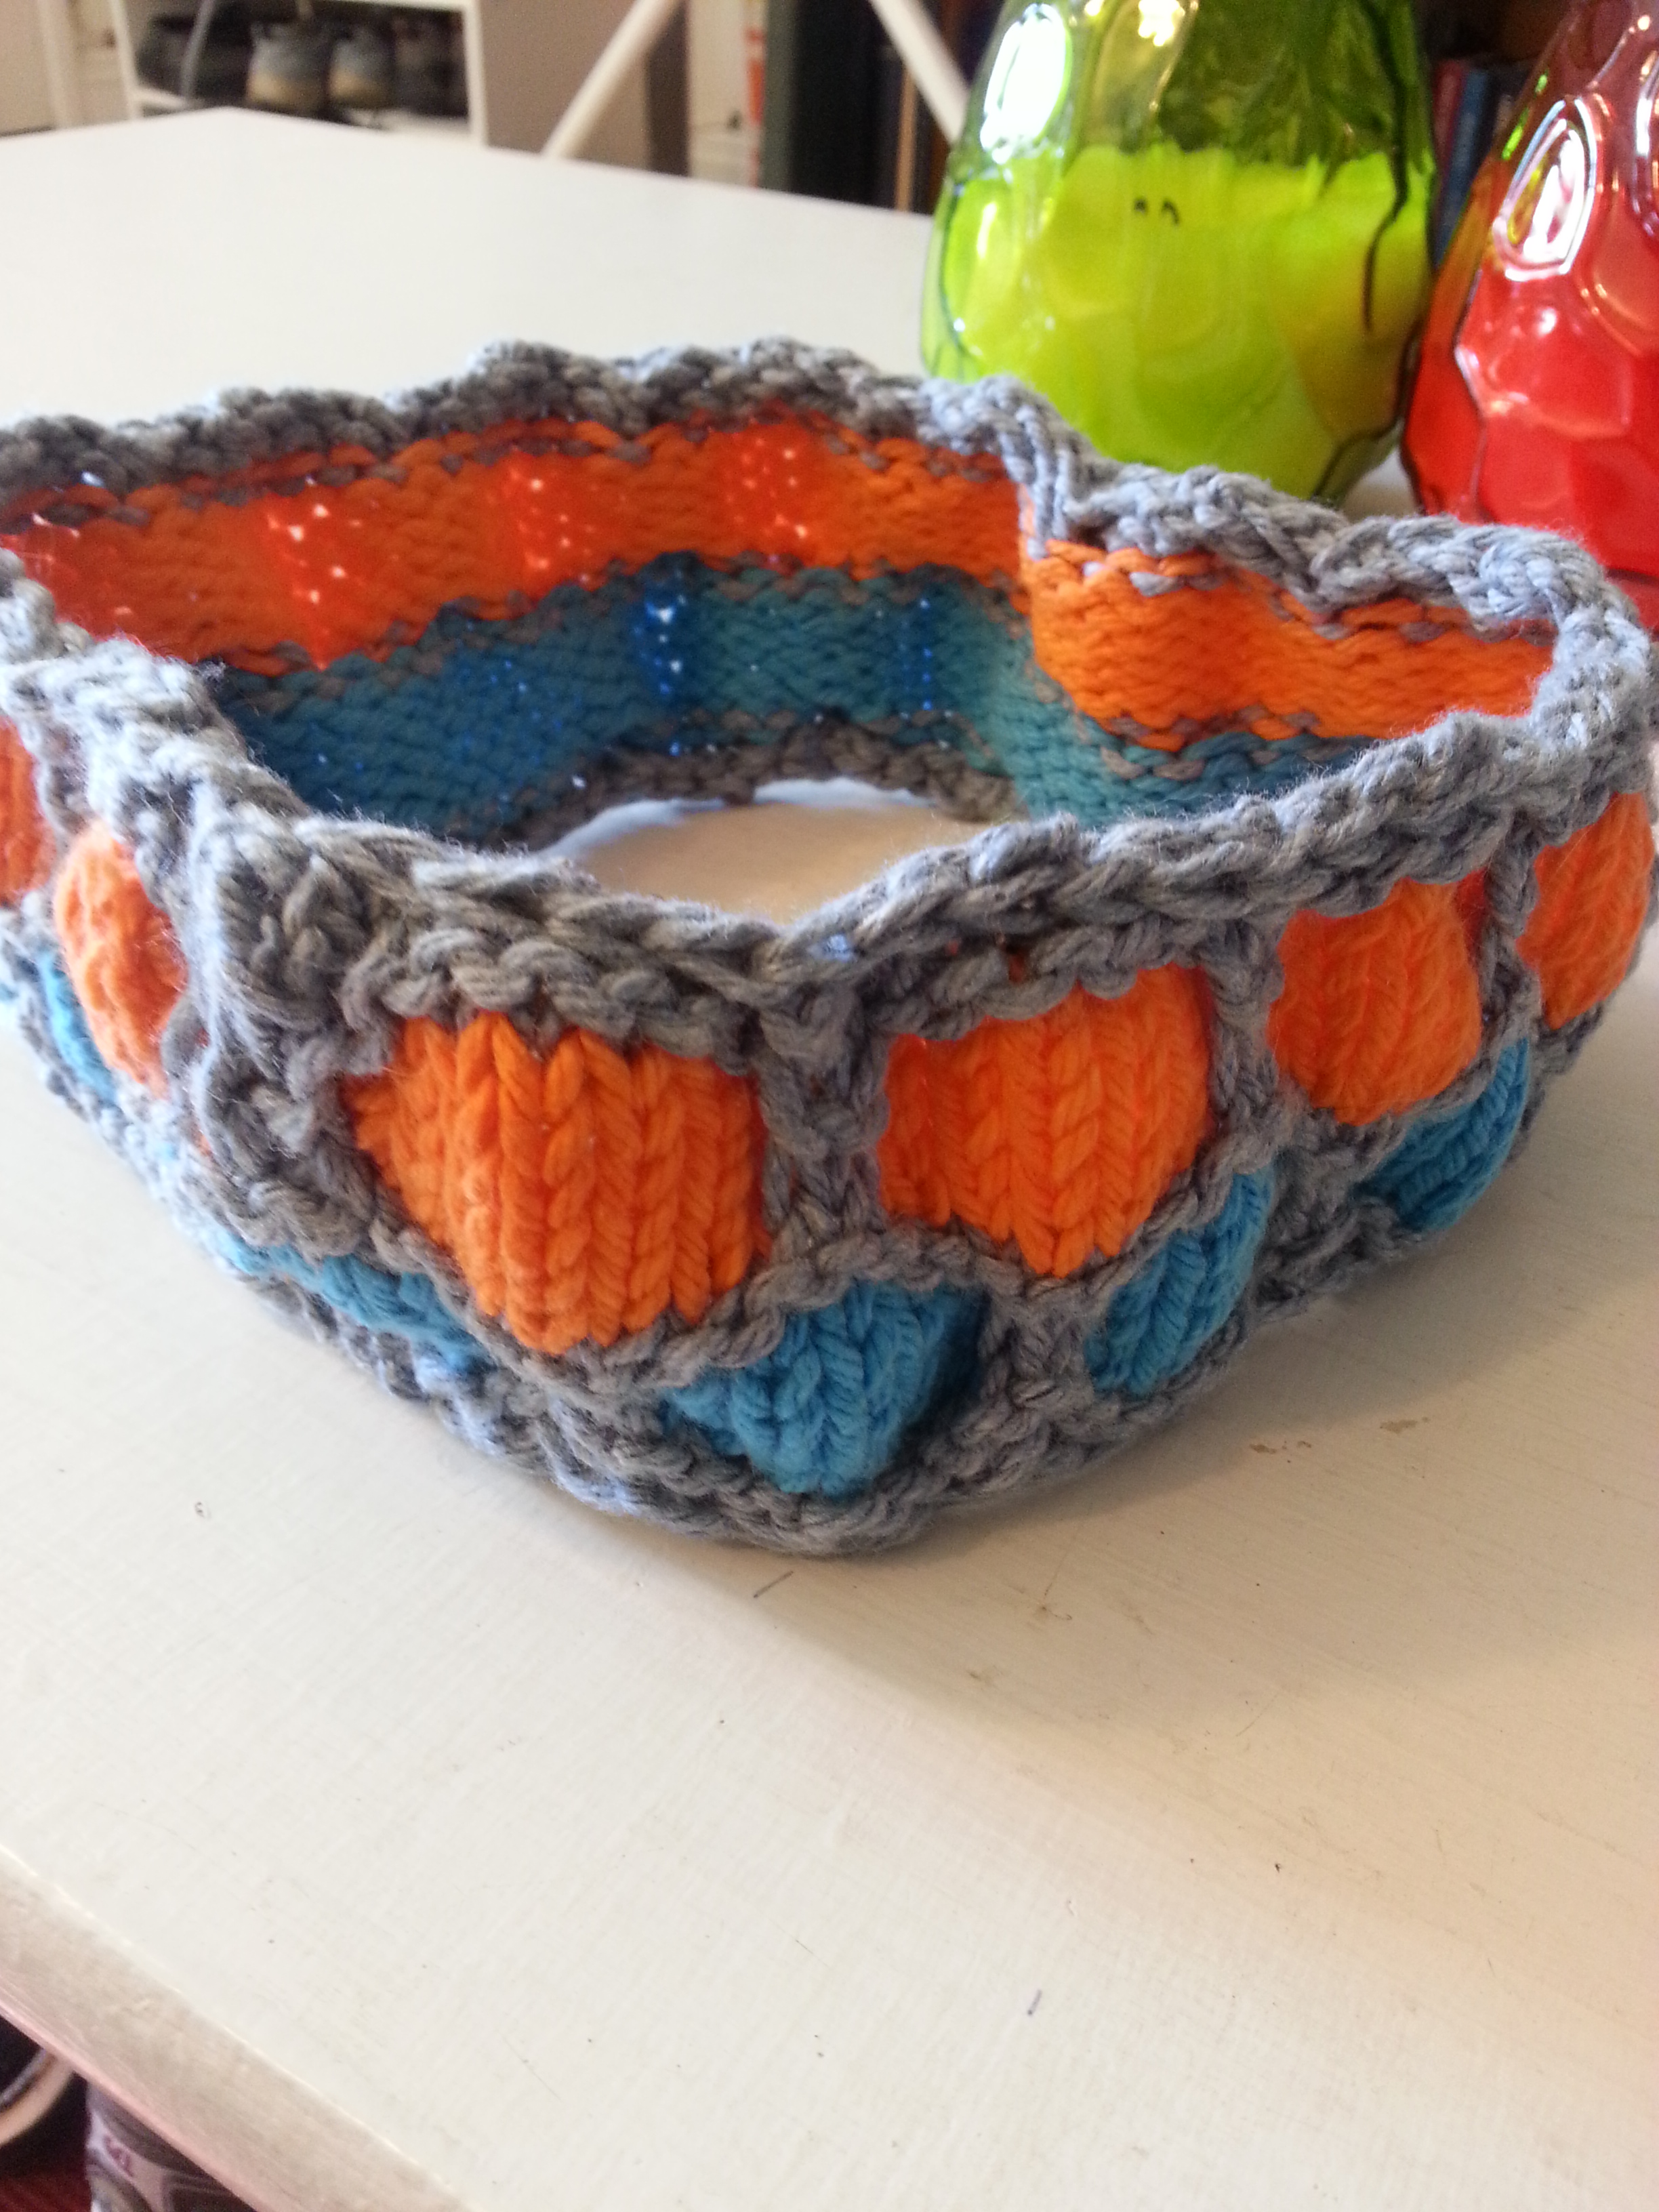
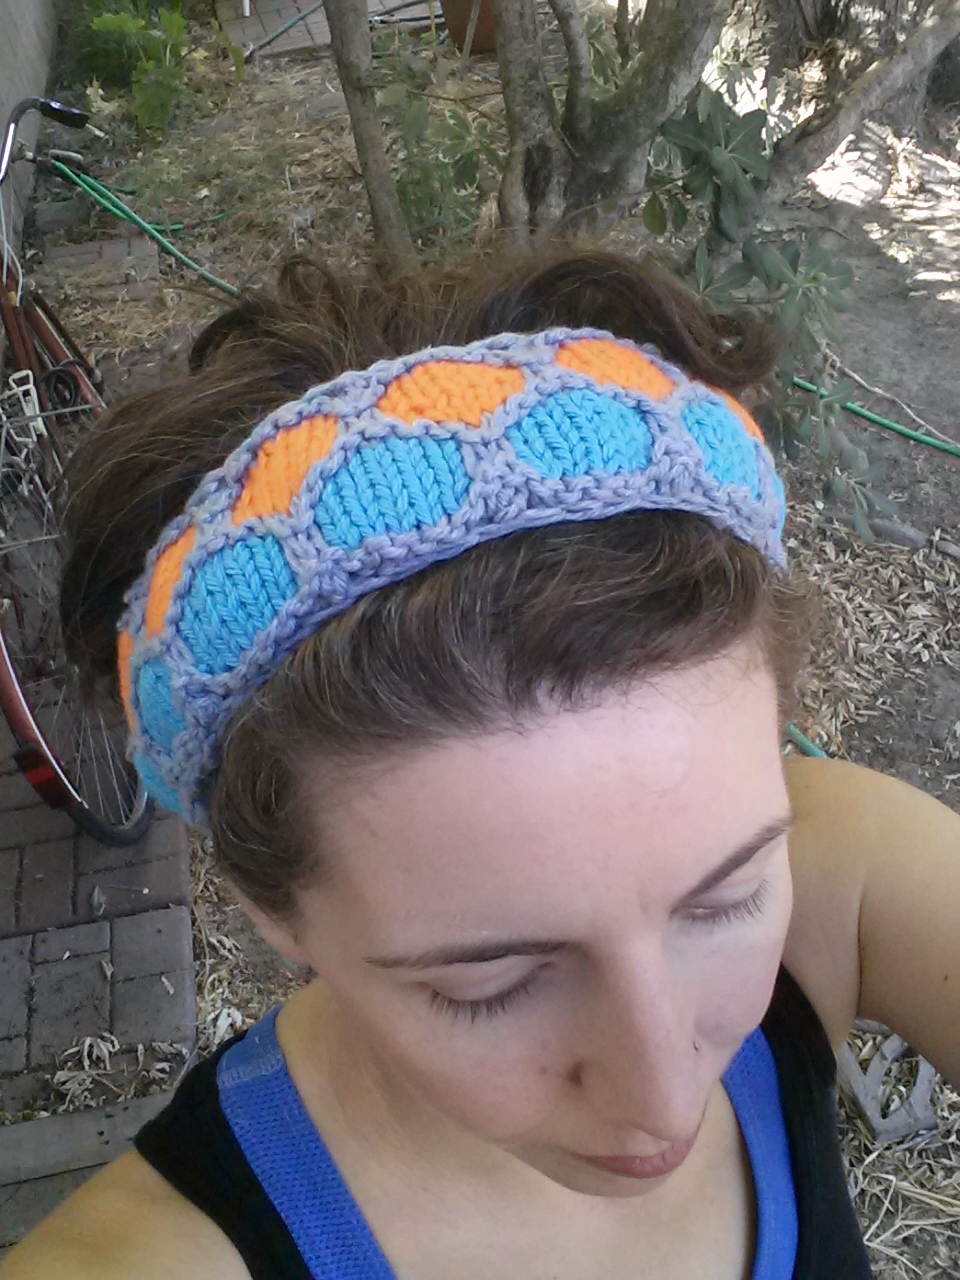
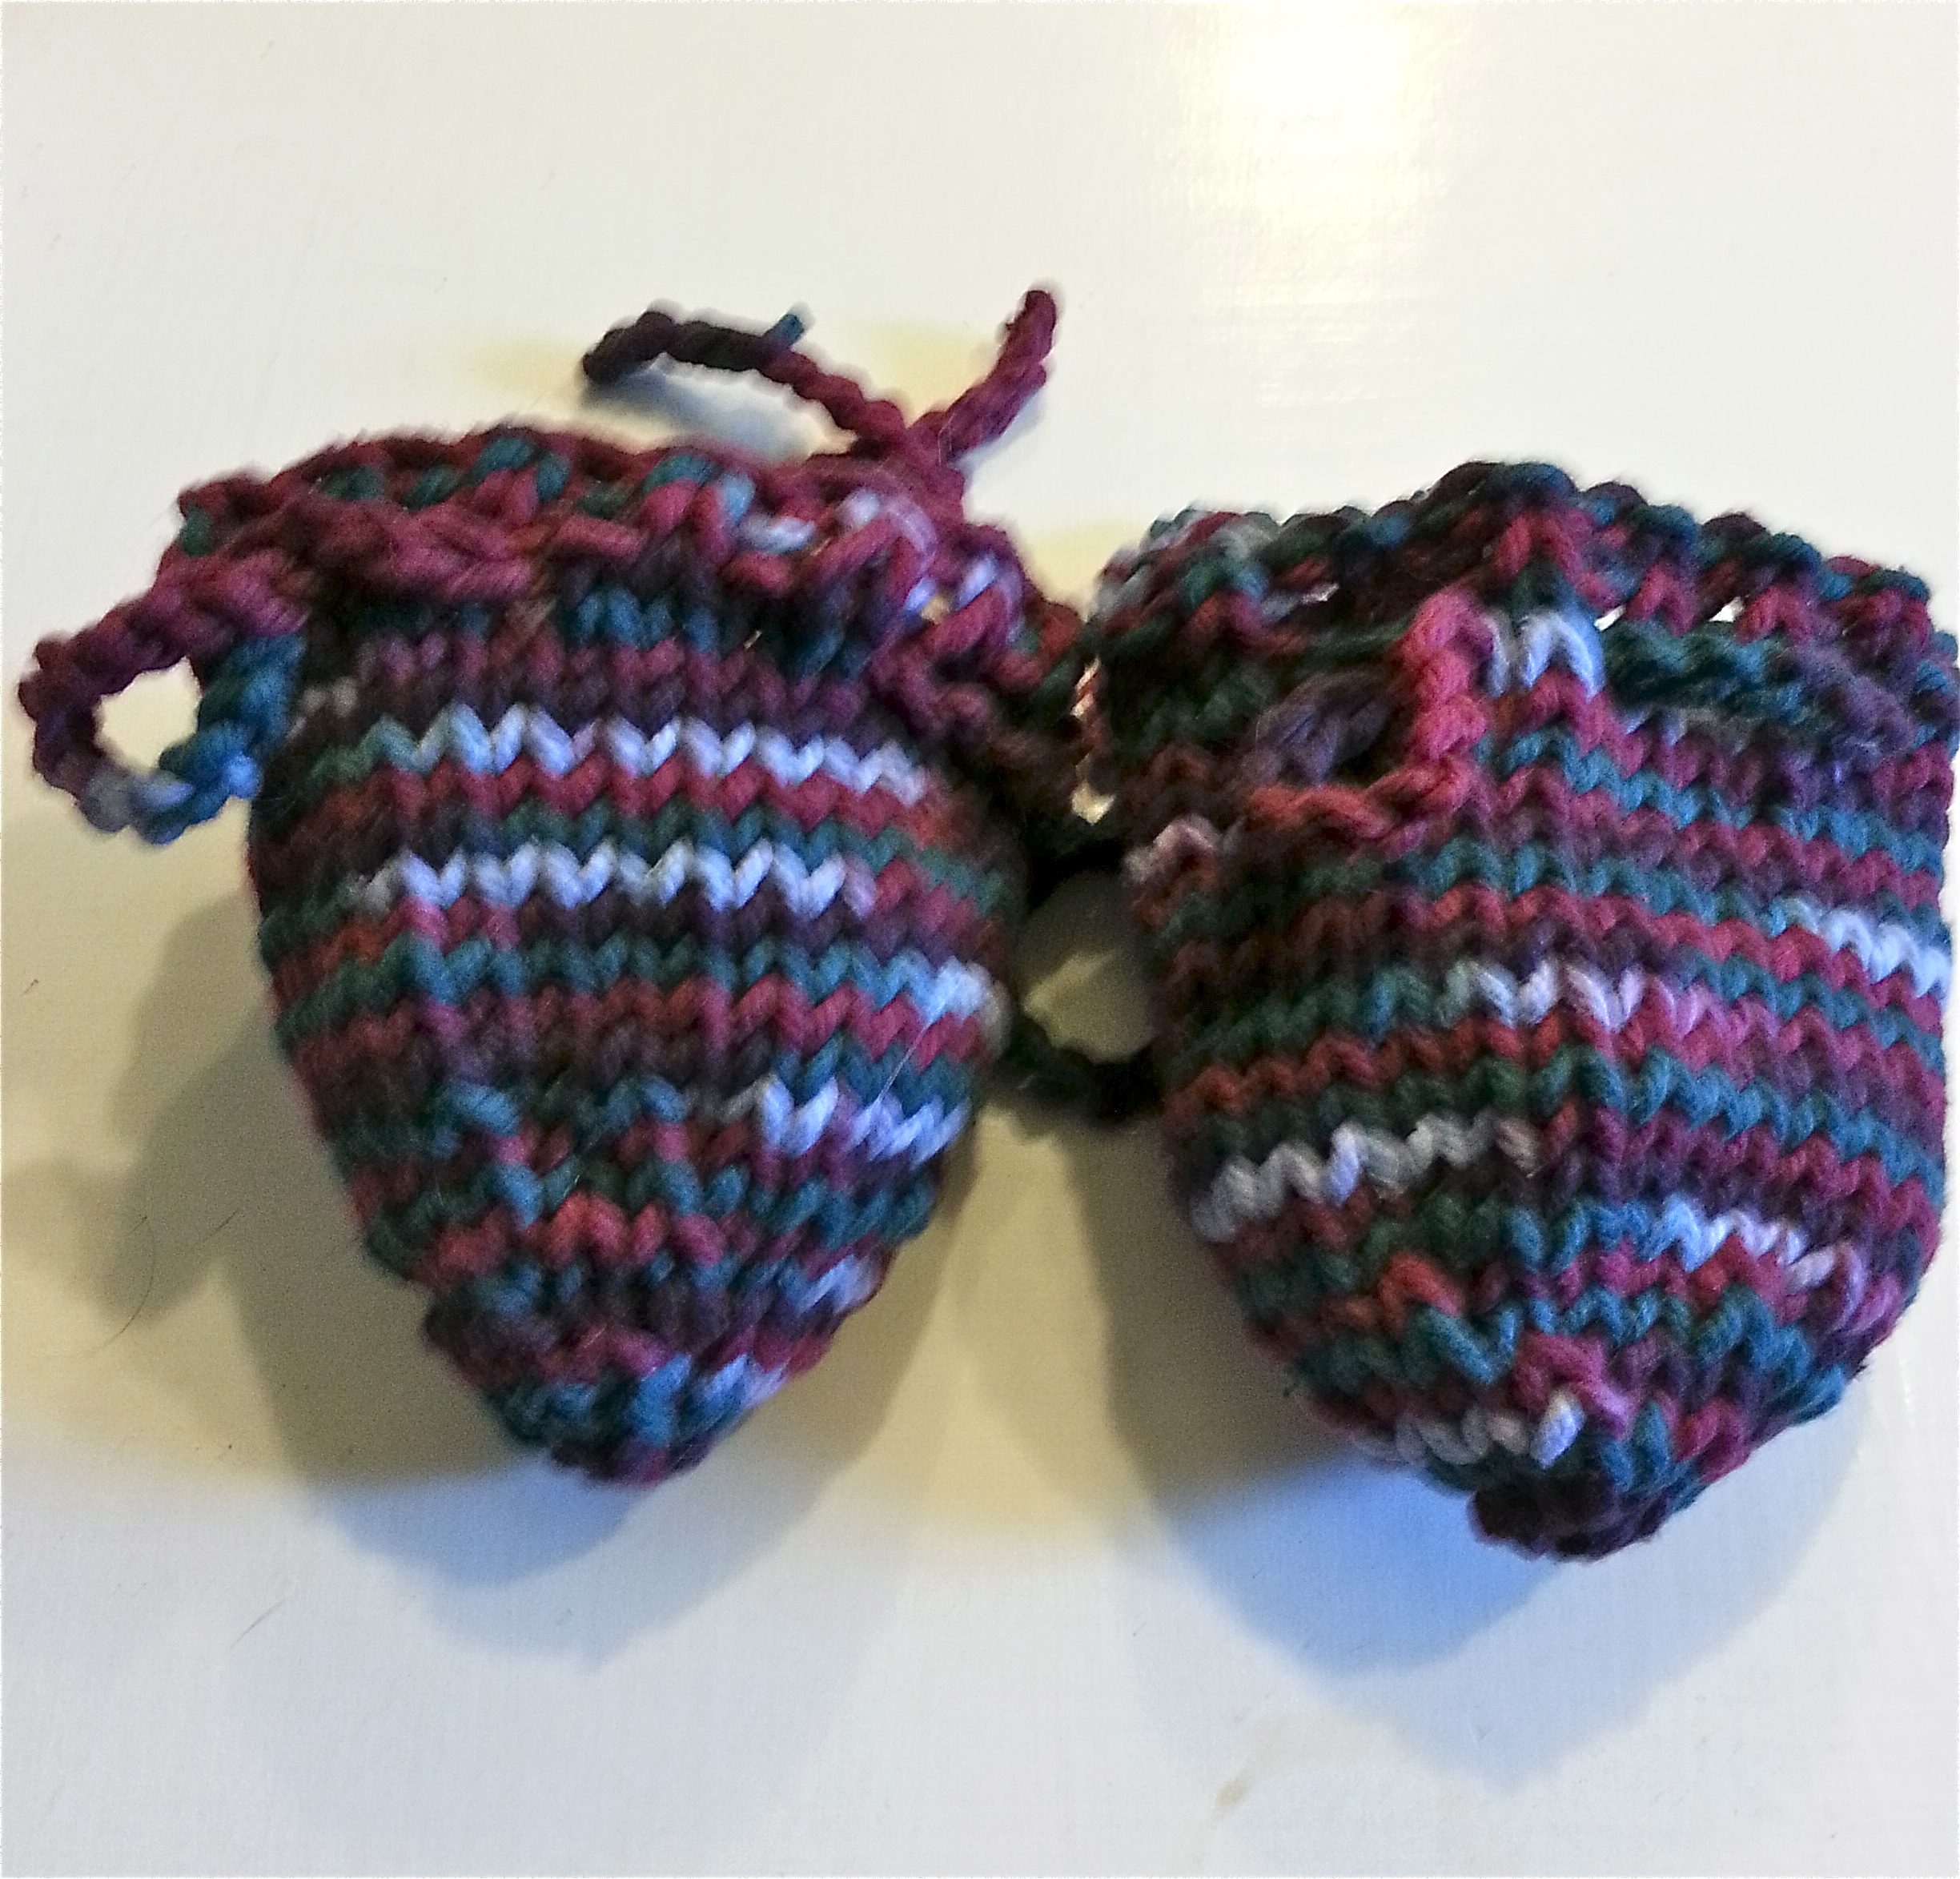
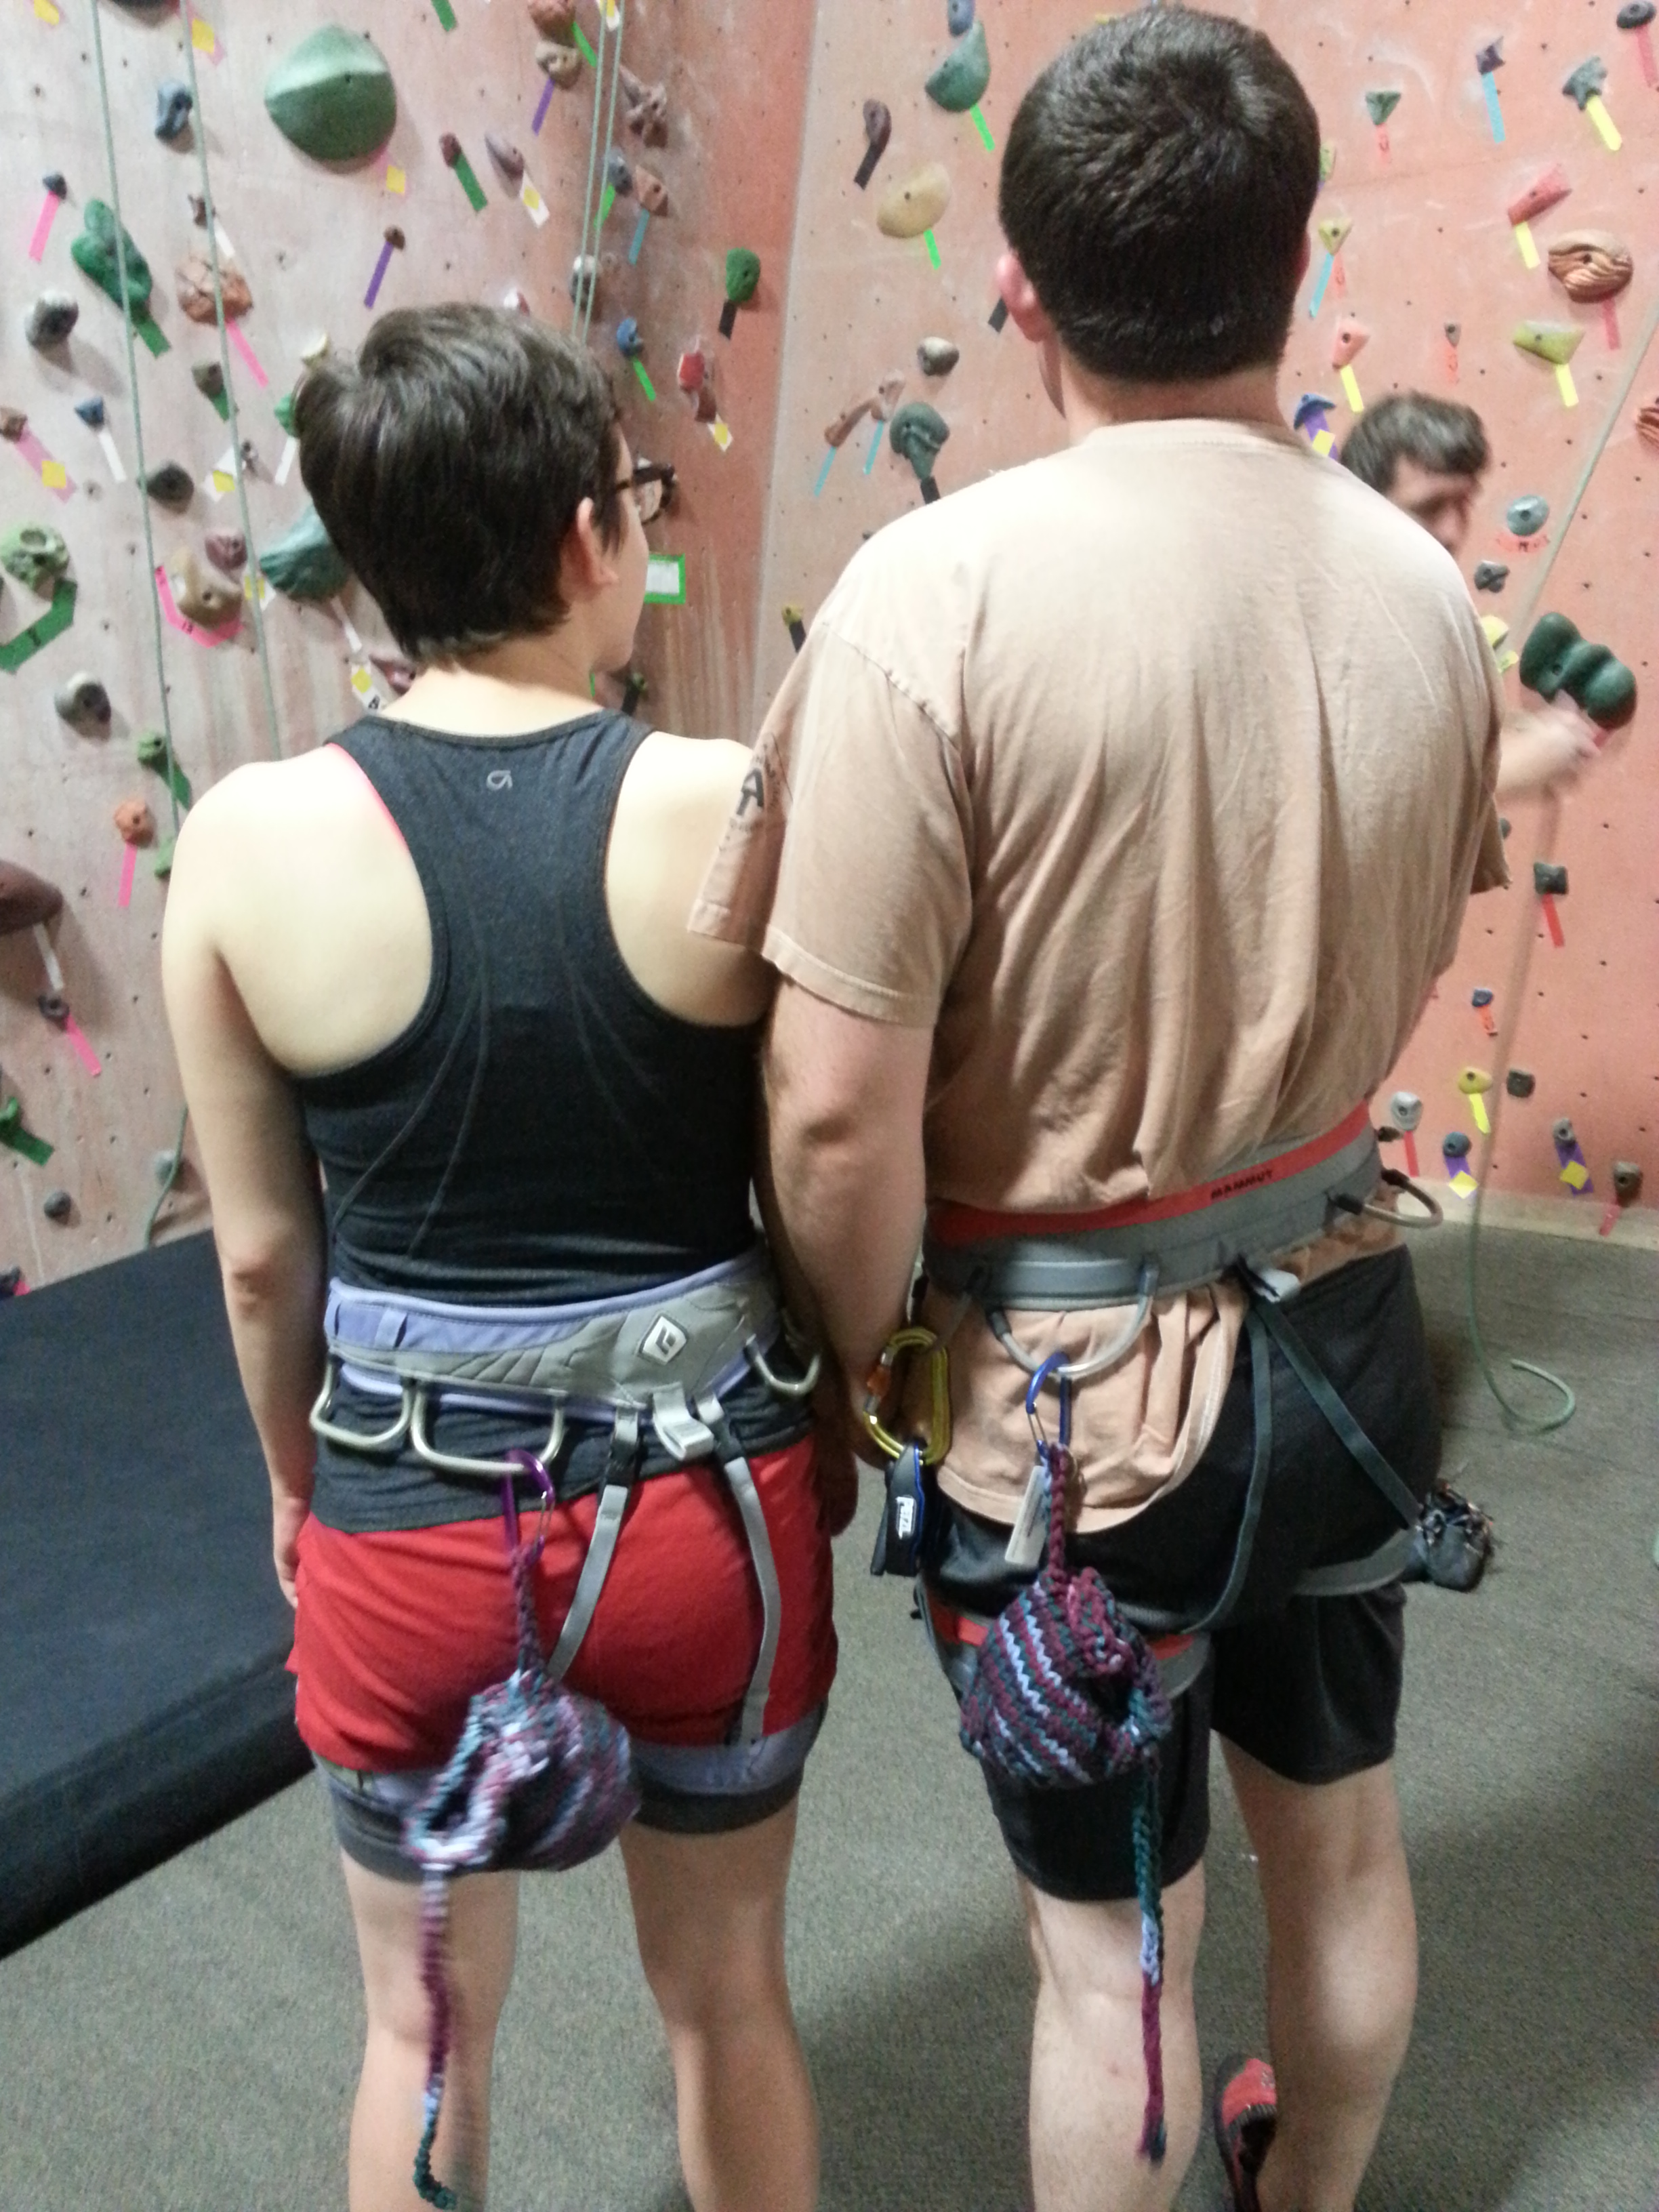
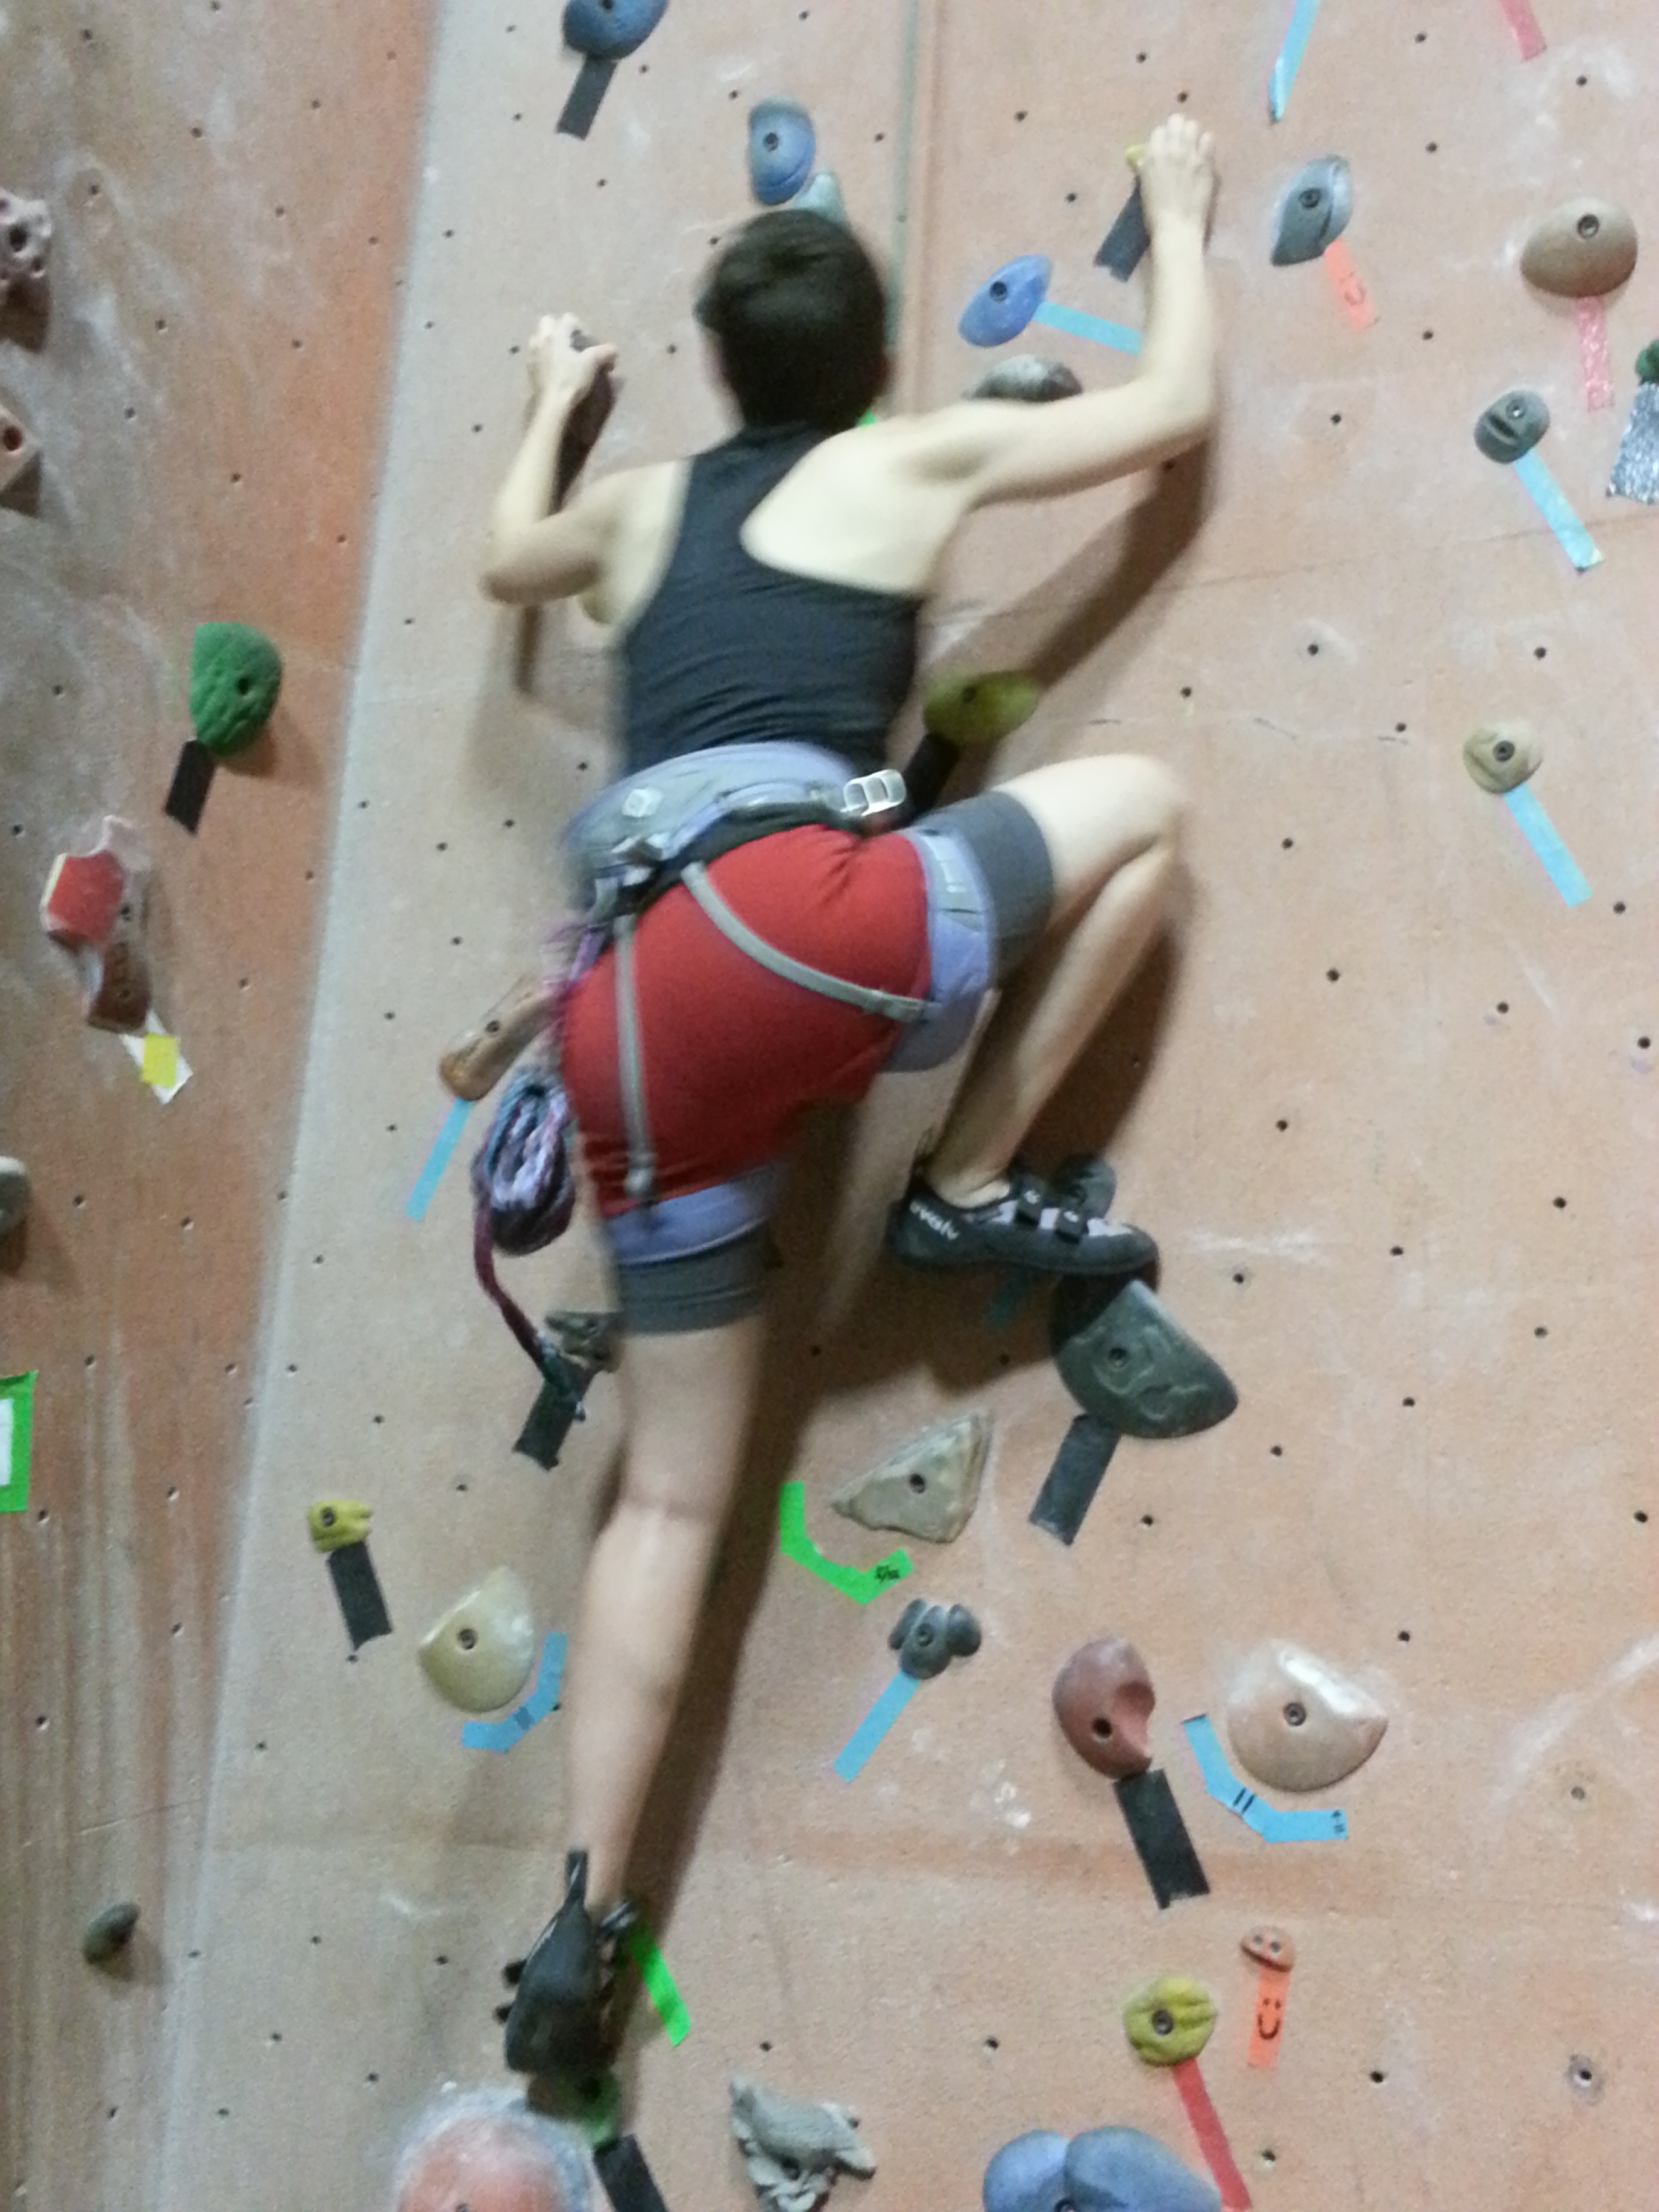
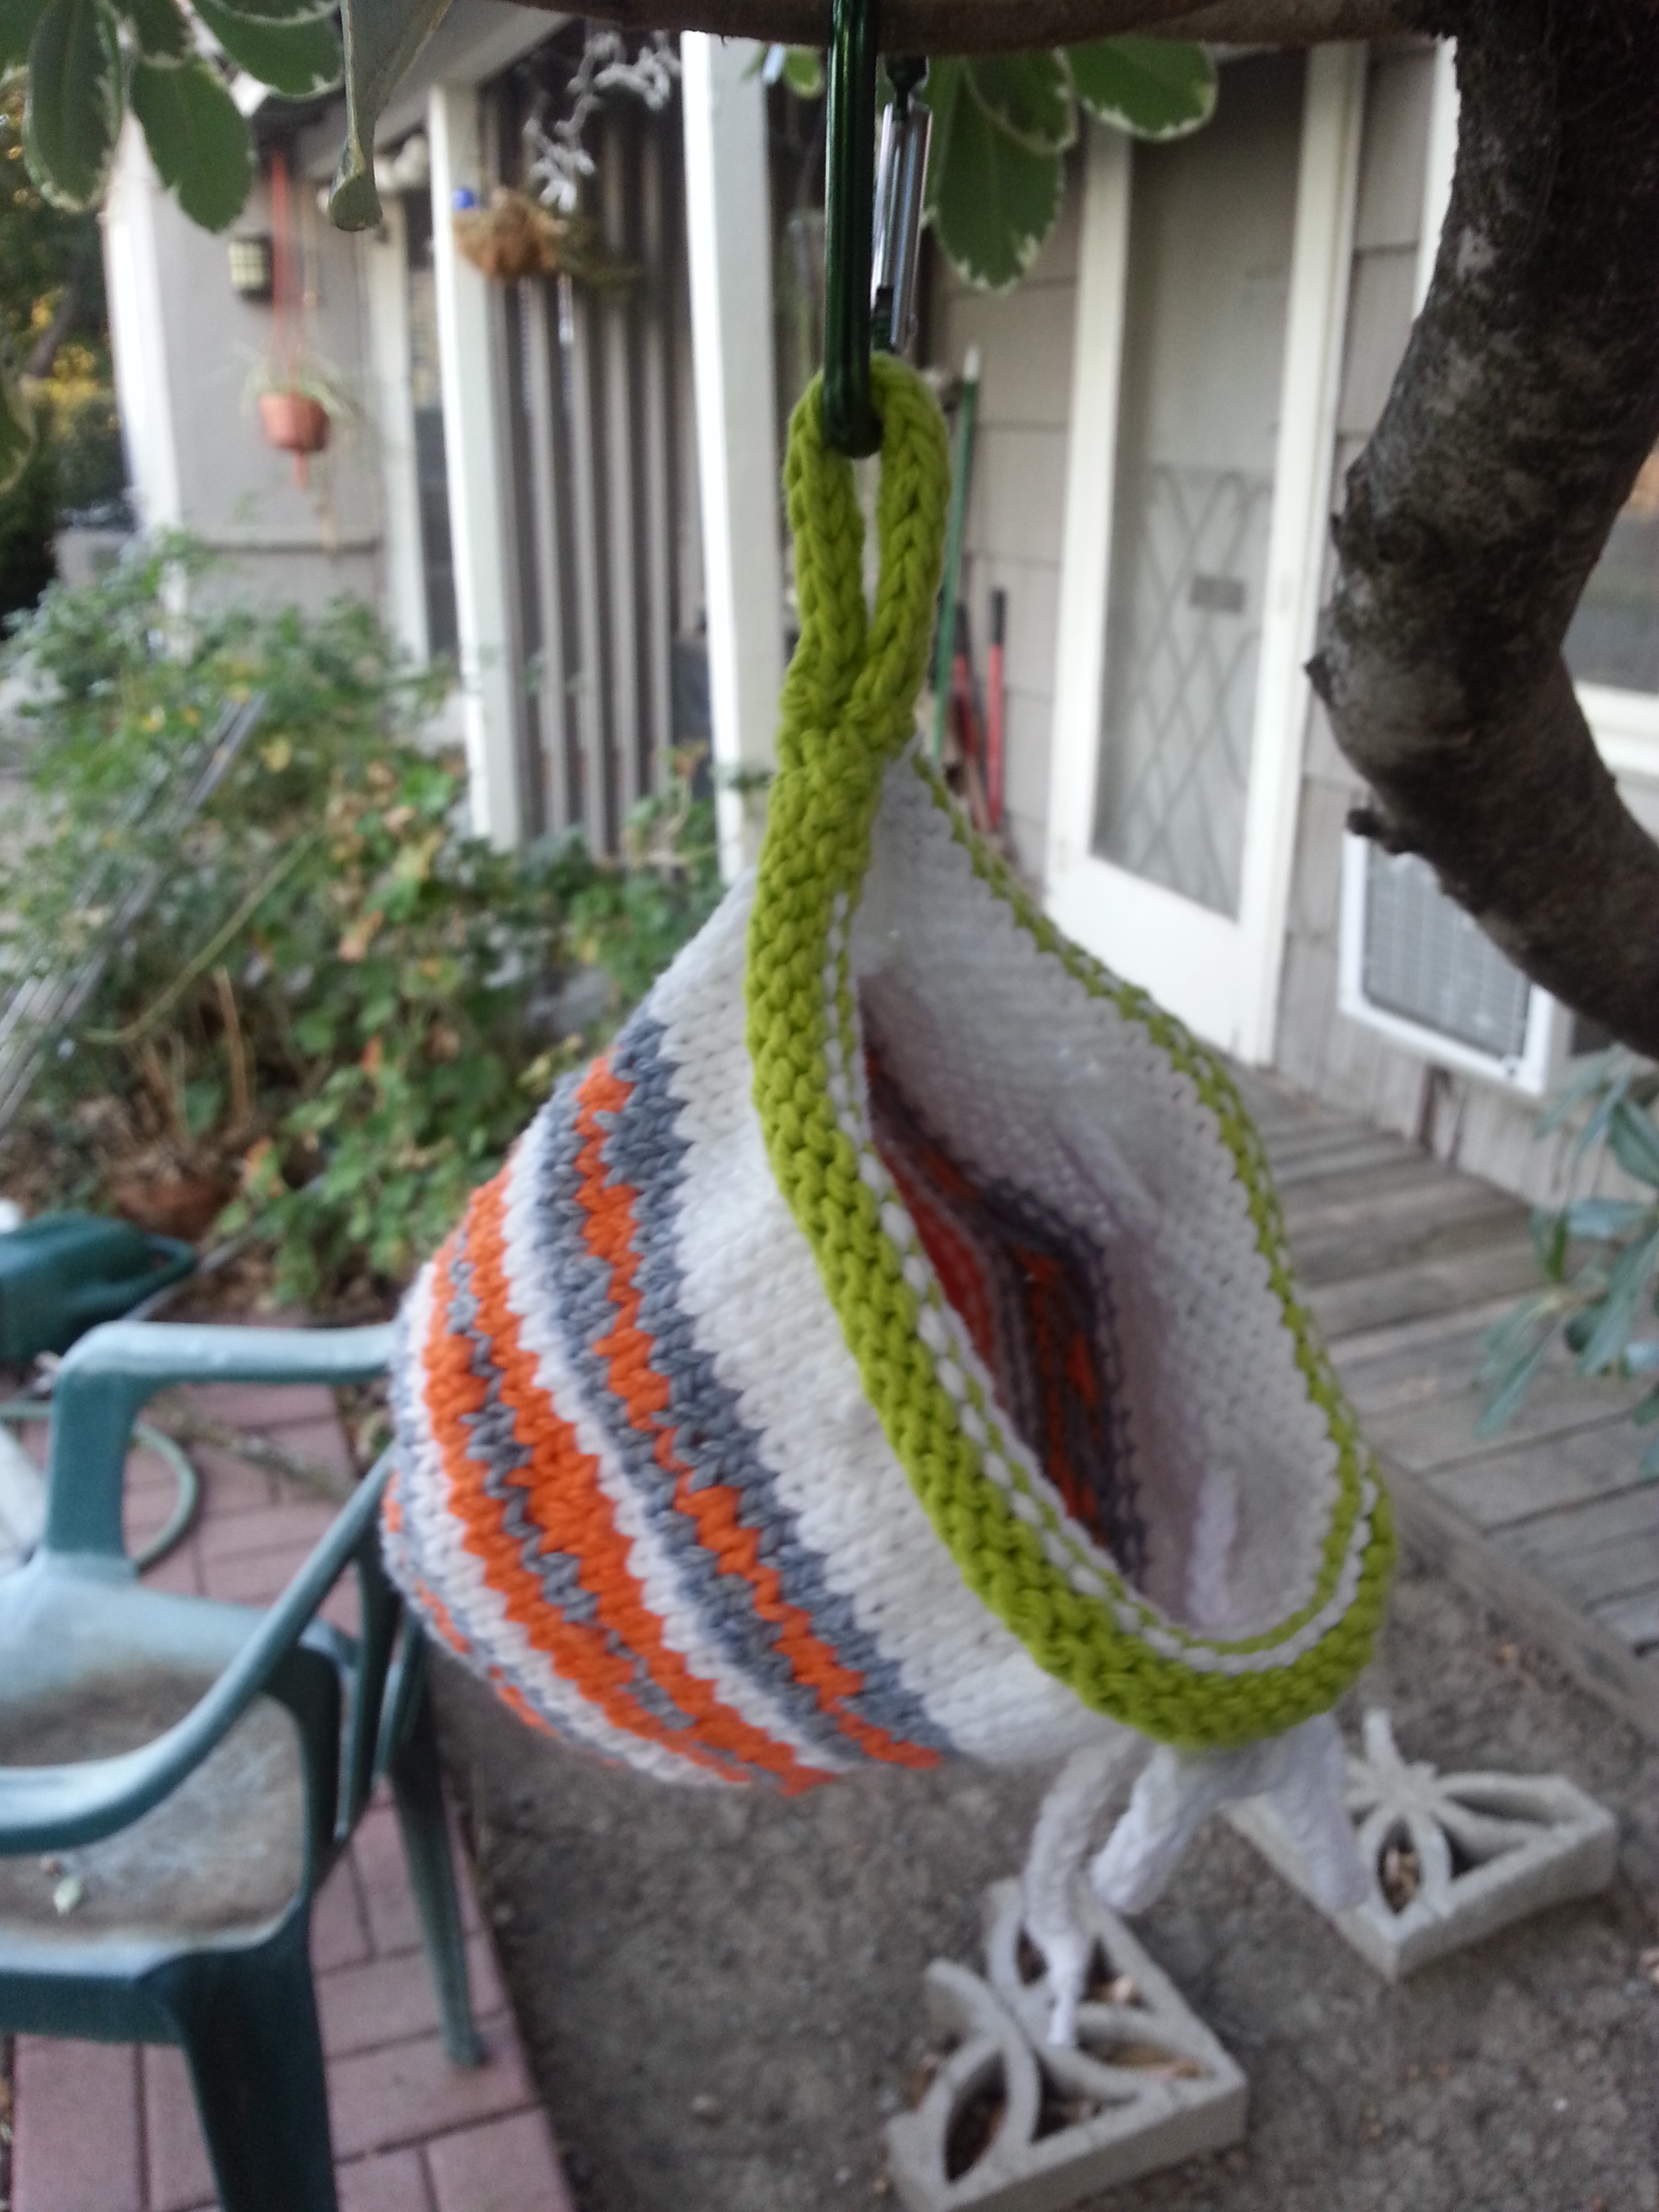
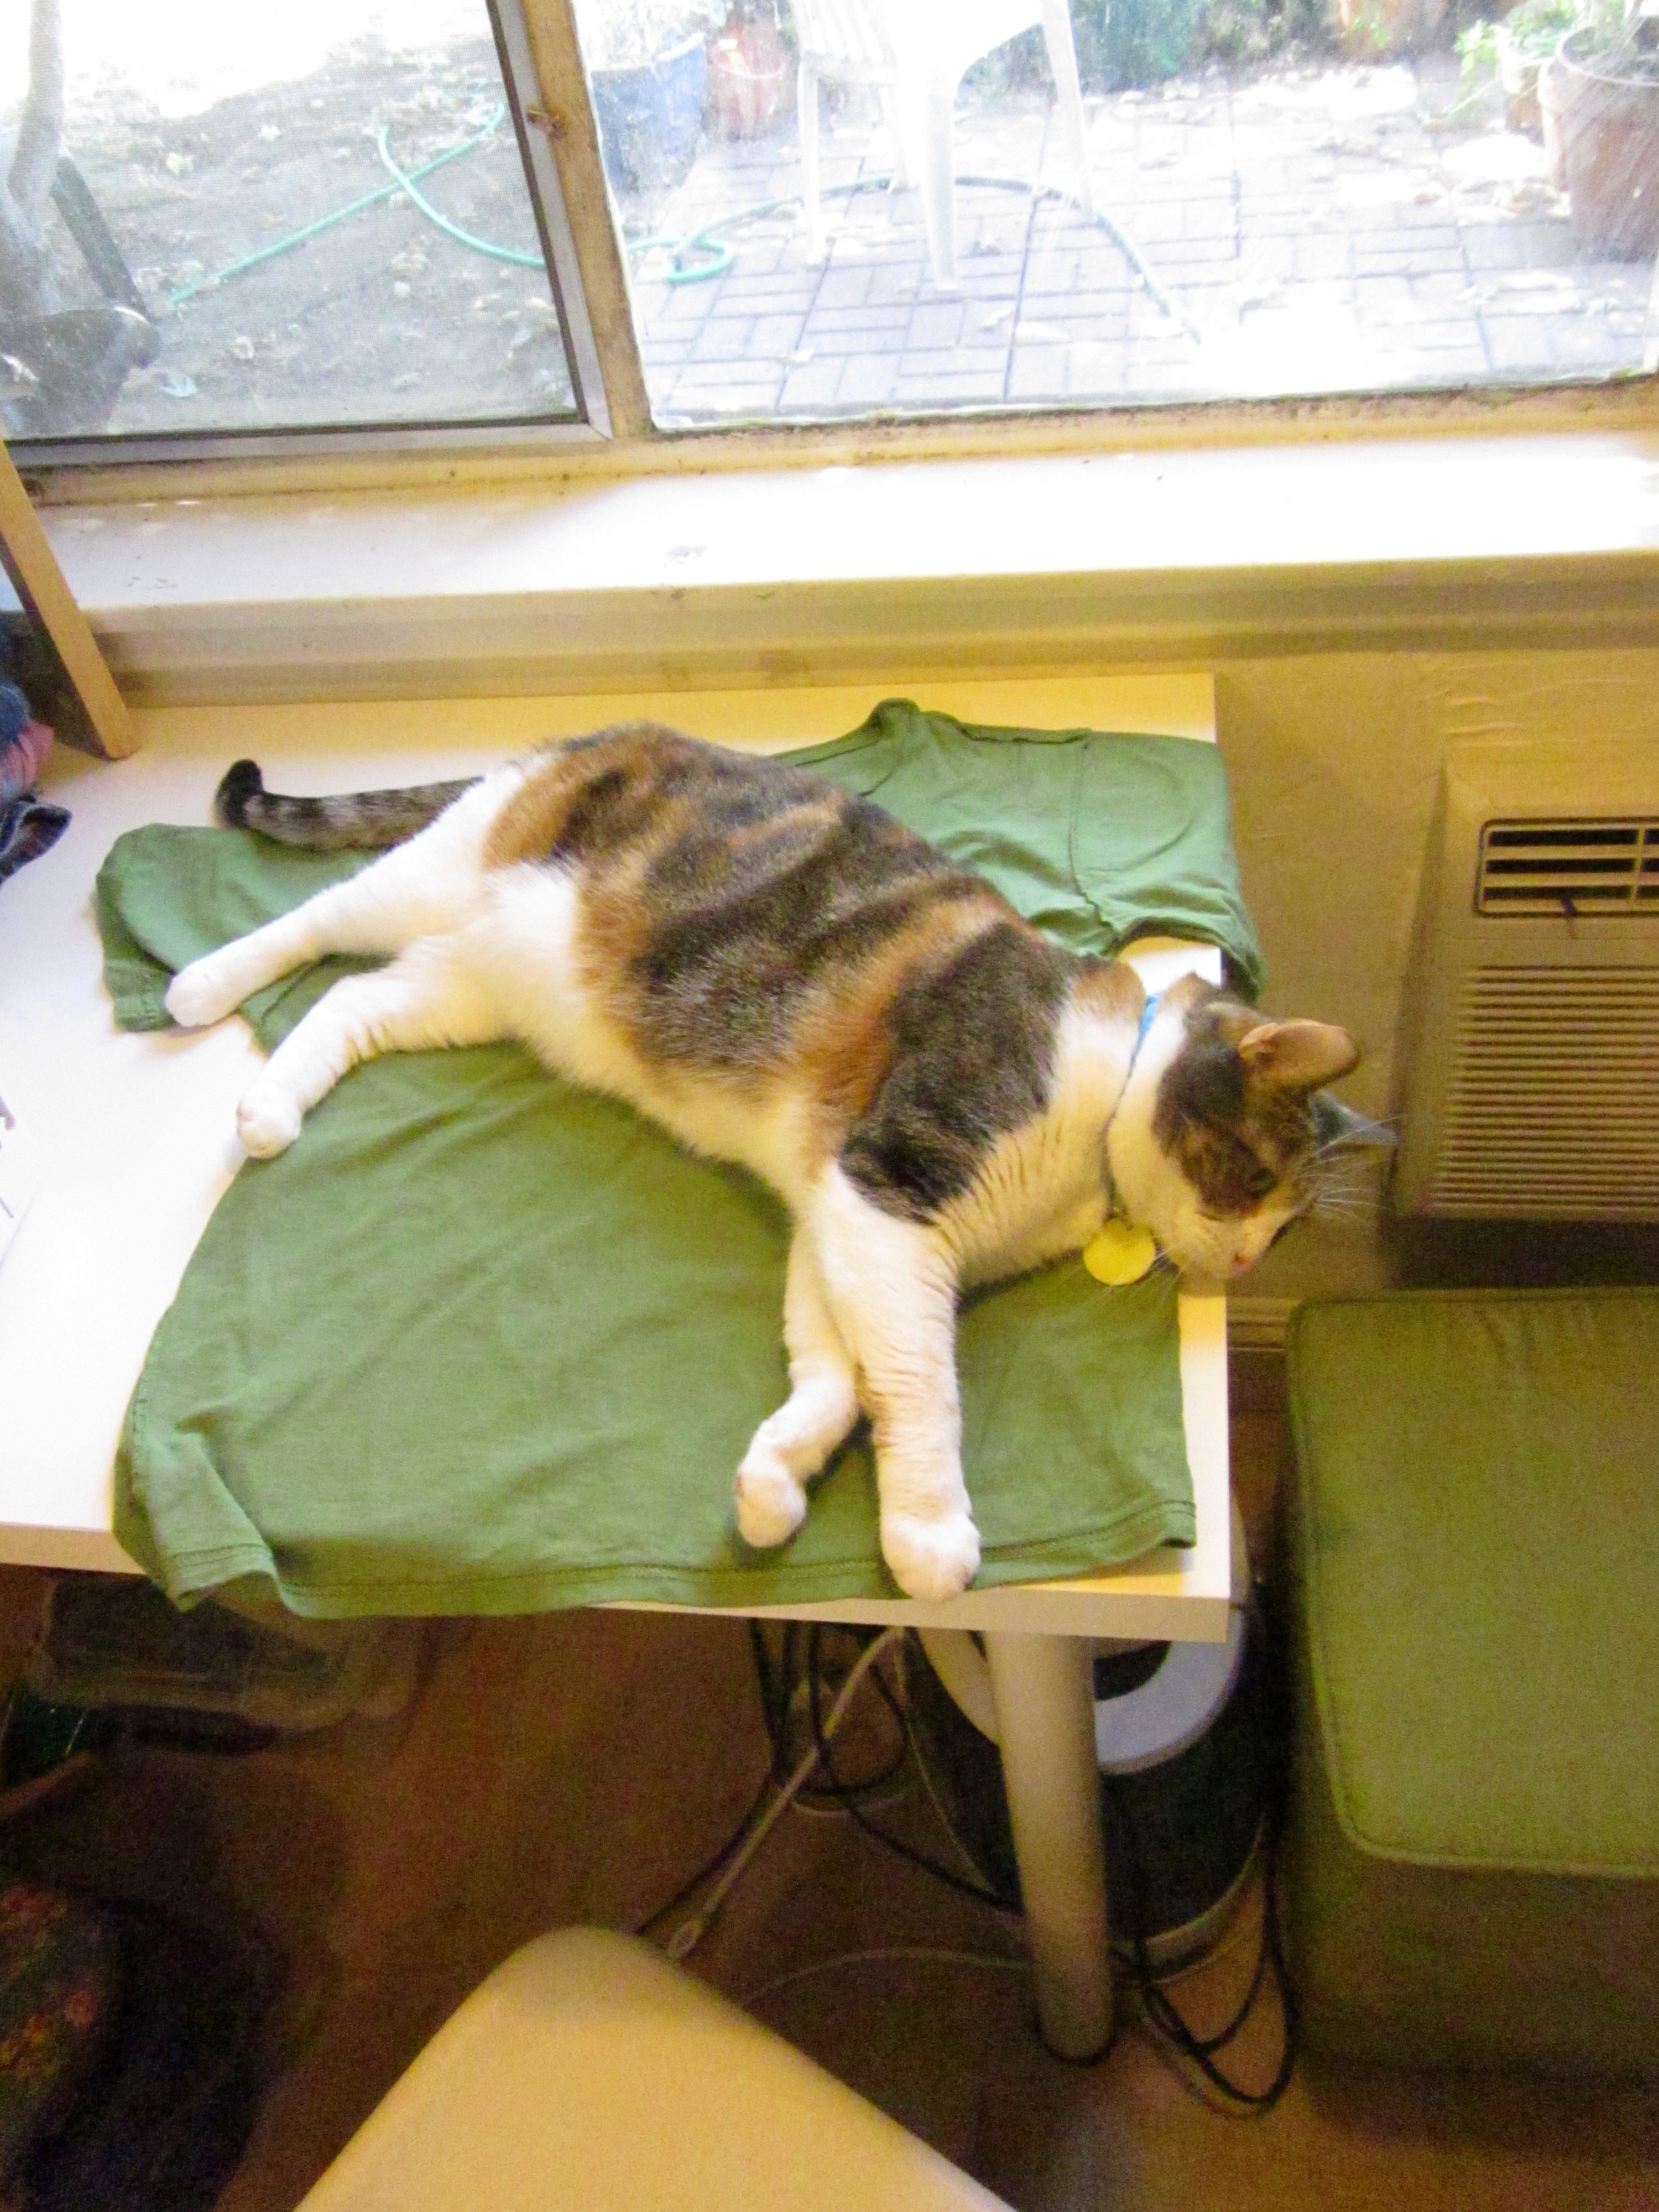
Last weekend was Tour d’Davis, where my flock and I celebrated this costumed bicycle tour of town with our “yarnbombed” bikes. I am particularly proud of creating this countryside scene for my top tube, complete with sheep grazing on the hillside and a matching pouch for my cellphone. The entire thing is my own design. I call this cozy pattern Pastoral.

2017-04-27 22.29.24If you want to do this project on your own bicycle, you’re in luck—it has a very low baaaa-r to entry. All yarn used here was leftover from other projects:

Materials: Scrap yarn, knitting needles, yarn sewing needle (or crochet hook), measuring tape, binder clips or clothes pins, and imagination!

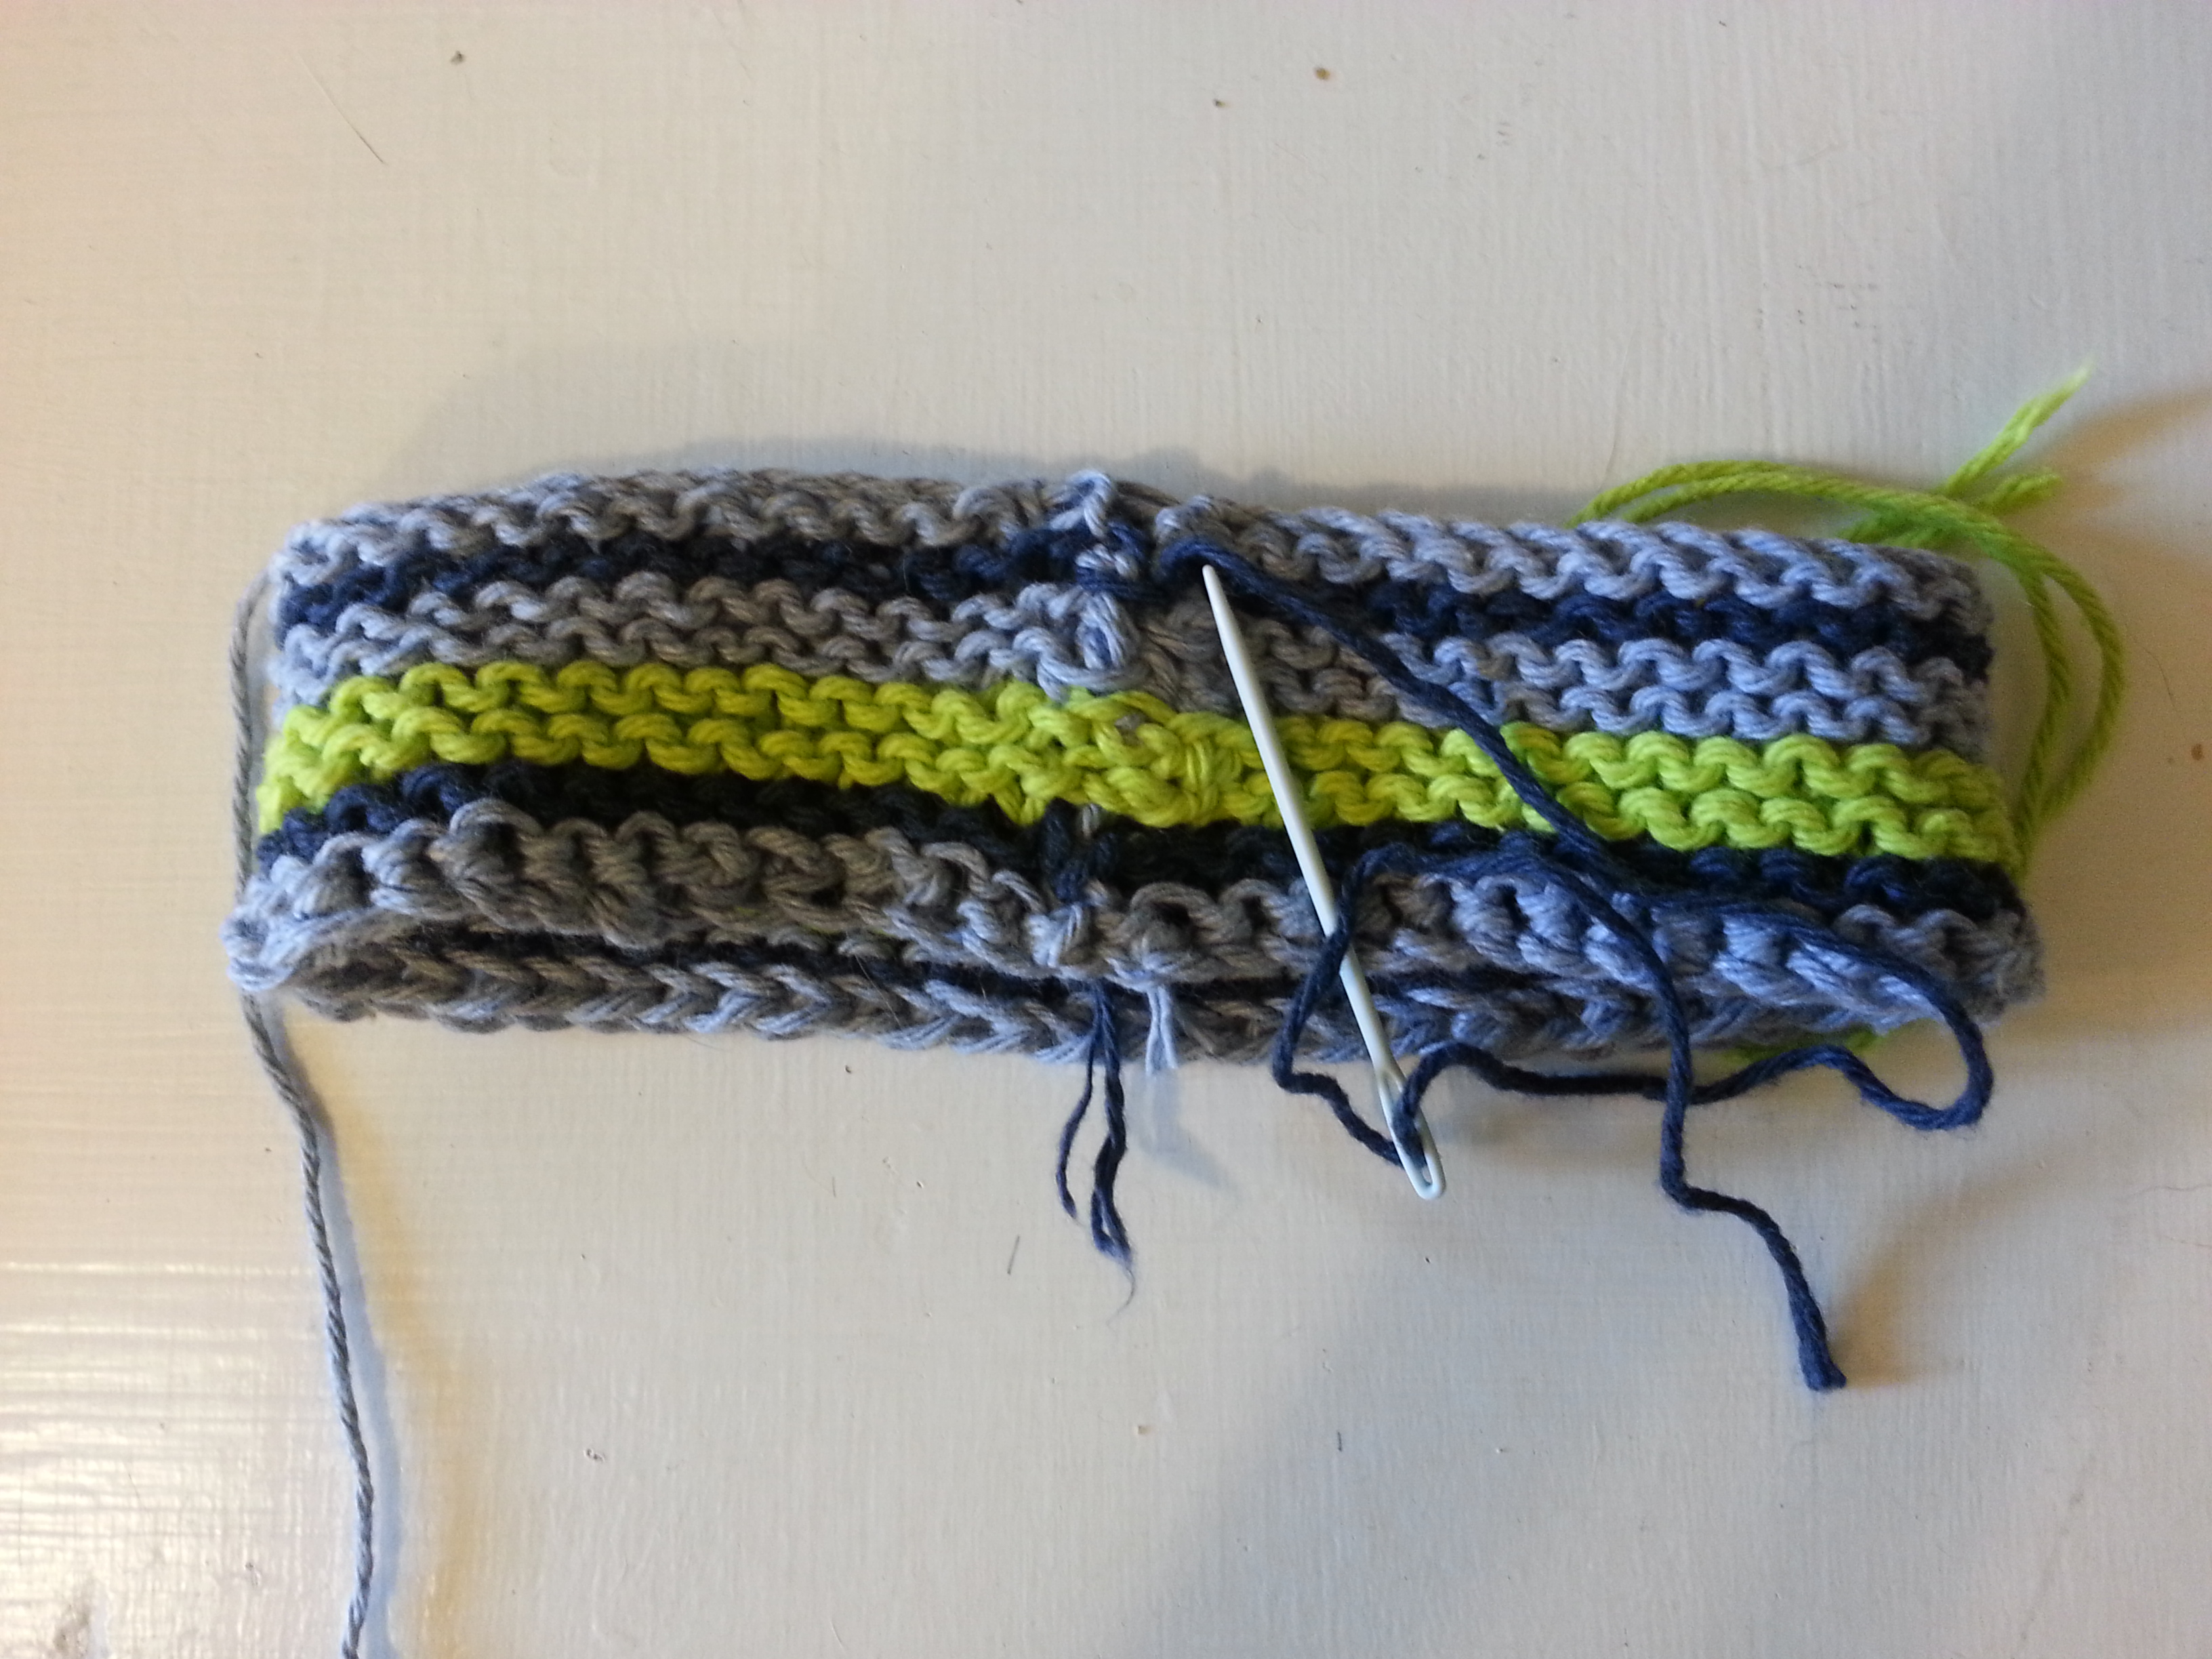
Instructions: Measure your top tube width and length, then check your knitting gauge for an exact fit. You can also eyeball it for an approximate fit that works pretty well too. Cast on in the most creative colors you can find! Stockinette stitch works well. When binding off, leaving a long tail so that you can sew it around the top tube. Use the binder clips or clothespins to hold the knitting in place as you sew up the seam. Don’t worry too much about the neatness of the seam, or weaving in ends, as neither are that visible.

2017-04-27 20.16.43

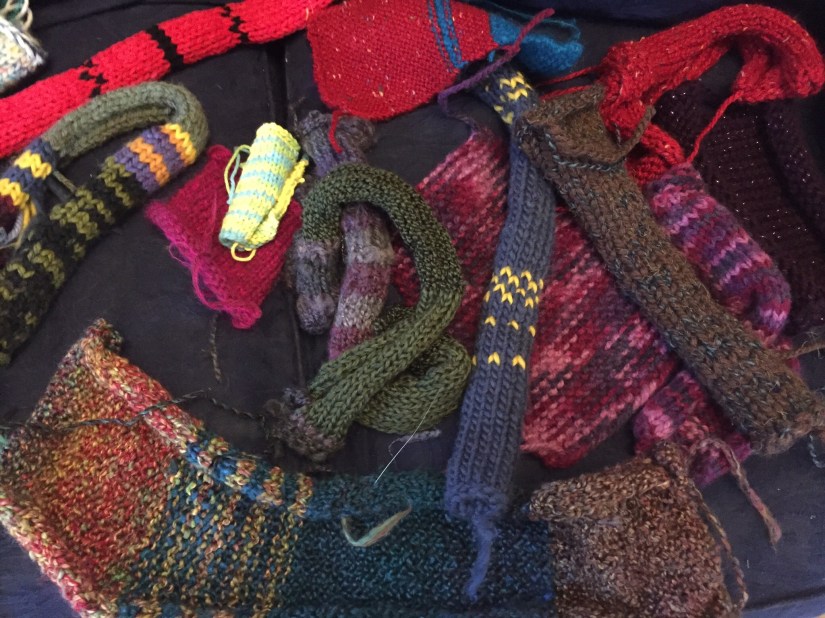
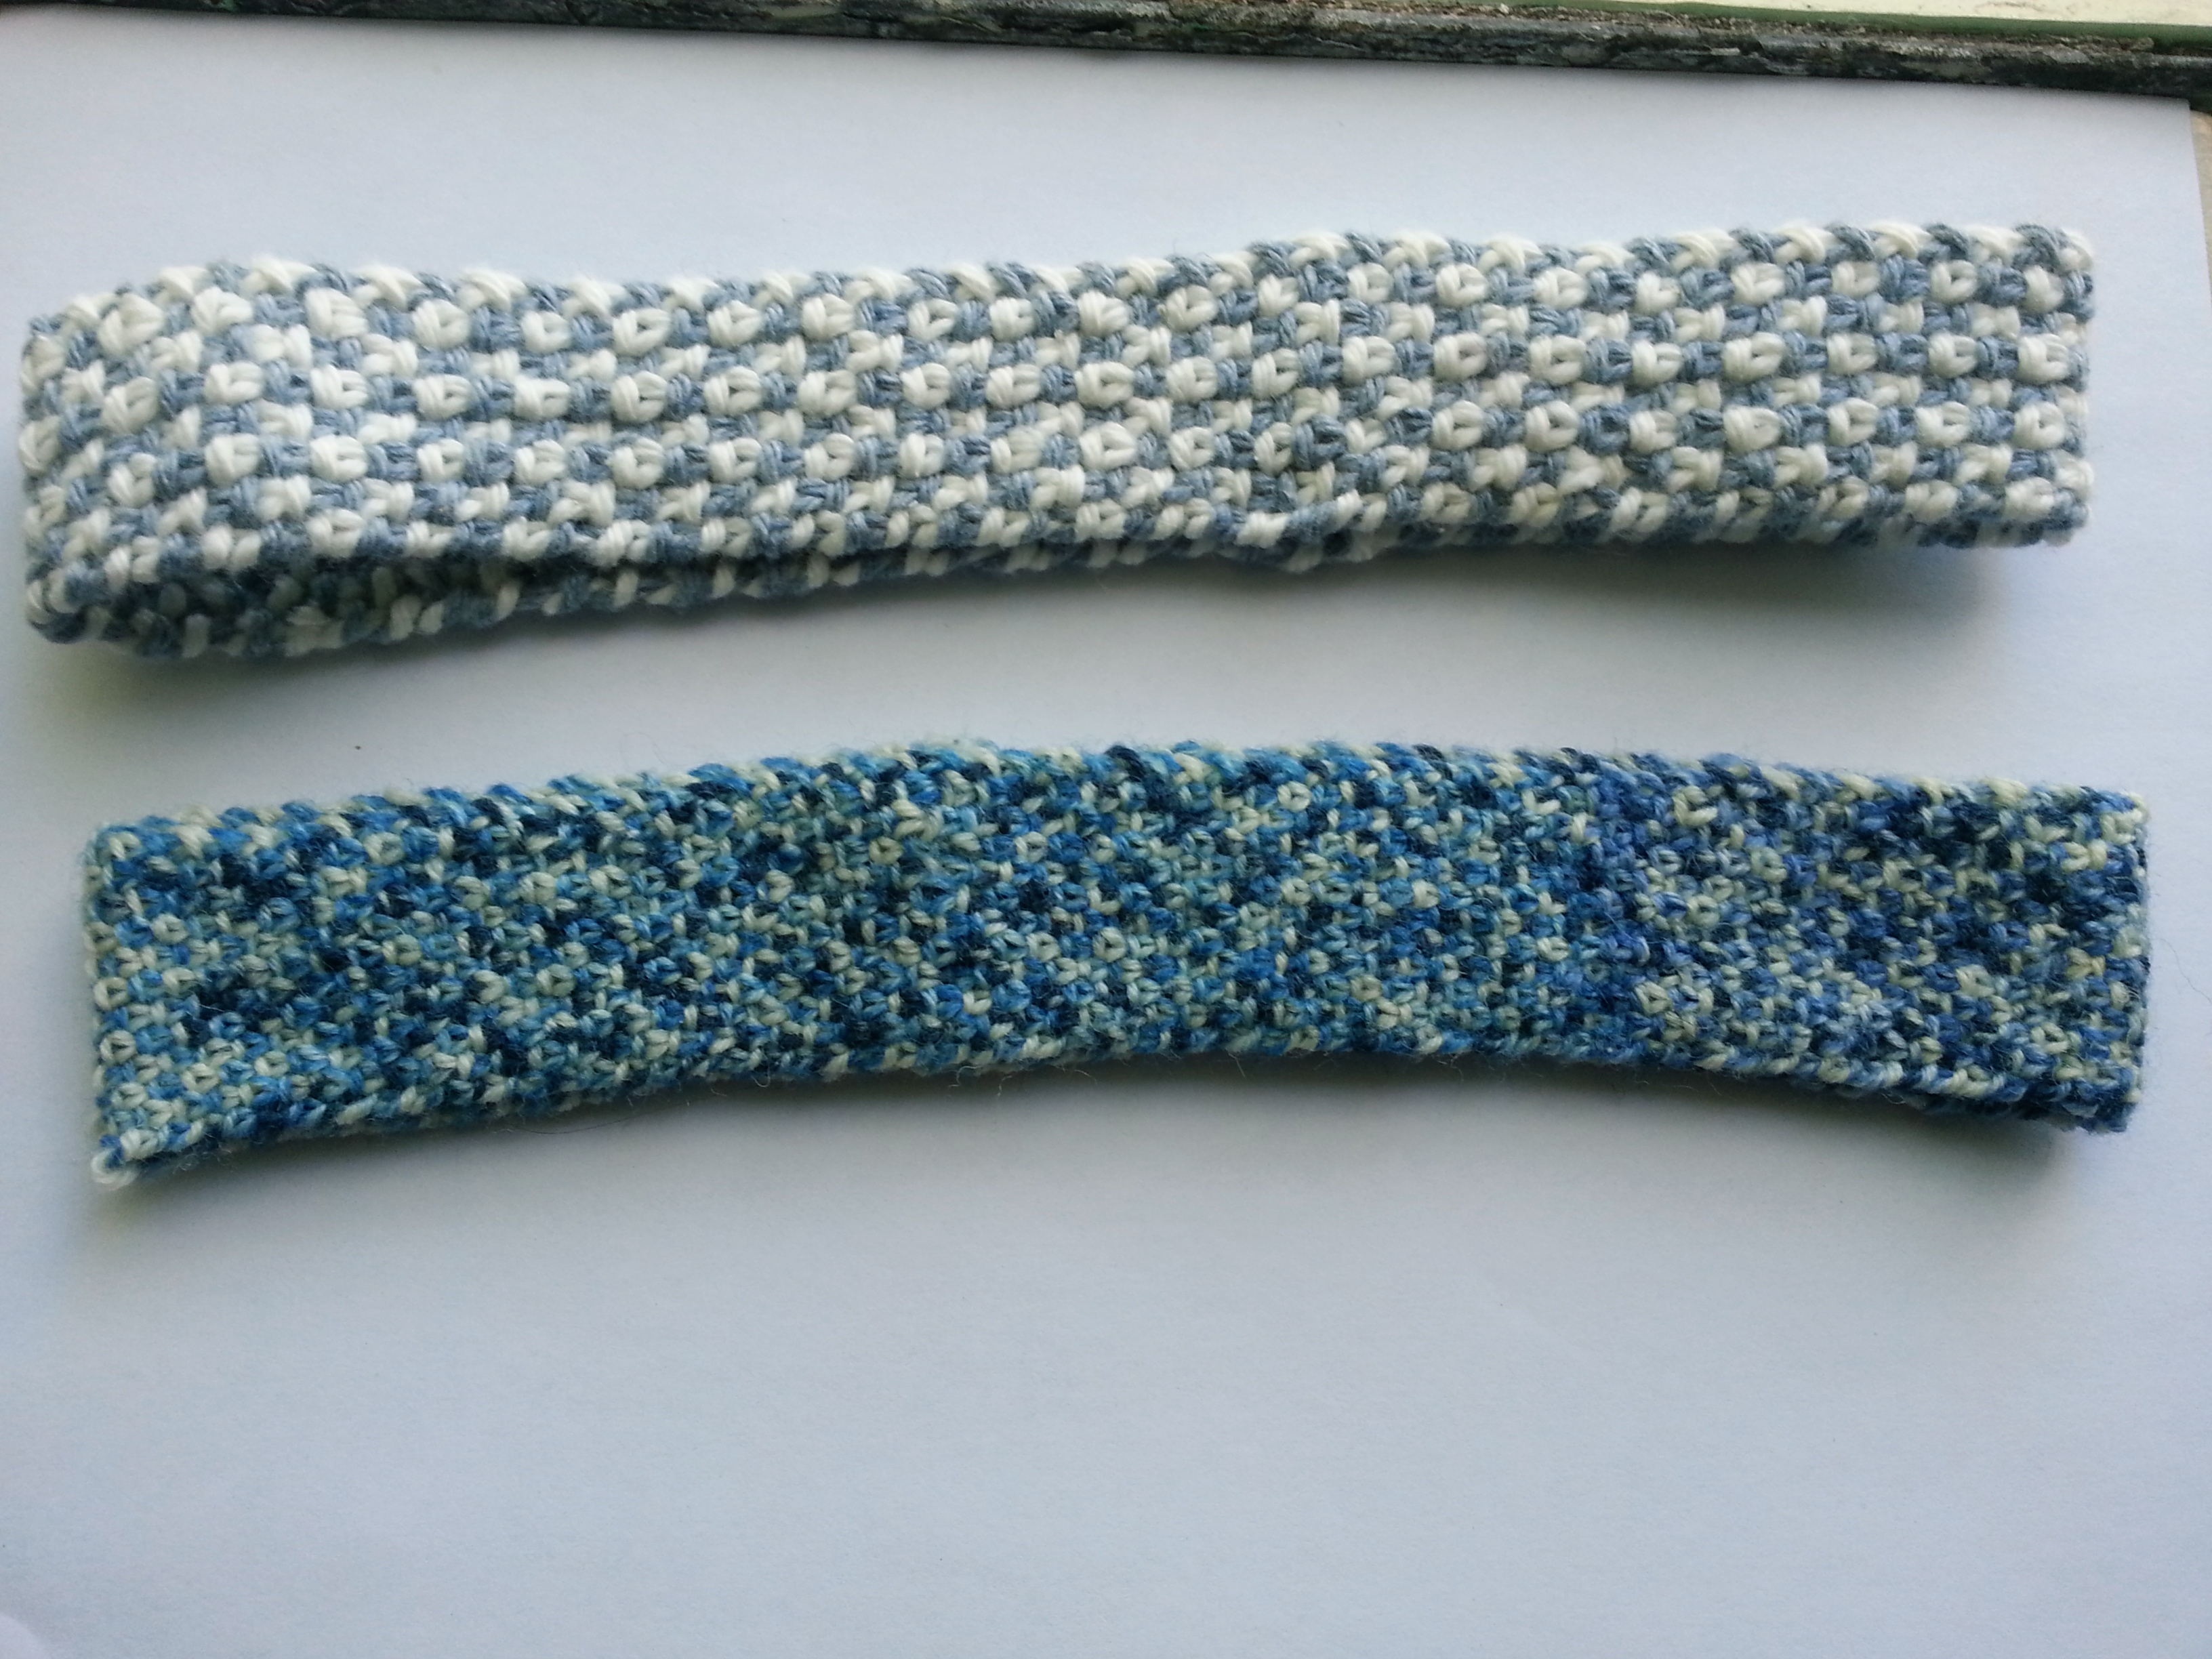
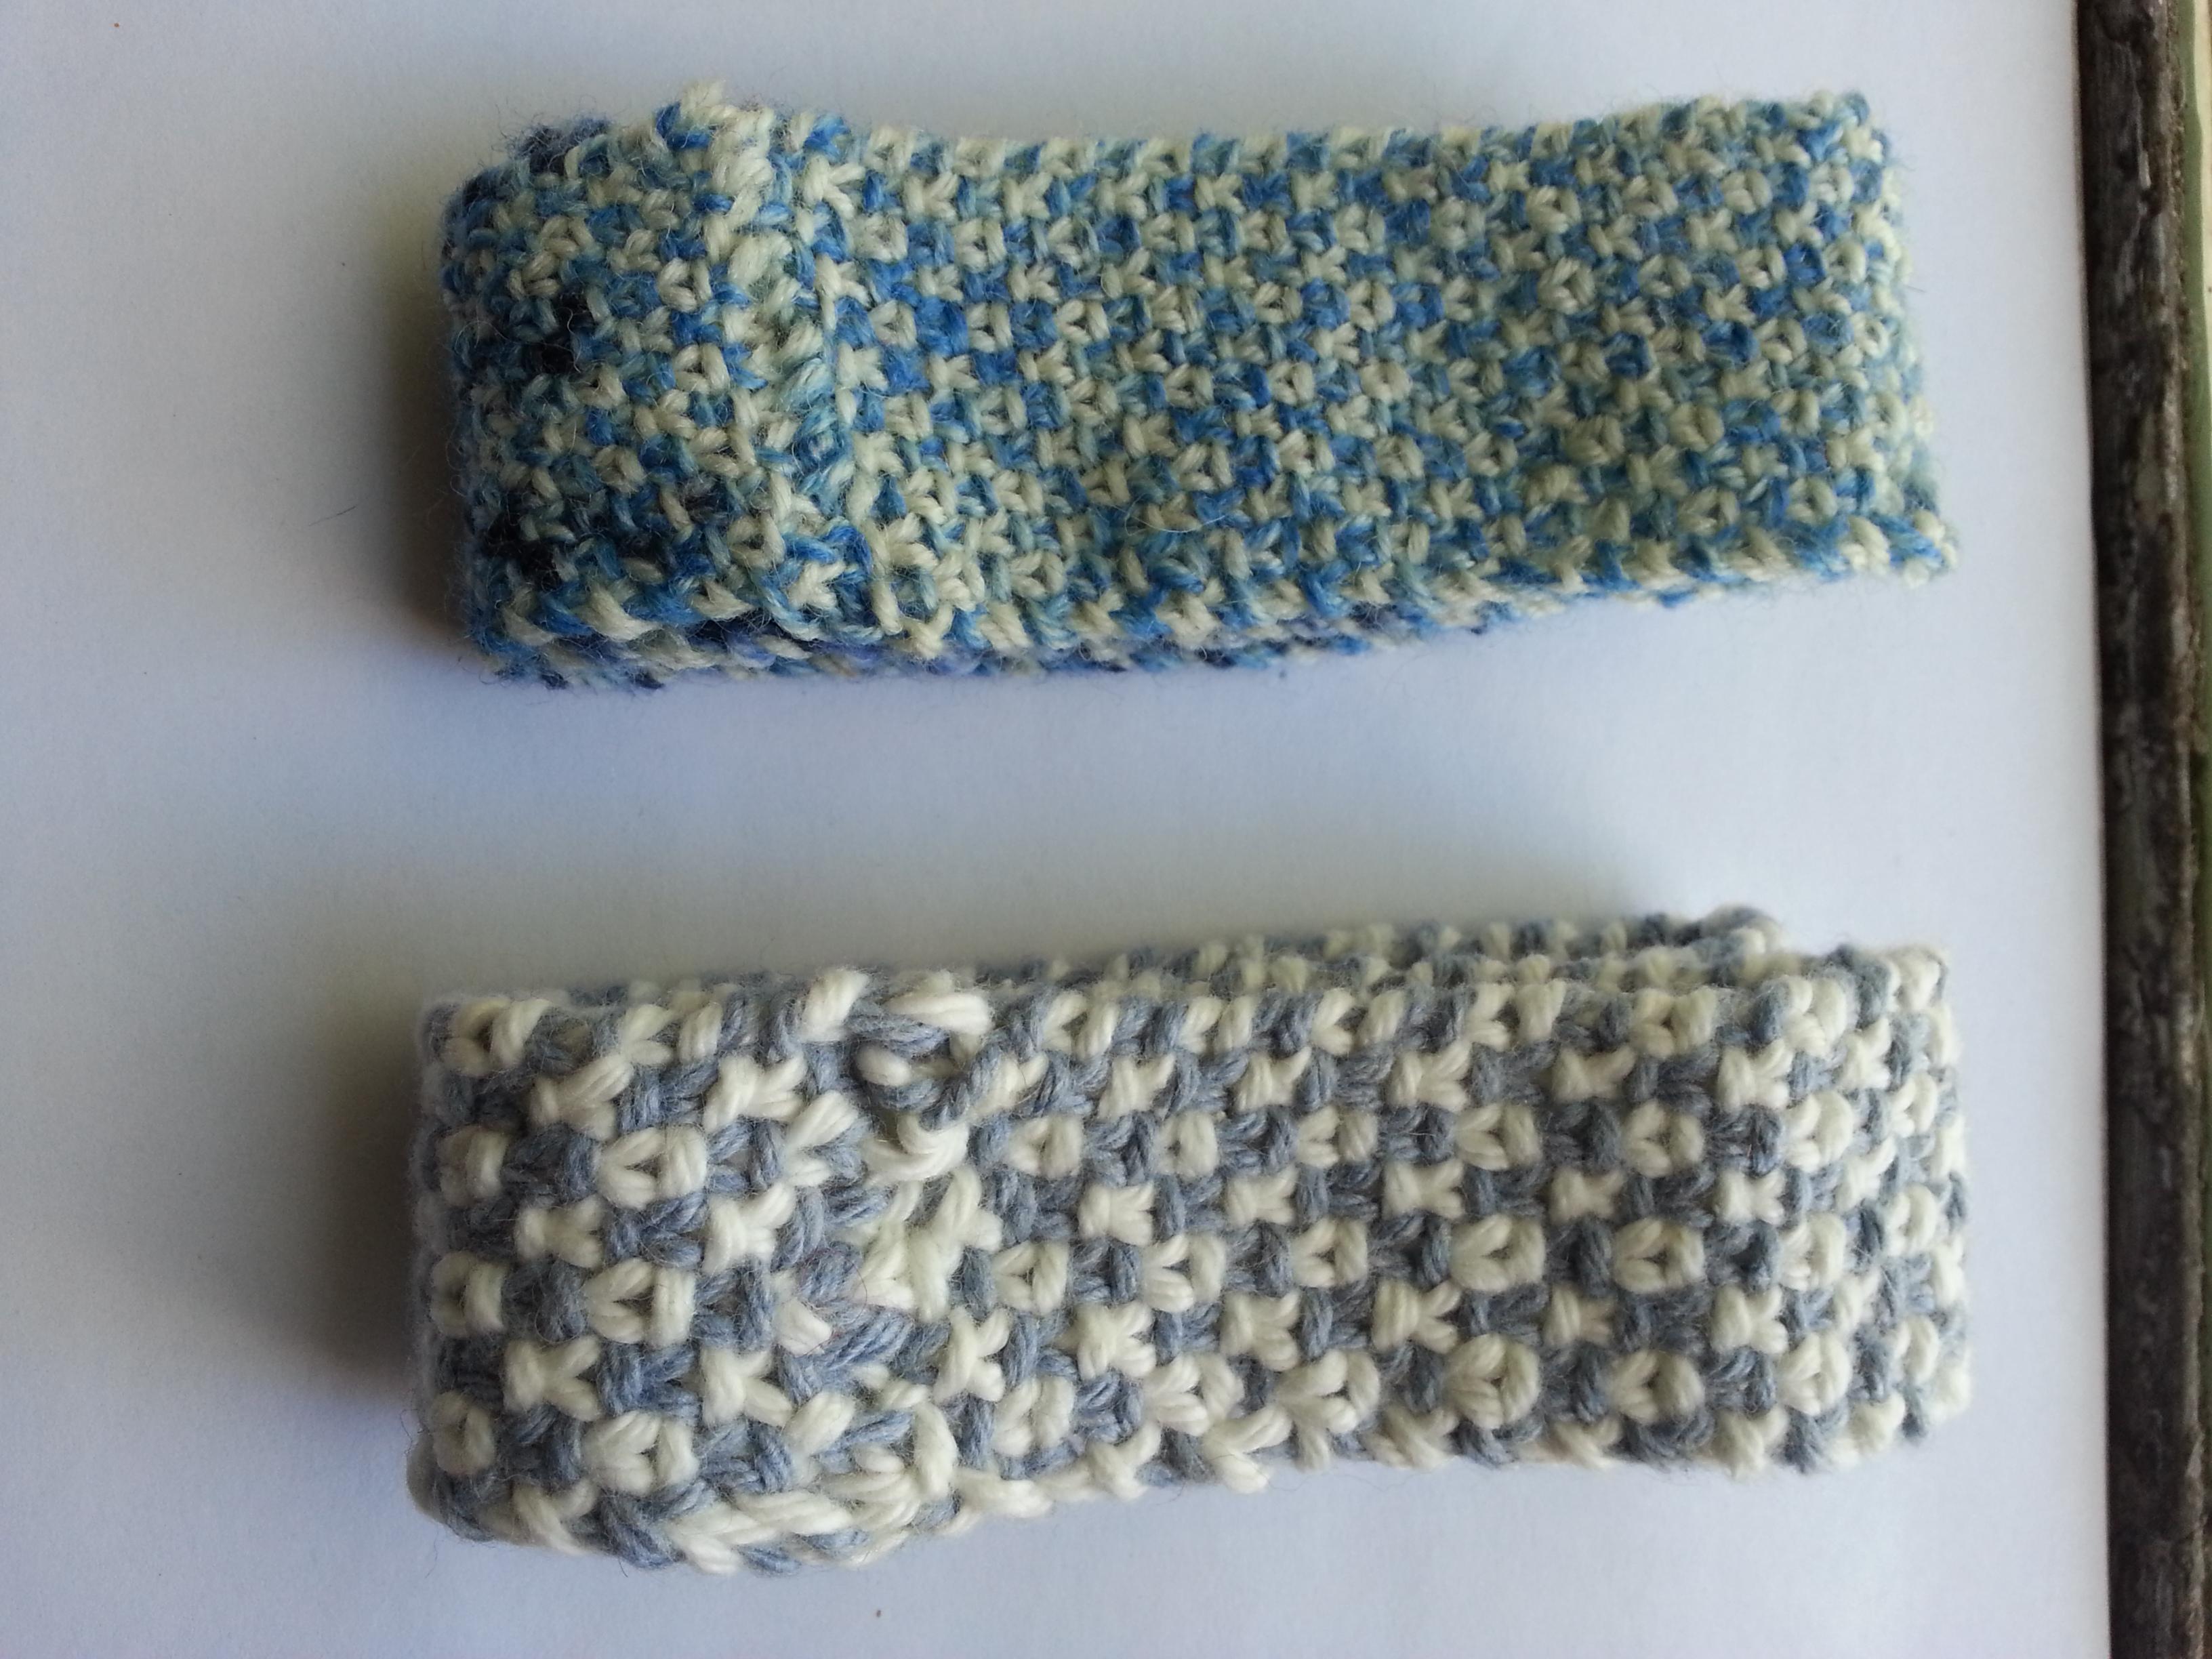
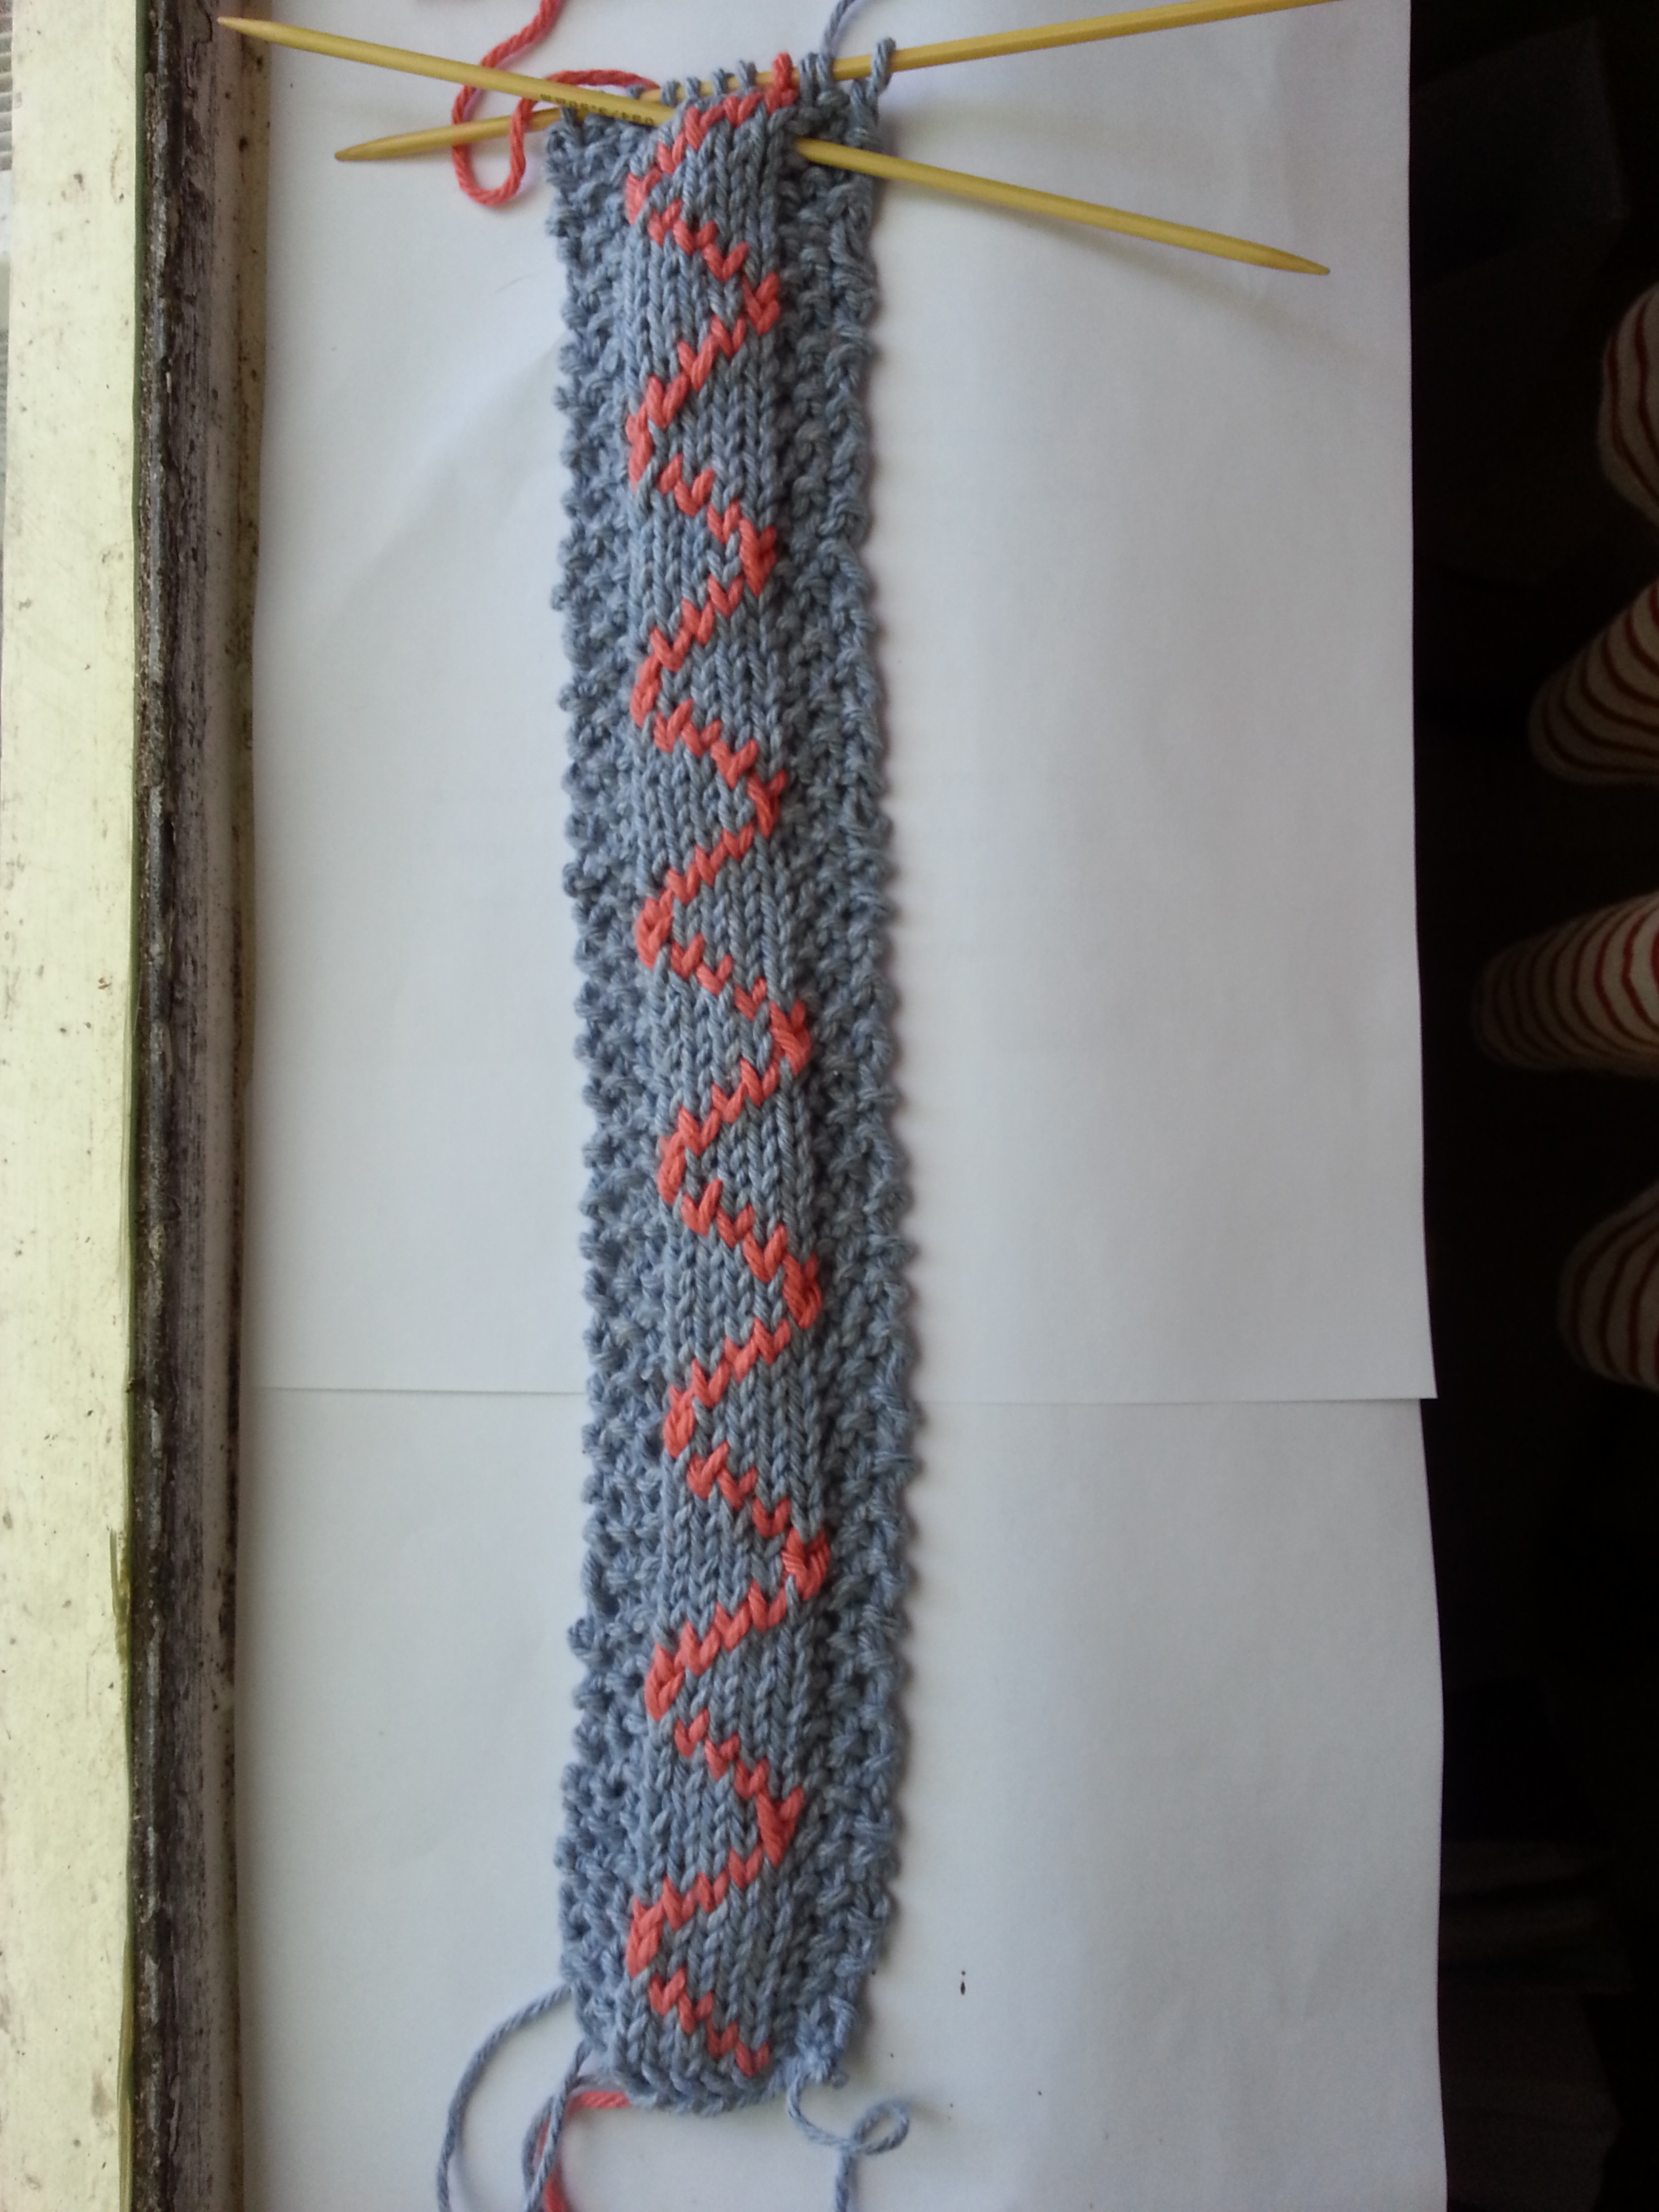
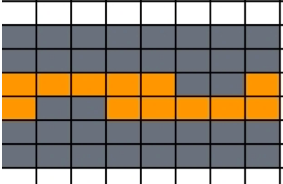
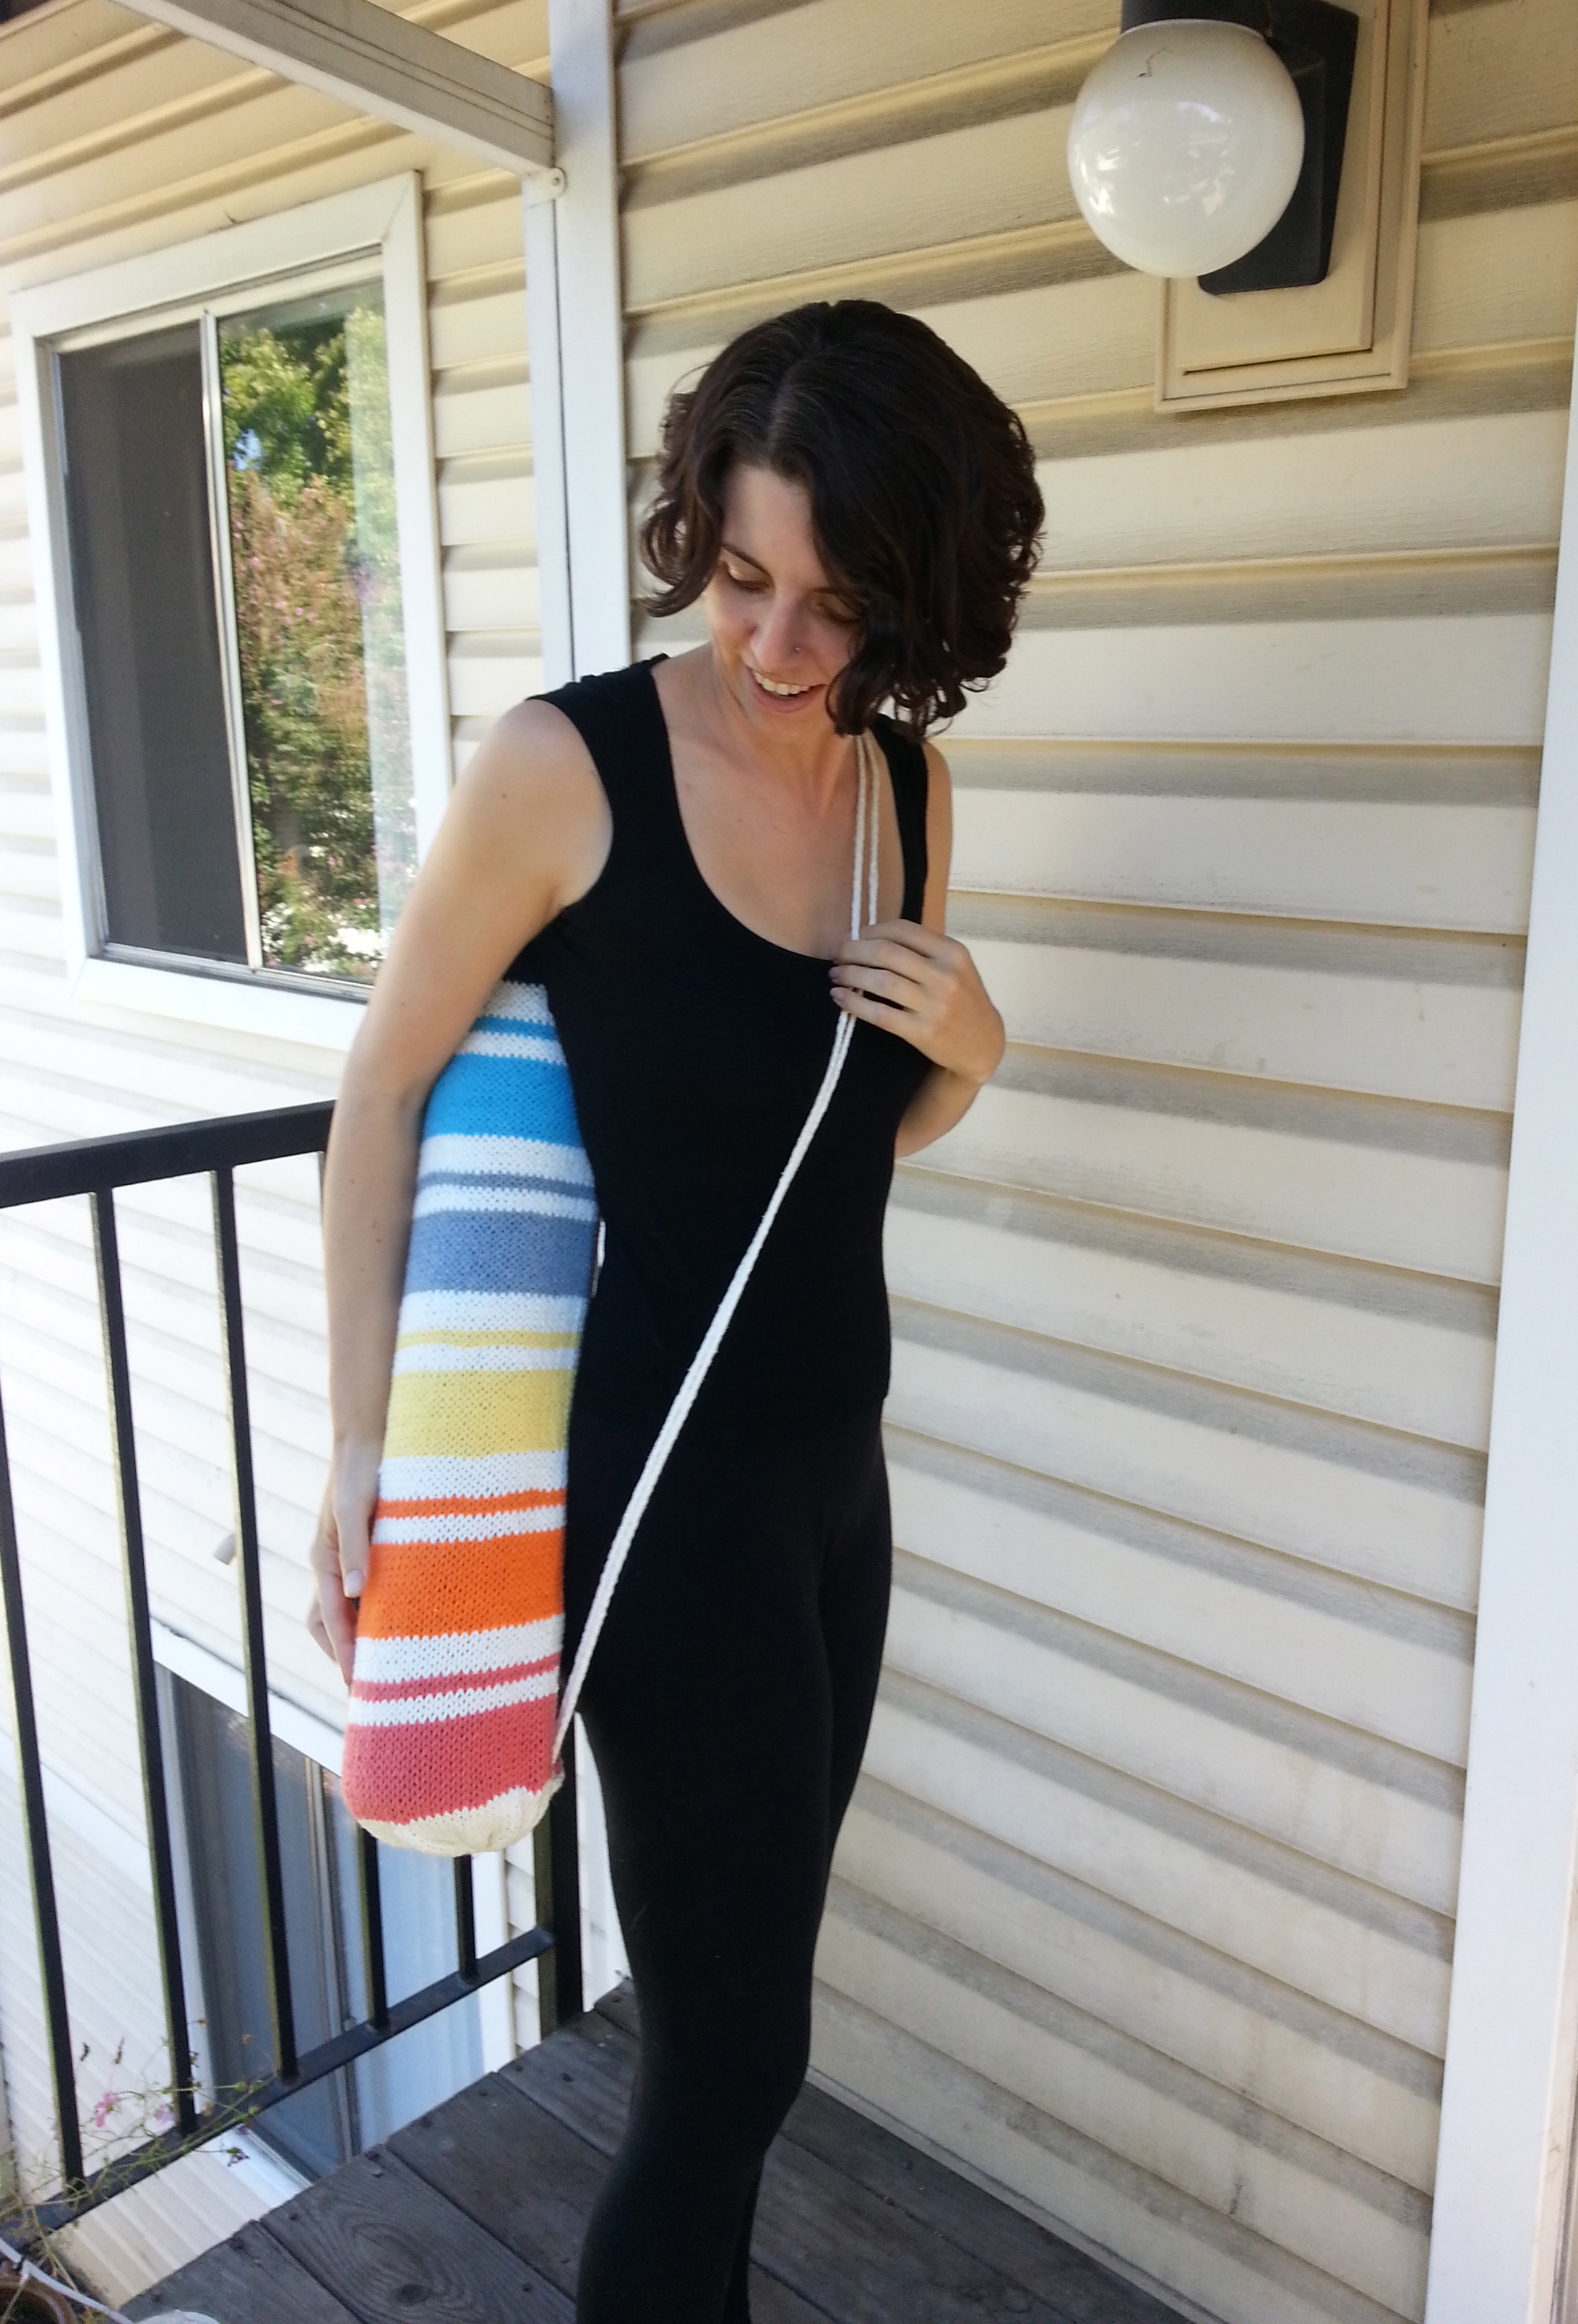
Colorways and patterns of the bicycle cozies above, from left to right: Unicorn, Dark Unicorn, UCD, and Co-Op Stripe (not pictured: Captain Picard, a red and black pattern). Below is Rogue One, my first bicycle cozy.

2017-04-16 19.53.42

Some of these cozies went to Team Sheep bicycles, but a few lucky cyclists on the tour got the extras!

2017-04-29 15.59.15

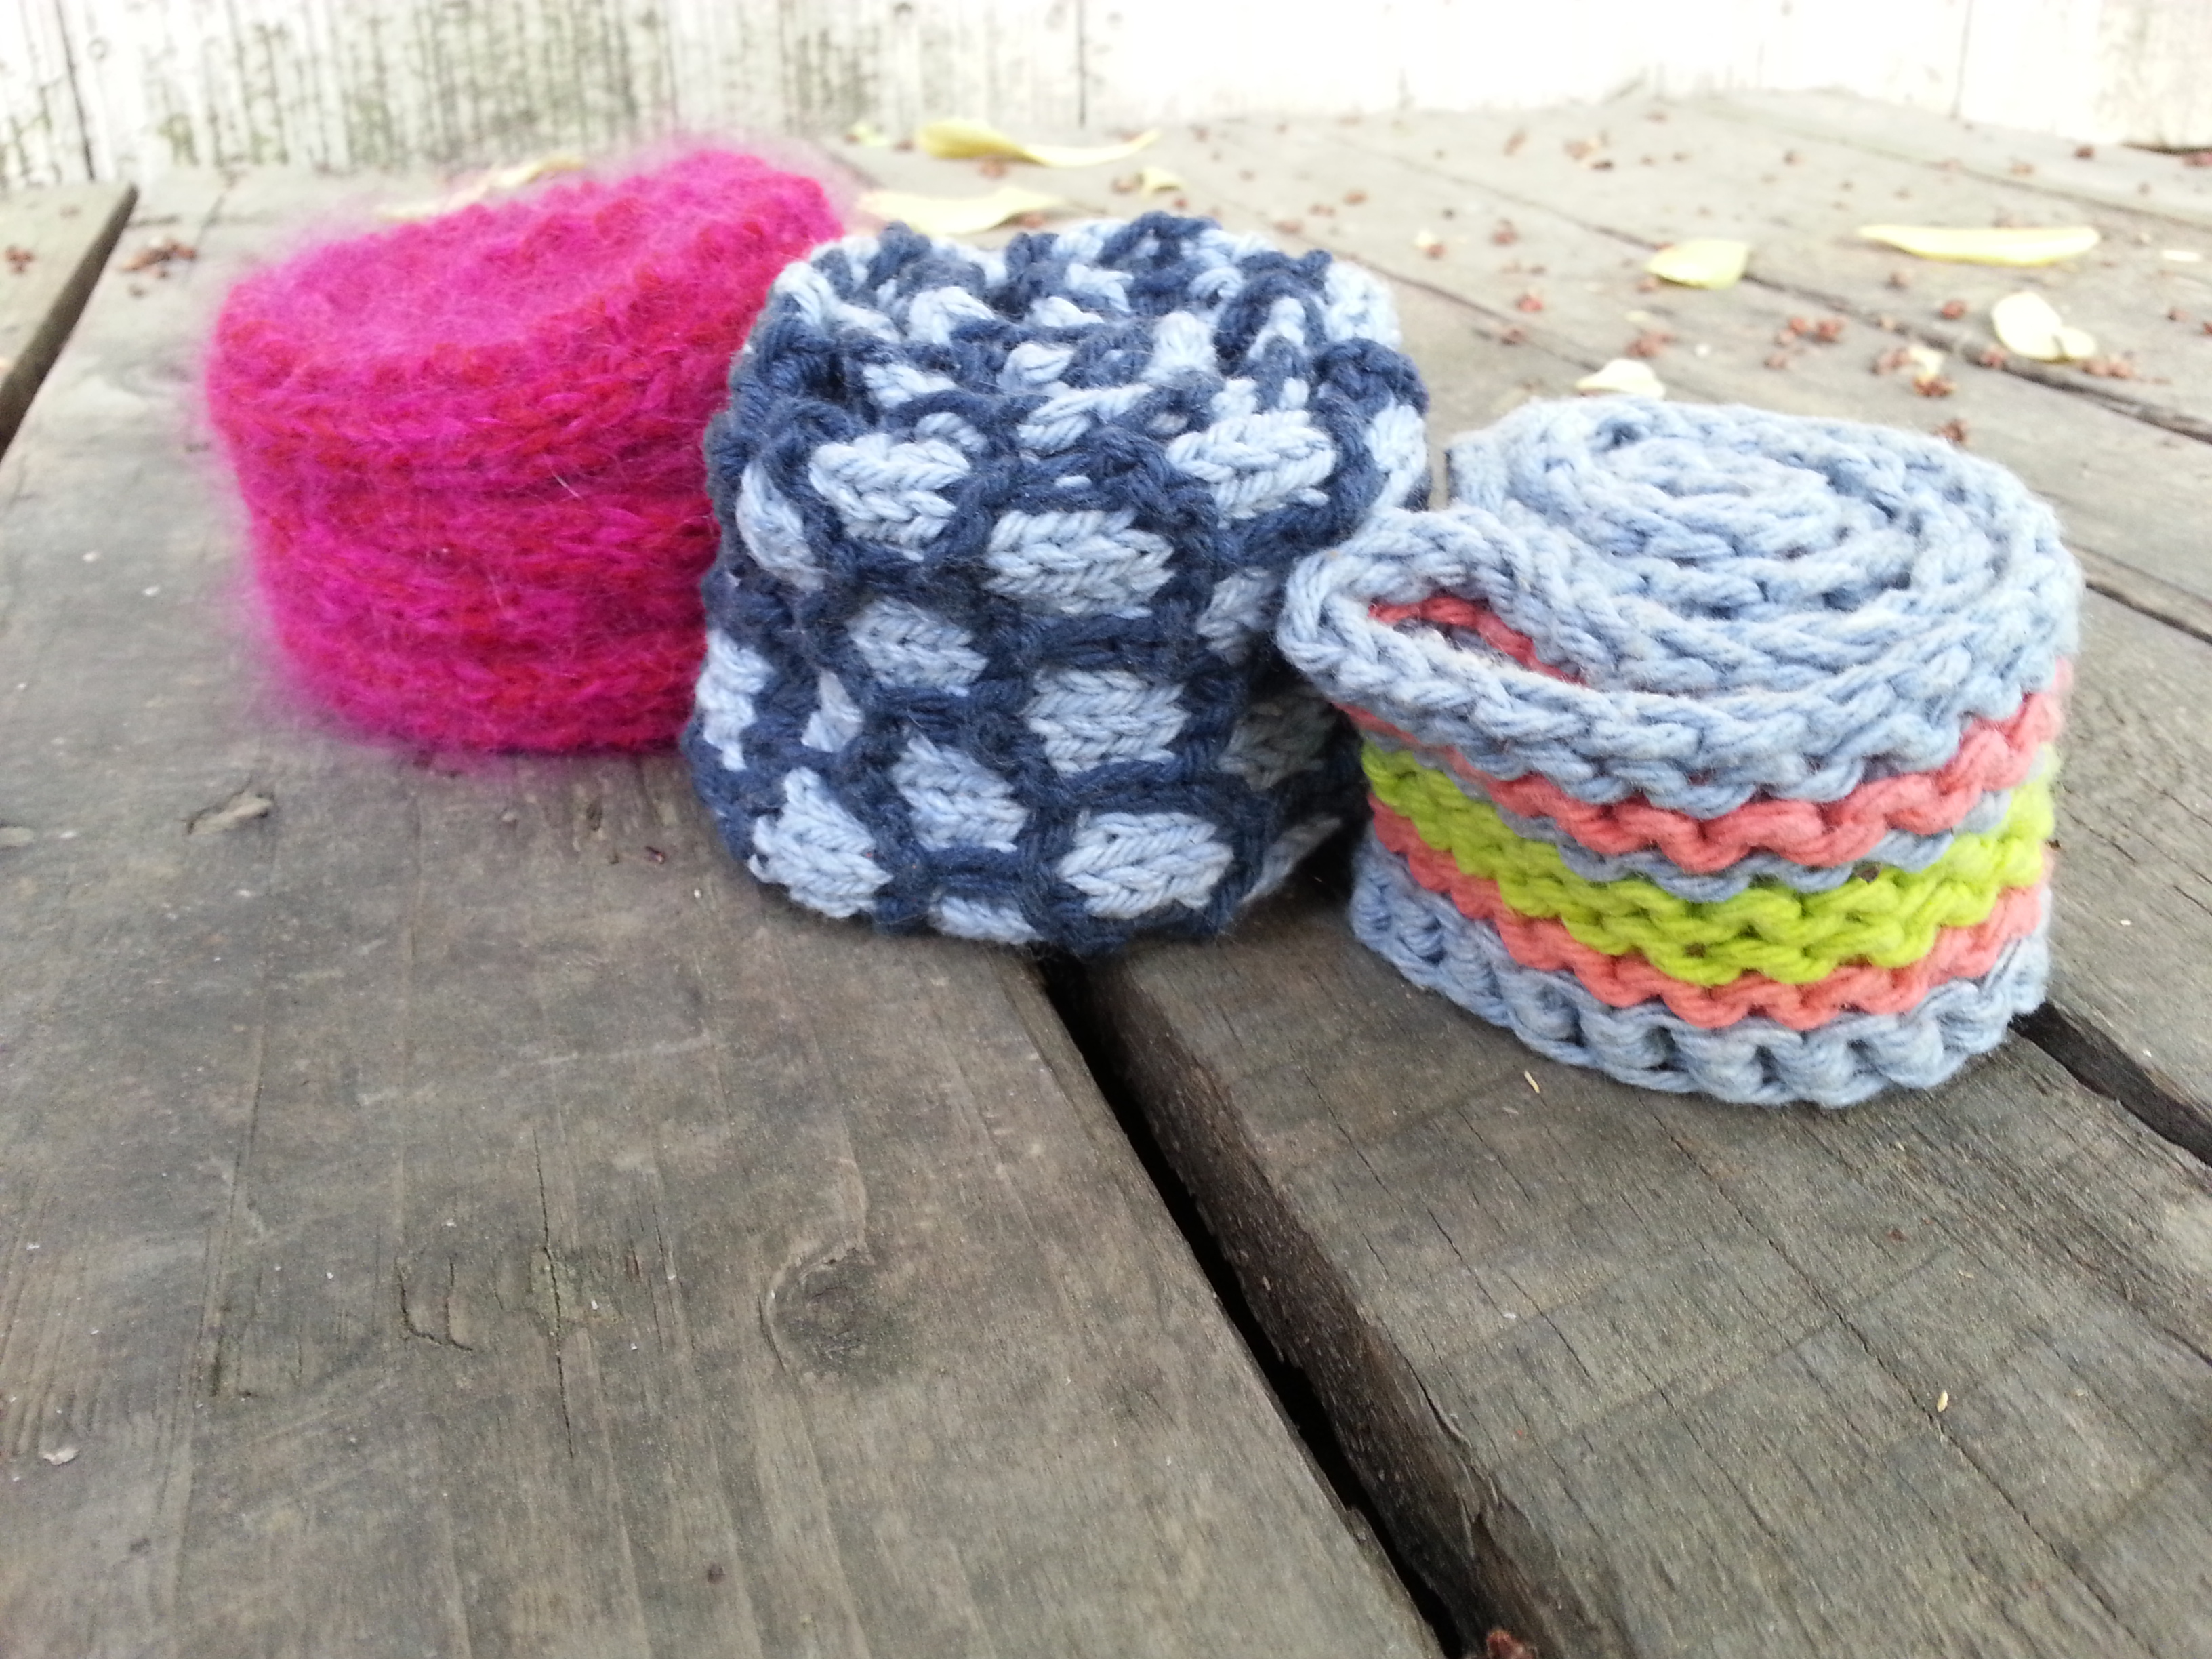
Several of my fellow sheep team members likewise rocked their yarn creations throughout the day! Here’s a shot of most of our yarn creations before installation:

IMG_4862

Many of these were for bicycle decorating, but we also did some yarnbombing, aka public yarn art instillations at stops along the Tour:

IMG_4897

Some on craft crew even did some more knitting and crocheting during the tour!

sheep3

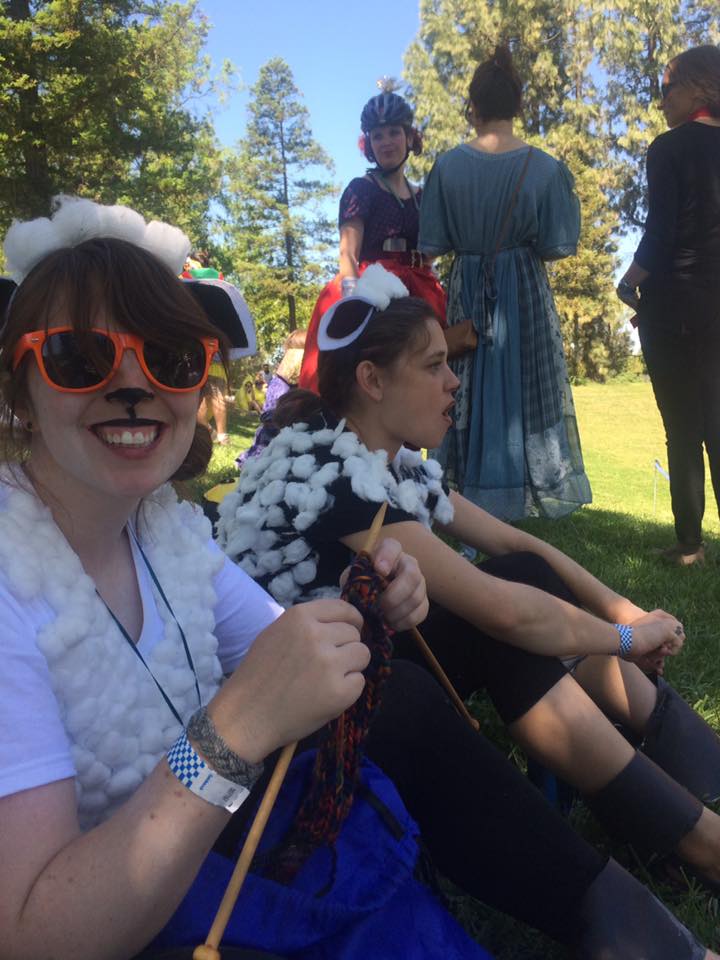
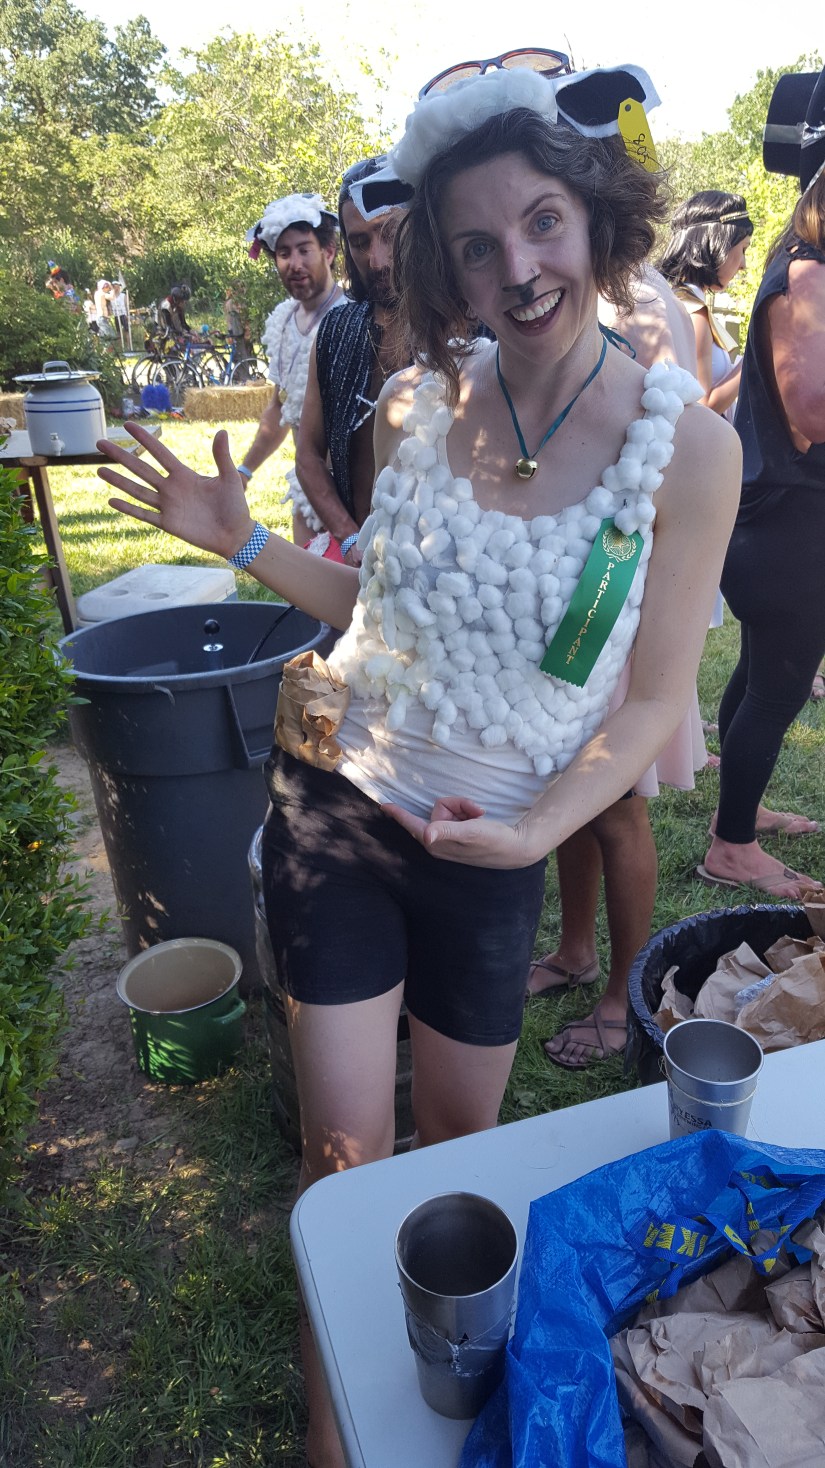
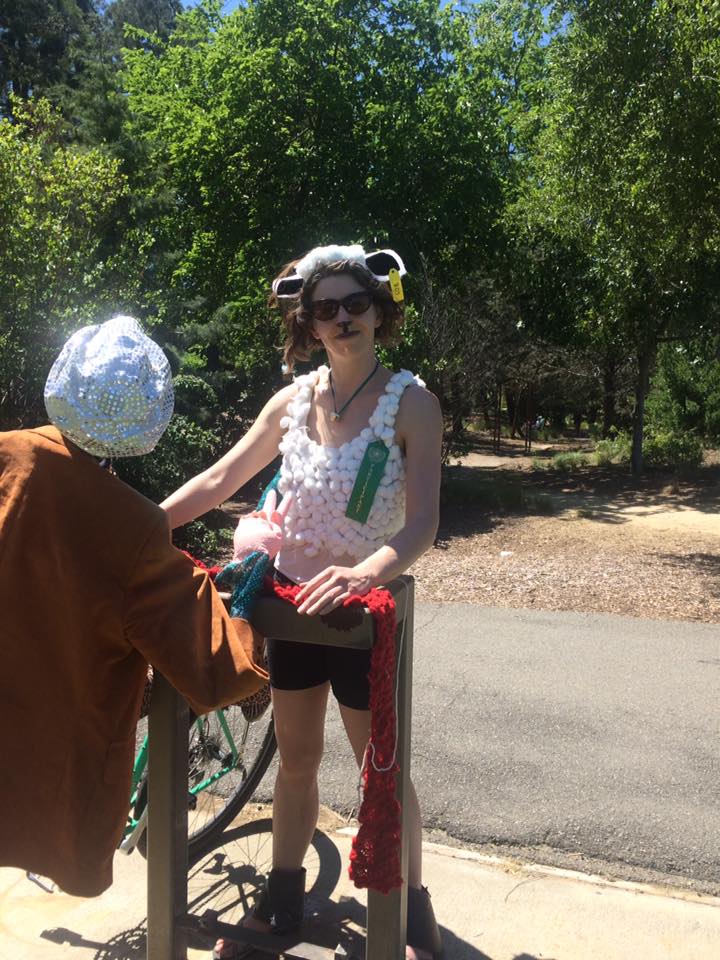
So much goes into hosting our stop for the event, from the food and drink prep, to game design, to structure set up— I wish could capture all the creativity that goes on behind the scenes. But since I was on craft crew, I mainly have photos of our costumes and other sheep-themed decorations.

2017-04-29 09.52.02

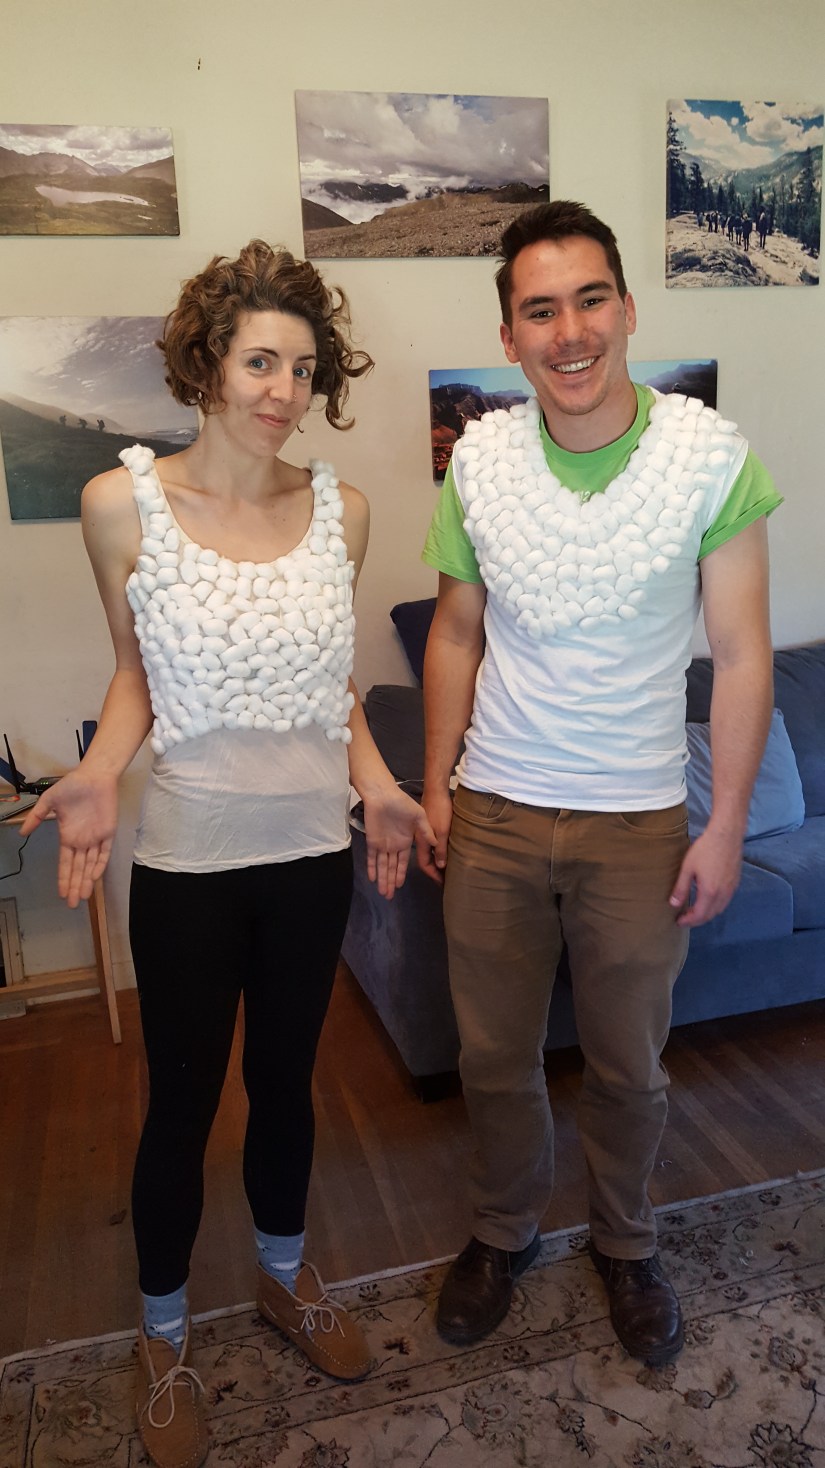
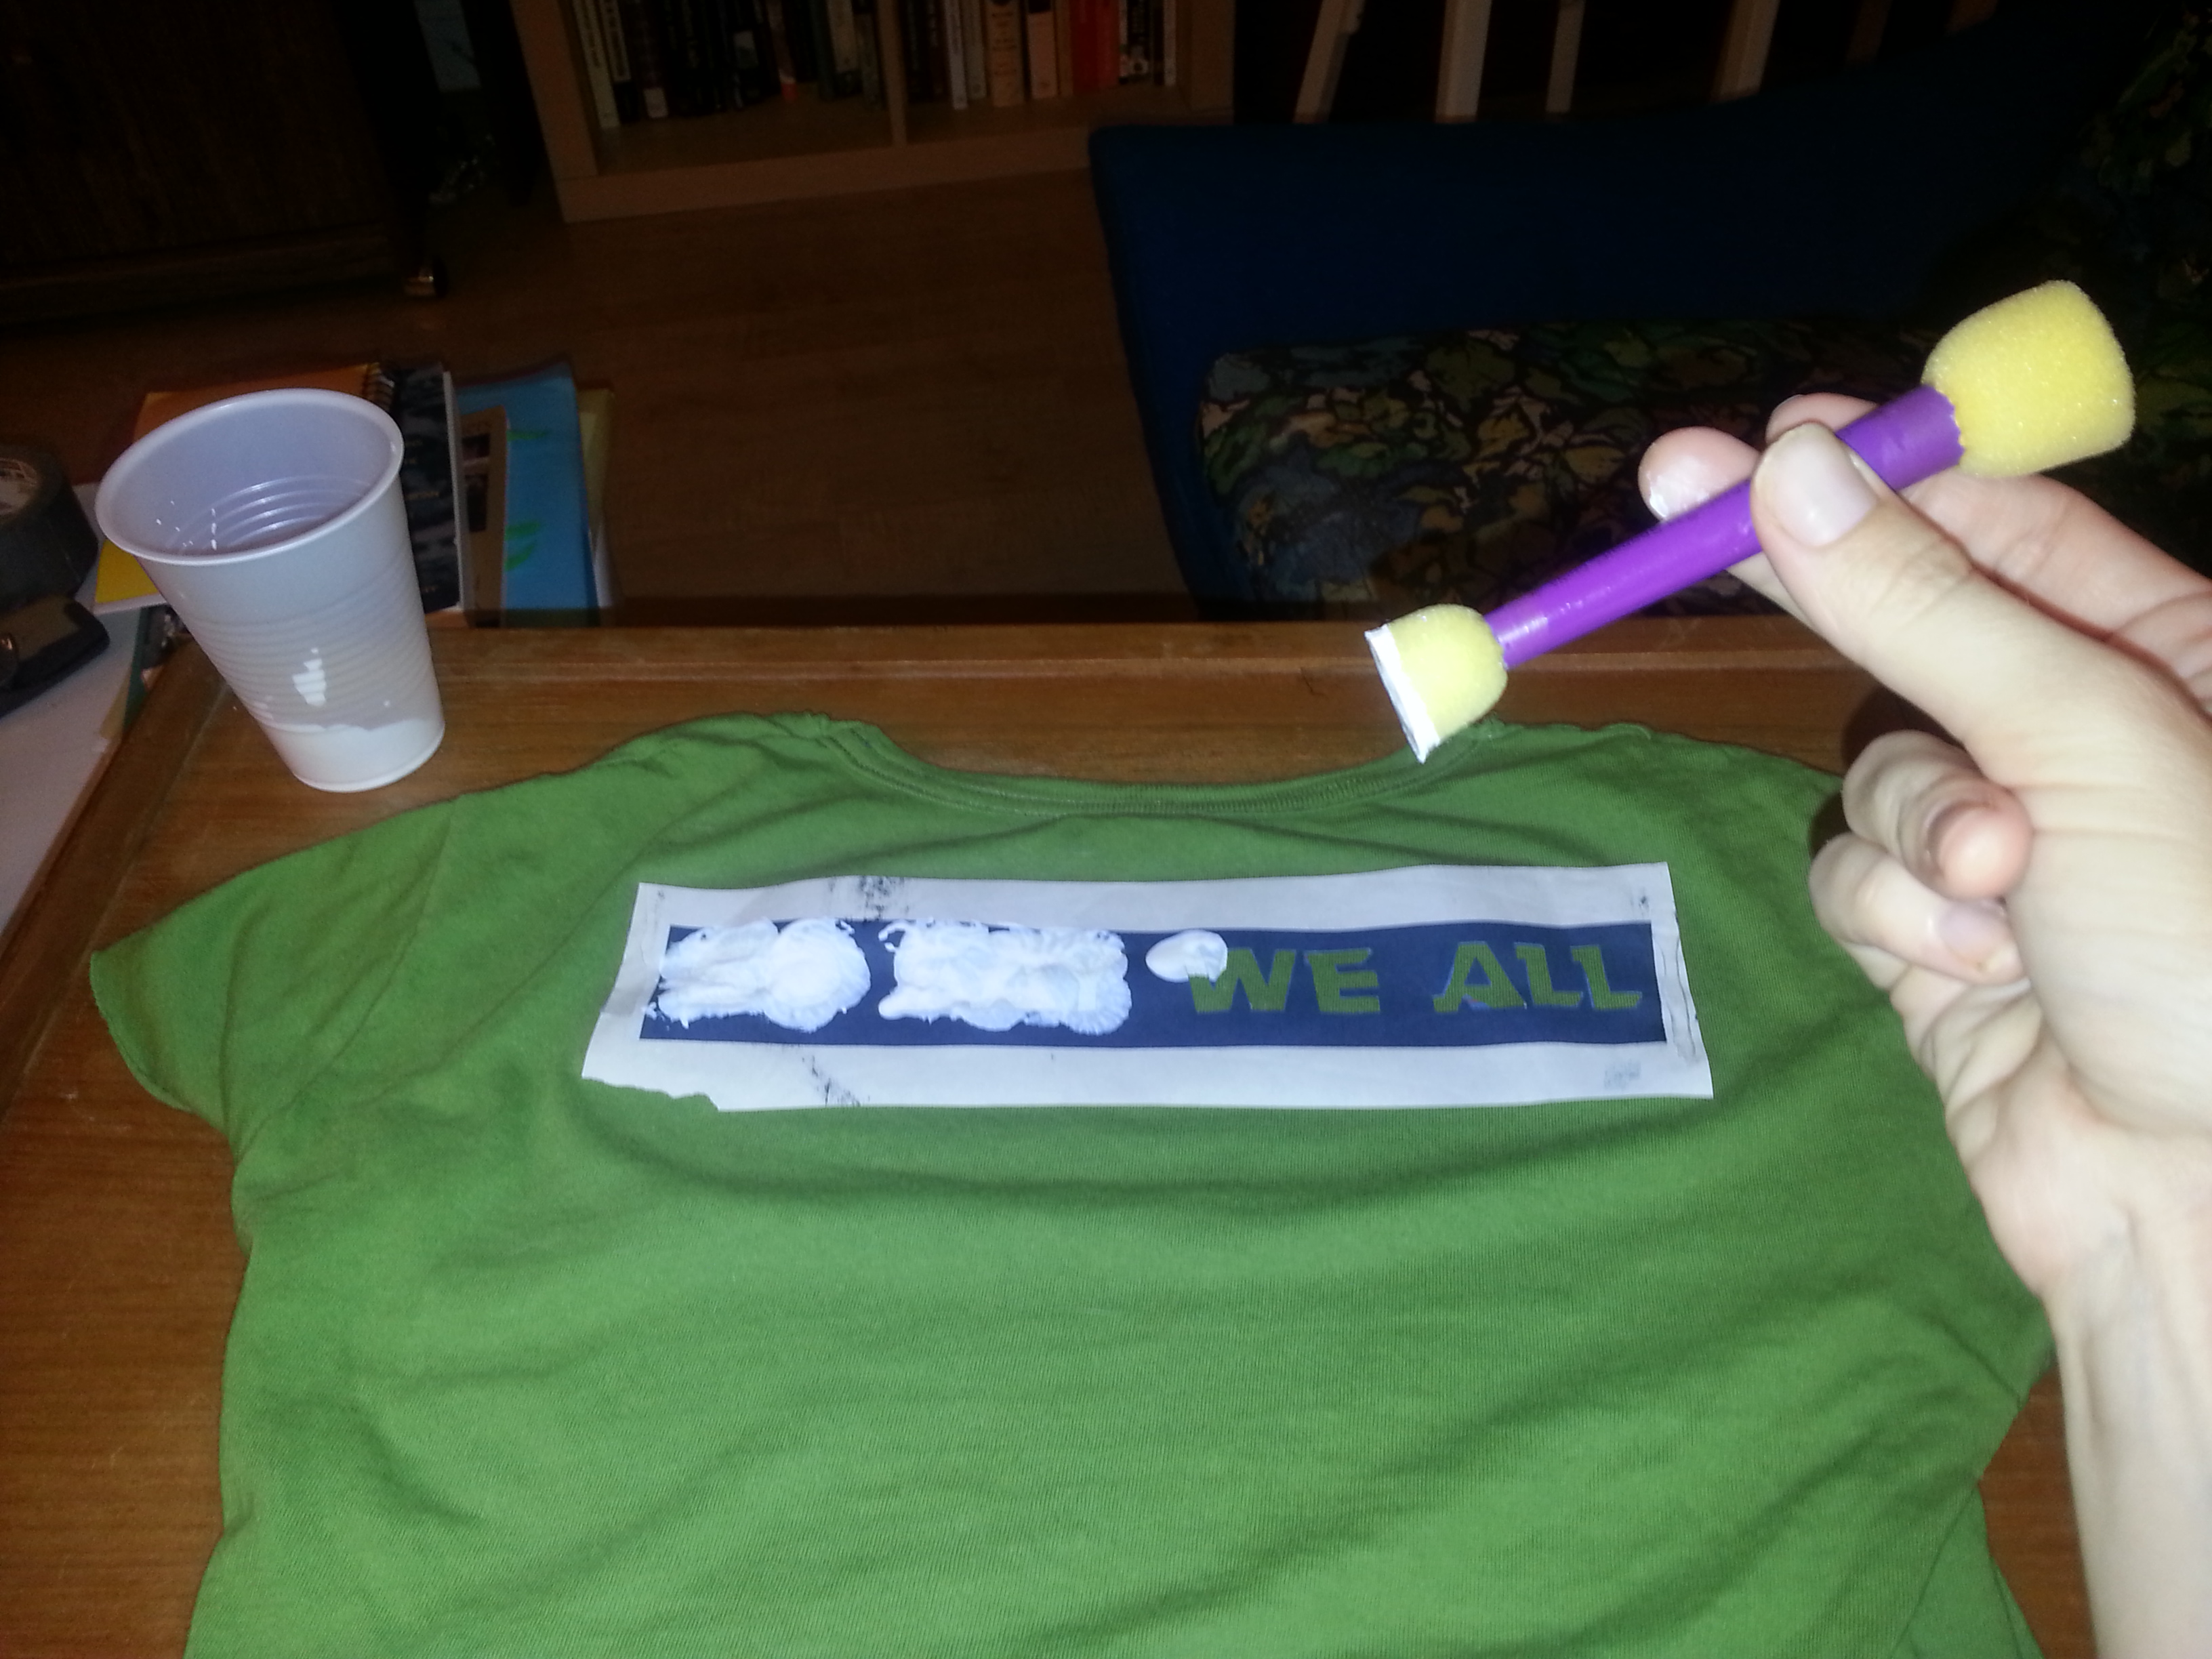
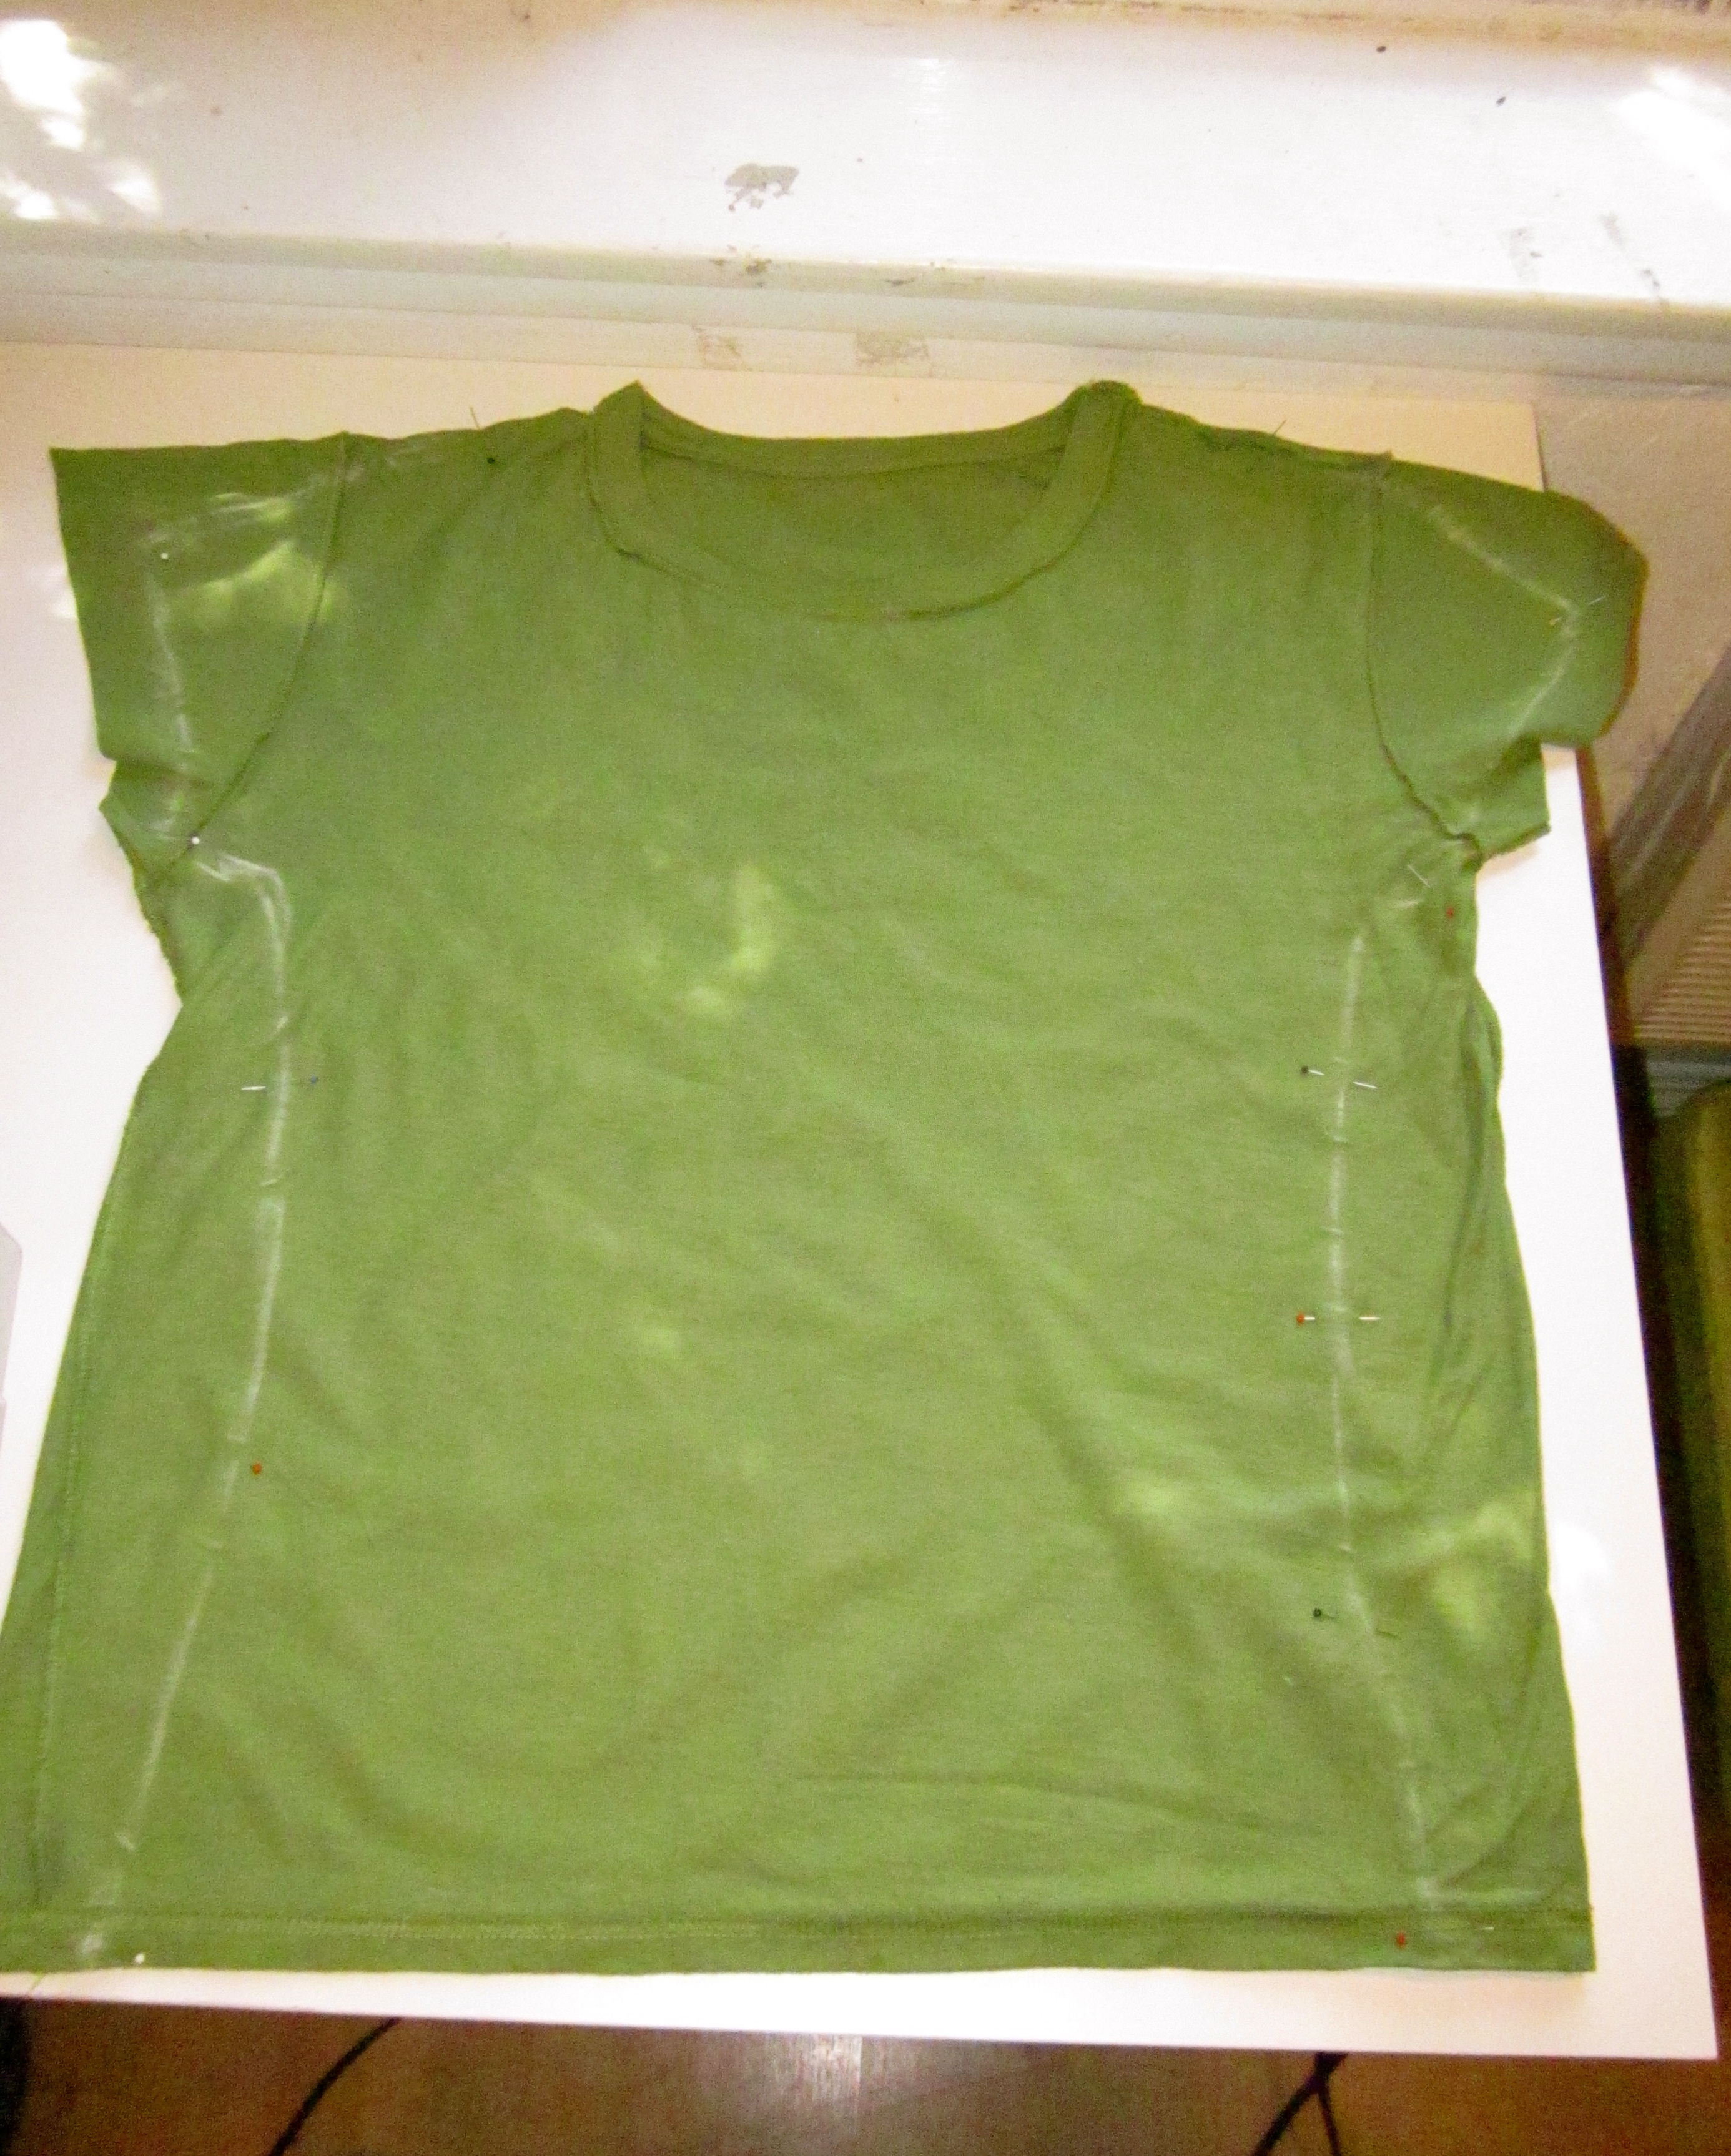
If you want to be a cheap sheep, be a cotton ball sheep! We hot glued cotton balls onto T-shirts for the main part of our costume.

Materials: white T-shirts, cotton balls, hot glue guns and hot glue, cardboard to place in between shirt layers.

2017-03-31 13.22.41

Instructions: Glue cotton balls to your shirt! You can do them in neat rows or in a more natural fashion. Just don’t burn your fingers. Also, be patient, it takes an hour or more.

2017-03-31 13.23.09-1

When you have finished a shirt, it’s time for sheepy accessories:

2017-04-29 16.19.21We searched through DIY sheep ear tutorials on the internet to come up with a simple head piece. Not baa-d, right?

Materials: Wide plastic headbands, white and black felt, white duct tape, cotton balls, and hot glue.

Instructions: The best order of operations is to hot glue the ear felts together, pinch at base, tape the ears to the headband, then hot glue cotton balls on the top. If you’re making a lot of these, cut ear templates out of cardboard first!

2017-04-14 19.42.11

I didn’t get great photos of all the other costume details, but you can see in my photo that we had bell necklaces, sheep face makeup (black eyeliner), and ear tags (paper gift tags cut down to size and hot glued on). I also made black poster board hooves at the last minute, which didn’t last that long on the bicycles!sheep1

All the white duct tape also had another important use: it went towards the creation of the red and white barn doors! 2017-04-29 14.59.18

Materials: four red poster boards, one roll of white duct tape, and a buddy.

Instructions: Lay out the boards so they overlap. Tape together horizontally and then vertically, using a friend to help hold the tape straight. Outline the entire door in white tape. Add the Xs at the bottom last.

sheep2

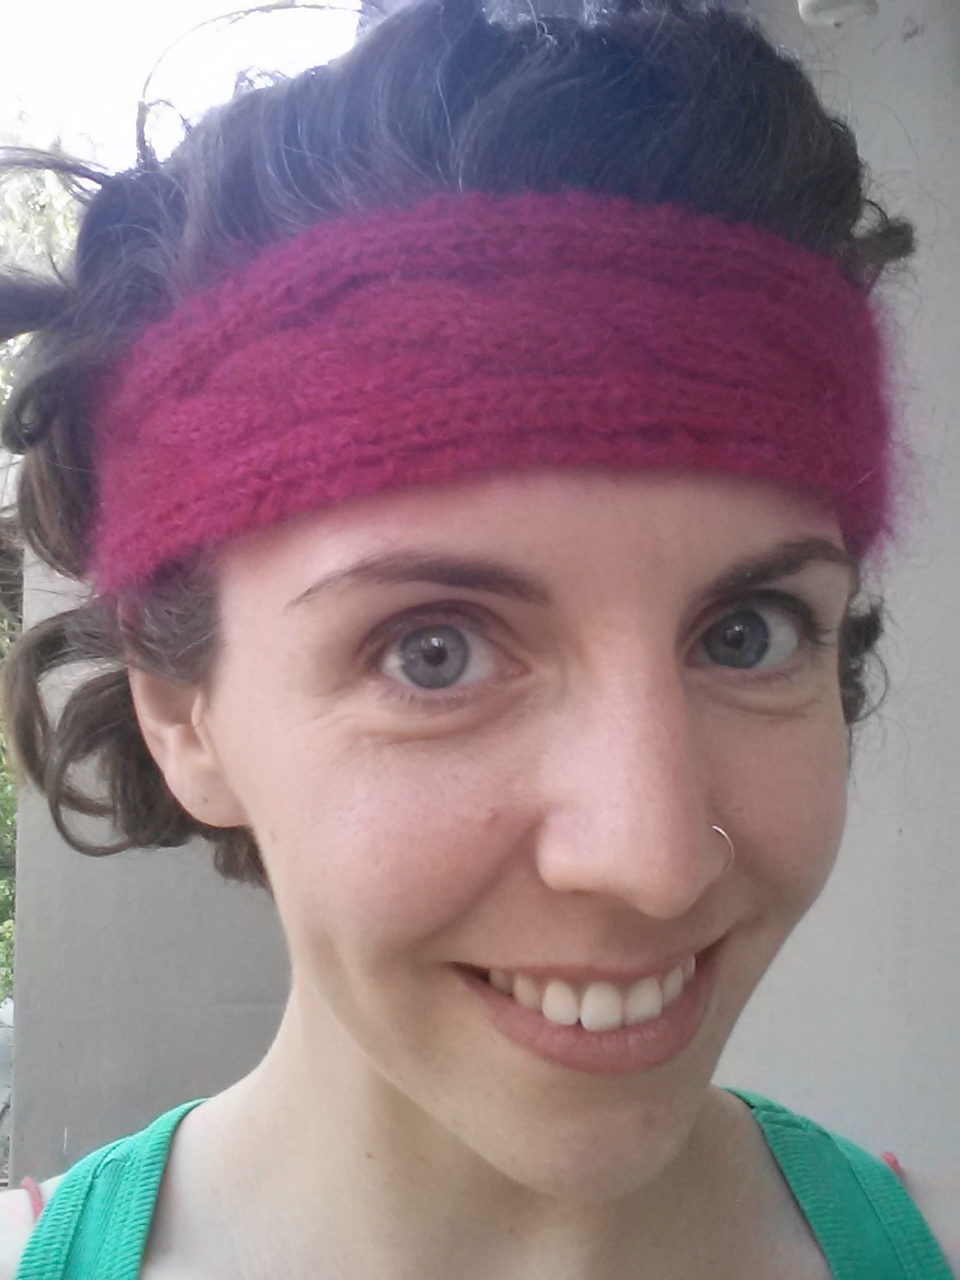
I hope this inspires many a bicycle cozy and sheep costume! (And if you need even more sheep patterns, check out the Baa-ble hat I made last winter.)


Activity Knits & Crafts, Nerdy Knits & Crafts, Quick Knits & Crafts, Uncategorized

Harry Pottercraft!

In honor of Harry Potter’s birthday (July 31), the release of Harry Potter and the Cursed Child, and my recent trip to Harry Potter World, I’m doing a quick post on pottercrafts!

Deathly Hot: The Hallows Tank Top

2016-07-22 12.42.52

Just before leaving for Los Angeles to visit the new Wizarding World of Harry Potter in Hollywood, I decided I needed a DIY top appropriate for the 100+ degree F weather of LA in July. Luckily (felix felicitously?), I found this great Deathly Hallows cutout tank tutorial on YouTube. I made my lines extra sharp by using an X-Acto Knife instead of scissors, but either will work. Just swish and flick!

2016-07-22 12.35.10

You can still kind of see the chalk lines here. They faded eventually, but I’m probably going to get more chalk on it, seeing as how this is a great top for the rock climbing gym.

2016-07-29 19.17.21

See that high stepping move? Definitely the (hor)crux of the boulder problem. 🙂

House Colors Headband -Gryffindor version

2016-07-29 16.48.48

The other item I wore that weekend was a headband, in lieu of a house scarf. Even though the Sorting Hat has placed me in Ravenclaw (and my cat too!), I figured that Gryffindor colors were the way to go here. I drew inspiration from the scarf pattern seen in the 4th Harry Potter Movie. But what I’m most proud of is the fact that I made this on the car ride down from Northern California! I actually finished it in the dark!

2016-07-29 16.46.55

It’s a little wonky because of that, and the fact that I had no pattern, and the fact that I forgot scissors and cut the back threads with a pocket knife, but I’m sure Dobby would still wear it.

2016-07-29 16.48.33

I mostly wore this headband when I went on rides, but once again, I forsee using it quite a bit for rock climbing:

2016-07-29 19.18.05

Perhaps it will help me be braver when bouldering! At any rate, I know Dumbledore would approve of this knitting pattern. Need proof? Here it is, book 6:

Dumbledorknitting

By the way, this the first Harry Potter themes knitting I’ve done—that would be the Lion Cat Toy from a post in 2012.

Also: bonus photos!

Wizarding World of Harry Potter:

2016-07-23 08.52.43Version 2

Me as Hermione in 2007:

1


Activity Knits & Crafts, Holiday Knits & Crafts, Quick Knits & Crafts

A really quick wrap up of 2015 crafts

2015 is almost over! Who knows when I’m going to have the time to do detailed craft posts and tutorials again. With that said, I have made a few small things over the past 6 months, and I imagine a lot of people reading this like to look at the photos on craft blogs anyway. So here the crafts of each season:

Summer

20150720_150842

A second chapstick holder for A.! You wouldn’t believe how much use he got out of the first one (well, you would if you saw it). This time, in a less phallic color.

20150720_150946

Another linen stitch headband for myself, also in green. I call this the commencement headband because knit a large portion of it during my graduation ceremony.

Autumn2015-11-08 13.27.50

An ombre version of the Yosemite beanie for G. As per usually, I made this pattern up as I went along to match the yarn. I did the colorwork because I didn’t haven enough of any one color, but I ended up really liking the gradient effect. Crochet.

2015-10-28 21.28.16

Ok, I know lots of non crafty people carve pumpkins, but these jack o’lanterns turned out really nice. I’d never used stencils before, but it was great. T’s is both a small scale image and a meta image, which neither of us noticed until he finished and we lit them up.

Winter

2014-12-08 19.03.37

Ombre paper snowflakes! Made with origami paper in shades of blue and this Italian tutorial. Confession time: this photo is from Xmas 2014. I put them up this year too, but I forgot to take a picture.

2014-12-01 23.28.372014-12-02 00.35.172014-12-08 16.38.06

Bonus images!

Winter

2015-12-22 11.02.55

As in previous years, I made Christmas decorations out of branches and berries gleaned from the local flora. This year I put together a holiday bouquet with the best pieces. (I also tucked the smaller bits into my grapevine wreath, so that now it looks like something out of the shire:)

2015-12-31 16.25.36

Works in Progress:

I am still working my miette cardigan— here it is back in September:

2015-09-25 18.23.52

Conclusion: I did stick to my 2015 New Year’s goal of only using what I already owned to craft! I think my 2016 goal is to finally finish the mustard yellow sweater above.

Activity Knits & Crafts, Original Knitting Patterns, Quick Knits & Crafts

The Quick and the Head: Knit Headbands!

Headbands! Lots of headbands. That’s what this post is about. Headbands with names. And possibly superpowers.

2015-03-30 17.24.02

(Forgive the lack of posts, I’ve been busy!)

Last summer, I knit my first headband. Then this winter, after finishing the green sweater, I reverted back to headband making. They are quicker than a big project, they are great for using up odd bits of yarn, and they’re great for playing with new designs. Most of these are my own patterns. Here’s how I made them, in the order that I made them.

Rocknasium

2014-07-25 10.55.35This is a multicolor garter stitch headband in cotton that gets a lot of use at the rock climbing gym. I knit it flat, in long rows on circular needles, then sewed the two short ends together. Make sure you use a stretchy cast-on and bind-off method. There isn’t a pattern besides knitting garter stitch, but you do need to measure your gauge and your head circumference so you can knit it in long rows and get the horizontal stripes. I’d recommend going a few inches down from your head size as it will stretch.

2014-07-25 10.53.36

The color pattern above is one row gray, one row orange, two rows green, one row orange, one row gray. The one below I made for a friend, and that one was two gray, one blue, two green, two gray, one blue, one gray. If you don’t want a break in the color stripe, you can knit them in the round or leave a yarn tail of each color and weave them in as I did.

2014-07-20 11.37.182014-07-20 11.39.442014-07-24 21.02.20

These are the easiest of headbands! And they will definitely help you with the crux of that overhung 5.11b project. This is just a fact.

Teenage Mutant Ninja Headband

2014-07-19 10.00.38The next headband I made was way more complicated! I got really into honeycomb brioche stitch and was determined to make a huge headband from it. The colors and the shapes somehow remind me of ninja turtles, hence the name. Bonus points if you know the names of the turtles who wore the orange and blue masks!*

2014-07-18 17.01.29

For this headband you will need three colors of cotton yarn and size 5 needles or whatever will get you a gauge of 8 stitches per inch unstretched/ 6.5 stretched. I know that’s kind of specific but that’s how I accounted for the fact that headbands have to stretch. If you have a smaller head you should adjust your gauge as needed. You’ll also need a crochet hook.

 CO 108 in Color A

r1 and r2: k

r3: Color B k1, sl 2 p wise, *k6, sl2. repeat from * to last st, k1

r4: p1, sl 2, *p6, sl2, repeat from * to last st, p 1

r5: repeat row 3 but carry Color A up the side

r6: repeat row 4

r7: repeat row 3

r 8: repeat row 4

r 9 and r 10: color A knit

r 11: k 5, sl 2, *k6, sl 2, repeat from * to last 5 sts, k5

Add Color C here and repeat. Cast off. Sew short ends together.

After casting off: Using a crochet hook and Color A, add a single chain stitch border to the edges. If your headband is seeming like it will be a bit loose, add some decreases (i.e. chain two knit stitches together) to tighten it up.

2014-07-18 18.09.44Your headband should look pretty wonky at this point—make sure to block it before wearing if it does! That’s how I got mine to lay flat.

2014-07-19 10.01.36

Wearing this headband will definitely give you the power to finally defeat Shredder with your mad katana/nunchuck skills …or, you know, keep your hair out of your face during zumba. One of the two.

*Answer: Michelangelo and Leonardo, respectively.

Jessa-Hannah Bluebell Poem

2015-03-21 18.29.13

This is another, smaller honeycomb brioche stitch headband. I started on this design nine months ago, but it took a long time and a fair number of mishaps for it to finally emerge in its complete form, hence the name (It comes from the last episode of  season 4 of Girls—spoiler warning!)

2015-03-21 18.31.43-2

 I used the same yarn and knitting needles as the big brioche headband, but knit it vertically and with just two colors. Make sure your colors work together! I had to start over when I realized my first, yellow version of this headband looked like a sickly easter egg.

Provisional Cast on: 15 sts in Color A

r1 and r 2: knit

r3:  With Color B, k 1, sl 1 p wise, k 3, sl 1*

r4: p 1, sl 1, p 3

r5: repeat row 3

r6: repeat row 4

r 7 and r8: With Color A, knit

r:9 With Color B k 3, sl 1 p wise, k 3*

r 10: p3, sl 1 pwise

r11: repeat row 9

r12: repeat row 10

You’ll need to join the two short ends to form a headband by ending either after a row 12 or a row 6. Provisional cast on will make it easiest. I used a three needle bind off. Once again, blocking will help the brioche honeycomb stitch look its best.

No matter what you do, the edges will still curl a bit. Overall, I like the pattern a lot, so I decided I can deal with some rolling of the edges. Or, as Hannah put it, “I can’t guarantee perfection, but I can guarantee intrigue.”

2015-03-21 18.29.34

This tiny brioche headband will not help you deliver your own baby or anything, but it will give you a new appreciation for the beauty of little things. What’s more magical than that?

Mahna Mahna

2015-03-21 18.41.31

This is one of the few patterns that is not my own! I used this free cabled headband pattern (also on ravelry). I won’t repost it here, but if you can handle a basic cable this headband will be no problem. I used my own unique yarn blend of two strands pink mohair, one strand recycle red sweater wool (heavily featured in my knit tank top in a previous post). Which is why I call this one Mahna Mahna, because it reminds me of the two Muppets from that one song.

2015-02-05 10.09.49

One of the nice things about making a wide cabled headband: it doubles as an earwarmer! This headband, like the Muppet song, will getting stuck in/on your head. It will give you the ability to feel warm and fuzzy even on a cold dreary day.

Minnesota

2015-03-03 10.01.06

These are two color linen stitch headbands! Linen stitch is fantastic for headbands because it lays nice and flat. These two are named Minnesota because that’s where they went to live.

I used Michelle Lewis’ linen stitch headband recipe, which seems rather underutilized, as a guide for these headbands. But since I was using two colors, this craftsy guide, especially the suggestion for how to avoid color pooling, was very helpful too.

The two-color linen stitch recipe:

Provisional cast on: even number of stitches in Color A

For your first ever row, skip to Row 2 (r 2) to avoid color pooling.

r 1: Knit 1, yarn front, slip 1, yarn back. repeat to end of the row

 r 2: Purl 1, yarn back, slip 1, yarn front. repeat to end of the row

Repeat these two rows with Color B, then repeat them with Color A, etc. When the headband is long enough, sew the ends together.

For the top headband, I used the same yarn and needles as most of the projects here. For the bottom headband, I used size 2 needles and two partial balls of a wool blend, self-striping sock yarn, which created a more intricate looking pattern.

2015-03-03 10.02.11These headbands will give you the ability to travel around the country and/or world having amazing adventures and connecting with inspirational people. Or they will give you the ability to get out of the house on a cold winter evening. Depending on what you need that day.

Heartbeats

2015-03-30 17.25.49I was all ready to write this post a week ago, but then I was like, you what I need to do? KNIT ANOTHER HEADBAND. So I did. I decided to call it Heartbeats, even though it has been pointed out to me the graph of a heartbeat does not follow this neat curve. I was inspired by the Jose Gonzalez cover of The Knife song “Heartbeats.”

I told myself to write down the pattern as I came up with it, but either I forgot or I misplaced it, so I’m going to reverse engineer it for you right now:

Heartbeats recipe:

Provisional Cast on 11 sts in Color A

From here on, the three stitches on either edge are your border stitches—they will always be knit with the pattern Knit, Purl, Knit. The five middle stitches are stockinette and they will have the color work. Here is the chart:

Screen Shot 2015-04-11 at 2.01.42 PM

As you can tell, you need to make sure to finish at the end of a complete chart for your heartbeat to be…complete. And as always, you’ll need to block it well—especially since there is a lot of stockinette. But it looks really cool laid out flat!

20150328_115256This headband gives you the power of the heart—wherever that may take you and for whatever that is worth. (It seemed important to the Planeeters!) It may or may not help you sing like Jose Gonzalez.

2015-03-21 18.43.44

Hope you enjoyed these headband patterns!

Activity Knits & Crafts, Quick Knits & Crafts, Uncategorized

personalized little knit gifts

I’ve let almost all of June go by without a post! It’s been a busy month of researching and writing, traveling and celebrating. I have knit two little gifts for friends that I’ve been meaning to share—both are cotton, quick to knit up, and personalized, which for me are the best things to make in these warmer months.

However, I have not been taking the best notes on my knitting, nor have I been taking good photos of my work! With apologies for the quality, here’s what I’ve been making.

Couples chalk bags

2014-04-26 11.29.28

Recently, some very cool friends of mine got married. As it happens, they had also recently gotten into rock climbing, but they did not yet have chalk bags. So I used some of the rudimentary designs from my chalk bag pattern Beta (ravelry) to make them some matching chalk bags in this bulky cotton yarn from my stash. Because the yarn was so thick, they knit up super quick—I made them the day before the wedding! I took that blurry photo above just before heading to the ceremony.

2014-05-13 20.26.02

Here they are in action! I think I would probably make the drawstrings shorter if I had it to do over again—I meant for them to be tied in bows, but the yarn is a bit too bulky, it doesn’t work as well as it does for the original pattern. I didn’t keep track of the number of stitches or rows here because I was in a hurry, but I did do a gauge swatch so I could figure out how to make these bags close to the dimensions of the original pattern.

2014-05-13 20.28.332014-05-13 20.28.30

It’s hard to get a non-blurry action shot of gym climbing, but you get the idea. I used the smallest size needle that would work with this yarn so that they could be used without a lining. I think unlined knit chalk bags work best with a tight gauge and a chalk ball inside as opposed to loose chalk. And of course, couples chalk bags work best when you’re climbing together. ;c)

Footnote washcloth

2014-06-16 00.45.27I have a musician friend who is having a birthday this week, and when I knew I would get a chance to visit him shortly beforehand, I decided to knit him something. One of the most unusual things about his music is that he wrote and can perform a song on guitar where he plays using his hands and his feet:

Jimplayingwithfeet

I decided that his knit gift should include some colorwork with both a foot and a musical note—a footnote if you will. This piece is my own design and yet again I put it together rather quickly (hence the funky spacing). I’m actually quite pleased with how the color contrast came out. I’m also somewhat proud of my creative combination of instarsia and stranded colorwork knitting, which you can see on the reverse side:2014-06-16 00.45.39

I didn’t write down the pattern for this knitted cloth, but I didn’t invent this pattern out of thin air either. I looked at a charts of footprints (here) and music notes (here) for inspiration. But in the end, I made my own version that deviated from the other patterns that inspired me. Like a guitar song played with feet, this bit of knitting ended up being rather unique.

Activity Knits & Crafts, Original Knitting Patterns

Beta: a chalk bag knitting pattern for rock climbers!

As promised, I have a new free pattern in my series of activity-related knitting. Last time it was a pattern for a colorful yoga mat bag. This time it’s pattern to make a uniquely colored chalk bag for rock climbing! Introducing, Beta:

2014-01-14 16.31.09

I tried rock climbing for the first time ever in a climbing gym about seven months ago. I was amazed at how much I liked it, and I’ve climbed there almost every week since June. I never thought of climbing as my kind of activity, but I love that it is both a mental and physical challenge. (A side benefit of the latter is that I have actually have some upper body strength now!)

2014-01-14 21.06.22

One of the things that climbers often have on their person is a chalk bag, as chalk can help you get a better grip on holds when your hands start to get sweaty. After seeing someone who had a crocheted chalk bag at the gym (she received it as a gift and didn’t know how it was made), I decided I had to knit my own. I also decided that it should match the other gear I use while top roping. So I wrote a pattern that incorporates the colors of my belay device, harness, and shoes, AND for good measure, loosely mirrors the pattern on the strap of my particular harness ( this one by Mammut) with stranded colorwork. You can kind of see all this in the photo above. Here’s a lovely (blurry) action shot of me “chalking up” with my new chalk bag:

2014-01-14 20.32.49

In climbing terms, ‘beta’ usually refers to descriptions of or advice about a particular route. I thought it was a fitting name for a knitting pattern like this one. I don’t expect that many people will want to replicate the exact colorwork that I have done, because it is so tailored to my climbing gear. But you can use this pattern as advice for how to make a chalk bag in whatever style and color you want.

[EDIT: I almost forgot to include some “in progress” pics!]

2013-12-29 11.07.052013-12-29 13.44.56

The only thing I don’t have good advice on is how much yarn you need, because I used leftovers from the Bernat Handicrafter Cotton that I had from making the yoga mat bag. I would guess that since skeins are 80 yds/50g each, to be on the safe side you’d want to have about 1/2 skein of white, 1/3 skein each of orange and grey, and 1/4 skein of green, but I did not measure or weigh my yarn so I am truly guessing. In the future I will try to take notes!

2014-01-14 16.31.22

I’m going to post the whole pattern below, but for the first time ever I have made a pattern into a free ravelry download, so if you are on ravelry, you can get the pattern there as well, and  post your own finished version!

Beta: A climber’s chalk bag pattern
Yarn: Worsted weight cotton yarn in white, green, gray, and orange
(this version was made with Bernat Handicrafter Cotton)
Materials:
One set of double pointed knitting needles, size 4
Yarn needle
Optional: stitch marker for start of round
Gauge:
18 stitches and 26 rows= 4 in. square.
Gauge is not super important as long as you can fit your hand inside the bag.
Chalk bag pattern
Cast on 56 stitches in green, divide onto four needles (14 stitches on each)
Round 1-4: knit
Rounds 5-8: switch to white, knit
Round 9: (k6, yo, k2tog), repeat to end of round
Rounds 10-13: knit
Colorwork section:
Rounds 14-21: Work Chart 1.
Chart 1
Chart 1

Rounds 22-29: Work Chart 2.

Chart 2
Chart 2
Rounds 30-37: Work Chart 1 again.
Decrease section:
Round 38: with white, knit
Round 39: (k2tog, k1) repeat until last two stitches remain, k2tog
Round 40: knit
Rounds 41-46: Repeat rounds 39 and 40 three times
Round 47: k2tog all around
At this point you should have about 6 stitches remaining.
Break yarn leaving a long tail, pull through remaining stitches. Weave in ends.
I-cord closure
With white yarn, cast two stitches onto a double pointed needle
Knit across, but do NOT turn. Slide stitches to the other point of the needle
Repeat until I-Cord is the desired length, approximately 30 inches.  Cast off.
Weave through the yarn over holes.
I-cord carabiner loop
Cast on 4 stitches in green, leaving a long tail (8-10 inches) for sewing
Knit an I-cord as for closure
When I-cord is 3 inches long, cast off stitches leaving another tail of yarn.
Using yarn needle, sew tails of yarn into the bag at the desired location.
 Liner options:
If you sew, you can make a fabric lining for the inside of the bag and stitch it in place. Otherwise, putting a zip closure plastic baggie inside or using a chalk ball will minimize the amount of chalk that falls out. A tighter gauge will also help loose chalk remain inside.

2014-01-14 16.32.42

 If you prefer written instructions to charts, I’ve typed them up below:
Chart 1 written out:
Round 14: knit
Rounds 15-16: switch to gray, knit
Round 17: (k1 orange, k2 gray, k5 orange), repeat to end of round, carrying floats in back
Round 18: (k5 orange, k2 gray, k1 orange), repeat to end of round, carrying floats in back
Rounds 19-20: with gray, knit
Round 21: switch to white, knit
 Chart 2 written out:

Round 22: knit

Rounds 23-24: switch to orange, knit

Round 25: (k5 gray, k2 orange, k1 gray), repeat to end of round, carrying floats in back

Round 26: (k5 gray, k2 orange, k1 gray), repeat to end of round, carrying floats in back

Rounds 27-28: with orange yarn, knit

Round 29: switch to white, knit

Abbreviations used:

k = knit,  yo =yarn over, k2tog =knit two together

As before, you must ask my permission before reproducing any of the content here, and when you do, cite me as the source!

2014-01-14 21.06.49

Happy Climbing!

Activity Knits & Crafts, Original Knitting Patterns, Tweaks & Alterations

Sunrise: a yoga mat bag knitting pattern

Happy 2014! I have been meaning to share this knitting pattern for a Yoga Mat Bag, and I figure the start of a new year is probably a great time to put it out there. (I’ve actually got a series of activity-related knits I’m planning to write about—stay tuned). I have done some yoga off and on for years, but this year but I hope to do even more. I think this pattern is perfect for (almost) mindless knitting on those cold January nights, and it will help you keep your New Years’ resolution to be more healthy—well ok, it may not actually help you do a sun salutation or attempt a headstand, but it might inspire and motivate you nevertheless.

Oh and did I mention this my first ever pattern??

2014-01-04 12.10.33

I never originally set out to make up my own patterns. I reasoned that it would be too much work. However, as I accumulated more years of knitting experience, I found that I was heavily modifying certain patterns. (I originally had this pattern up on ravelry as an extreme variation of this pattern but I now think mine is significantly different).

sunday yoga

I named this pattern Sunrise because that’s what the colors remind me of, and because last summer I went to an early morning yoga session in a park that was glorious, and it reminds me of then (yep, that’s me, yoga-ing on the grass). This began as a modification but morphed into my own design, particularly the color work.  It’s no masterpiece and it may have some errors, but I have decided to try and write it up, as a free pattern for you.

2013-10-01 14.29.28

Sunrise— A Yoga Mat Knitting Pattern

(Quick note—please ask my permission before reproducing any of the content here, and when you do, cite me as the source! I don’t mind sharing this pattern as long as it’s for non-commercial purposes.)

Materials: 

Bernat Handicrafter Cotton Solids & Denim (80 yds/50g each):

White (2 skeins), Tangerine, Hot Orange, Banana Yellow,  Stonewash, Hot Blue, Indigo ( 1 skein each)

One size 6 circular knitting needle (12 inches)  or double pointed needles (or size needed to obtain gauge)

yarn needle

 Gauge:

4.5 stitches per inch

To fit a yoga mat approximately 24 inches wide and 16 inches around when rolled up

Directions:

Cast on 35 stitches in White, leaving a long tail of yarn for later. Do not join yet.

Round 1: Knit into front and back of each stitch [70 stitches total]

Round 2: Purl

Round 3: Join in the round. Knit

Rounds 4-12: Knit

Round 13: Switch to Tangerine. Knit.

Rounds 14- 23: Knit

Round 24: Switch to White. Knit

Rounds 25-26: Knit

Round 27: Switch to Tangerine. Knit

Round 28: Knit

Round 29: Switch to White. knit.

Round 30-33: Knit

For remaining colors: repeat rounds 13-33. (The patter will be 11 rounds of color, 3 rounds white, 2 rounds color, 5 rounds white)

After doing this for 6 colors total, finish as follows:

Knit 5 rounds White

Eyelets: knit 2, yo, k2tog. Repeat until end of round.

Knit 3 rounds.

Cast off.

Weave in ends. Thread long tail of yarn from the beginning of the project through the cast on loops and draw together until tight. Secure end of yarn tail to the bag.

I-cord Drawstring:

Cast on three stitches.

Knit across, do NOT turn.

Slide stitches to the other point of the needle.

Knit across, do not turn, slide stitches to the other point of the needle.

Continue until you have 75-80 inches of I-cord. Cast off.

Thread one end of the drawstring through the eyelets at the top. Fasten both ends of the drawstring securely to the bottom of the bag.

2013-10-01 14.29.35

Notes:

  • I am a loose knitter, always have been. You may want to go up several needle sizes if you are a tight knitter.
  • This is a great project for using up small amounts of cotton yarn. I didn’t calculate how much I used of each skein but I don’t think it would be hard to adjust the pattern to the yarn you have on hand (a really conservative estimate of yardage would be maybe 280ish, based on other patterns?)
  • The coolest part of this design is that when you put on the strap, the bag cinches up at the top on its own. I can’t take credit for this idea, I’ve seen it on other yoga bags, but I figured out how to do it myself. Perfect for taking your yoga mat with you on a bicycle!
Activity Knits & Crafts, Nerdy Knits & Crafts, Tweaks & Alterations

creative destruction: re-inventing t-shirts with scissors, paint, and thread

This summer, I took four old t-shirts and transformed them with stencils, cut outs, or both. I even altered the basic structure of two of them to get the fit I wanted. And thanks to my lovely friend, I now have pictures of myself wearing them. So if you want a DIY run down of how to cut, slash, and paint your way to a unique T, read on. (Bonus: Battlestar Galactica references ahead!)

2013-09-05 11.55.45

Stencils

2013-08-23 19.59.59

Let’s start with the least destructive activity—paint. If you read my post on nerdy crafts, you’ll notice I’m not new to stenciling. On that post I linked to the tutorial on stencilry that I use, but I’ll give you the short version here.

One of the easiest ways to make a clean stencil is to use the freezer paper method. First, pick a stencil image—in this case “So Say We All,” the “amen” of the Battlestar Galactica universe, in an appropriate font. Be sure to read the tutorial section on islands and bridges to make sure your image will work as a stencil—as you can see above, I had to add back in the “islands” in the middle of the “O” and “A” to keep the letters looking correct. Buy freezer paper, cut it to the size of paper your printer will accept, and print your stencil onto the non glossy side (some wrangling with the printer may be required). Cut out the stencil with an X-acto knife, and then with a dry iron, iron it directly onto the shirt.

2013-08-23 20.12.17

For the painting part, mix your preferred color of acrylic paint with fabric medium according to the directions on the bottle, then paint onto the stencil with a sponge or a brush. Make sure to put something between the layers of the shirt so the paint doesn’t soak through (and not cardboard, because I’ve notice the paint will stick to it—I used my X-Acto knife cutting pad). Let dry completely before removing the stencil, then follow the fabric medium directions for heat setting and washing the shirt so that the stencil will be permanent and clean.

2013-08-23 20.33.09

The process is somewhat similar if you have a permanent stencil, like this plastic alphabet one I used to make the phrase “Nothing But the Rain”—yet another BSG reference (its the phrase said by Starbuck to Captain Adama). The only difference here is being careful about getting paint everywhere when you move the stencil—I decided I didn’t care about the mess because I liked the splattered look, but you can decide for yourself.

The last option is to just trace simple shapes directly onto the stencil paper and then cut those out—that’s the easiest option, and it’s what I did on my pink shirt when I wanted to use up the last of the paint I mixed. I did a pattern of triangles to match the cut outs on the back of the shirt.

Cut Outs

2013-10-01 14.35.15

I had a strong urge to do something “destructive” to a few of the shirts I had. This pink shirt, for example, which my friend promptly dubbed the pink triangle (i thought she was referencing the Weezer song but she was not!). This shirt had been abandoned in my laundry room lost and found box for months, so it became the first guinea pig for my cut out and stenciling experiments.

2013-10-01 14.34.56

I don’t have any in-progress shots for the cut outs, but here’s what I did. First I looked at some photos and tutorials online for some inspiration—this listicle of cut outs has some great images, and photos # 5, 21 and 22 intrigued me.  I decided to do a simplified version of the triangle cut outs from photo # 22. That one unfortunately had no tutorial, so I decided to make a triangle template, trace it onto the shirt with chalk, and then cut it out with scissors. I did the stencils later with the same template.

2013-10-01 14.35.08      2013-10-01 14.35.05

This mostly worked, but it was tricky to get the triangles all the same size and shape with scissors. So when I tried it on another t-shirt, I used my X-Acto knife to cut them out. Much easier! I think it works especially well for straight lines.

2013-10-01 14.33.08

I love the way that you can play with the placement of cut outs—for example, you can place them to reveal another shirt underneath and play with the contrast of colors and patterns. I think someday I’d like to attempt one of these two designs, especially the tree one.

Fit Alterations

2013-10-01 14.32.57

One of the most basic DIY t-shirt projects is also the one that requires the most patience and skill (and a sewing machine)—changing the fit and cut of a shirt. The above tank top used to be a men’s size medium crew neck tee that I found in a free pile.  The green shirt below that I stenciled on was a boy’s size large crew neck t-shirt, also from a free pile. There are many tutorials out there for doing this, but I am going to show you the easier way I know.

2013-10-01 14.36.30

First, you need to start with a  clean t-shirt that is larger than you want it to be ( in this case, green shirt).  Your’e also going to need a smaller t-shirt that fits you well that will act as a template (here it’s the blue shirt).  Both need to be true t-shirts—those made from the kind of material that doesn’t unravel if you leave raw cut edges, and that’s important. It’s also a good idea that they have about the same amount of elasticity—if one is super stretchy and the other has no stretch, the end result may be a poor fit.

IMG_1717IMG_1713

Iron out any wrinkles and lay the larger shirt on a flat surface, then place the template shirt on top of it (remove cat if necessary). Line up the top seams and trace the outline of the template shirt on top.

IMG_1718IMG_1719IMG_1721

Pin the fabric together at the chalk edges and sew along that line using a matching color thread. After sewing, try it on once to be sure it’s not too tight, then trim the excess fabric off, and shorten the sleeves if necessary.

IMG_1722 IMG_1723

If the front and back necks are different, you now need to cut out the neck. You can either eyeball it or place the template shirt inside the other shirt and use pins to trace it by feel.

IMG_1727IMG_1729

Cut out the neckline with some good sharp scissors.

IMG_1730

…and try on the finished product!

IMG_1740

Making the tank top was even easier—the front and the back of the shirt had identical necklines, and I cut out the sleeves entirely. I first used this technique years ago making my very first re-fit, cut up, stenciled tank top, which you can see below. The stencil was an homage to my very first pair of lefty scissors, which I’ve had since I was a kid and still own. That’s right—I’ve been cutting it up Lefty style since first grade.

Photo 192

Let me know if you use any of these techniques to (de)construct your own t-shirts! I’d love to see the results.