Two nights ago I finished my custom fit raglan sweater! Ok, so I still have to weave in the ends and steam block it, but basically it is done. It’s definitely the best fitting article of knitting I’ve made so far—pics to come! Now, of course, I’m trying to pick a new craft project. Crafts are how I unwind after doing work, so although it is counterintuitive, I need them more when I’m busy than when I’m not.
In looking back over what crafts I’ve already made, I began to notice a pattern—I love to craft nerdy things! That’s right—if you’d find it on Geekcrafts, I’d probably want to make it. Fantasy, sci fi, video games, tech, or obscure pop culture, apparently I’ve dabbled in it all, either in crafts for myself or for someone I know. I have enough that I can actually make a list of my top ten favorites. So here they are, in order from “aww, how dorky is that” to “LOL I can’t believe you actually made that.”
10. Pokemon’s Ash Ketchum gloves
The only reason that these are number ten is because, by themselves, fingerless two toned green gloves can look pretty normal. But if you add a certain red and white hat…

Then suddenly, you gotta catch ’em all.
I made these for Keith’s Halloween costume the other year (nerdy costumes I’ve made could be a whole post by themselves). I bought the slightly stretchy dark green fabric from JoAnn’s and used light green felt and black velcro from my sewing stash.


Improviser that I am, I didn’t look at any glove patterns. If I had, I’m pretty sure I would have discovered that its easier to make a separate thumb piece rather than putting in darts in a whole piece. Oh well. I thought the velcro cuff part was a clever way of using the felt in a way that require it to stretch over the hand.
9. Apple logo iPod cozy

This was one of my first successes knitting with a chart—and it was a chart of the iconic apple logo. As you may be able to tell by the iPod in the picture, I made this a number of years ago—one of my early geek knits! I wanted to take a better photo but alas, I don’t know where this cozy ended up. It was the perferct size for the older iPods. You can see the button hole at the top of the photo—on the back I added a retro green fabric covered button. I didn’t use a pattern for the cozy, but I did check my gauge to make sure it would fit. Knit on straight size 1 needles I believe. Pretty sure I learned kitchener stitch (video link) to sew up the sides. So many memories!

8. Bjork’s swan dress
Out of all the costumes I’ve made, this replica of Icelandic singer Bjork’s 2001 Oscars dress is the one I am most proud of.

Perhaps it’s not typical nerdery, but let me tell you, it’s usually a pop culture junky who is the first to figure out who I am at a party (since Bjork wore it over a decade ago, it seems to have fallen away from public memory somewhat). I have now worn it on at least three separate occasions—the photo above was the most recent, at a Rock Star costume party (with bonus Pikachu in the background!) Below are some previous Halloween photos:


I made this audacious avian outfit from a $10 thrift store dress. I suppose it might have been a wedding dress, though I suspect it was a quinceanera dress. It was strapless and had seven tiered layers of white tulle. Seven! I chopped off the bottom ones and used that along with polyfill, black foam, orange cotton and a black button to fashion the swan top. Finally, I sewed a pale colored camisole that matched my skin tone to the top.


My mom helped a lot on this one—there were so many layers to sew through!
7. Game of Thrones house sigil coasters
My newest strain of crafting nerdery has been influence by all things George R.R. Martin —in this case, the HBO series Game of Thones.

This Christmas I made my brother coasters depicting the sigils and official house words. I used this awesome craftster tutorial to learn how to use the paint pen on ceramic surfaces—heat set them and the paint won’t wash off! Plain white tiles with felt feet on the bottom make nice coasters that don’t scratch tables. I only made two because my paint pen was running out. If you’re an architecture nerd, you may like the Frank Lloyd Wright designs I did on coasters for my mom even more.

6. LOL Cat baby blanket
If you thought I would bypass internet meme geekiness, think again!

This is one of my favorite modifcations. I used the free pattern for a bunny blanket buddy, but I shortened the ears. Then I used a crochet hook to write “O HAI” on the front, in a true, I can has cheezburger style. I wish I’d know about duplicate stitch then, because I think it would have lined up better for the words, but on the whole I’m pleased with the results. I did this as part of a craft swap, so to go along with the blanket, I made magnetic poetry with the kind of words you see in lolcat images using my printer, thin magnetic strips, and laminated cat photos for refrigerator meme action.

5. NES Controller stencil shirt
I love me some old school video games. And so does my brother. Which I why I made him this shirt.

Every so often I get the urge to learn a new craft, and this was one of them. I used the excellent tutorial from stencilry to learn how to mix acrylic paint with fabric medium use it on a disposable freezer paper stencil. Like the coasters, you can heat set the paint so it is washable. I’m pretty sure I downloaded the Nintendo controller image from the same website’s gallery of stencils, but I don’t know what folder it was in so if you want it you’ll have to hunt around. The hardest part of this was doing those red A and B buttons—getting the red paint to fill in those circles evenly was challenge. But then again, so was sharing a Nintendo with my brother back in the 90s! I still have it, by the way, and it works.

4.Drogon the Dragon Game of Thrones scarf
Another Song of Ice and Fire craft! This one is wearable, but you do so at your own risk.

(Spolier alert if you haven’t read the books or watched the series!)
Drogon is one of Daenery’s three dragons. In the books it says that when he was little, he perched on Dany’s shoulder. So of course for my Halloween costume, I had to knit a dragon scarf. What a pain in the neck (pun intended). I used this dragon scarf pattern because it was free, even though many ravelry reviewers said it was fiddly. They were right—you knit all the pieces separately and then sew them together. Ugh. And, since my scarf was black, it was really tricky to see where to sew. Also, all the cool patterning on Drogon’s back gets lost in all that black. However, I am proud of some parts. I used a drop spindle to ply two different color red yarns together to get the exact shade I wanted for his mouth. Also, I had Keith cut the eyes and teeth out of felt for me. The original dragon eyes and mouth look dopey, but this little guy is positively scary. It’s great if you are Daenerys, but if you are a regular person wearing Drogon, I’d keep an eye on him.

3. Flight of the Conchords stencil shirt

This t-shirt makes it into the top three because not only is it from song by the kings of nerd-dom, New Zealand duo Flight of the Conchords—it’s a shirt that is only featured in the music video version of their song “Business Time.” You won’t get the reference from a different version of the song. And even then, you only notice it if you look closely about halfway through the song (I’ve cued the link above to the correct moment. I guess I should add a NSFW warning if you chose to watch it past the 2 minute mark, even though they blurred things out…)
I made this t-shirt at the same time that I made the NES controller stencil. It was a birthday/Christmas gift for my friend Ali. I even made sure to get the font as close as possible to the original, which is a nice touch. And of course, it’s a baggy gray shirt just like the one in the video. The only thing I didn’t do was put a stain on it like the lyrics described (you can only take these things so far). As I recall, she thought it was pretty sweet.
2. A Dance With Dragons by George R.R. Martin book safe
Yet another George R.R. Martin craft? Oh yes it is!


This was a graduation gift for Keith, and it was really two gifts in one. First of course, was the craft you see above: a hollowed out book dressed up to look like the latest from the Song of Ice and Fire fantasy series. In order to get a large enough hard cover book to make it realistic, I went to the thrift store and bought a Tom Clancy novel when their books were on sale (it was about 50 cents). Then I hollowed out the inside using this tutorial as a guide. It wasn’t too bad, but it did take a while with my wimpy exacto knife. I printed out a copy of the cover for A Dance with Dragons on some printer paper to make the dust jacket—it fit rather well if I do say so myself.
The second part of the gift you can see from the folded paper inside the hollow book—a receipt for the order of the real A Dance With Dragons book. When he graduated, the book was not due out for another month or so. I thought this was a clever way to present a tangible gift when the actual gift happened to be on pre-order.


1. “Bake it So” aka the Star Trek TNG oven mitt
Of all the geeky crafts I’ve made, this one takes the cake—and it literally could pull said cake out of a hot oven.

This oven mitt is a pun on Capitan Jean-Luc Picard’s famous phrase “Make it So” from Star Trek: The Next Generation (now streaming on Netflix, fyi). I was a kid when that show was on the air and I totally loved it. When I re-watched some episodes with some friends many years later, we decide that if Captain Picard ever had any kitchen accessories, they would have to say “bake it so” on them. So of course, I had to make an oven mitt with the phrase.
The mitt is exactly what it looks like—dark blue letters cut from scrap material, zig zag stitched onto the front of a light blue oven mitt. I remember that I had to rip the seam of that oven mit from the bottom up to the thumb in order to get it to fit over the arm of the sewing machine. If I had it to do over I would have probably added interfacing to the letters to keep them from fraying or getting out of shape. But overall, I am really proud of my extremely nerdy accessory.

And that’s the end of the nerdy craft list—now, on to find some new geeky projects!
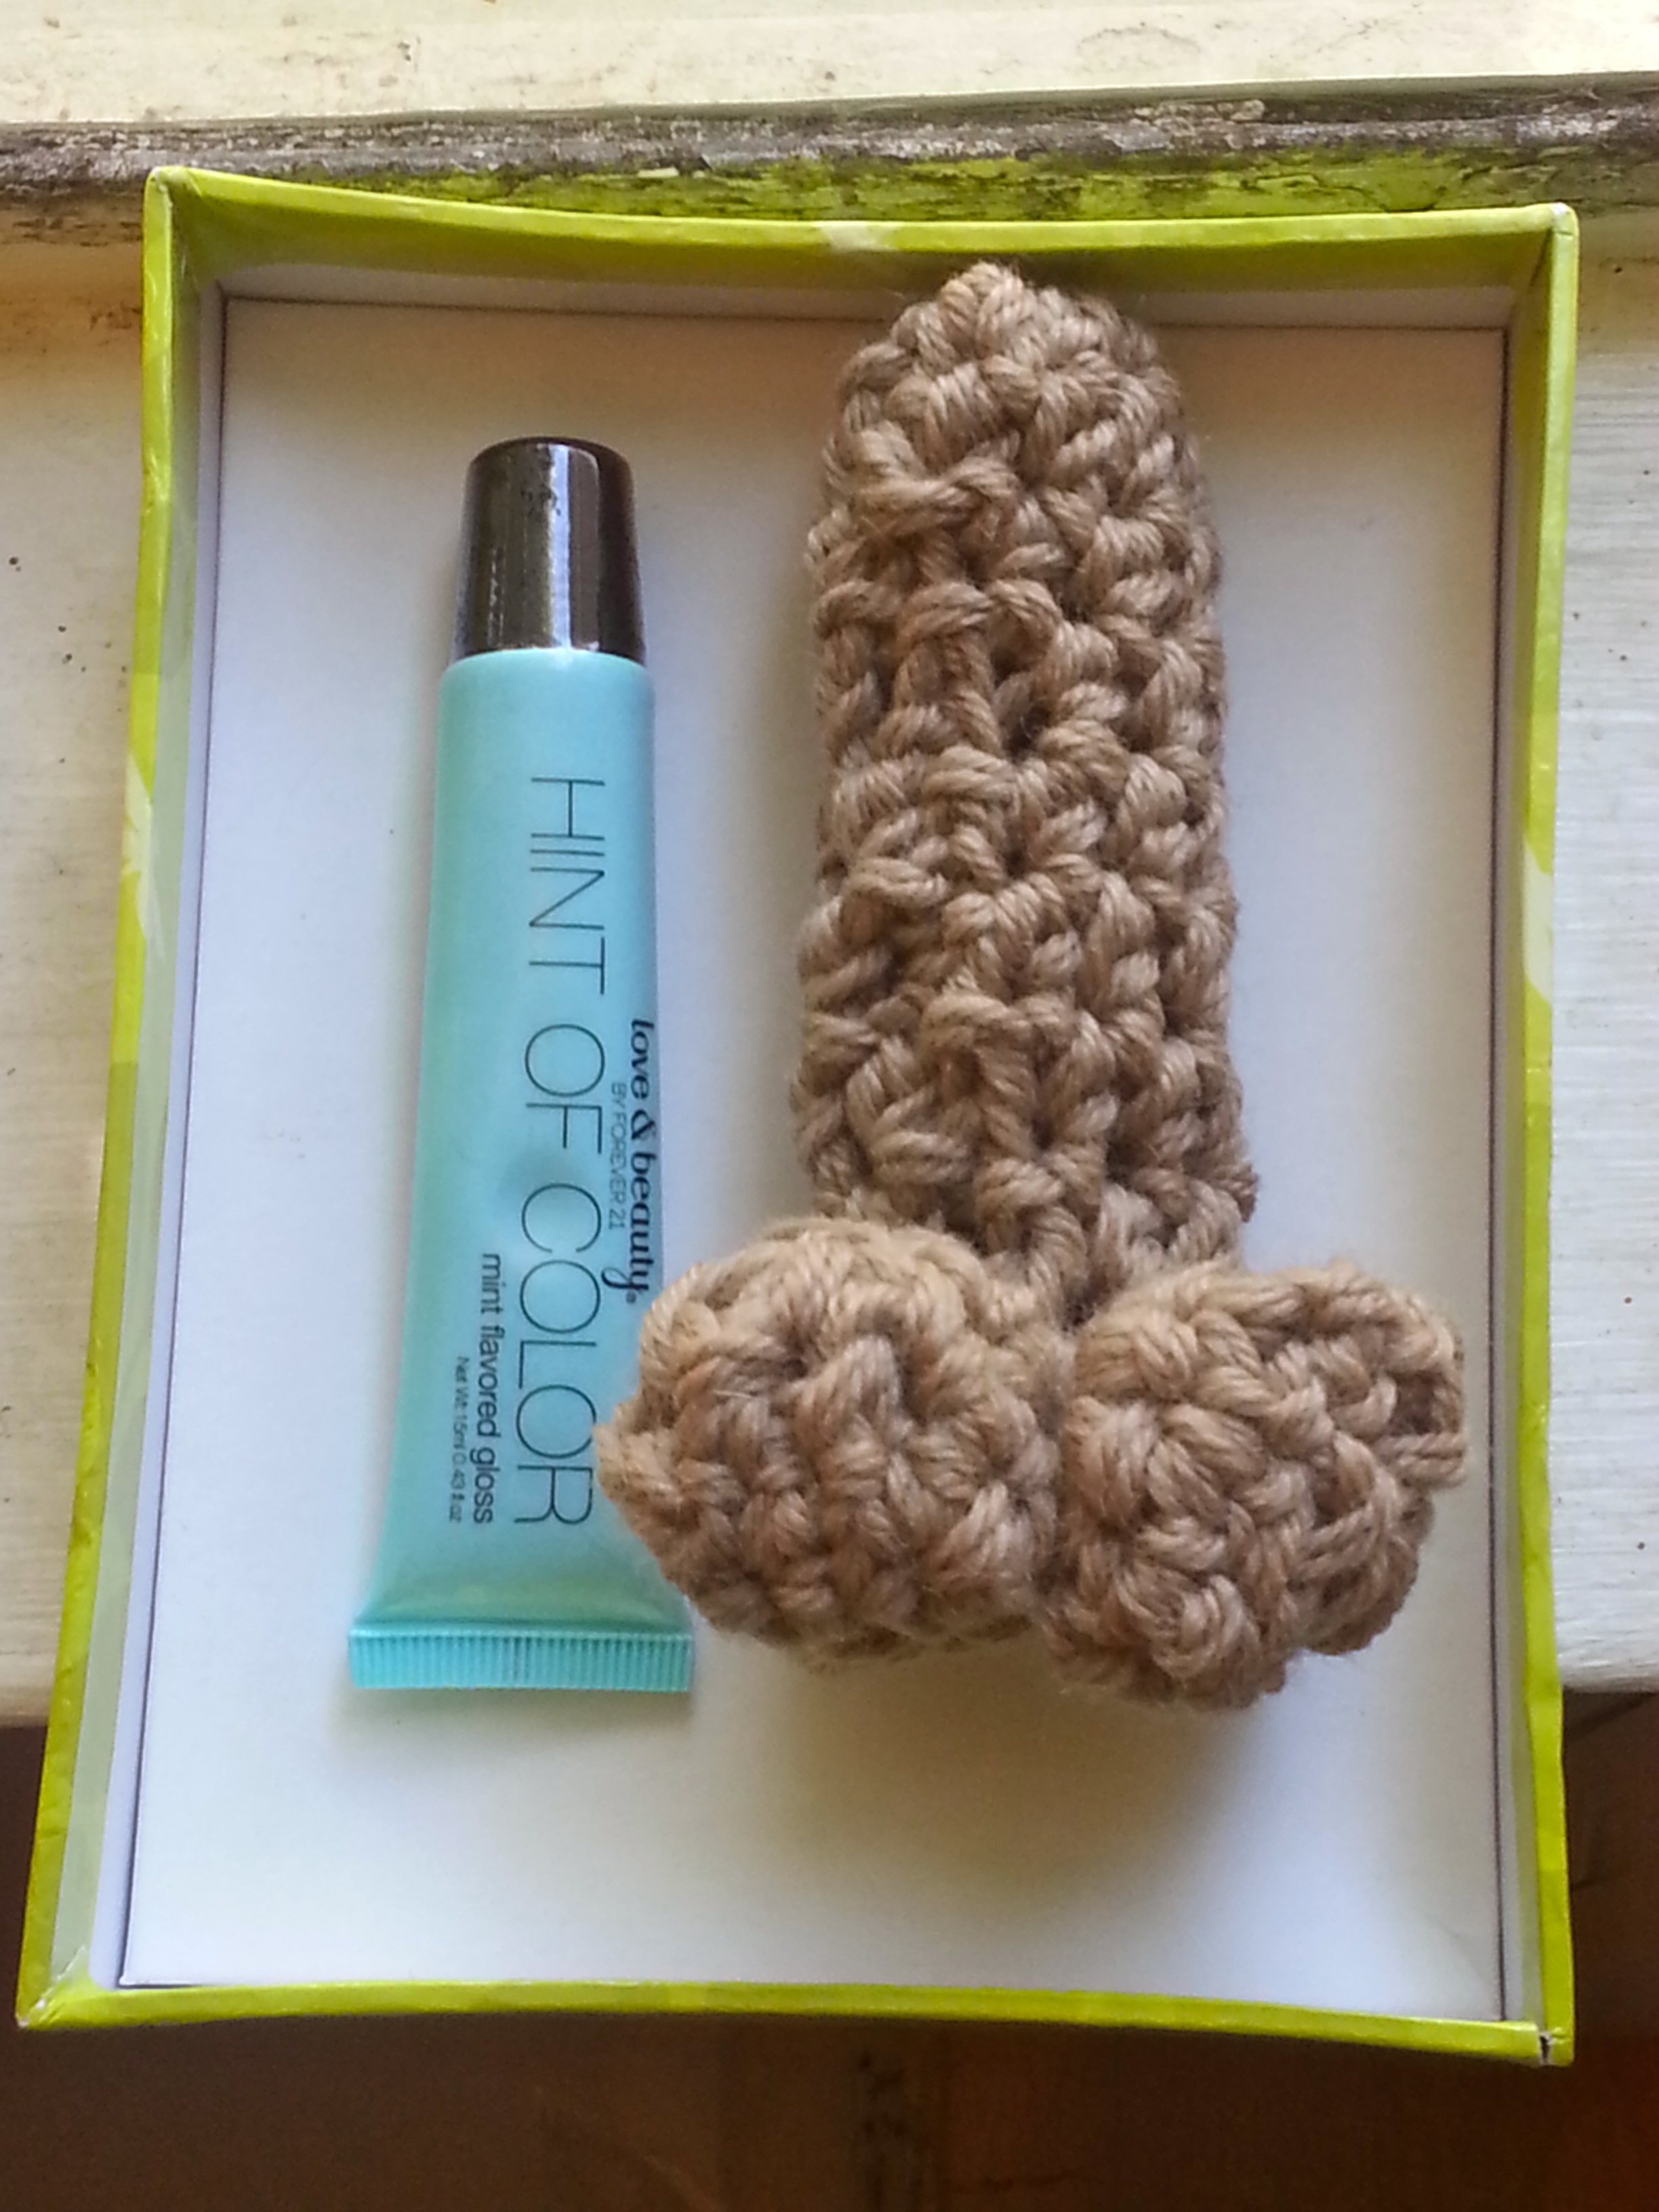 This project didn’t take too long (long!) to finish (finish!), mainly because I was really pressed for time. But I wanted to add a personalized touch (touch!) to my bachelorette party gift for a fellow knitter and crafter. Another friend suggested I knit something as a gift, and I recalled how my version of a chapstick holder that I blogged about back in February looked a bit like a tiny penis, thanks to the color of yarn I used. And so that became the inspiration for Phallicozy.
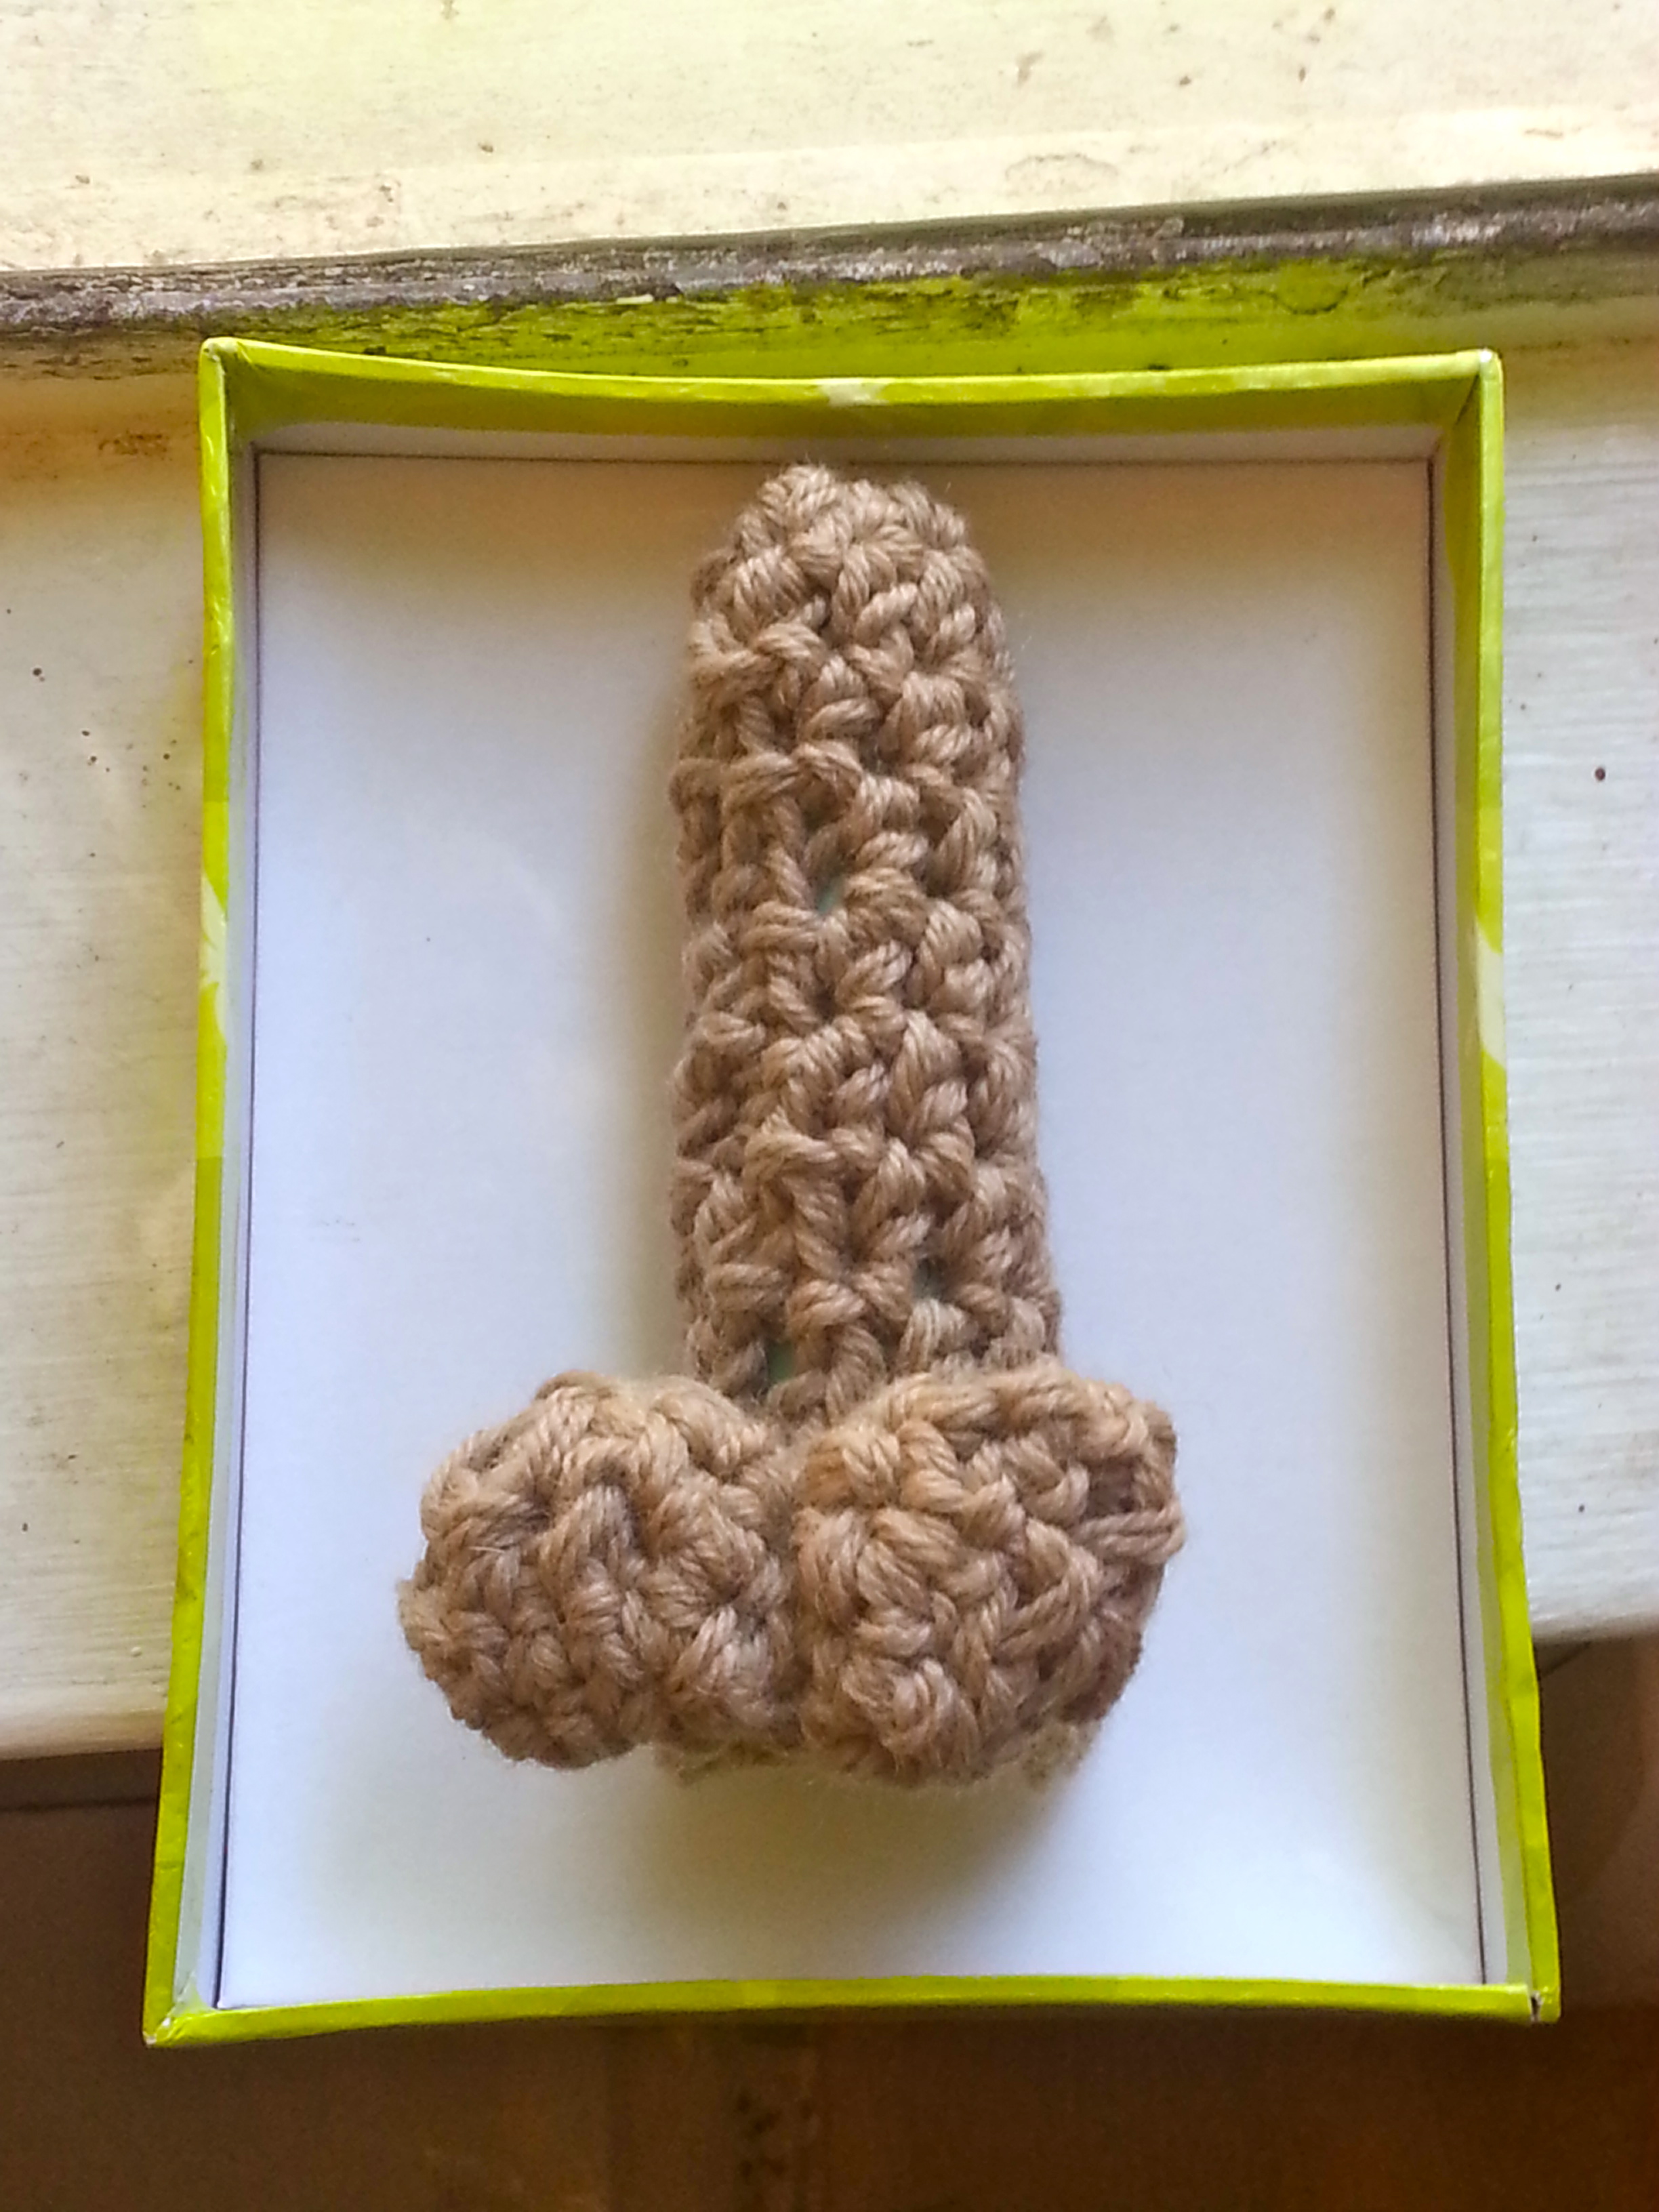 While I could have used a pattern, because there are some nice free knit patterns here and here as well as a nice free crochet one here, I decided to just wing it. It wasn’t too hard (hard!). I went with crochet instead of knitting and held the yarn double because I knew it would go faster and that the finished project would be thicker (thicker!) I tried to take notes as I went, but I am the worst at crochet patterns because I rarely read them, so they are rather vague.


