Activity Knits & Crafts, Holiday Knits & Crafts, Quick Knits & Crafts

A really quick wrap up of 2015 crafts

2015 is almost over! Who knows when I’m going to have the time to do detailed craft posts and tutorials again. With that said, I have made a few small things over the past 6 months, and I imagine a lot of people reading this like to look at the photos on craft blogs anyway. So here the crafts of each season:

Summer

20150720_150842

A second chapstick holder for A.! You wouldn’t believe how much use he got out of the first one (well, you would if you saw it). This time, in a less phallic color.

20150720_150946

Another linen stitch headband for myself, also in green. I call this the commencement headband because knit a large portion of it during my graduation ceremony.

Autumn2015-11-08 13.27.50

An ombre version of the Yosemite beanie for G. As per usually, I made this pattern up as I went along to match the yarn. I did the colorwork because I didn’t haven enough of any one color, but I ended up really liking the gradient effect. Crochet.

2015-10-28 21.28.16

Ok, I know lots of non crafty people carve pumpkins, but these jack o’lanterns turned out really nice. I’d never used stencils before, but it was great. T’s is both a small scale image and a meta image, which neither of us noticed until he finished and we lit them up.

Winter

2014-12-08 19.03.37

Ombre paper snowflakes! Made with origami paper in shades of blue and this Italian tutorial. Confession time: this photo is from Xmas 2014. I put them up this year too, but I forgot to take a picture.

2014-12-01 23.28.372014-12-02 00.35.172014-12-08 16.38.06

Bonus images!

Winter

2015-12-22 11.02.55

As in previous years, I made Christmas decorations out of branches and berries gleaned from the local flora. This year I put together a holiday bouquet with the best pieces. (I also tucked the smaller bits into my grapevine wreath, so that now it looks like something out of the shire:)

2015-12-31 16.25.36

Works in Progress:

I am still working my miette cardigan— here it is back in September:

2015-09-25 18.23.52

Conclusion: I did stick to my 2015 New Year’s goal of only using what I already owned to craft! I think my 2016 goal is to finally finish the mustard yellow sweater above.

Historical Knits & Crafts, Holiday Knits & Crafts

World War I knits—the annual free pattern post!

It’s my four-year blogiversary, and even though I an swamped with work, I can’t forgot my annual tradition of sharing WWI era knitting patterns! Since I started this blog on 11/11/11, which is Veteran’s Day in the US and Remembrance Day in Canada and the UK, I have been sharing patterns from my 1918 copy of Fleisher’s Knitting and Crocheting Manual (16th edition).

iwonderwhosknittingforme

For previously posted free patterns and instructions on needle size, yarn, and gauge, please see the posts from 2012, 2013, and 2014.  And now onto the pattern book!

2015-11-11 16.00.30

(things I love about this introduction: all service wear has been “approved by competent authorities”; scarves are apparently “growing in favor,” and US knitters and crocheters are collectively known as “yarn users of America.”)

First, up: The Red Cross Afghan.

2015-11-11 15.55.44

This is a crochet pattern, which I suppose makes sense, given the heft of blankets. But note that cross here is done in “khaki” yarn, not white!

Somerset Afghan

2015-11-11 15.54.02

Another crochet afghan, but this one has an intriguing colorwork design. Is it some sort of leaf or vine? I’m not sure, but part of me wonders if it could be adapted into a nice knitting colorwork pattern as well.

Woman’s Glove

2015-11-11 15.53.05

I love the little details on this glove, especially the cable. Of course I doubt I’d attempt these, as I’ve never made gloves and these patterns are often a bit vague on the details.

Savoy Sweater

2015-11-11 15.51.53

2015-11-11 15.52.13

Look at this long full coat! I don’t even want to imagine how long with would take me. I’d at least ditch the belt. I do like the pleats though.

Pauline Sweater2015-11-11 16.33.49

2015-11-11 16.33.59This is a child’s crochet sweater, but I’d rather like it in a grown up size. I think the off center buttons are such a nice touch.

Bernadetta Scarf2015-11-11 16.35.35I think this might be more accurately labeled a shawl due to its size, but it’s hard to see the full shape from this photo. Nevertheless: what a lovely chevron piece!

Miscellaneous stitches 

2015-11-11 15.49.25

I complain a lot about the vague directions and unclear photos in this book, but it reality these is a little section that’s part stitch dictionary and part closeups of stitches used in the patterns. (I still don’t know what “narrow” means as a stitch though…)

Hope these World War I era patterns are useful to you!

p.s. I still wear the red crochet poppy I shared in my very first post:

2015-11-11 17.29.18

Nerdy Knits & Crafts

The Seven-Year Sweater

In 2008, I started a PhD and a sweater. This year, I’m finally finishing both of them. Starting with the sweater!

2015-07-02 14.20.02Do you know the Six Swans fairy tale? The one where six brothers are cursed to be swans unless their one sister knit them shirts out of stinging nettles without speaking—and it took seven years? I would have so failed at that task. Here’s what I had a year and a half in:

Photo_343_medium

My version of the ironically named Easy Weekend Pullover was made with cotton yarn. If you’re not a knitter, you should know that cotton has a bit of a reputation for being hard on your hands. Think of it like running with a weighted vest on.

So I would get really into this sweater for a while (like, for a month in 2010), finish part of it, and then get tired and forget about it again.

2015-05-08 22.42.32

But I as a wrote at the start of this year, my DIY goal for 2015 was to finish my unfinished objects (UFOs), and this sweater fit the bill.

2015-05-08 22.42.14So in May, I dug it back out. I had a front piece and half a back piece at that point. Keep in mind that this is my first bottom up, set-in sleeve sweater, so I didn’t even know if the pieces would fit together well.

2015-07-02 14.20.29

I knit the sleeves two at a time.

2015-07-02 14.20.56

And I had to redo the shoulder portion, because it turns out that I did not remember that I was knitting the smallest size!

2015-07-02 14.23.07

So the sleeves are a bit on the loose side, I but I can live with that.

2015-07-02 14.19.38

I am proud of myself for learning a new skill to finish this sweater: setting in sleeves! I highly recommend watching a video tutorial before attempting it (this one is good, as is this one).

2015-07-02 14.19.09

The shallow armscye seemed like it would be a problem for my broad shoulders at first, but it actually worked out fine because the neckline is so wide. The neck is probably my favorite part of the sweater.

2015-07-02 14.14.15

It was 90 degrees when I took these pictures, but I was so happy to have this knitting project done, I didn’t want to wait for a cooler day.

2015-07-02 14.16.34

I hope this can be an inspiration to other people with creative projects that have been on the back burner for waaaaay too long. I went from liking the weird salt-and-pepper yarn to hating it to actually kind of loving it. I went from certain I would finish, to certain I would NOT finish, to being determined to finish, even if the whole thing turned out completely weird and unlovable to anyone but me.

There’s probably a metaphor for writing a dissertation somewhere in there.

2015-07-02 14.24.38

What was my point again? Oh yeah—just finish it! Finish all the things!


Activity Knits & Crafts, Original Knitting Patterns, Quick Knits & Crafts

The Quick and the Head: Knit Headbands!

Headbands! Lots of headbands. That’s what this post is about. Headbands with names. And possibly superpowers.

2015-03-30 17.24.02

(Forgive the lack of posts, I’ve been busy!)

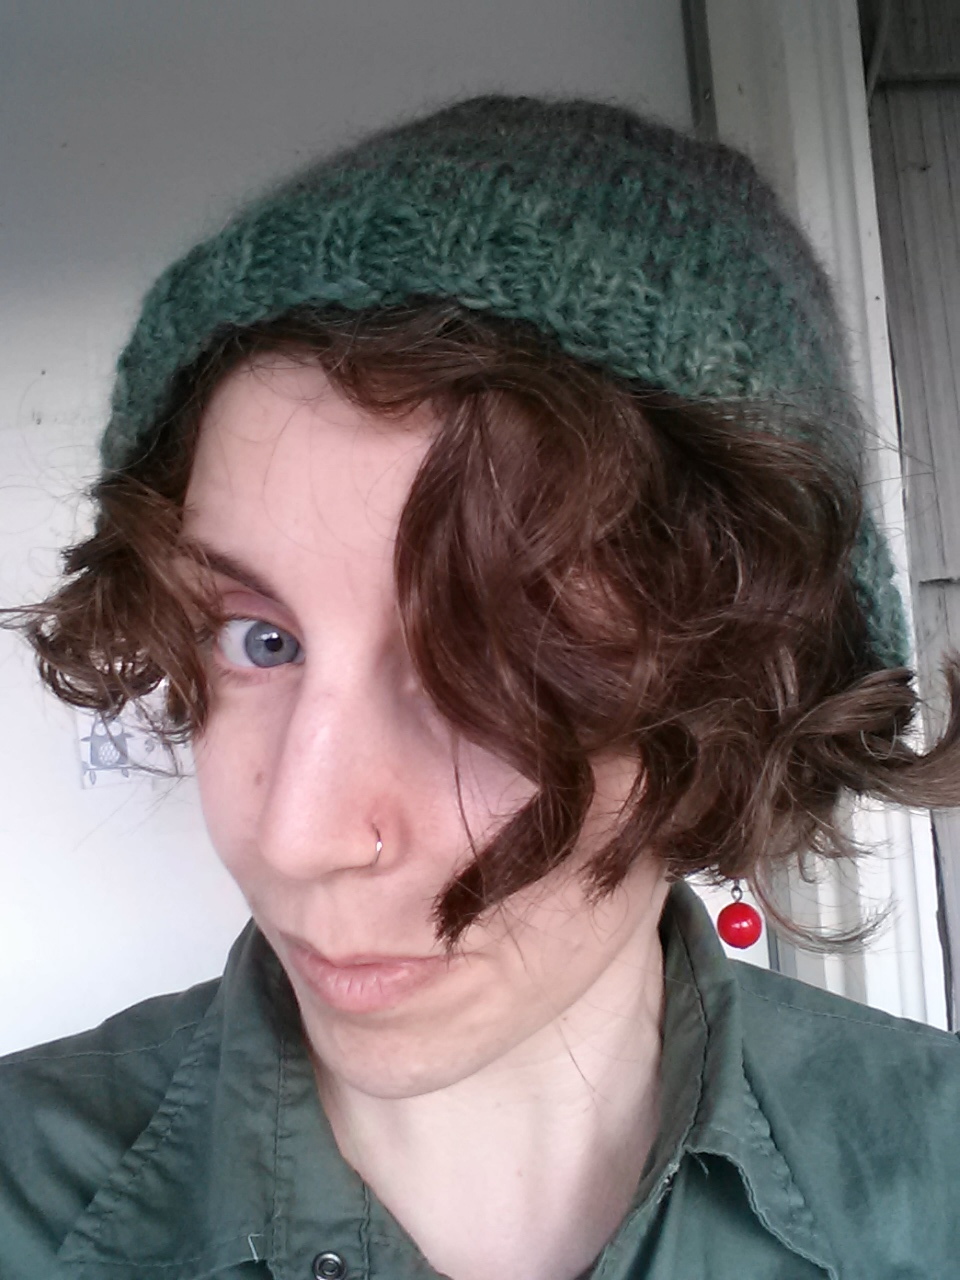
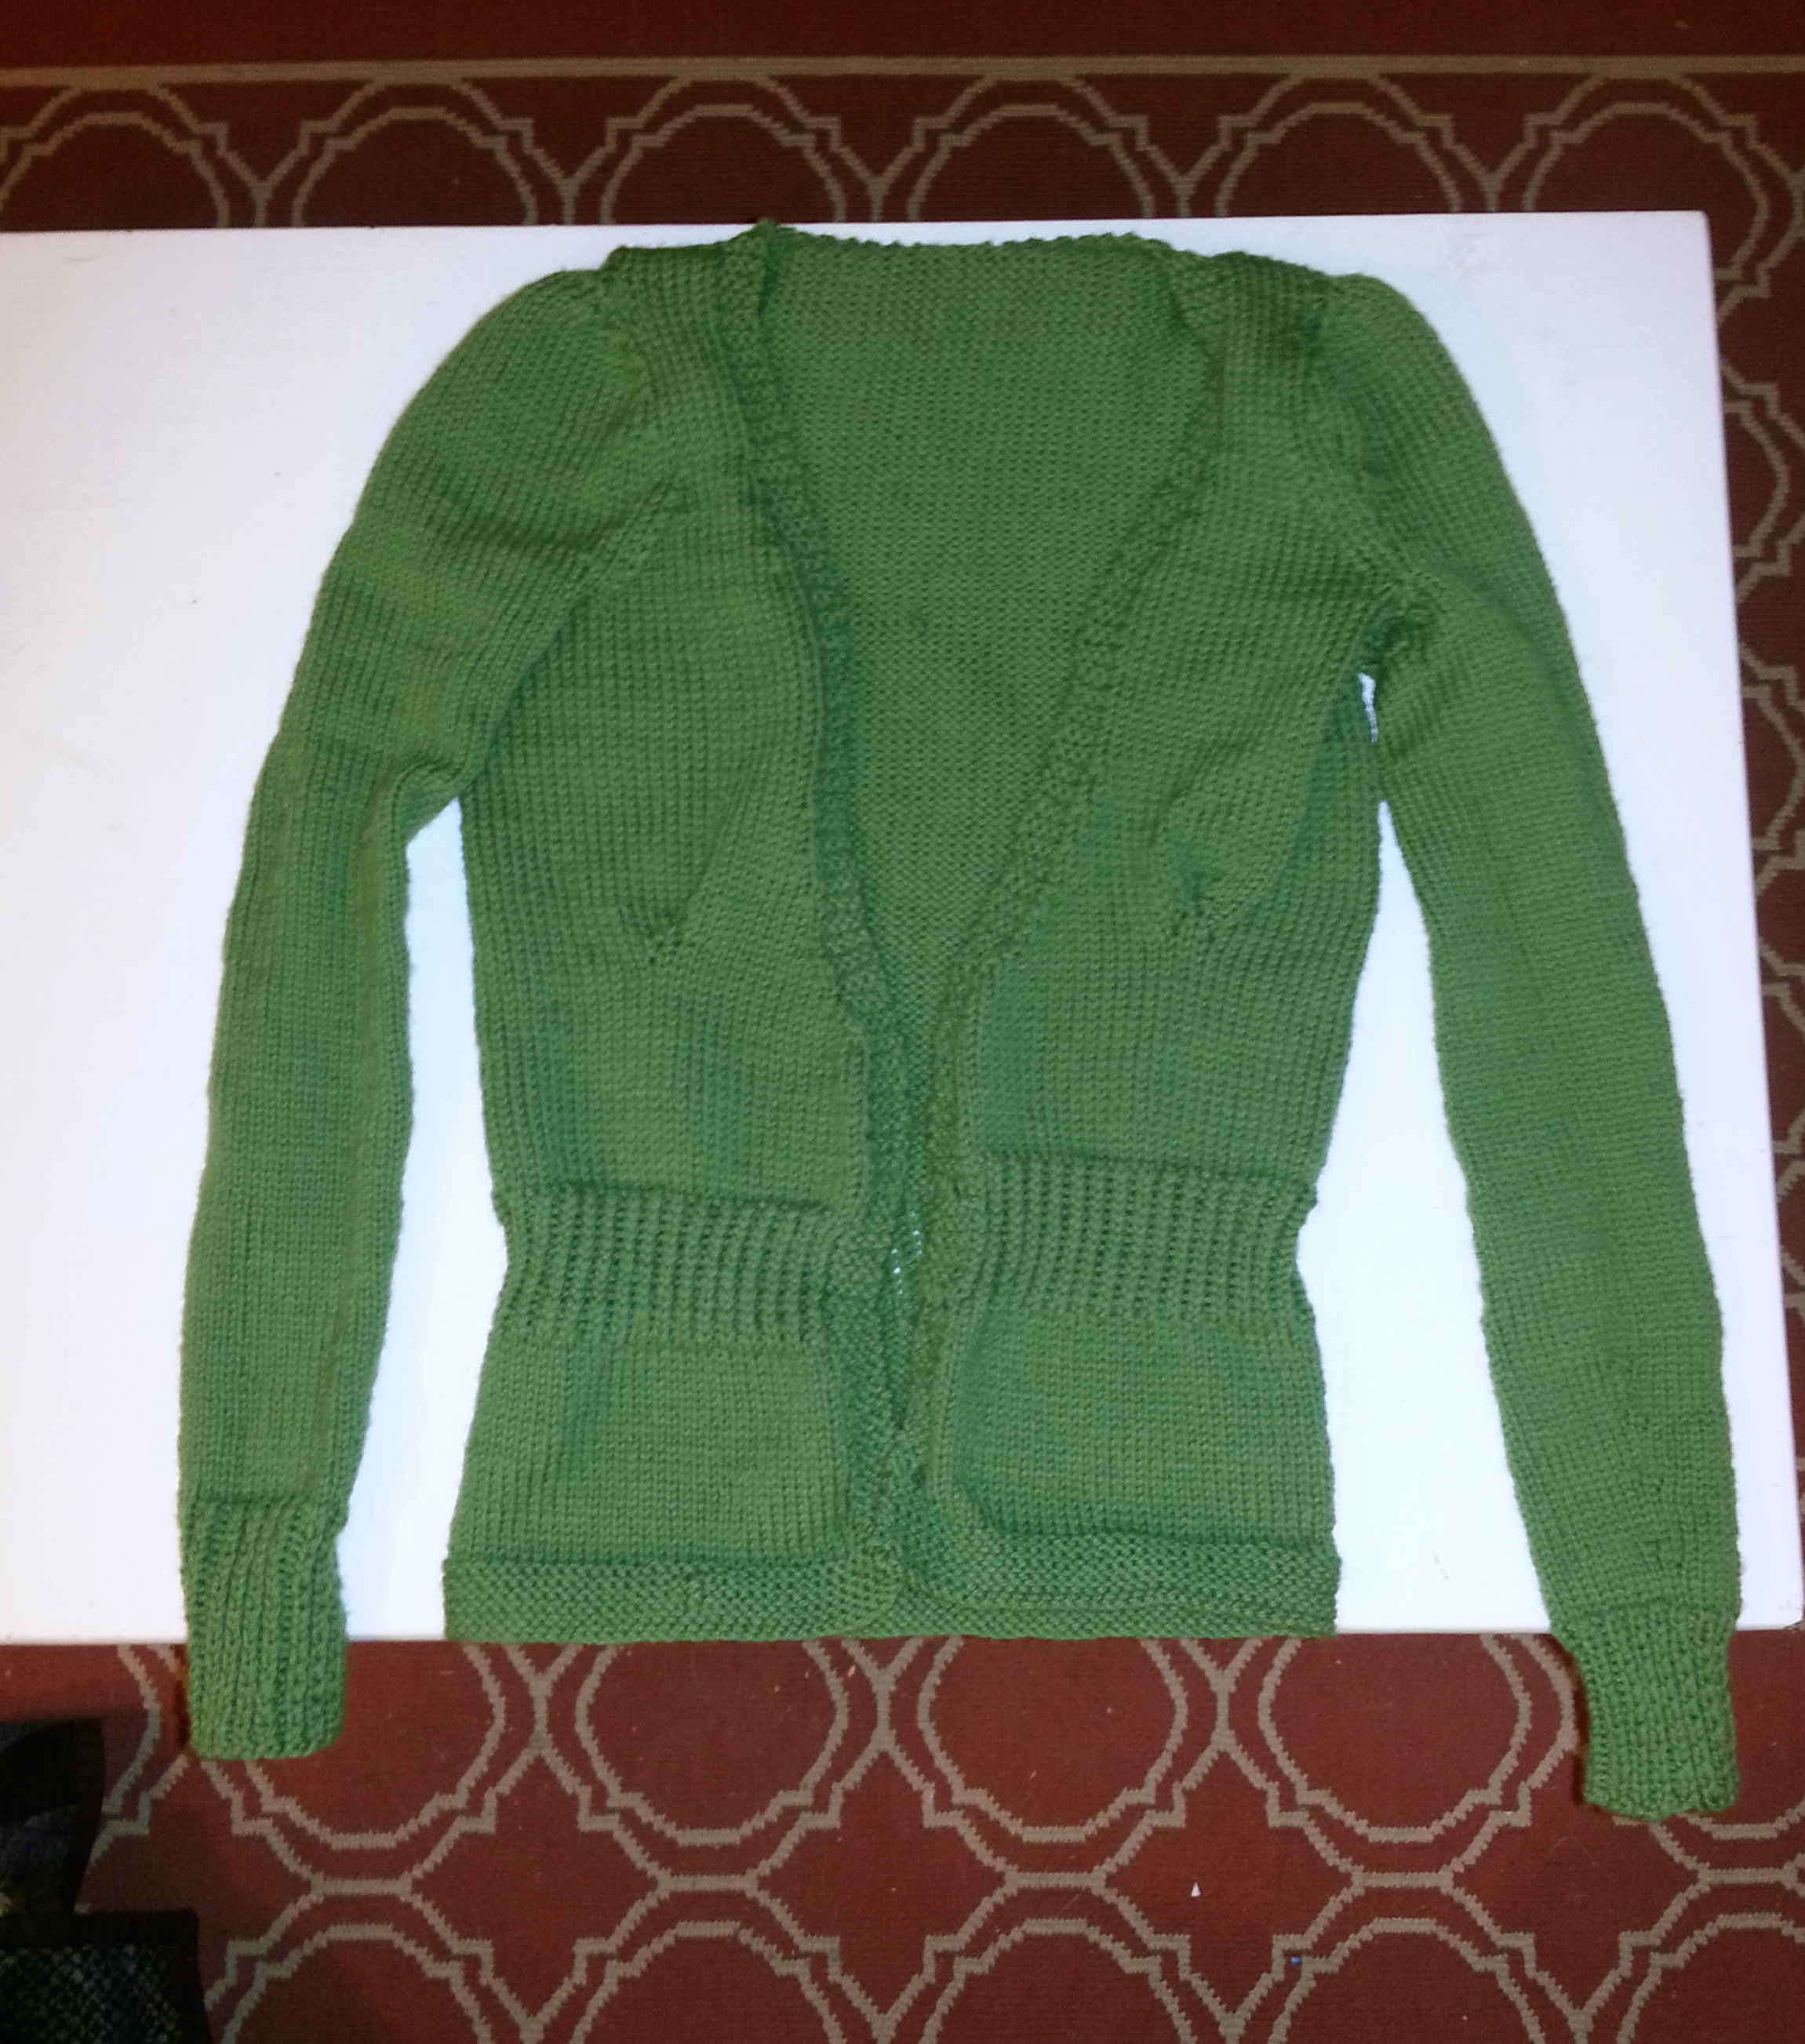
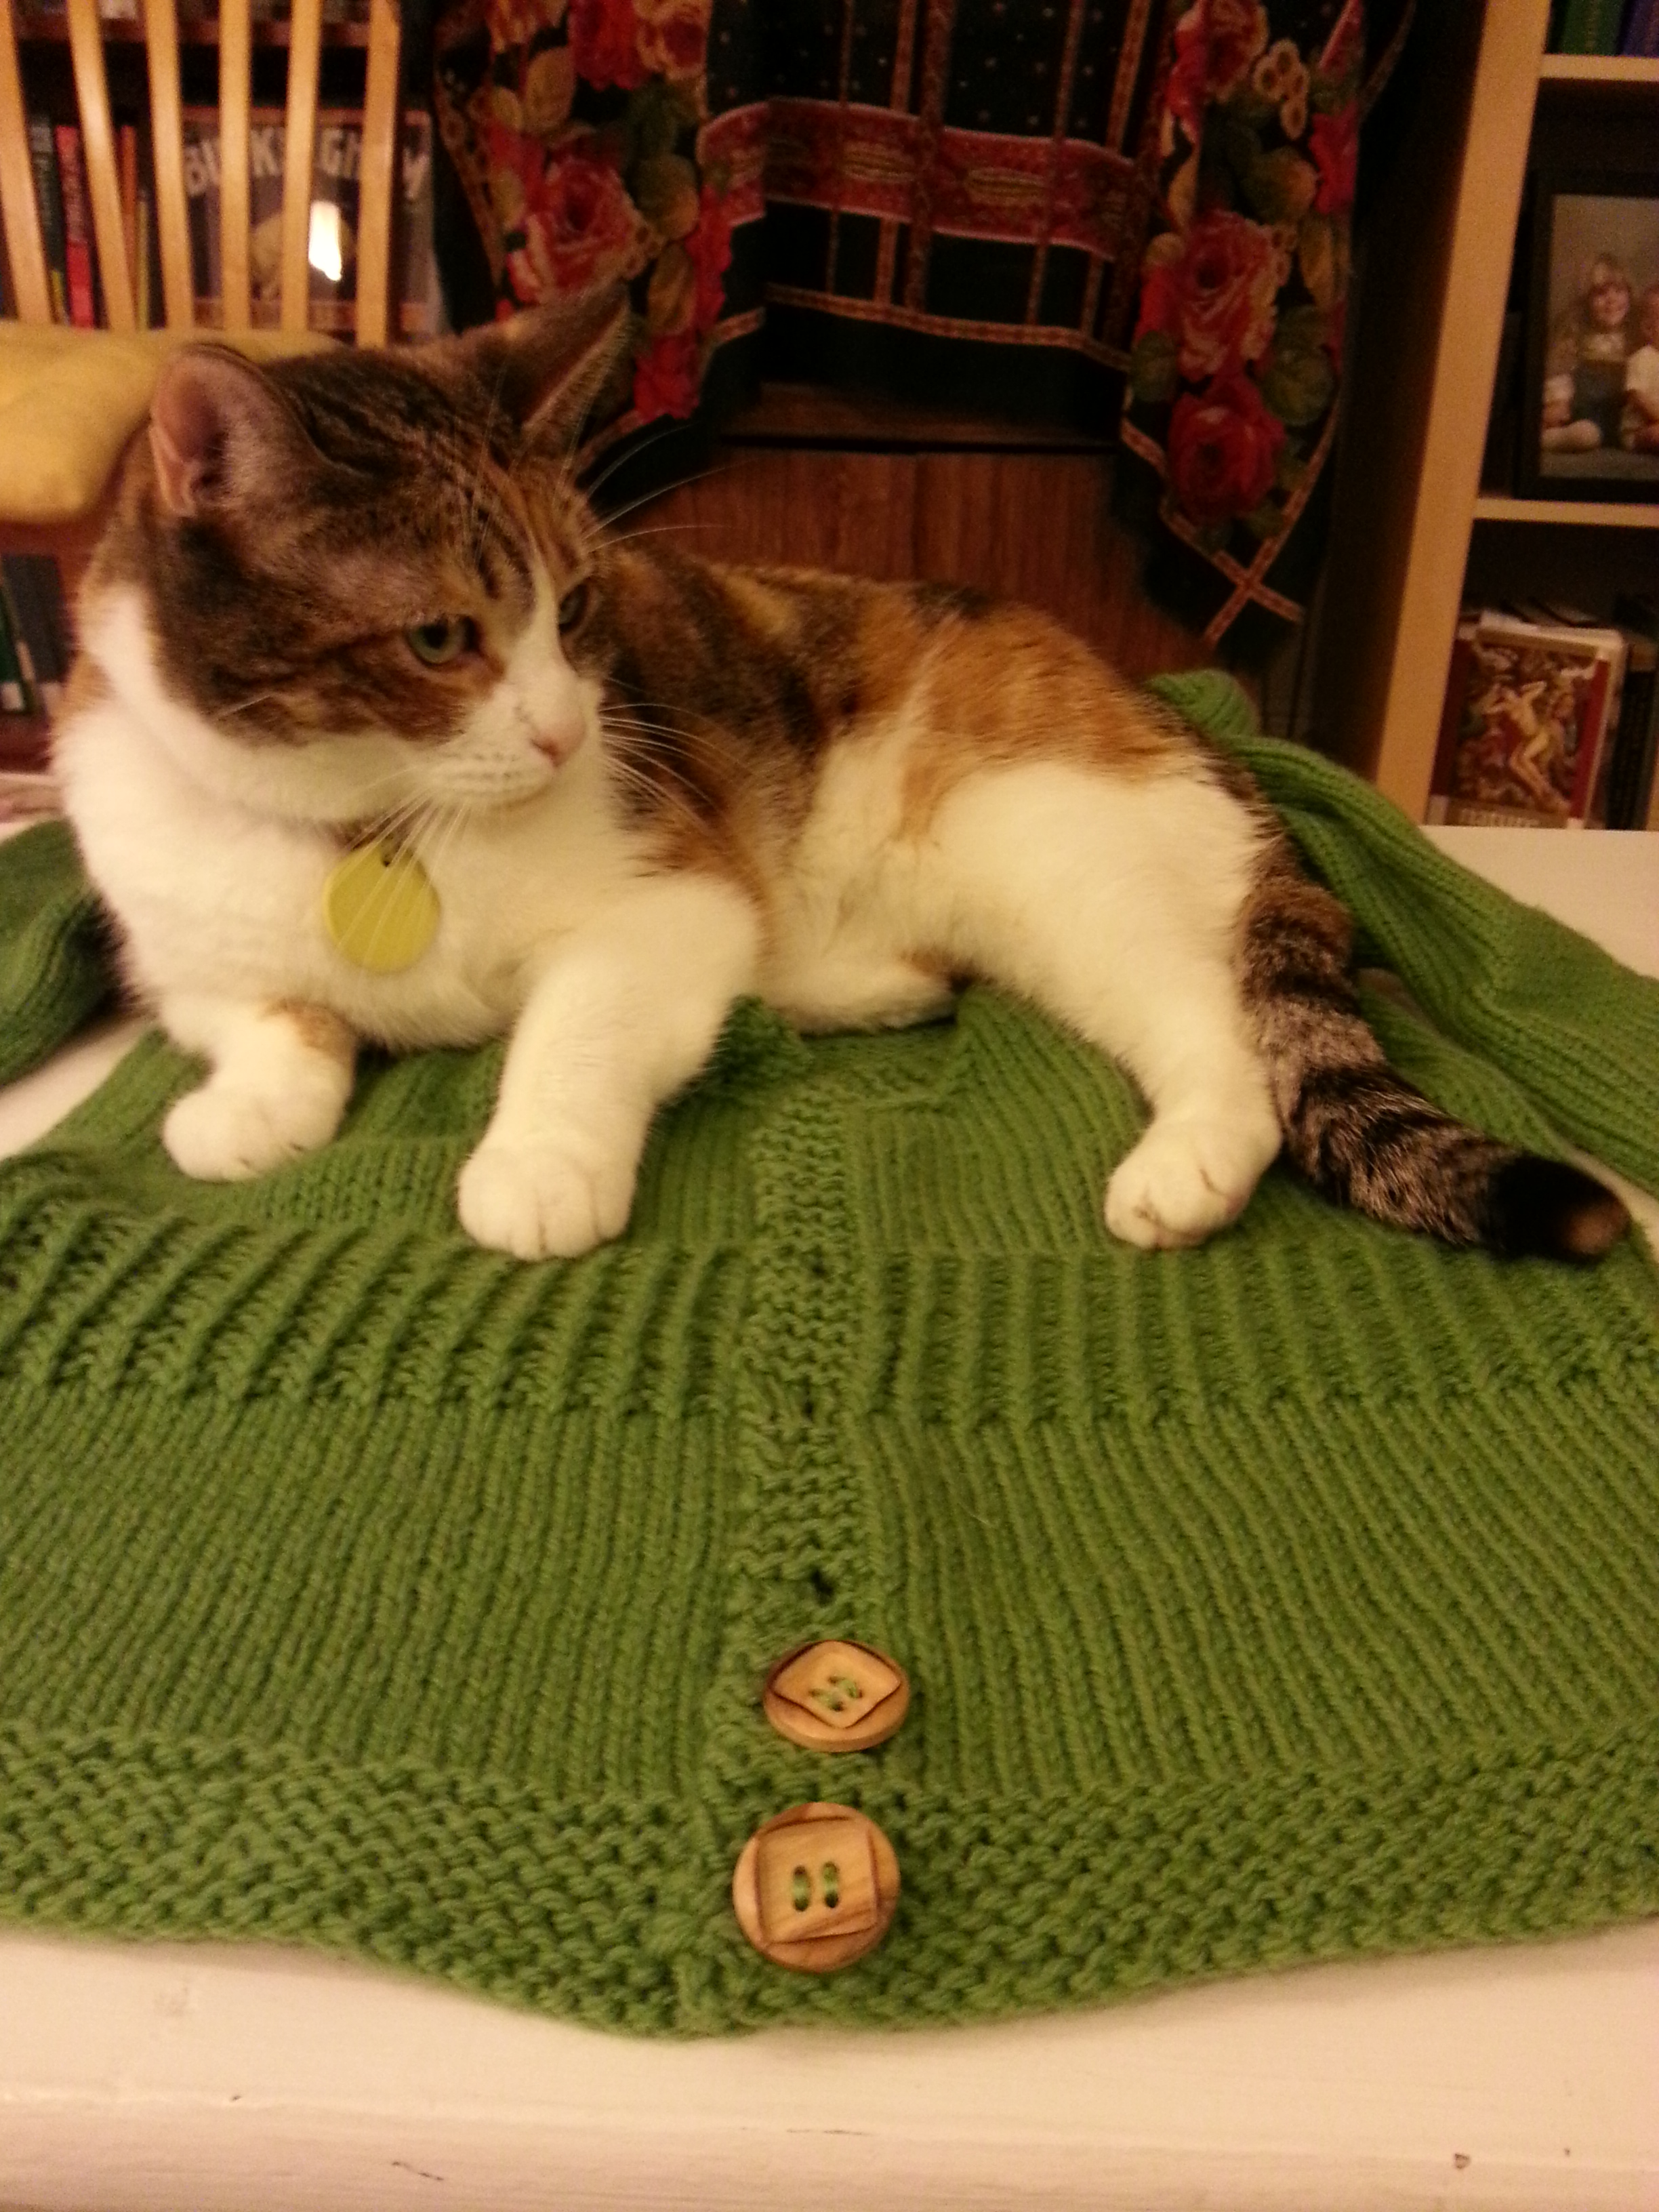
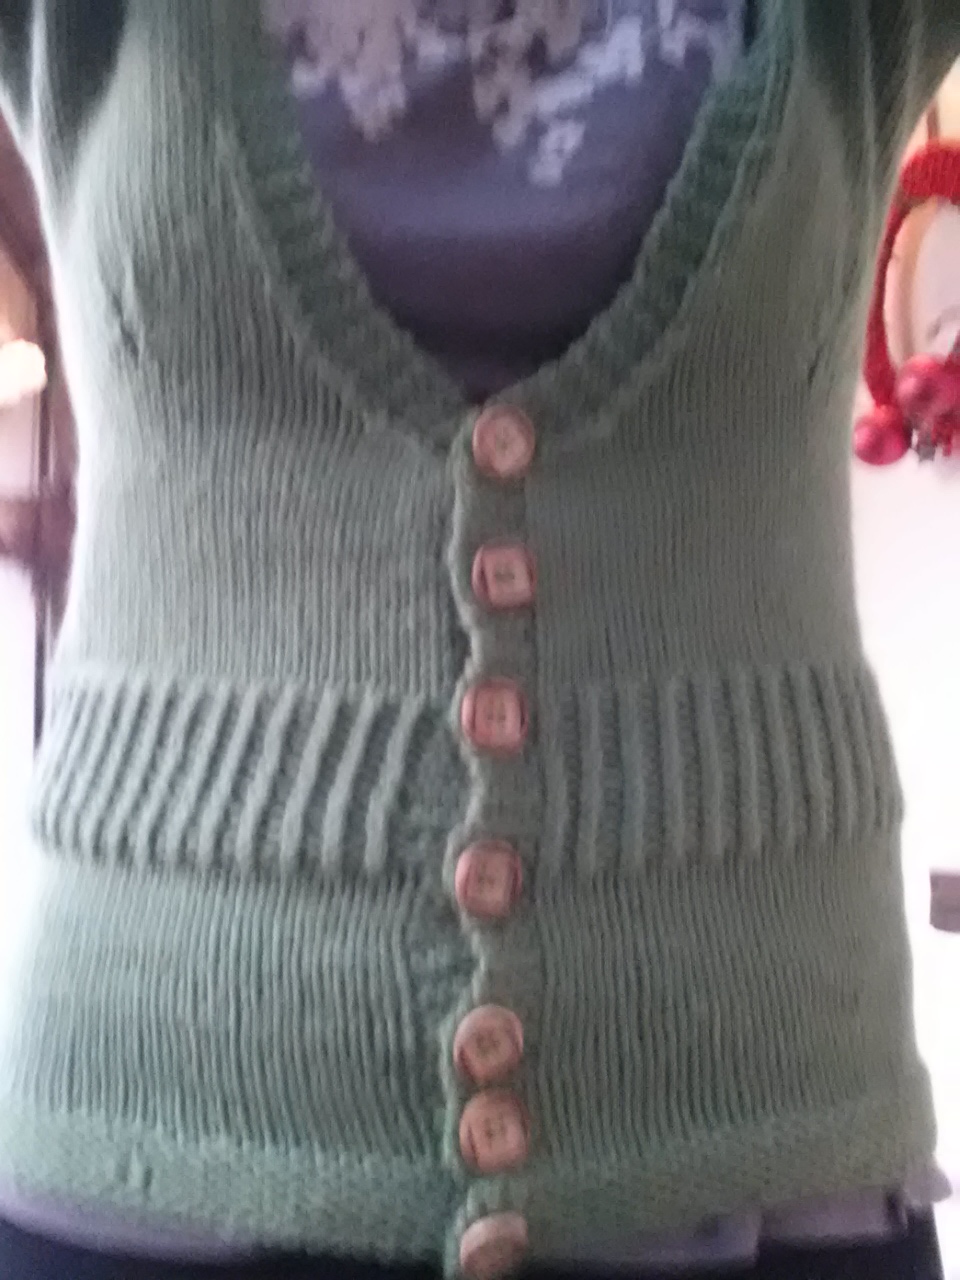
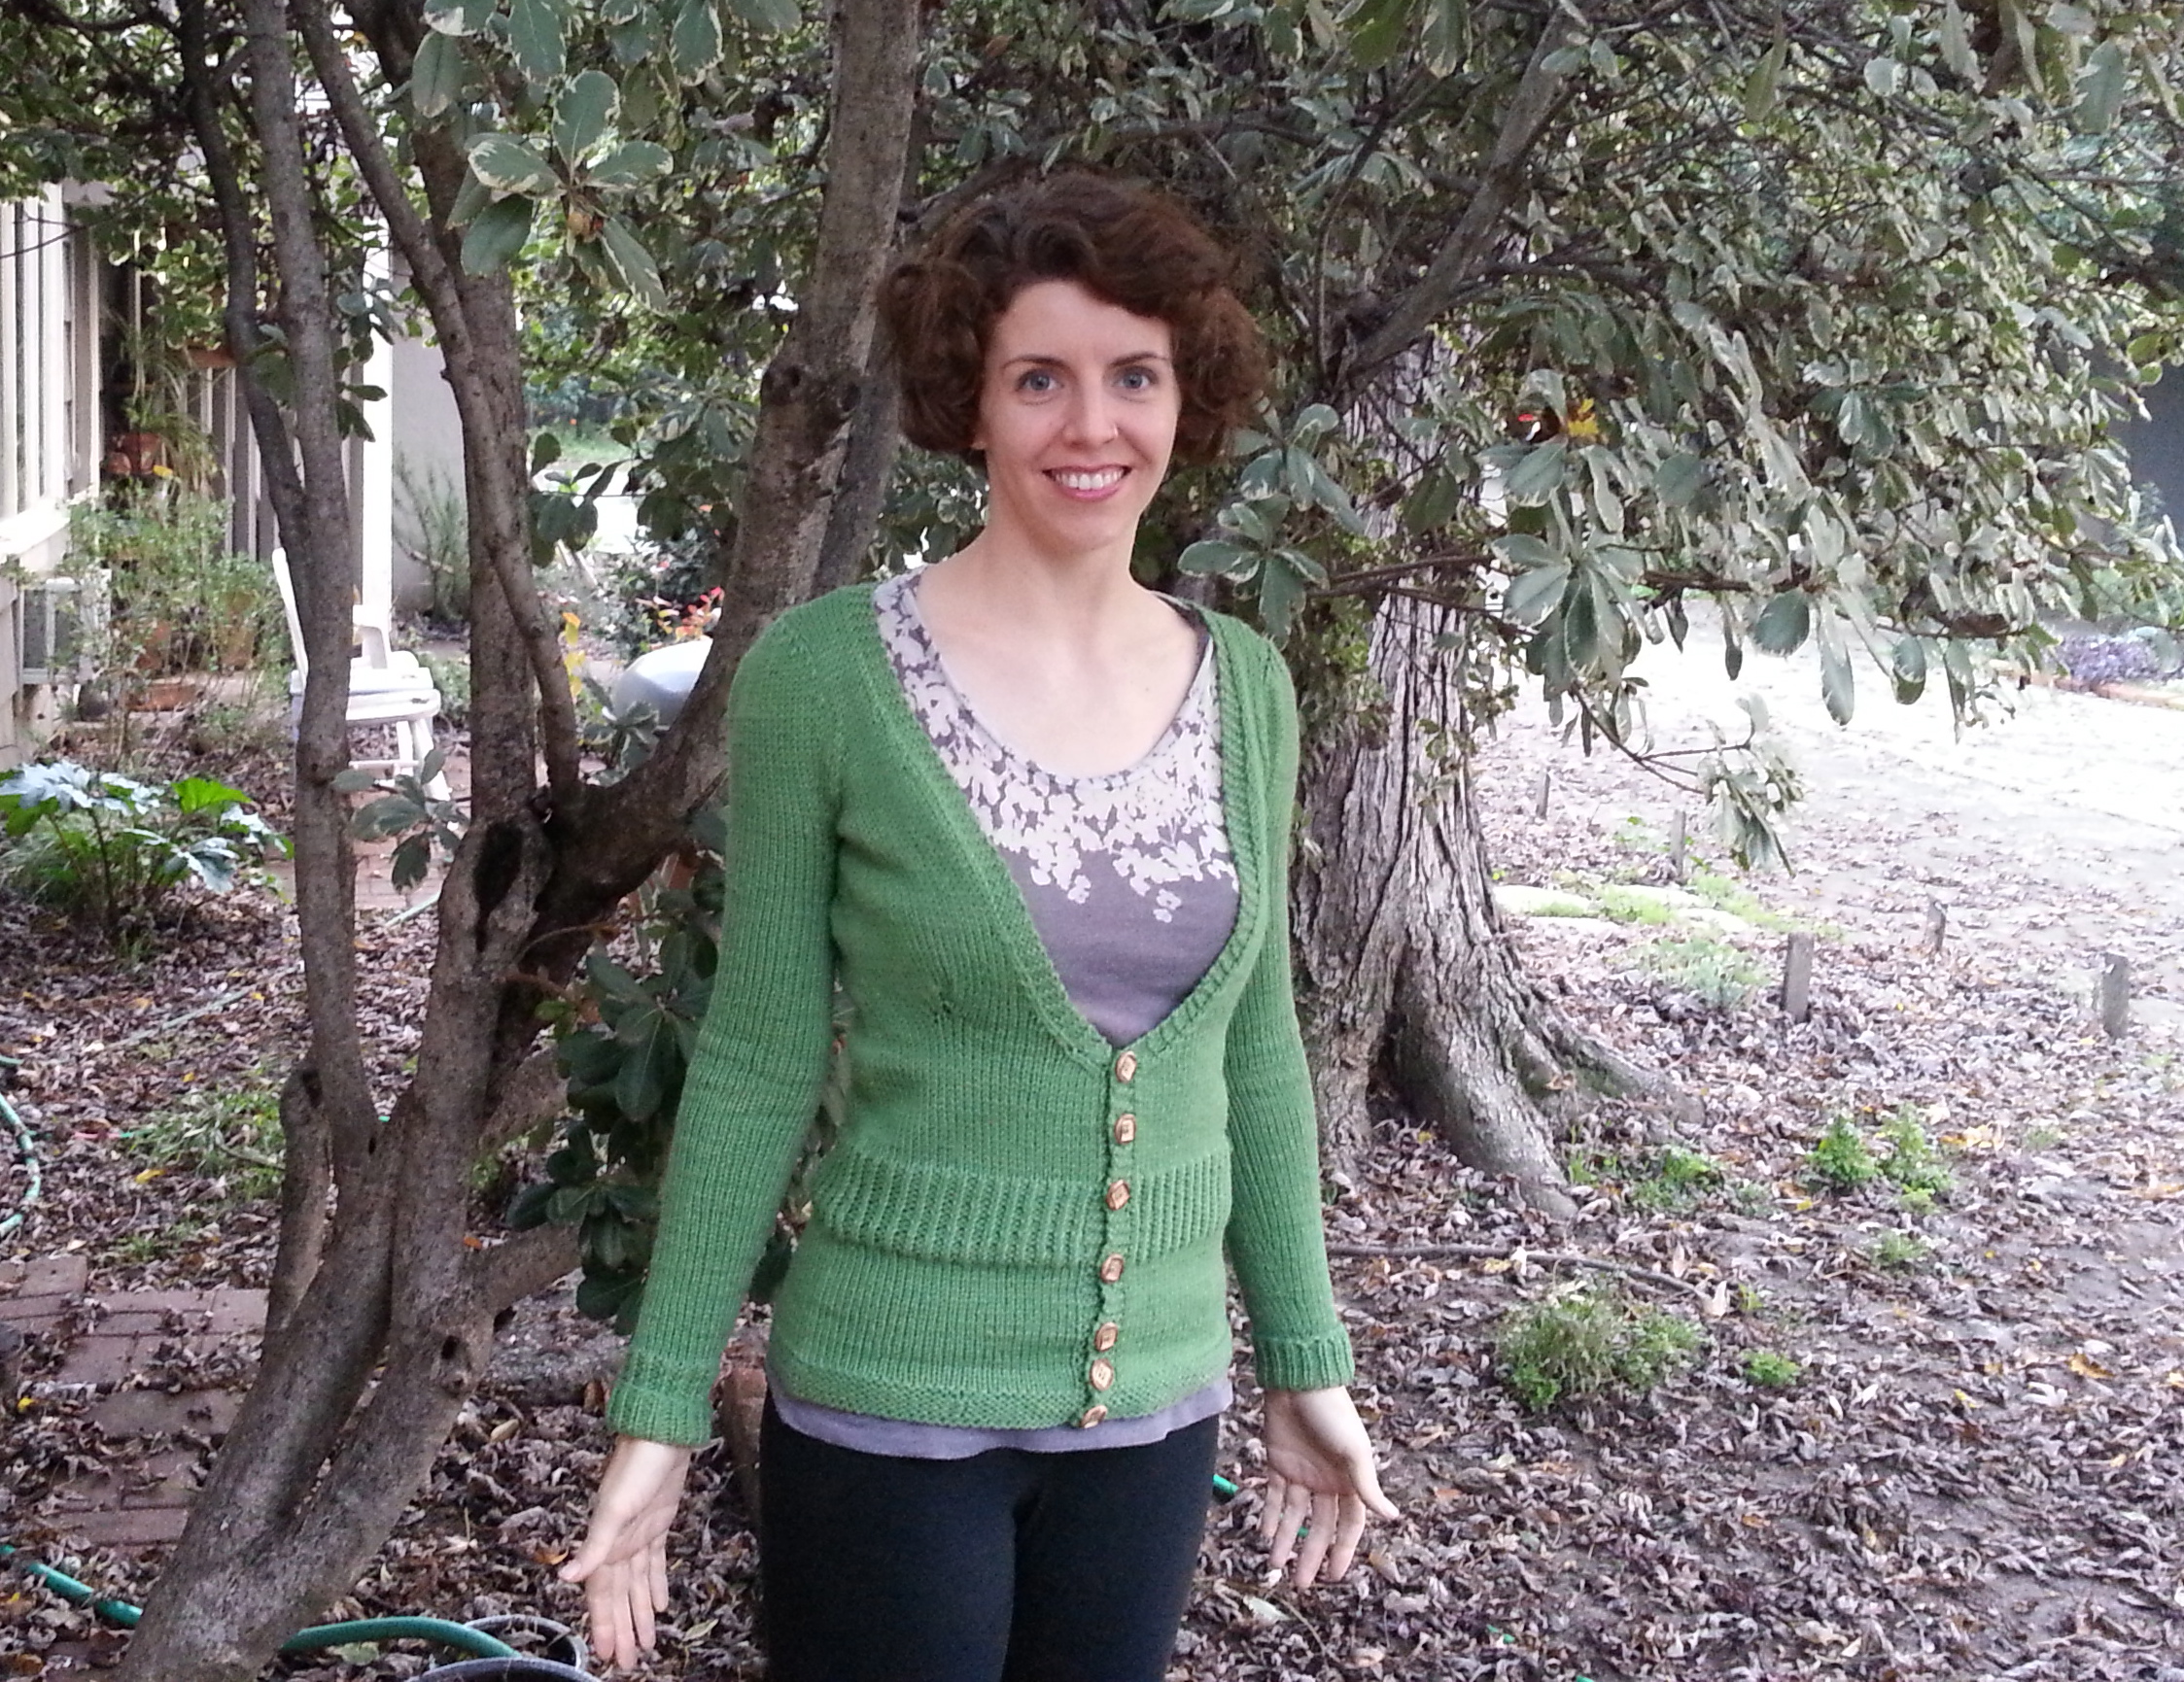
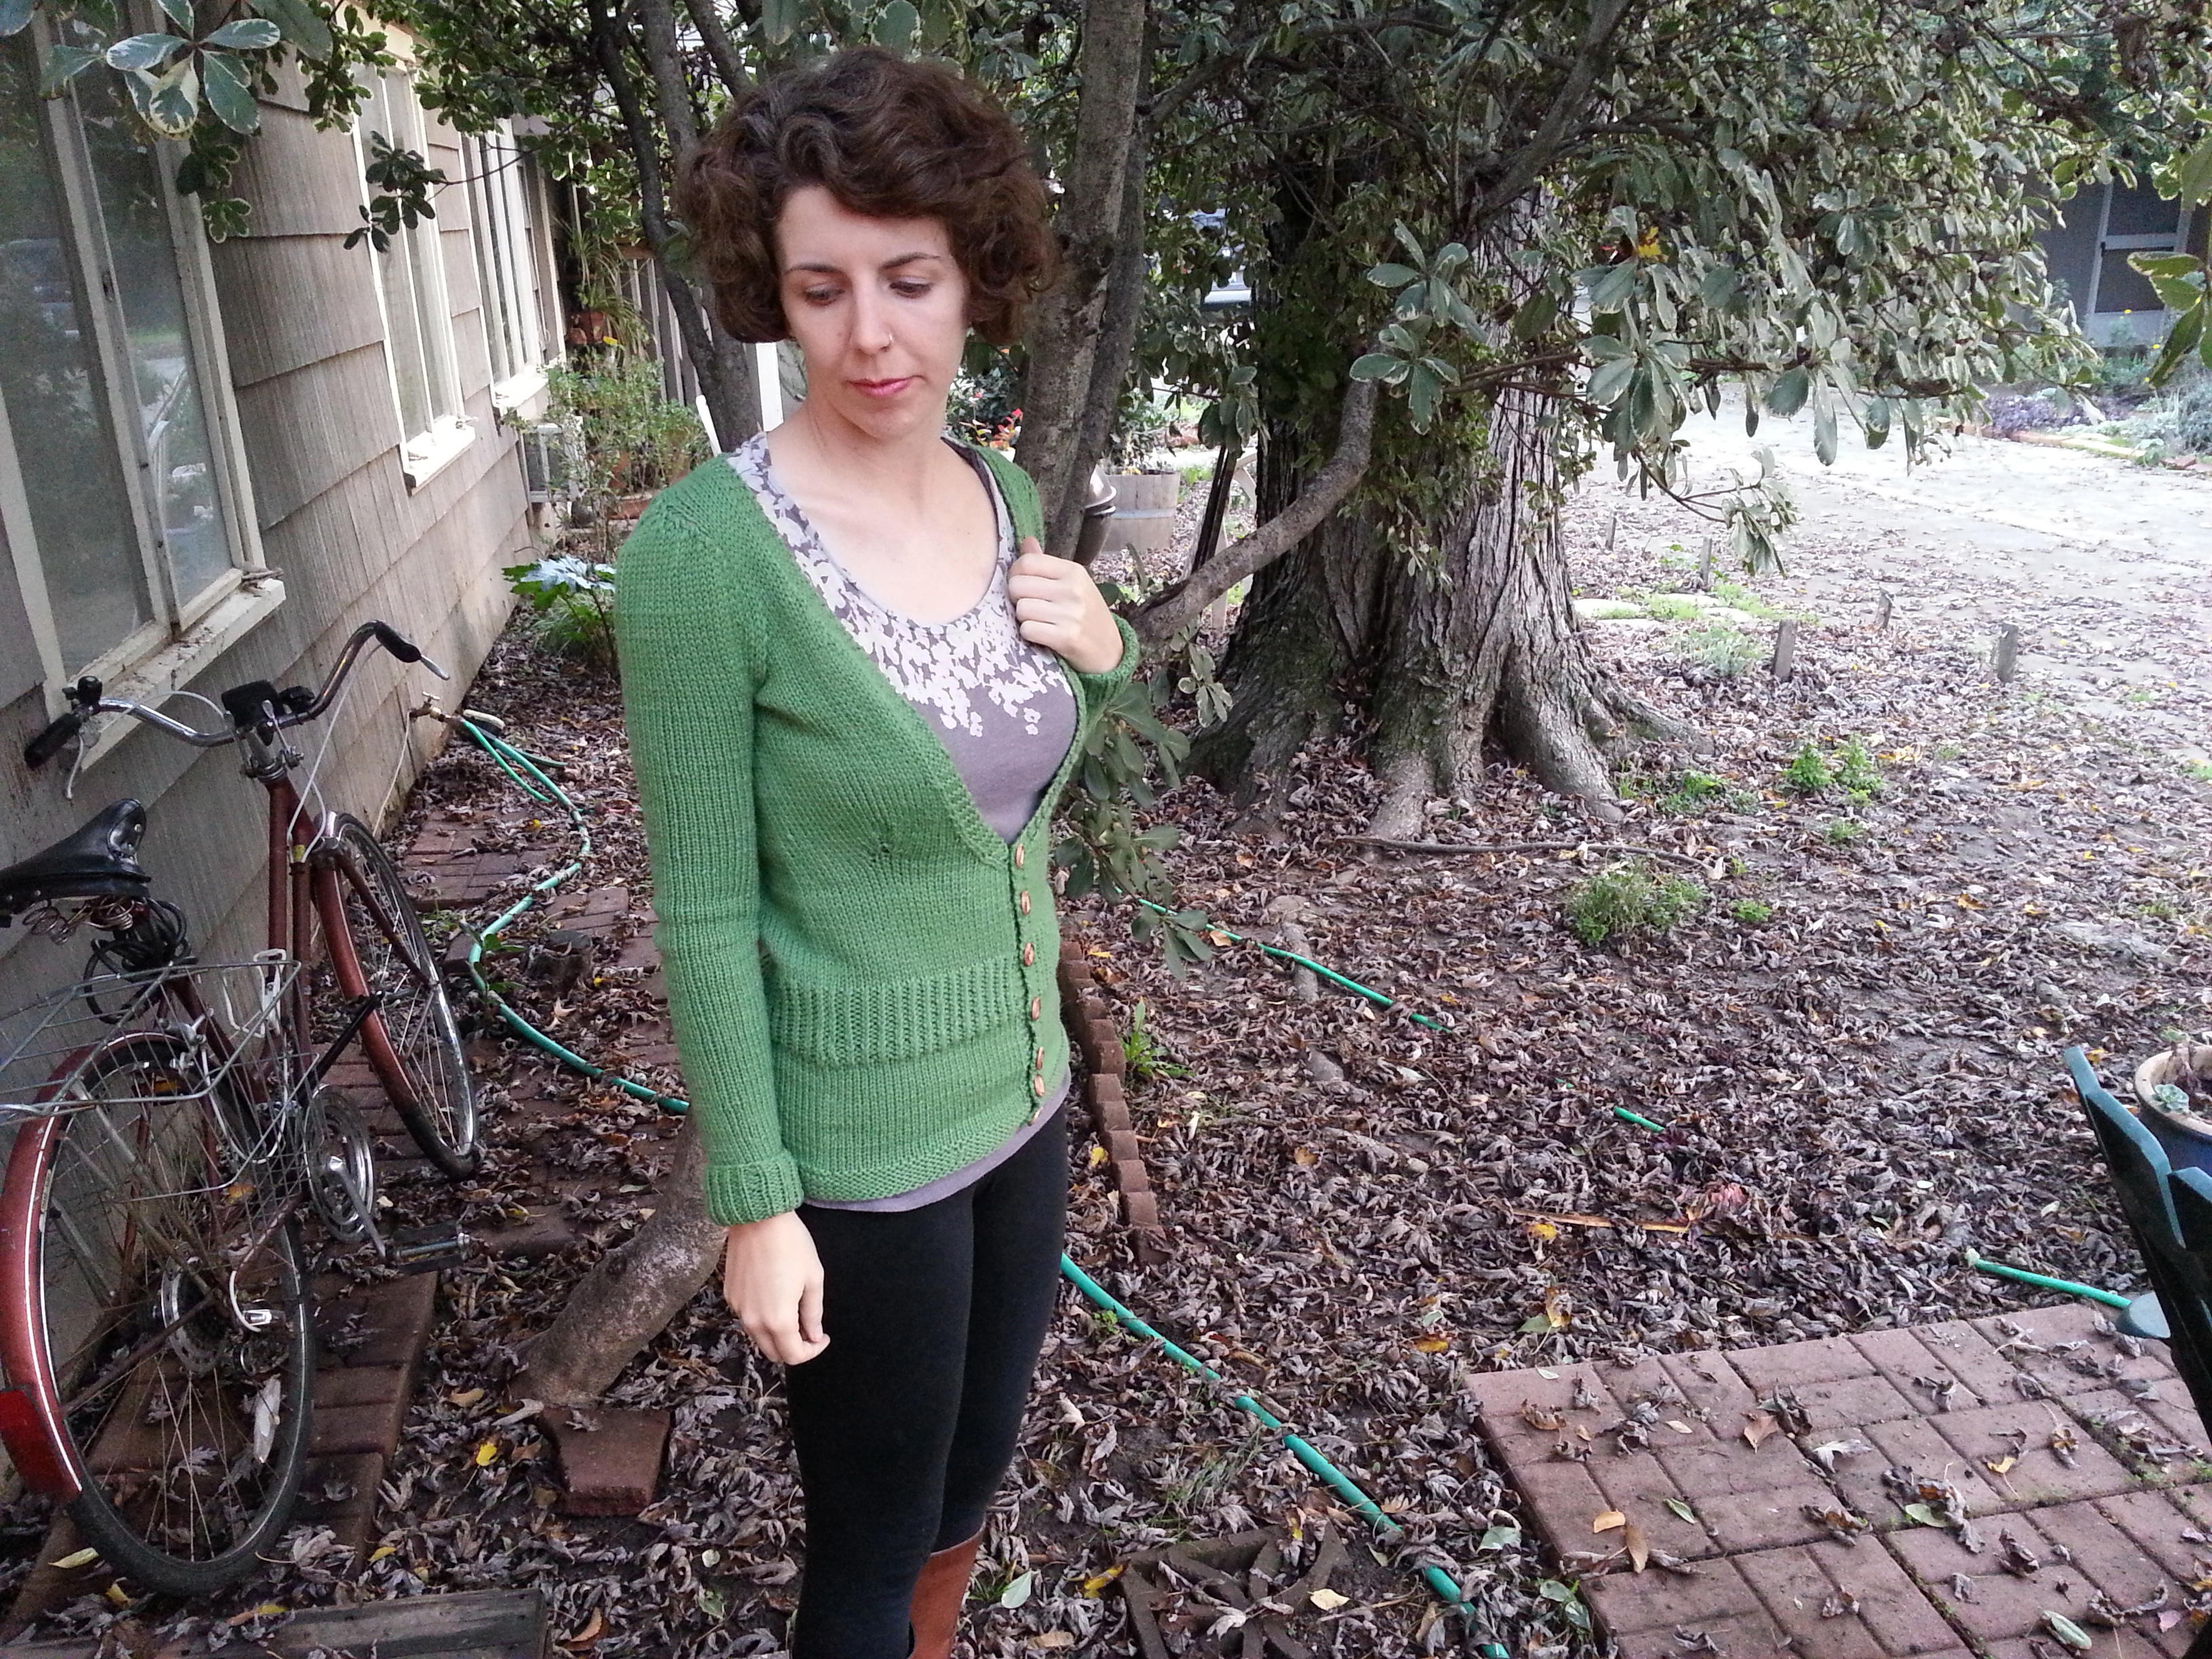
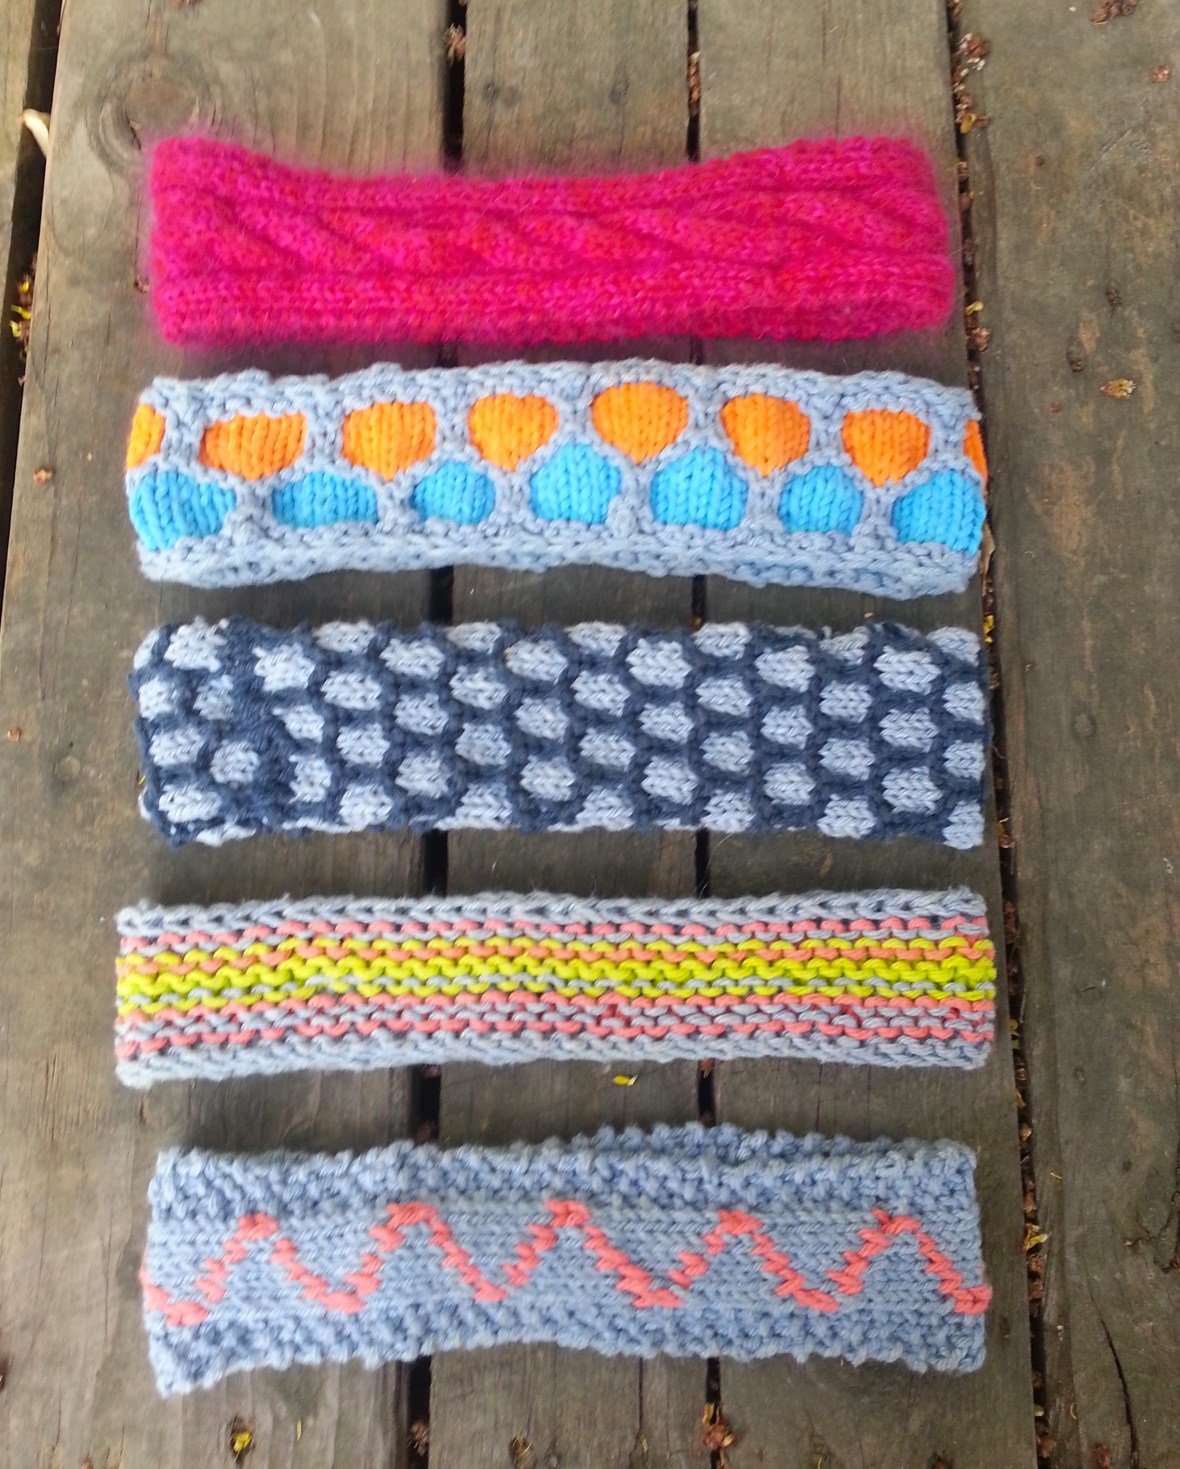
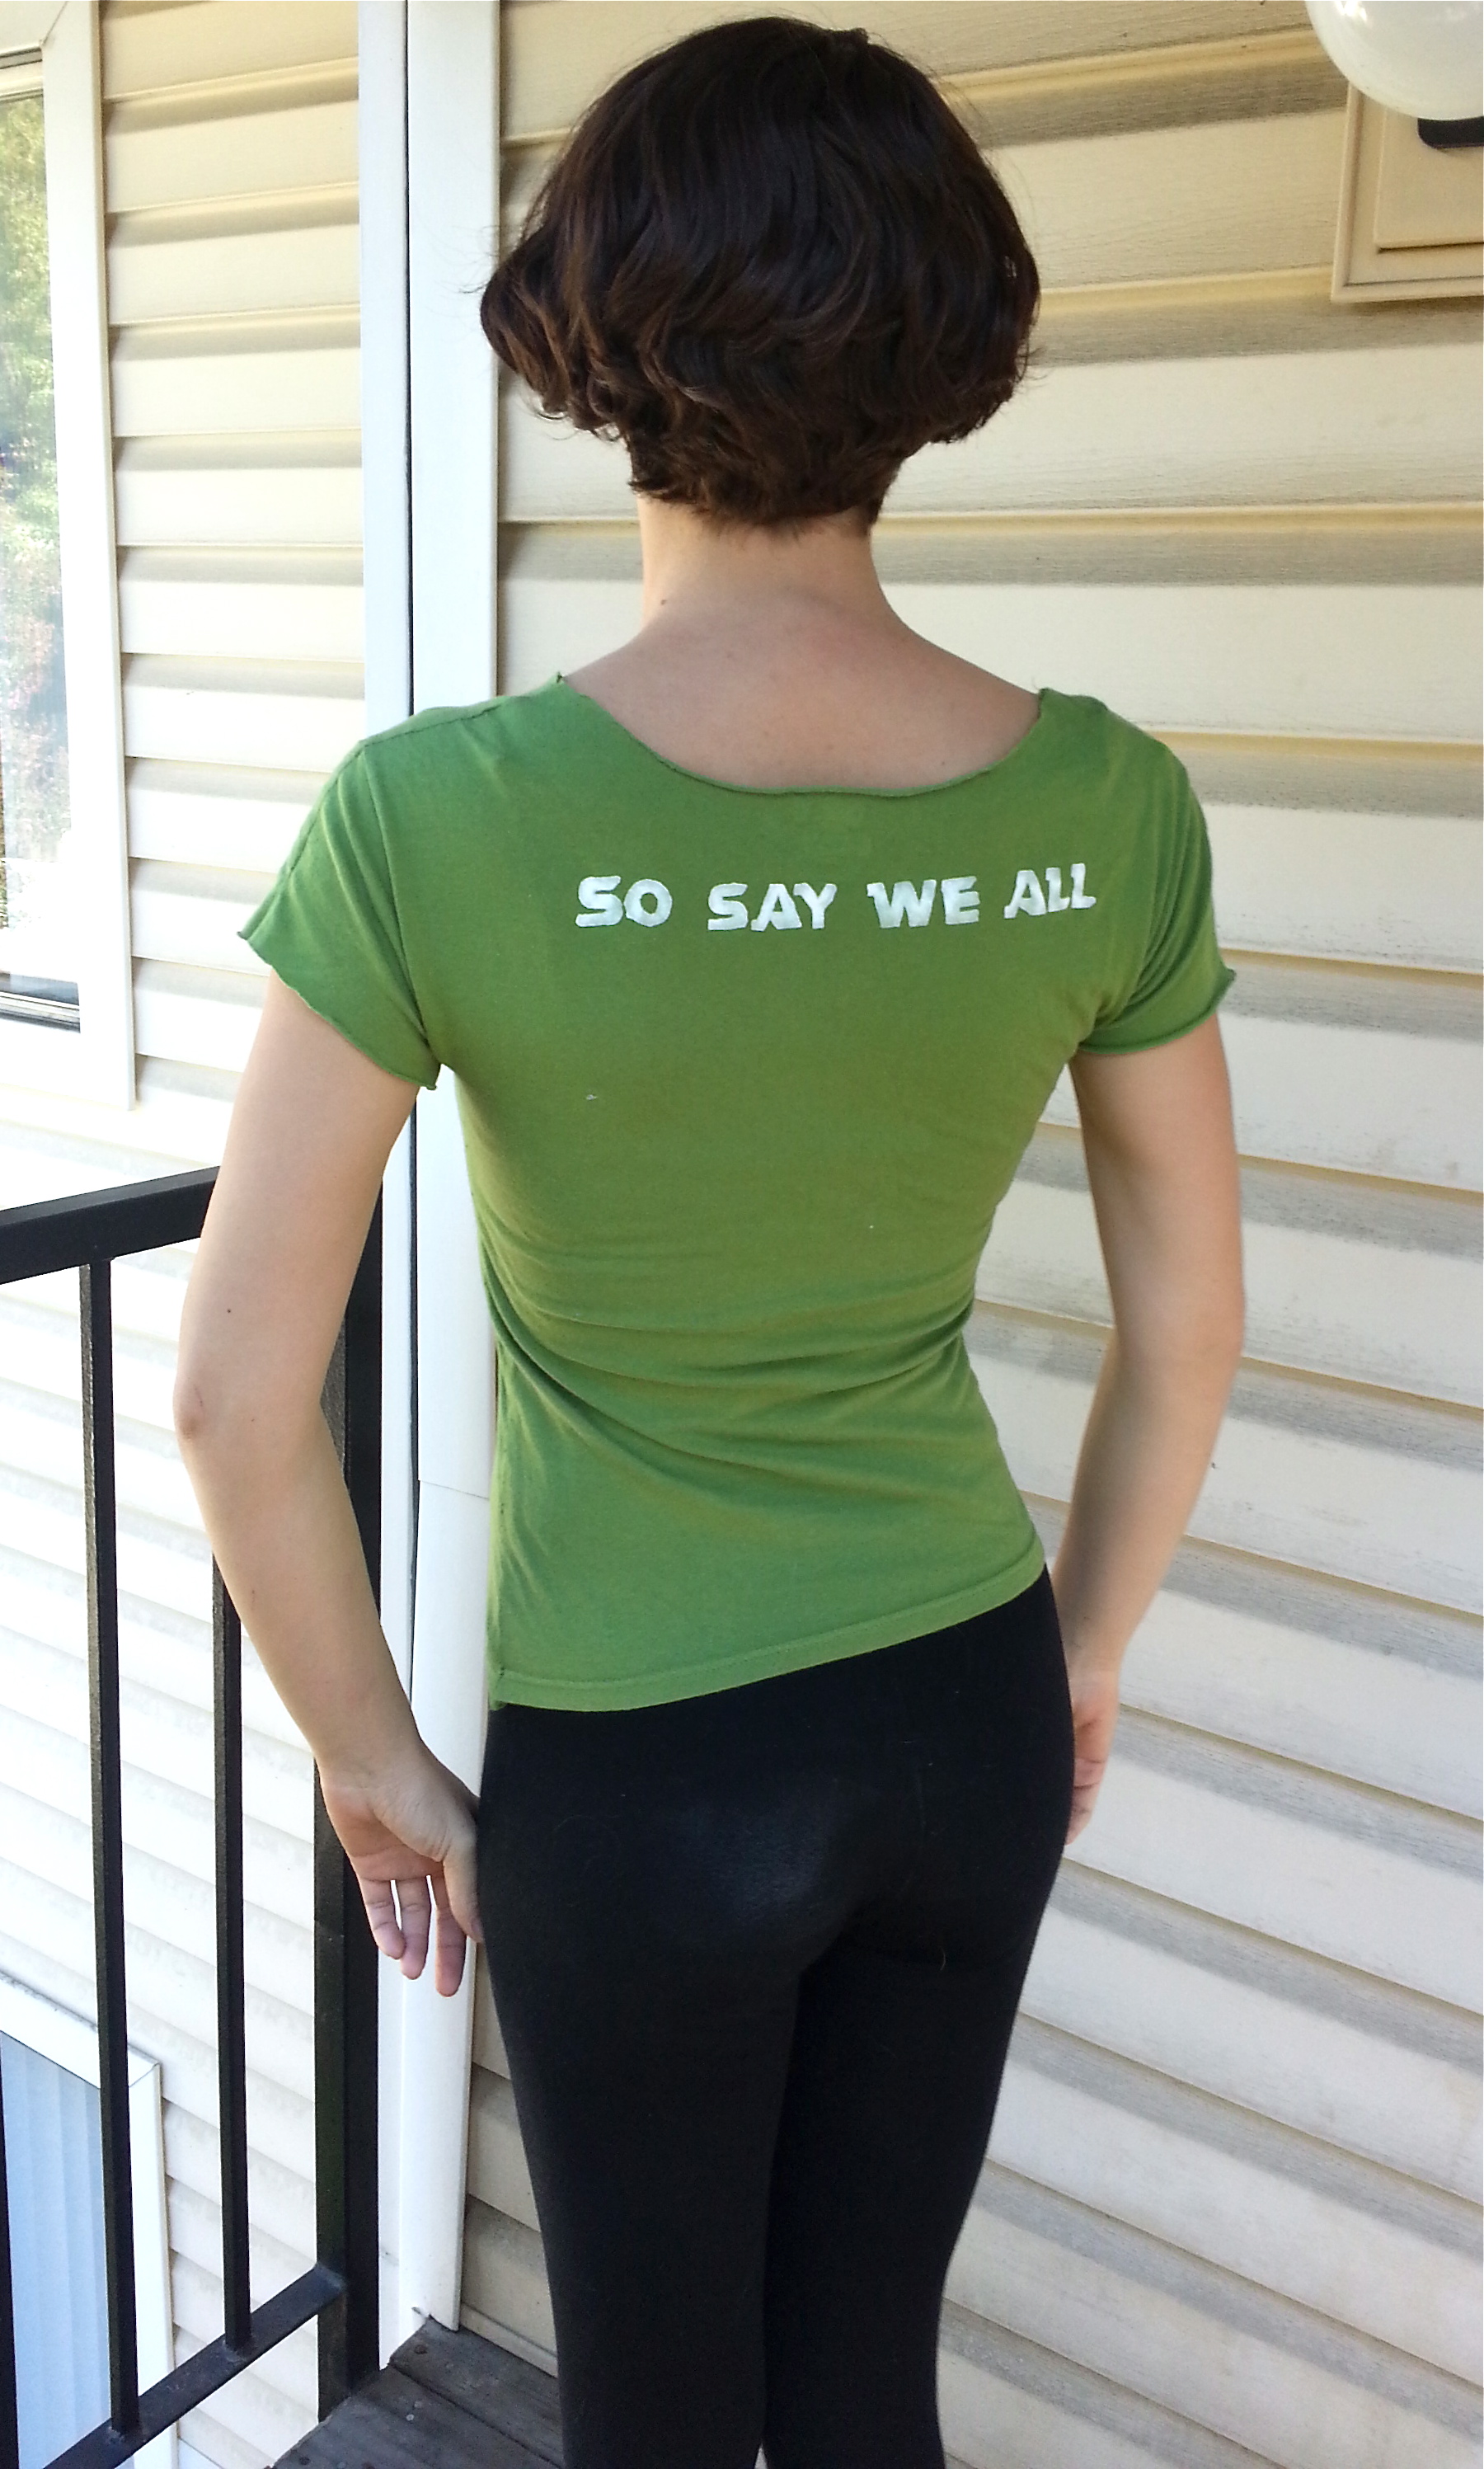
Last summer, I knit my first headband. Then this winter, after finishing the green sweater, I reverted back to headband making. They are quicker than a big project, they are great for using up odd bits of yarn, and they’re great for playing with new designs. Most of these are my own patterns. Here’s how I made them, in the order that I made them.

Rocknasium

2014-07-25 10.55.35
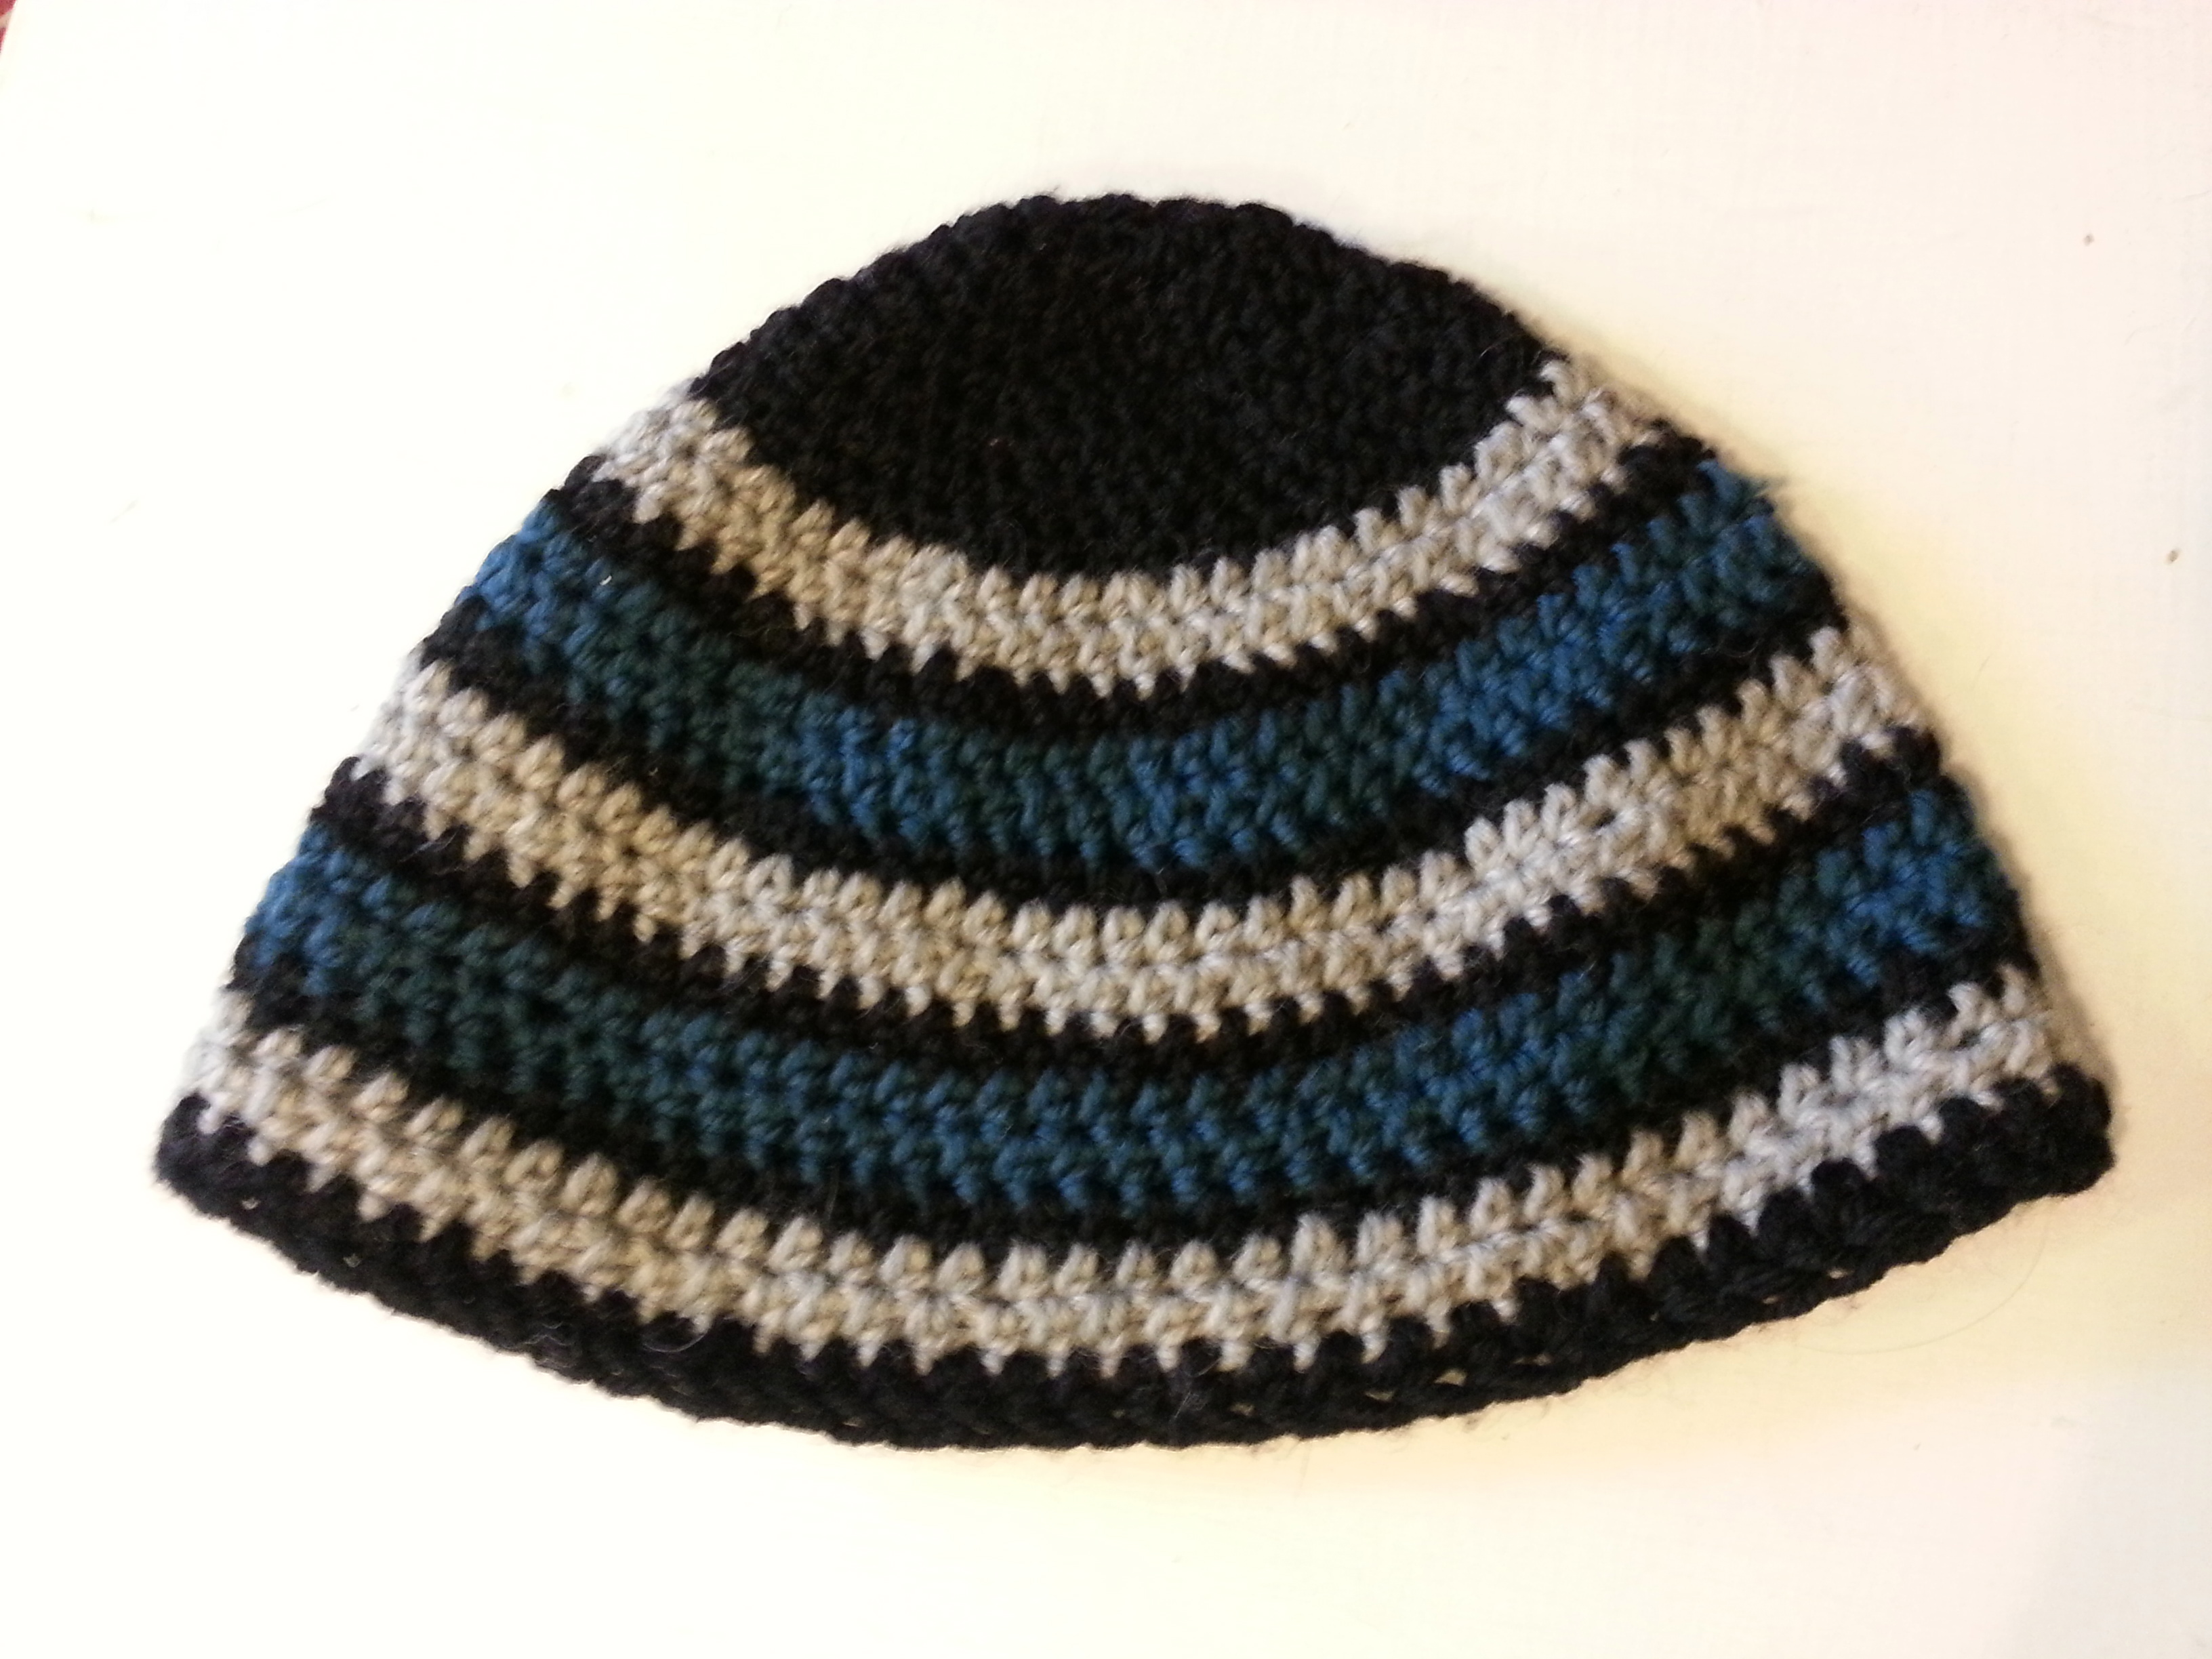
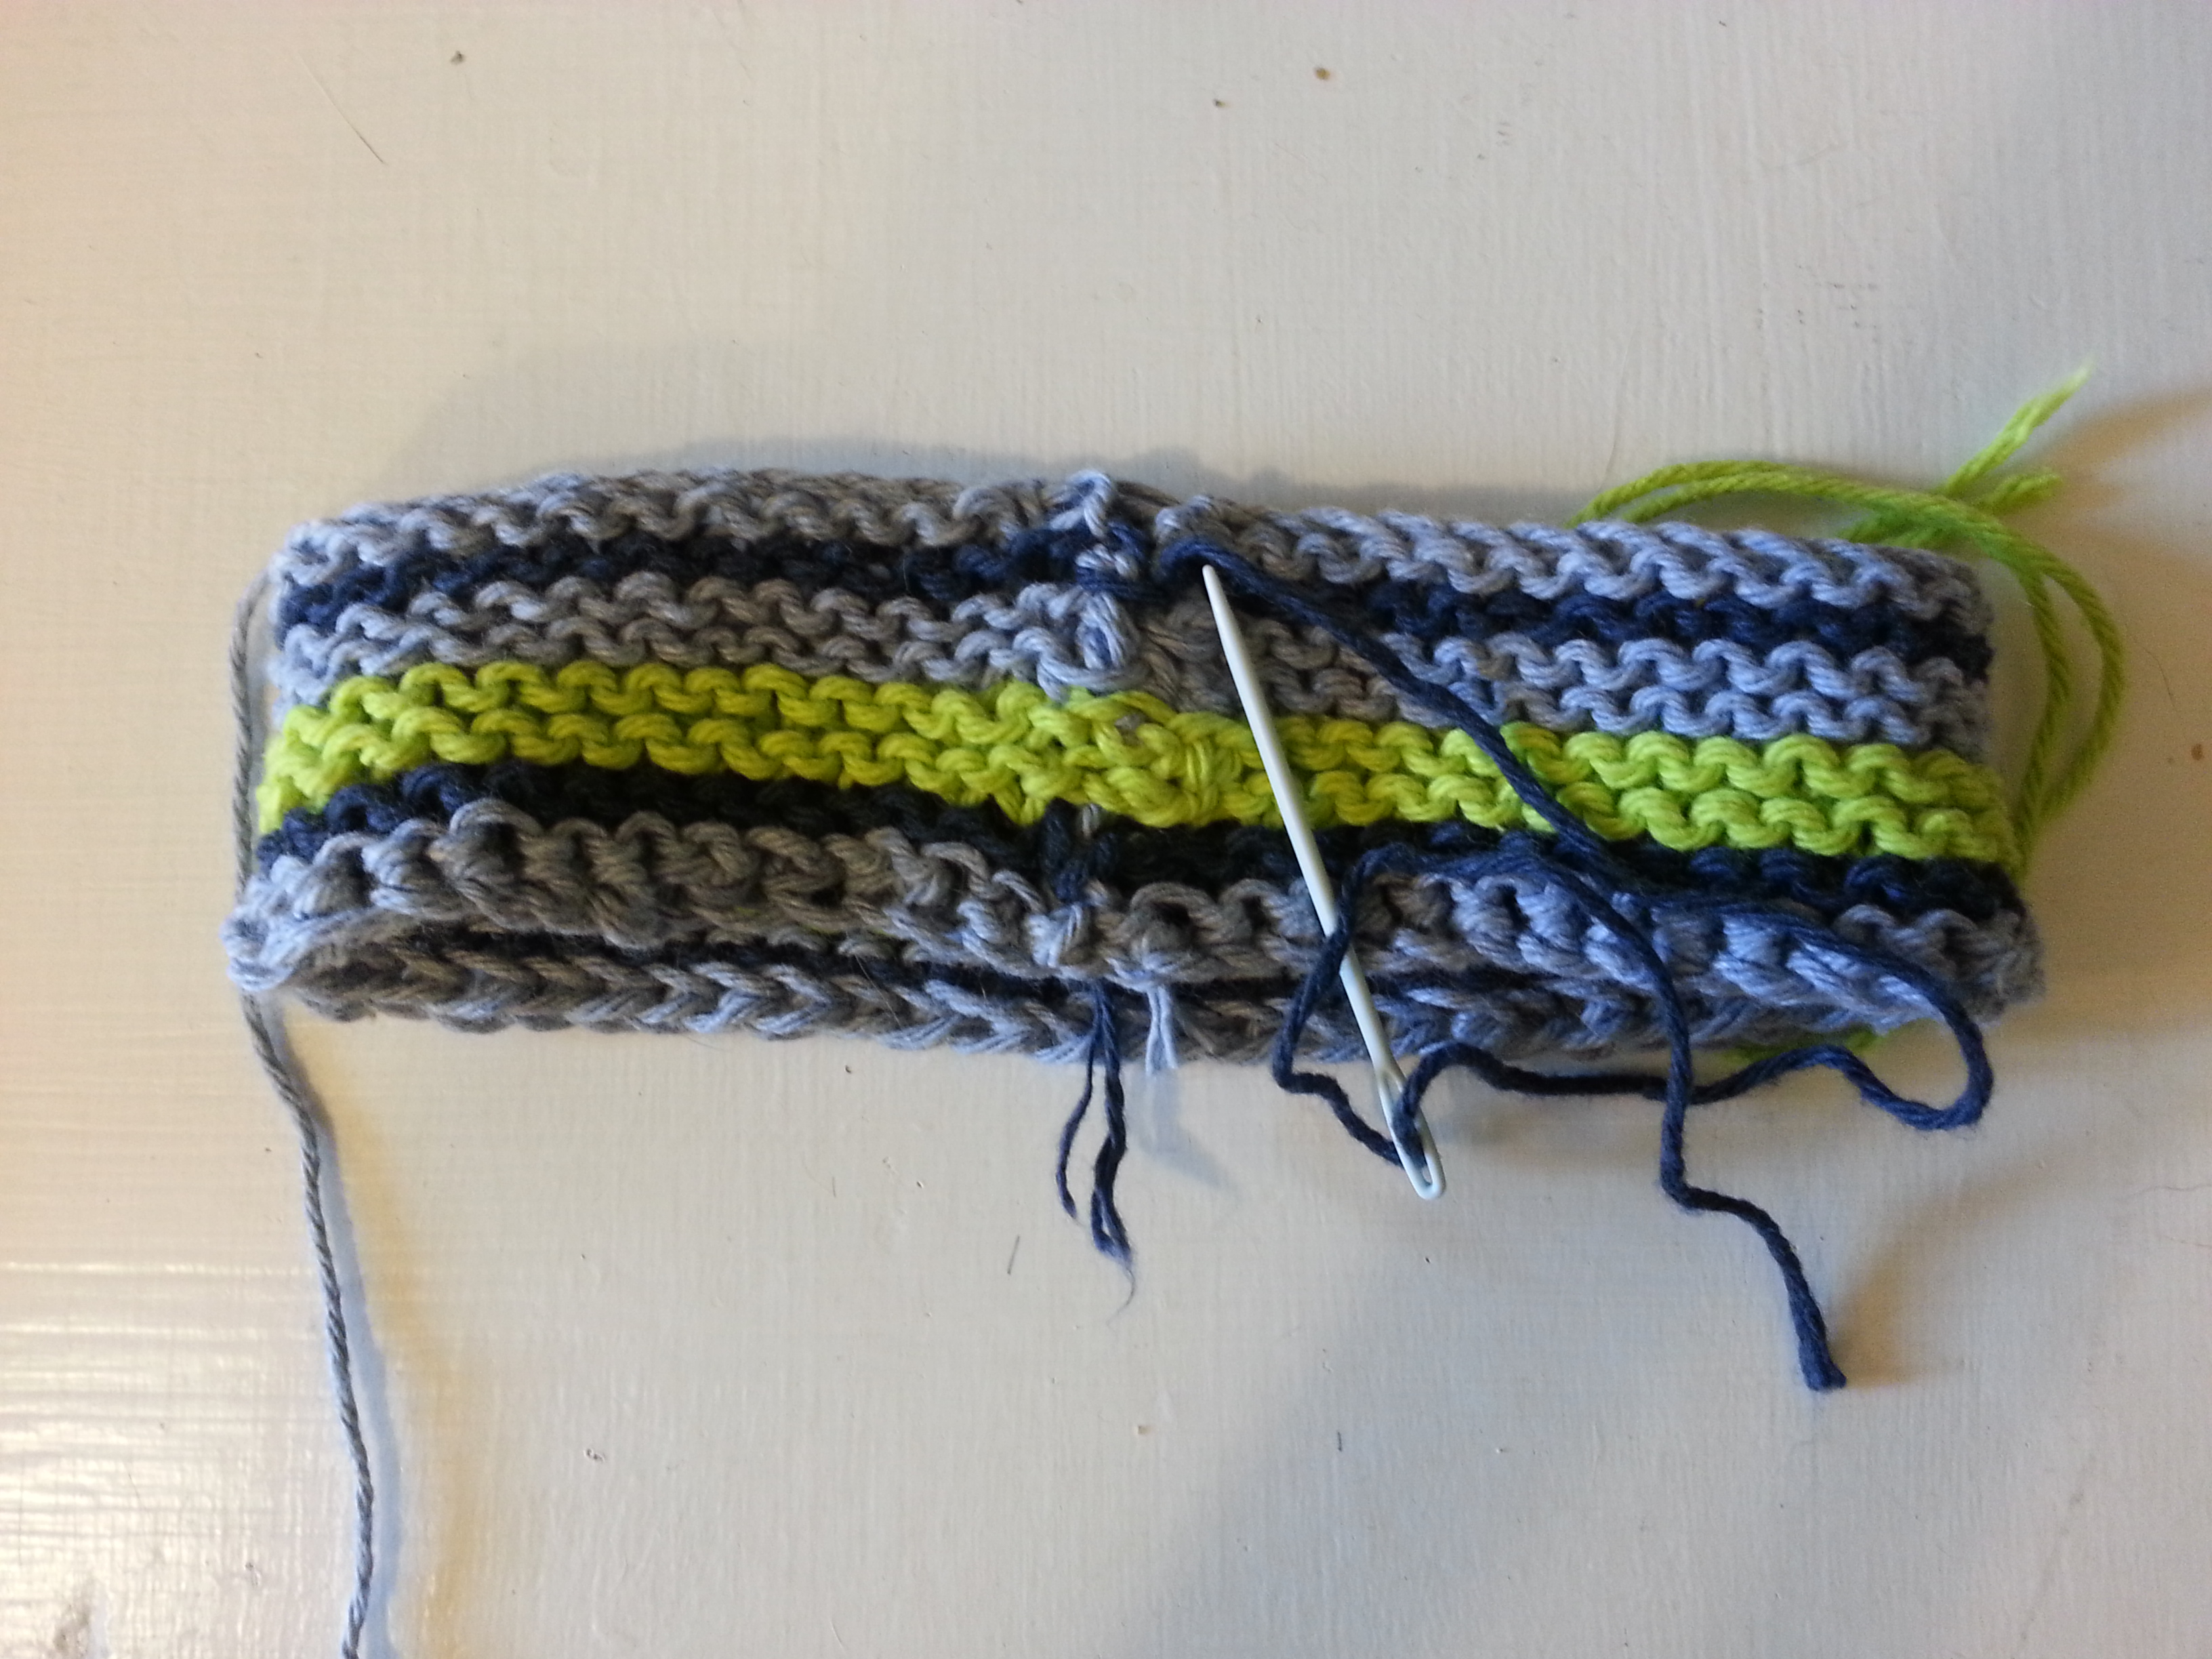
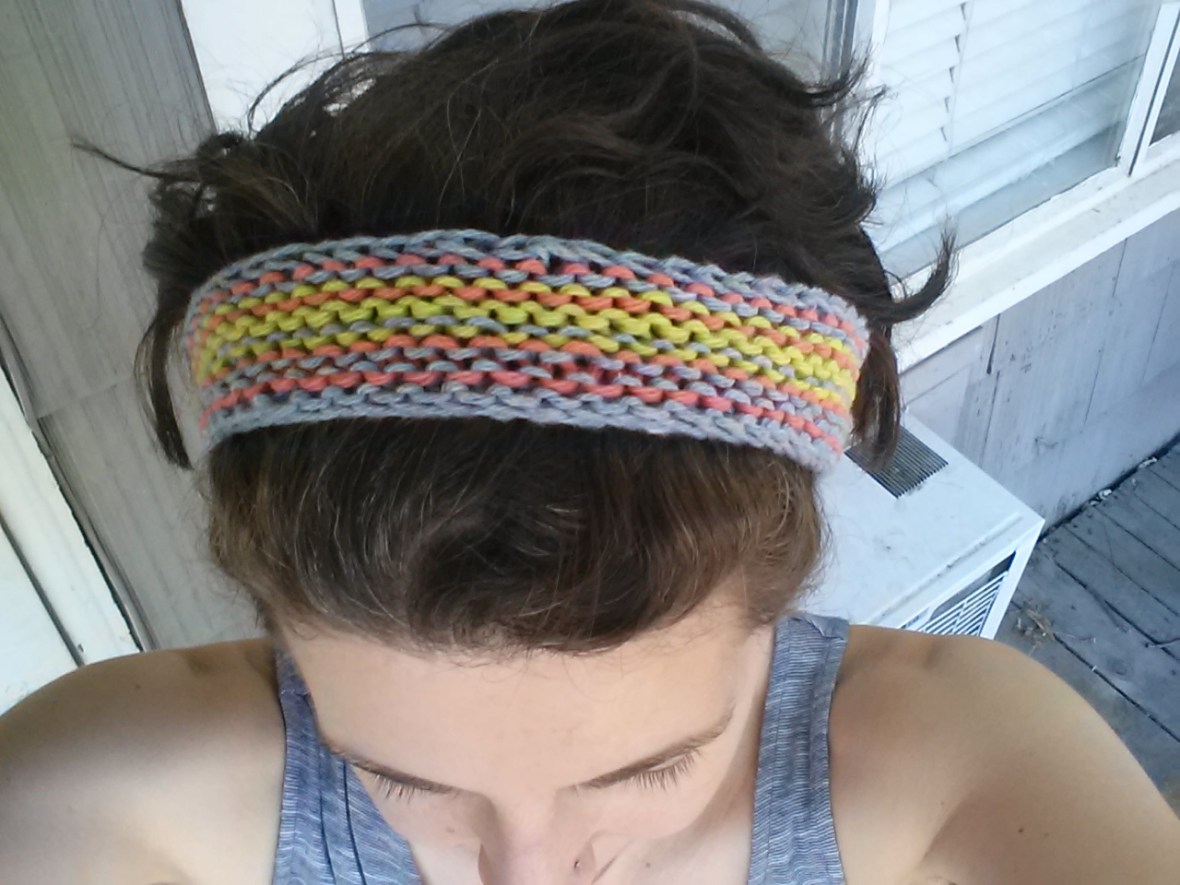
This is a multicolor garter stitch headband in cotton that gets a lot of use at the rock climbing gym. I knit it flat, in long rows on circular needles, then sewed the two short ends together. Make sure you use a stretchy cast-on and bind-off method. There isn’t a pattern besides knitting garter stitch, but you do need to measure your gauge and your head circumference so you can knit it in long rows and get the horizontal stripes. I’d recommend going a few inches down from your head size as it will stretch.

2014-07-25 10.53.36

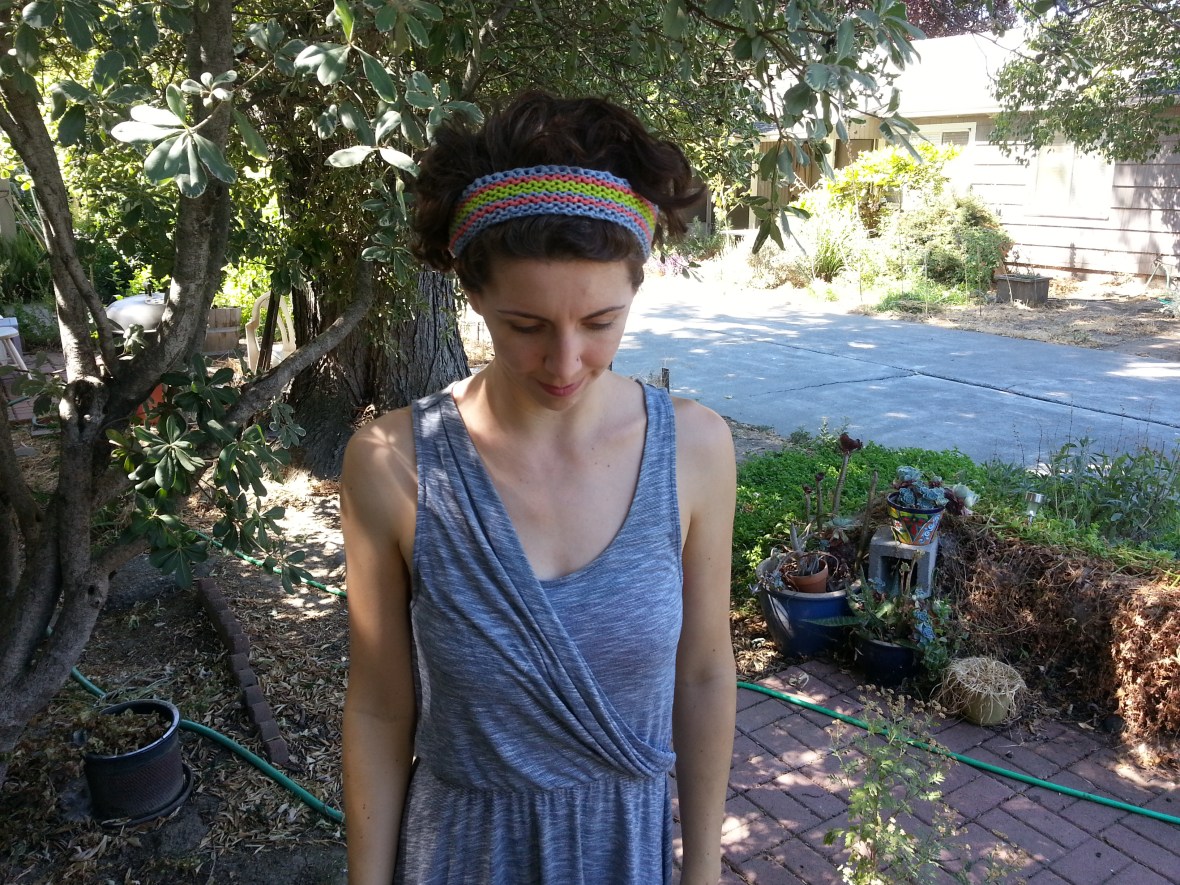
The color pattern above is one row gray, one row orange, two rows green, one row orange, one row gray. The one below I made for a friend, and that one was two gray, one blue, two green, two gray, one blue, one gray. If you don’t want a break in the color stripe, you can knit them in the round or leave a yarn tail of each color and weave them in as I did.

2014-07-20 11.37.182014-07-20 11.39.442014-07-24 21.02.20

These are the easiest of headbands! And they will definitely help you with the crux of that overhung 5.11b project. This is just a fact.

Teenage Mutant Ninja Headband

2014-07-19 10.00.38
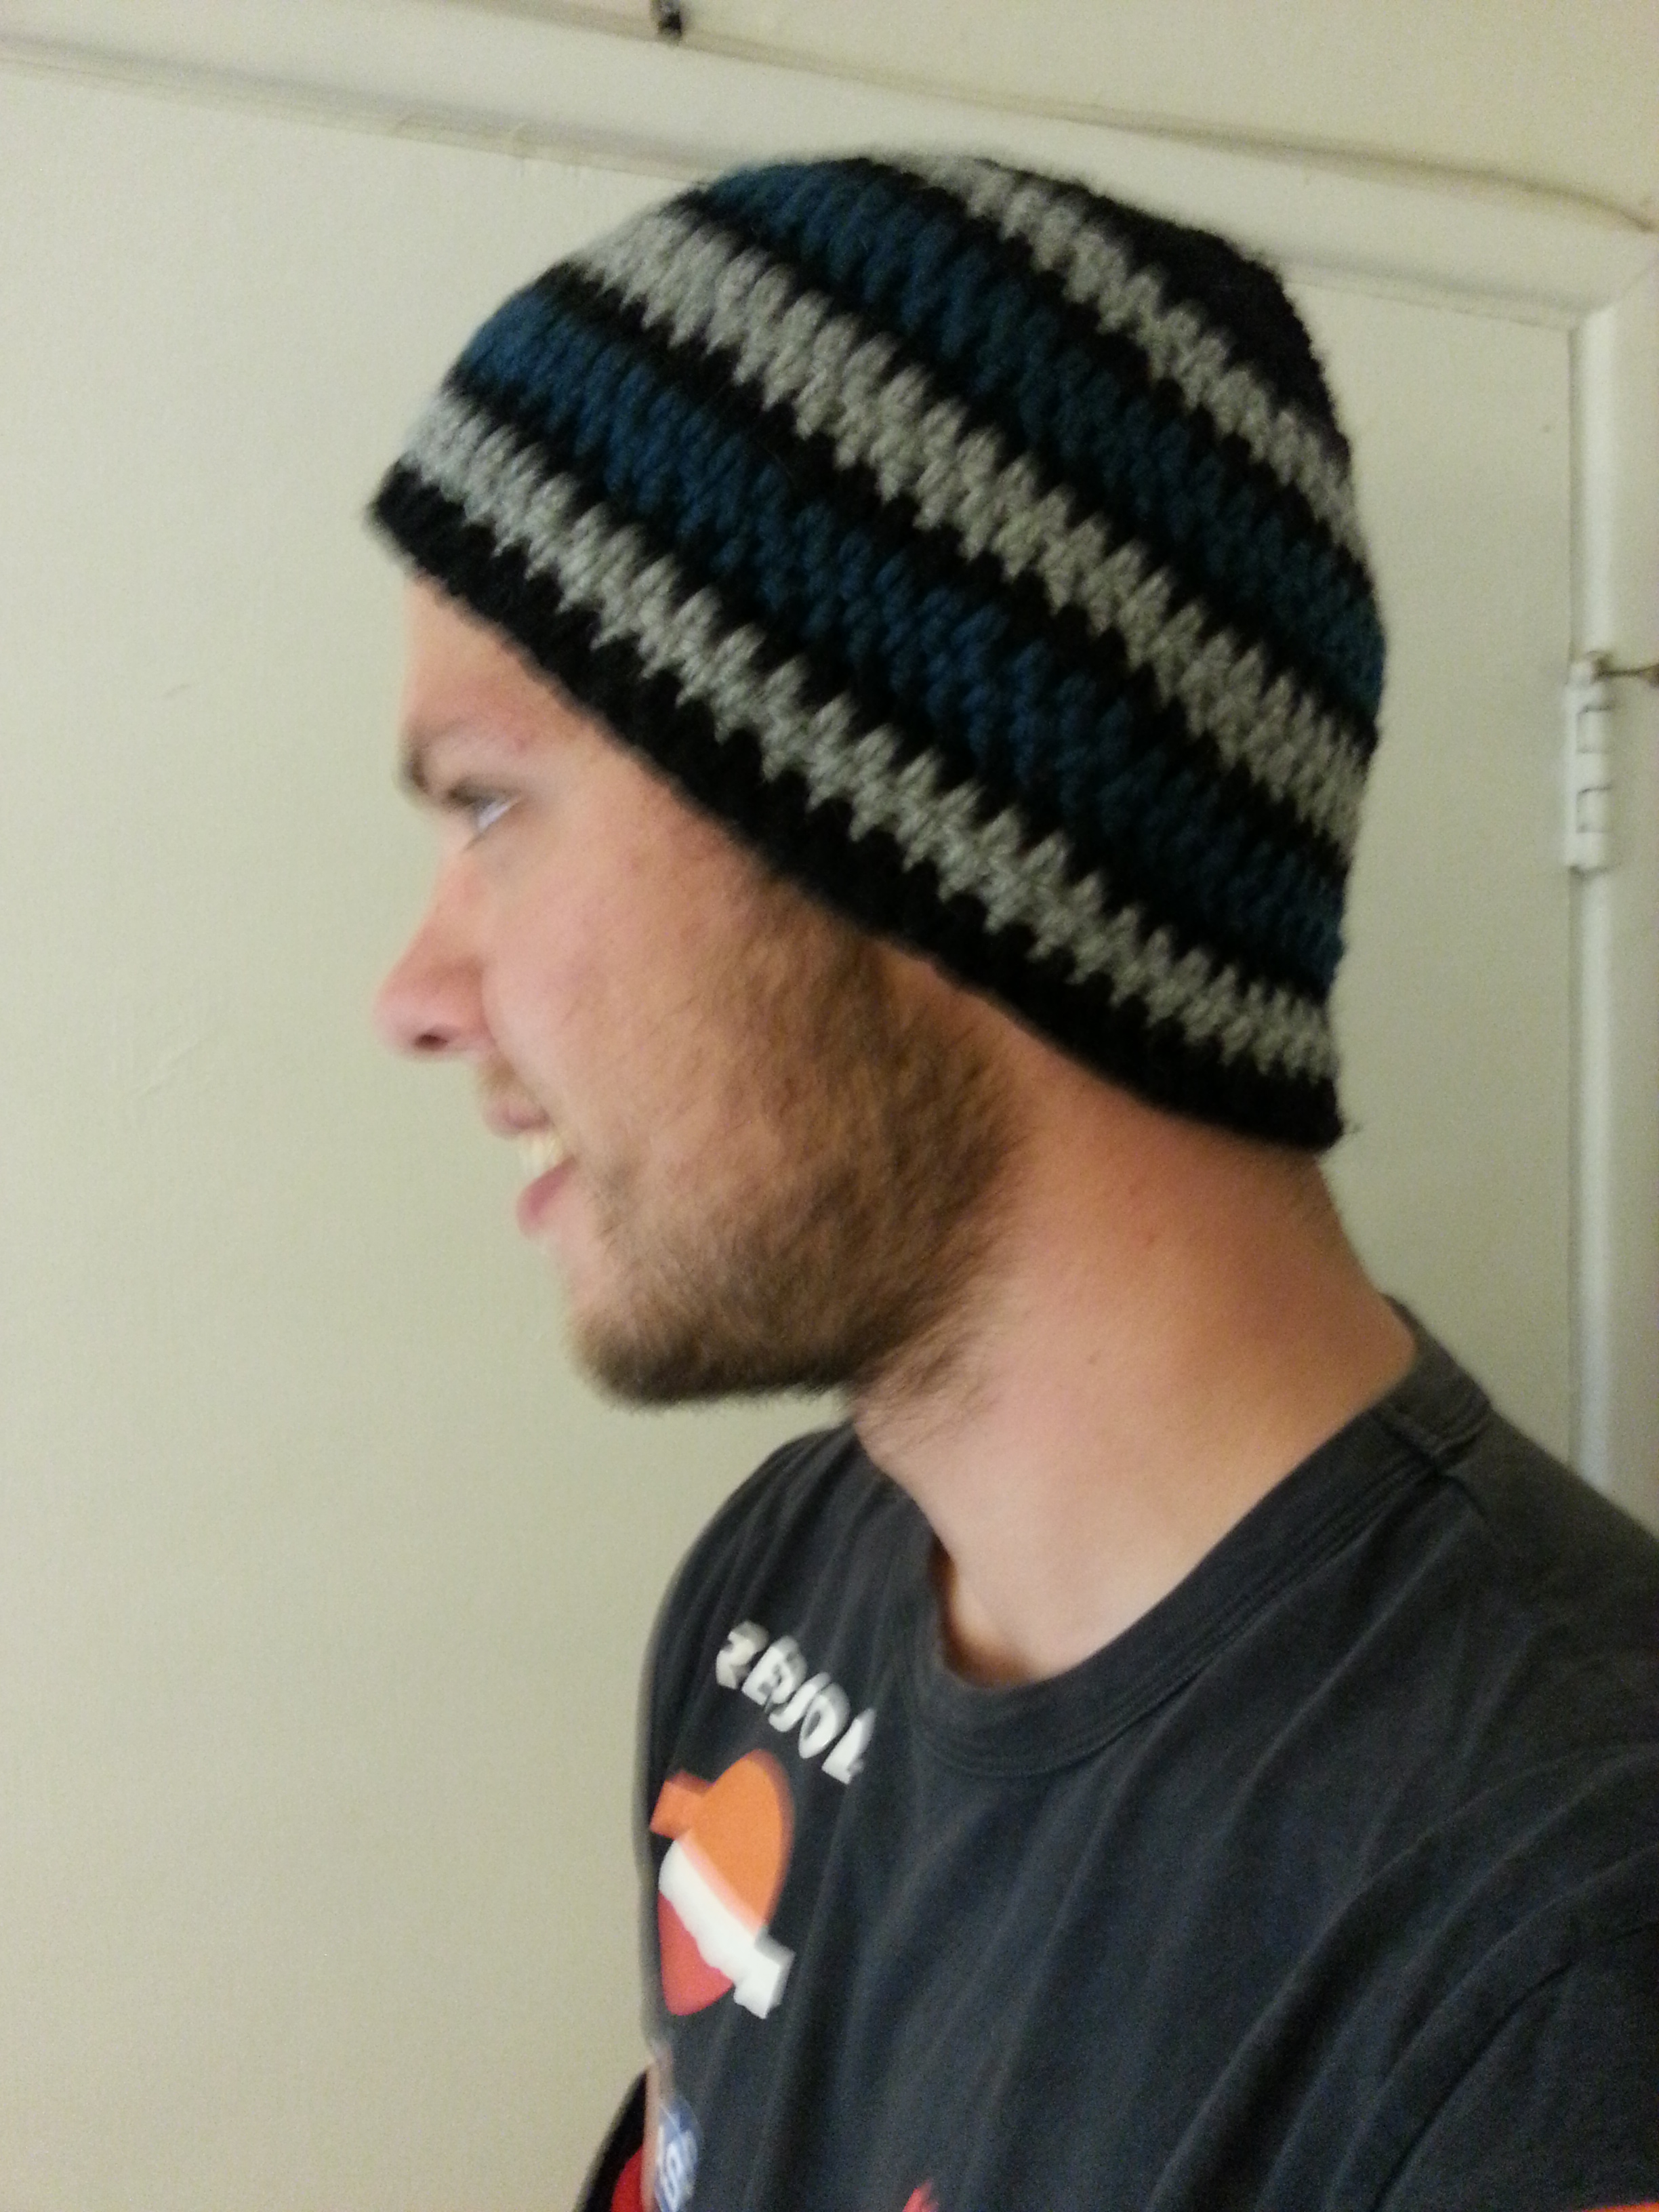
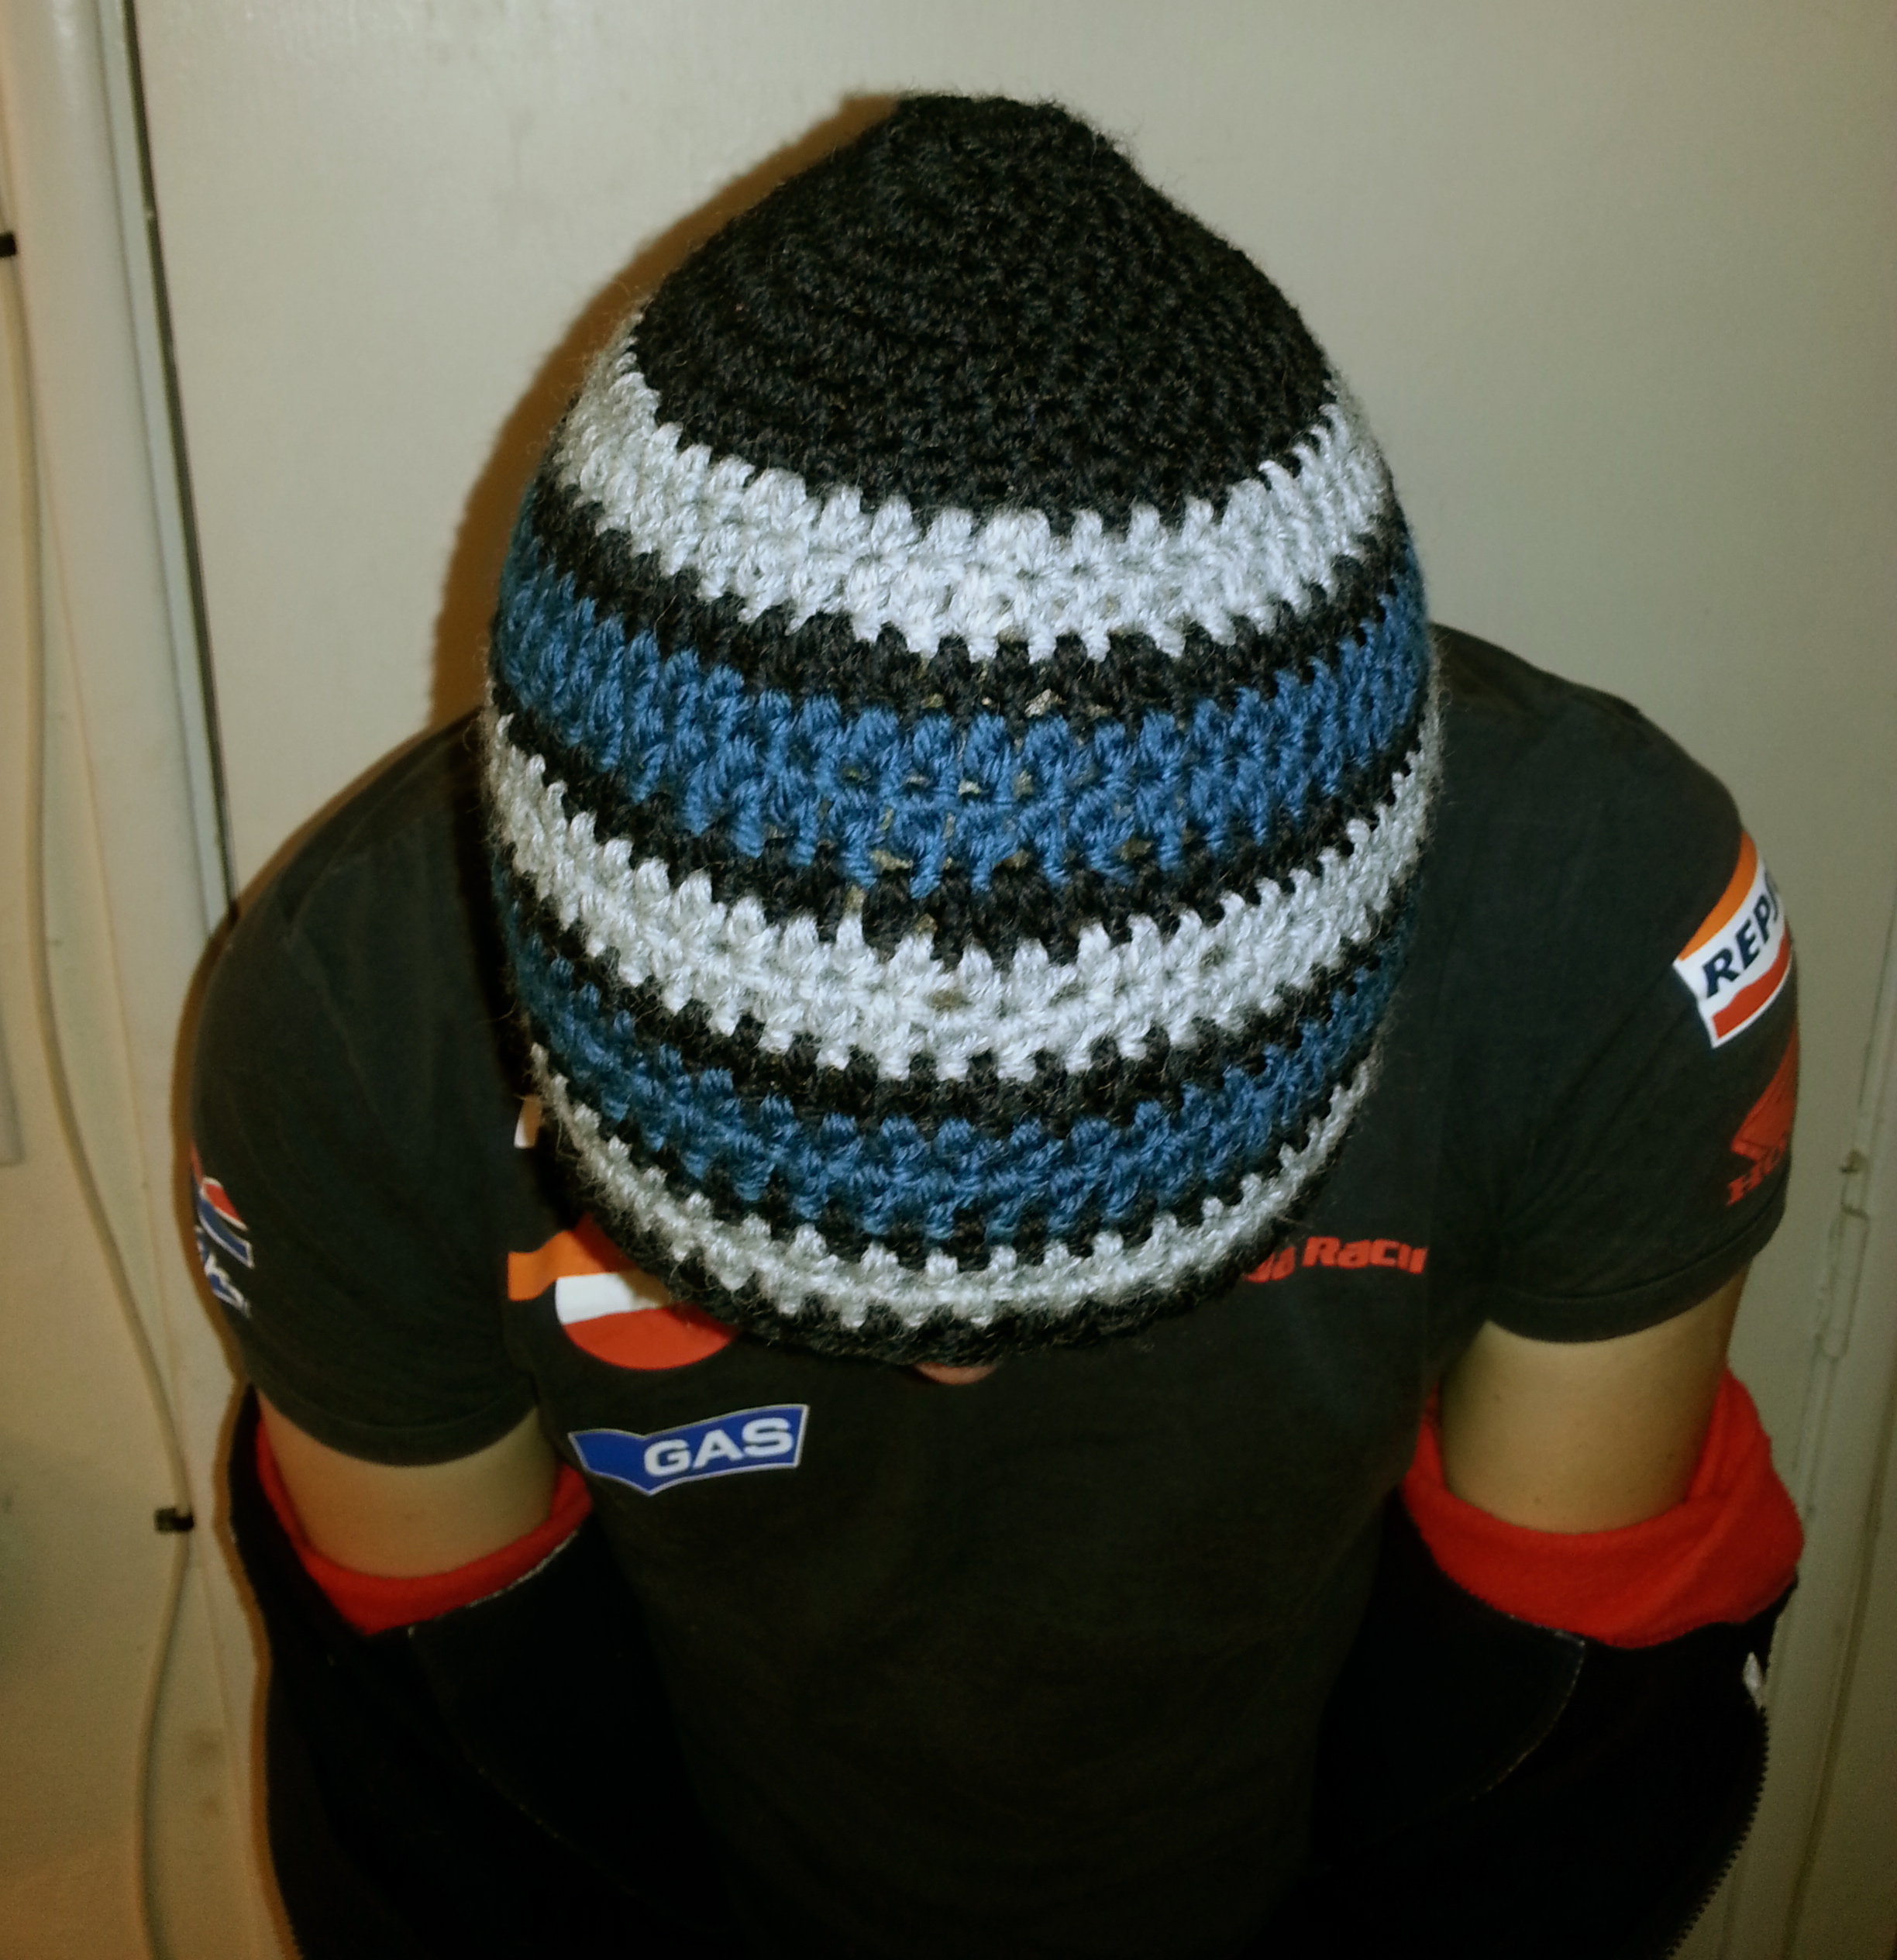
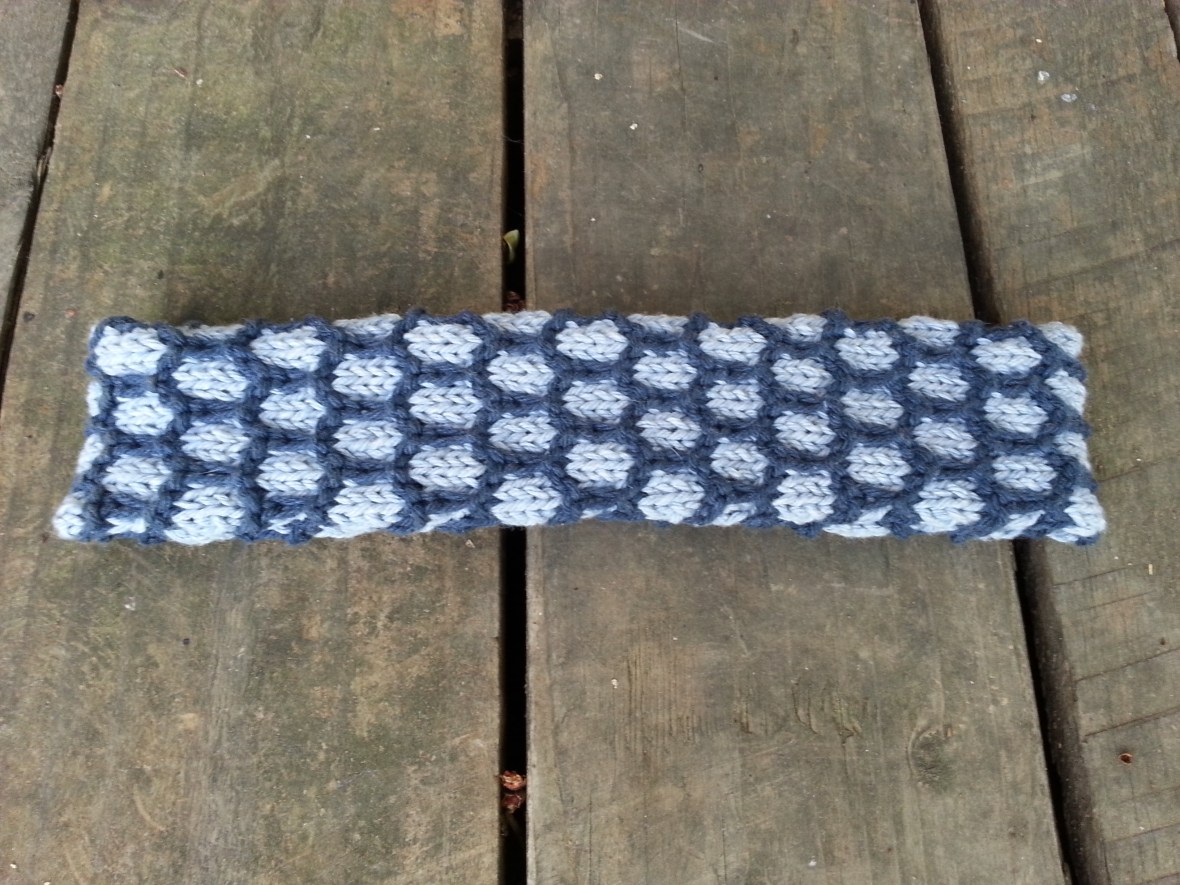
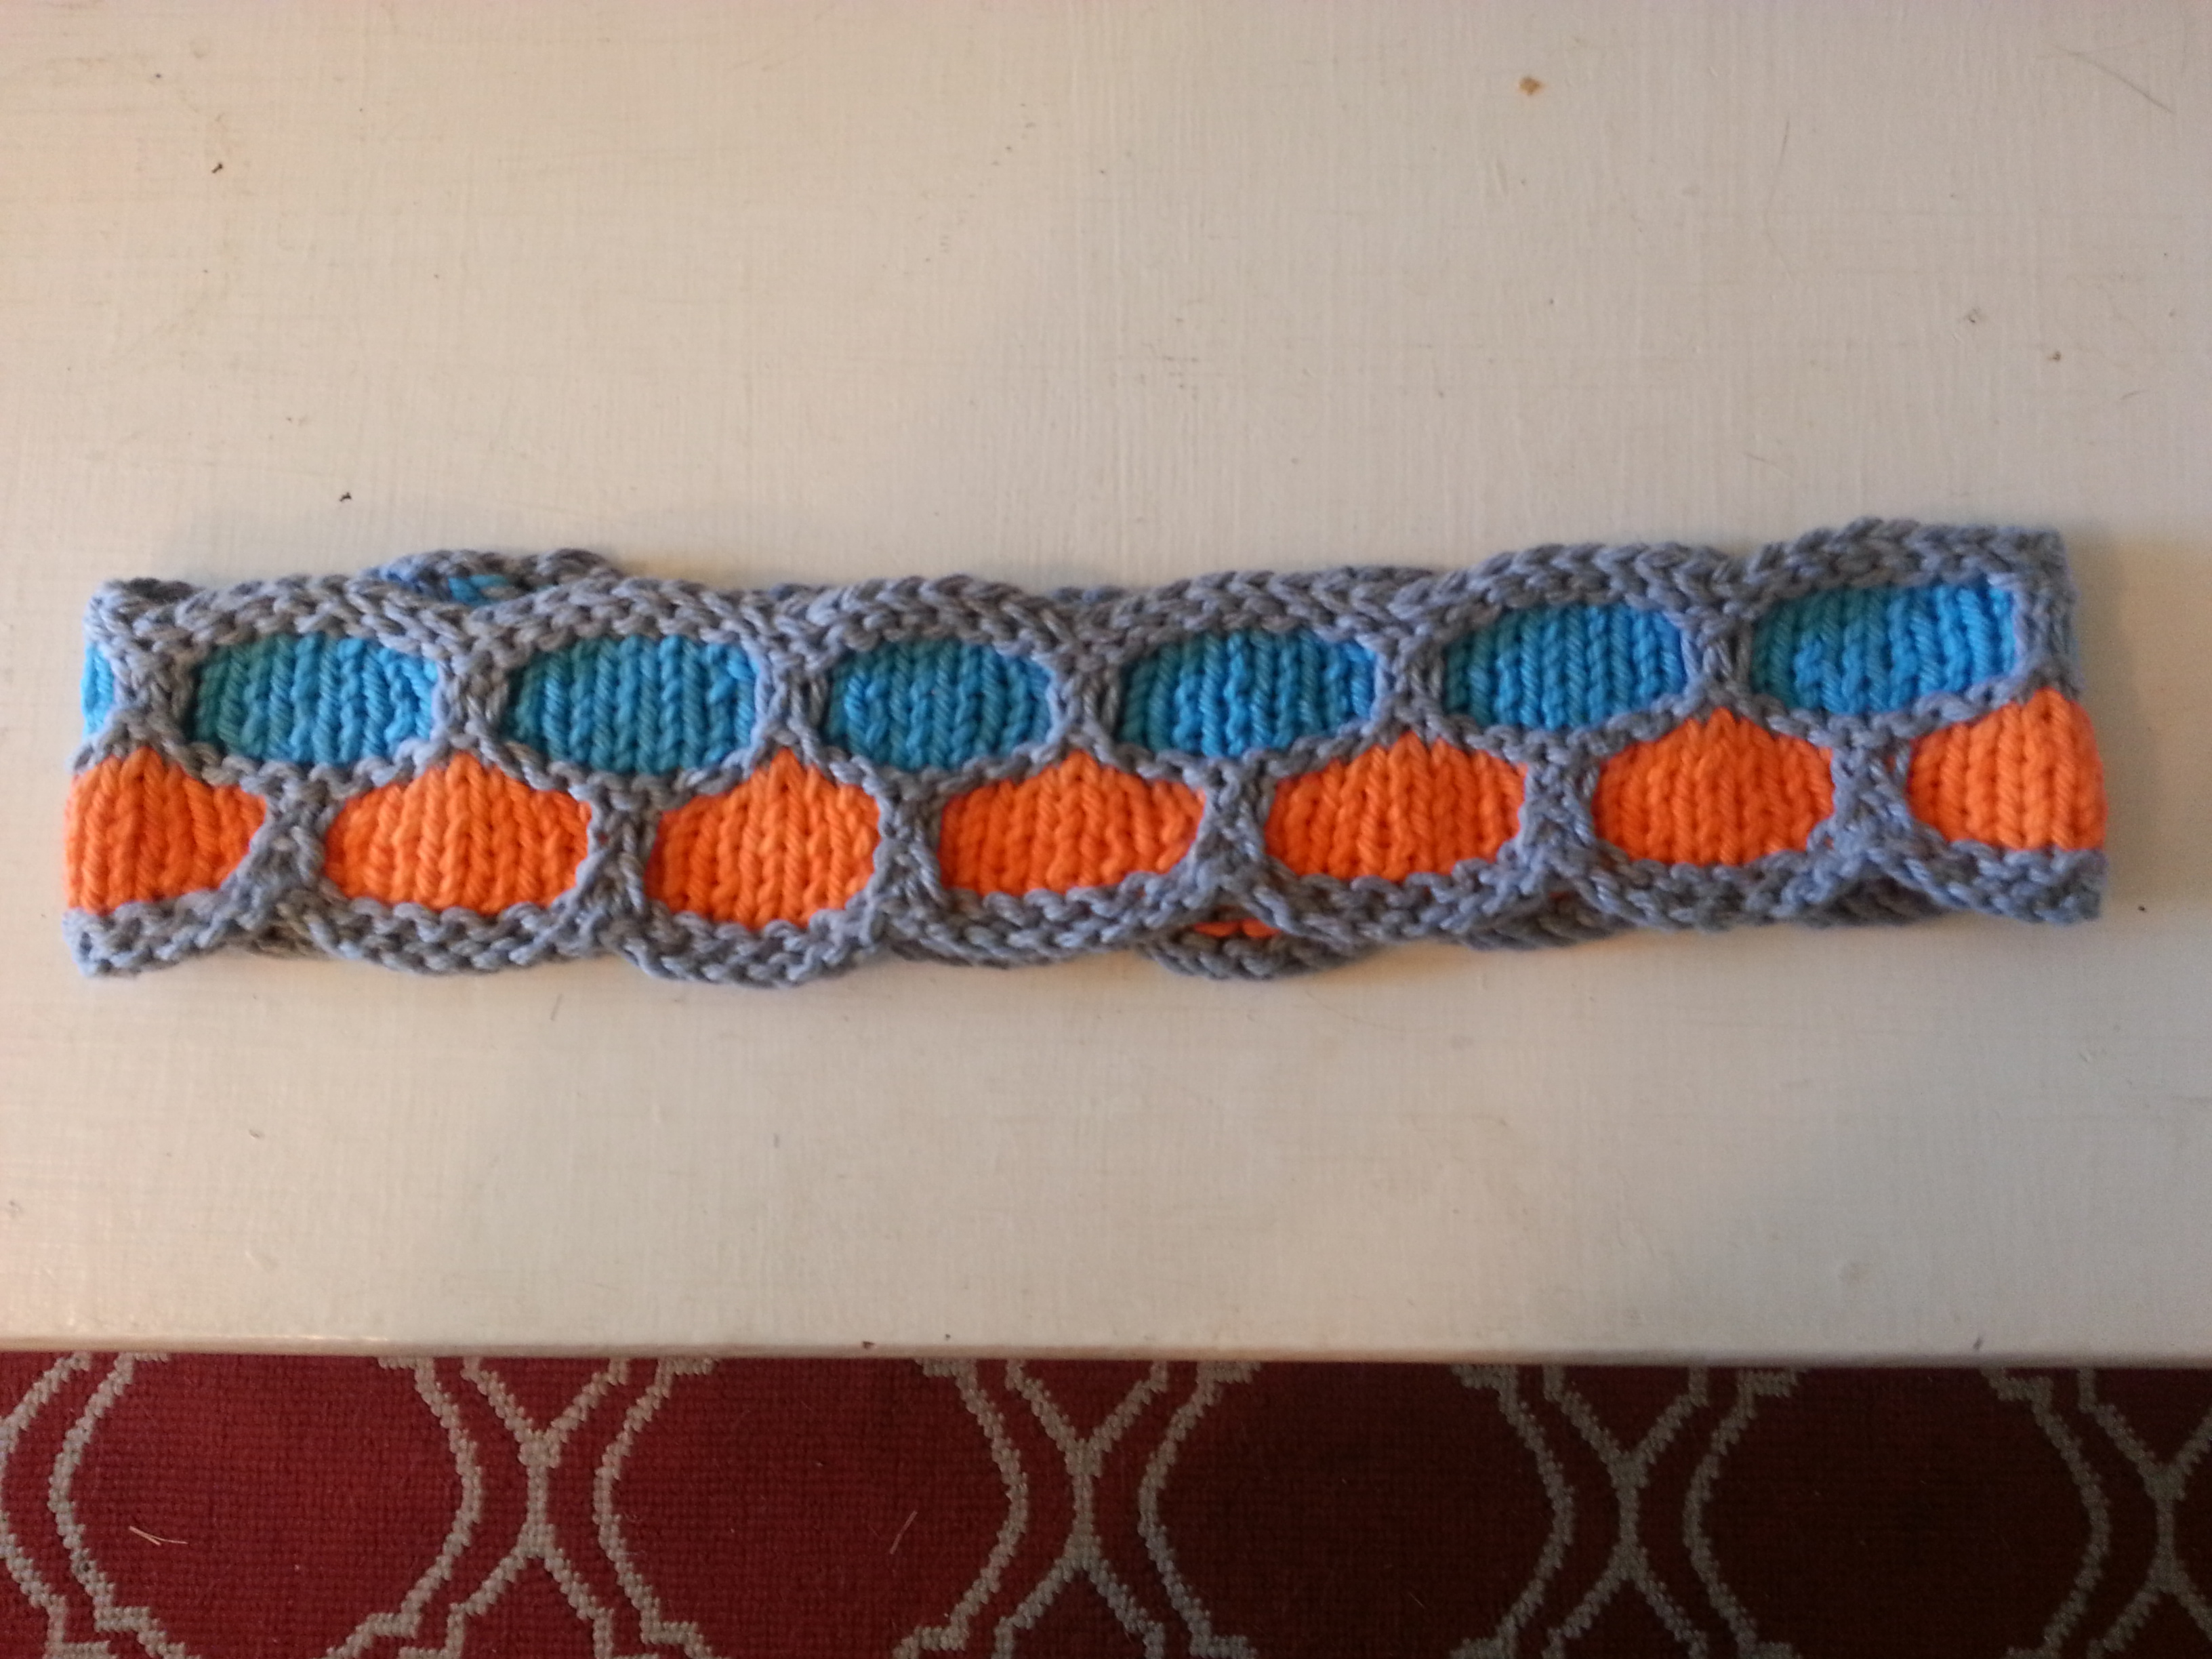
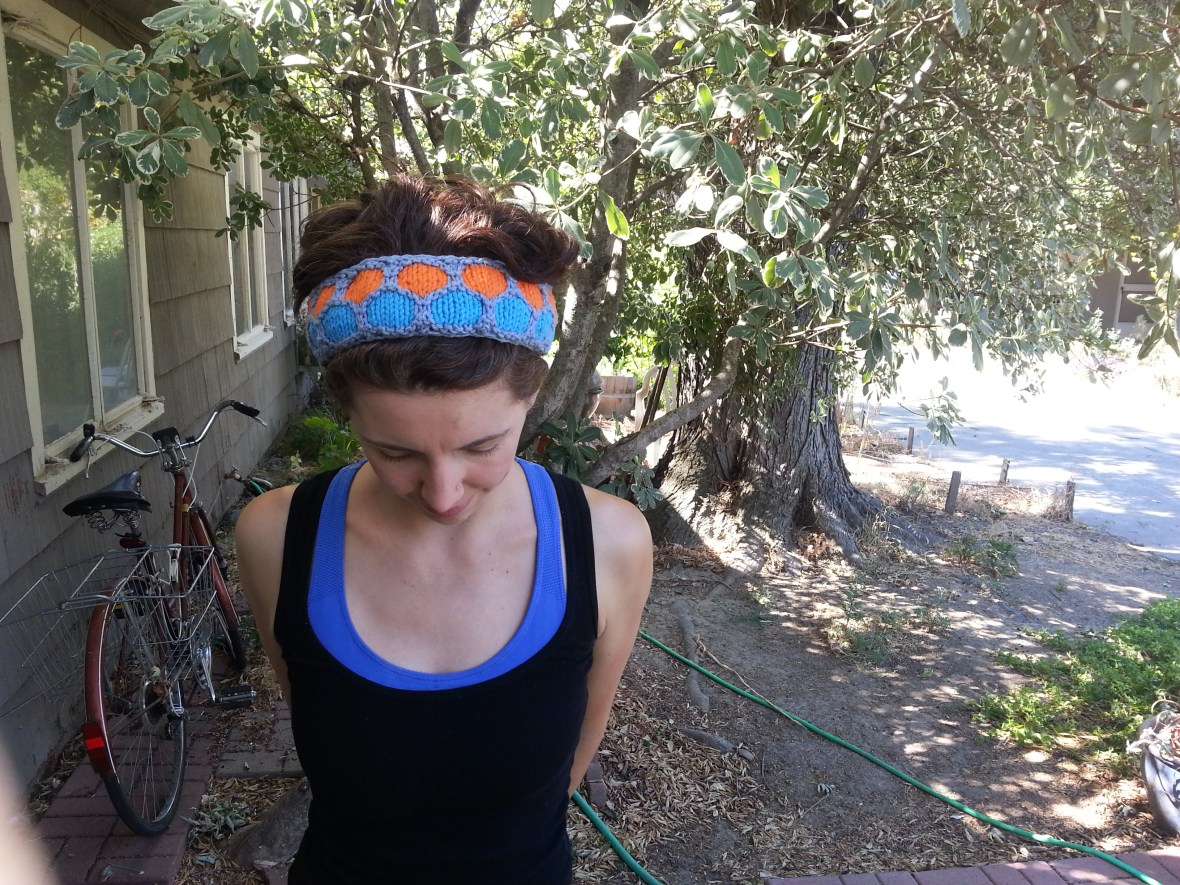
The next headband I made was way more complicated! I got really into honeycomb brioche stitch and was determined to make a huge headband from it. The colors and the shapes somehow remind me of ninja turtles, hence the name. Bonus points if you know the names of the turtles who wore the orange and blue masks!*

2014-07-18 17.01.29

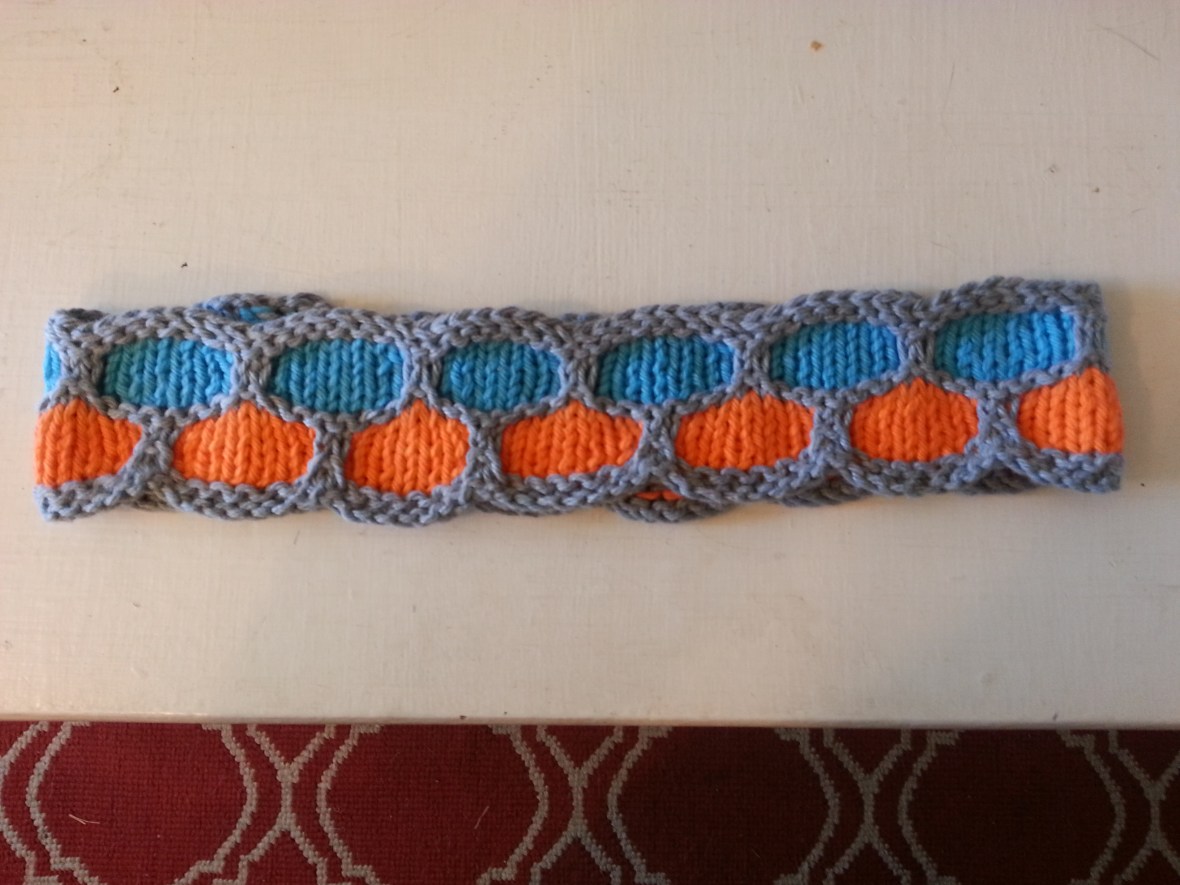
For this headband you will need three colors of cotton yarn and size 5 needles or whatever will get you a gauge of 8 stitches per inch unstretched/ 6.5 stretched. I know that’s kind of specific but that’s how I accounted for the fact that headbands have to stretch. If you have a smaller head you should adjust your gauge as needed. You’ll also need a crochet hook.

 CO 108 in Color A

r1 and r2: k

r3: Color B k1, sl 2 p wise, *k6, sl2. repeat from * to last st, k1

r4: p1, sl 2, *p6, sl2, repeat from * to last st, p 1

r5: repeat row 3 but carry Color A up the side

r6: repeat row 4

r7: repeat row 3

r 8: repeat row 4

r 9 and r 10: color A knit

r 11: k 5, sl 2, *k6, sl 2, repeat from * to last 5 sts, k5

Add Color C here and repeat. Cast off. Sew short ends together.

After casting off: Using a crochet hook and Color A, add a single chain stitch border to the edges. If your headband is seeming like it will be a bit loose, add some decreases (i.e. chain two knit stitches together) to tighten it up.

2014-07-18 18.09.44
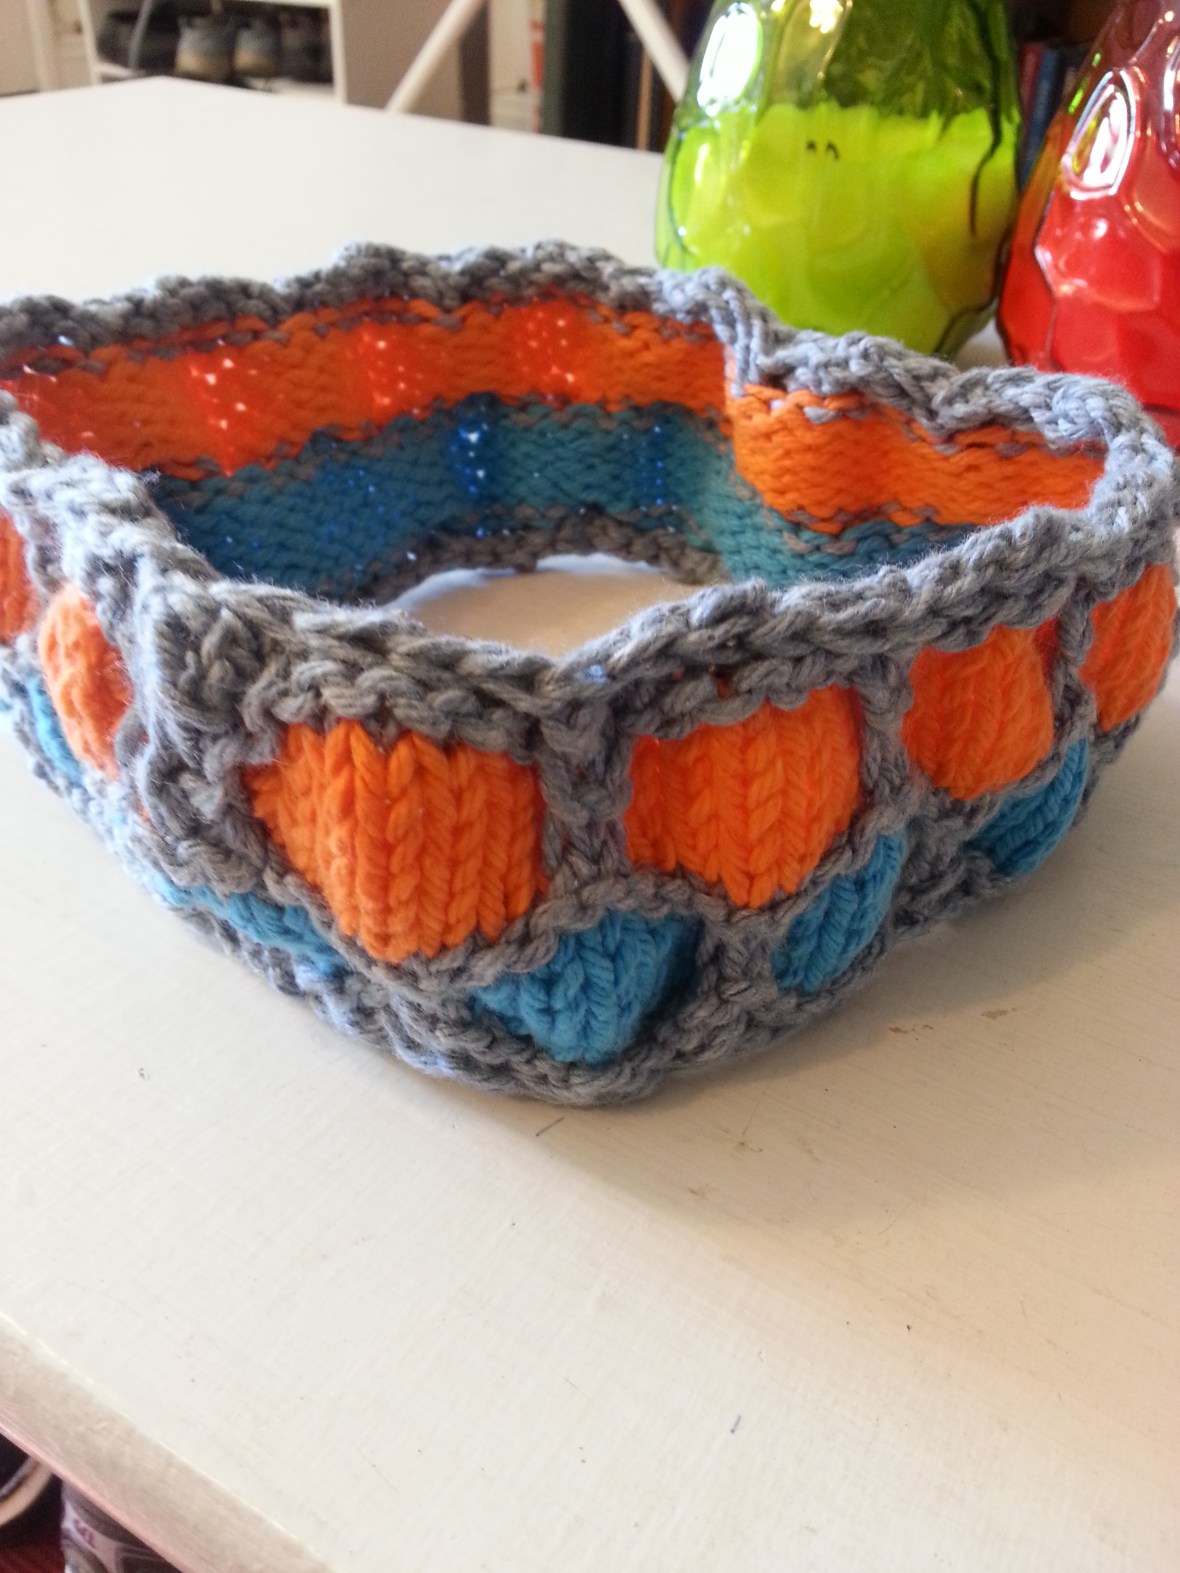
Your headband should look pretty wonky at this point—make sure to block it before wearing if it does! That’s how I got mine to lay flat.

2014-07-19 10.01.36

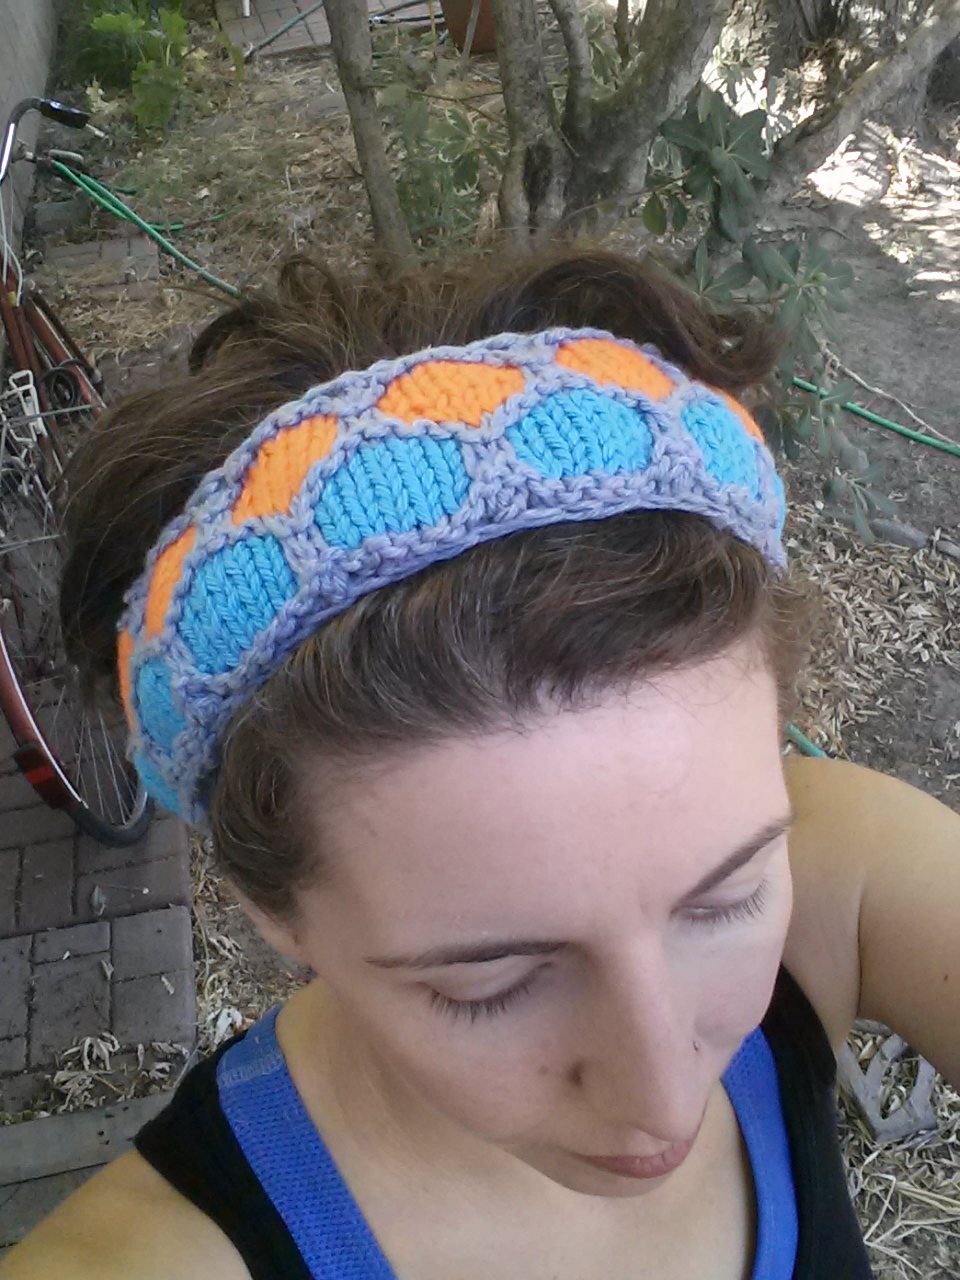
Wearing this headband will definitely give you the power to finally defeat Shredder with your mad katana/nunchuck skills …or, you know, keep your hair out of your face during zumba. One of the two.

*Answer: Michelangelo and Leonardo, respectively.

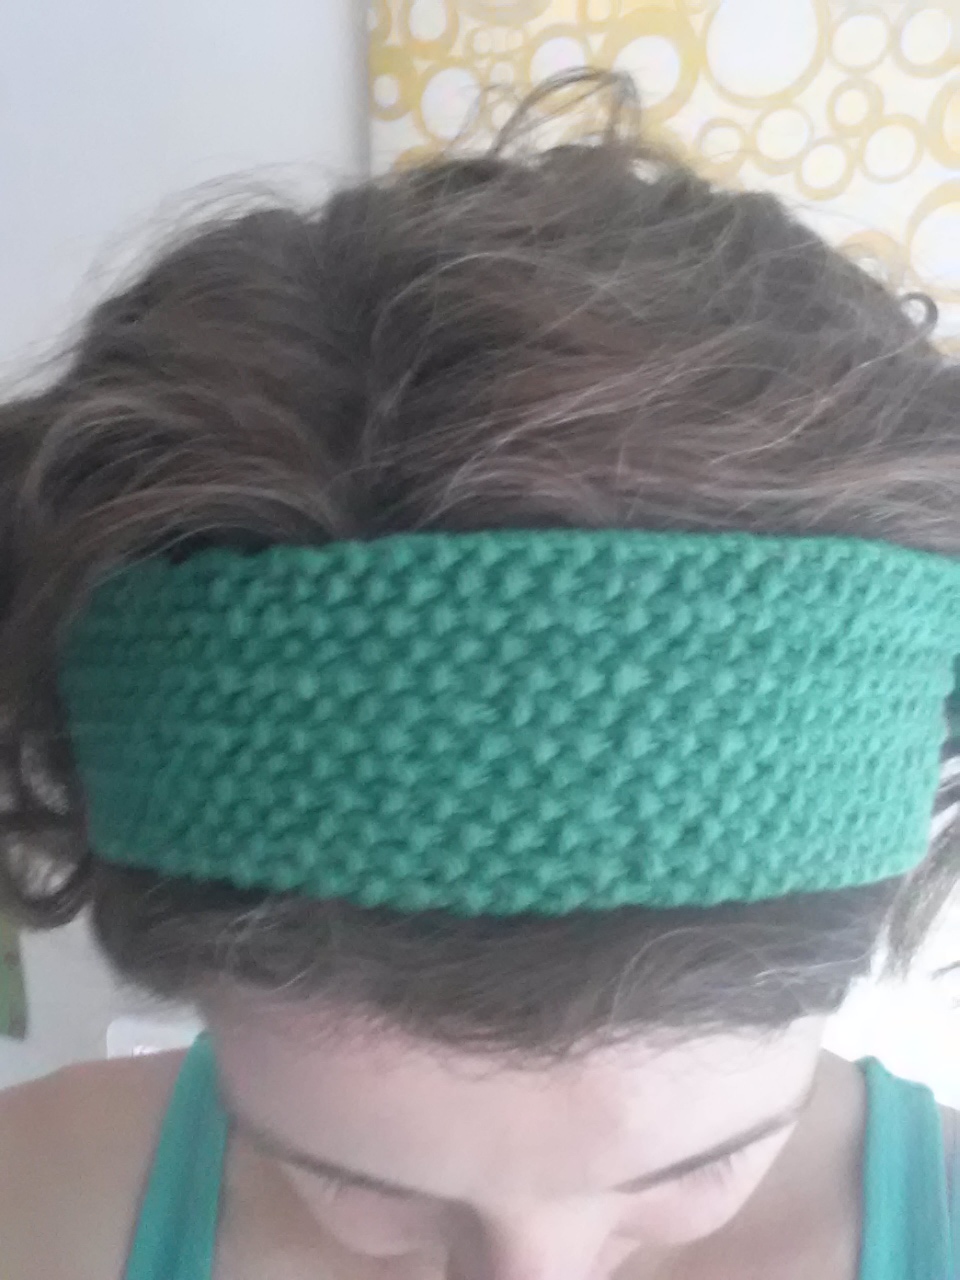
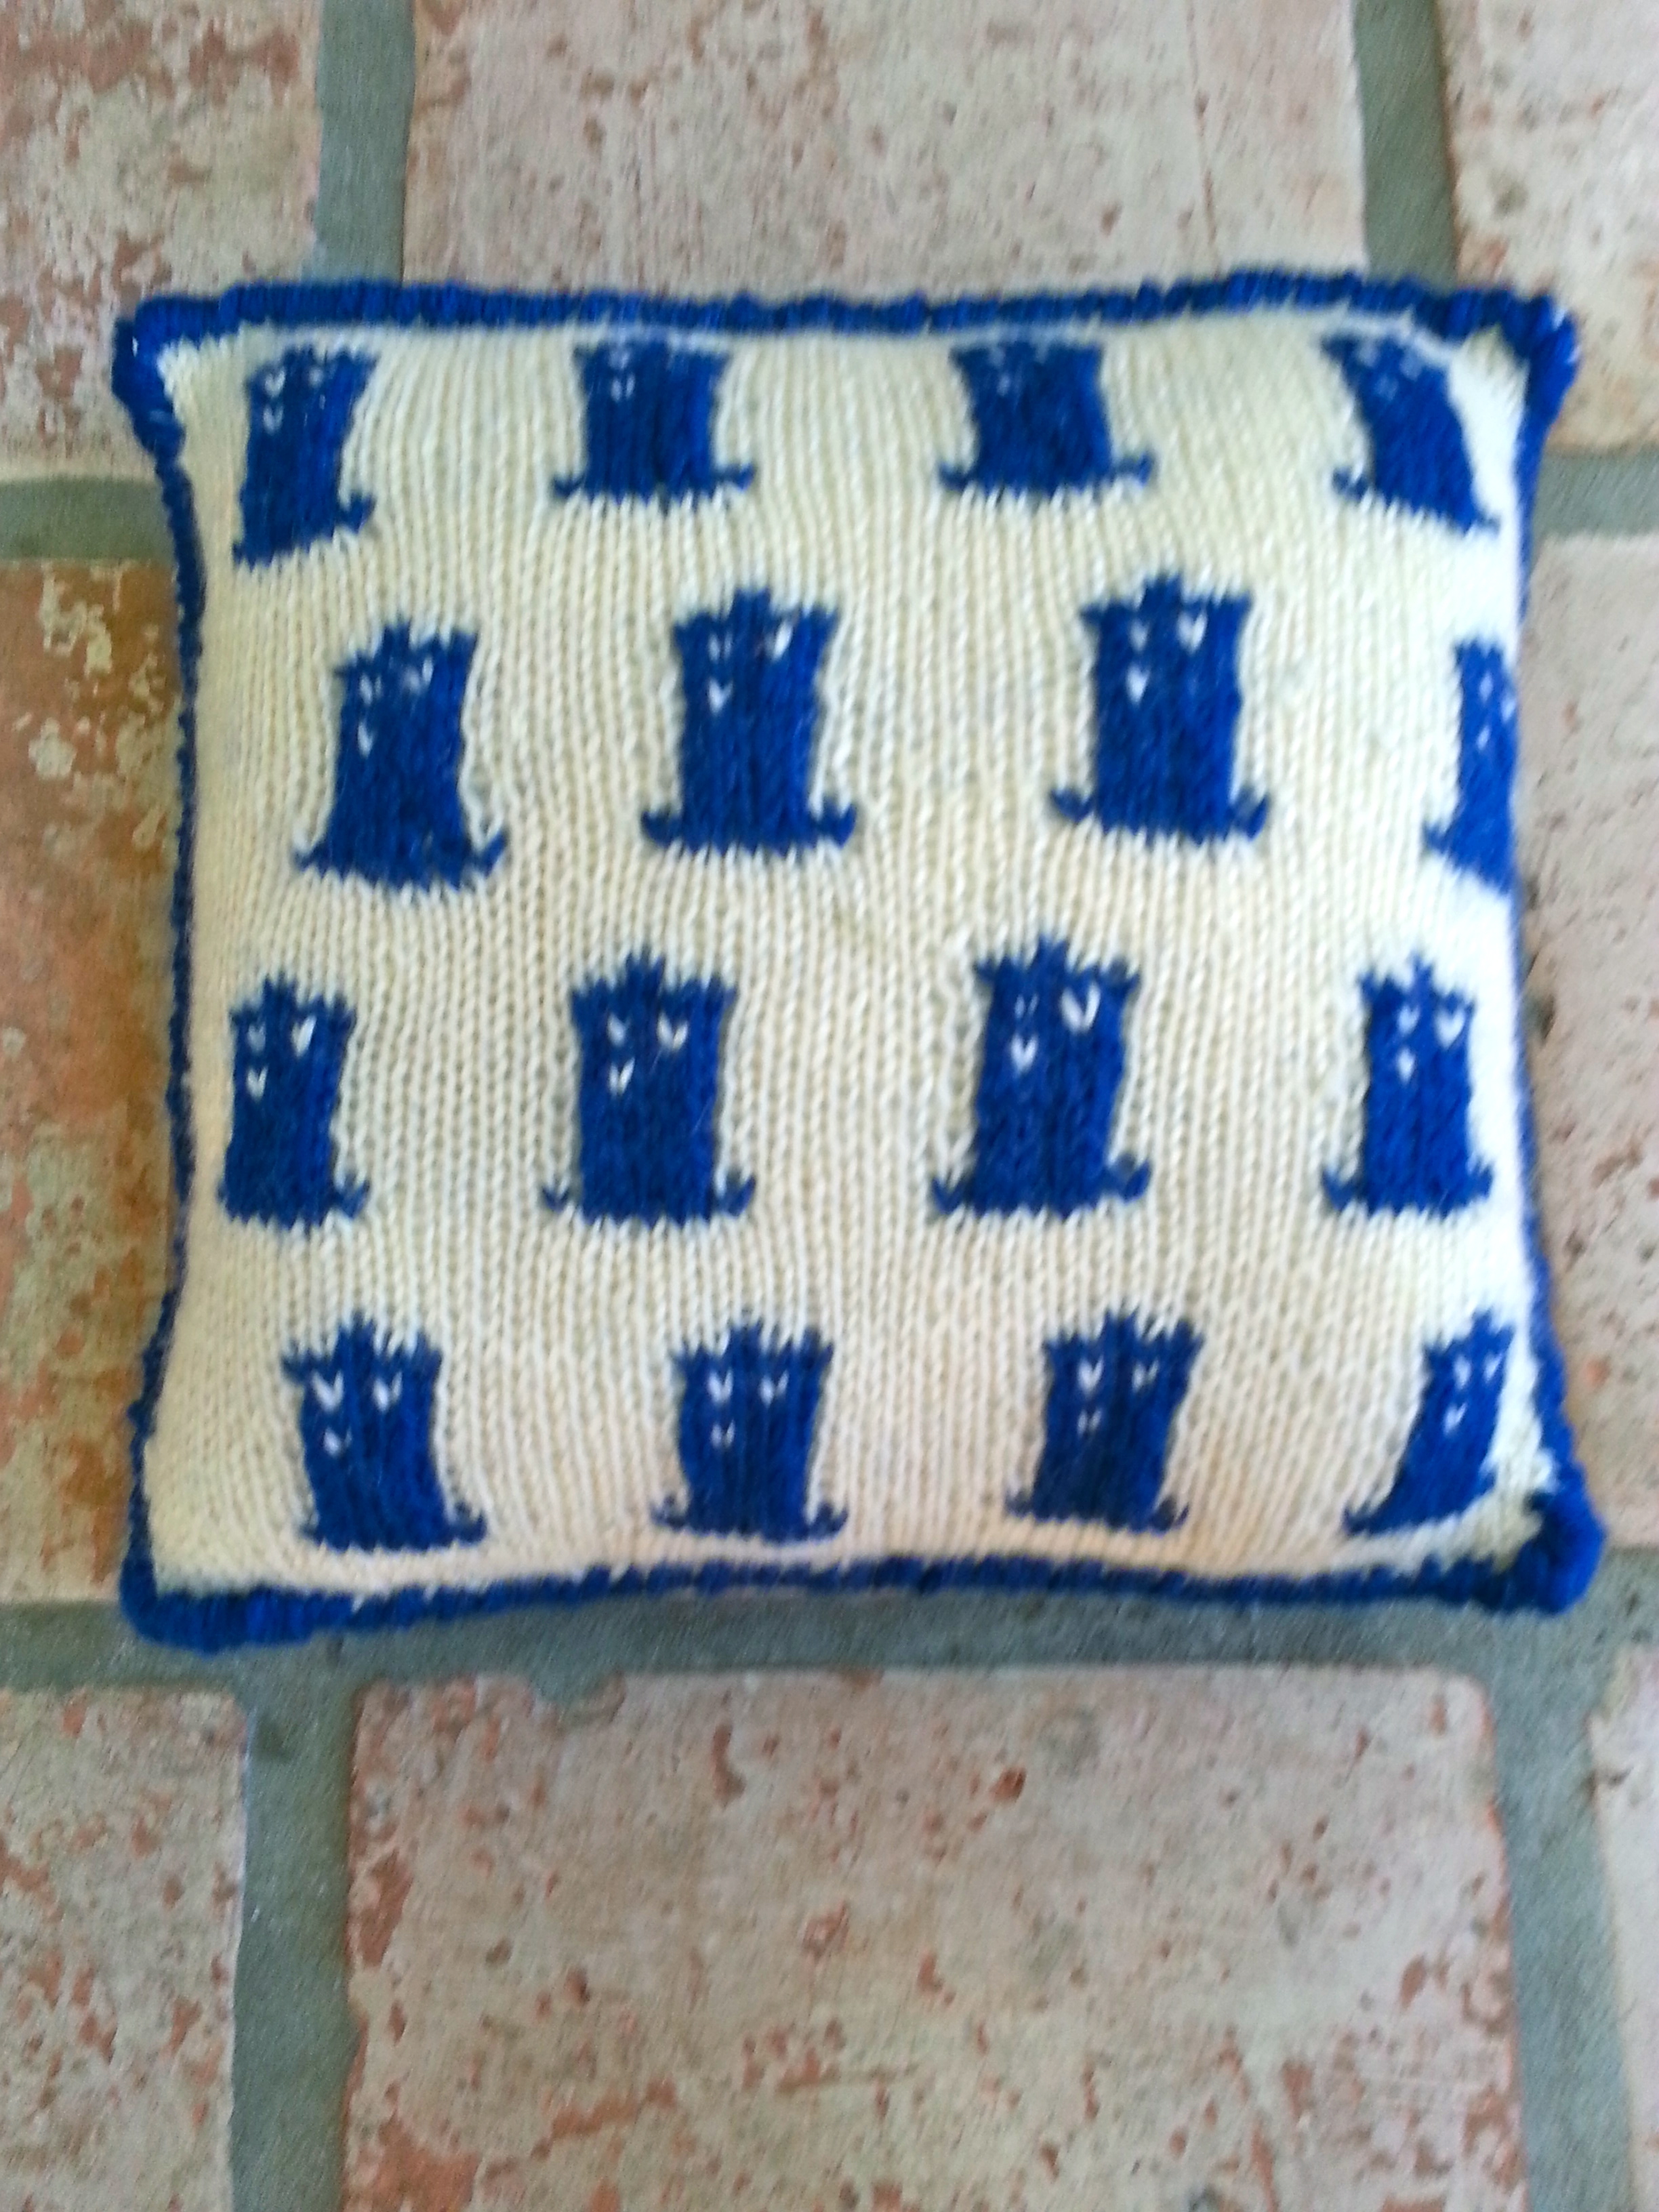
Jessa-Hannah Bluebell Poem

2015-03-21 18.29.13

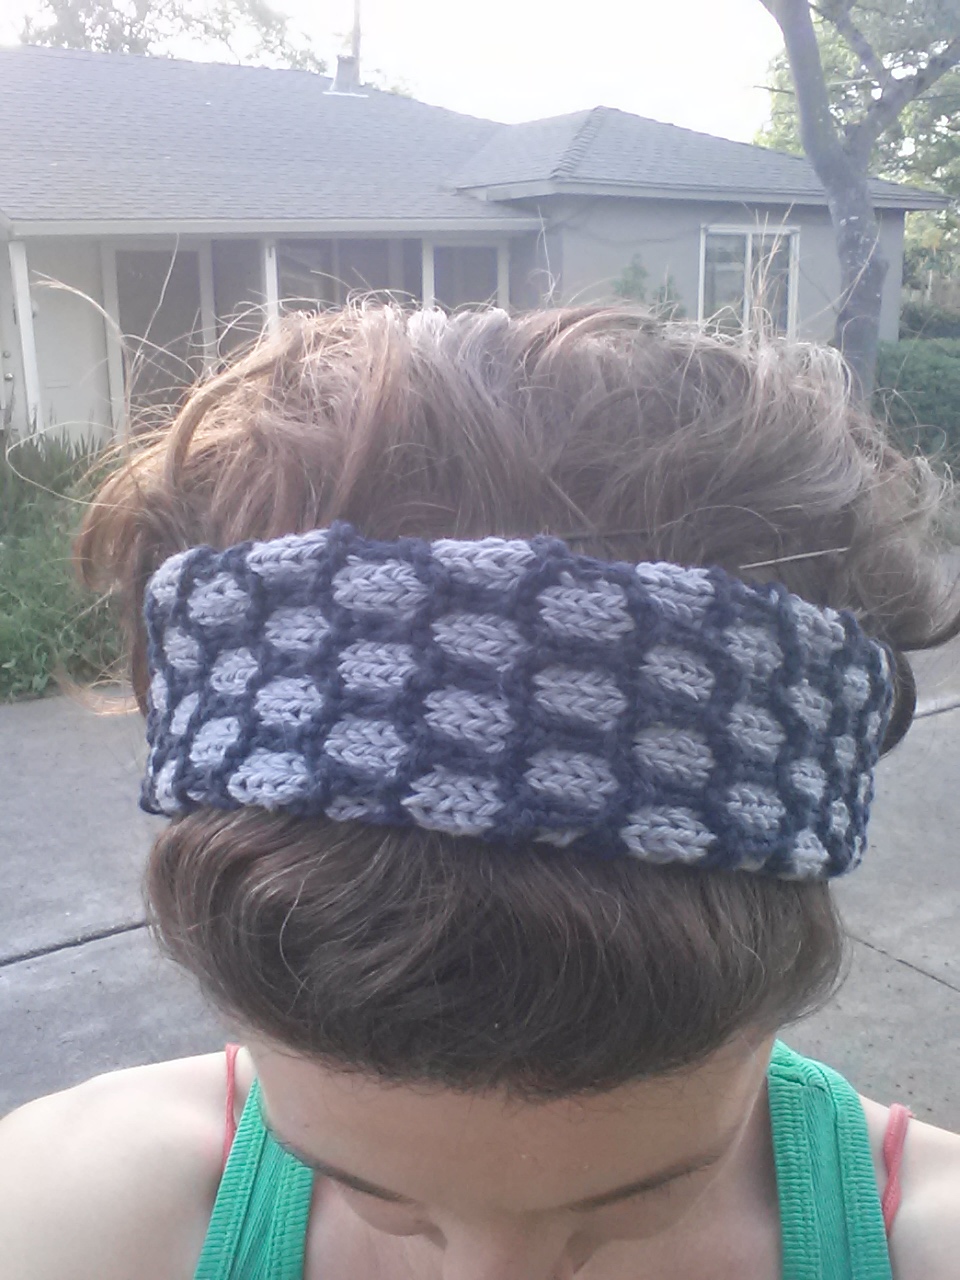
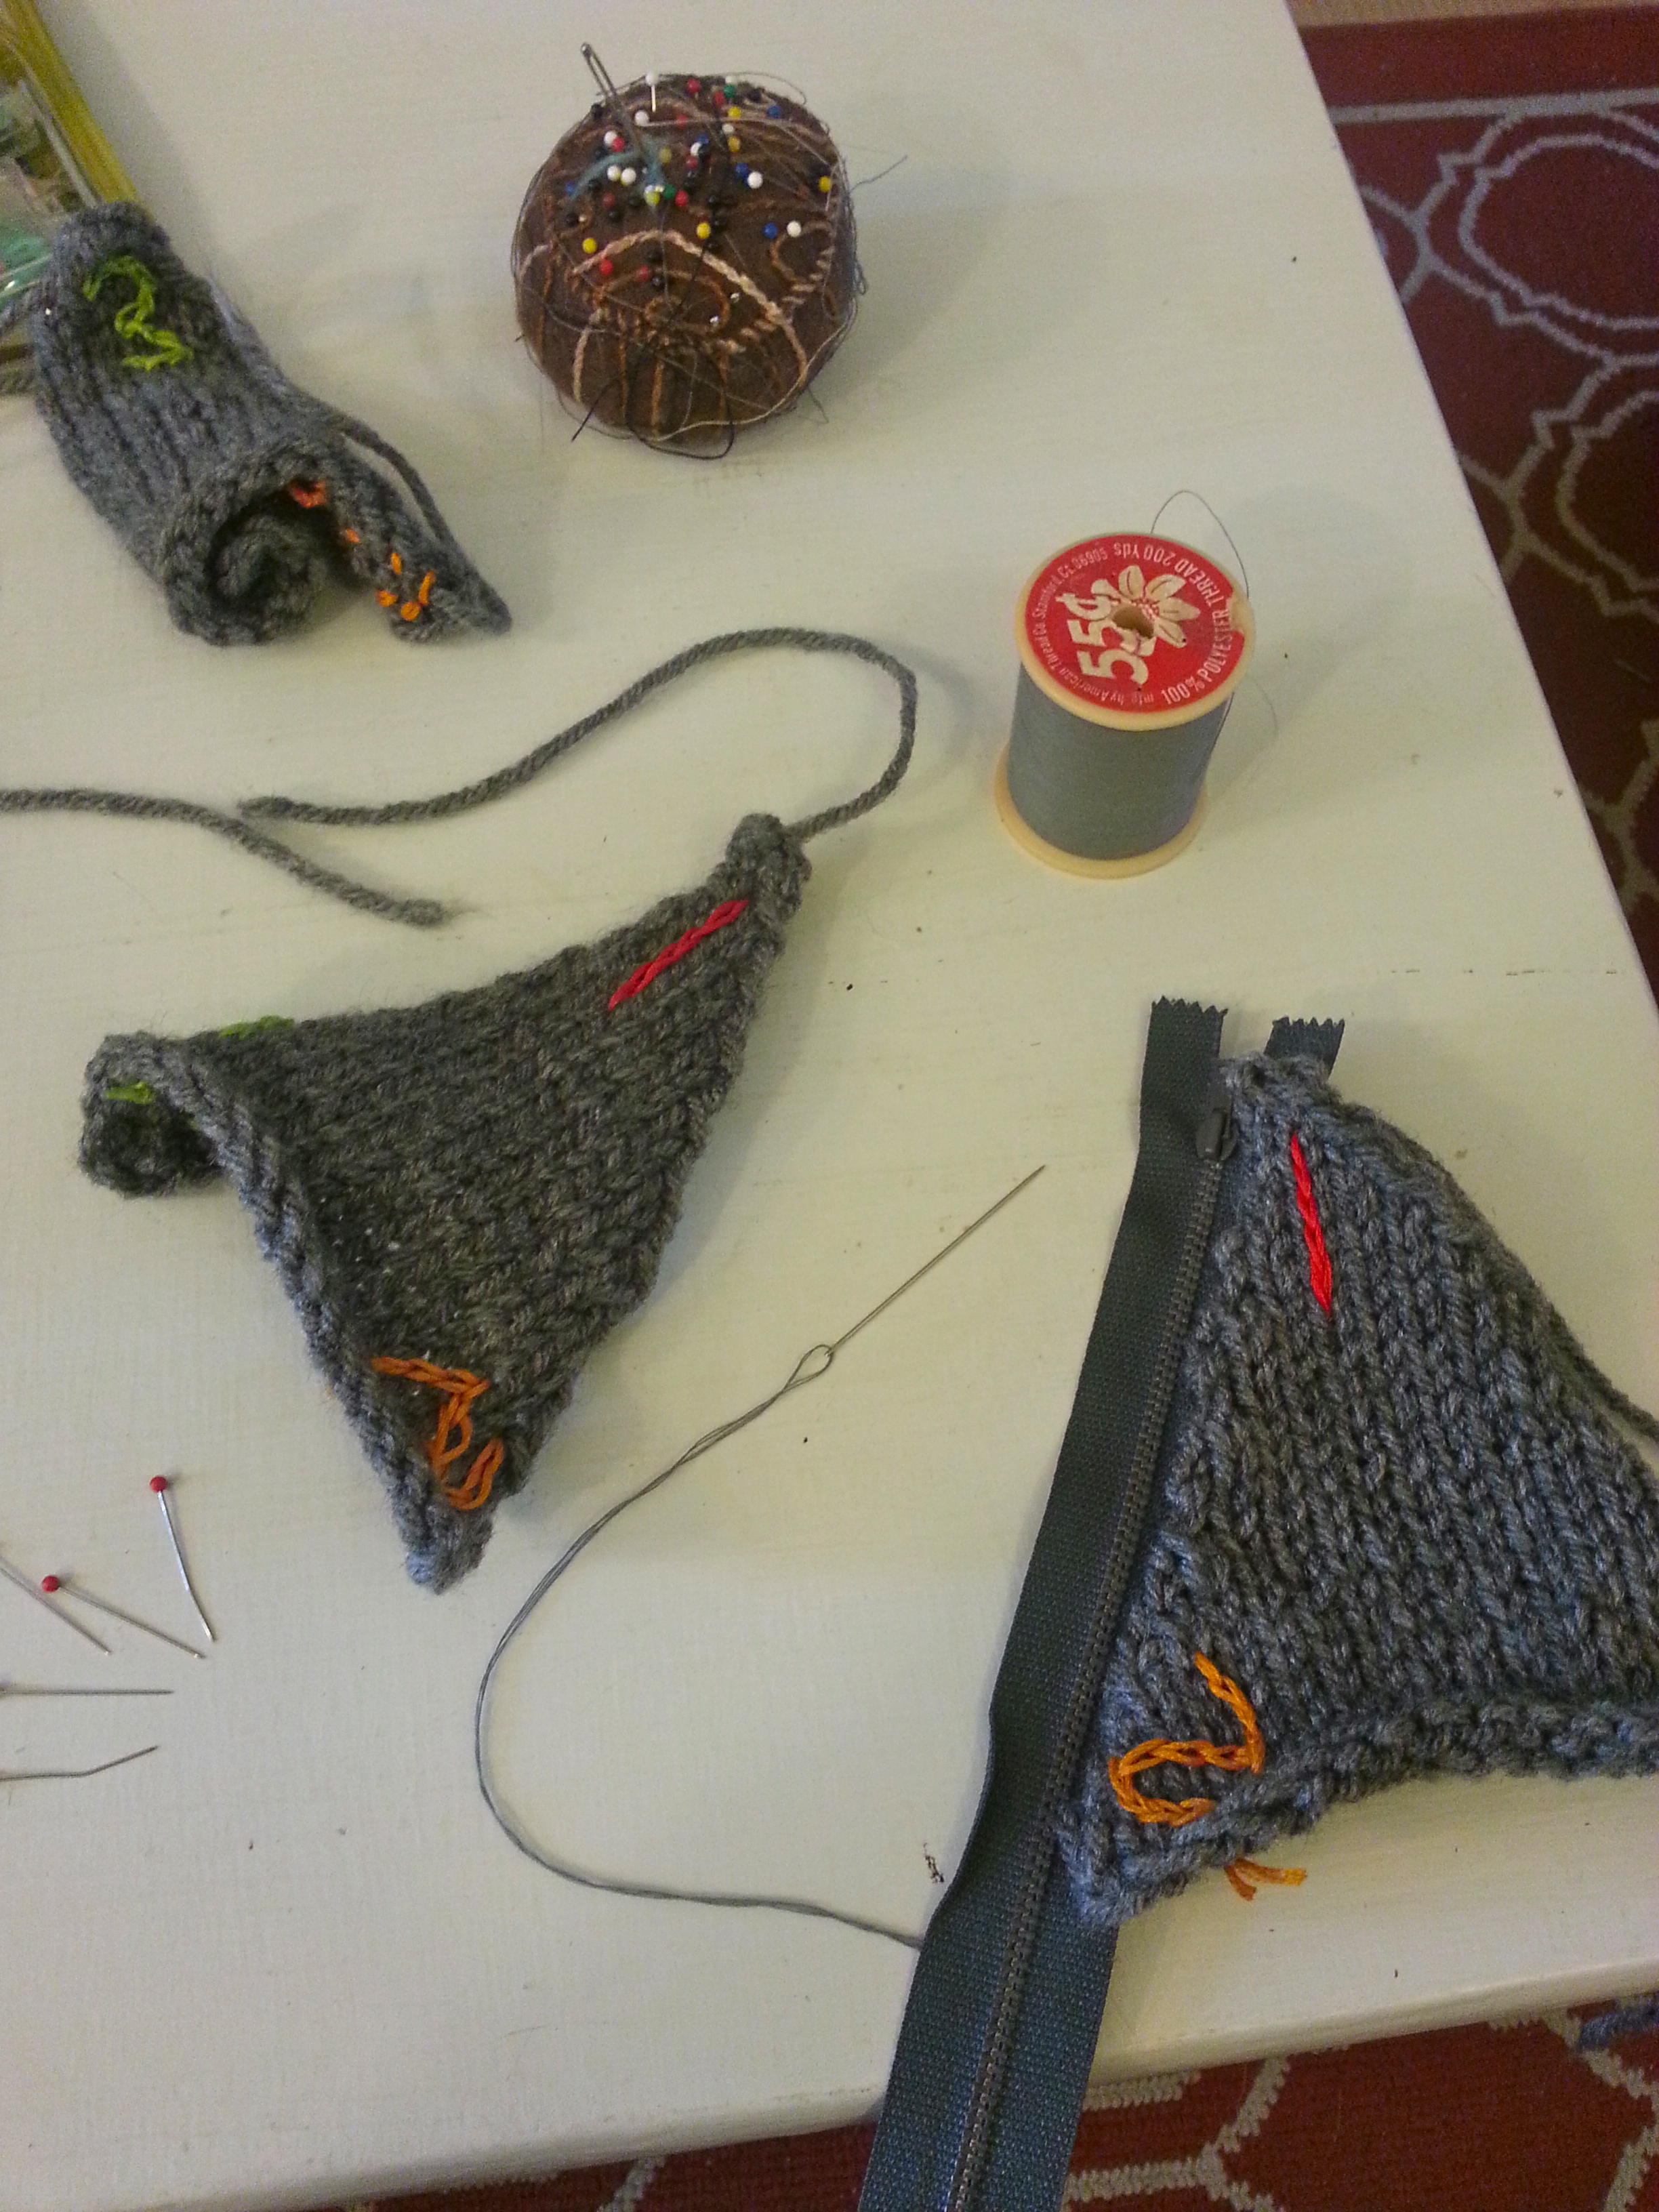
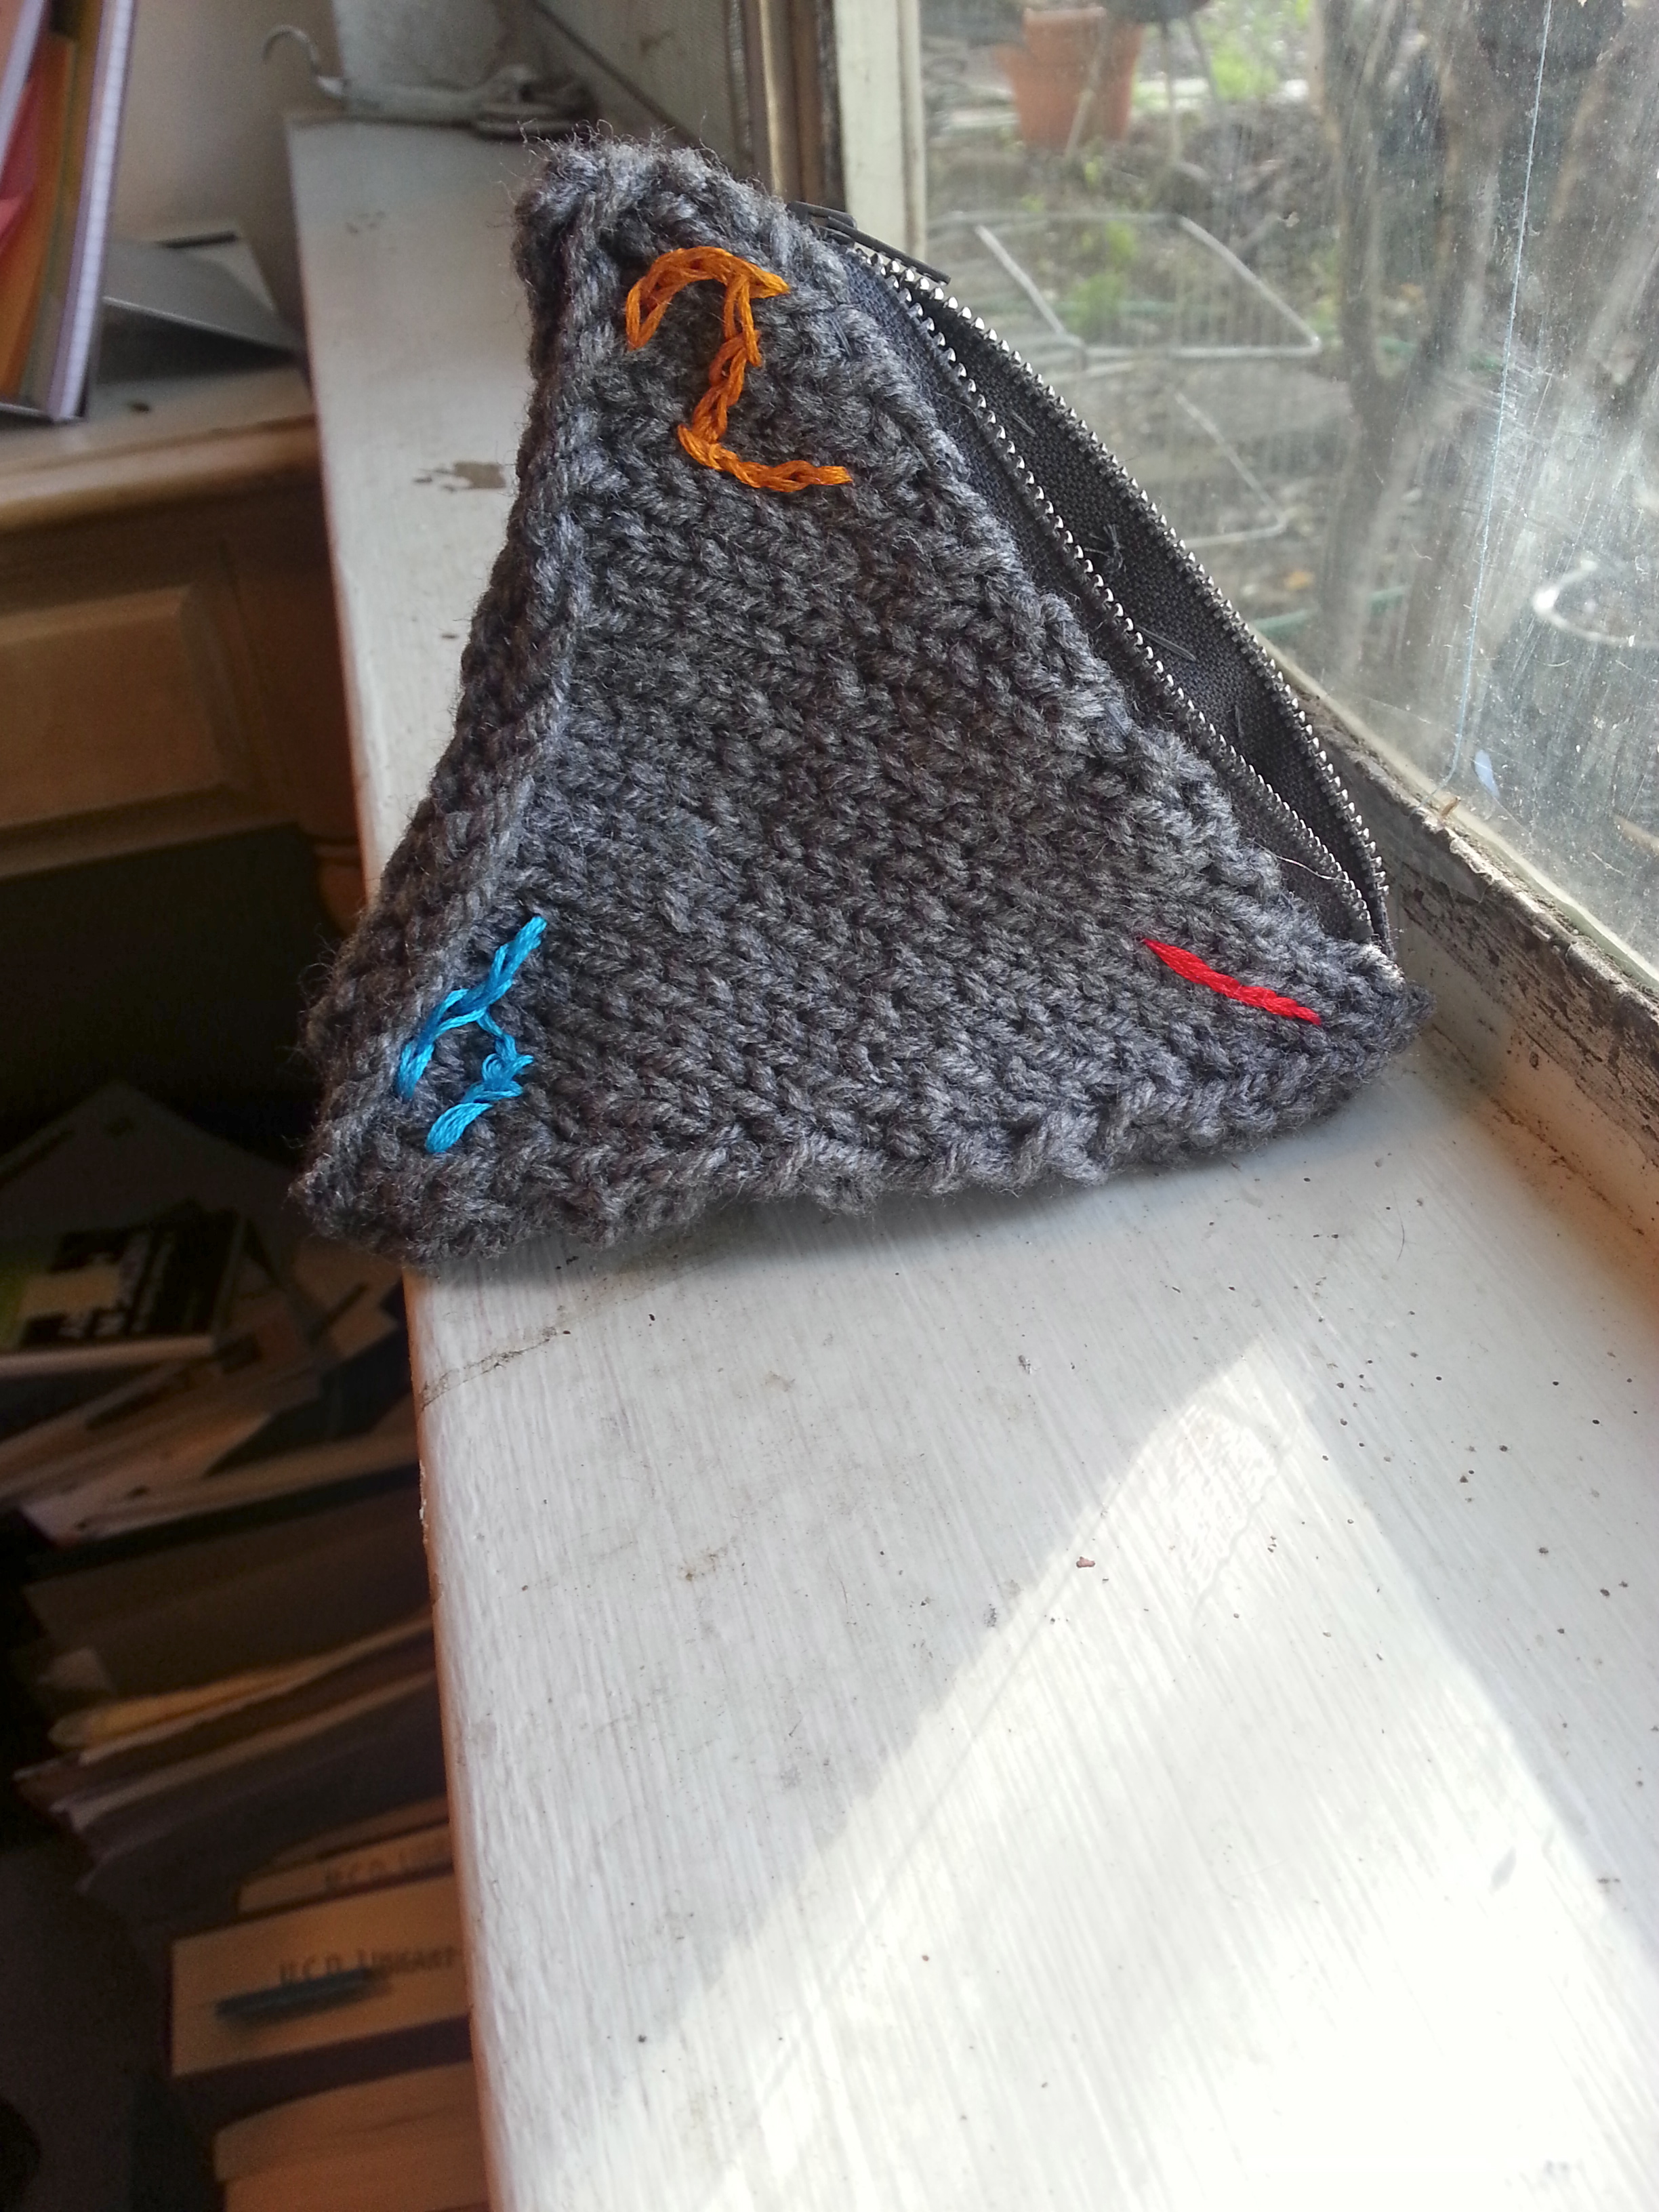
This is another, smaller honeycomb brioche stitch headband. I started on this design nine months ago, but it took a long time and a fair number of mishaps for it to finally emerge in its complete form, hence the name (It comes from the last episode of  season 4 of Girls—spoiler warning!)

2015-03-21 18.31.43-2

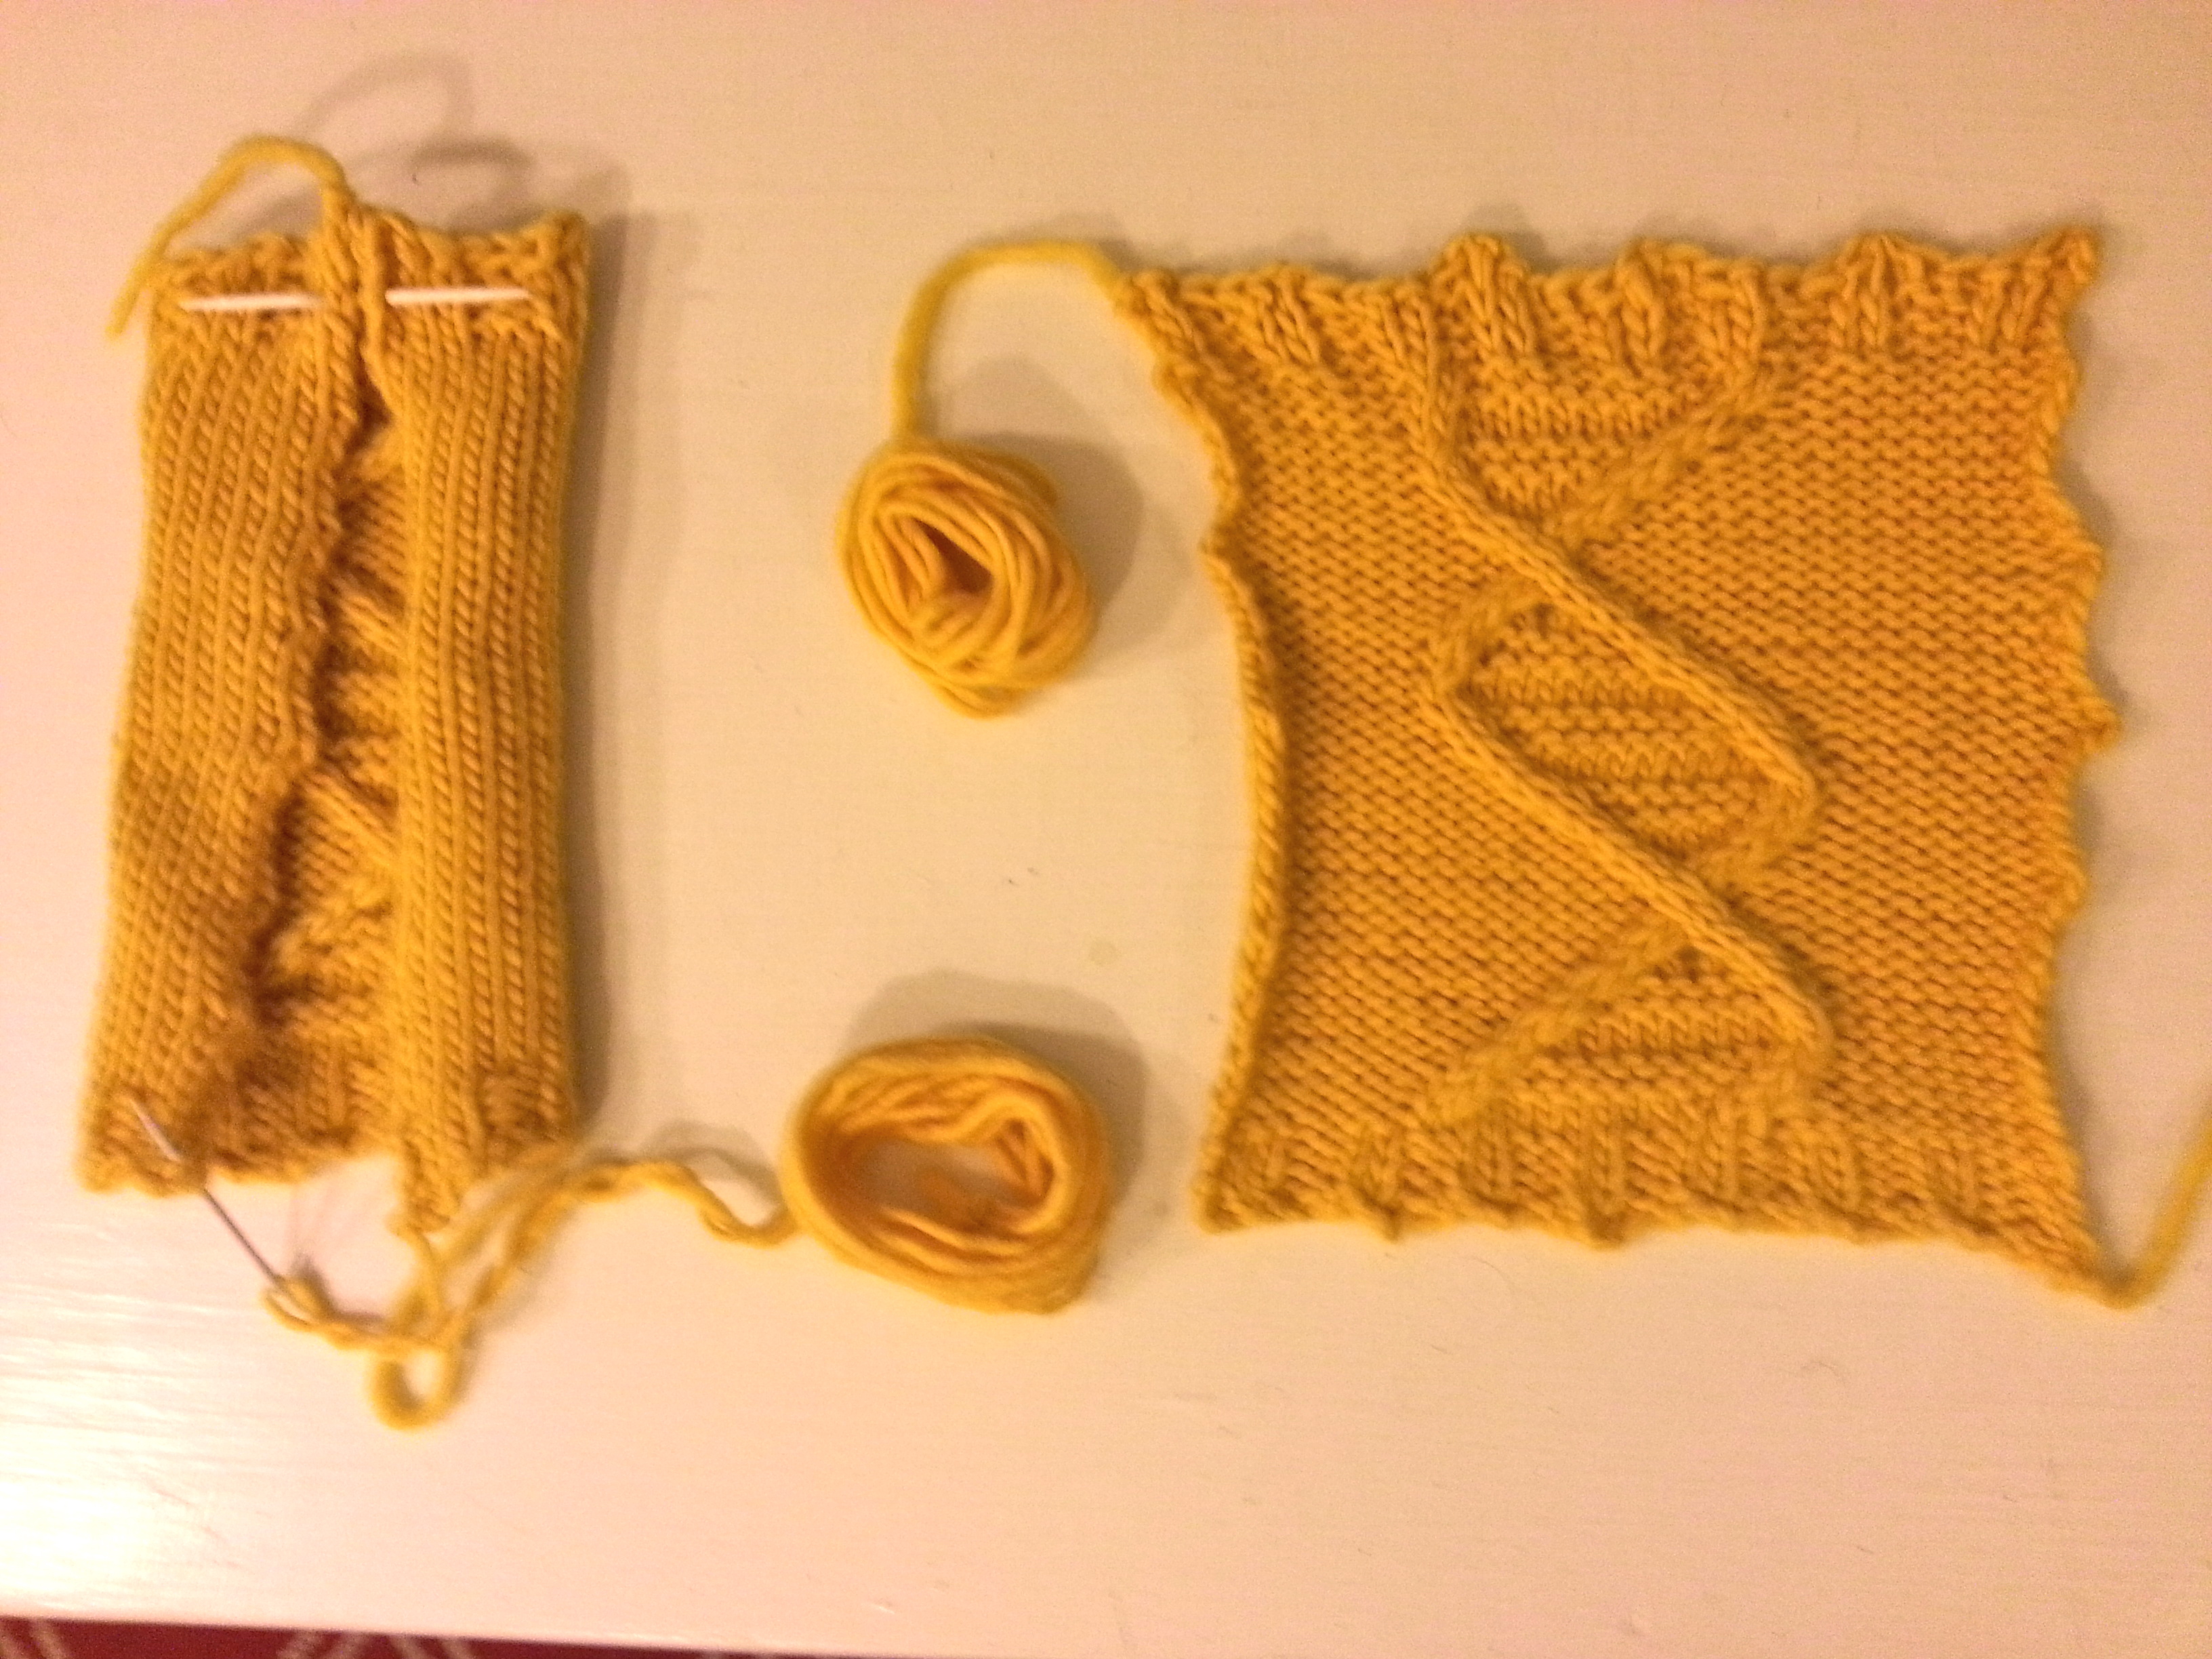
 I used the same yarn and knitting needles as the big brioche headband, but knit it vertically and with just two colors. Make sure your colors work together! I had to start over when I realized my first, yellow version of this headband looked like a sickly easter egg.

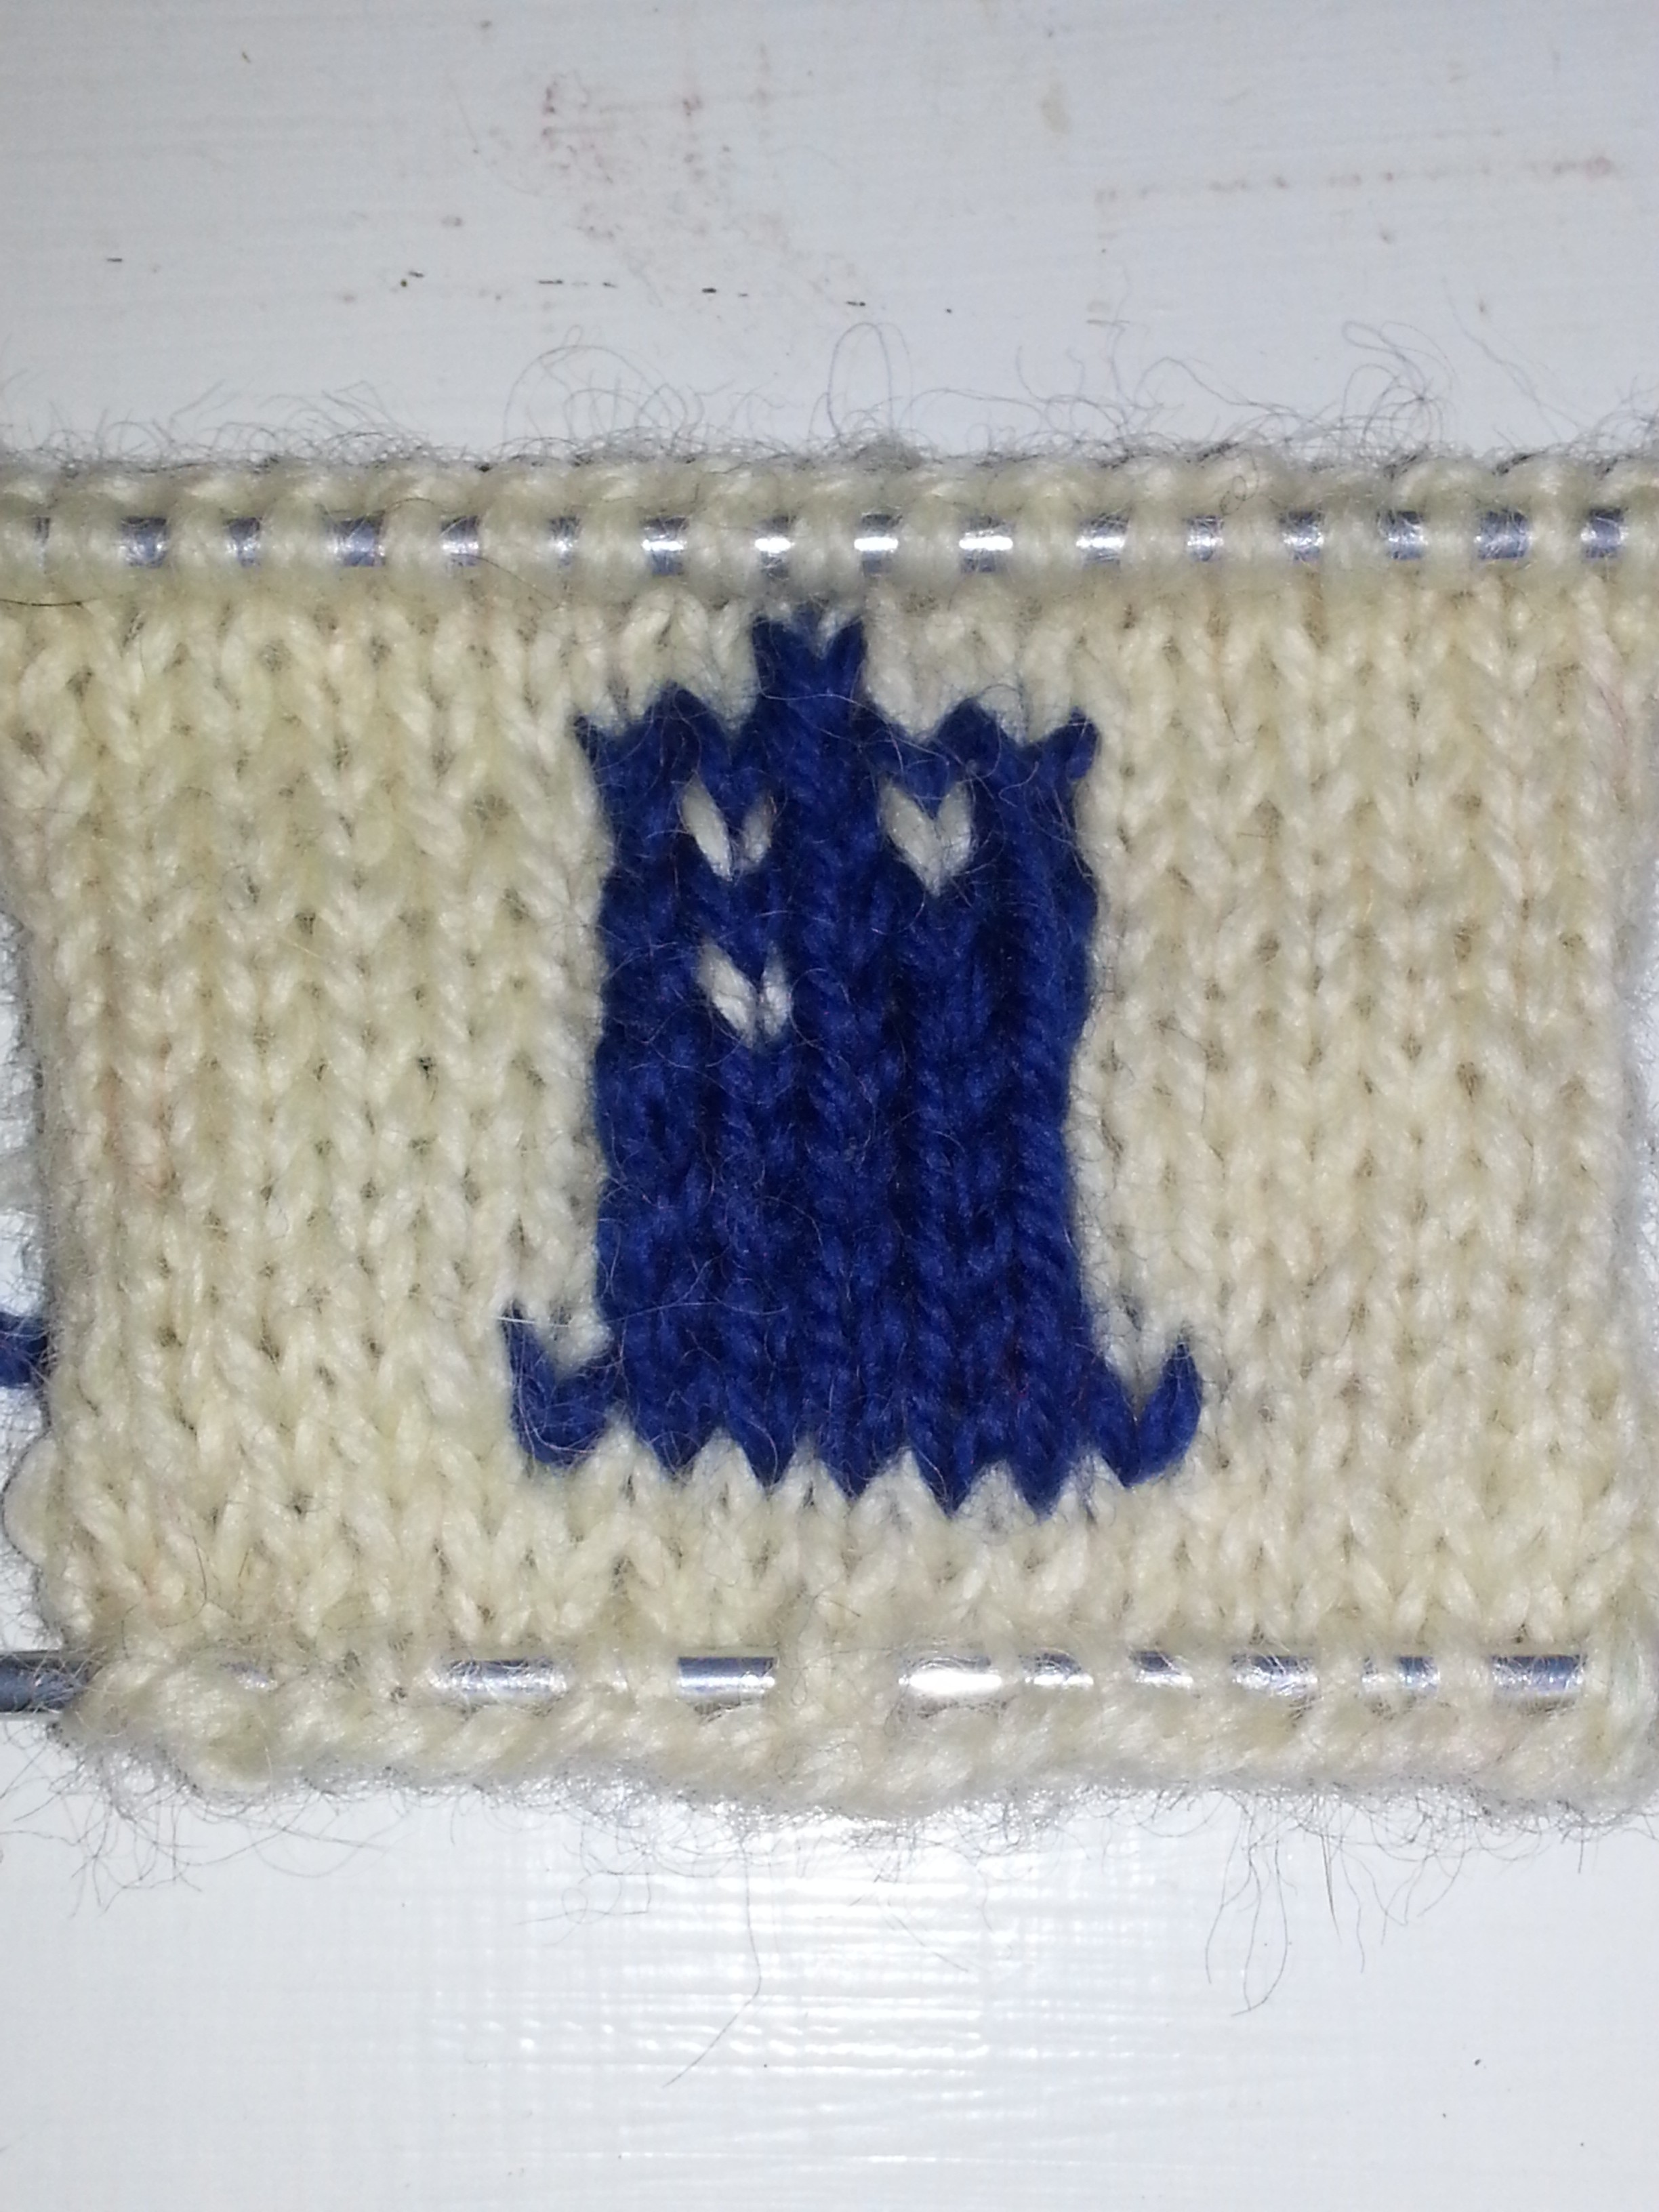
Provisional Cast on: 15 sts in Color A

r1 and r 2: knit

r3:  With Color B, k 1, sl 1 p wise, k 3, sl 1*

r4: p 1, sl 1, p 3

r5: repeat row 3

r6: repeat row 4

r 7 and r8: With Color A, knit

r:9 With Color B k 3, sl 1 p wise, k 3*

r 10: p3, sl 1 pwise

r11: repeat row 9

r12: repeat row 10

You’ll need to join the two short ends to form a headband by ending either after a row 12 or a row 6. Provisional cast on will make it easiest. I used a three needle bind off. Once again, blocking will help the brioche honeycomb stitch look its best.

No matter what you do, the edges will still curl a bit. Overall, I like the pattern a lot, so I decided I can deal with some rolling of the edges. Or, as Hannah put it, “I can’t guarantee perfection, but I can guarantee intrigue.”

2015-03-21 18.29.34

This tiny brioche headband will not help you deliver your own baby or anything, but it will give you a new appreciation for the beauty of little things. What’s more magical than that?
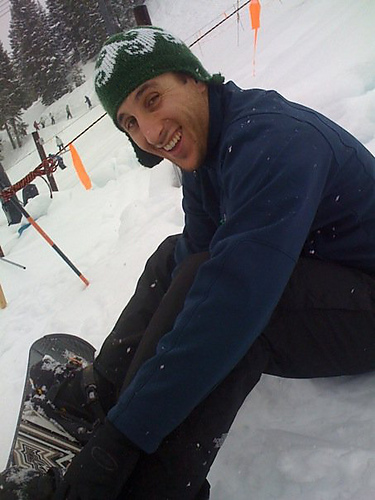
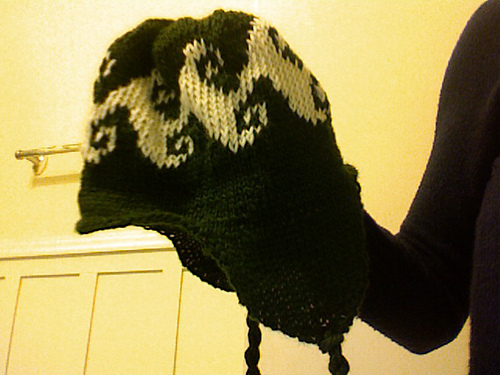
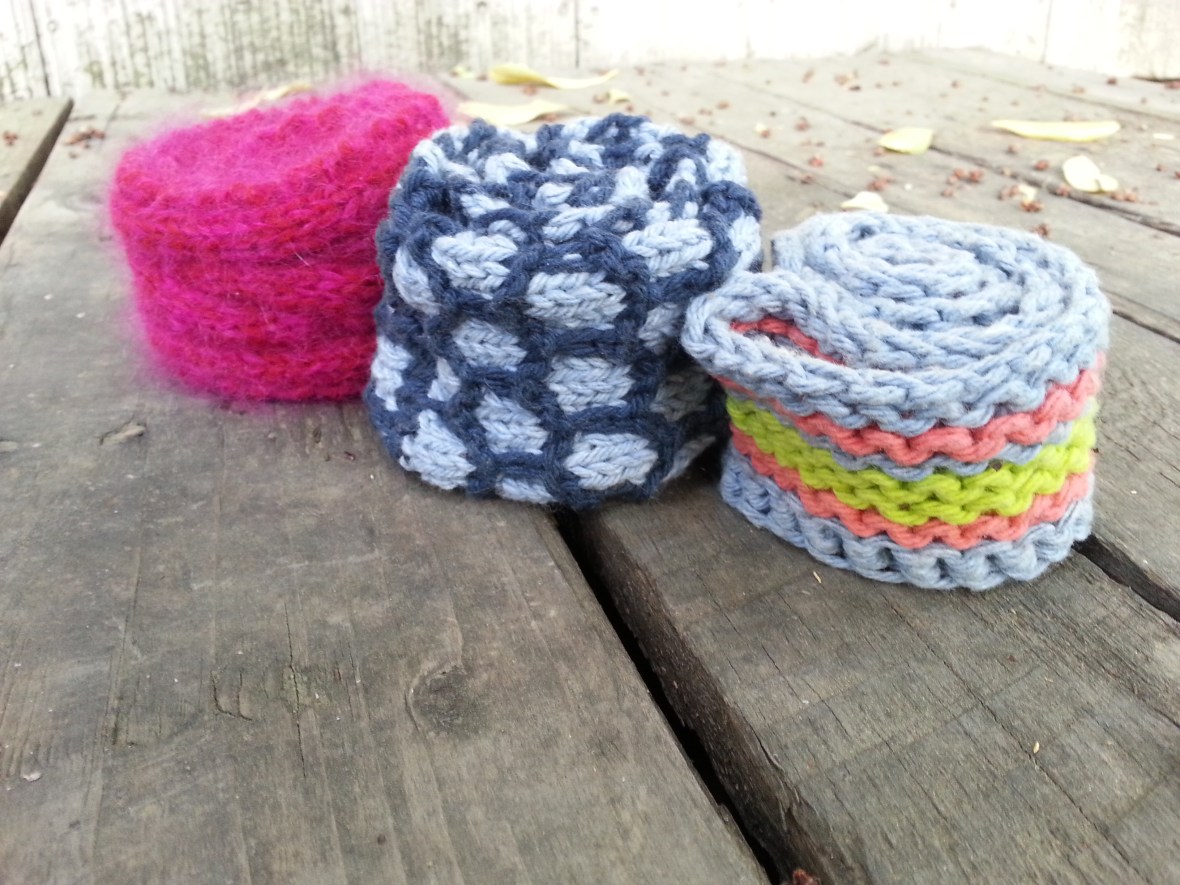
Mahna Mahna

2015-03-21 18.41.31

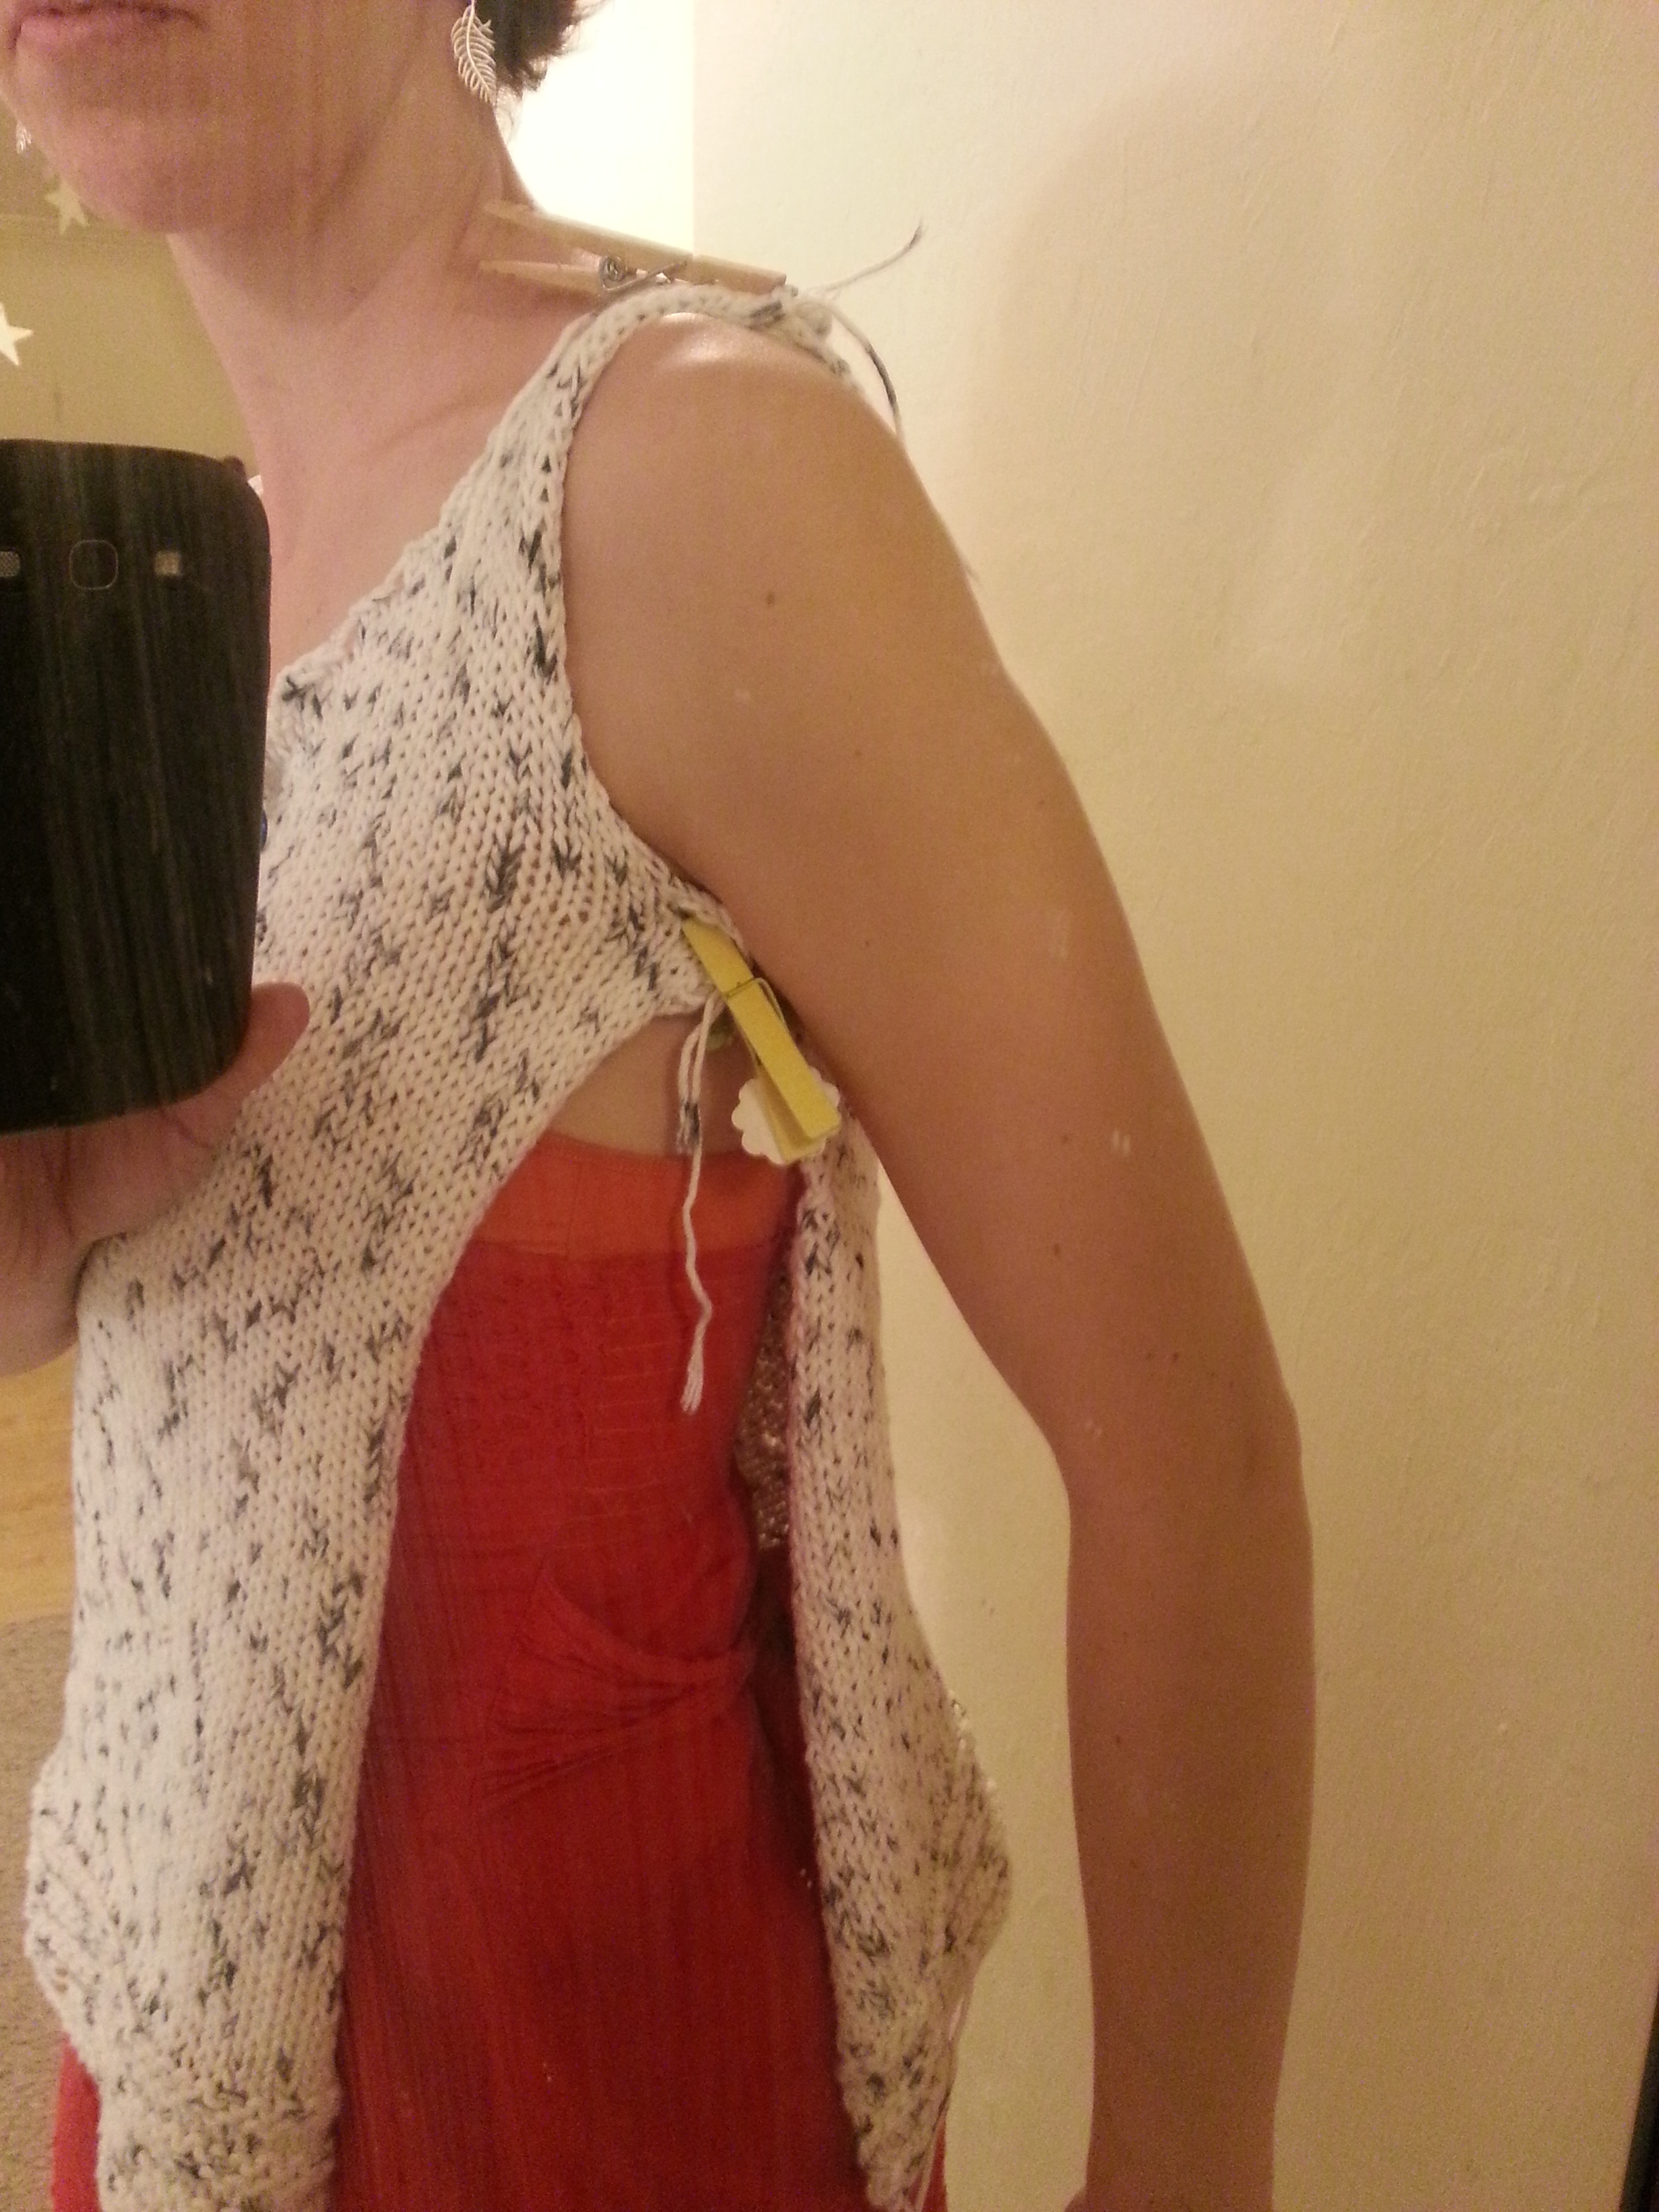
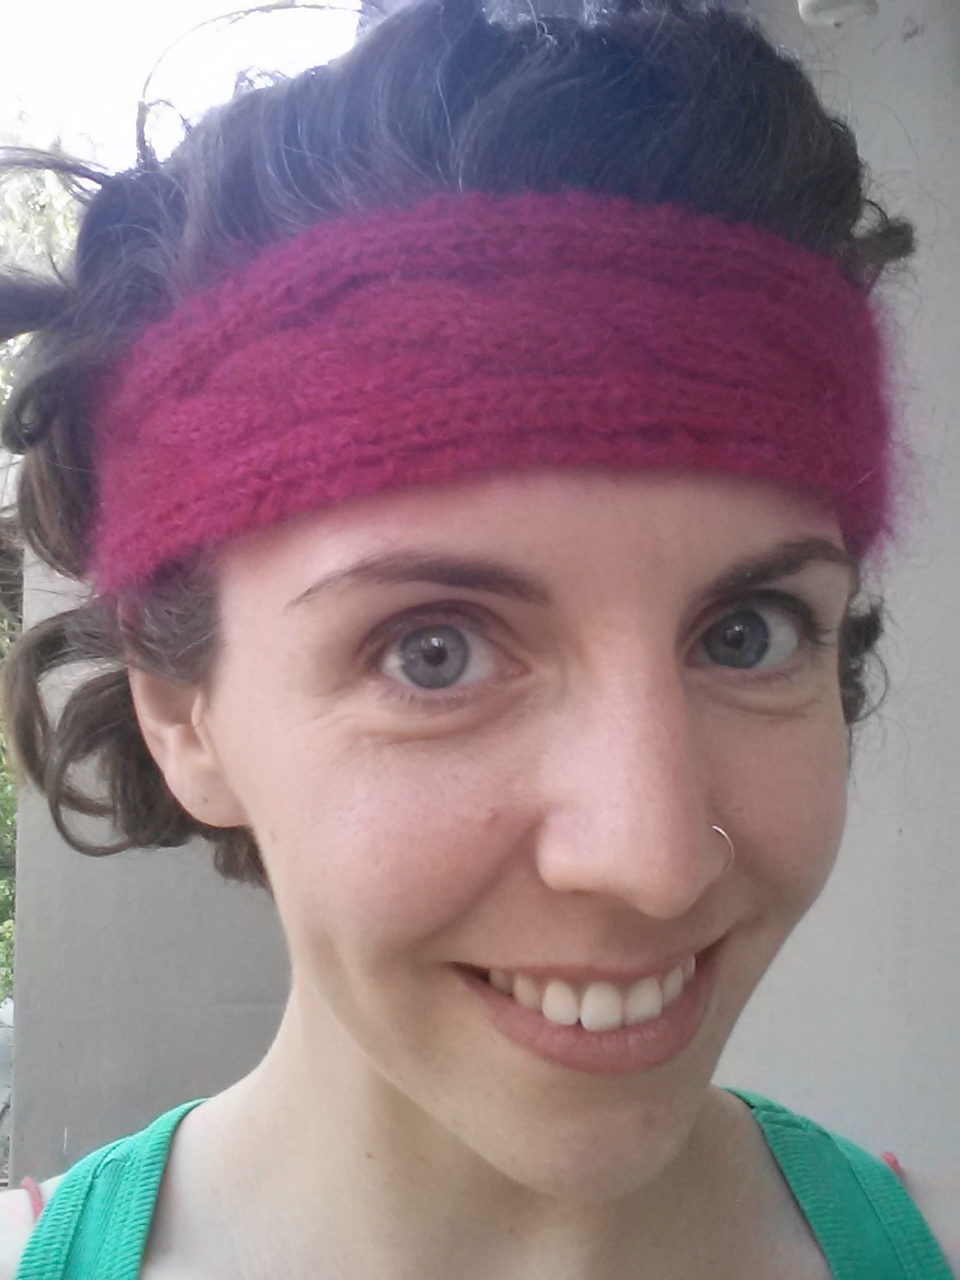
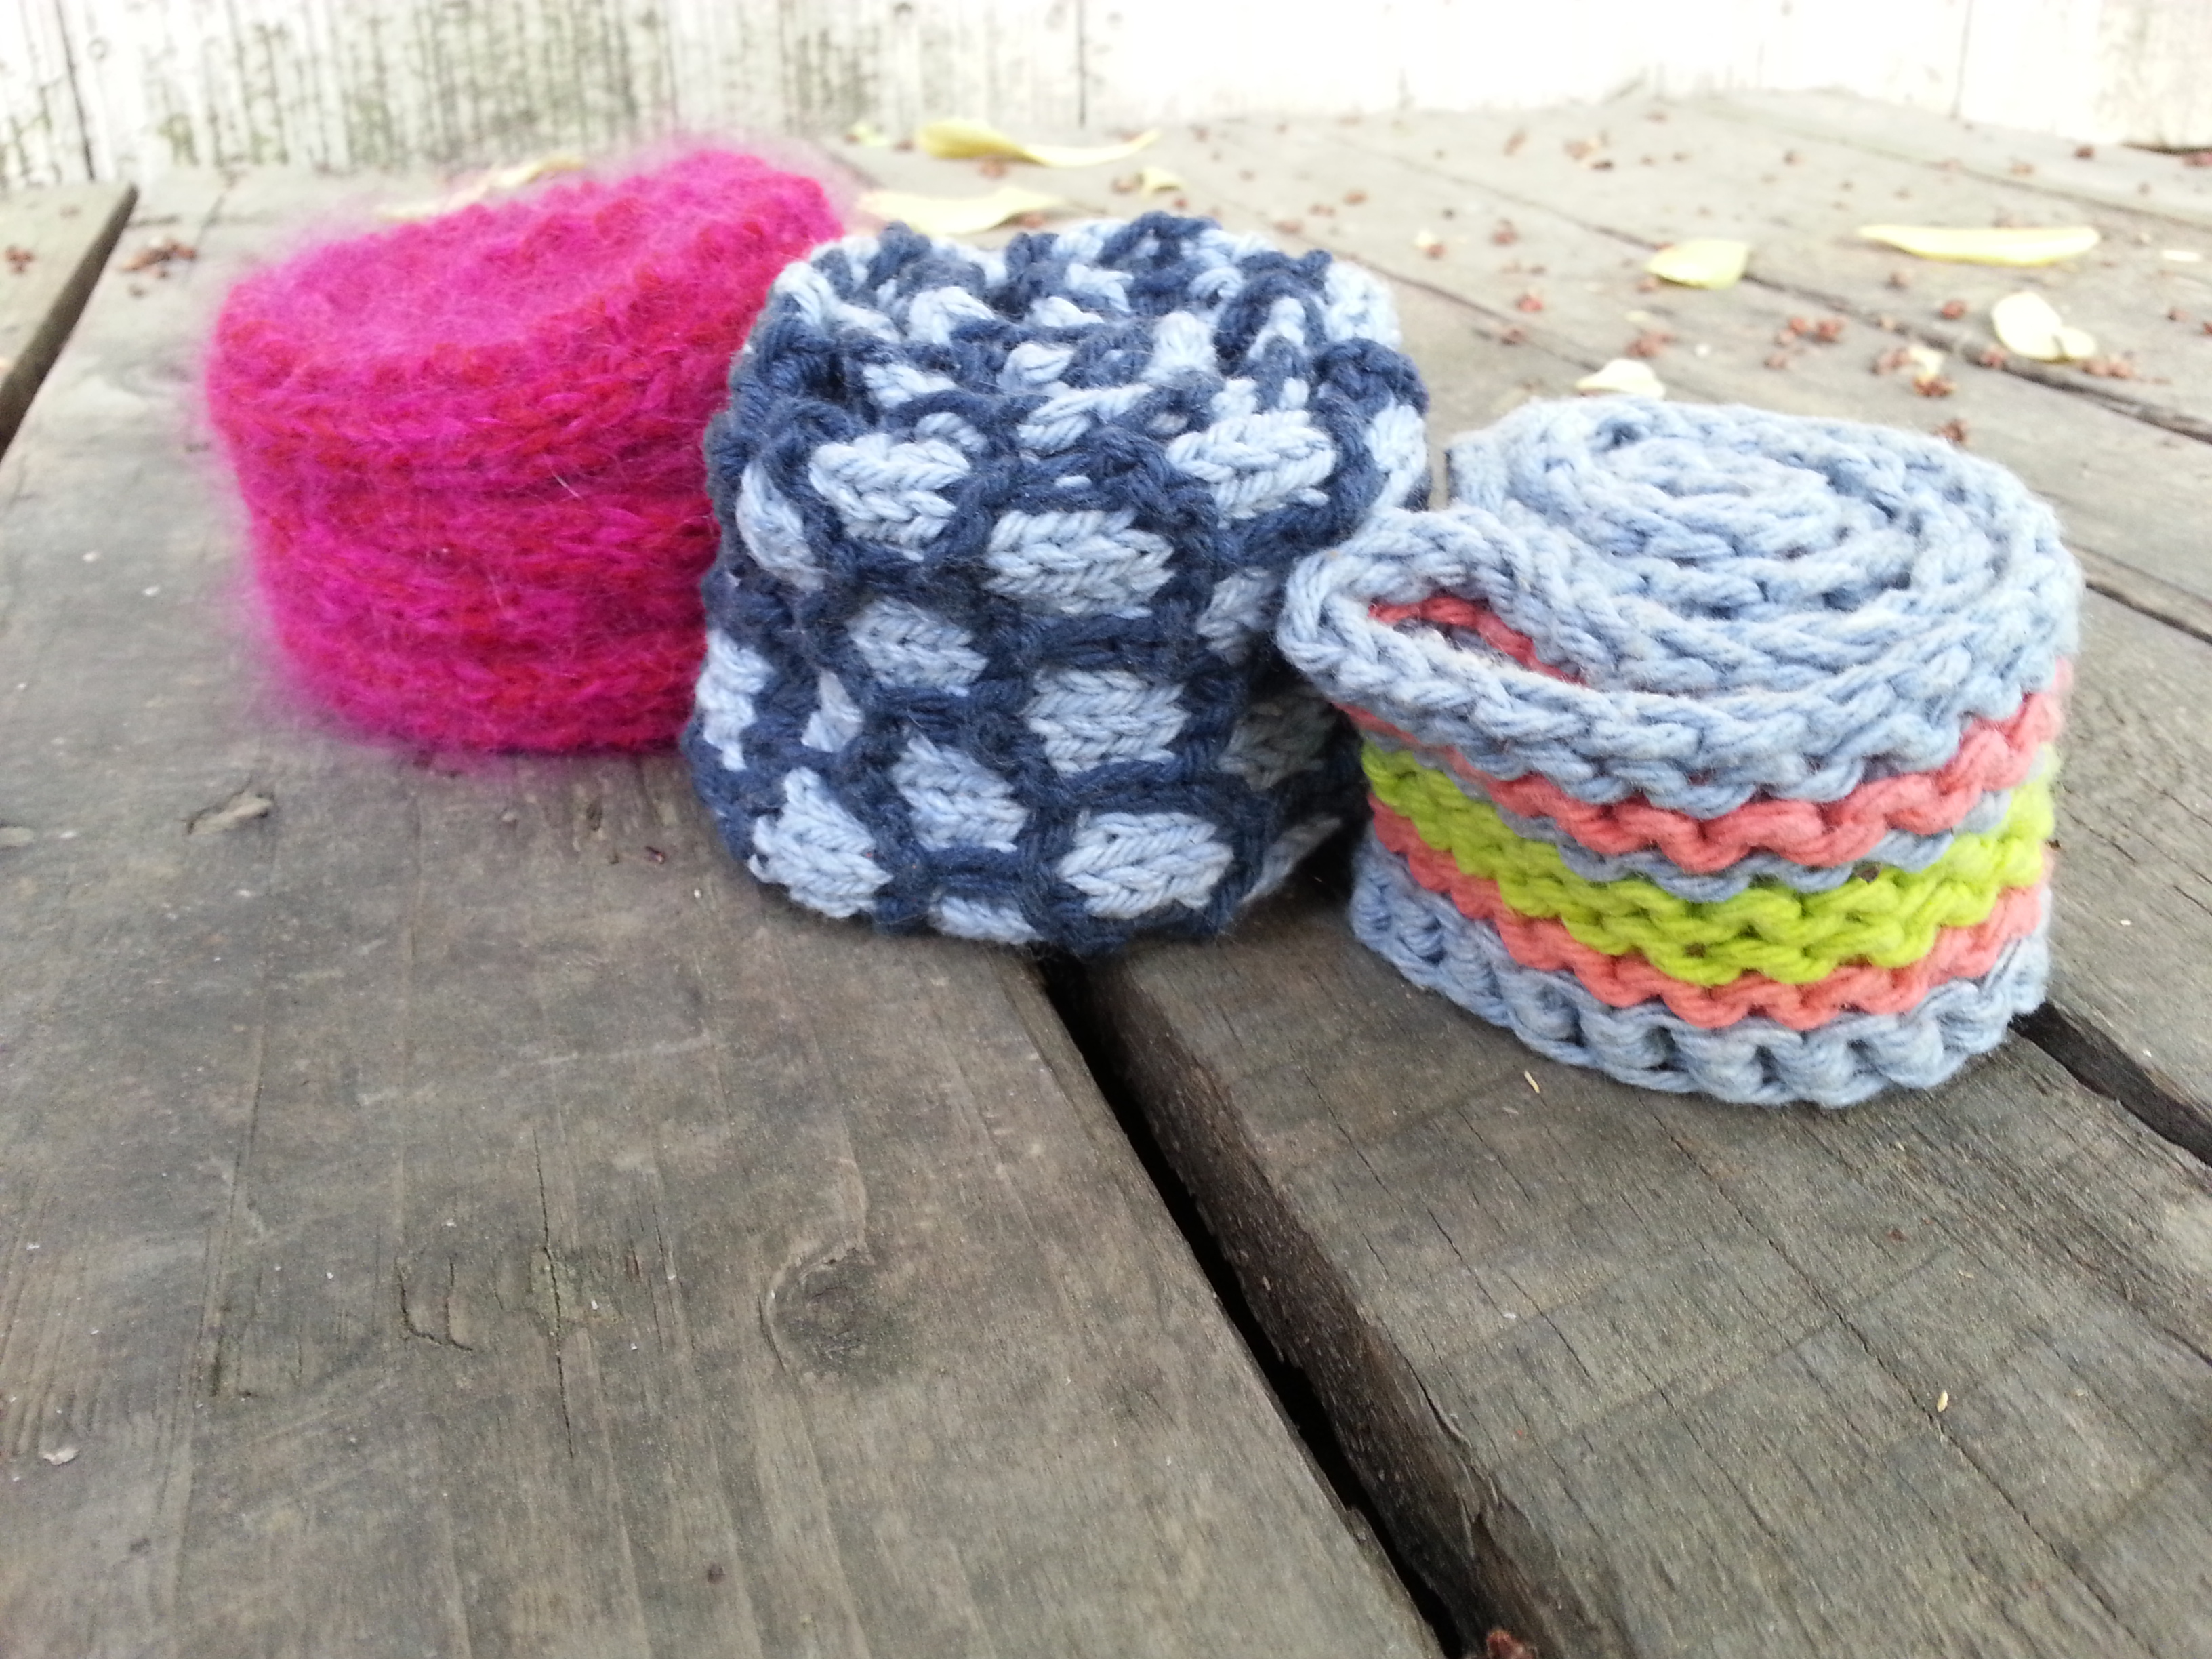
This is one of the few patterns that is not my own! I used this free cabled headband pattern (also on ravelry). I won’t repost it here, but if you can handle a basic cable this headband will be no problem. I used my own unique yarn blend of two strands pink mohair, one strand recycle red sweater wool (heavily featured in my knit tank top in a previous post). Which is why I call this one Mahna Mahna, because it reminds me of the two Muppets from that one song.

2015-02-05 10.09.49

One of the nice things about making a wide cabled headband: it doubles as an earwarmer! This headband, like the Muppet song, will getting stuck in/on your head. It will give you the ability to feel warm and fuzzy even on a cold dreary day.

Minnesota

2015-03-03 10.01.06

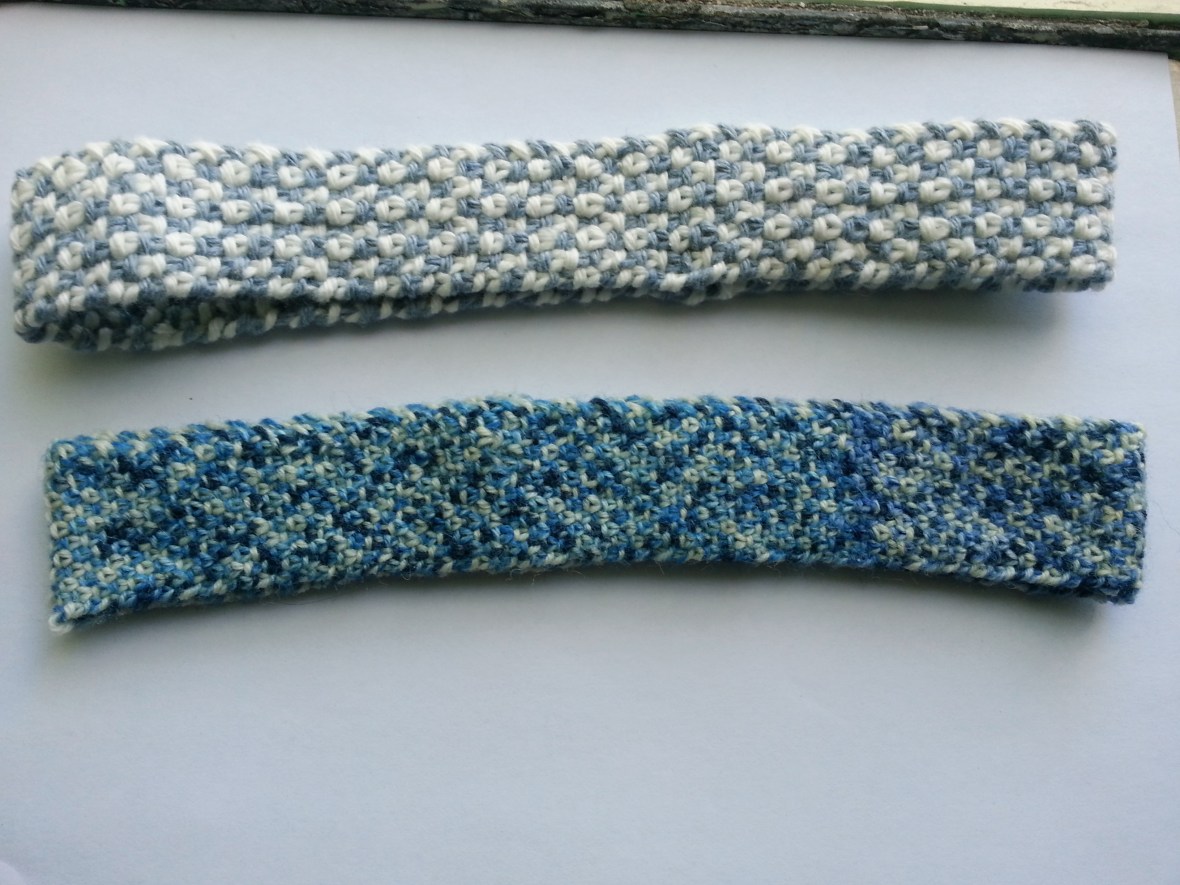
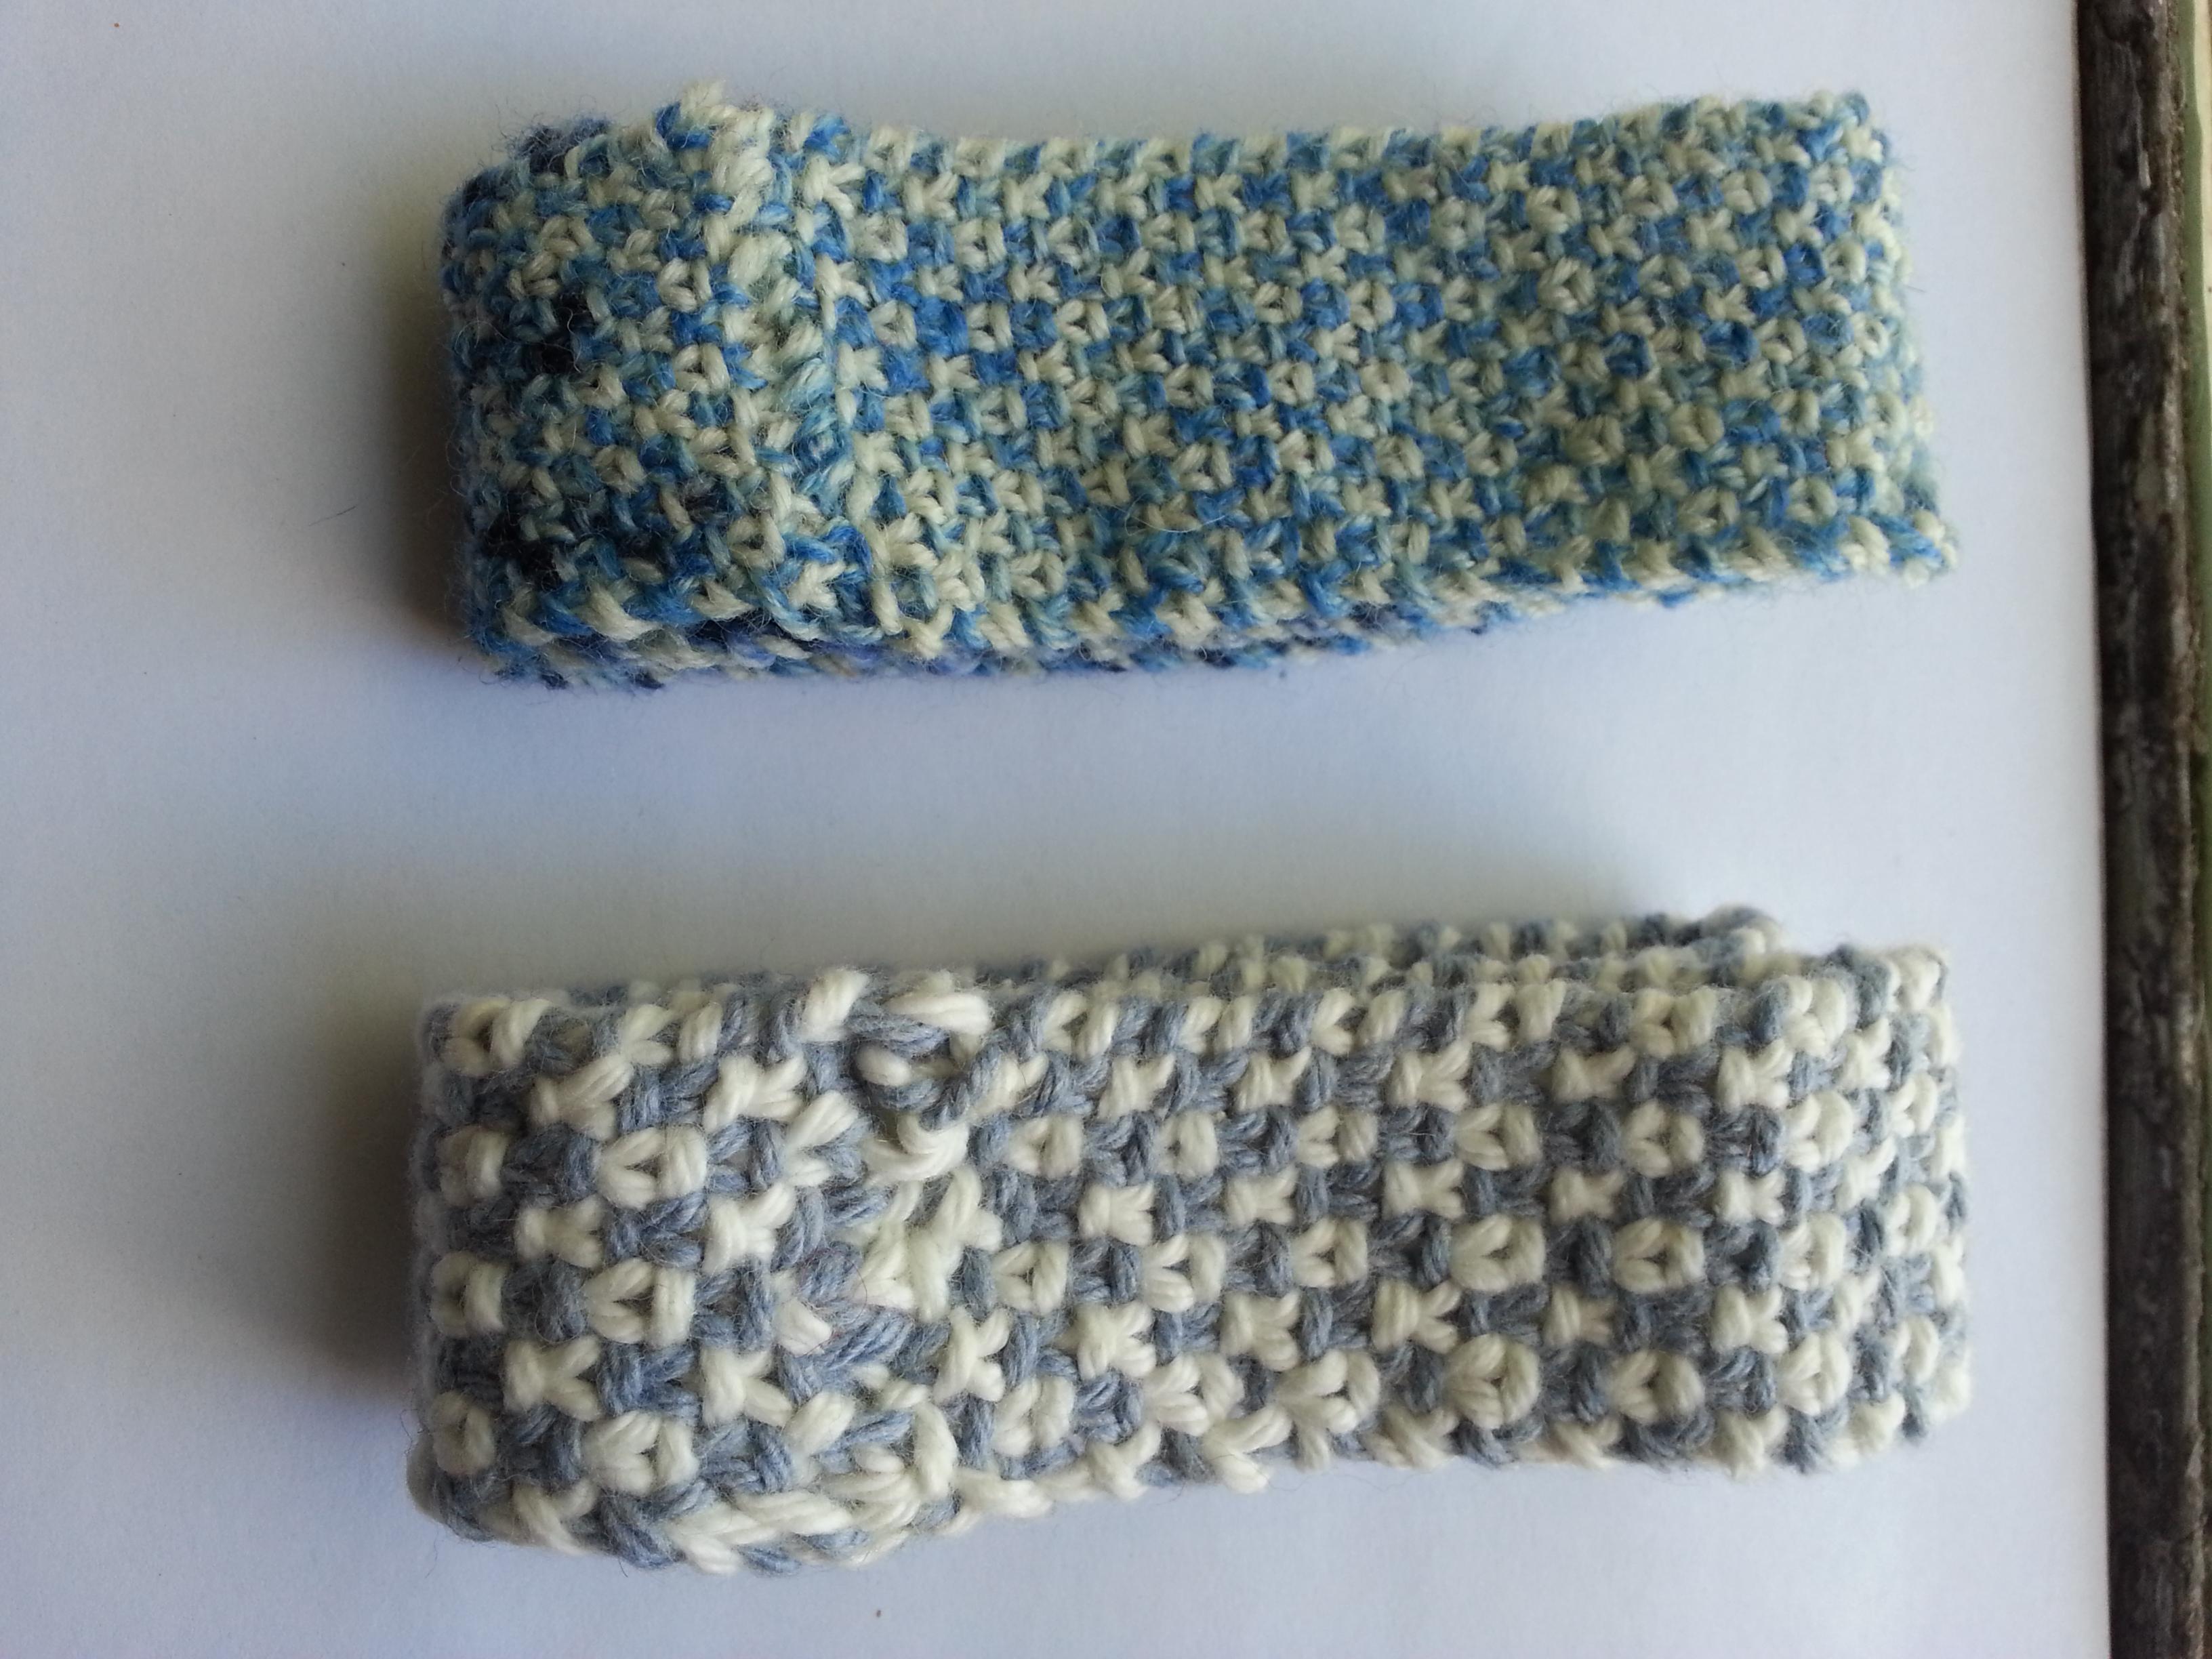
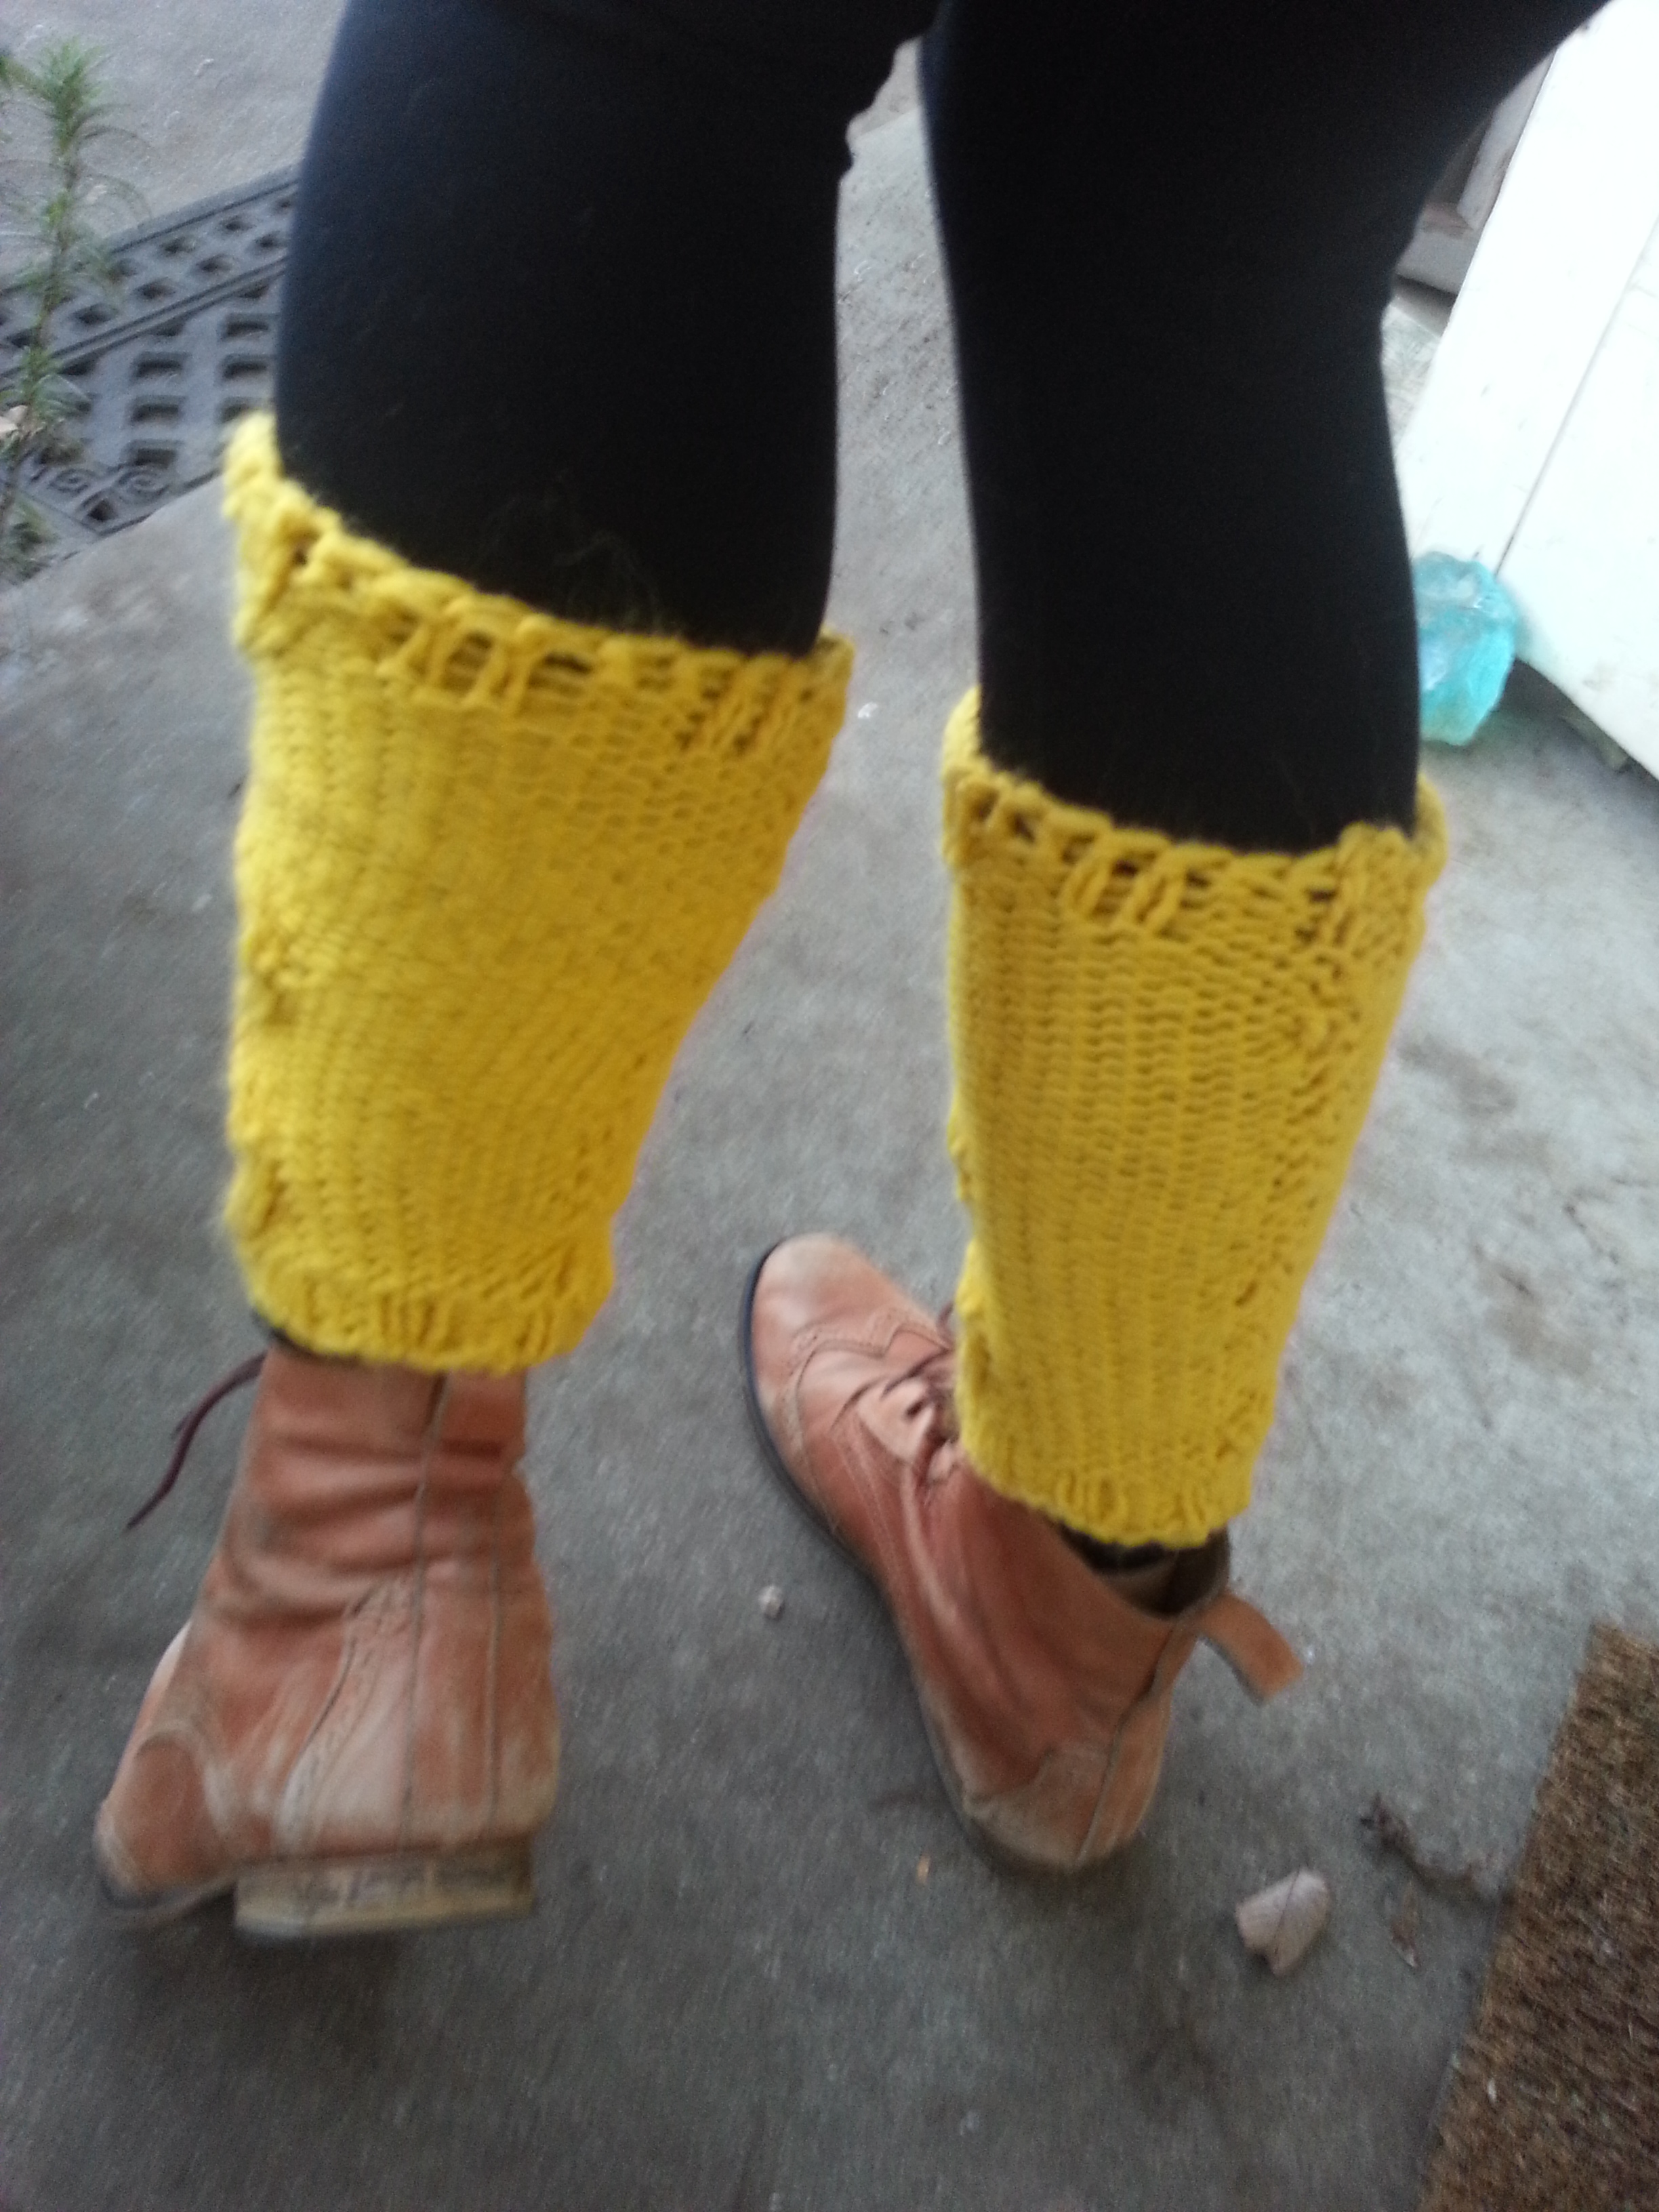
These are two color linen stitch headbands! Linen stitch is fantastic for headbands because it lays nice and flat. These two are named Minnesota because that’s where they went to live.

I used Michelle Lewis’ linen stitch headband recipe, which seems rather underutilized, as a guide for these headbands. But since I was using two colors, this craftsy guide, especially the suggestion for how to avoid color pooling, was very helpful too.

The two-color linen stitch recipe:

Provisional cast on: even number of stitches in Color A

For your first ever row, skip to Row 2 (r 2) to avoid color pooling.

r 1: Knit 1, yarn front, slip 1, yarn back. repeat to end of the row

 r 2: Purl 1, yarn back, slip 1, yarn front. repeat to end of the row

Repeat these two rows with Color B, then repeat them with Color A, etc. When the headband is long enough, sew the ends together.

For the top headband, I used the same yarn and needles as most of the projects here. For the bottom headband, I used size 2 needles and two partial balls of a wool blend, self-striping sock yarn, which created a more intricate looking pattern.

2015-03-03 10.02.11These headbands will give you the ability to travel around the country and/or world having amazing adventures and connecting with inspirational people. Or they will give you the ability to get out of the house on a cold winter evening. Depending on what you need that day.
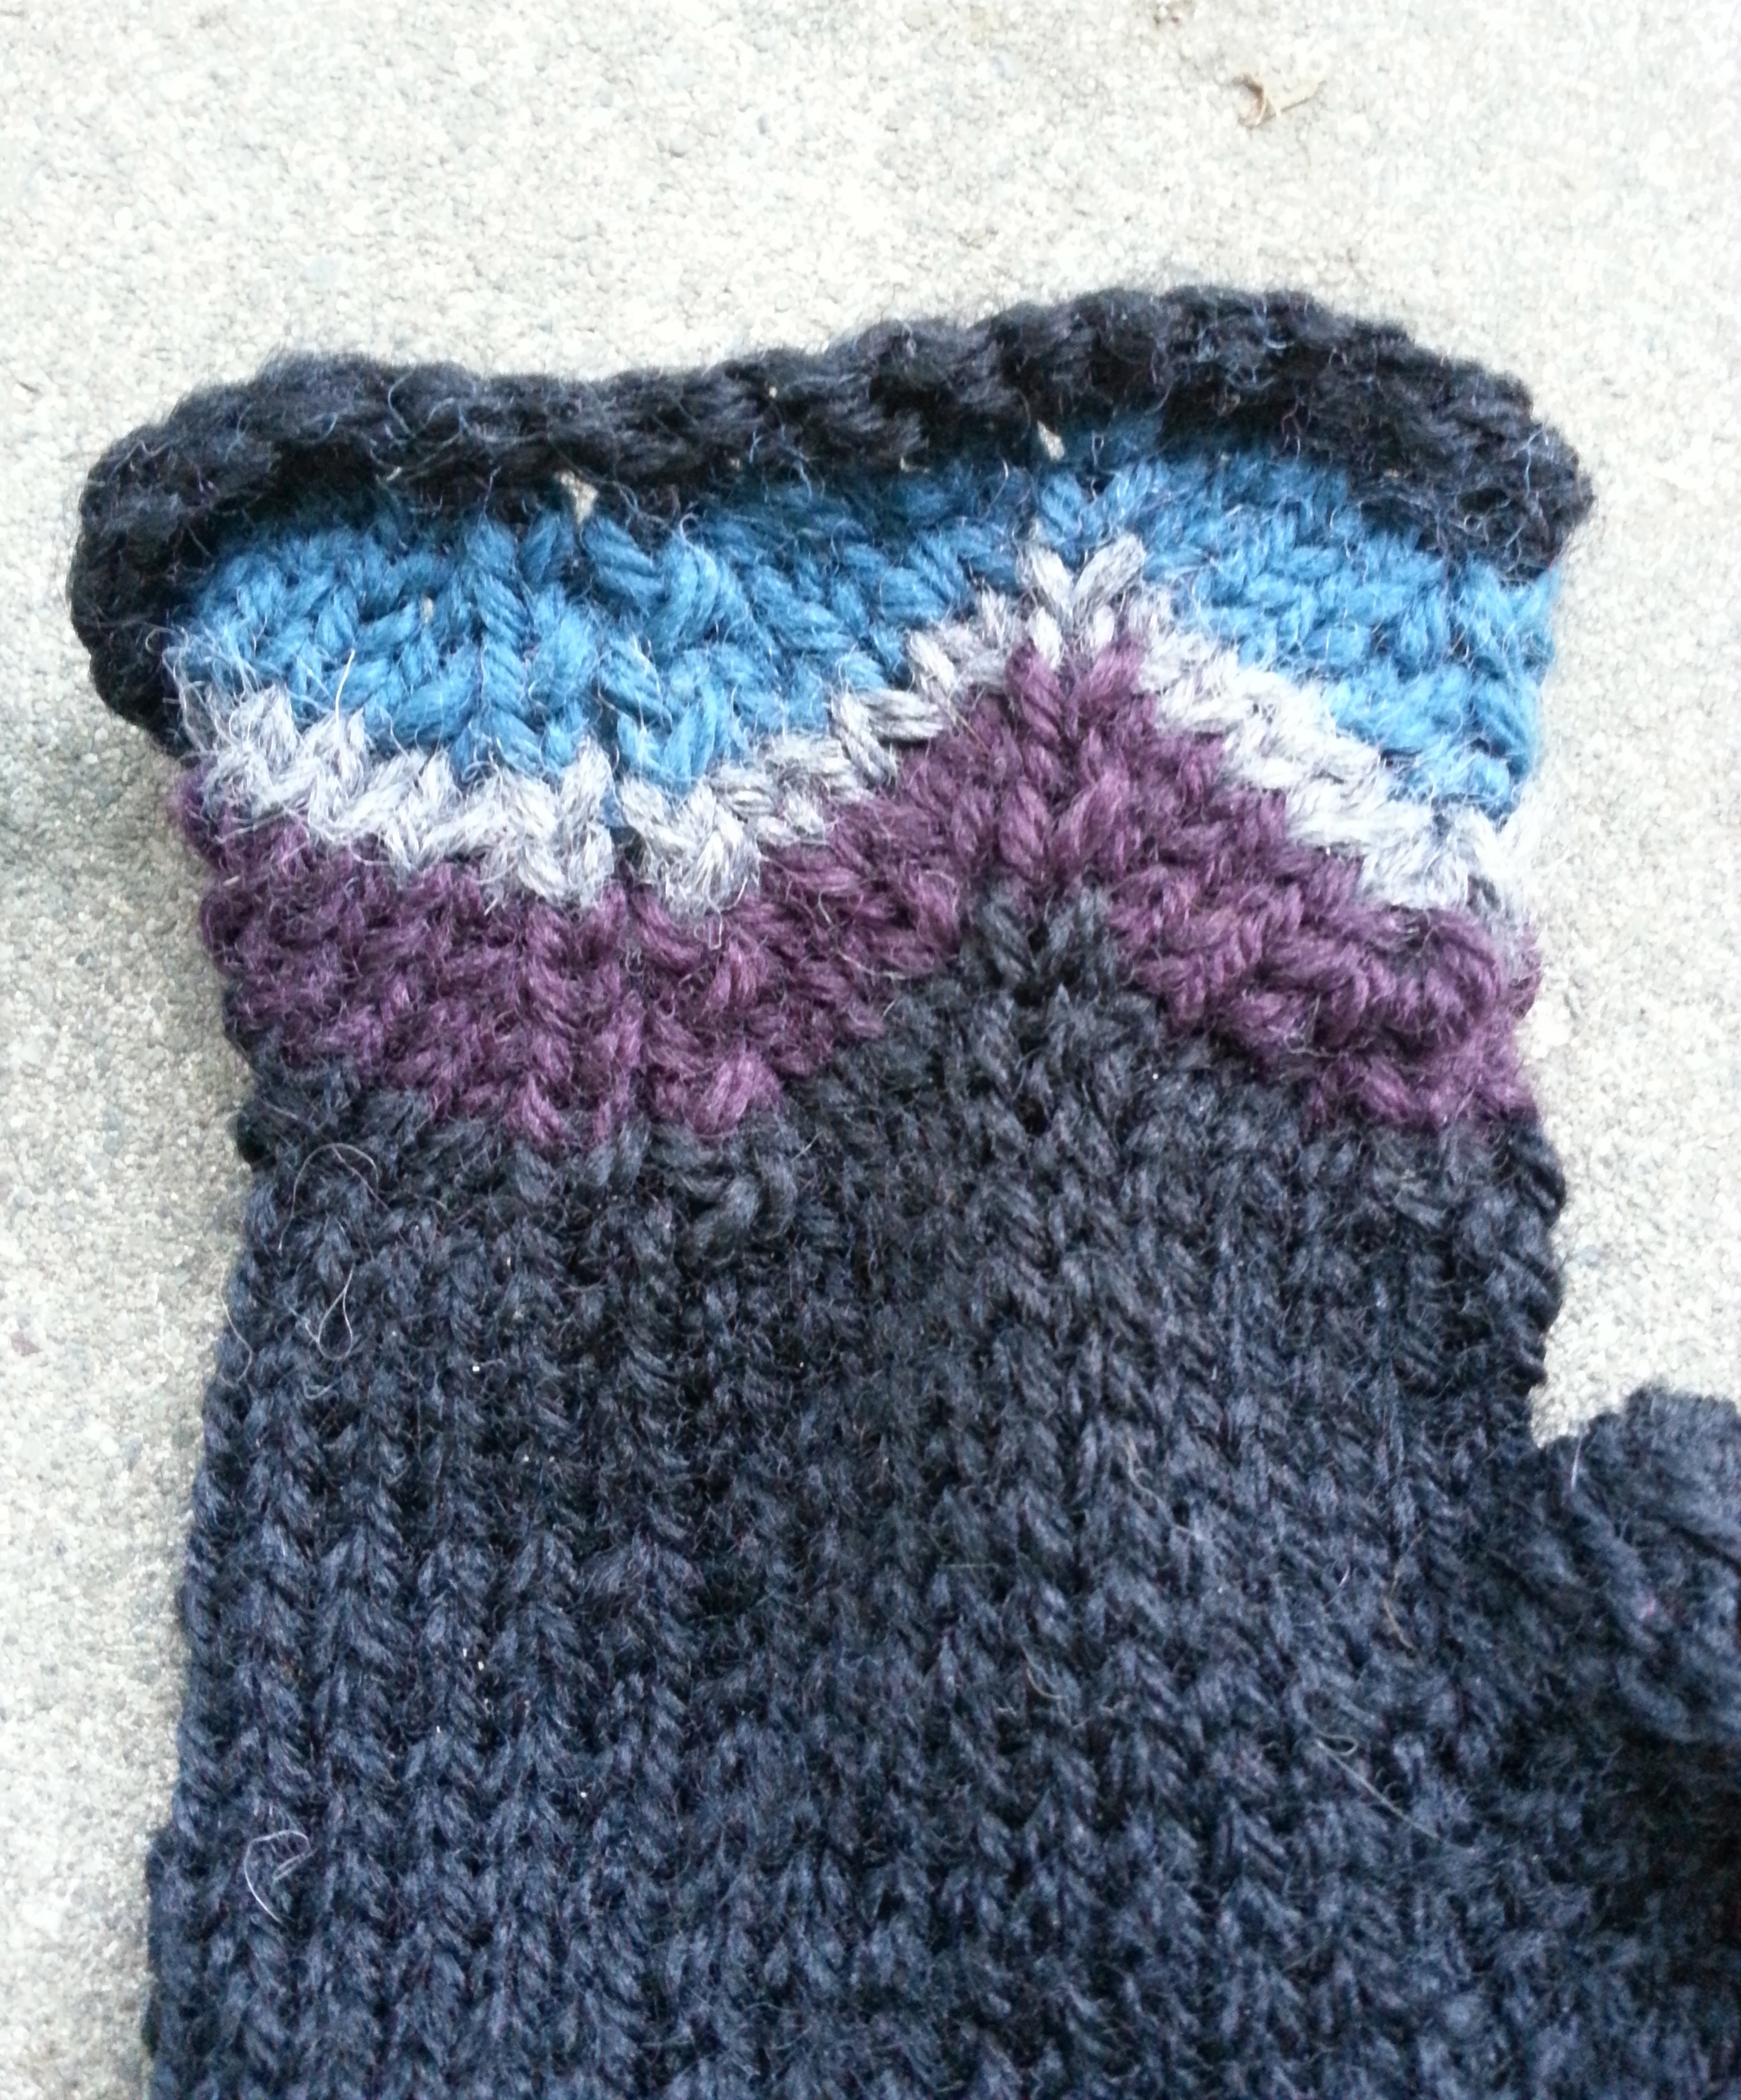
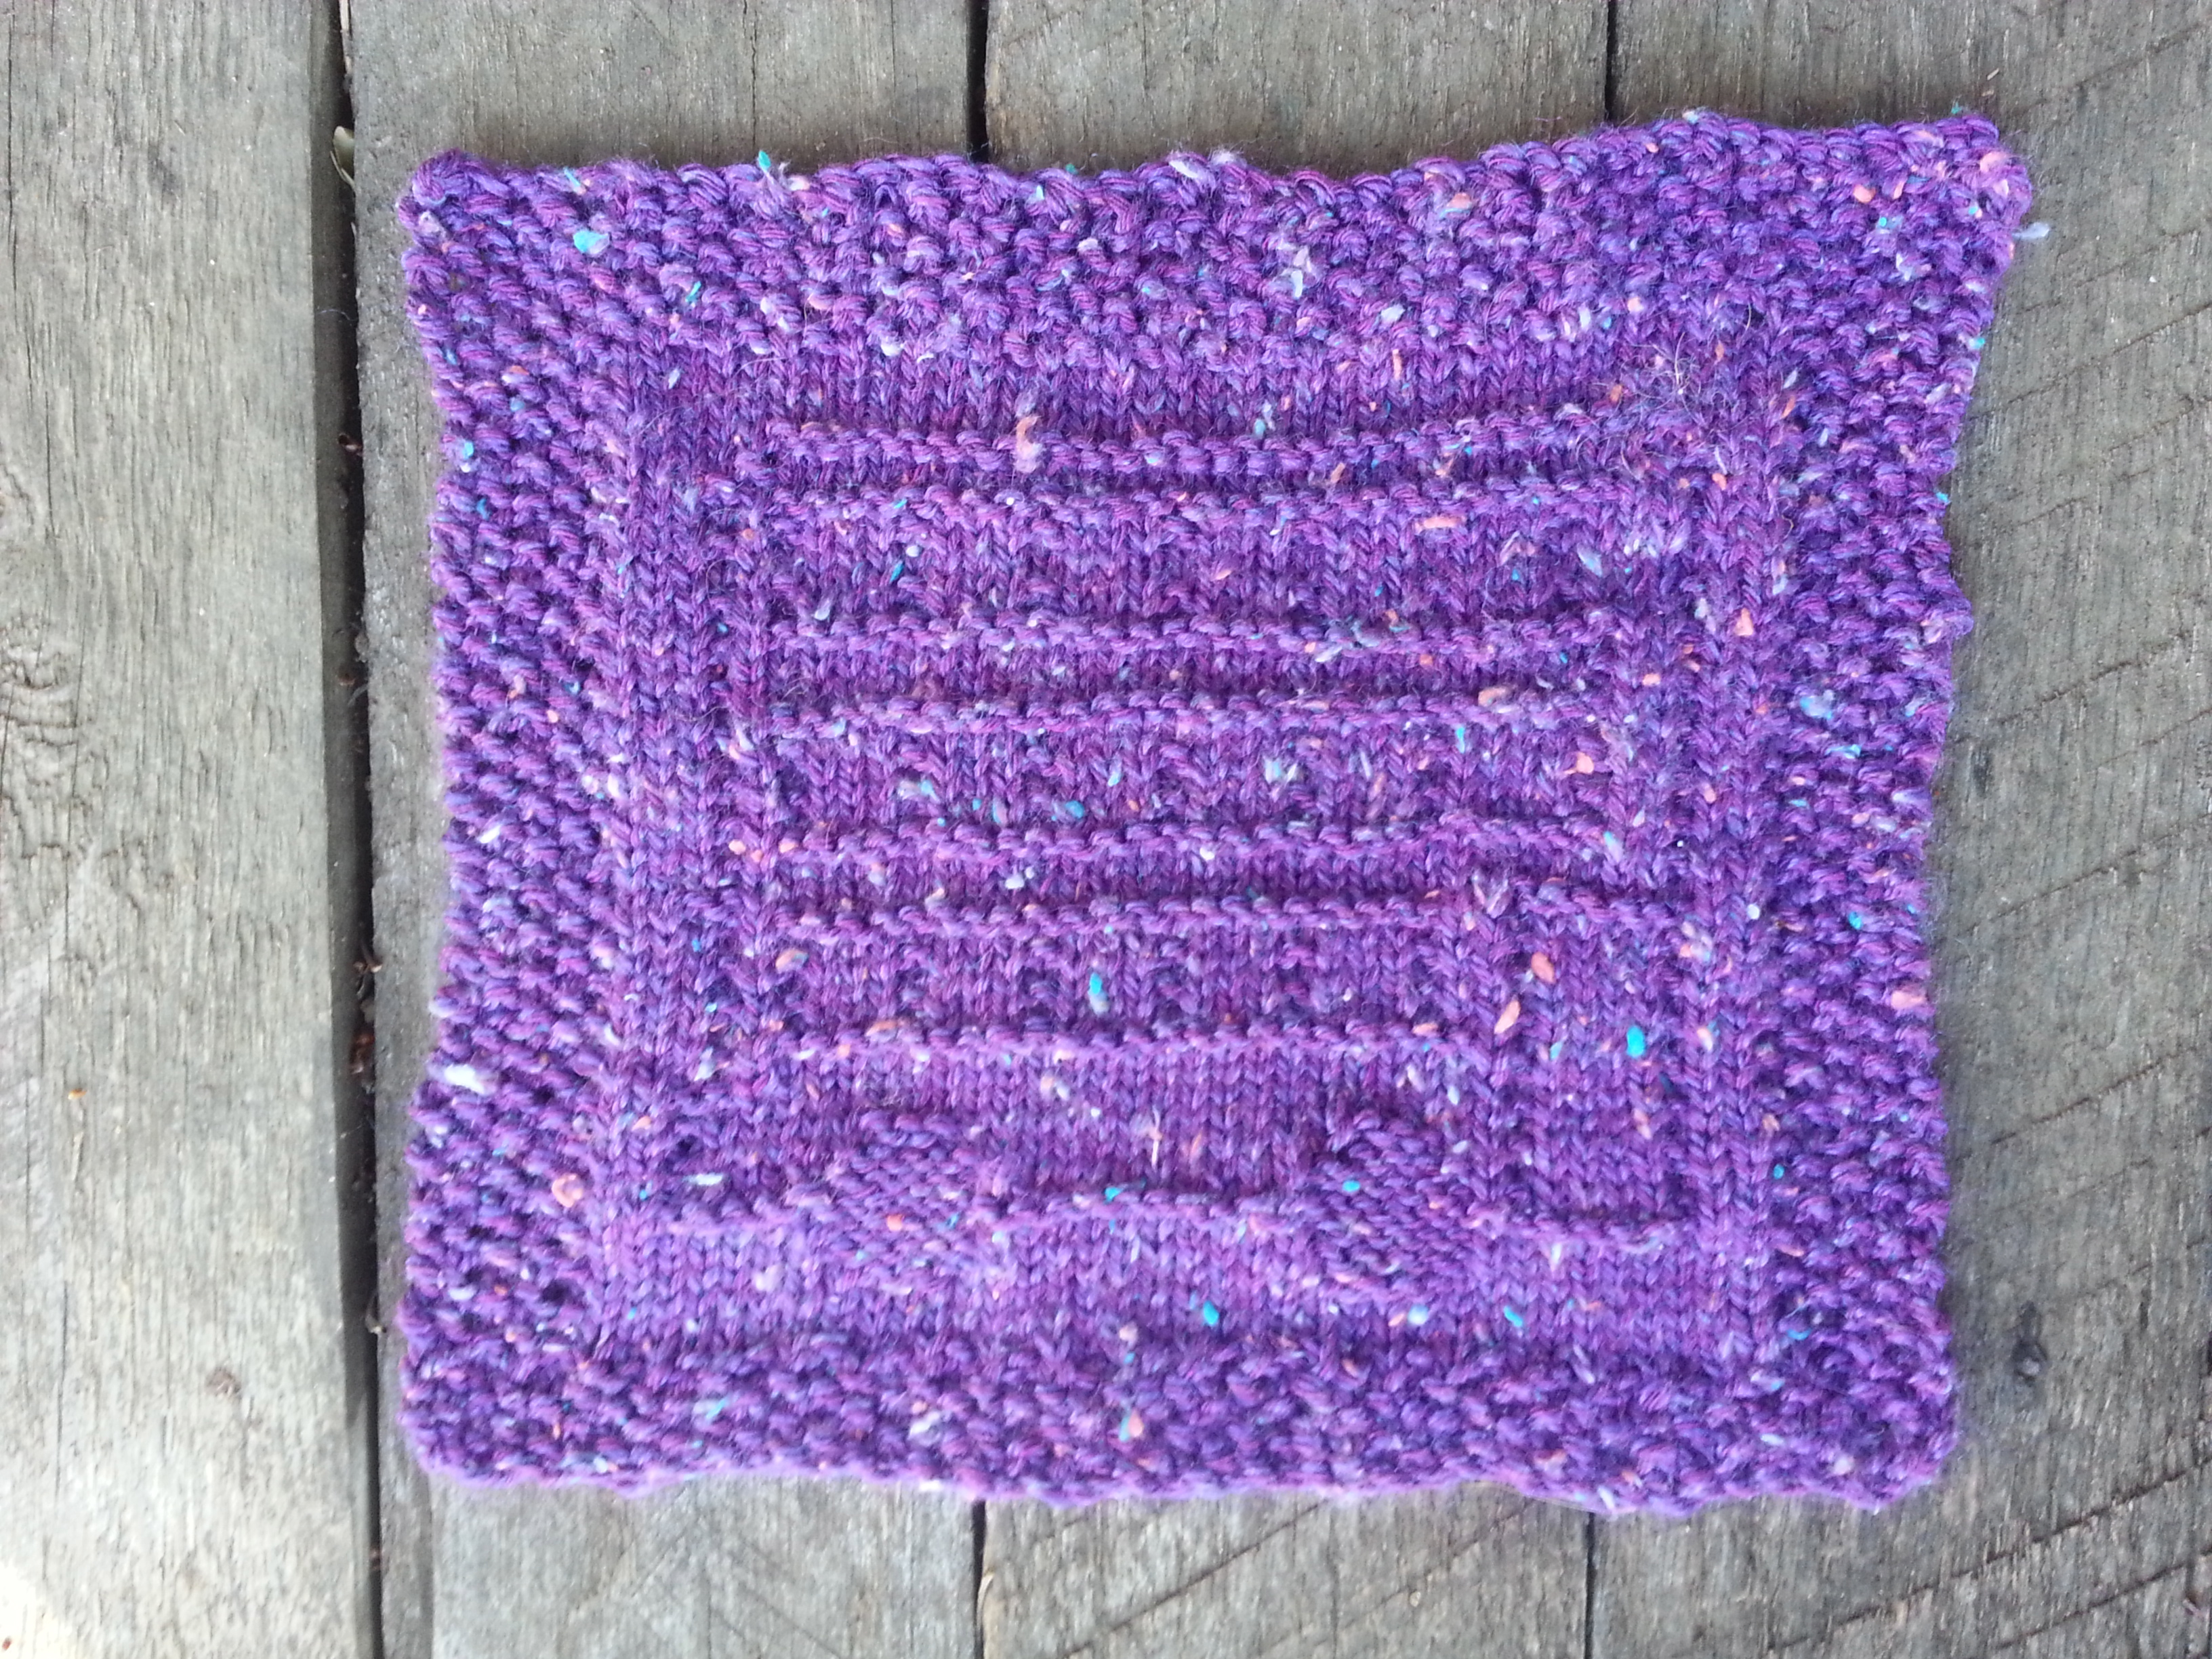
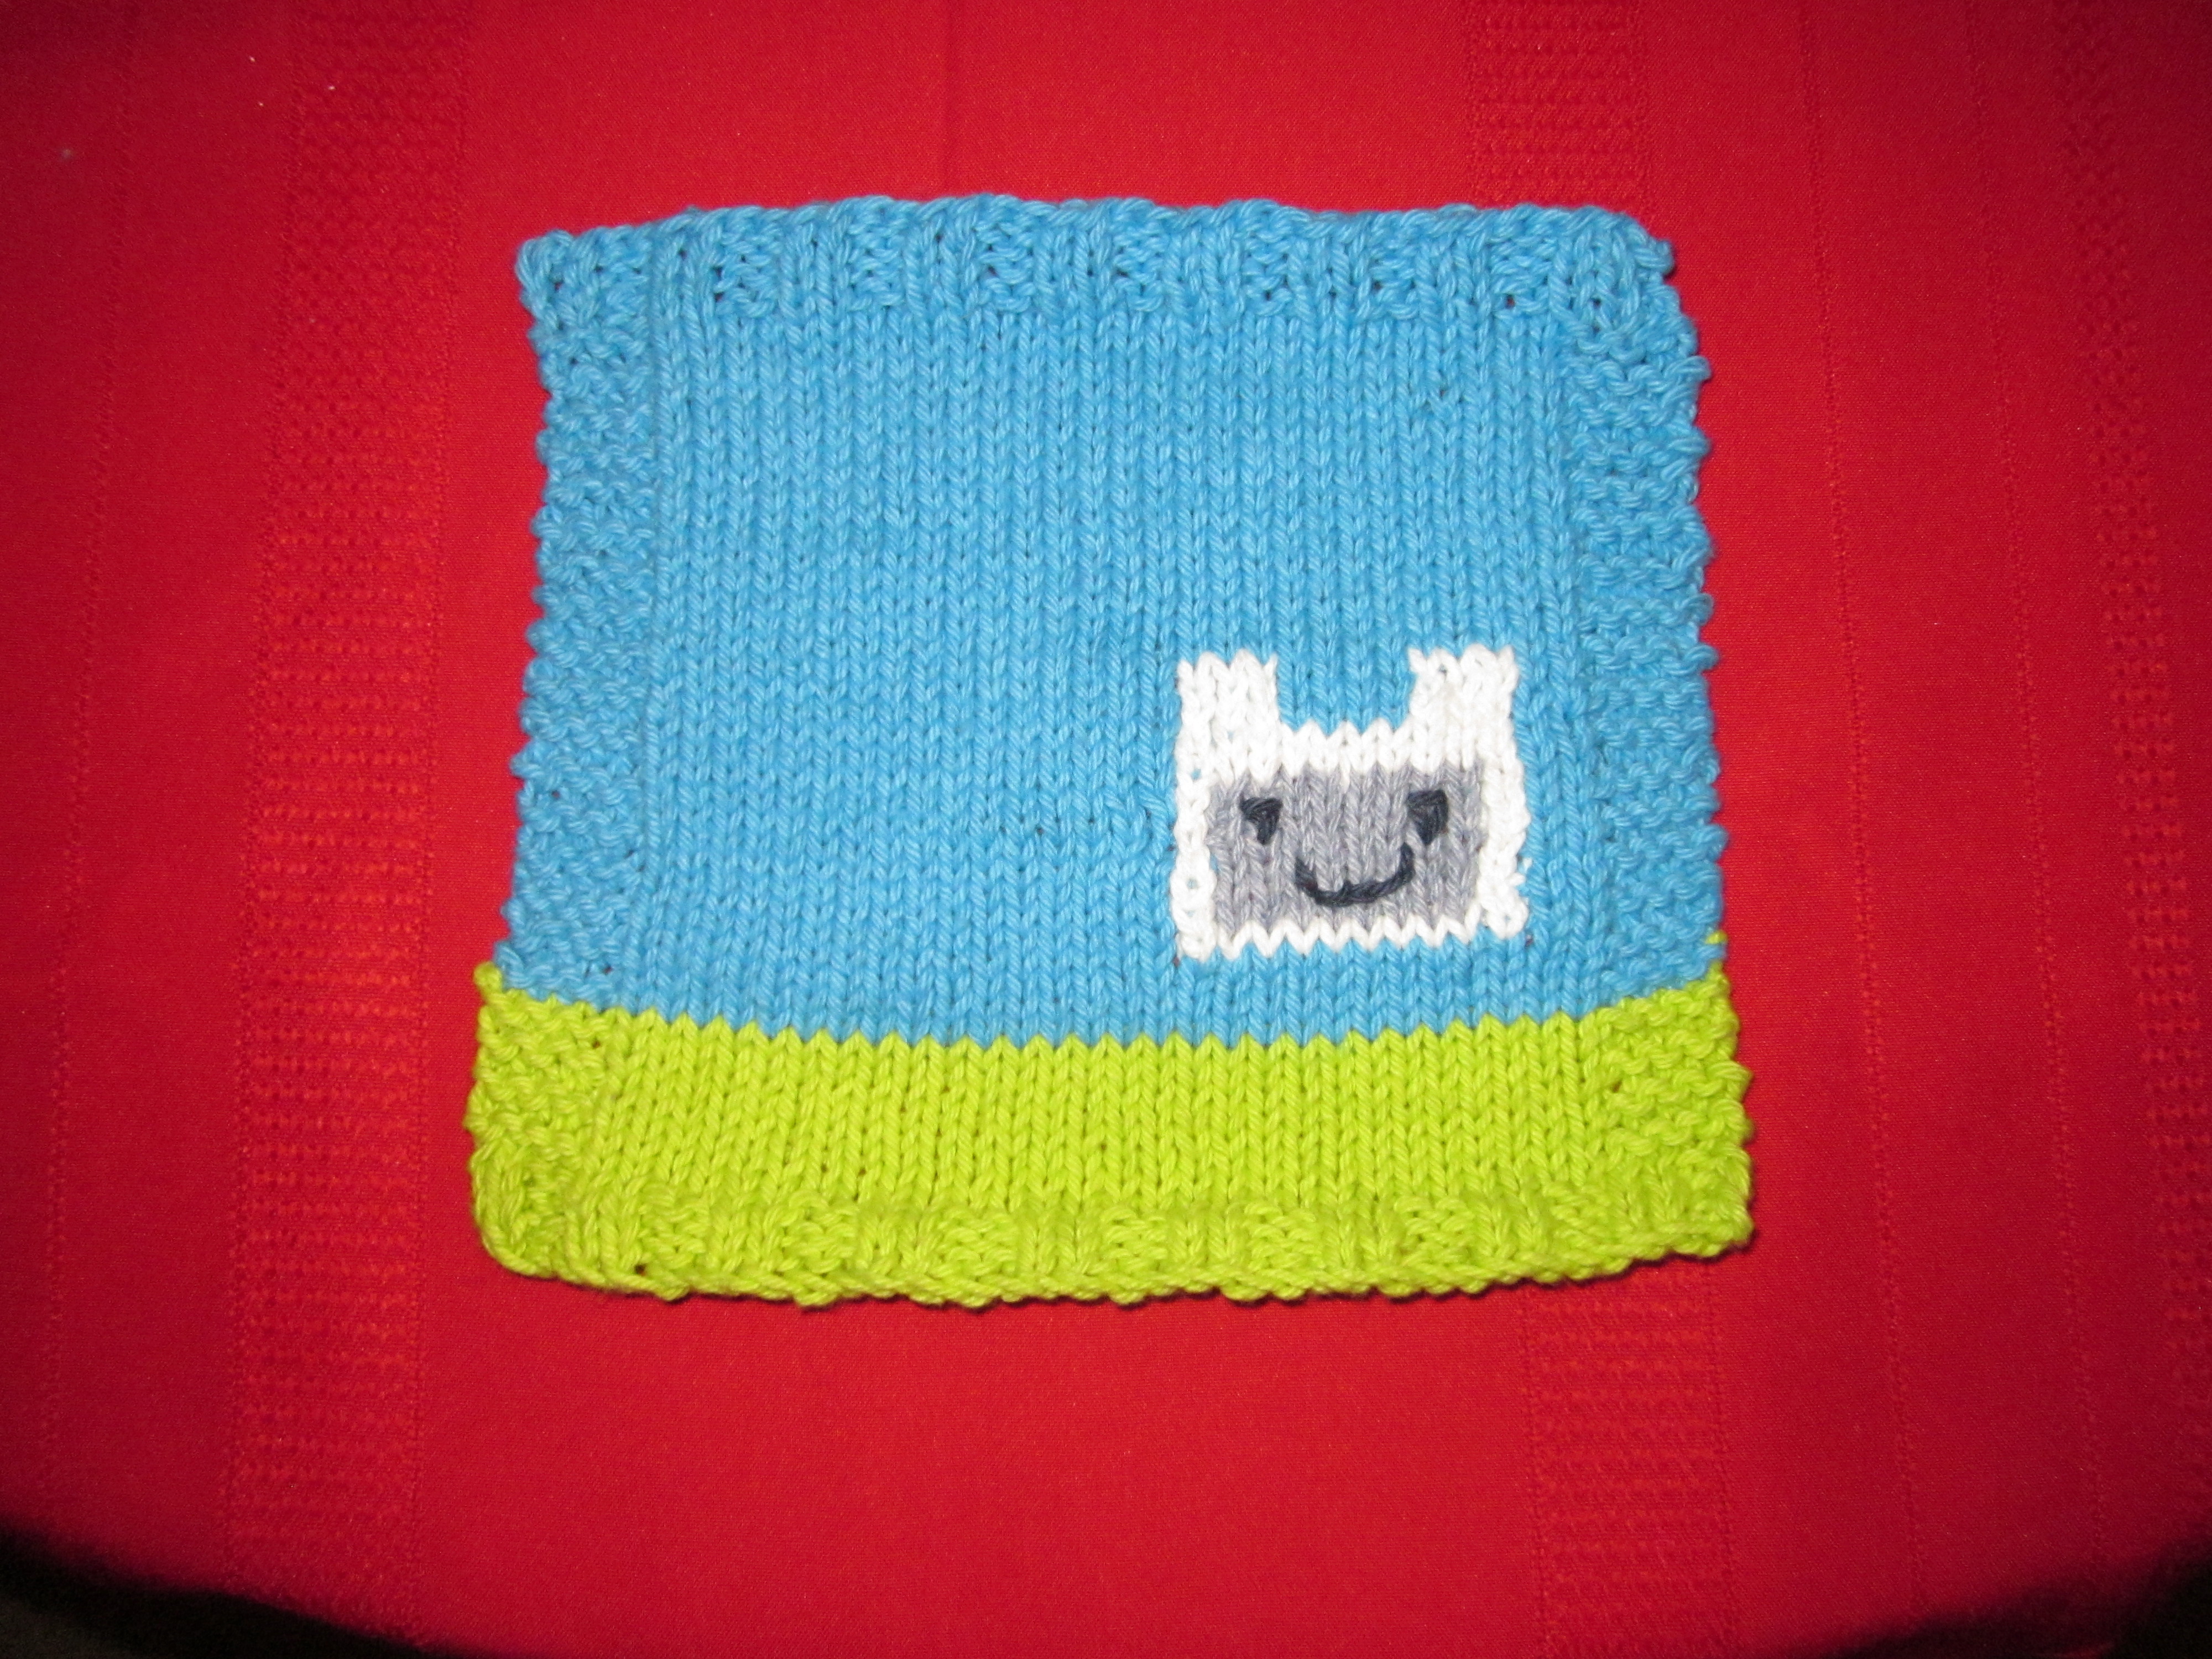
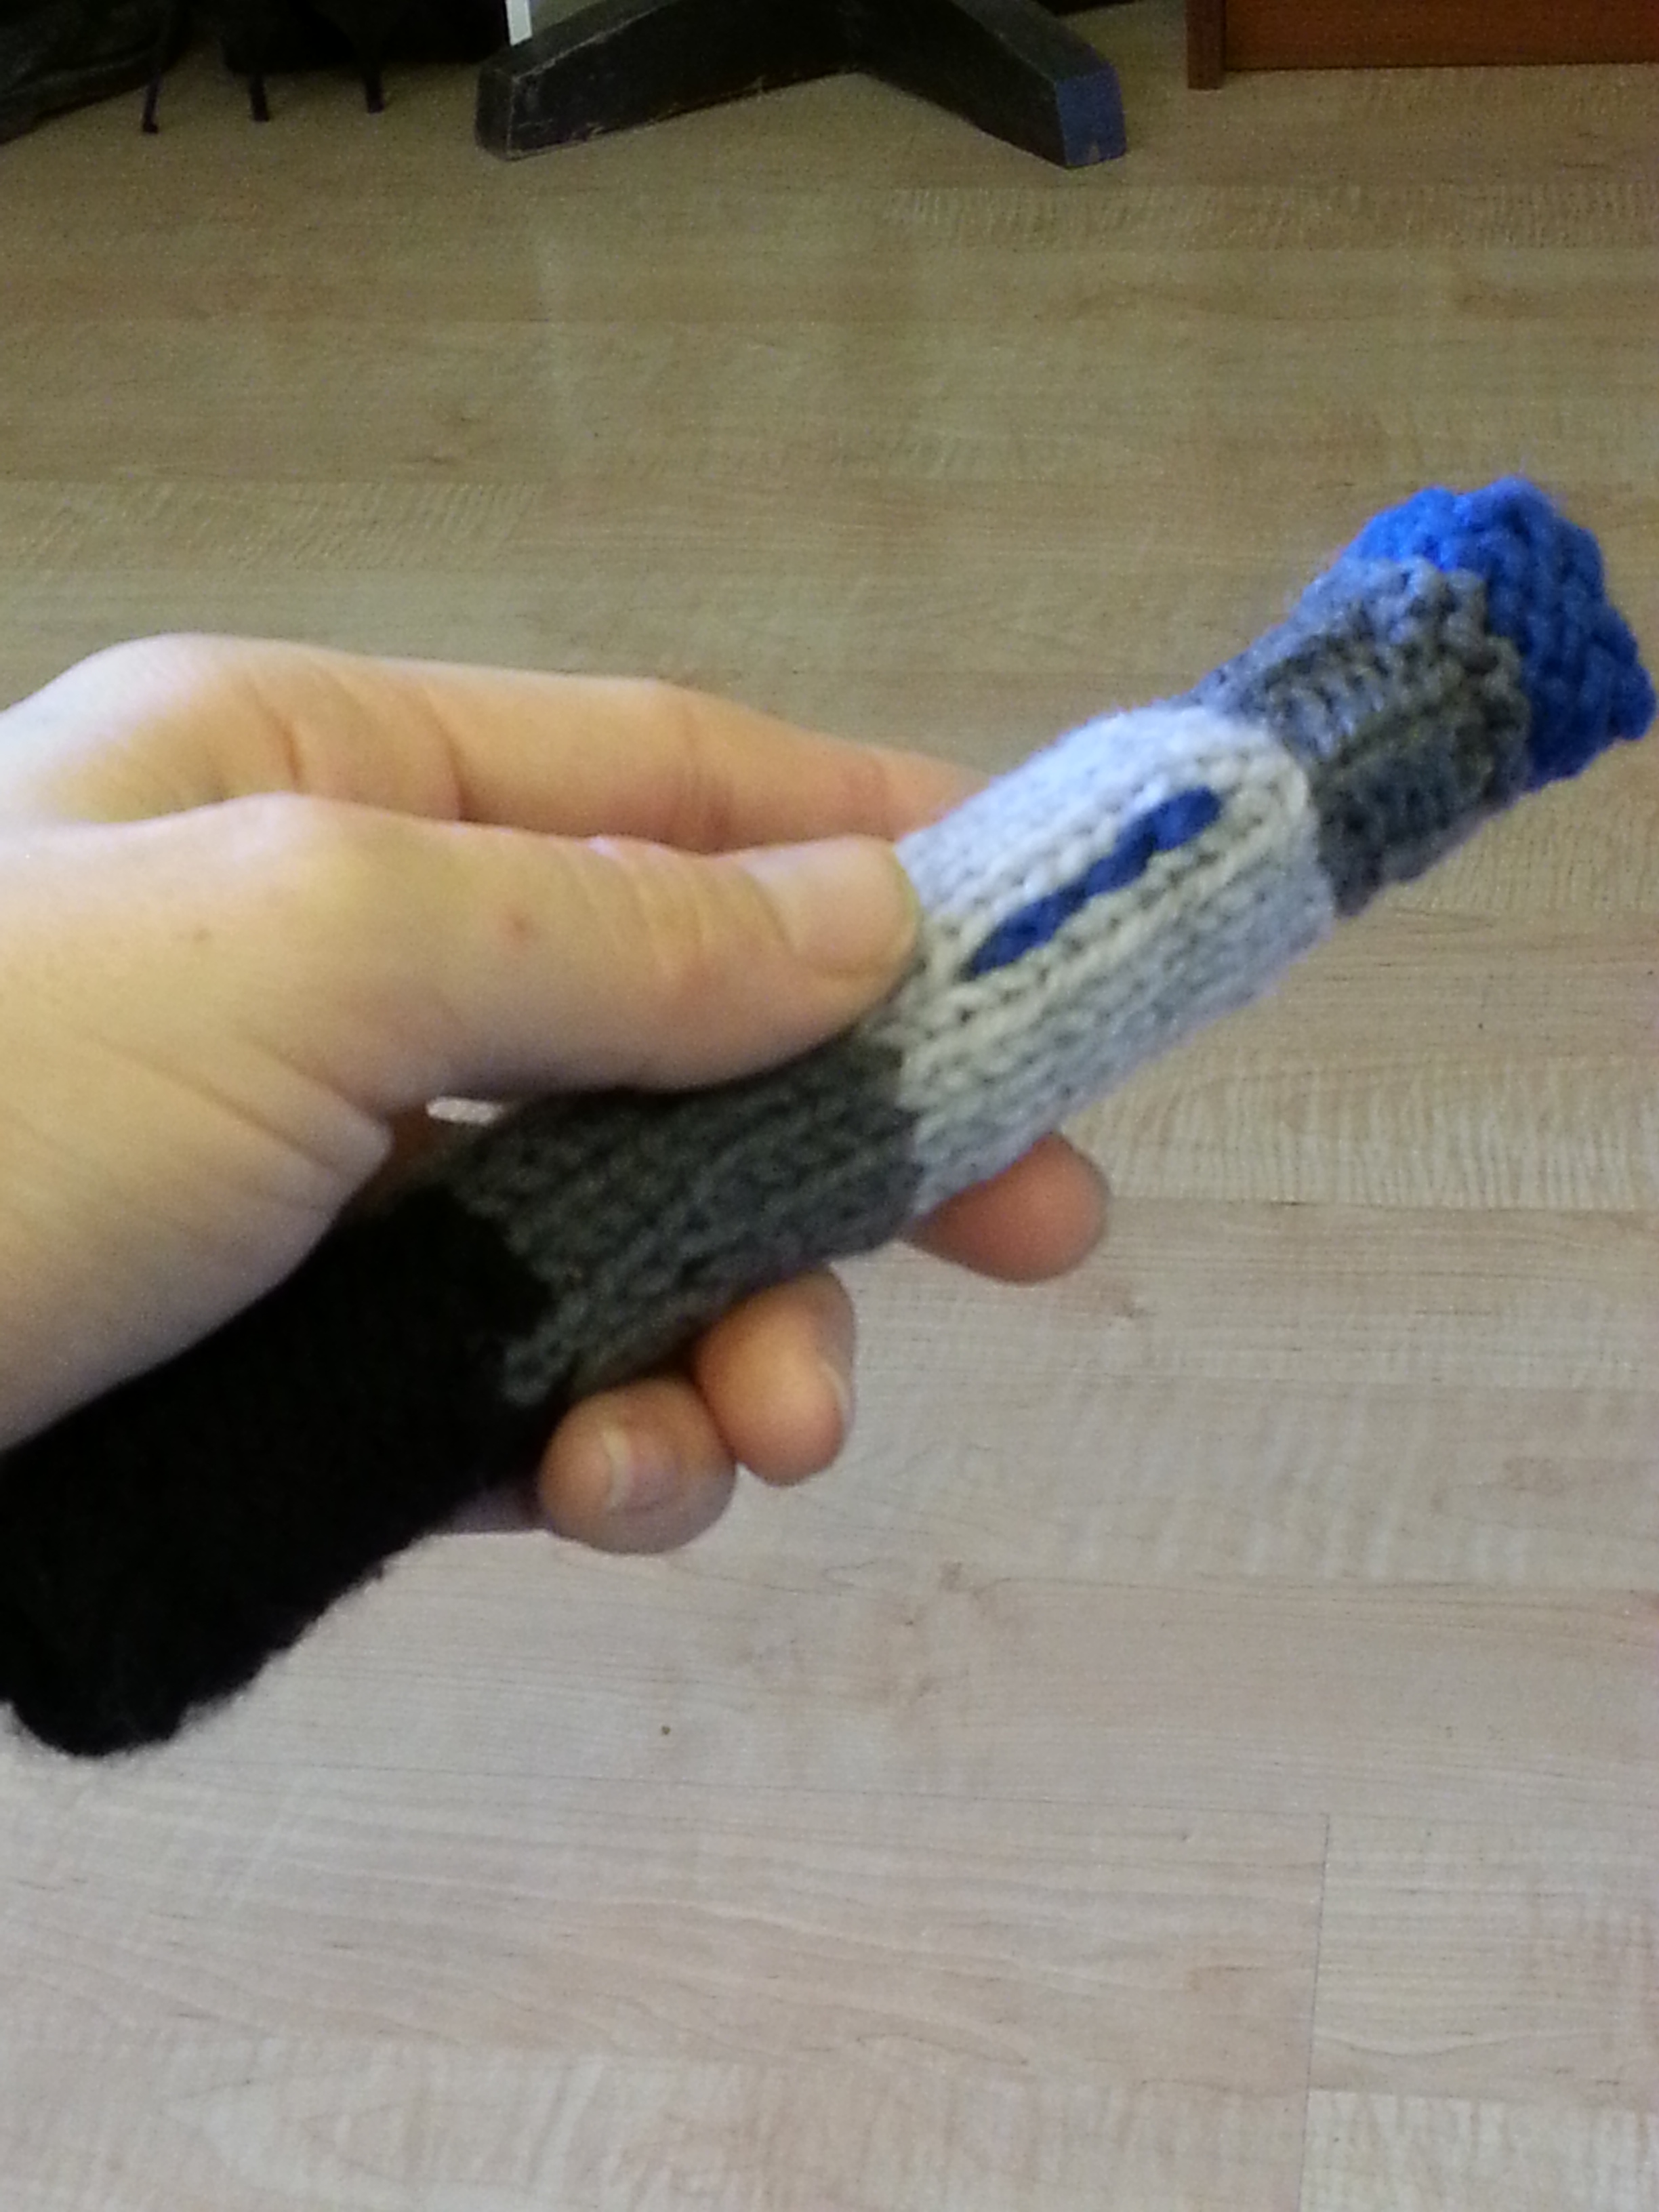
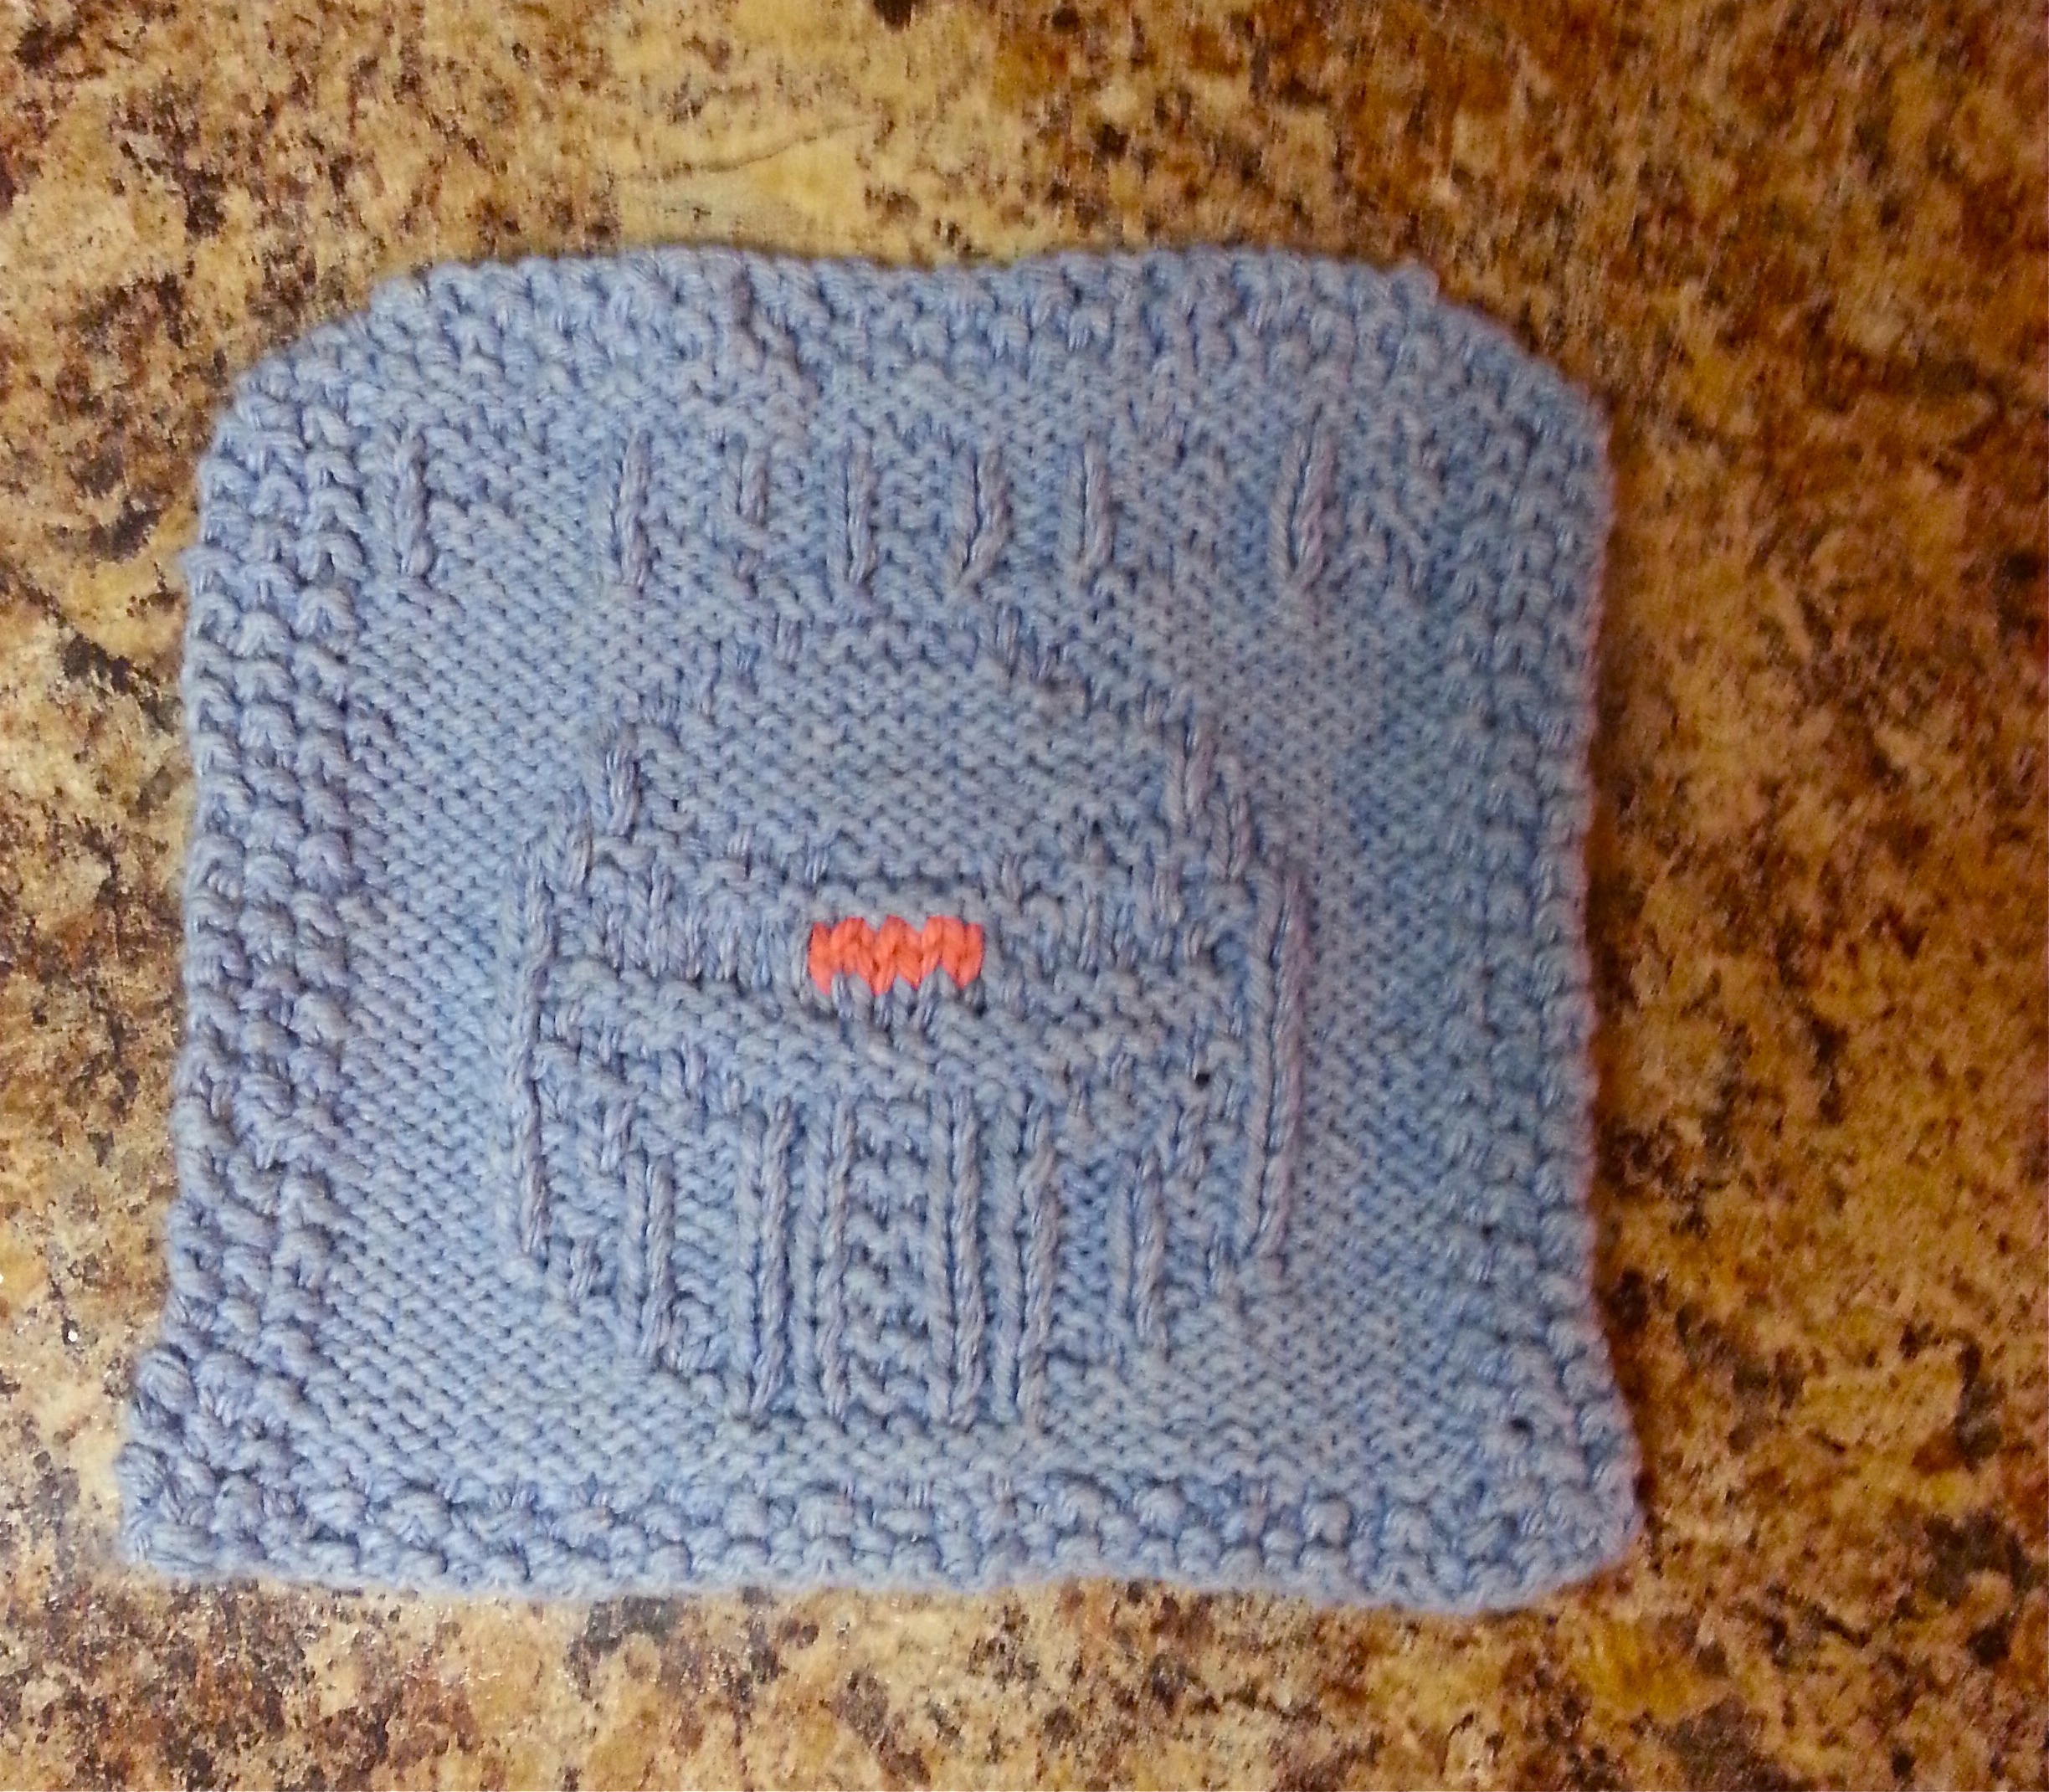
Heartbeats

2015-03-30 17.25.49
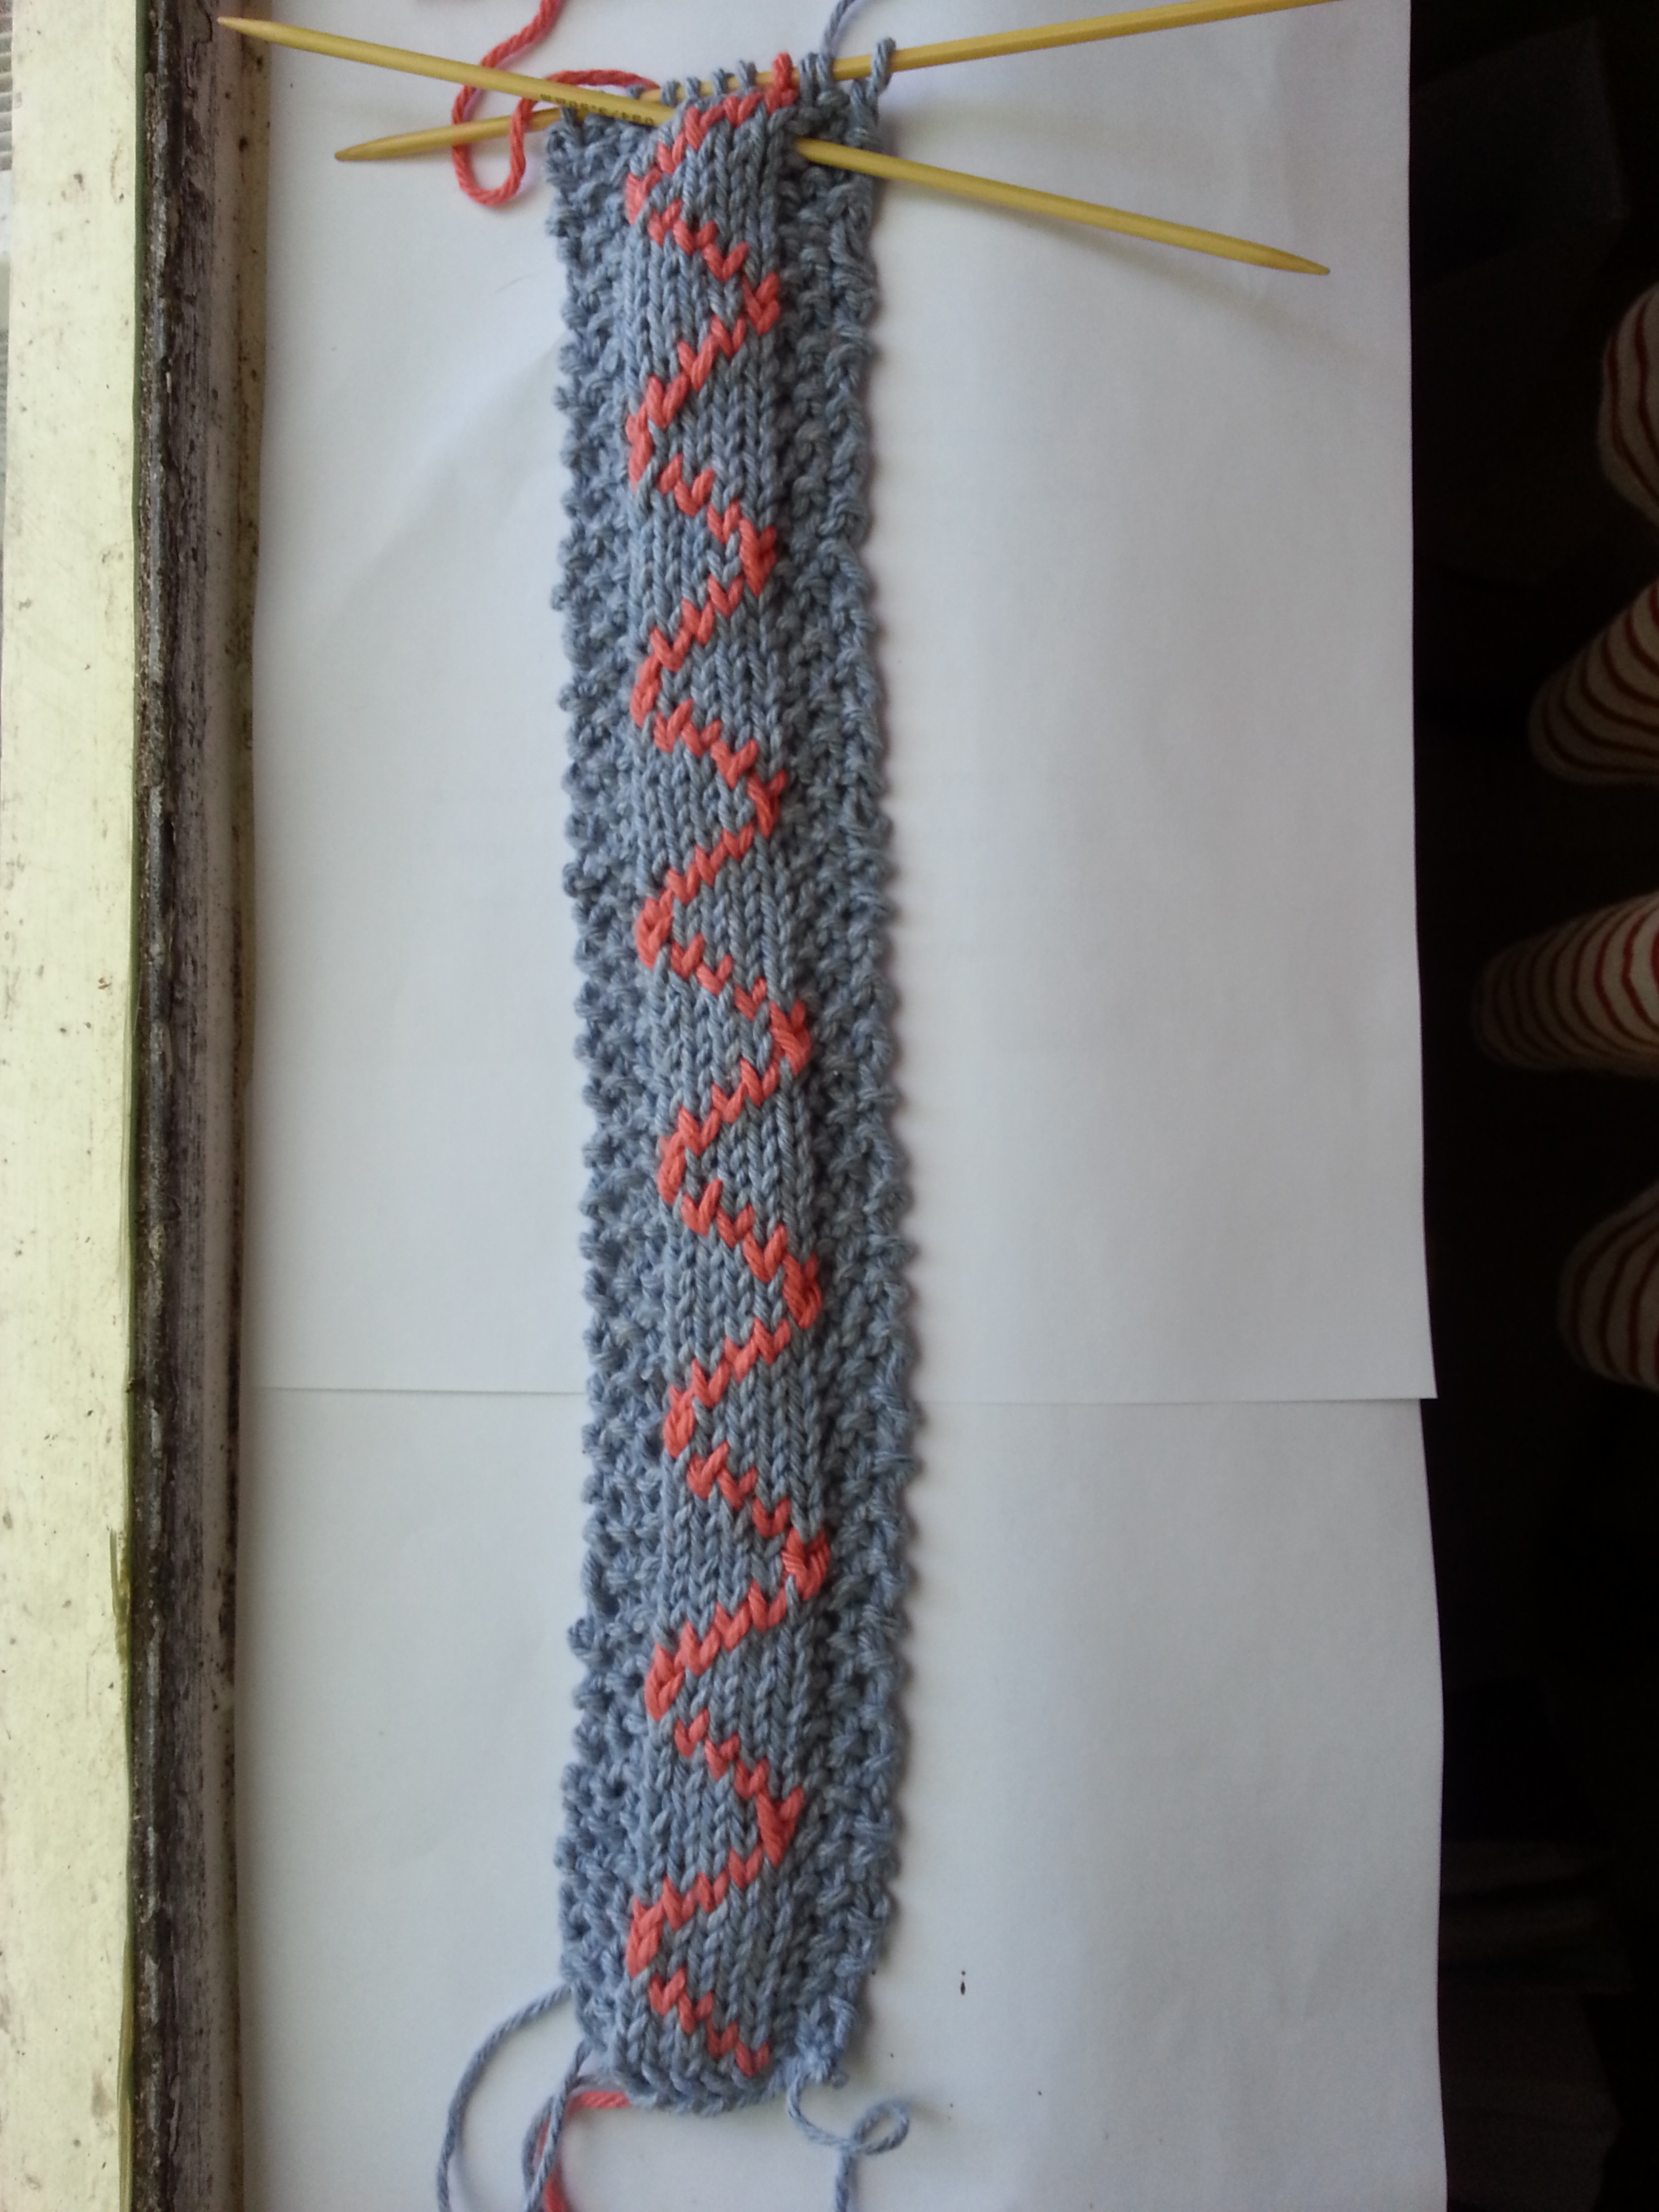
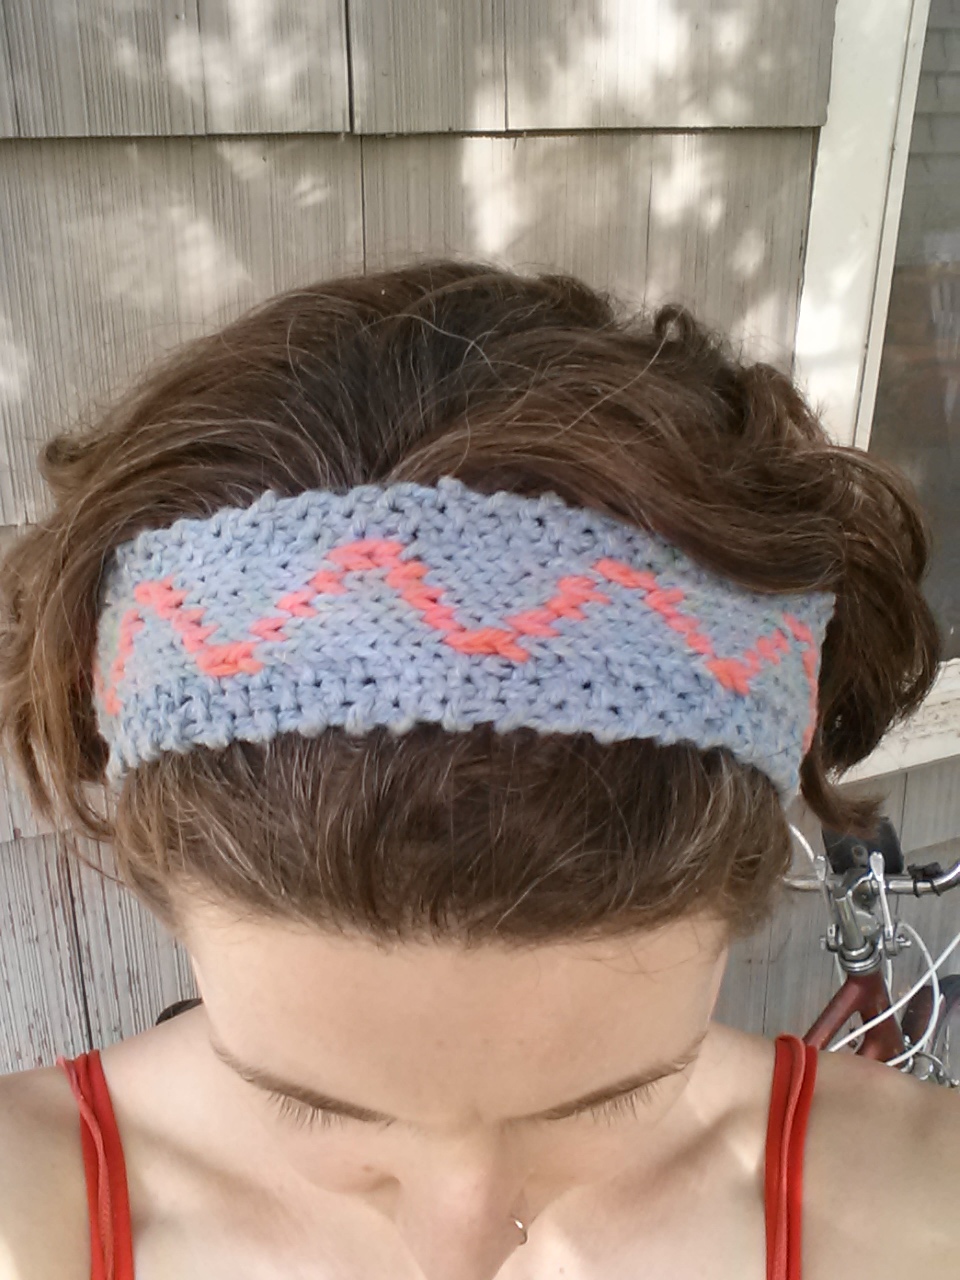
I was all ready to write this post a week ago, but then I was like, you what I need to do? KNIT ANOTHER HEADBAND. So I did. I decided to call it Heartbeats, even though it has been pointed out to me the graph of a heartbeat does not follow this neat curve. I was inspired by the Jose Gonzalez cover of The Knife song “Heartbeats.”

I told myself to write down the pattern as I came up with it, but either I forgot or I misplaced it, so I’m going to reverse engineer it for you right now:

Heartbeats recipe:

Provisional Cast on 11 sts in Color A

From here on, the three stitches on either edge are your border stitches—they will always be knit with the pattern Knit, Purl, Knit. The five middle stitches are stockinette and they will have the color work. Here is the chart:

Screen Shot 2015-04-11 at 2.01.42 PM

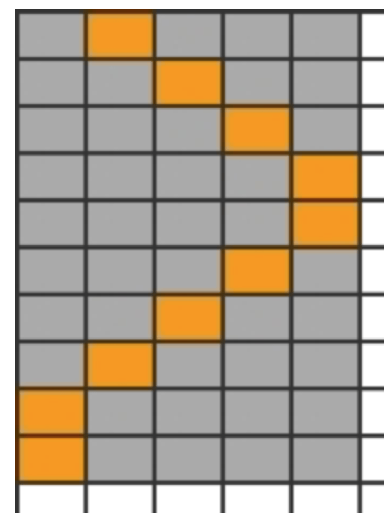
As you can tell, you need to make sure to finish at the end of a complete chart for your heartbeat to be…complete. And as always, you’ll need to block it well—especially since there is a lot of stockinette. But it looks really cool laid out flat!

20150328_115256This headband gives you the power of the heart—wherever that may take you and for whatever that is worth. (It seemed important to the Planeeters!) It may or may not help you sing like Jose Gonzalez.

2015-03-21 18.43.44

Hope you enjoyed these headband patterns!

Costumes, Nerdy Knits & Crafts, Tweaks & Alterations

Ten MORE of the nerdiest crafts I have made

Project #5 preview: My DNA is showing!

In 2012, I shared a list of the Top Ten nerdiest crafts I have made. Recently, I realized I have made enough nerdy crafts since then to have a second top ten list. (And who doesn’t love a good listicle? I am a total sucker for them.)

Here’s the list! I have written about most of these before, but #5 and #1 are brand new projects!

10. Harry Potter Cat Toy20120821_174144Details: Knit in August 2012 for a couchsurfing host, first blogged here, based on this pattern.

Nerd Alert: The recipient had two cats named Harry and Ron (brothers!), so of course their cat toy had to be knit in Gryffindor colors. I also gave it a mane, because of course I did.

Bonus Pics:

Harry caught the snitch, er, mouse in his mouth.

Honorable Mention: I recently knit a purple washcloth with the Knight Bus on it. Maybe the pattern did not turn out very visible…OR maybe, the Knight Bus cannot be seen with muggle eyes. You decide.

2015-01-19 14.42.54

9. Sweatered Shetland Pony Cozy

2014-11-17 13.24.17Details: Knit in November 2014 for a fellow knitting friend, blogged here, pattern details here.

Nerd Alert: Many knitters make sweaters. A select few knit sweaters for Shetland Ponies. But to my knowledge, I am the only one who had made a sweater for a knitted pony on a beer cozy.

Bonus Pics:

one pint of ale, please.

8. Katniss Cowl

2014-03-29 17.54.23Details: Knit in March 2014 for myself, blogged here, ravelry pattern notes here. Based on the cowl the main character wore in the second Hunger Games film.

Nerd Alert: Did I wear this to see the most recent Hunger Games  film? Yes, yes I did. Also, it’s still held together at the side with my cable needle.

Bonus Pics:

2014-03-29 17.59.072014-04-02 14.10.252014-04-02 14.06.47

7. TARDIS PillowTime And Relative Dimension In Spacebigger on the OTHER side!Details: Knit in December 2013 for my brother, blogged here, pattern details here.

Nerd Alert: You don’t have to be a Doctor Who fan to enjoy this pillow across all of time and space…but it helps. I blame/thank my brother for introducing me to the show. (Also—notice how it’s bigger on the other side!)

Bonus Pics:

just a little blue box

6. Adventure Time Washcloth

IMG_1935Details: Knit in December 2012 for my brother, blogged here, pattern from here.

Nerd Alert: Confession—I haven’t seen Adventure Time. I know this is Finn. His face is a little gray but he doesn’t seem to mind.

5. DNA Double Helix Legwarmers

2015-01-07 16.49.17Details: New project! Knit in January 2015, pattern details here.

Nerd Alert: That’s right—that’s a double helix cable! Expertly charted, or so I have read. The original pattern was for a scarf, but I added some ribbing to the top and bottom, knit two of the pattern at a time, and stitched them together in the back to create legwarmers. (And yes—I wear these! To the gym! In public!)

Bonus Pics:

Bringing back the 80s.

2015-01-03 17.18.522015-01-06 17.44.352015-01-07 16.47.402015-01-07 16.49.32

4. Battlestar Galactica T-Shirt

2013-10-01 14.36.33Details: Made in August 2013 for myself.

Nerd Alert: Not only did I stencil the signature phrase “So Say We All” from BSG onto a t-shirt—I also made a second shirt for my friend with the phrase “Nothing But the Rain,” an even more obscure reference. Nerdy stenciling at its best.

Bonus Pics:

Starbuck, what do you hear?

2013-09-05 11.55.452013-08-23 20.12.172013-08-23 20.33.092013-10-01 14.36.30

3. Sonic Screwdriver Chapstick Cozy

2014-01-22 10.54.33Details: Knit in January 2014 for myself, blogged here, pattern here.

Nerd Alert: Not only did I make Doctor Who’s sonic screwdriver to hold two chapsticks…I may have shown it to a cosplaying Tenth Doctor I ran into. Just saying.

2014-01-20 10.12.272014-01-19 22.04.122014-07-16 14.44.59

2. Cylon Potholder

20130101_113650Details: Knit in November 2012 for the friend who introduced me to Battlestar Galactica, blogged here, pattern here.

Nerd Alert: Before I saw BSG, I dismissed it as Top Gun with Robots in Space. That is, until my friend convinced me it was about much more than that (like the ethics of what it means to be human—I was sold) and I gave it a chance. To thank her for this, I made her a potholder that not only had a creepy red glowing cyclon “eye” but the words “FRACK” and rounded corners at the top. It’s a terrifying potholder. I’m that kind of friend.

1. The Dungeon Master’s D4 Dice Bag2014-12-21 14.33.06
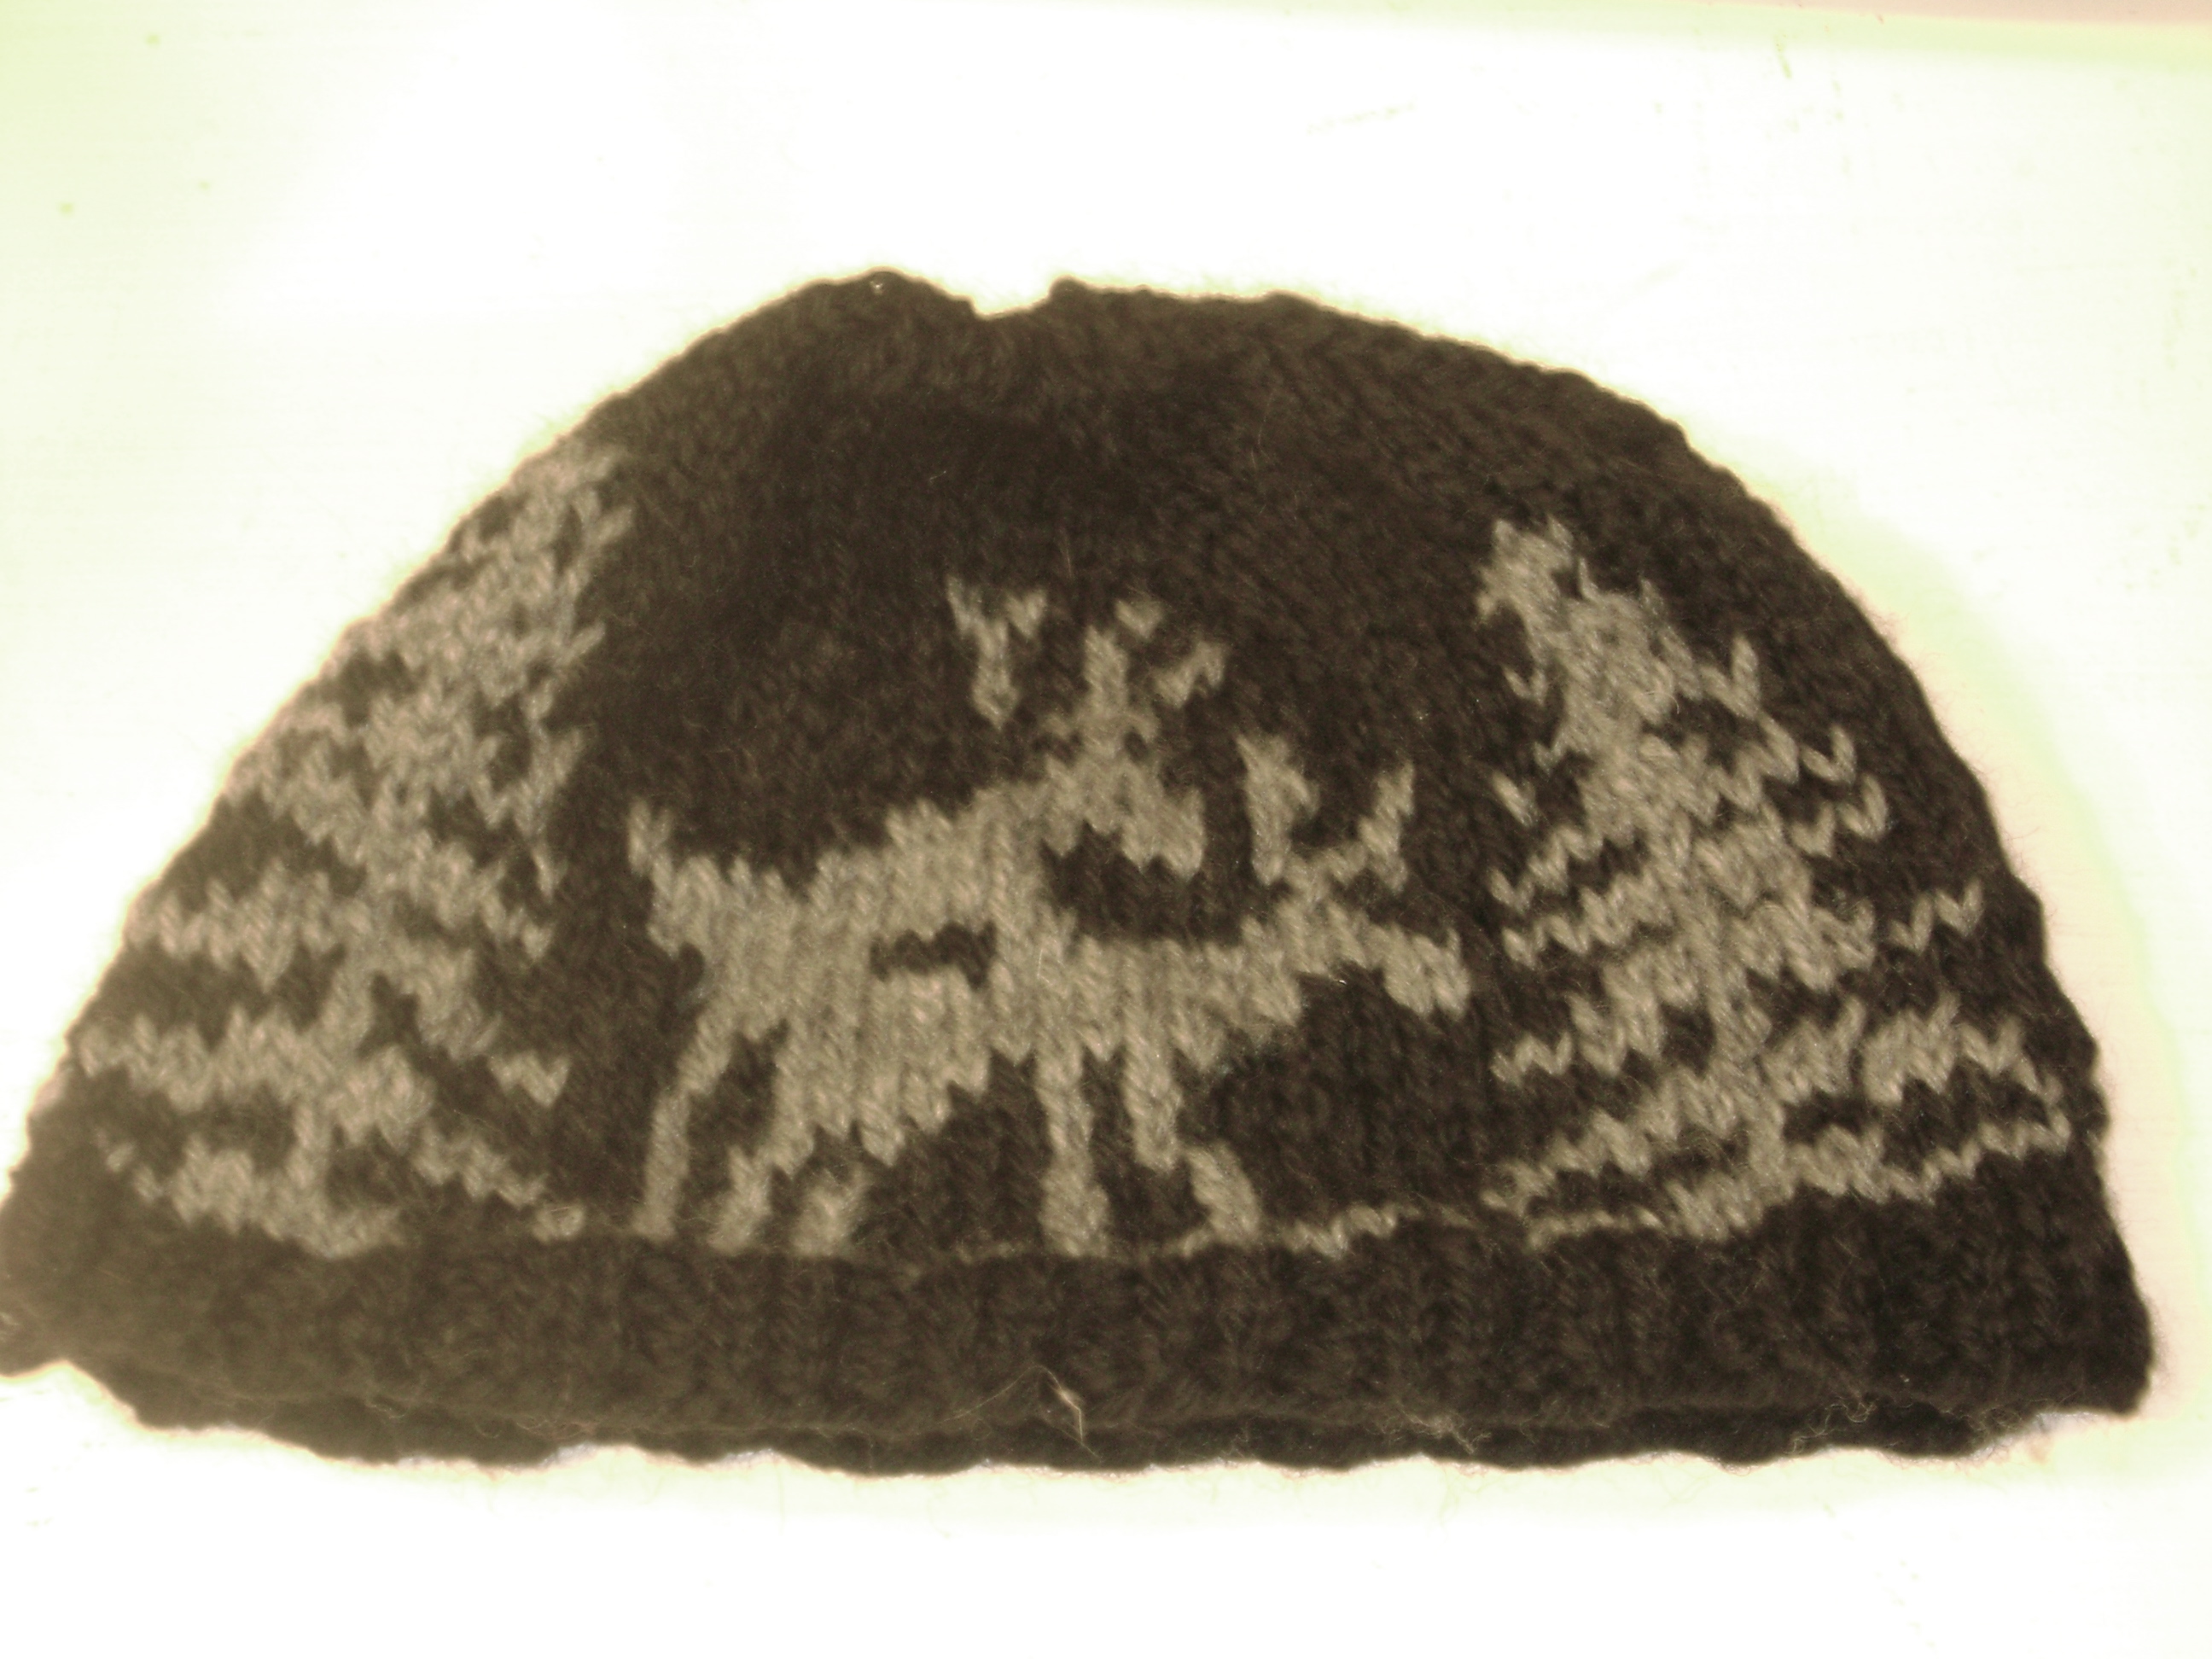
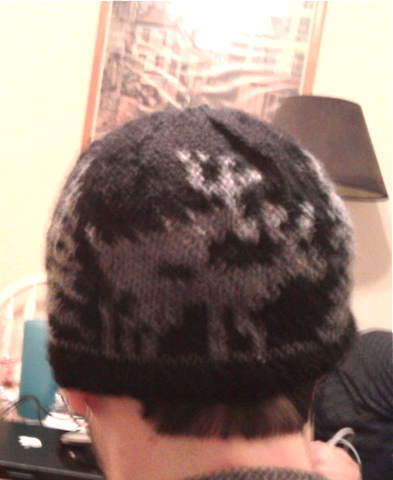
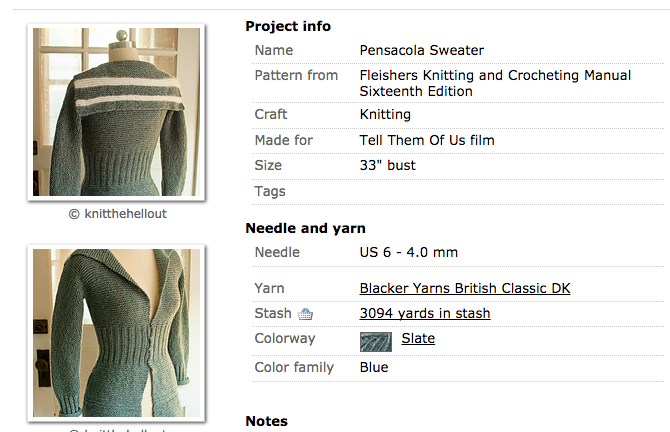
Details: New Project! Knit in December 2014 for my brother, pattern here.

Nerd Alert: I’ve never played Dungeon and Dragons, but my brother leads several D&D groups and has need of dice transportation! Not only did this project require maths to get the exact size of triangle, it also required sewing a zipper. I stitched the numbers in different embroidery threads to make it extra colorful!

Bonus Pics:

(You should be able to get an idea of how to sew the zipper in from these photos)

2014-12-19 17.27.422014-12-21 13.17.072014-12-21 13.21.072014-12-21 13.42.202014-12-21 14.33.30

While I enjoy making things for myself, the best part of being able to knit something nerdy is having something fun to give to the lovely nerdy people in my life. Here’s to ten more nerdy knits!

2014-12-25 10.18.50

Botanical Knits & Crafts, Original Knitting Patterns, Tweaks & Alterations

2015: Out with the New and In with the Old!

2015-01-11_154351The title of this post pretty much sums up my goals for the making of things in the coming year. At its most basic, “out with the new and in with the old” means as much as possible, I’m going to try to use what I’ve got on hand or what I can get second hand to knit, sew, costume, or otherwise craft, instead of buying new materials. Not exclusively, but as much as is feasible. I already do this a lot, but I wanted to be more intentional about it. (I promise this won’t become one of those smug greener-than-thou sort of projects. If I need to buy new buttons, I’ll buy some new freaking buttons!)

Here’s what this kind of making has looked like this month:

Creative Stash Knitting

challenge: How to knit with what you’ve got when your yarn doesn’t fit the pattern.

2015-01-11_162626When you have been knitting for many years, you develop a yarn stash. Extra yarn left over from previous projects, yarn that friends or family gifted you, yarn that you bought for a purpose never fulfilled—they all live in the stash. My stash lives in a small underbed storage box.

I’m trying to get even more inventive with the ways I can knit from my stash. This hat is one of those projects. I knit with small amounts of a wool-and-mohair-blend yarn I had in a few colors in my stash. I used the quick and very lovely pattern easy ombre slouch hat by Paul S Neary. Well, sort of. I weighed the yarn on a scale realized I did have enough of the green yarn to do the full pattern. So I just did the colorwork pattern until I ran out of green. And it still looks good.

The only disadvantage to this strategy is that I’m going to have to be flexible with the outcomes. My hat came out far less slouchy because I omitted extra rows of the pattern. I’m going to soak and block it, but it doesn’t seem to quite fit over the sheer volume of my hair now.

2015-01-11_162724

I think it may need to be a gift to someone else, and I’m ok with that.

Thrifted and Salvaged Crafts

challenge: How to make useful and beautiful things without buying new stuff.

2015-01-11_141850I think the hardest thing about trying not to buy new things is that I have to be patient. I have to forgo the instant gratification for the long game of keeping an eye out. It’s probably not a bad trait to work on. At any rate, being patient was what led me to find and refashion these chairs.

2015-01-11 12.38.25I had been using folding wood chairs in my kitchen for years when I spotted this guy and its twin at my dumpster. I hauled them inside just before a rainstorm. They were not in good shape. But my neighbor friend had assured me that wooden chairs with fabric covers are easy to re-cover.

2015-01-11 12.39.34-1I found my “fabric” at the thrift store. It was a large pillowcase with a green tree print that I bought for 60 cents.

2015-01-11 12.38.432015-01-11 12.40.12

If you want to do this project, make sure you have a screwdriver that fits the screws on the underside of the chair, scissors, a staple gun, and enough staples. (I borrowed the staple gun and ran to the hardware store to get staples). A seam ripper and an iron are also handy if your fabric is being repurposed. And a flashlight or headlamp is a plus if your screws are hard to see.

2015-01-11_132940I didn’t “measure” exactly but I did make sure there was enough fabric to cover both seats.

2015-01-11_141331Stapling is the most fun part. Just make sure that you don’t cover up the holes where the screws are going to go back in.

2015-01-11_1528002015-01-11_1528082015-01-11_153222Screwing the whole thing back together is the most annoying part. Again, patience is key. Trim any excess fabric that is in your way.

2015-01-11_154512It’s kind of ridiculous that this whole project cost under a dollar, considering how much I like the end result.

Repurposing Unfinished Projects

challenge: How to revisit the incomplete objects from the past and find a place for them in the present.

2015-01-11_164450The dirty little secret of any maker of things is the UFO—the unfinished object. We all have at least one— a project that can’t be completed but also can’t be tossed. They are hidden away for weeks, months—or in my case, ten years.

If I am really going to go “out with the new and in with the old,” I have to revisit my UFOs. And I did. To do so, I first I had give up what I had planned for this piece to be back them and think about what it could be here and now.

2015-01-11_162953What you see here is the front piece of a completely imaginary argyle sweater. I knit it in 2005—specifically, in February and March during the weeks I was in the hospital after a really bad car accident. I must have asked someone to bring me some knitting needles and yarn from home, but I don’t remember. I do remember how I spent ages planning and designing and knitting this blue and green argyle pattern in my hospital bed while I was unable to walk. I was completely determined to knit myself a sweater.

2015-01-11_163006But this sweater was never going to exist, because I had no idea what I was doing. I was a beginning knitter and ravelry did not exist (neither did YouTube). You can see how my stitches were uneven, and how the blue and green yarns are thicker than the white yarn and did not stay flat. I also had no concept of how a sweater was constructed. And even I can’t make sense of my knitting notes now, although the argyle chart is pretty solid:

2015-01-17 11.40.36

2015-01-17 11.40.49So I knit this whole pseudo pattern, and then it sat, in a bag, doing nothing. As I got better at knitting, I became convinced it was unredeemable. It was a symbol of knitting failure. That is, until I rediscovered it while cleaning last weekend. This time it didn’t remind me of failure—I looked at it and remembered how much I had loved it and how it had been a bright spot in my life during a really dark time. I also still had the borrowed staple gun in my possession, and I had an idea.

2015-01-11_1633572015-01-11_163410

In keeping with “out with the new,” I went to the thrift store. I found a large framed image there for $2.50. The important thing about the frame was that had a removable back (those little black tabs around the back are always a good sign). I brought it home.

2015-01-11_164425I then lightly steam blocked the argyle piece, stretched it across what had been the print inside the frame, and stapled it into place. With some careful wiggling, I got it back into the frame and secured with the black tabs.

2015-01-11_172355Now my long abandoned argyle sweater project is a framed and mounted work of fiber art on my wall. And I can’t even describe how much joy I feel when I look up at it. Yes, I was crazy stubborn to try to design and knit my own sweater with no experience from a hospital bed. And yeah, it’s wonky and full of flaws. But I love it— I poured myself into it and I can see the beauty in it now. What was old suddenly looks new.


Tweaks & Alterations

The green cardigan of 2014

I knit a sweater! It took forever. But it’s finished and I love it.

2014-12-08 16.34.29

This is my version of the Mrs. Darcy cardigan. According to my ravelry project page, I started it on January 5, 2014. I sewed the final buttons on December 7, 2014.

2014-01-11 16.56.38 The post where I first described this sweater is here.

Everything went quickly at first. I finished the sleeves in January, but I stalled in February because I realized that I would need to modify this short, deep V neck cardigan to fit my long torso. I ended up using Wakenda’s modifications to the pattern. The funny thing is, her version looks very different from the original pattern—the V isn’t very deep. But I also added lots of extra length, so it actually ended up looking a lot like the original pattern!

2014-12-02 17.15.53

Here is it without buttons. I essentially made an extra long size small, blended to a medium nearing the shoulders. It used a little under 5 skeins of Cascade 220.

2014-12-07 22.23.27This was my first time ever sewing buttons onto knitting. I used this video tutorial and it helped quite a bit. You really have to make sure you compensate for the thickness of the sweater when you sew them on, especially if you make a cardigan that fits as snugly as this one. You also have to remove the cat before sewing them on. Obviously.

2014-12-07 23.37.16

Fun fact: since I’m a lefty knitter, the buttons are on the “wrong” side for a woman’s sweater! It’s knit in the round, you see. Yet another quirk of left-handed knitting.

2014-12-08 16.39.17

More pictures:

2014-12-08 16.31.59

from the front.

2014-12-08 16.33.36from the side.

2014-12-08 16.33.15

from the back.

2014-12-08 16.38.06

unbuttoned.

2014-12-08 16.39.29

detail of the bust darts I added (it does seem to improve the shaping) and construction of the shoulder. I had never done a bottom up sweater, so wakenda’s description of joining sleeves was much appreciated.

2014-12-08 16.39.44

I added an extra inch or so at the armpit when I seamed it together, mostly because when I started this sweater I did not have any muscle from climbing, but now I do, and those shoulders were gonna be tight (the forearms are a little snug, but that’s less of an issue).

2014-12-08 16.40.18

It takes me forever to finish a big knitting project like this, but I’m always happy with the results. Here’s to tacking another sweater in 2015!


Holiday Knits & Crafts

Three colorwork men’s hats

*Mild Warning—the Reindeer hat is slightly NSFW!*

This is a quick post to share some knit and crochet hats I’ve made. Some of them are things I made a long time ago but never shared (in those cases, sorry about the crappy quality of the old photos!). They all have three things in common—they are hats, they were made gifts, and they involved colorwork. They were all things I made for guys as well, but they don’t have to be for men only—I would wear any one of these hats.

Hats make great holiday gifts—they don’t take as much time or require as much fitting as other projects do, they are super practical, and you can probably make them with yarn in your stash. This patterns, as usually, are all available on the internet for free.

To the hats!

The Striped Beanie (Crochet)

The fastest way for me to make a hat is to crochet one. And the easiest way to make said hat more interesting is to add stripes.

2014-10-25 11.32.03

I made this beanie in a few hours using blue, gray, and black worsted weight wool from my stash. I placed stripes of blue and gray two rounds tall between stripes of black that were one round tall so no one color dominated.

2014-10-20 12.16.54

I do not actually have a pattern for this hat—I have done versions of it several times, and I adjust it to the recipient. But I would suggest using this free beanie pattern if you want to make something similar.

2014-10-20 12.18.372014-10-20 12.18.50

Here’s a version I made seven (!) years ago, this time out of two colors of bulky weight wool blend, with one stripe 5 rounds tall in the middle:

DSCF0799

(side note—look at how long my hair was then!)

The Swell Earflap (Knit)

Want something a little more challenging and with more ear coverage? Try Swell:

matt_in_hat_medium

This earflap hat has a basic repeating chart to form the wave pattern. You need to be comfortable with colorwork in the round, but once you get the hang of the pattern it’s not too difficult.

I will say that this pattern runs small! I am a loose knitter and I made the medium—it just fit him. Also, it looks best on very short or very long hair, but not so great on my medium-short curly bob:

swell-Photo_318_medium

That’s me trying to keep my hair under the earflaps without success.

In my version, I omitted the peace sign on the earflap and joined the flaps to the hat with knit stitches in stead of purls to make it more seamless.

swell-Photo_324_mediumswell-Photo_323_medium

Originally I did include the tassels, but the recipient preferred it without, and was able to remove them without difficulty.

The Procreating Ungulant (Knit)

Looking to make a hat with more complicated colorwork and a slightly NSFW motif? The Fornicating Deer is probably what you want:

DSC04259

This is hat is the full package—it’s seasonal, it’s intricate, and it features two deer in the process of making another deer. It also runs really small. Confession—the first time I made it, I got 3/4 of the way through a size small and had to rip it back. It was awful. But the final product (made with gray and black wool, worsted weight) turned great.

1217112314

My version was a weird size—I actually used Swell as a basis for it, sort of. Since the medium sized Swell hat had 88 stitches and did not divide by the 32 stitch chart, I actually started knitting at the beginning of the second tree and ended at the end of the first tree, then did this all over again (total of two times). This gave me a total of 90 stitches, which was close enough to the original swell pattern (I just increased twice before beginning the chart and decreased twice before starting the top decreases). It worked.

Surprisingly, with the colors I chose, the exact activities of said reindeer are not apparent until you really examine it closely. Heh.

Original Knitting Patterns, Quick Knits & Crafts, Tweaks & Alterations

Knitting Recipe Remixes: Shetland Pony Drink Cozy + Handbook Fingerless Chevron Mitts

Recipes. I use them all the time in cooking—I’ll certainly be consulting a few for the Thanksgiving dishes I’m making next week. However, I usually see the ingredients and directions as more suggestions than mandates. And I often combine elements of different recipes to get the final results I am looking for. I like to remix my recipes.

Lately, that’s what I’ve been doing with my knitting as well. It’s finally knitting weather here in California, and I have been working on projects big and small. But I can’t resist remixing the recipes—combining elements of two patterns to get the finished object I really want. It’s one step above following a pattern with a few modifications, which is easy but can only transform the pattern so much. And it’s one step below writing your own pattern, which is great for creating exactly what you want but takes a lot of time and effort to do properly.

I’ve got two remixed knitting recipes for you. Both are small, relatively quick knits.  They all involve bits of colorwork, so they are perfect for stash busting. They also make great gifts—and you won’t find them anywhere else!

Shetland: The Pony Drink Cozy (ravelry)

2014-11-17 13.36.16

If you have not seen the video of Shetland Ponies Wearing Cardigan Sweaters, you should really go do so now. I’ll wait.

shetlandsweaters

My friend and fellow knitter, who loves shetland ponies and this video in particular, had a birthday recently. This was the gift I gave her.

Ingredients

20-25 yds main color, worsted weight

10-15 yds contrasting color, worsted weight

2-3 yds scraps of three colors for sweater, sock or lace weight

knitting needles (sz 7 or whatever gives you gauge)

tapestry needle (I used metal not plastic)

Patterns Used

f. pea’s beer cozy (raverlyblog)

Jóhanna Hjaltadóttir’s Hestapeysa sweater (ravelry, pdf)

Directions

The basic idea is to knit the beer cozy pattern FLAT with the pony chart from the sweater centered in the middle. Cast on 32 stitches and work in ribbing as directed for beer cozy. (I don’t have many in-progress shots but you can at least see how it looks flat):

2014-11-17 13.24.17

After work the ribbing from the beer cozy, start the pony chart. To center it, do some basic math:

32 (beer cozy width) – 18 (pony chart width) =14 stitches /2 = 7 stitches of main color on each side

Complete chart (I added one contrasting color stitch extra on the head to give it that shetland mane look). Add 3 more rows, then finish with top ribbing (if you skip these rows, the pony’s head gets squished into the ribbing). Bind off in ribbing and leave a 12-15 inch tail for sewing.

Thread your tapestry needle with one of the sweater yarn scraps (if you have different thicknesses of yarn, start with the thickest). Outline the outer edge of what will be the cardigan, stitching around the lower neck, partway down the front legs, and half way down the back. With the second color, stitch several parallel lines diagonally across the sweater. With the third color, stitch several lines perpendicular to the first set of lines. This will create the illusion of a sweater. Be careful to keep the tension on the yarn as even as possible, because the whole thing needs to stretch over a glass.

2014-11-17 13.35.21

Weave in and cut all the ends except the long main color one at the bind off edge. With tapestry needle, use kitchener stitch to connect the two edges of the beer cozy. Weave in and cut this end, then admire how your drink sweater is a pony wearing its own sweater!

Handbook: Fingerless Chevron Mitts (ravelry)

2014-11-19 15.33.39

A few weekends ago, I went to this conference, where all of the presenters were contributors to an upcoming Oxford Handbook. As I listened to the presentations, I worked on these fingerless mitts. Much like publishing a handbook, with these fingerless mitts I had to take a lot of different pieces—different colors, different lengths—and try to blend them into a seamless finished product.

Ingredients

100-120 yds main color, worsted weight

5-20 yds each of four contrasting colors, worsted weight

double pointed needles (size 6 or whatever you need to obtain gauge)

tapestry needle and patience

Patterns used

Maggie Smith’s Fingerless Mitts (ravelry)

Kat Lewinski’s Those Zig-Zag Mittens (ravelry, blog)

Directions

Just a heads up—this recipe involves a lot of weaving in ends! But other than that its fast and satisfying. I had never done a chevron (zig zag) pattern before, and I really enjoyed it.

Before you cast on, decide how many chevron rows you want of each color and the order that you want them in. You may want to place strands of each yarn next to each other to see what you like best. Make sure to include at least one section of the main color!

Cast on—you can either cast on 44 stitches as the Zig Zag patterns says, OR you can cast on in a higher or lower multiple of 11 for bigger or smaller hands. Just know that chevron is very snug, so it can’t be too small as it won;t stretch as much as stockinette. I have small hands and I knit loosely, so I cast on 33 stitches and then did only three total repeats of the chevron pattern, not 4: (k2tog, k3, M1L, k1, M1R, k3, ssk).

Important tip! On the end of first round of a new color, knit in pattern to the last stitch, then grab the tail/non working yarn from where you joined the new color, and knit that together with the working yarn on the last stitch of that first round. It will help reducing the hole that tends to occur at the color change. (I didn’t figure this out until rather late in the knitting process.)

2014-11-19 15.35.14

After you switch back to main color, do one more round in the zig zag mitts pattern. Then switch back to the fingerless mitts pattern to make the thumb increases. But instead of doing increases until you get to the designated number of stitches as that pattern says, just add 14 to whatever number of stitches you started with. In my case, 33 + 14 = 47 stitches is when I did the bind off for the thumb.

Now you have a choice—you can increase or decrease your stitch count to a multiple of four and then do the ribbing at the top like the fingerless mitt pattern says, or you can keep your stitch count and do a small repeat the chevron stitch at the top instead. That’s what I did.

2014-11-19 15.35.28

If I had to do it over again, I might have begun the bind off a bit sooner. Just make sure to do several purl rows before you bind off, as knit stockinette will tend to curl. I haven’t blocked these yet so I’m hoping some of the curl in mine will come out.

Further option:I also added a few more rounds at the thumb—two knit rounds, four purl rounds, then bind off.

2014-11-19 15.34.20

Are you ready for the least fun part? Because While your fingerless mitt will look like this on the outside…

2014-11-18 23.34.07

It will look like this on the inside. So: get your tapestry needle and start weaving in all those ends. If there are any gaps occurring where you changed color, now is the time weave through those spots so they are less visible. Have patience, it will be worth it.

2014-11-19 15.35.07

I was too excited and I photographed these mitts before blocking—but look at those lovely colors! There’s something about chevron that looks classier than stripes. It’s nice to have a stash busting project that uses the leftover bits of colorful yarn that I love.


Historical Knits & Crafts, Holiday Knits & Crafts

Remembrance Knits: Cardigan Sweaters from The Great War

Three years ago—on November 11, the anniversary of World War I’s end—I started this blog. Every year since, on what is known as Veteran’s Day in the U.S. and Remembrance Day in the Commonwealth, I have shared free knitting and crochet patterns from my thrifted 1918 copy of Fleisher’s Knitting and Crocheting Manual (16th edition), which dates to the era of the Great War. (Check out the 2012 post and the 2013 post for more patterns.)

I’m continuing the tradition this year with a special post of all cardigan sweater patterns. There’s a little something for everyone—knitting and crochet, children’s and adult’s sizes. I decided to share all sweater patterns partly because it’s National Knit a Sweater Month, and partly because I have finally seen what one of these 100-year-old sweaters looks like in color! Way back in February, Cassandra of Knit the Hell Out knit the Pensacola Sweater from this knitting manual (You can read about why she made it and how she interpreted the pattern here). You should really check it out!

Screen Shot 2014-11-11 at 12.28.09 PM

Sweaters are inspiring me this year. So without further ado: this year’s free knitting patterns!

Bobby Sweater and Rosemary Sweater (knit)

EPSON MFP image

Have some little ones? Then check out these adorable mini cardigans for children. Like most of these patterns, there are no sizes listed. The “Germantown Zephyr” yarn was a probably a DK or worsted weight yarn and a ladies vest took about 6 balls to make, if that helps. As the Bobby Sweater requires only 4 balls, I would guess it’s probably more of a toddler size, and the Rosemary Sweater at 8 balls was probably intended for preschool to early elementary school age children, but again, it’s hard to say.

I love the simplicity of Bobby—only 3 big buttons!  But I also love the details on the Rosemary, with its fun collar, interesting stitch pattern, and off center row of buttons.

Athol Sweater (knit)

EPSON MFP image

Who can say no to Angora cuffs? Ok, that’s not really the biggest appeal of this women’s cardigan to me. What I like about Athol is the stitch pattern, which looks easy enough but is eye-catching with its ribs and ridges. I also really appreciate that sweater model is making use of those pockets.

EPSON MFP image

Athol also comes with a handy schematic of for sweater construction. It looks pretty straightforward—back, set in sleeves, two front pieces. (Guess you’re on your own for attaching the collar.)

Northwoods Sweater (crochet)

EPSON MFP image

One of the interesting things about this Fleisher’s Manual is how many crochet patterns it had. Northwoods is a boy’s cardigan done in crochet with a worsted weight wool yarn. I think every detail of this sweater is nicely done—the pockets, the cuffs, the shawl collar.

While I’m not sure what size it is, this patterns also comes with a schematic for how to piece it together. Once you have swatched to get gauge, you could figure out approximately what size you will end up with.

EPSON MFP image

P.S. There is also a man’s version of this sweater, but it’s missing pockets! Why?? I don’t know, but it just didn’t look as nice as the boys version.

Man’s Sweater (crochet)EPSON MFP image

So instead of sharing the adult Northwoods, I thought I’d share the creatively named “Man’s Sweater.” Man’s is also crochet— not exactly a common phenomenon for men’s cardigans! (I looked on ravlery for crochet men’s cardigans and there are like, six total.) I think the upper pockets are a bit ridiculous (and I swear they are not lined up properly in the photo) but I like the button collar and the overall construction looks very pleasing.

Hope you enjoyed this year’s 1918 patterns! I promise to have some of my own knitting posted soon.