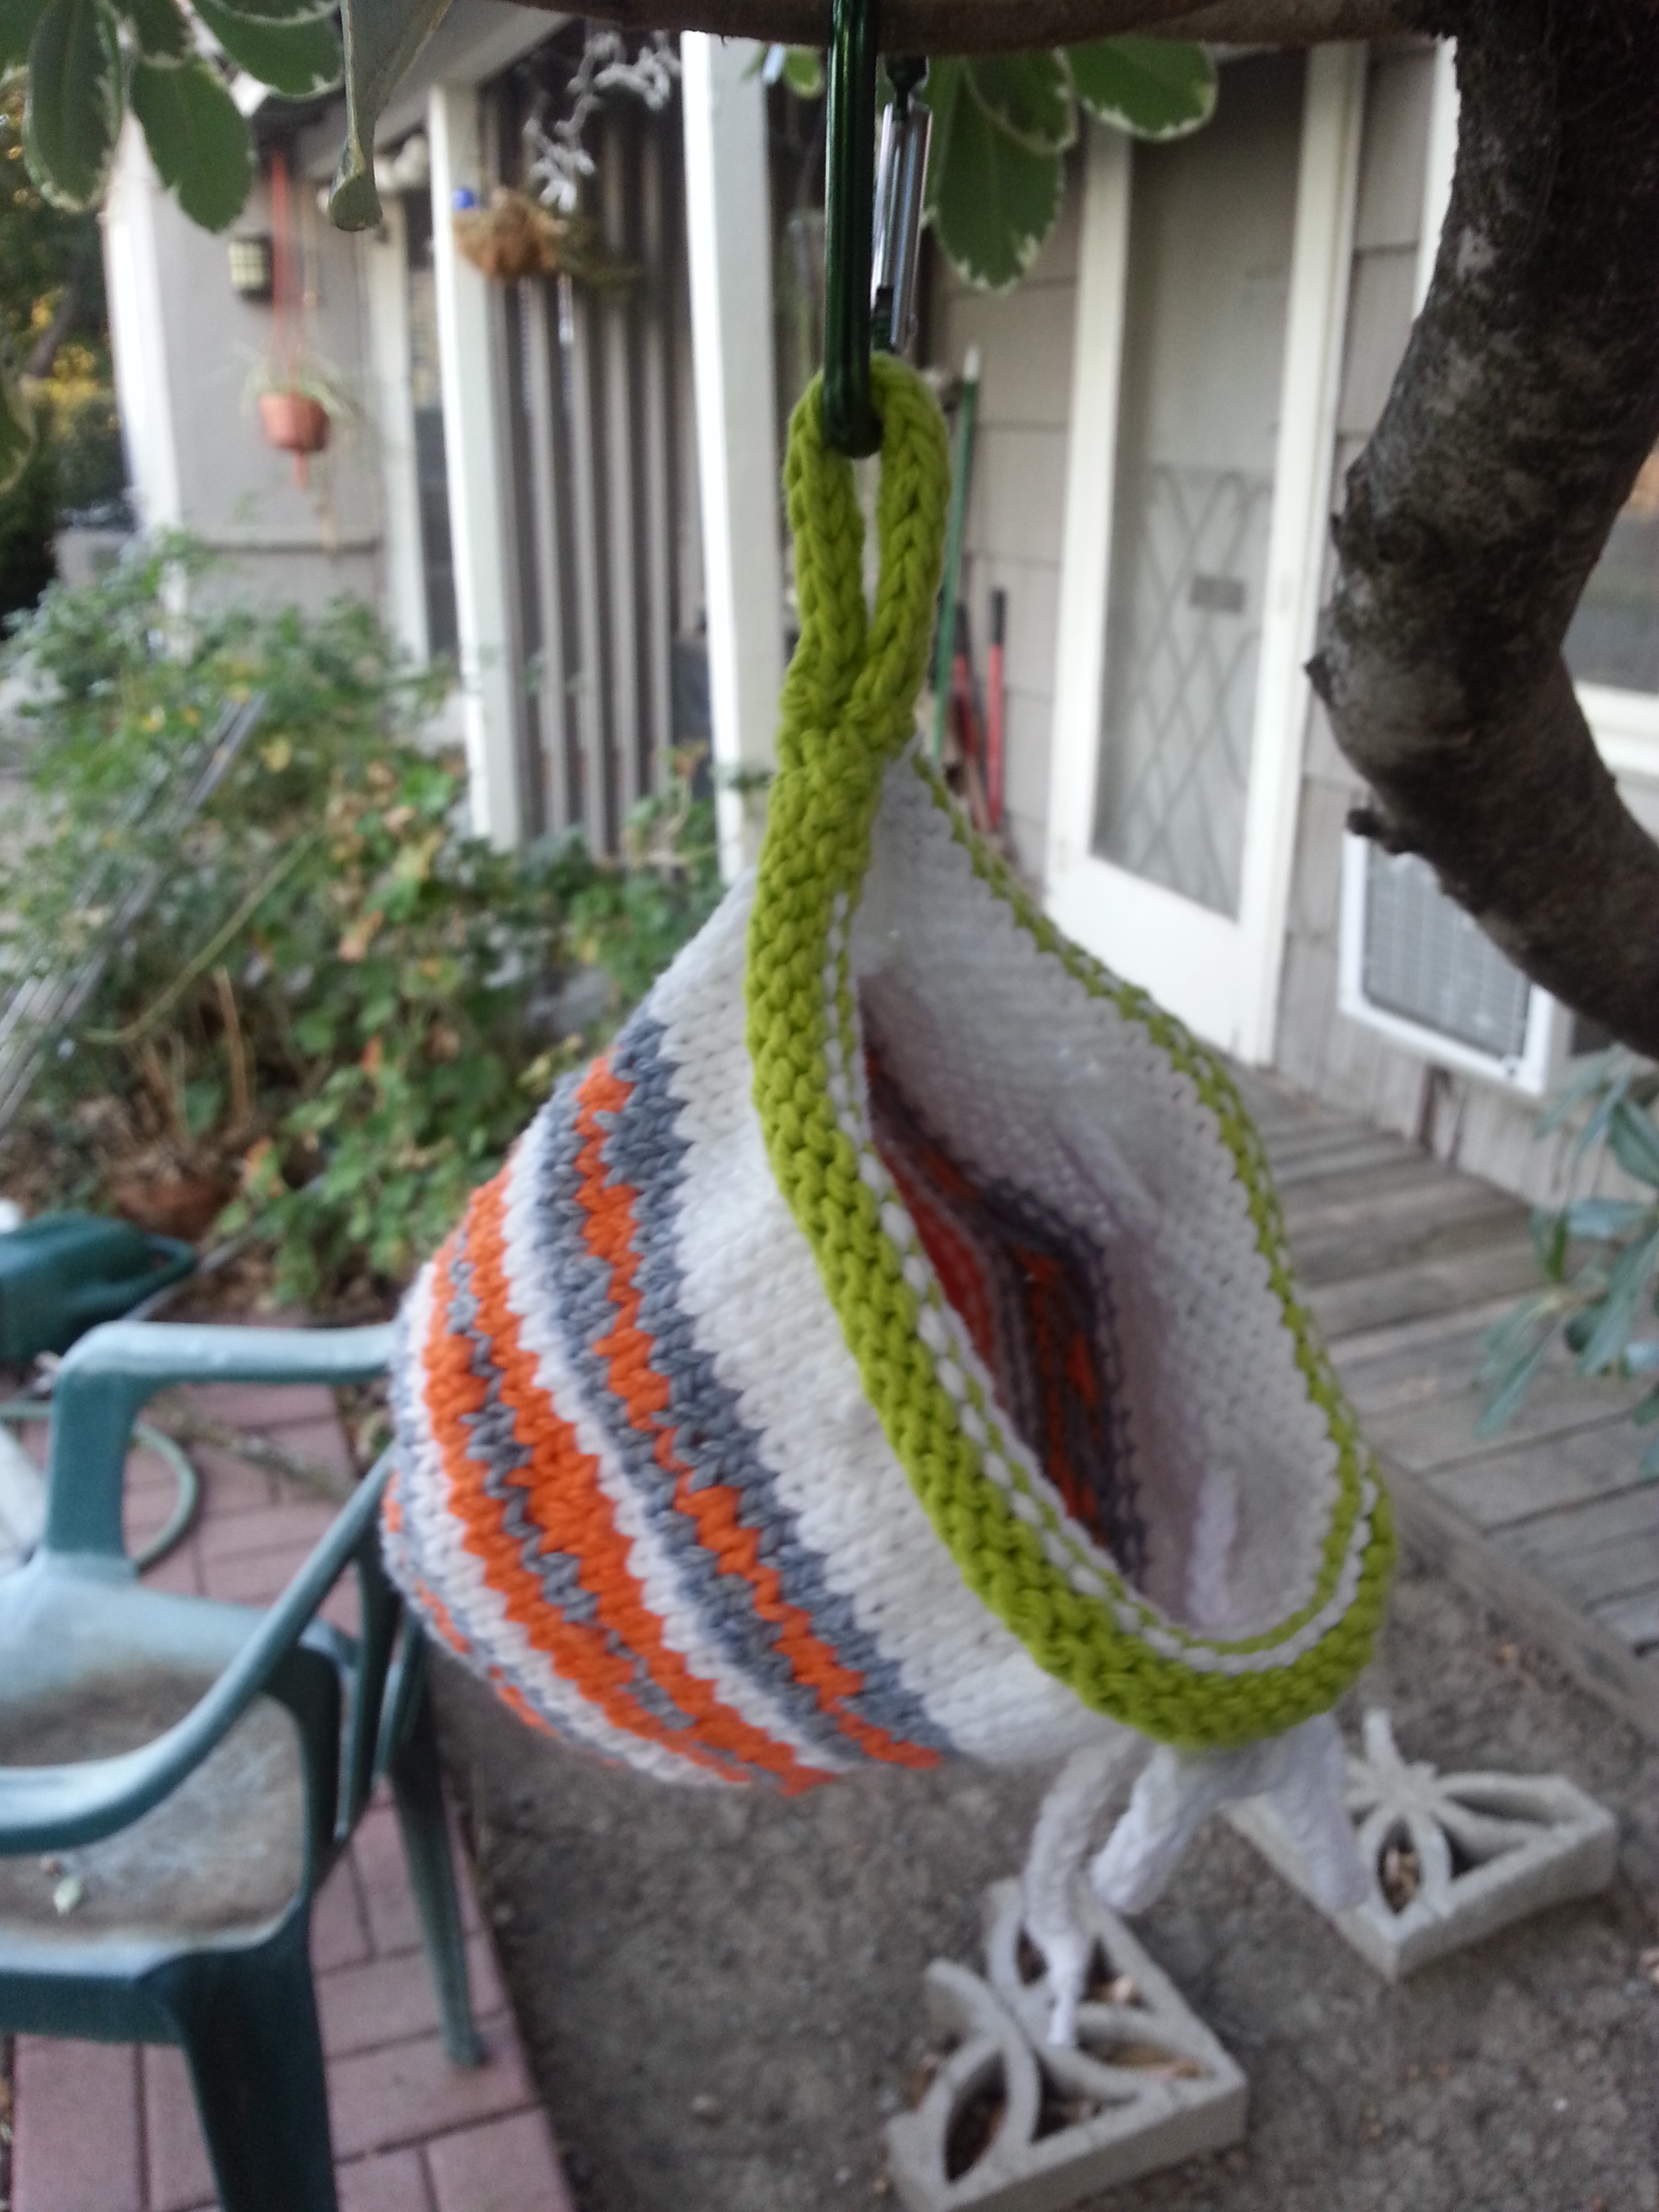
As promised, I have a new free pattern in my series of activity-related knitting. Last time it was a pattern for a colorful yoga mat bag. This time it’s pattern to make a uniquely colored chalk bag for rock climbing! Introducing, Beta:
I tried rock climbing for the first time ever in a climbing gym about seven months ago. I was amazed at how much I liked it, and I’ve climbed there almost every week since June. I never thought of climbing as my kind of activity, but I love that it is both a mental and physical challenge. (A side benefit of the latter is that I have actually have some upper body strength now!)
One of the things that climbers often have on their person is a chalk bag, as chalk can help you get a better grip on holds when your hands start to get sweaty. After seeing someone who had a crocheted chalk bag at the gym (she received it as a gift and didn’t know how it was made), I decided I had to knit my own. I also decided that it should match the other gear I use while top roping. So I wrote a pattern that incorporates the colors of my belay device, harness, and shoes, AND for good measure, loosely mirrors the pattern on the strap of my particular harness ( this one by Mammut) with stranded colorwork. You can kind of see all this in the photo above. Here’s a lovely (blurry) action shot of me “chalking up” with my new chalk bag:
In climbing terms, ‘beta’ usually refers to descriptions of or advice about a particular route. I thought it was a fitting name for a knitting pattern like this one. I don’t expect that many people will want to replicate the exact colorwork that I have done, because it is so tailored to my climbing gear. But you can use this pattern as advice for how to make a chalk bag in whatever style and color you want.
[EDIT: I almost forgot to include some “in progress” pics!]
The only thing I don’t have good advice on is how much yarn you need, because I used leftovers from the Bernat Handicrafter Cotton that I had from making the yoga mat bag. I would guess that since skeins are 80 yds/50g each, to be on the safe side you’d want to have about 1/2 skein of white, 1/3 skein each of orange and grey, and 1/4 skein of green, but I did not measure or weigh my yarn so I am truly guessing. In the future I will try to take notes!
I’m going to post the whole pattern below, but for the first time ever I have made a pattern into a free ravelry download, so if you are on ravelry, you can get the pattern there as well, and post your own finished version!
Beta: A climber’s chalk bag patternYarn: Worsted weight cotton yarn in white, green, gray, and orange
(this version was made with Bernat Handicrafter Cotton)
Materials:
One set of double pointed knitting needles, size 4
Yarn needle
Optional: stitch marker for start of round
Gauge:
18 stitches and 26 rows= 4 in. square.
Gauge is not super important as long as you can fit your hand inside the bag.
Chalk bag pattern
Cast on 56 stitches in green, divide onto four needles (14 stitches on each)
Round 1-4: knit
Rounds 5-8: switch to white, knit
Round 9: (k6, yo, k2tog), repeat to end of round
Rounds 10-13: knit
Colorwork section:
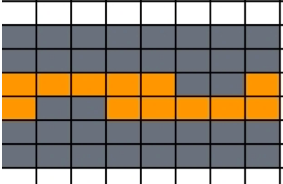
Rounds 14-21: Work Chart 1.Chart 1
Rounds 22-29: Work Chart 2.
Chart 2
Rounds 30-37: Work Chart 1 again.
Decrease section:
Round 38: with white, knit
Round 39: (k2tog, k1) repeat until last two stitches remain, k2tog
Round 40: knit
Rounds 41-46: Repeat rounds 39 and 40 three times
Round 47: k2tog all around
At this point you should have about 6 stitches remaining.
Break yarn leaving a long tail, pull through remaining stitches. Weave in ends.
I-cord closure
With white yarn, cast two stitches onto a double pointed needle
Knit across, but do NOT turn. Slide stitches to the other point of the needle
Repeat until I-Cord is the desired length, approximately 30 inches. Cast off.
Weave through the yarn over holes.
I-cord carabiner loop
Cast on 4 stitches in green, leaving a long tail (8-10 inches) for sewing
Knit an I-cord as for closure
When I-cord is 3 inches long, cast off stitches leaving another tail of yarn.
Using yarn needle, sew tails of yarn into the bag at the desired location.
Liner options:
If you sew, you can make a fabric lining for the inside of the bag and stitch it in place. Otherwise, putting a zip closure plastic baggie inside or using a chalk ball will minimize the amount of chalk that falls out. A tighter gauge will also help loose chalk remain inside.
If you prefer written instructions to charts, I’ve typed them up below:
Chart 1 written out:
Round 14: knit
Rounds 15-16: switch to gray, knit
Round 17: (k1 orange, k2 gray, k5 orange), repeat to end of round, carrying floats in back
Round 18: (k5 orange, k2 gray, k1 orange), repeat to end of round, carrying floats in back
Rounds 19-20: with gray, knit
Round 21: switch to white, knit
Chart 2 written out:
Round 22: knit
Rounds 23-24: switch to orange, knit
Round 25: (k5 gray, k2 orange, k1 gray), repeat to end of round, carrying floats in back
Round 26: (k5 gray, k2 orange, k1 gray), repeat to end of round, carrying floats in back
Rounds 27-28: with orange yarn, knit
Round 29: switch to white, knit
Abbreviations used:
k = knit, yo =yarn over, k2tog =knit two together
As before, you must ask my permission before reproducing any of the content here, and when you do, cite me as the source!
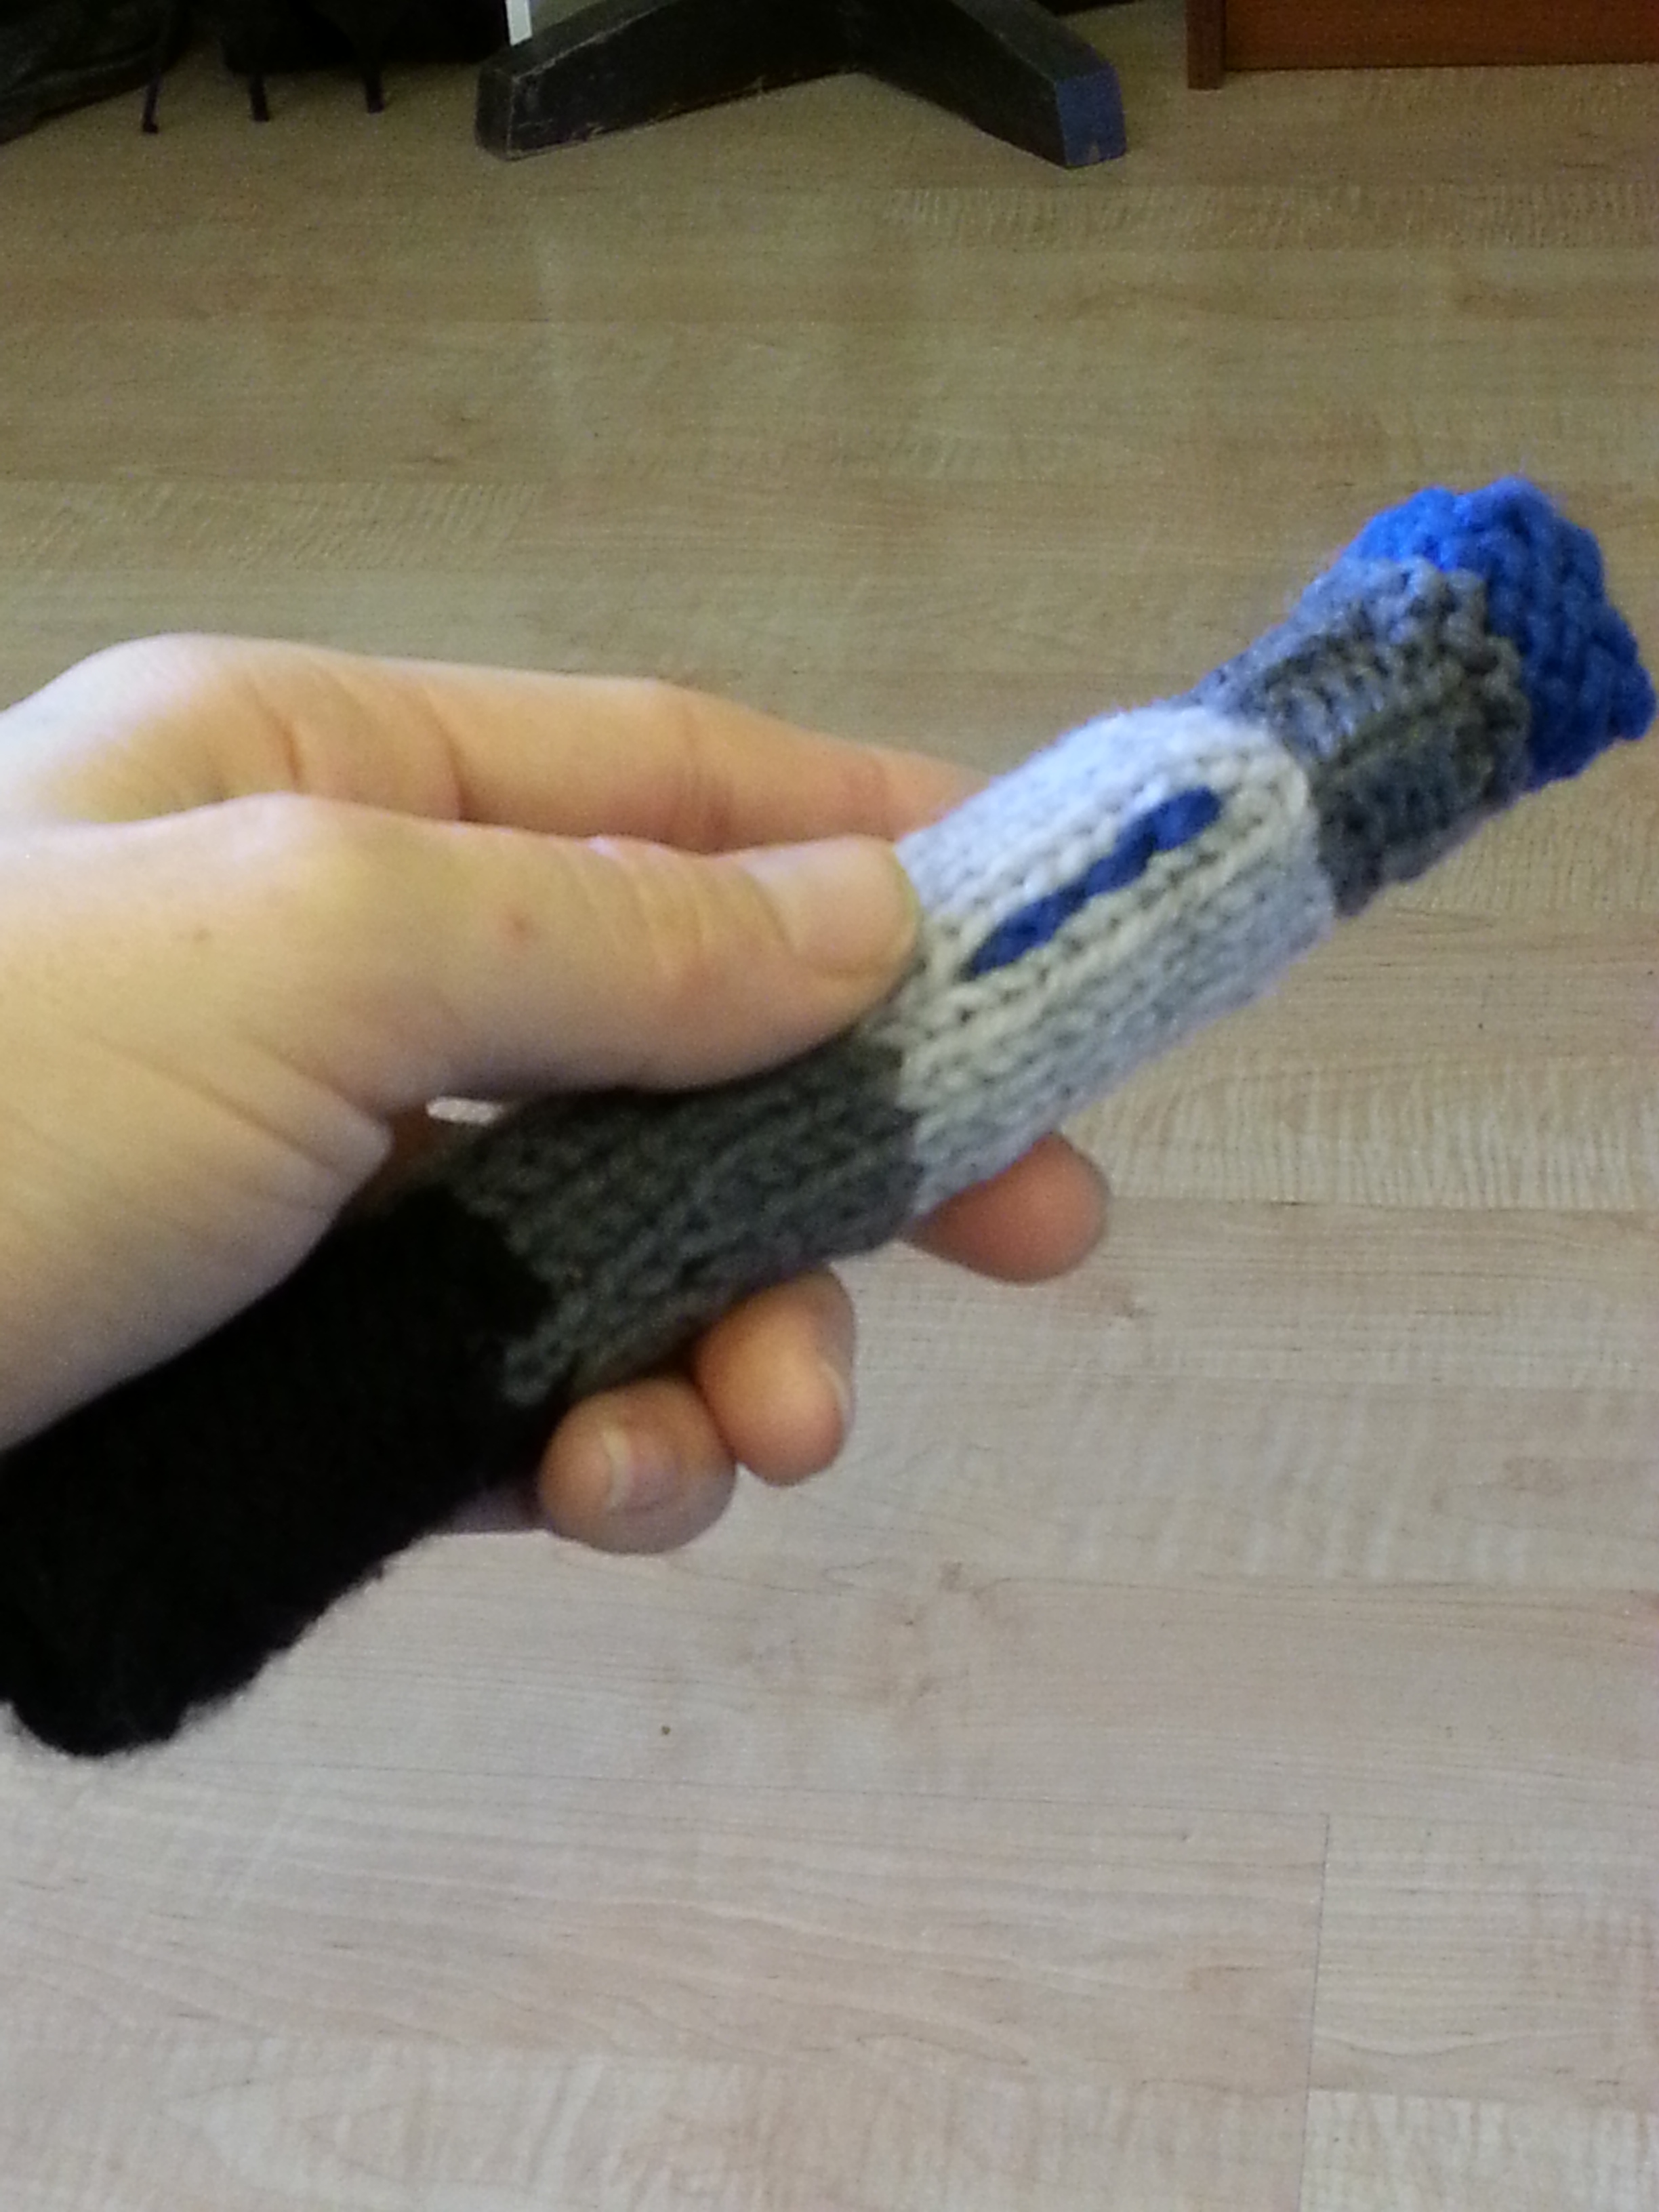
My blog reached 10,000 views today! To celebrate, I’m sharing details about my most recent finished object—the 10th Doctor’s sonic screwdriver, which I have conveniently modified to serve as a chapstick holder!
(Yeah, that’s right, because making a TARRIS pillow was not enough whovian knitting for me…)
This project is a modification of a modification of an original pattern for a Doctor Who sonic screwdriver. That pattern was for the sonic used by the 11th Doctor (Matt Smith), which is different in shape and size. I found this modification from user Cordetta on ravelry that changed the colors and some of the shape to be more like that of the 10th Doctor (David Tennant), which is what I wanted. I have to give a lot of props to her mod for helping me out! But I had to modify it even further to make it shorter and tighter to fit two chapsticks with just a little room on the ends.
To be honest, when I finished this project it was late and I did not record every single detail of my knitting. But I wrote down enough to tell you approximately how I did it.
10th Doctor’s Sonic Chapstick Holder
materials:
-size 3 double pointed needles (set of 4), yarn needle.
-worsted weight yarn in black, dark gray, light gray, and blue
Cast on 9 sts in black, divide over three needles, and join to knit in the round, being careful not to twist stitches.
Rnds 1-2: k all sts
Rnds 3-5: p all sts
Rnds 6-10: p all sts
Rnds 11-12: k 1 grey, p 2 black*
Change to dark gray
Rnd 13: k all sts
Rnd 14: k1, m1, k to end of rnd (10sts)
Rnd 15: k all sts
Rnd 16: k5, m1, k to end of rnd (11sts)
Rnd 17: k all sts
Rnd 18: k9, m1, k to end of rnd (12sts)
Rnd 19: k all sts
Rnd 20: k2, m1, k to end of rnd (13sts)
Rnd 21: k all sts
Rnd 22: k7, m1, k to end of rnd (14sts)
Change to light gray
Rnd 23-35: k all sts
Rnd 36: k1, k2tog, k 2, k2tog repeat to end of rnd (11sts)
Rnd 37: k2, k2tog, k5, k2tog, k to end of rnd (10sts)
Change to dark gray
Rnd 38: k all sts
Rnds 39-44: k1, p1, repeat to end of round
Rnd 45: p all sts*
Change to blue
Rnd 46: k all sts
Rnds 47-49: p all sts
Rnd 50: k3, k2tog, k3, k2tog (8 sts)
Cast off loosely.
With blue yarn and yarn needle, stitch a straight line lengthwise up the light gray section.
*if you haven’t done colorwork before, consider skipping these two rounds and going straight to the gray section, it’s kind of annoying to do. If you chose to do it (I promise, it looks cool!), be careful to move the black yarn to the inside of the work at the end of the last round.
**at this point, if you want to weave any of the ends into the inside of the tube, do it now! It will be too tight to turn it inside out after the final section.
As always, remember that my gauge is looser than most—use your own tube of lip balm as a guide. The way I made mine, both ends are open but they are tighter than the middle section, so the chapstick naturally remains inside until I push it out. I’m sure there are ways you could make a closure at the top or bottom, but I found I didn’t need it.
The sonic screwdriver chapstick holder—it doesn’t work on wood or deadbolts, but it does work on dry lips!
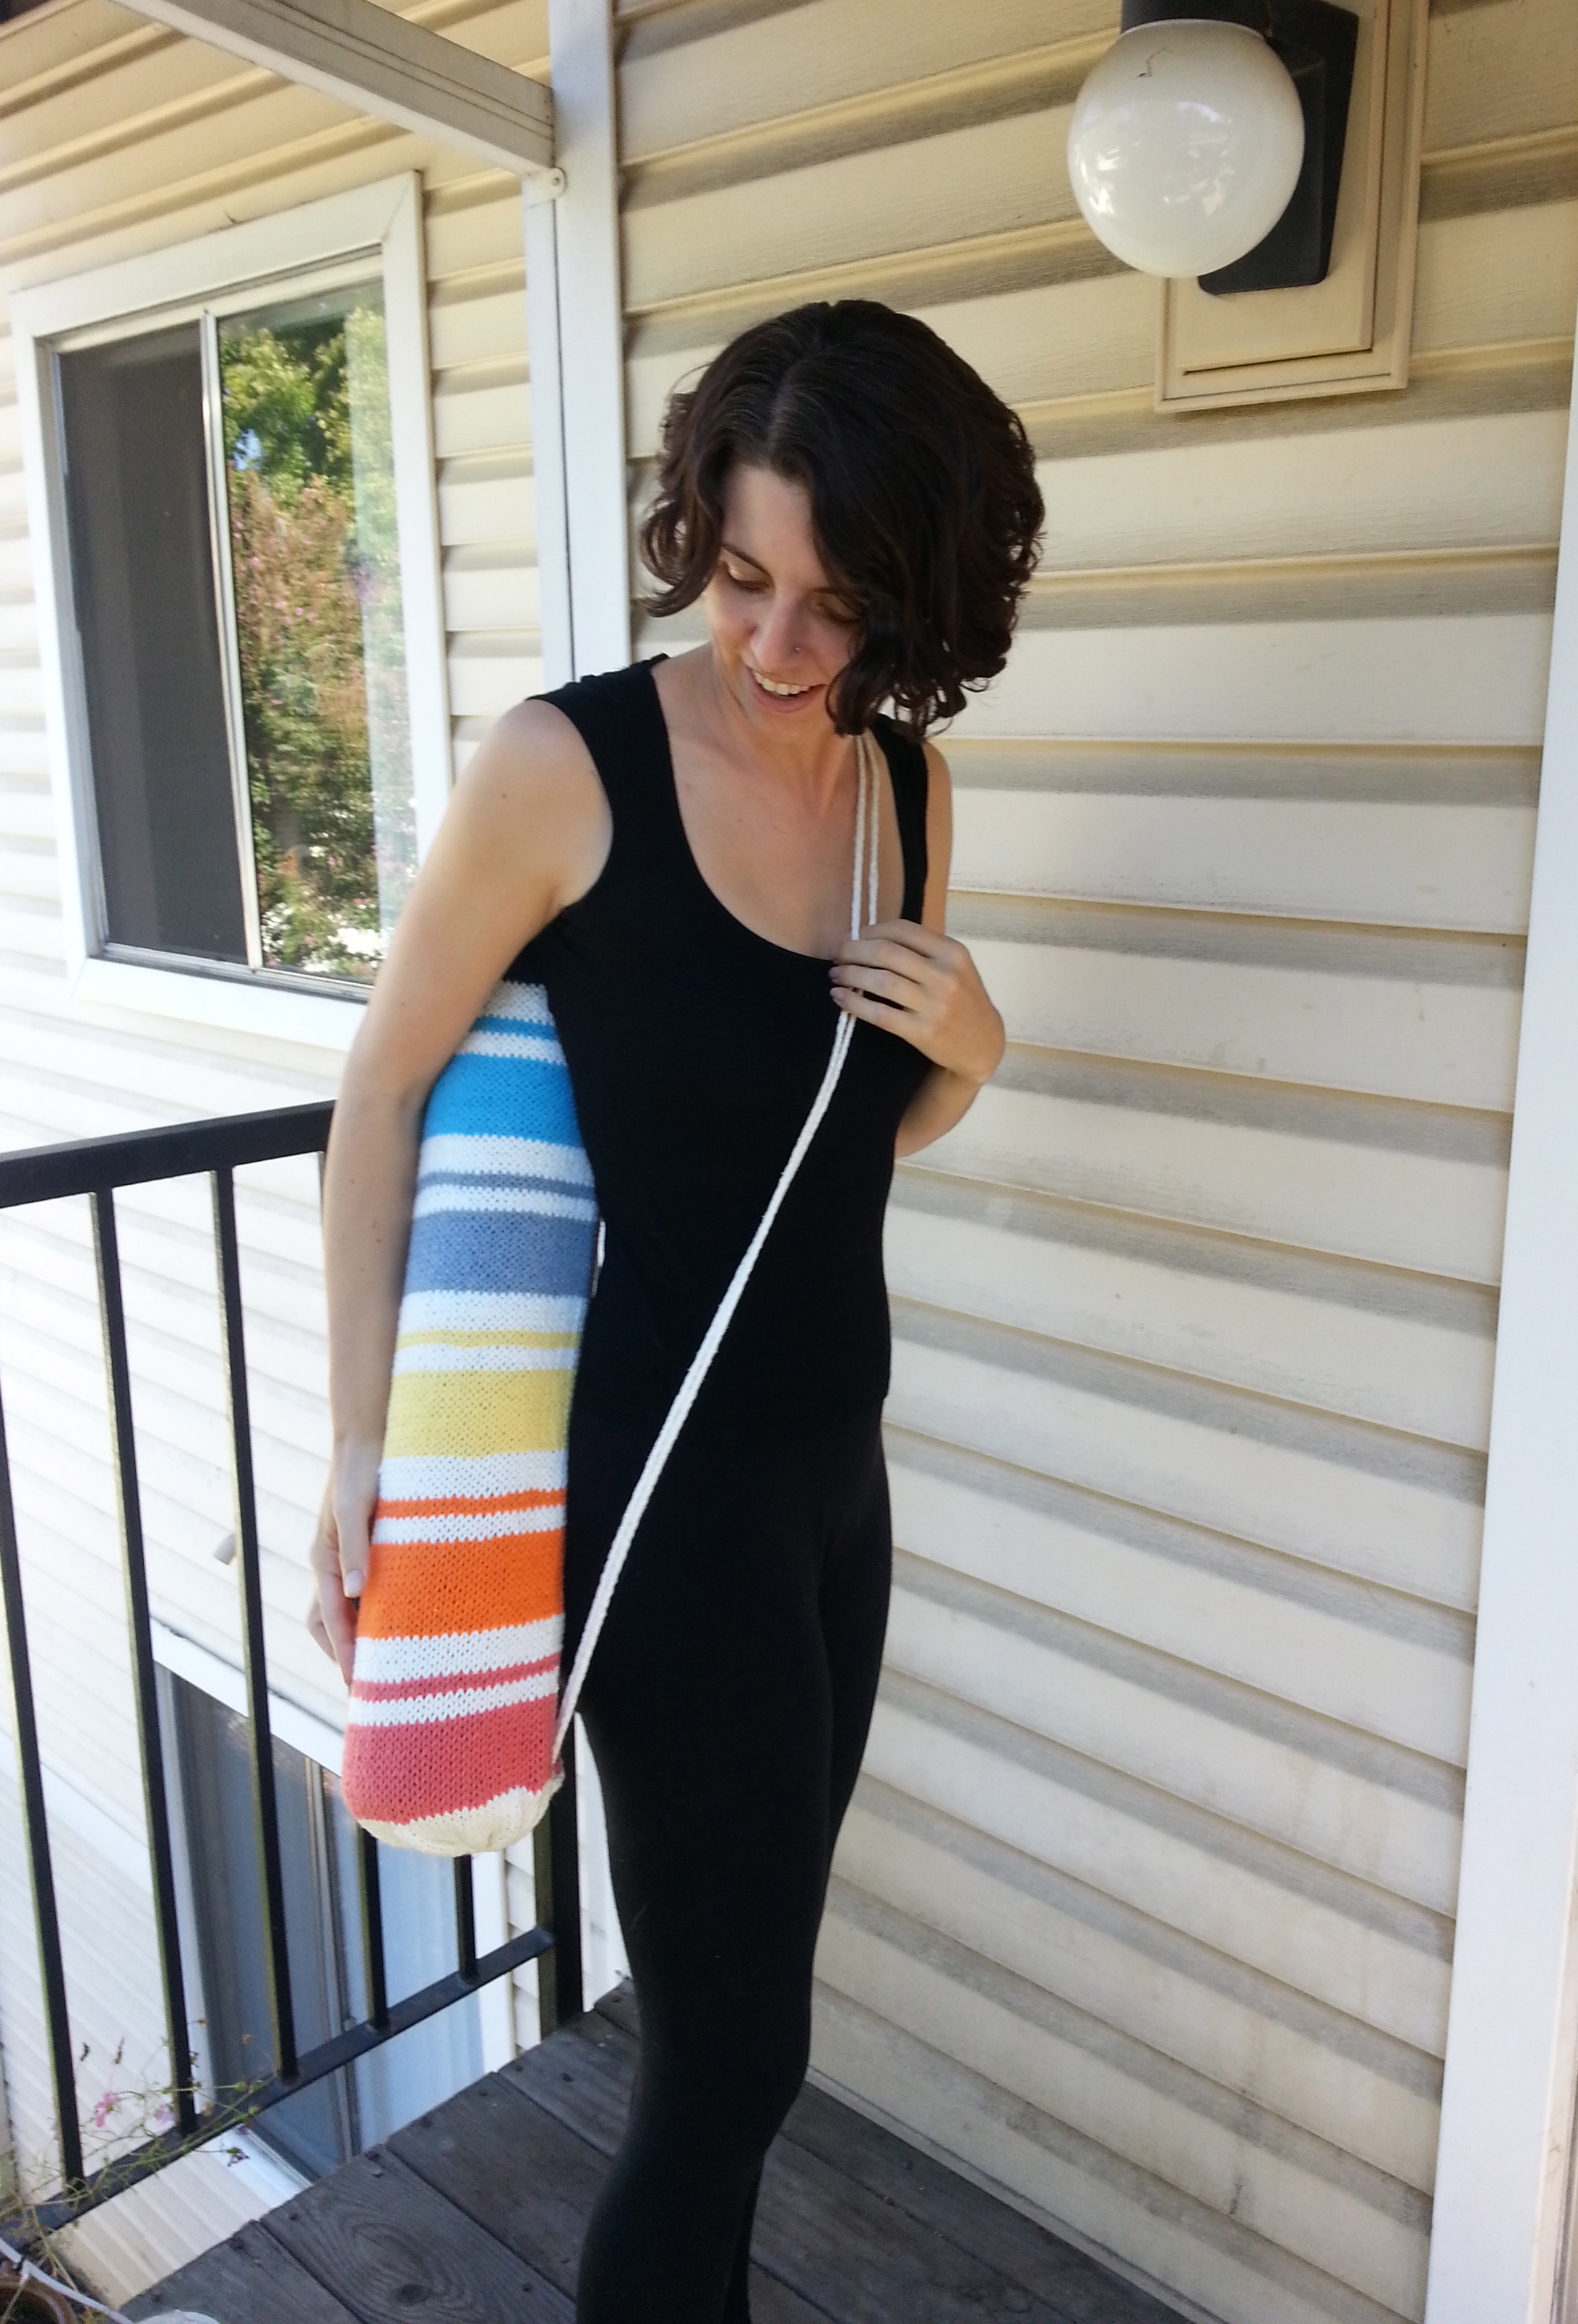
Happy 2014! I have been meaning to share this knitting pattern for a Yoga Mat Bag, and I figure the start of a new year is probably a great time to put it out there. (I’ve actually got a series of activity-related knits I’m planning to write about—stay tuned). I have done some yoga off and on for years, but this year but I hope to do even more. I think this pattern is perfect for (almost) mindless knitting on those cold January nights, and it will help you keep your New Years’ resolution to be more healthy—well ok, it may not actually help you do a sun salutation or attempt a headstand, but it might inspire and motivate you nevertheless.
Oh and did I mention this my first ever pattern??
I never originally set out to make up my own patterns. I reasoned that it would be too much work. However, as I accumulated more years of knitting experience, I found that I was heavily modifying certain patterns. (I originally had this pattern up on ravelry as an extreme variation of this pattern but I now think mine is significantly different).
I named this pattern Sunrise because that’s what the colors remind me of, and because last summer I went to an early morning yoga session in a park that was glorious, and it reminds me of then (yep, that’s me, yoga-ing on the grass). This began as a modification but morphed into my own design, particularly the color work. It’s no masterpiece and it may have some errors, but I have decided to try and write it up, as a free pattern for you.
Sunrise— A Yoga Mat Knitting Pattern
(Quick note—please ask my permission before reproducing any of the content here, and when you do, cite me as the source! I don’t mind sharing this pattern as long as it’s for non-commercial purposes.)
White (2 skeins), Tangerine, Hot Orange, Banana Yellow, Stonewash, Hot Blue, Indigo ( 1 skein each)
One size 6 circular knitting needle (12 inches) or double pointed needles (or size needed to obtain gauge)
yarn needle
Gauge:
4.5 stitches per inch
To fit a yoga mat approximately 24 inches wide and 16 inches around when rolled up
Directions:
Cast on 35 stitches in White, leaving a long tail of yarn for later. Do not join yet.
Round 1: Knit into front and back of each stitch [70 stitches total]
Round 2: Purl
Round 3: Join in the round. Knit
Rounds 4-12: Knit
Round 13: Switch to Tangerine. Knit.
Rounds 14- 23: Knit
Round 24: Switch to White. Knit
Rounds 25-26: Knit
Round 27: Switch to Tangerine. Knit
Round 28: Knit
Round 29: Switch to White. knit.
Round 30-33: Knit
For remaining colors: repeat rounds 13-33. (The patter will be 11 rounds of color, 3 rounds white, 2 rounds color, 5 rounds white)
After doing this for 6 colors total, finish as follows:
Knit 5 rounds White
Eyelets: knit 2, yo, k2tog. Repeat until end of round.
Knit 3 rounds.
Cast off.
Weave in ends. Thread long tail of yarn from the beginning of the project through the cast on loops and draw together until tight. Secure end of yarn tail to the bag.
I-cord Drawstring:
Cast on three stitches.
Knit across, do NOT turn.
Slide stitches to the other point of the needle.
Knit across, do not turn, slide stitches to the other point of the needle.
Continue until you have 75-80 inches of I-cord. Cast off.
Thread one end of the drawstring through the eyelets at the top. Fasten both ends of the drawstring securely to the bottom of the bag.
Notes:
I am a loose knitter, always have been. You may want to go up several needle sizes if you are a tight knitter.
This is a great project for using up small amounts of cotton yarn. I didn’t calculate how much I used of each skein but I don’t think it would be hard to adjust the pattern to the yarn you have on hand (a really conservative estimate of yardage would be maybe 280ish, based on other patterns?)
The coolest part of this design is that when you put on the strap, the bag cinches up at the top on its own. I can’t take credit for this idea, I’ve seen it on other yoga bags, but I figured out how to do it myself. Perfect for taking your yoga mat with you on a bicycle!
I’ve been working on two big knitting projects and one small one in the last few months. It just so happens that all of them were gifts, and all of them were blue. Now that they are all completed, I can share them with you!
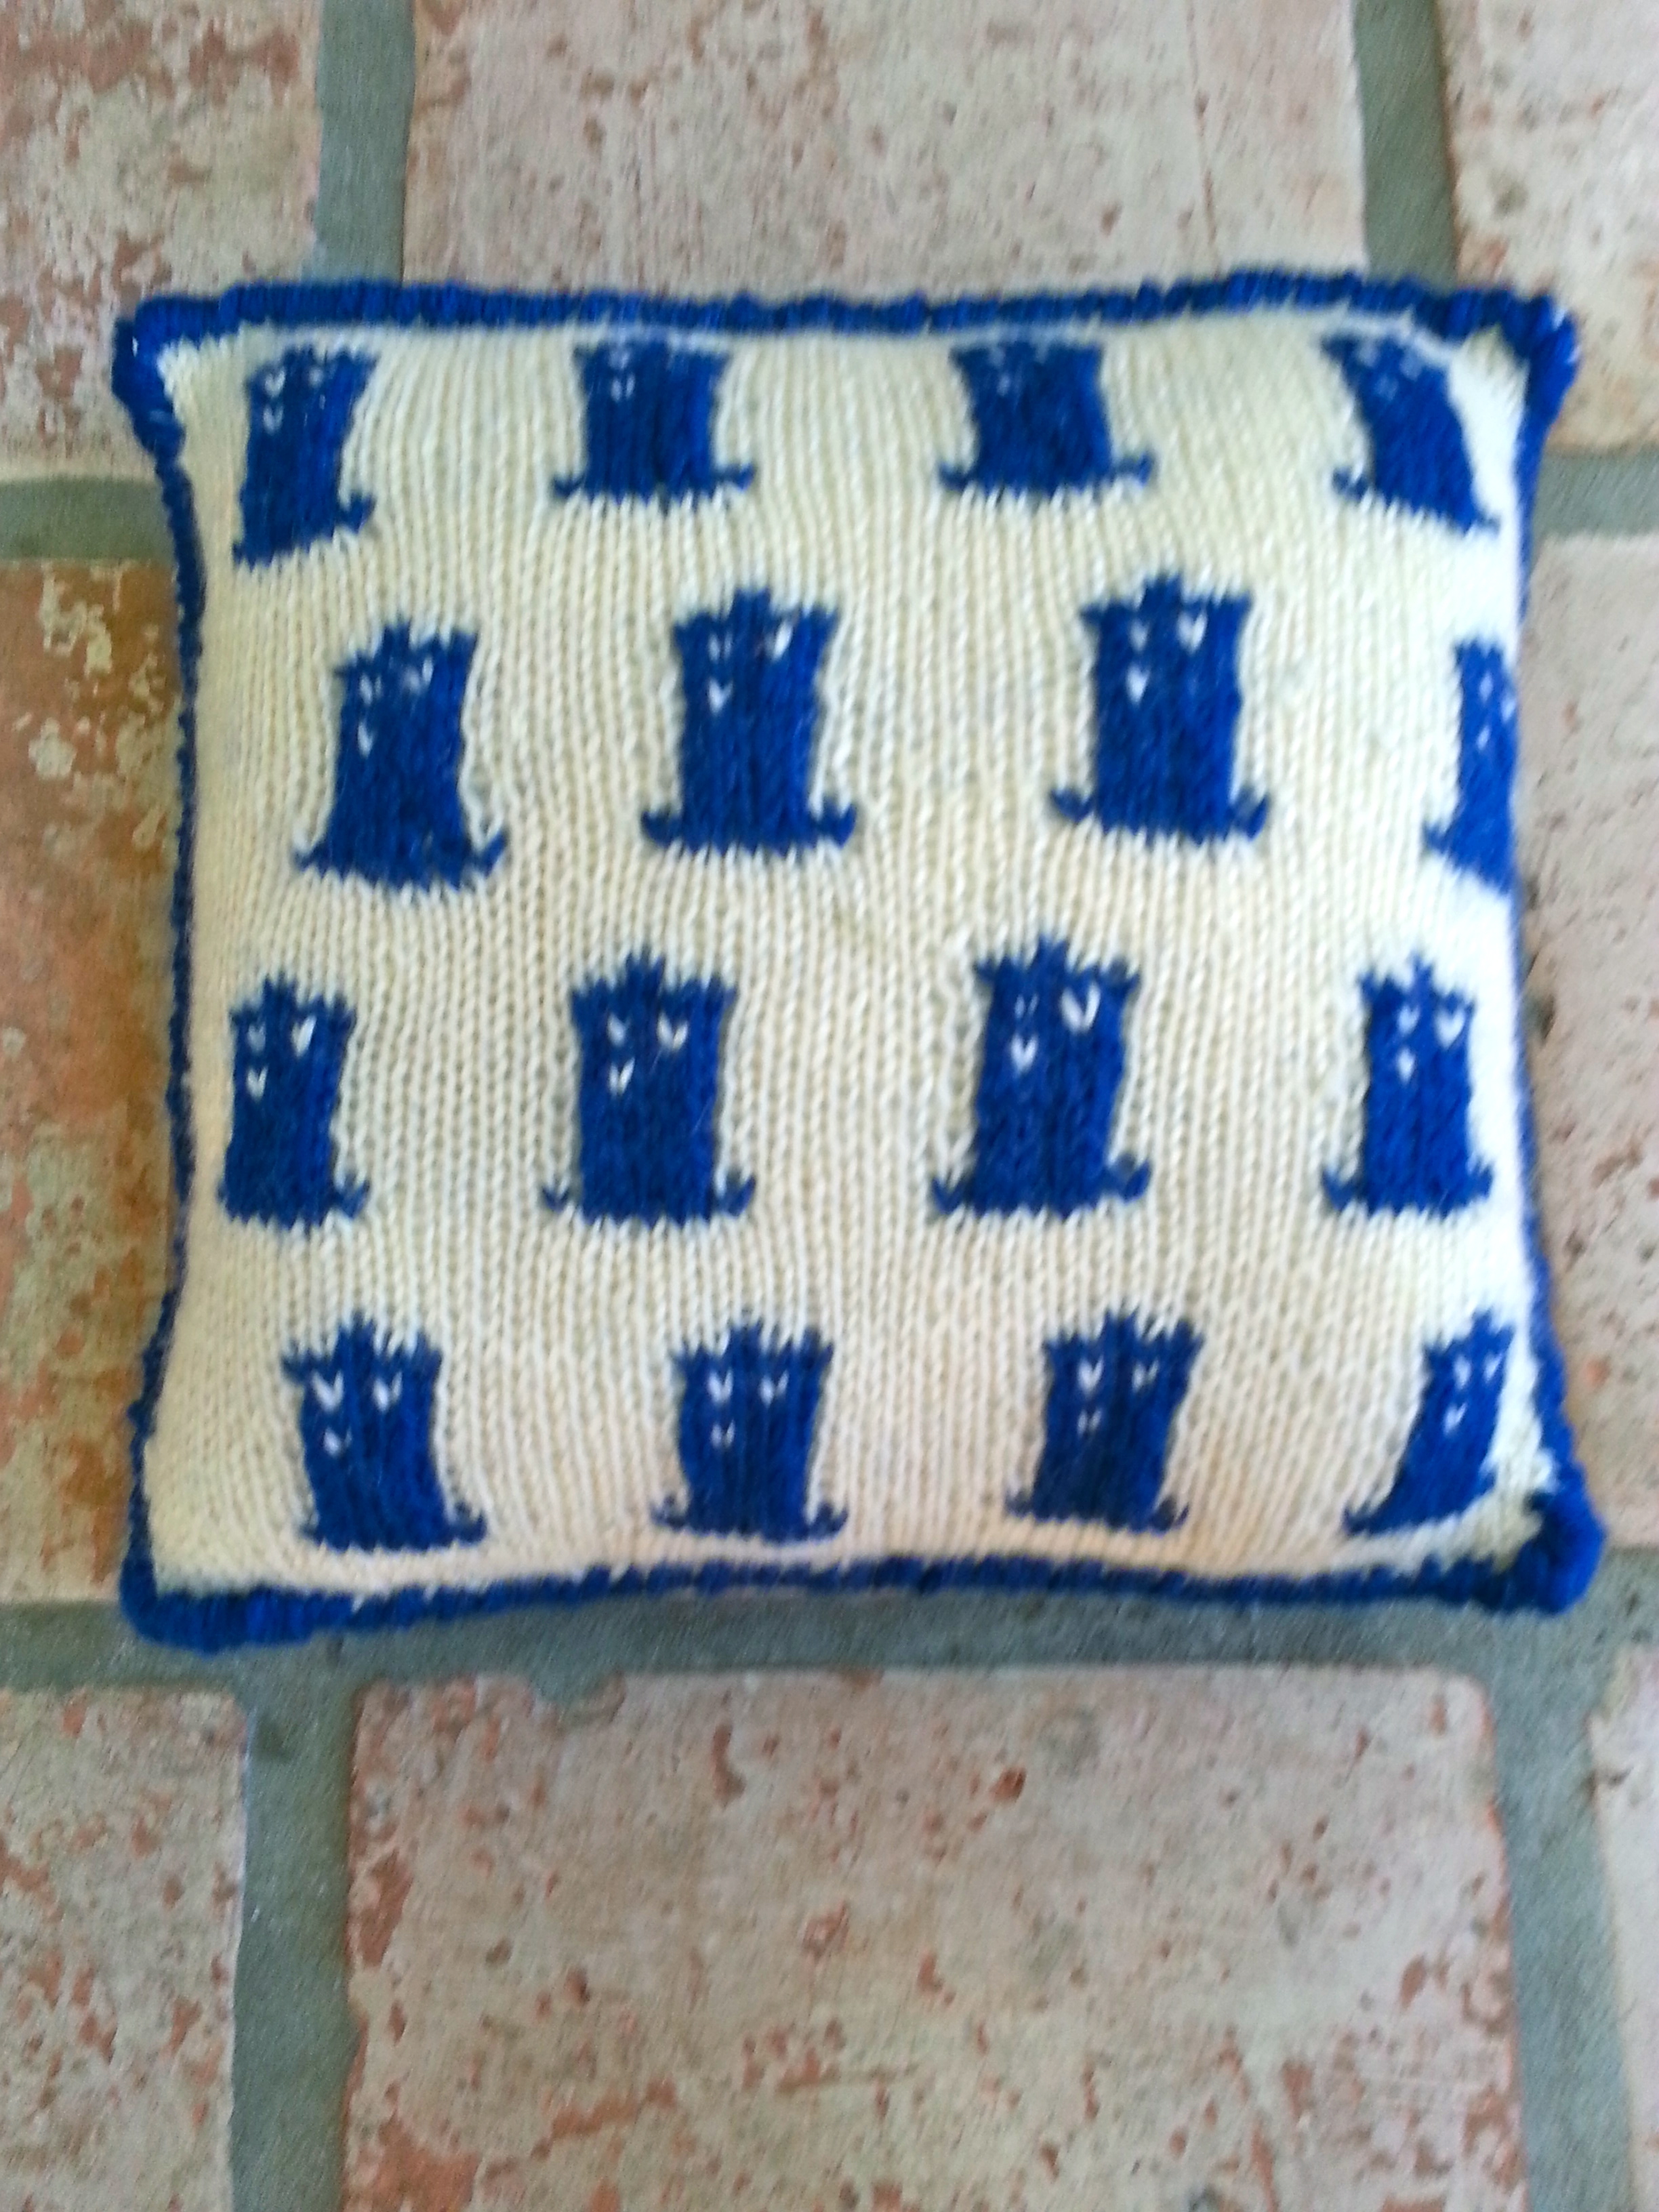
A different kind of blue box: the TARDIS pillow!
I started watching Doctor Who at the beginning of November and I got totally into it (yes I realize I’m a little late to the party). My brother is also a fan and when I was home for Thanksgiving, he suggested I could knit him something Whovian for Christmas. I showed him the myriad of free patterns on ravelry and he chose this one by Rebecca Norton, a tiny tardis print. Interestingly, the only project on ravelry was the original, so I was going into uncharted (ha!) territory. But as the pattern says…Allons-y!
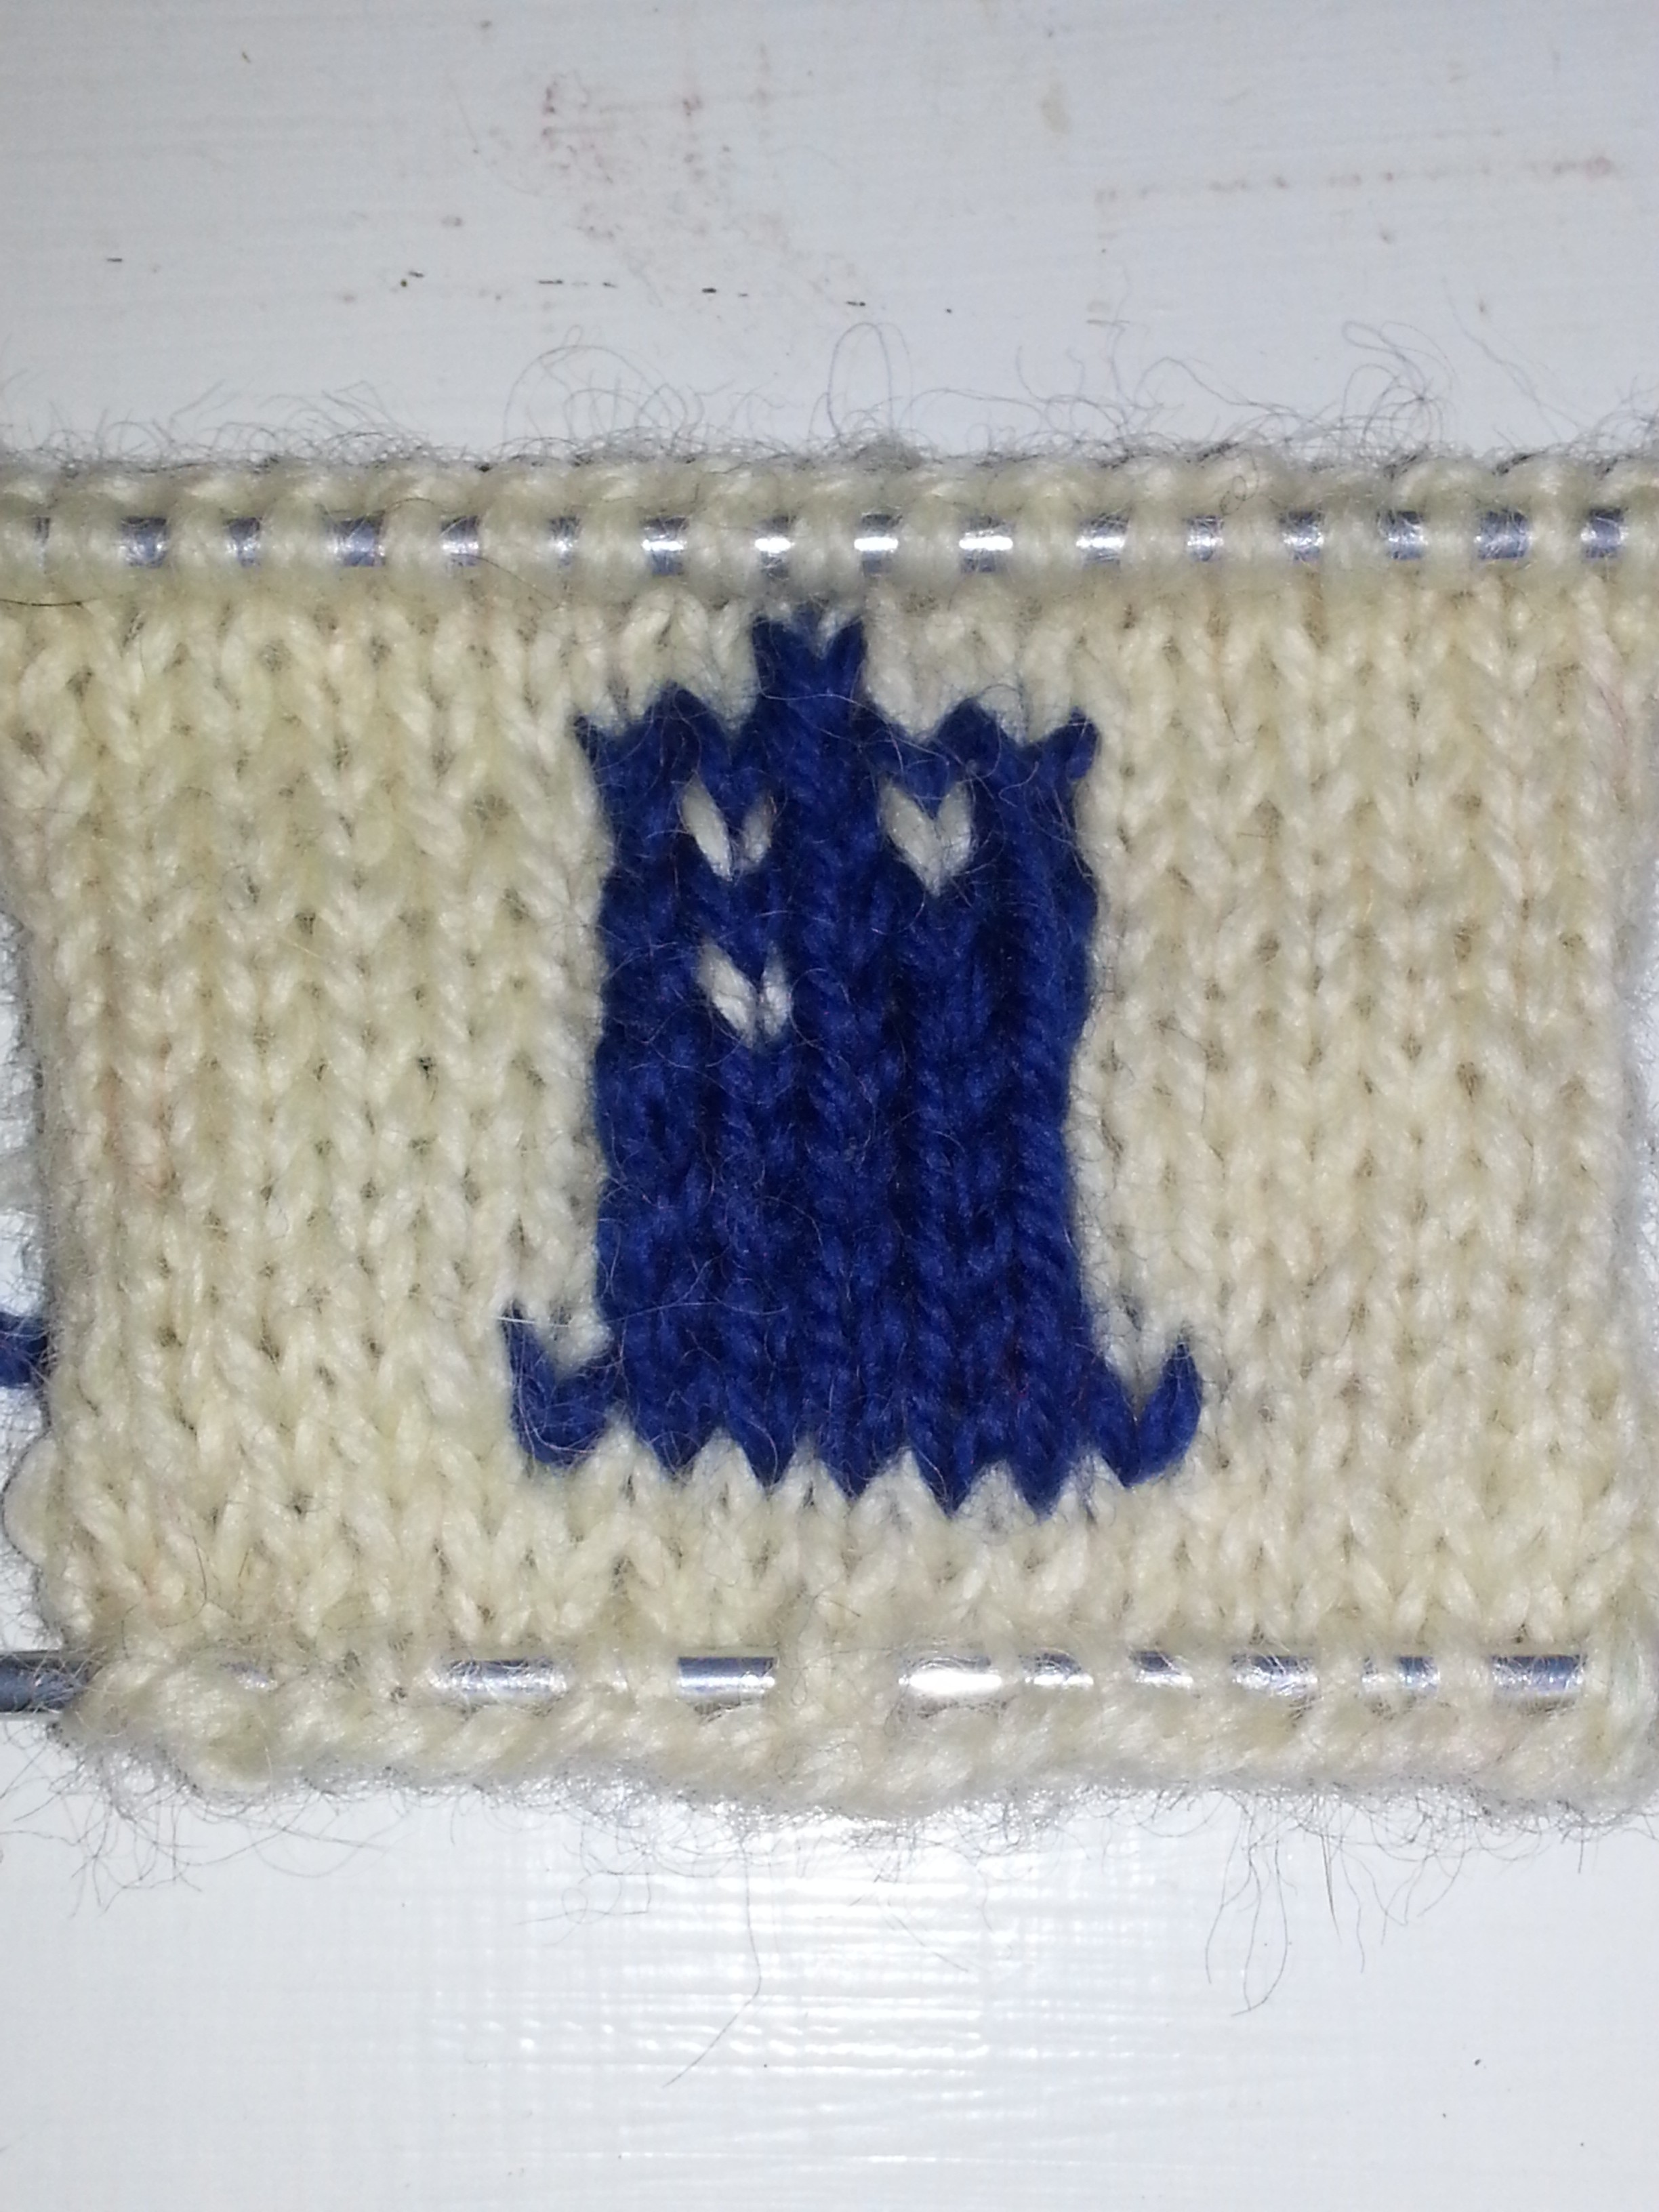
This was one of the funnest swatches to knit. If you aren’t familiar with colorwork, this is not a bad pattern to learn on. The pattern was pretty easy to remember after a while, and even when I messed up the window placement on one row and didn’t notice it till the end, it was easily fixed with duplicate stitches to get the proper colors. The pillow uses the intarsia technique for each TARDIS, so I had a short bobbin of blue yarn for each. However, after knitting one side of the pillow, I realized I was going to run out of white yarn. It was stash yarn and I had no idea what it was or where it came from. So I improvised…
And came up with this pattern for the reverse side. I didn’t get too detailed here—no public notice, no “police box” lettering—but I think it came out really well for a TARDIS pattern I wrote on the fly! I used garter stitch to create the illusion of doors, and each grouping of six windows only used a small bobbin of white yarn. I would write up the pattern but I didn’t save all my notes on it, but I did write down what I could remember on my ravelry project page. If you try to do it and it doesn’t work out, trust me, there are like six million patterns on ravelry for some version of the TARDIS if you want it.
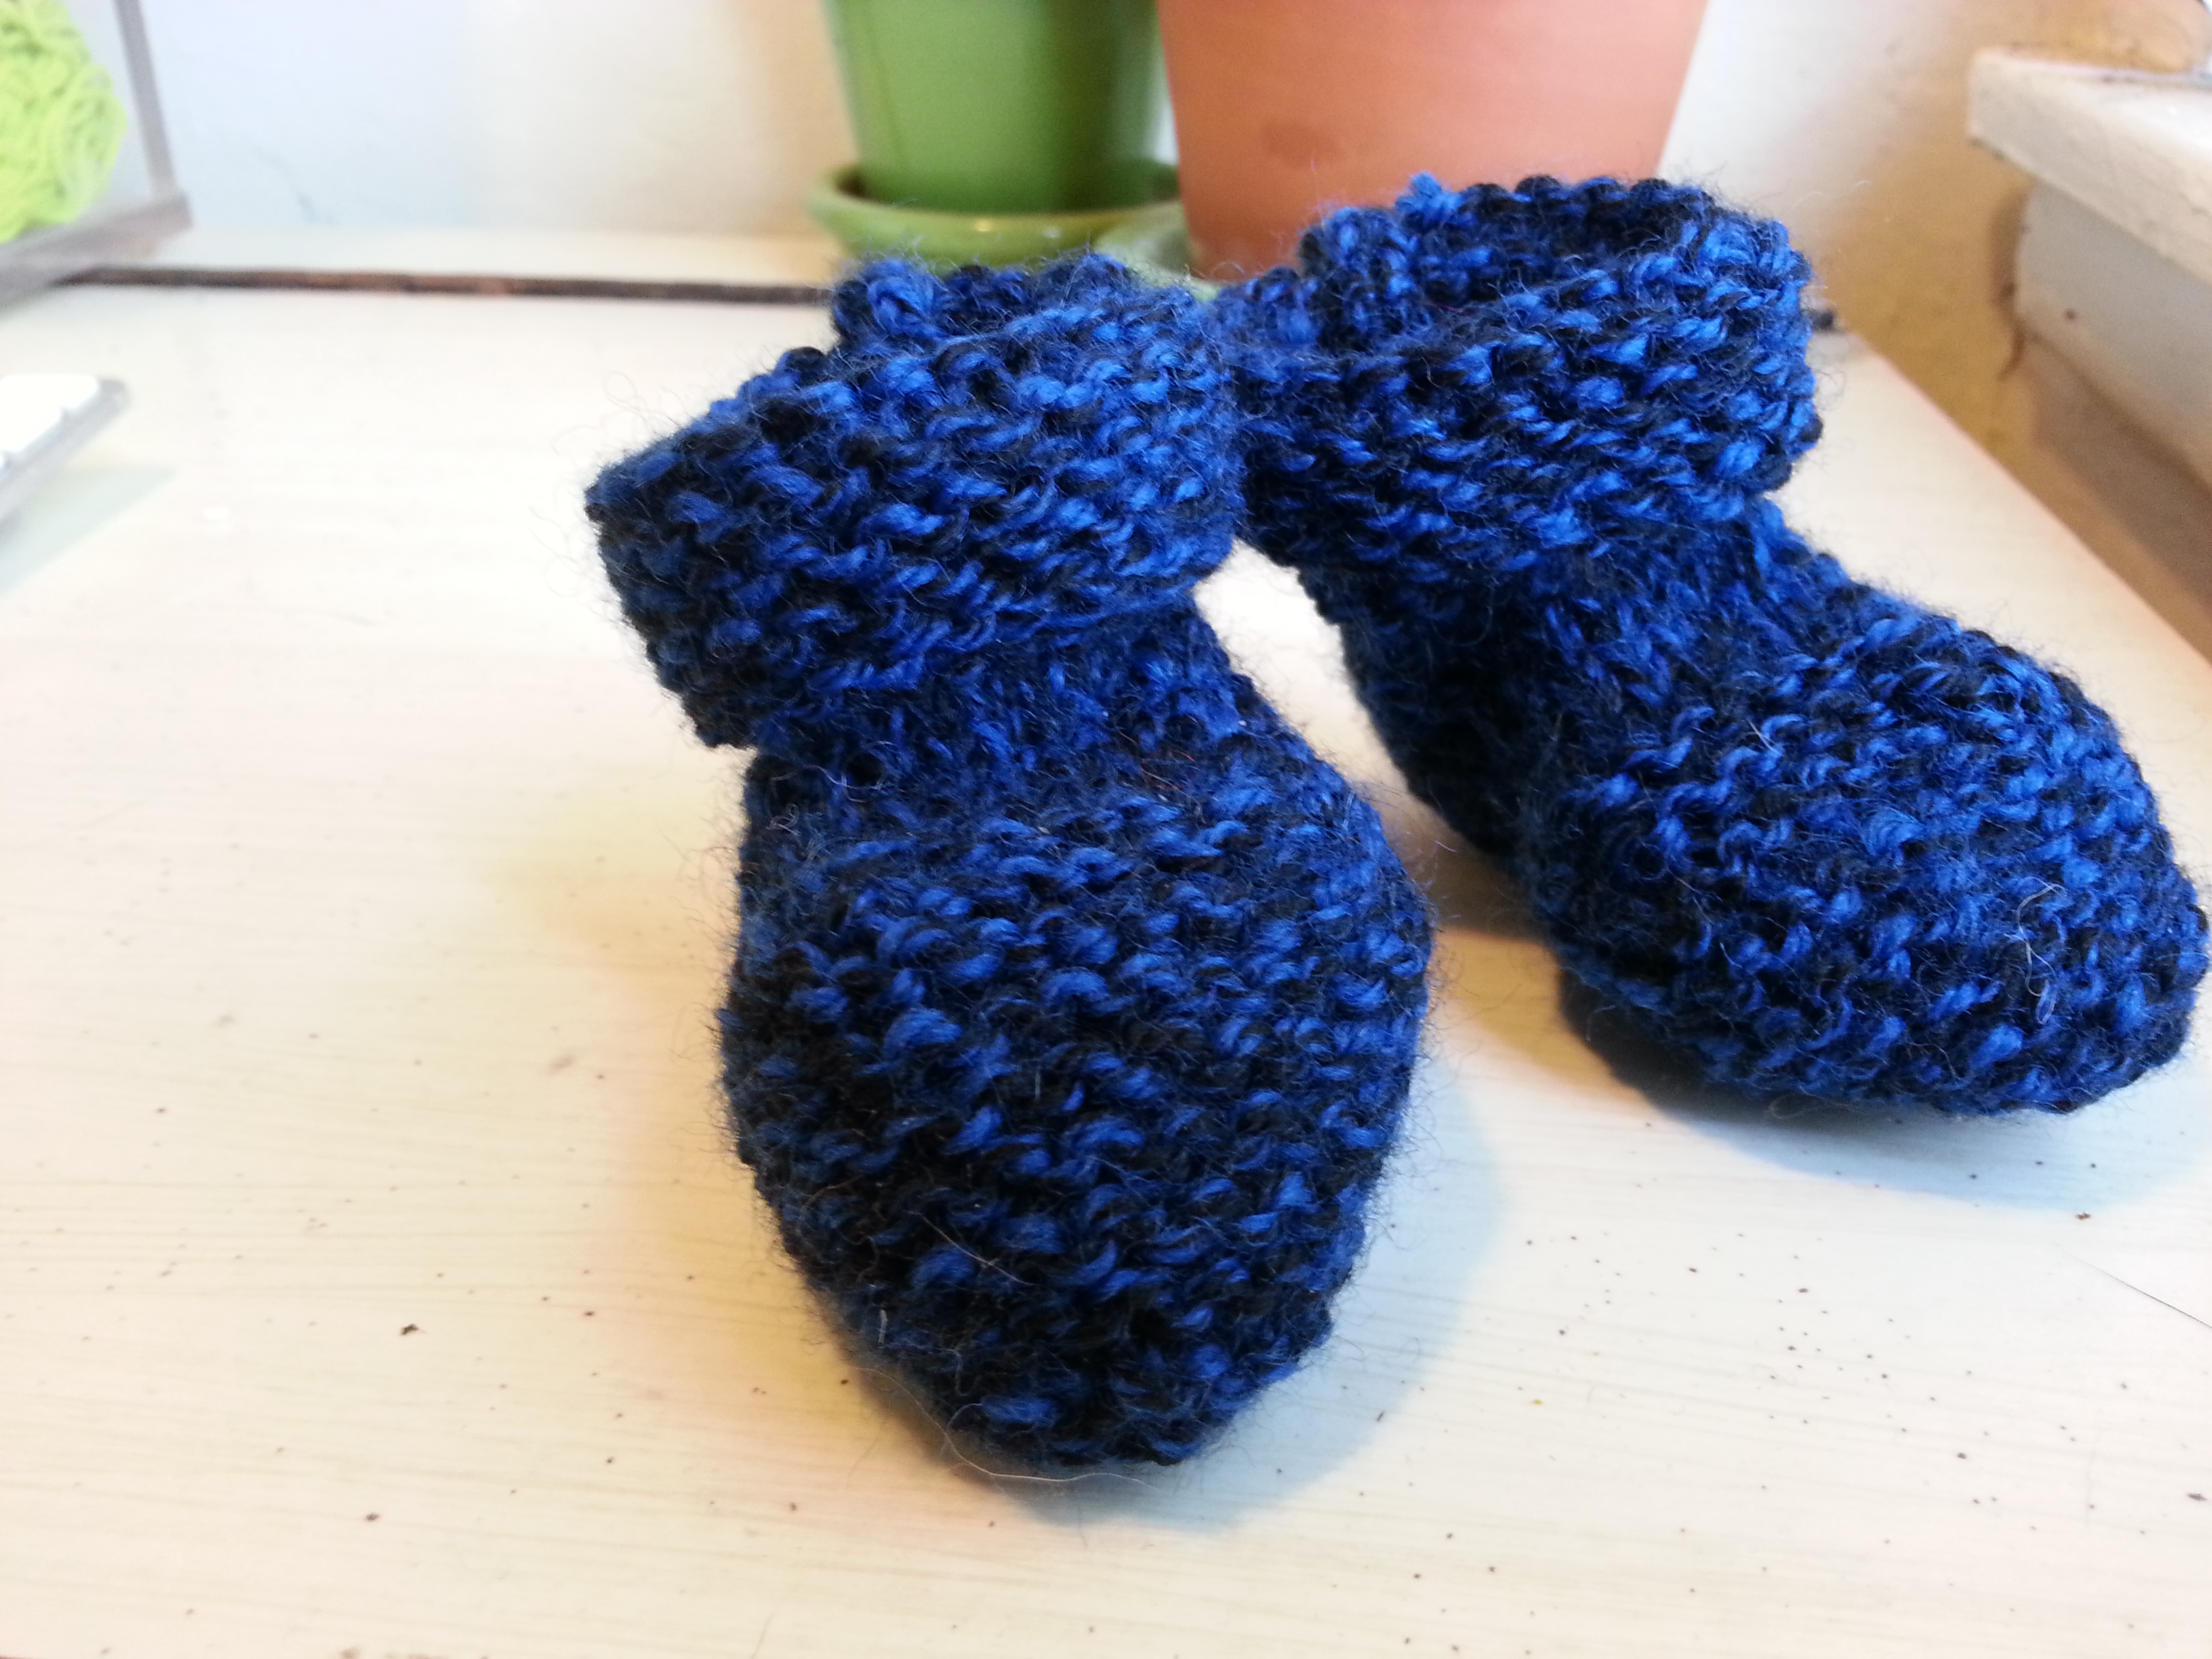
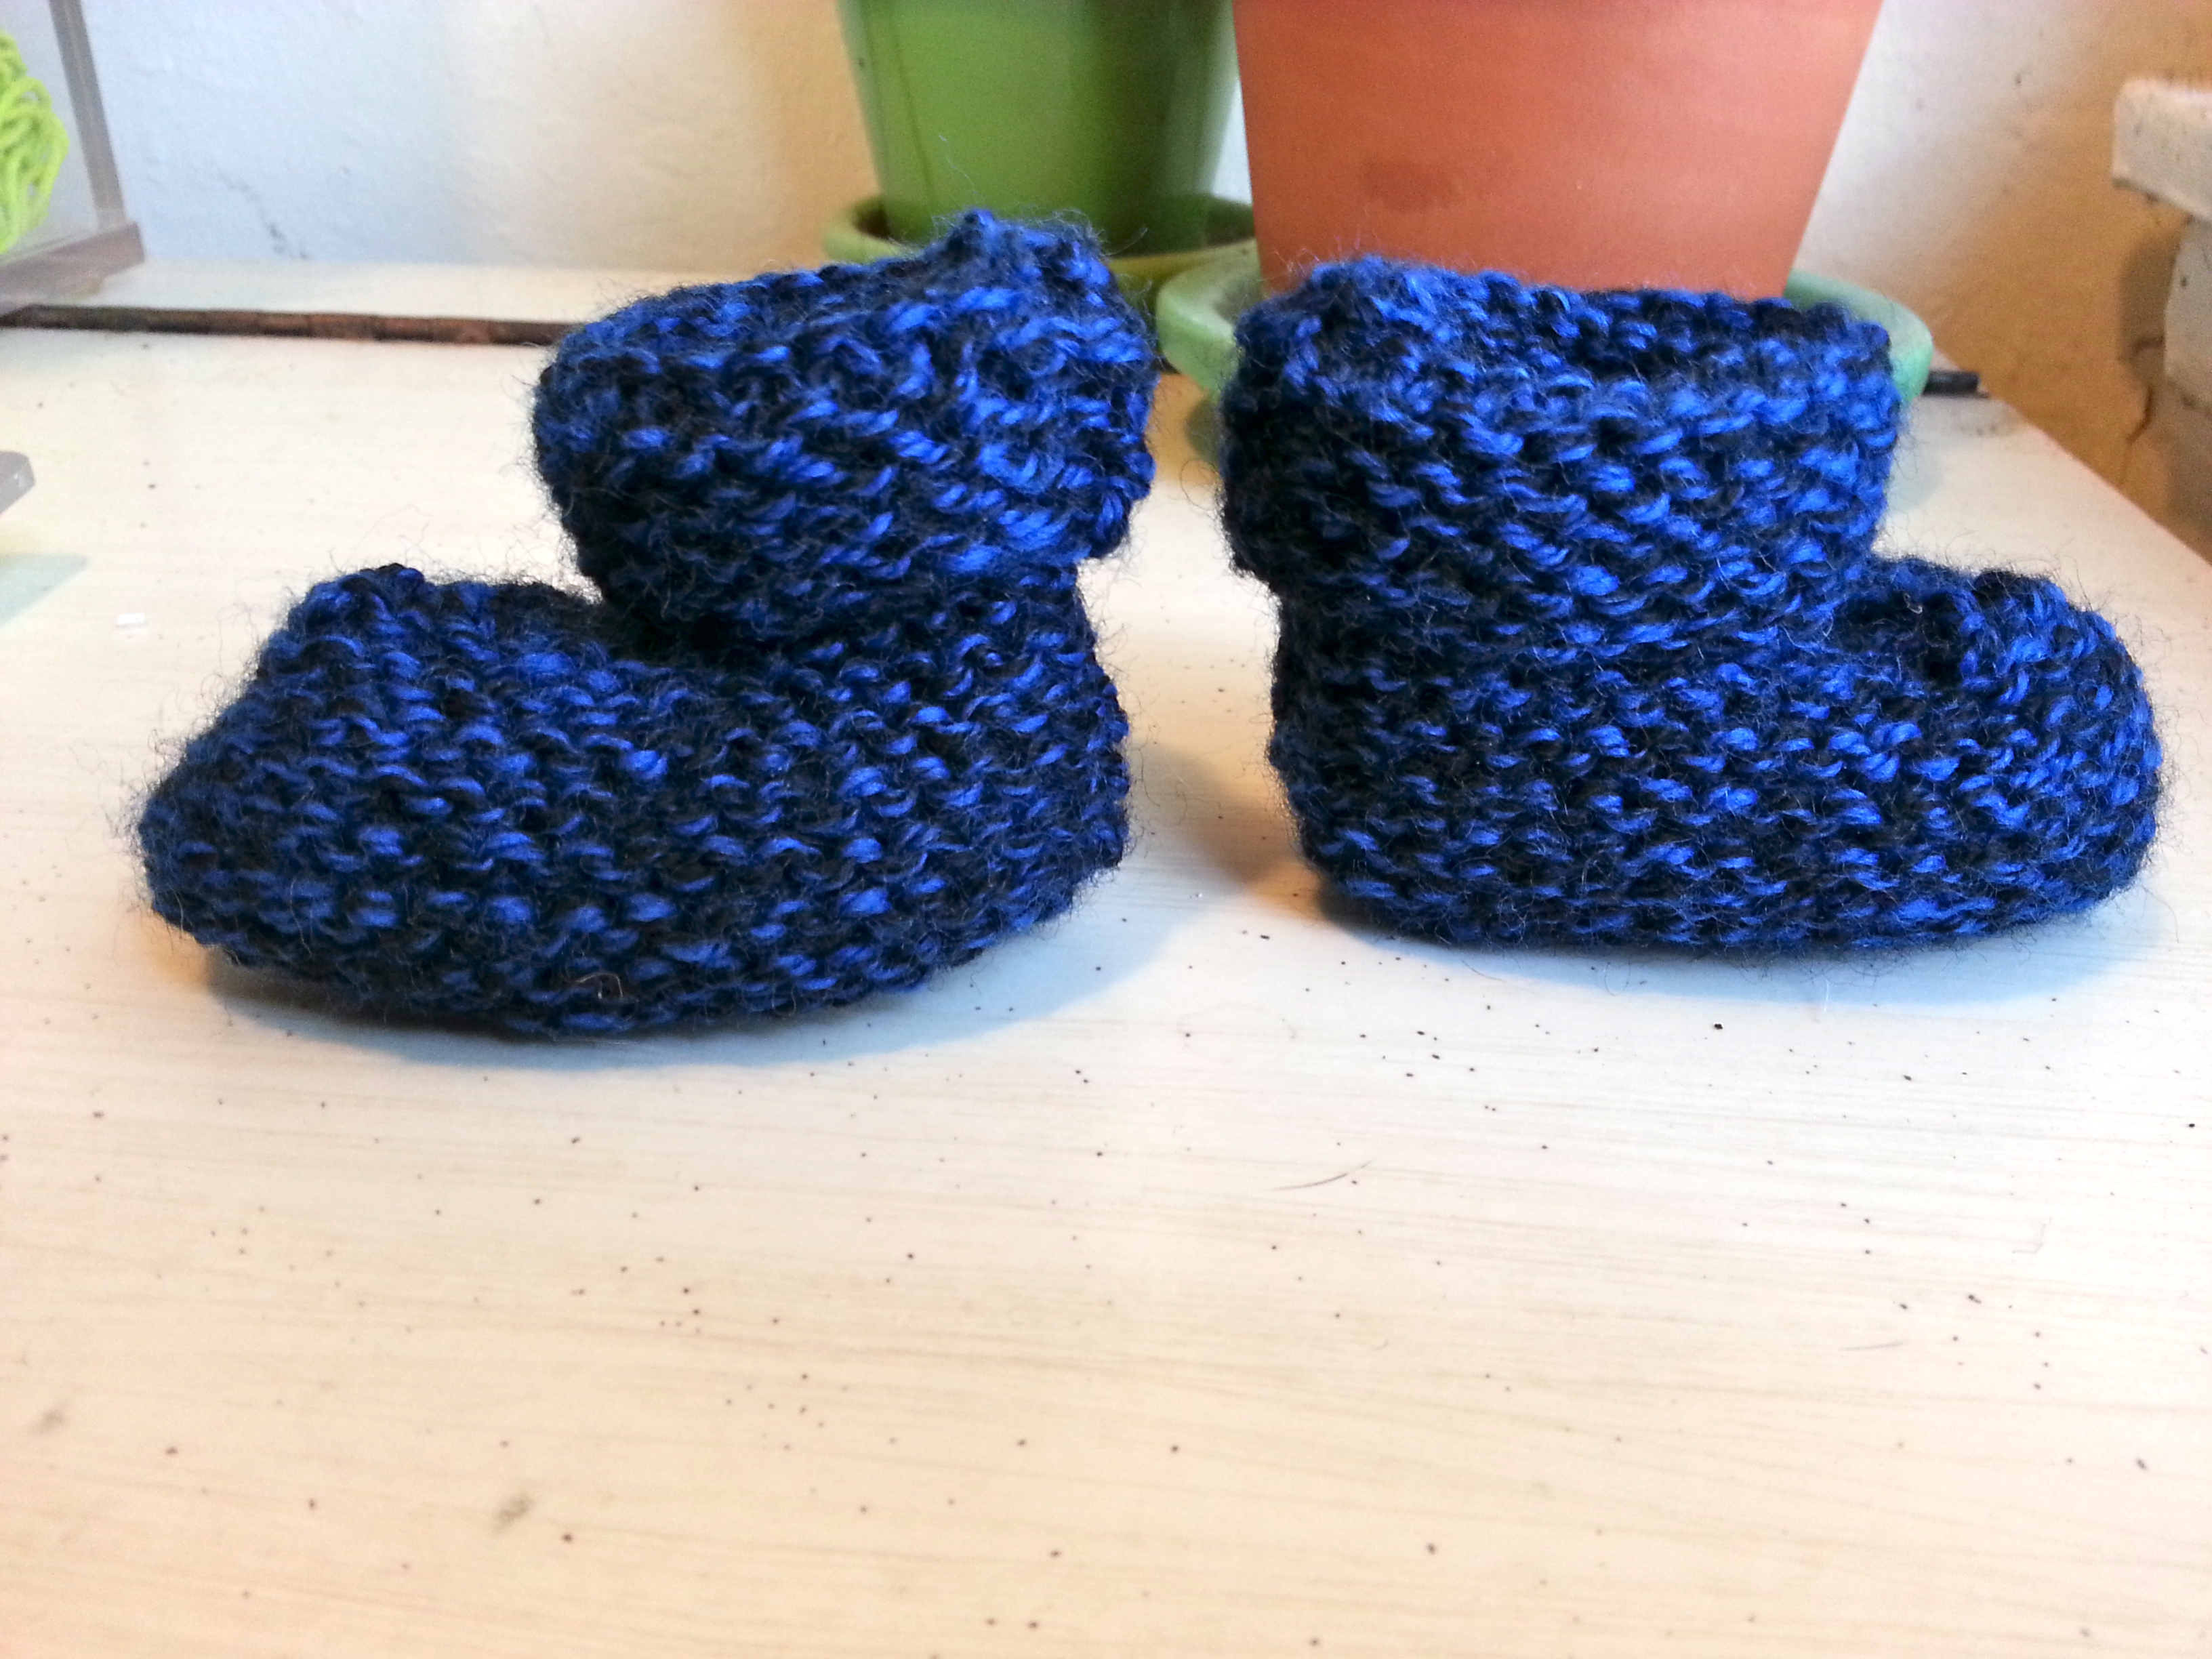
My cousin and his wife had a baby in December, and so over Christmas break I decided to whip up some of my favorite baby booties in the newborn size. Baby items are great because they knit up so quick. I also like making them in colors other than the traditional pastels. Previously, I have made them in a bright purple tweed:
The booties are constructed with short row shaping, so they are knit on straight needles. In the past I sewed them up so that only garter stitch was showing, but this time I decided that having the stockinette part on the outside actually gave it a better shape.
I highly recommend this pattern, but I should point out that I have always modified the increases to be “knit front and back” because I’m more used to that. I don’t think it changes the pattern, just putting that out there.
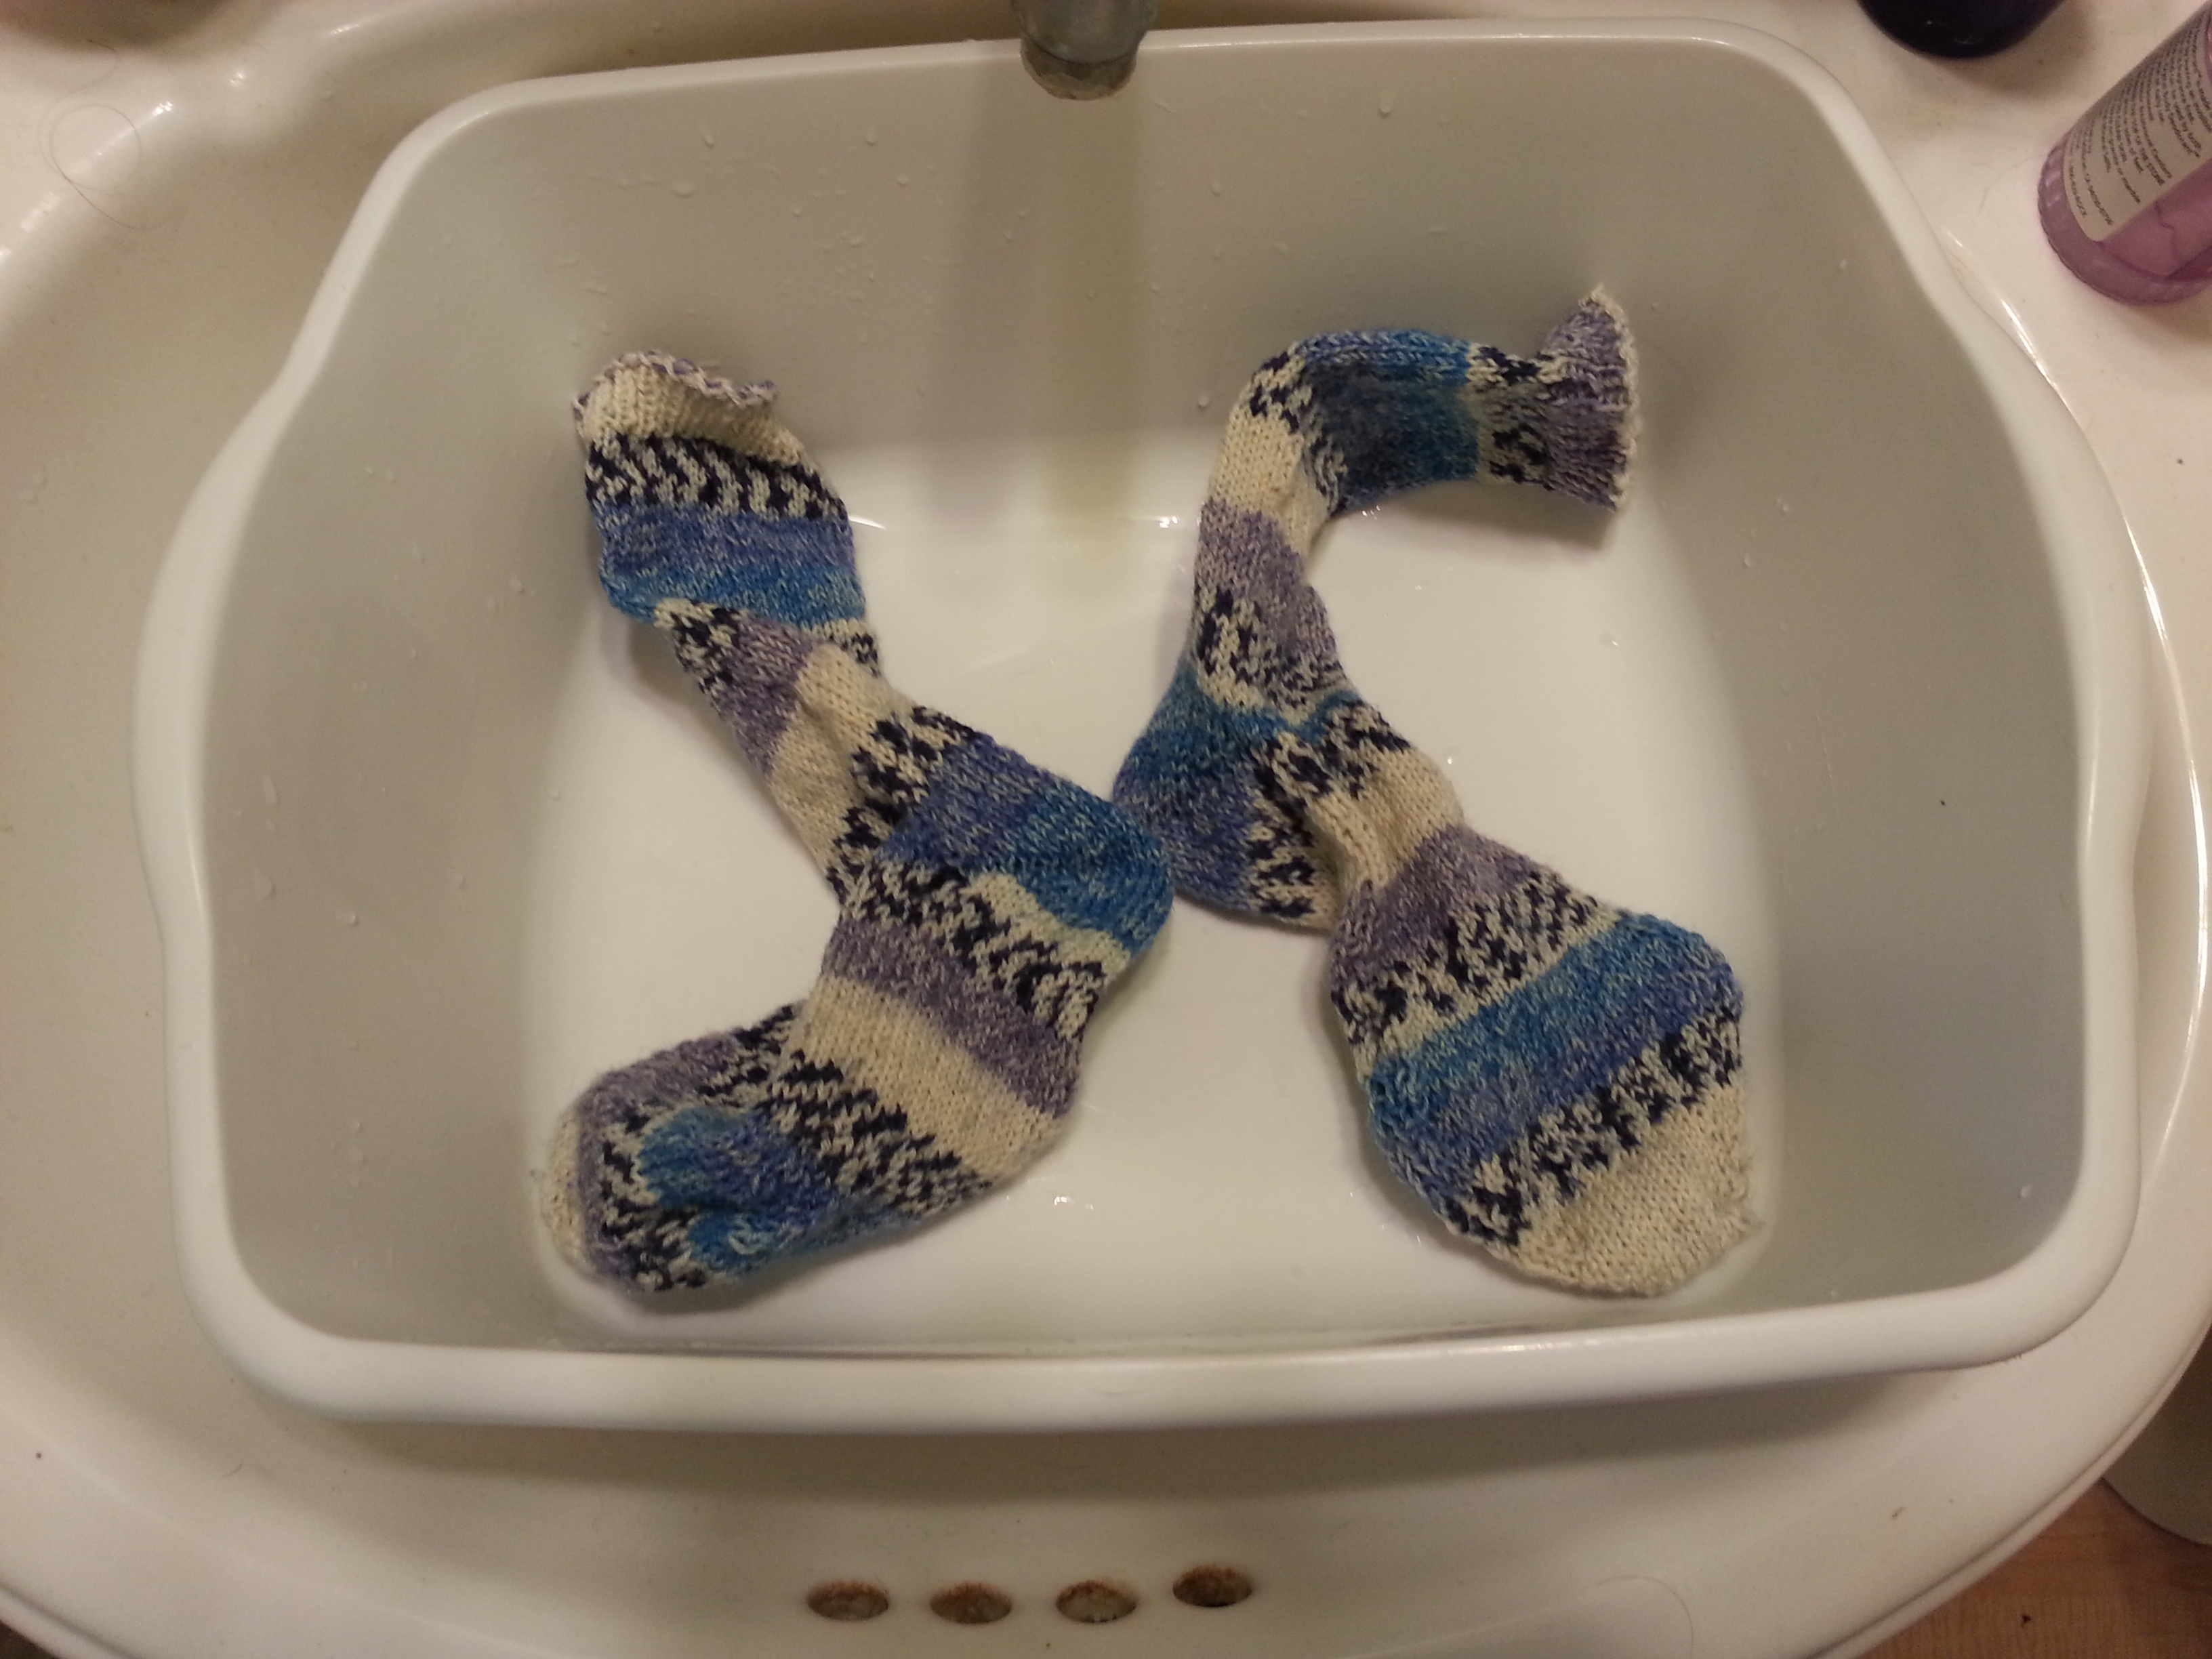
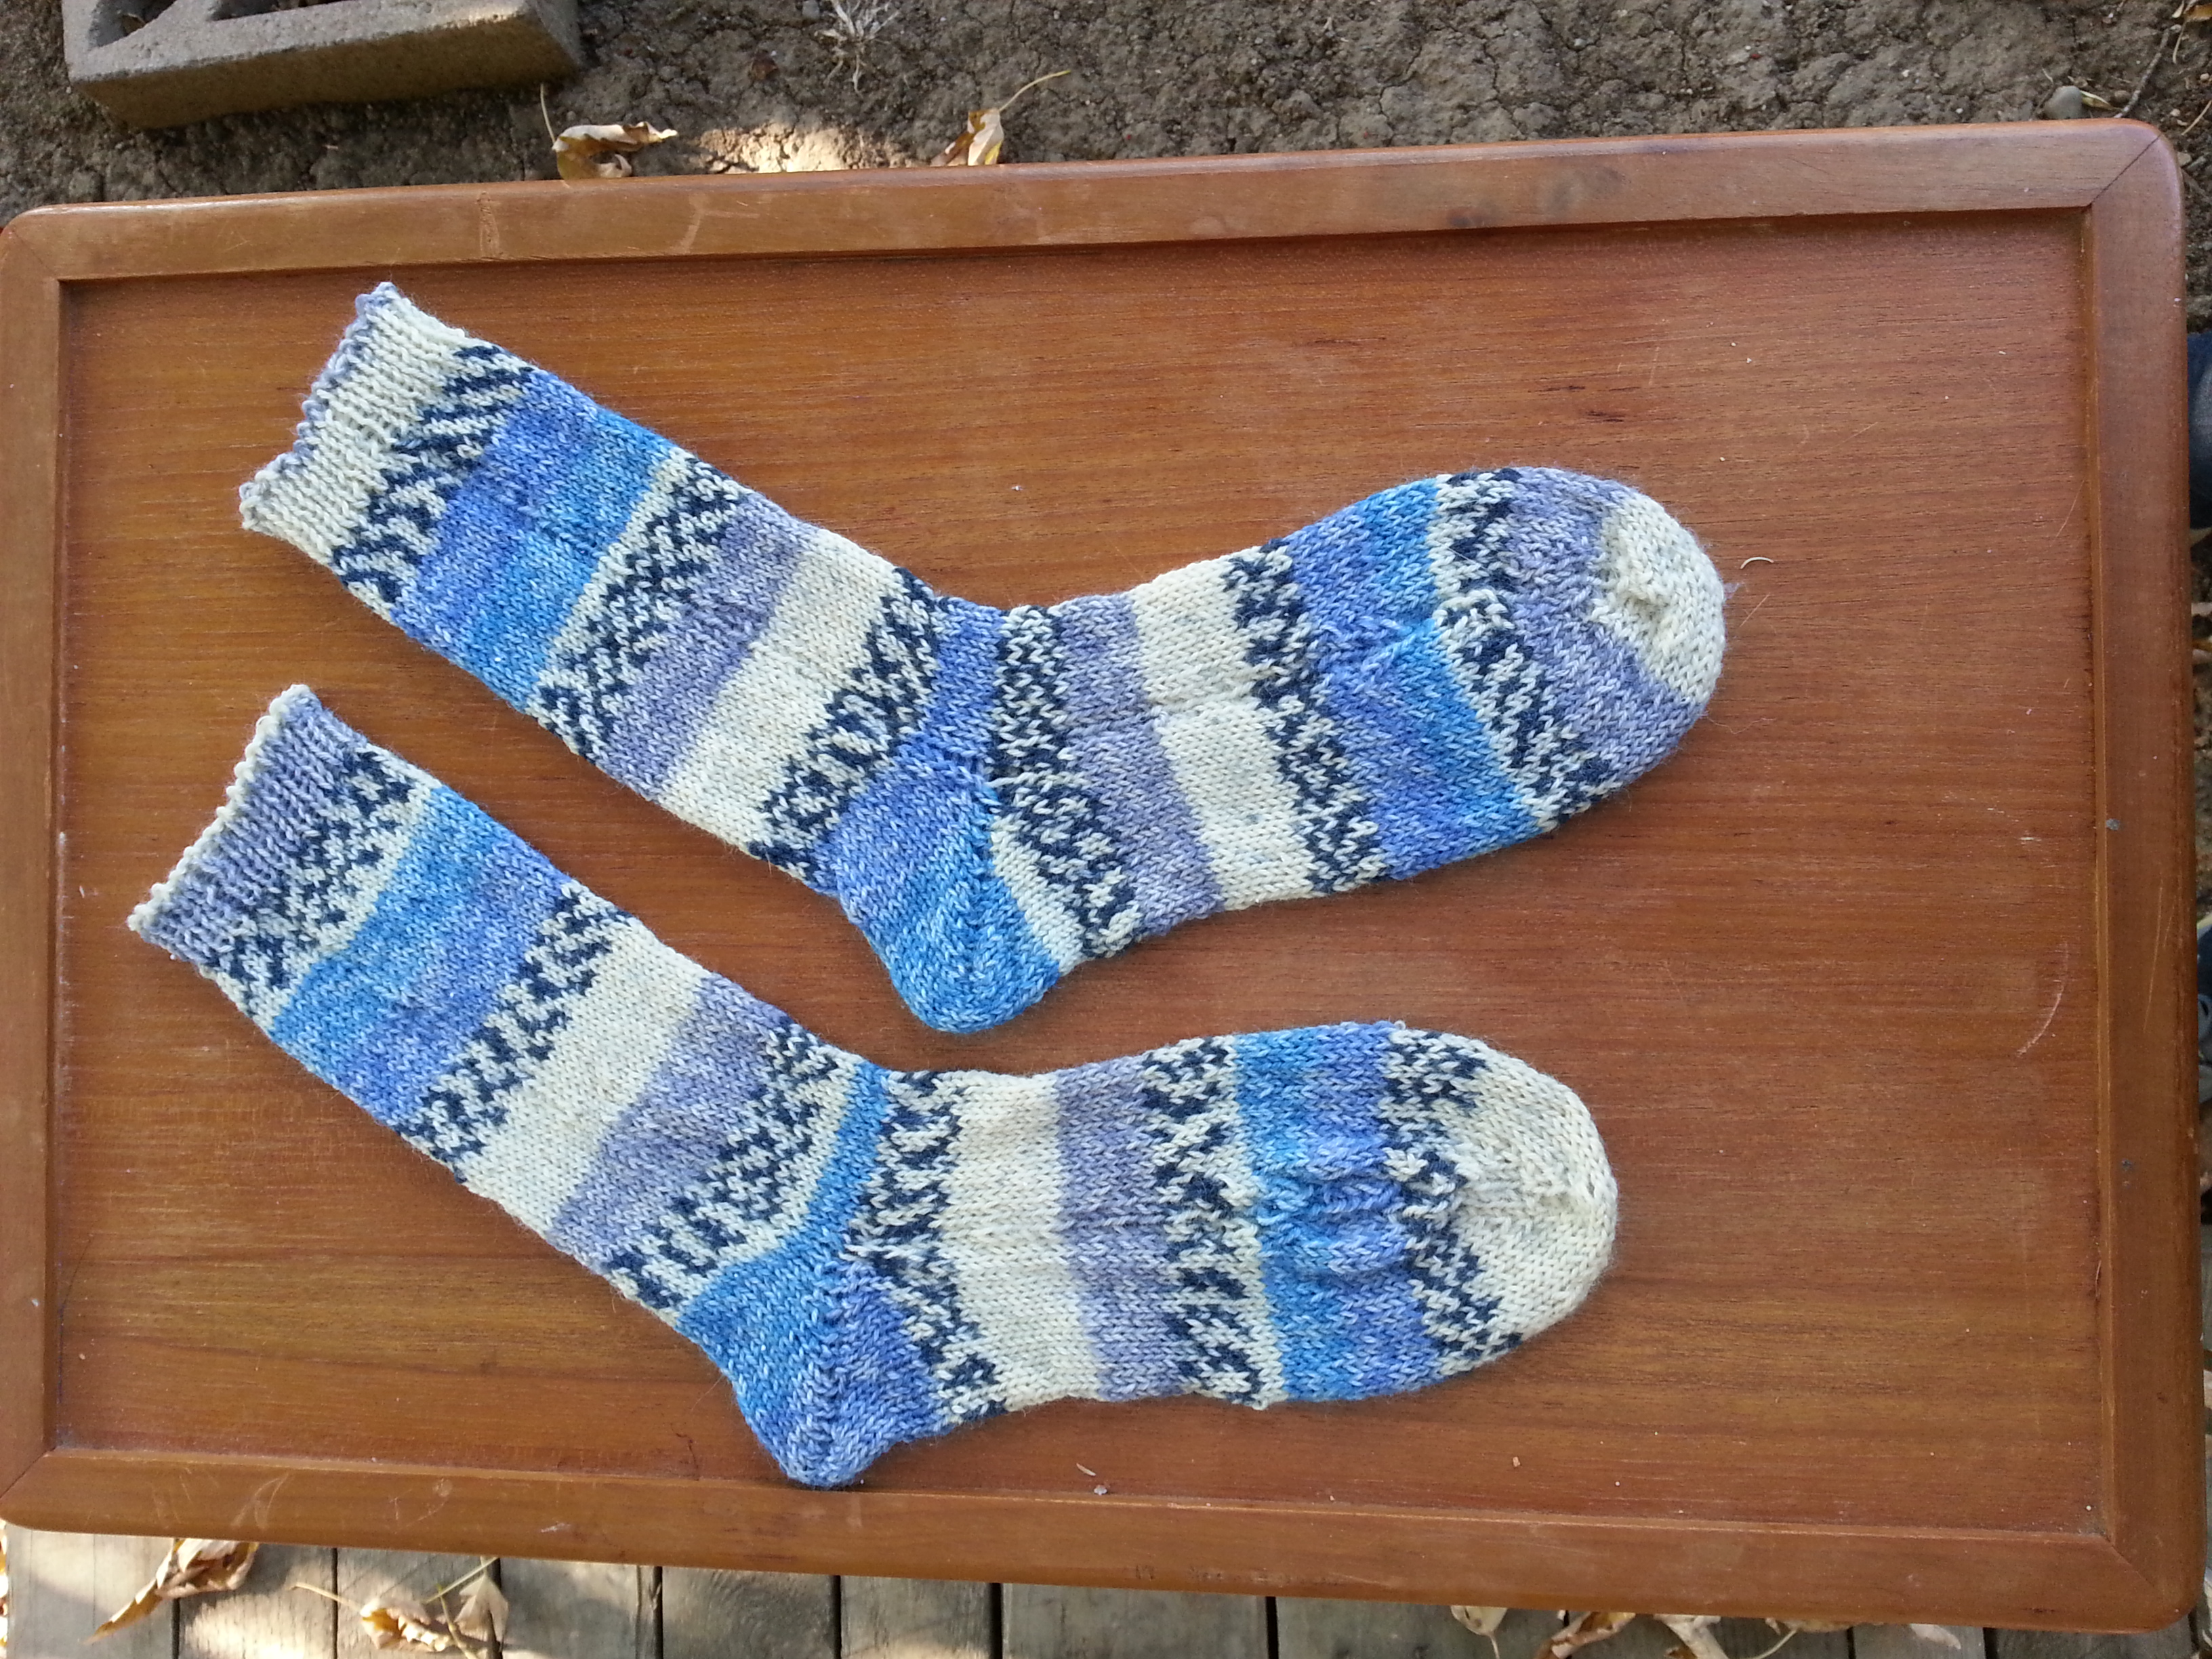
Socktober blues: Magic loop toe-up socks!
Way back in October, I started making socks for my friend’s November birthday. I had this really cool sock yarn, the self striping kind, and I was eager to use it. And I also wanted to knit these socks at the same time. So I decided to learn the magic loop method for small diameter circular knitting.
Ever year I try to do a new knitting technique—it’s a slow learning process but it works. I could probably devote a whole post to what I learned and didn’t learn doing magic loop. First of all, you should NOT do what I did, which was 1) switch patterns more than once when I was part way through, so I was constantly readjusting. I initially started out using the free Knit Picks pattern Two at once, toe up socks but I quickly discovered that it was going to be tough to follow for someone who was new to magic loop. Another thing you should NOT do is 2) connect several interchangeable needles to get the long circular needle needed for this technique, because the metal connecting piece will be a constant pain when you have to slide it through a bunch of stitches. Bite the bullet and buy the exact size circular needles you need.
What I DO recommend you do if you are learning this technique is watch videos on how to do magic loop. My favorites were from KnitFreedom— Liat Gat’s 2-at-a-time toe-up socks video series. I’m sure it would be best if you were using her pattern, but I found them helpful regardless, especially the videos for casting on and the first increase round. I also suggest practicing magic loop with larger needles and yarn than you’d use for socks, because starting the toe is a bit challenging at first. Ok, a lot challenging.
I wish I took photos at the start, because it would show you what looked like some pretty bad laddering at the sides that ended up being ok in the end. The Knit Picks pattern has an afterthought heel, and KnitFreedom’s pattern has a fleegle heel, but I wanted I heel I was familiar with, so I did short row heels using the technique described by HeidBears in part 1 and part 2 on her blog. Not a video, but I have done short row heels before and the illustrations were all I needed to translate it to magic loop socks.
After blocking, you could still see the ladders on the sides of the socks (especially at the heel) and the loose part of the toe where I almost made the socks too big when I switched patterns (thankfully my friend has the same size feet as me and I tried them on and discovered the problem early). BUT despite all the problems and irregularities, I am really proud of these socks. The blue stripes are so cool! And most importantly, their recipient was happy with them.
With rain and freezing temperatures, it’s finally starting to feel like winter is coming—perfect weather for knitting. I’ve been working on some knitting projects, but I’ve also done a few things with yarn that require no needles or hooks at all. Yarn wrapping items is a great way to use up small amounts of special yarn, large amounts of lower quality yarn, and everything in between. Here’s what I’ve made:
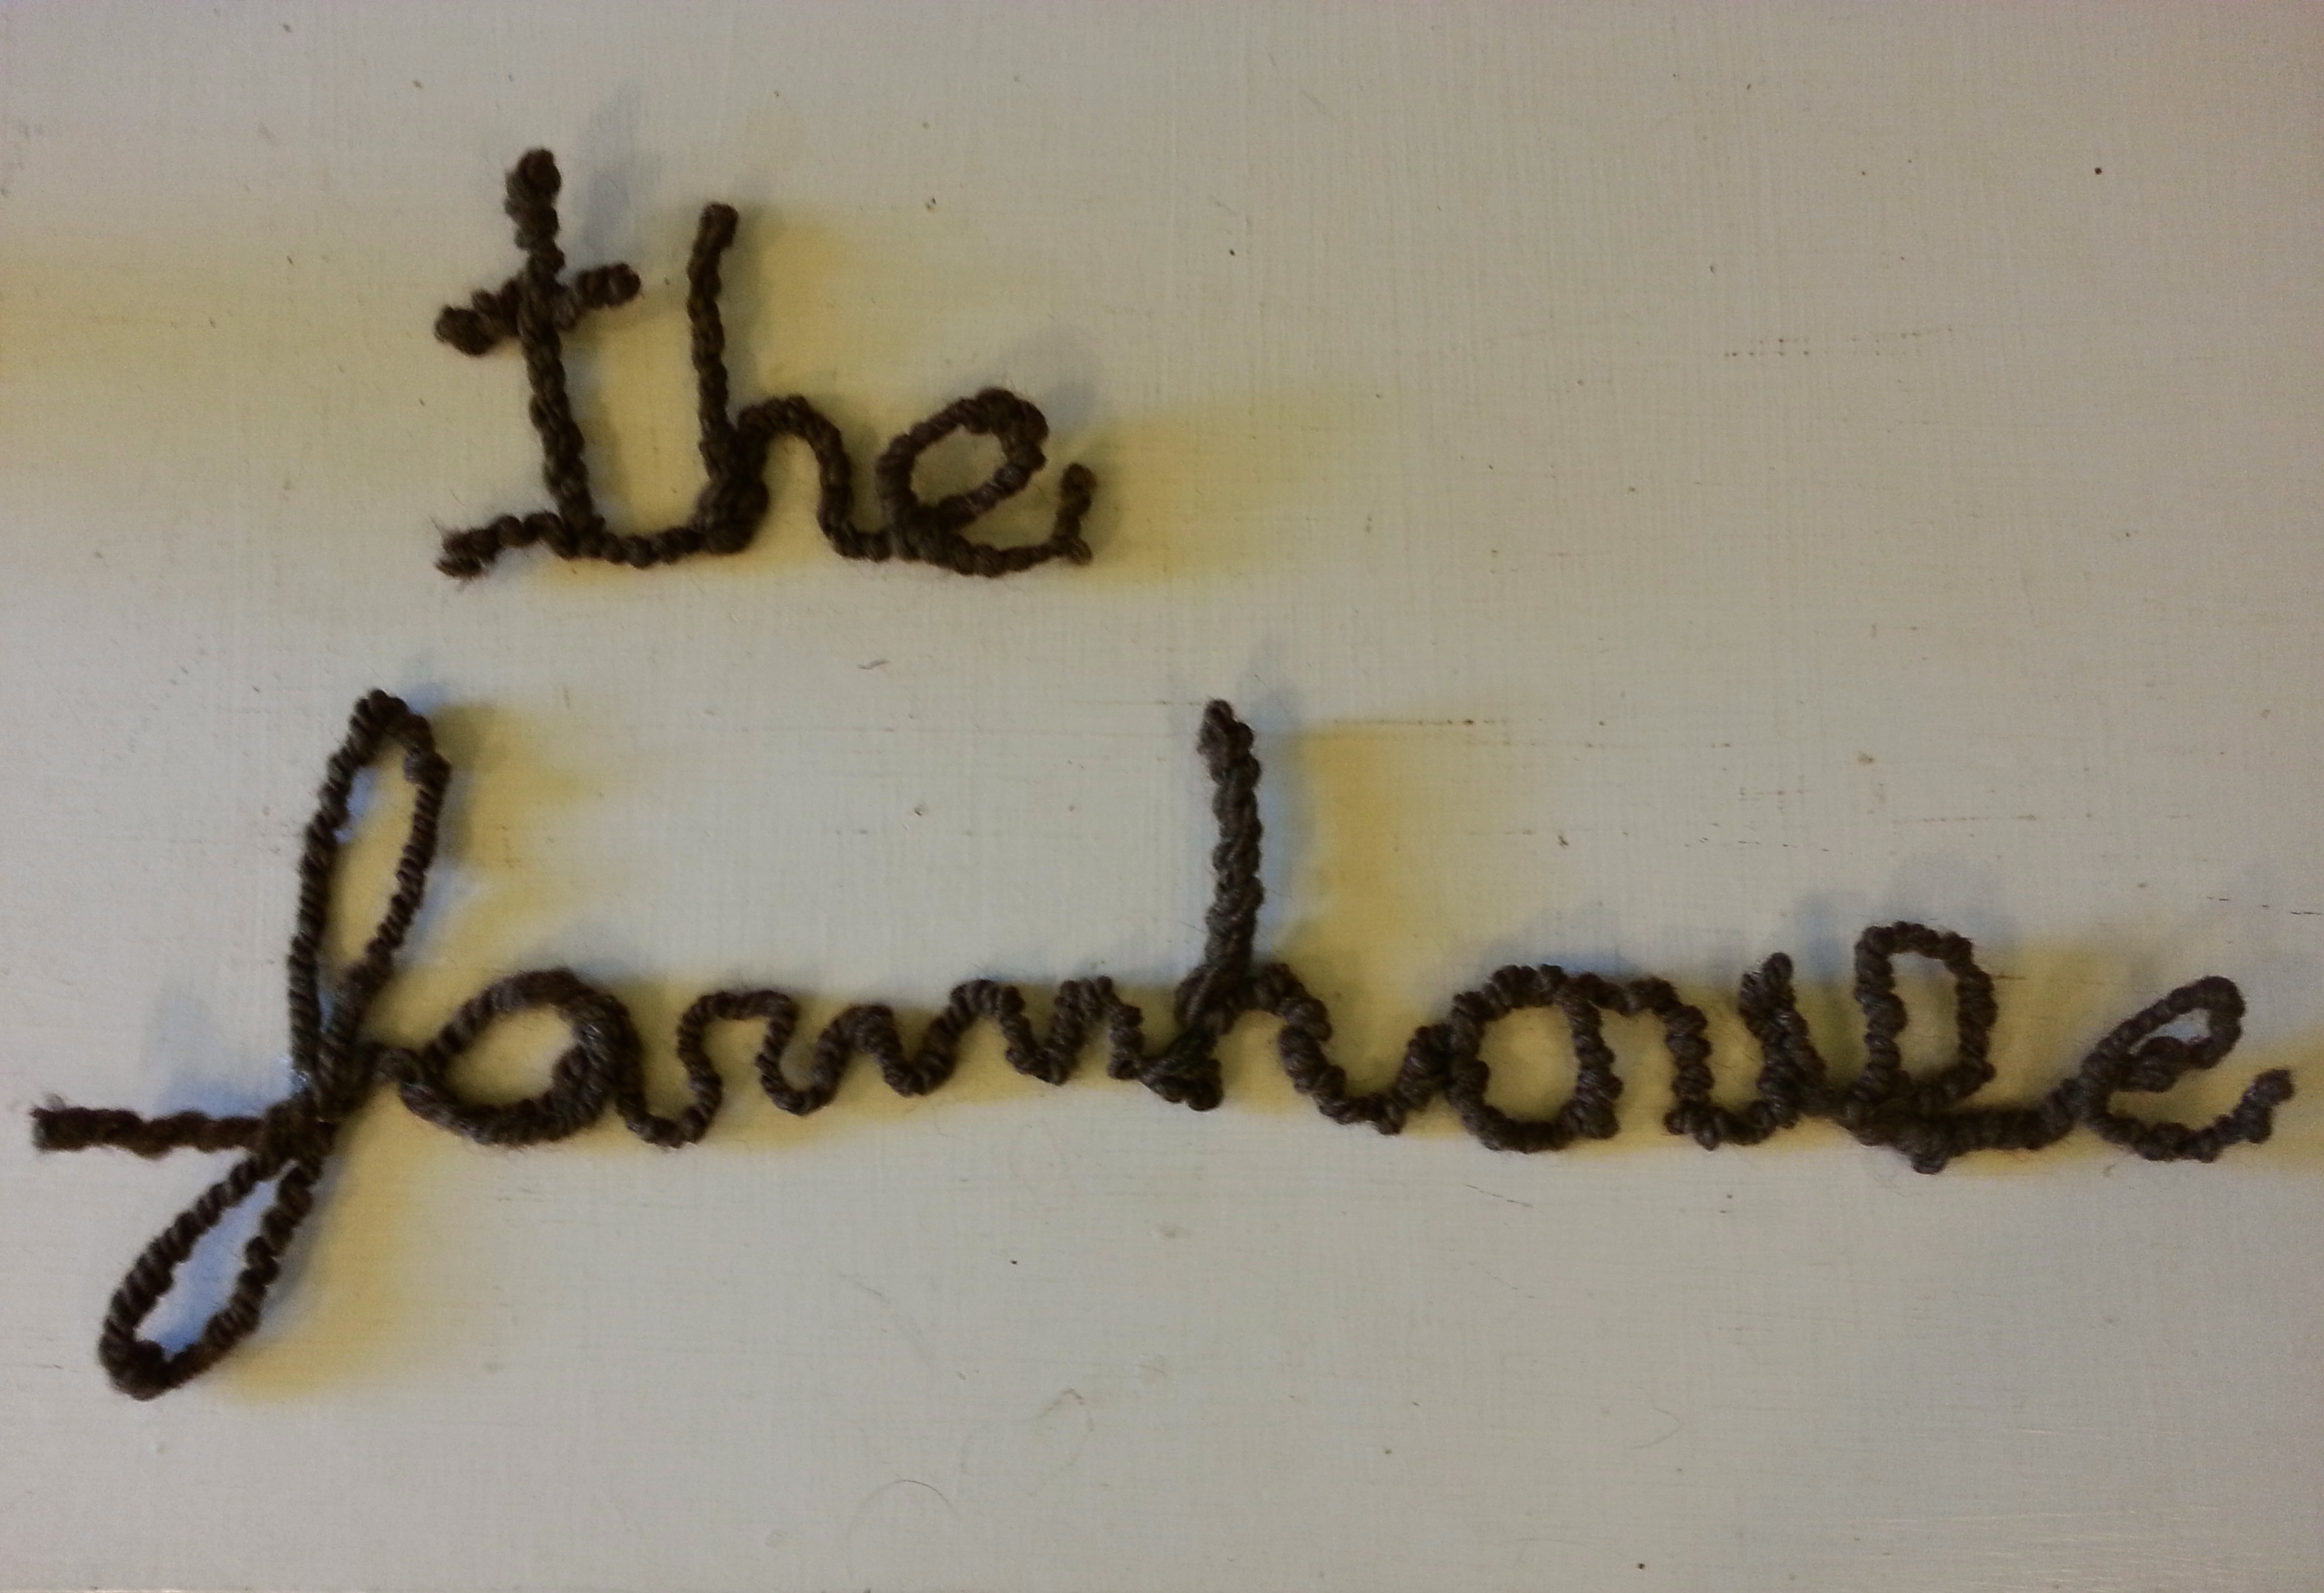
Yarn Words
materials: bendable wire that will hold its shape, yarn, binder clips, hot glue gun.
I got the idea to do some yarn wrapped words from this blog post. I made this as a a Thanksgivikah gift of sorts for (you guessed it) “the farmhouse,” a house of friends who were hosting a big dinner on that particular holiday. I was excited to finally have a use for the tiny amount of brown handspun yarn I’d made in my craft center spinning class back in Fall 2011!
I didn’t have the wire reinforced clothesline that the blog suggested using, so at first I tried using an old coat hanger. Not bendable enough, it turns out. Then I tried florist wire, which I do have on hand from making wreaths and evergreen boughs out of shrubbery in previous years. It worked! But since it was a little thin and just a bit too bendy, which made me worry that it would lose its shape, I doubled it.
I strongly suggest writing out the word you want to do in cursive on a piece of paper beforehand—it’s a lot easier to copy from a template than to do it on the fly. And definitely use binder clips to hold letters with a lot of wire overlapped in place. Hot glue the yarn to one end of the word and wrap tightly as you go. Hot glue any spots that seem like they’ll want to come loose. Considering the fact that I got Ds in cursive in grade school (it’s hard to get the slanting right as a lefty!), I’m pretty happy with the results of this project.
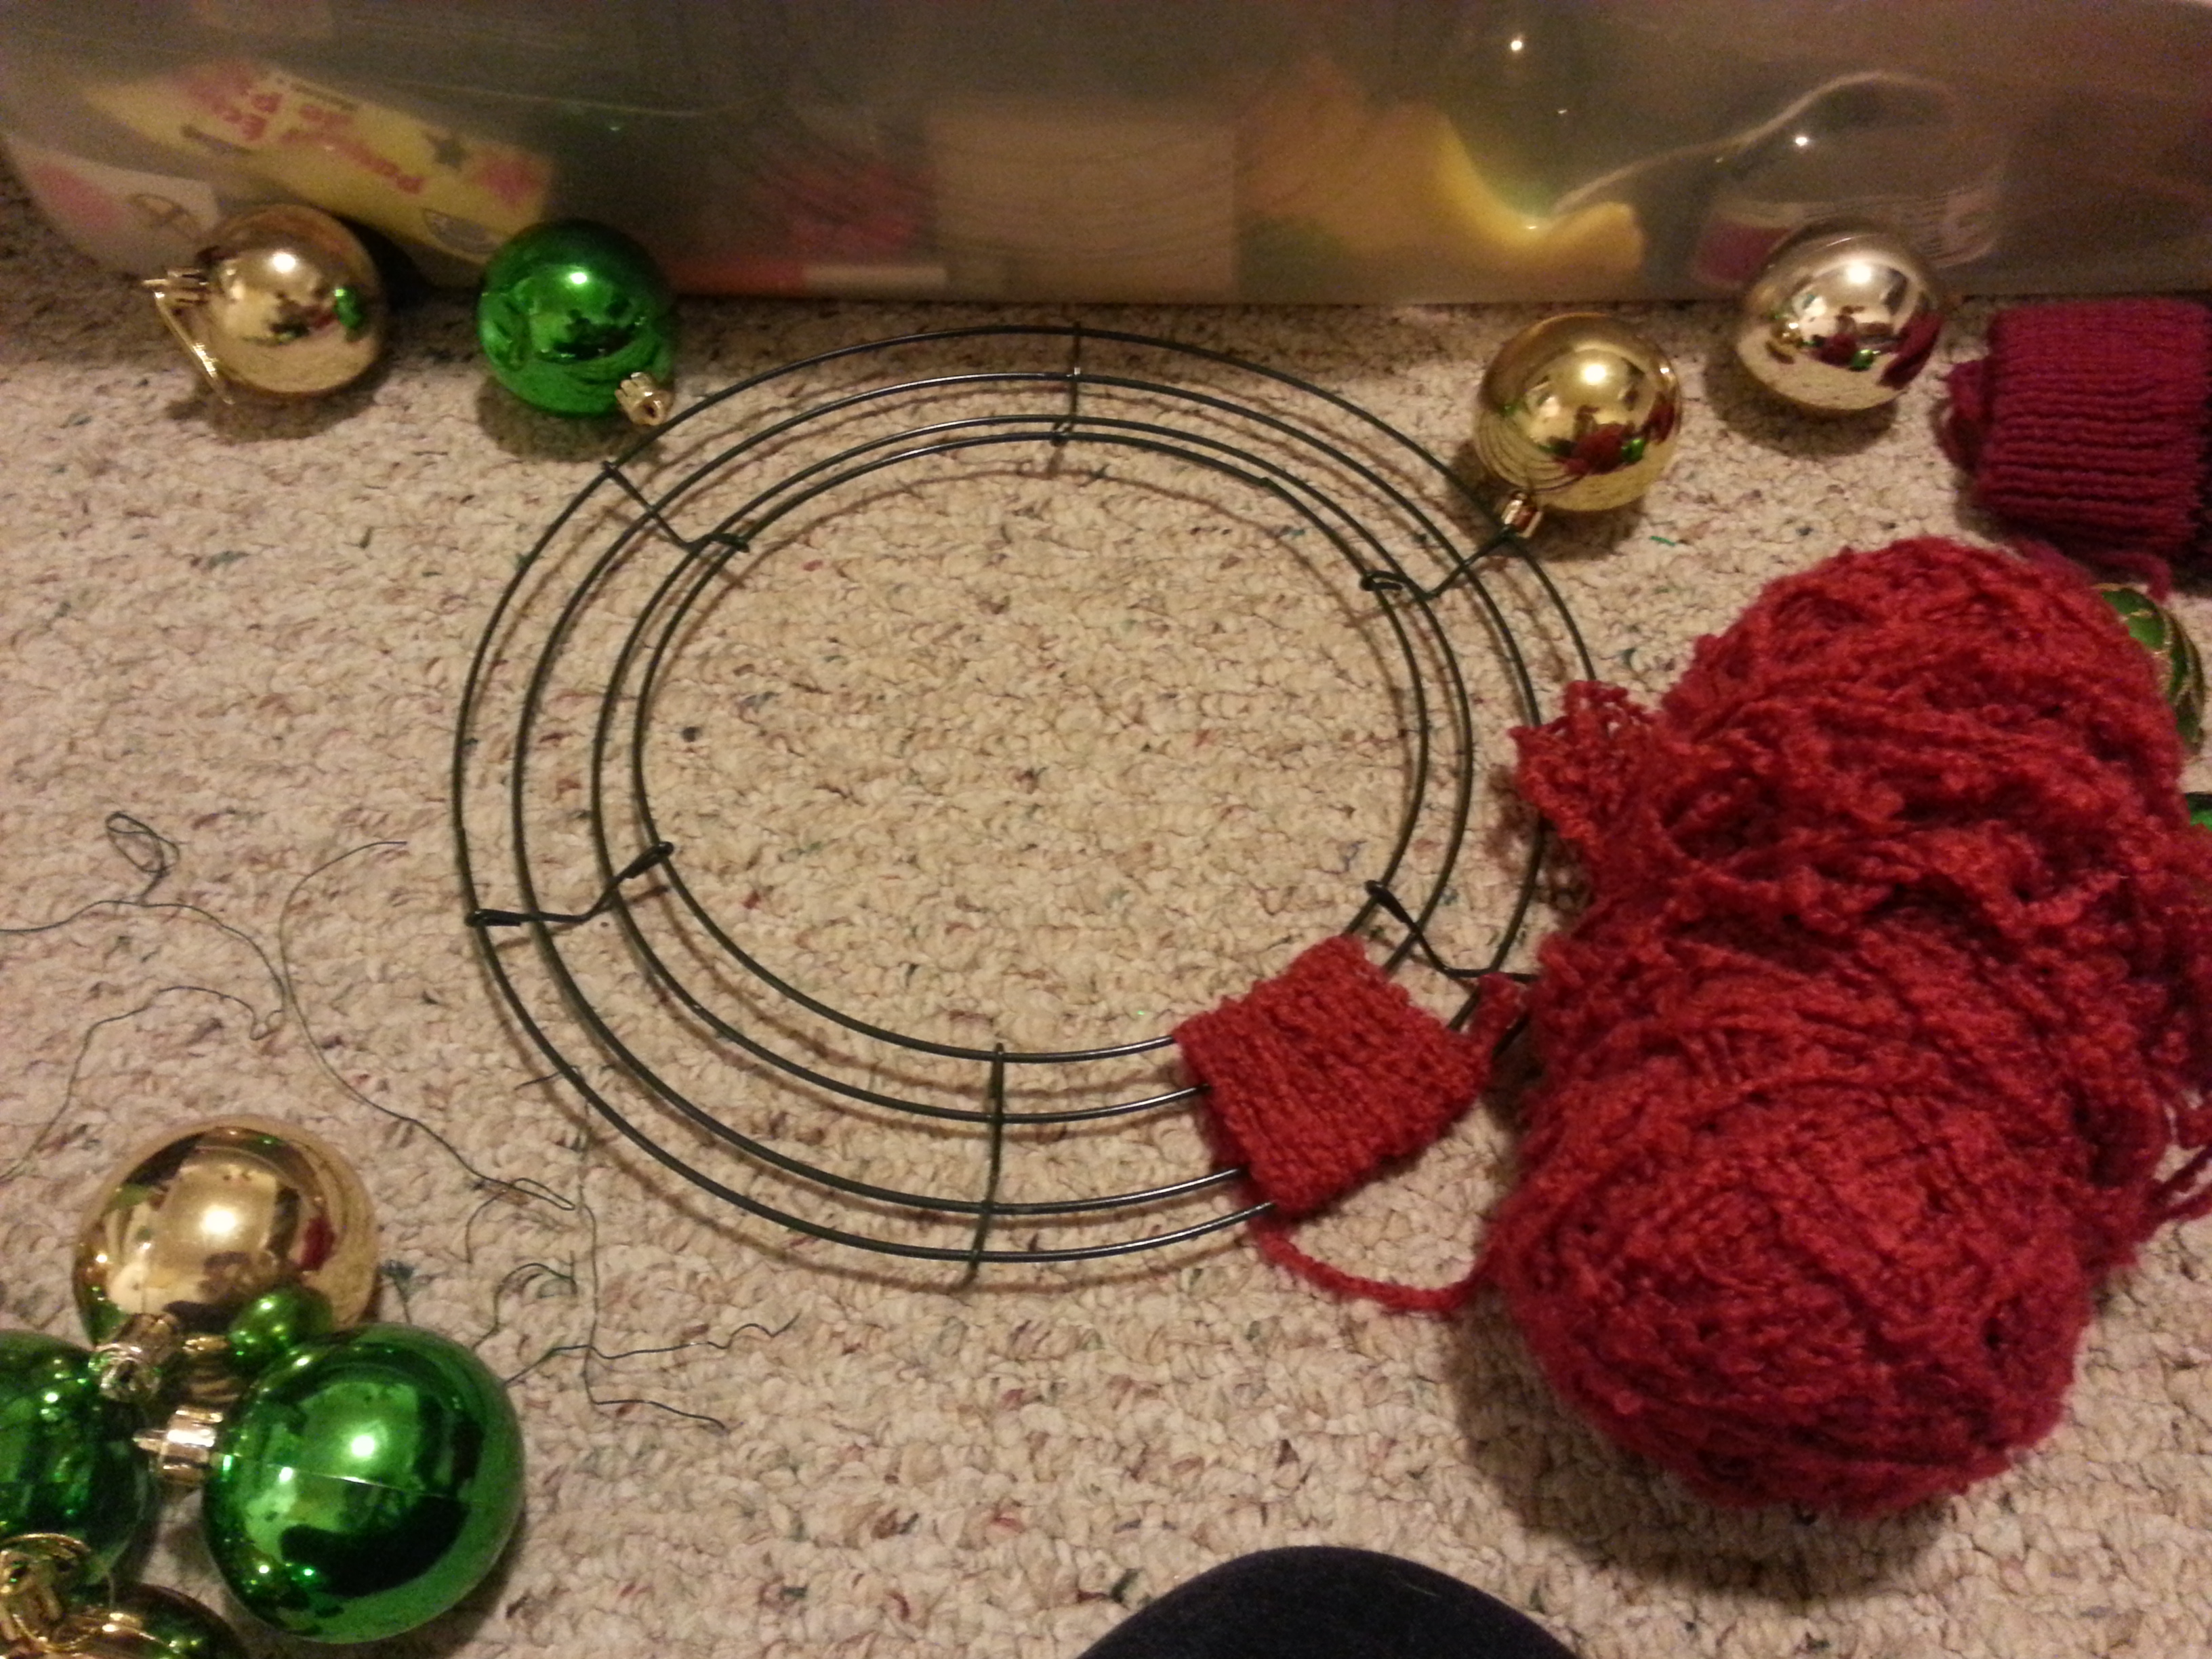
There are tons of tutorials out there for how to make a yarn wreath, most of them using a puffy, styrofoam wreath form. I didn’t look at any of them before I made this, however. Because this is pretty much the simplest project ever: wrap yarn around wreath form. When you are done, tuck the yarn end in the back. That’s it.
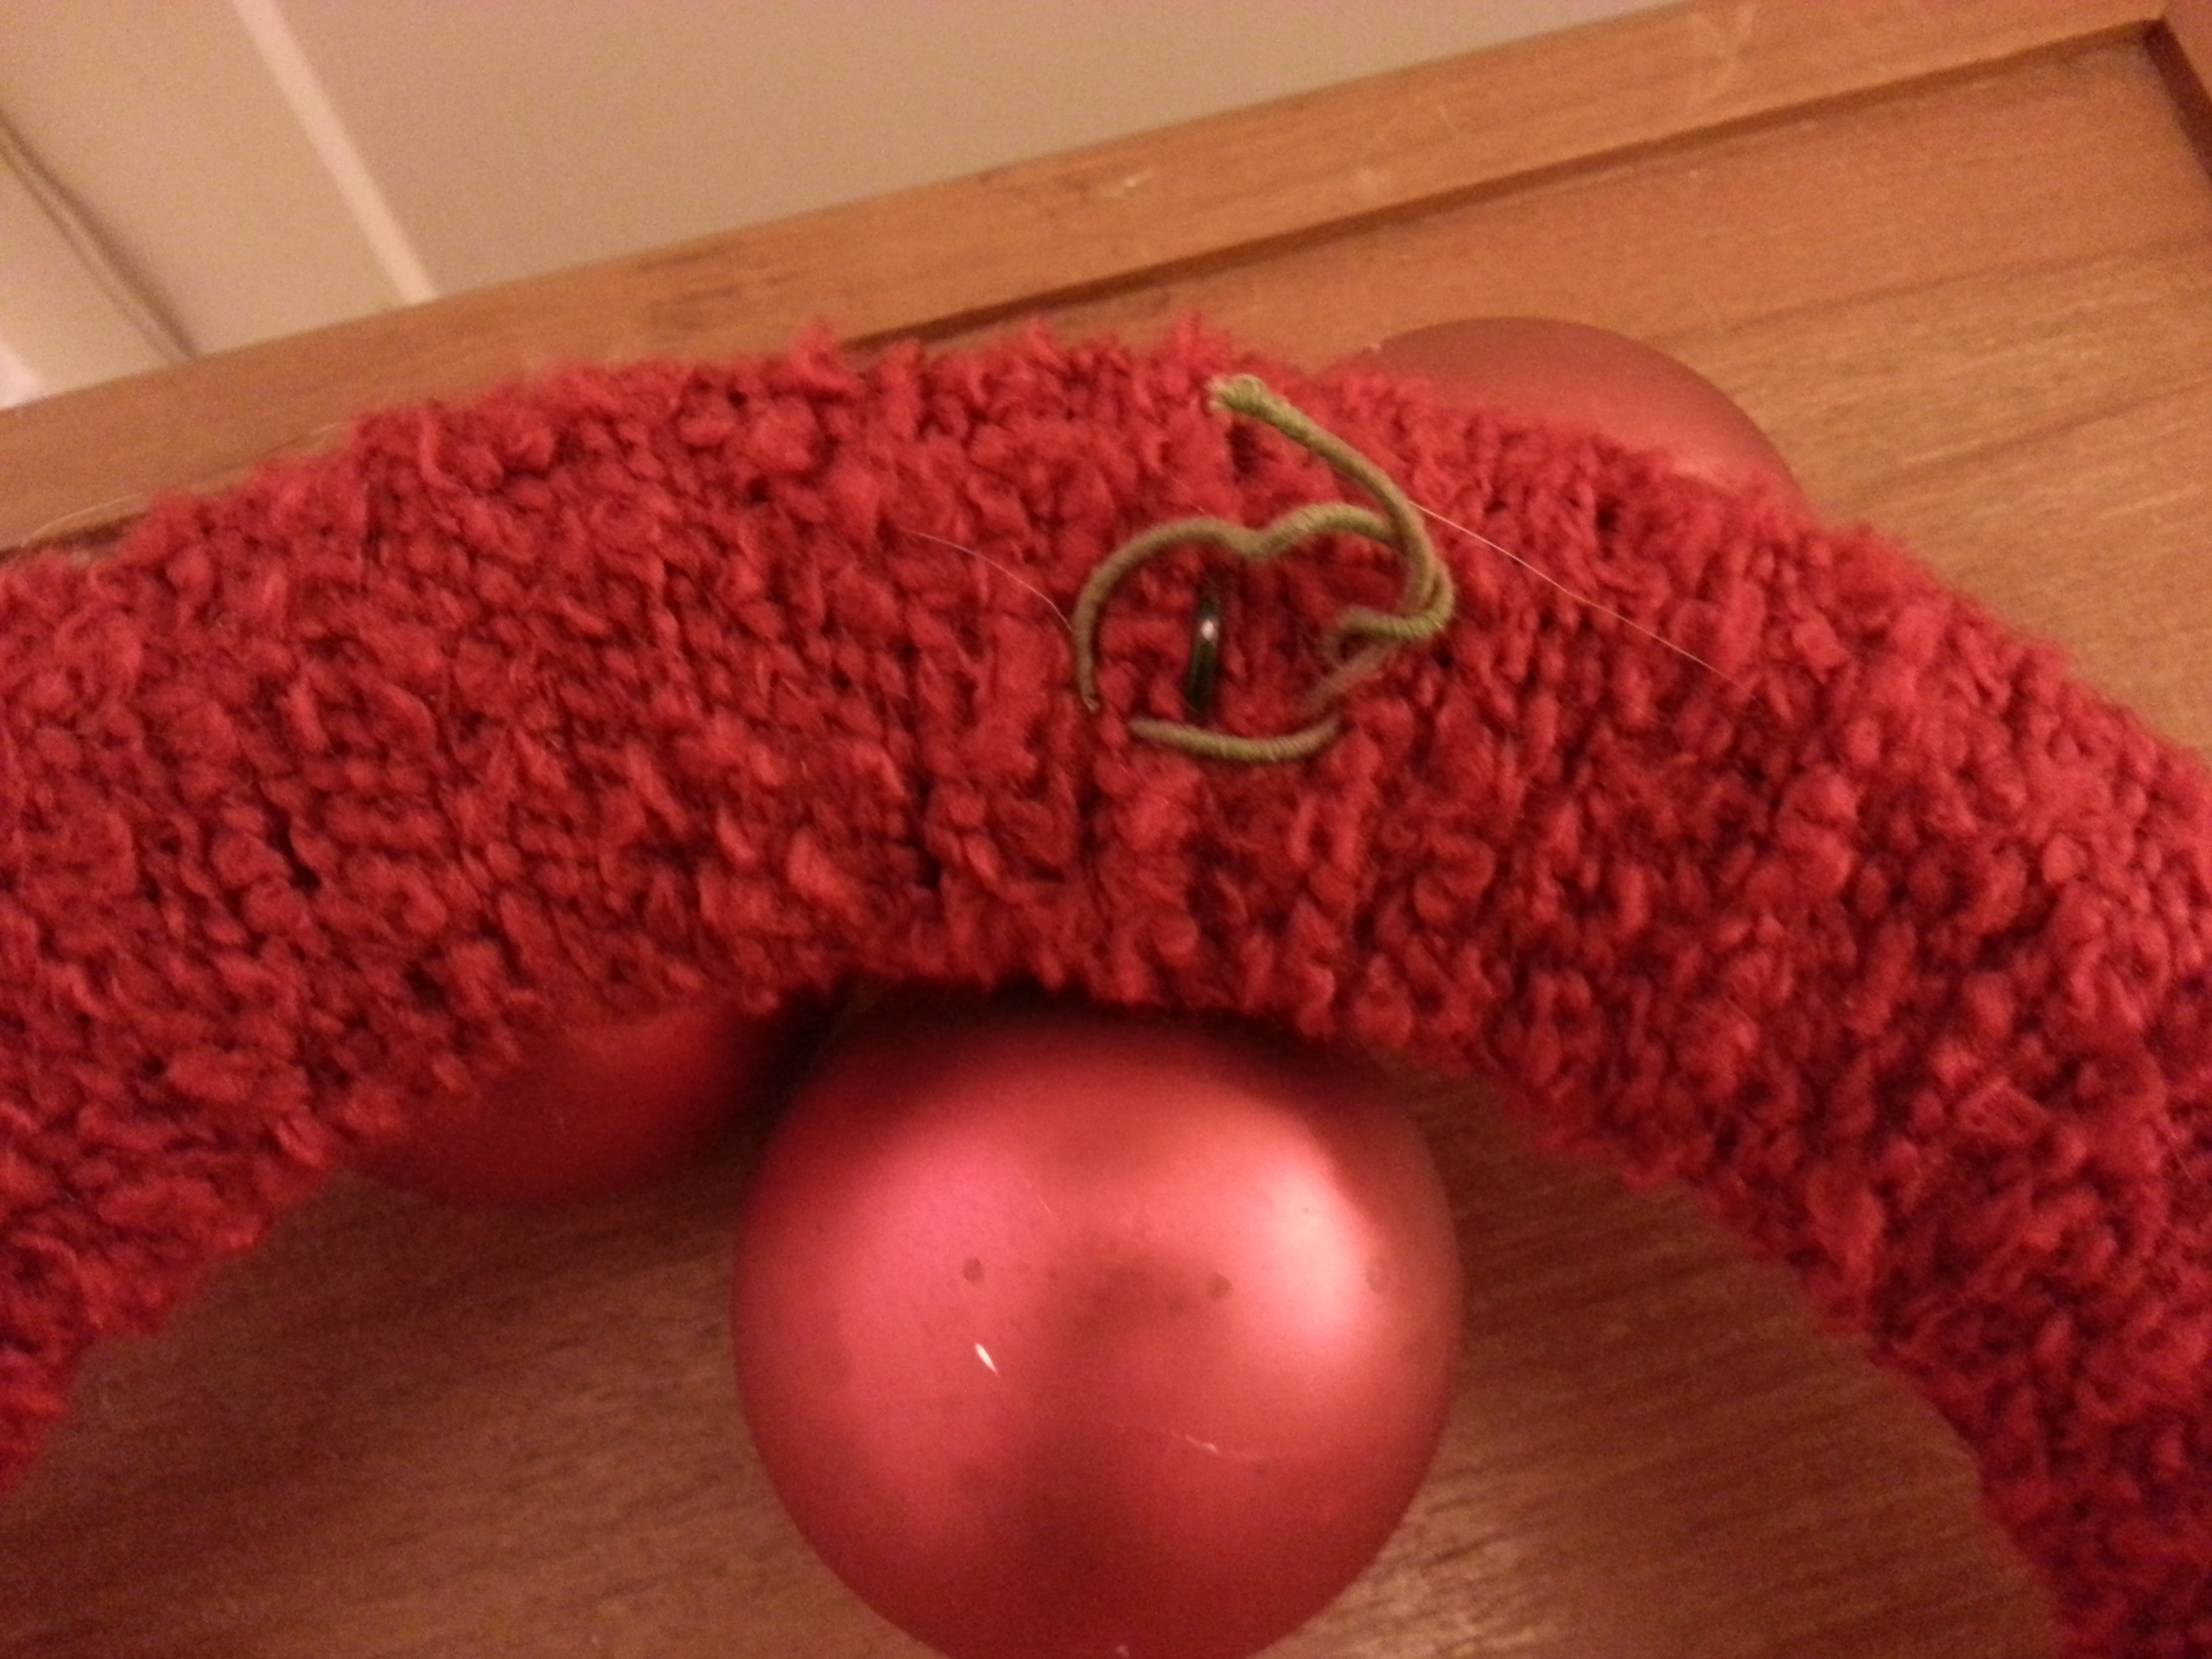
I used this red boucle yarn of unknown origin that was in my stash, which gave the wreath a nice texture. Since my wreath form is flat (it’s the same one I used in previous years to make evergreen wreaths), I added depth by attaching some bobble ornaments in the same color.
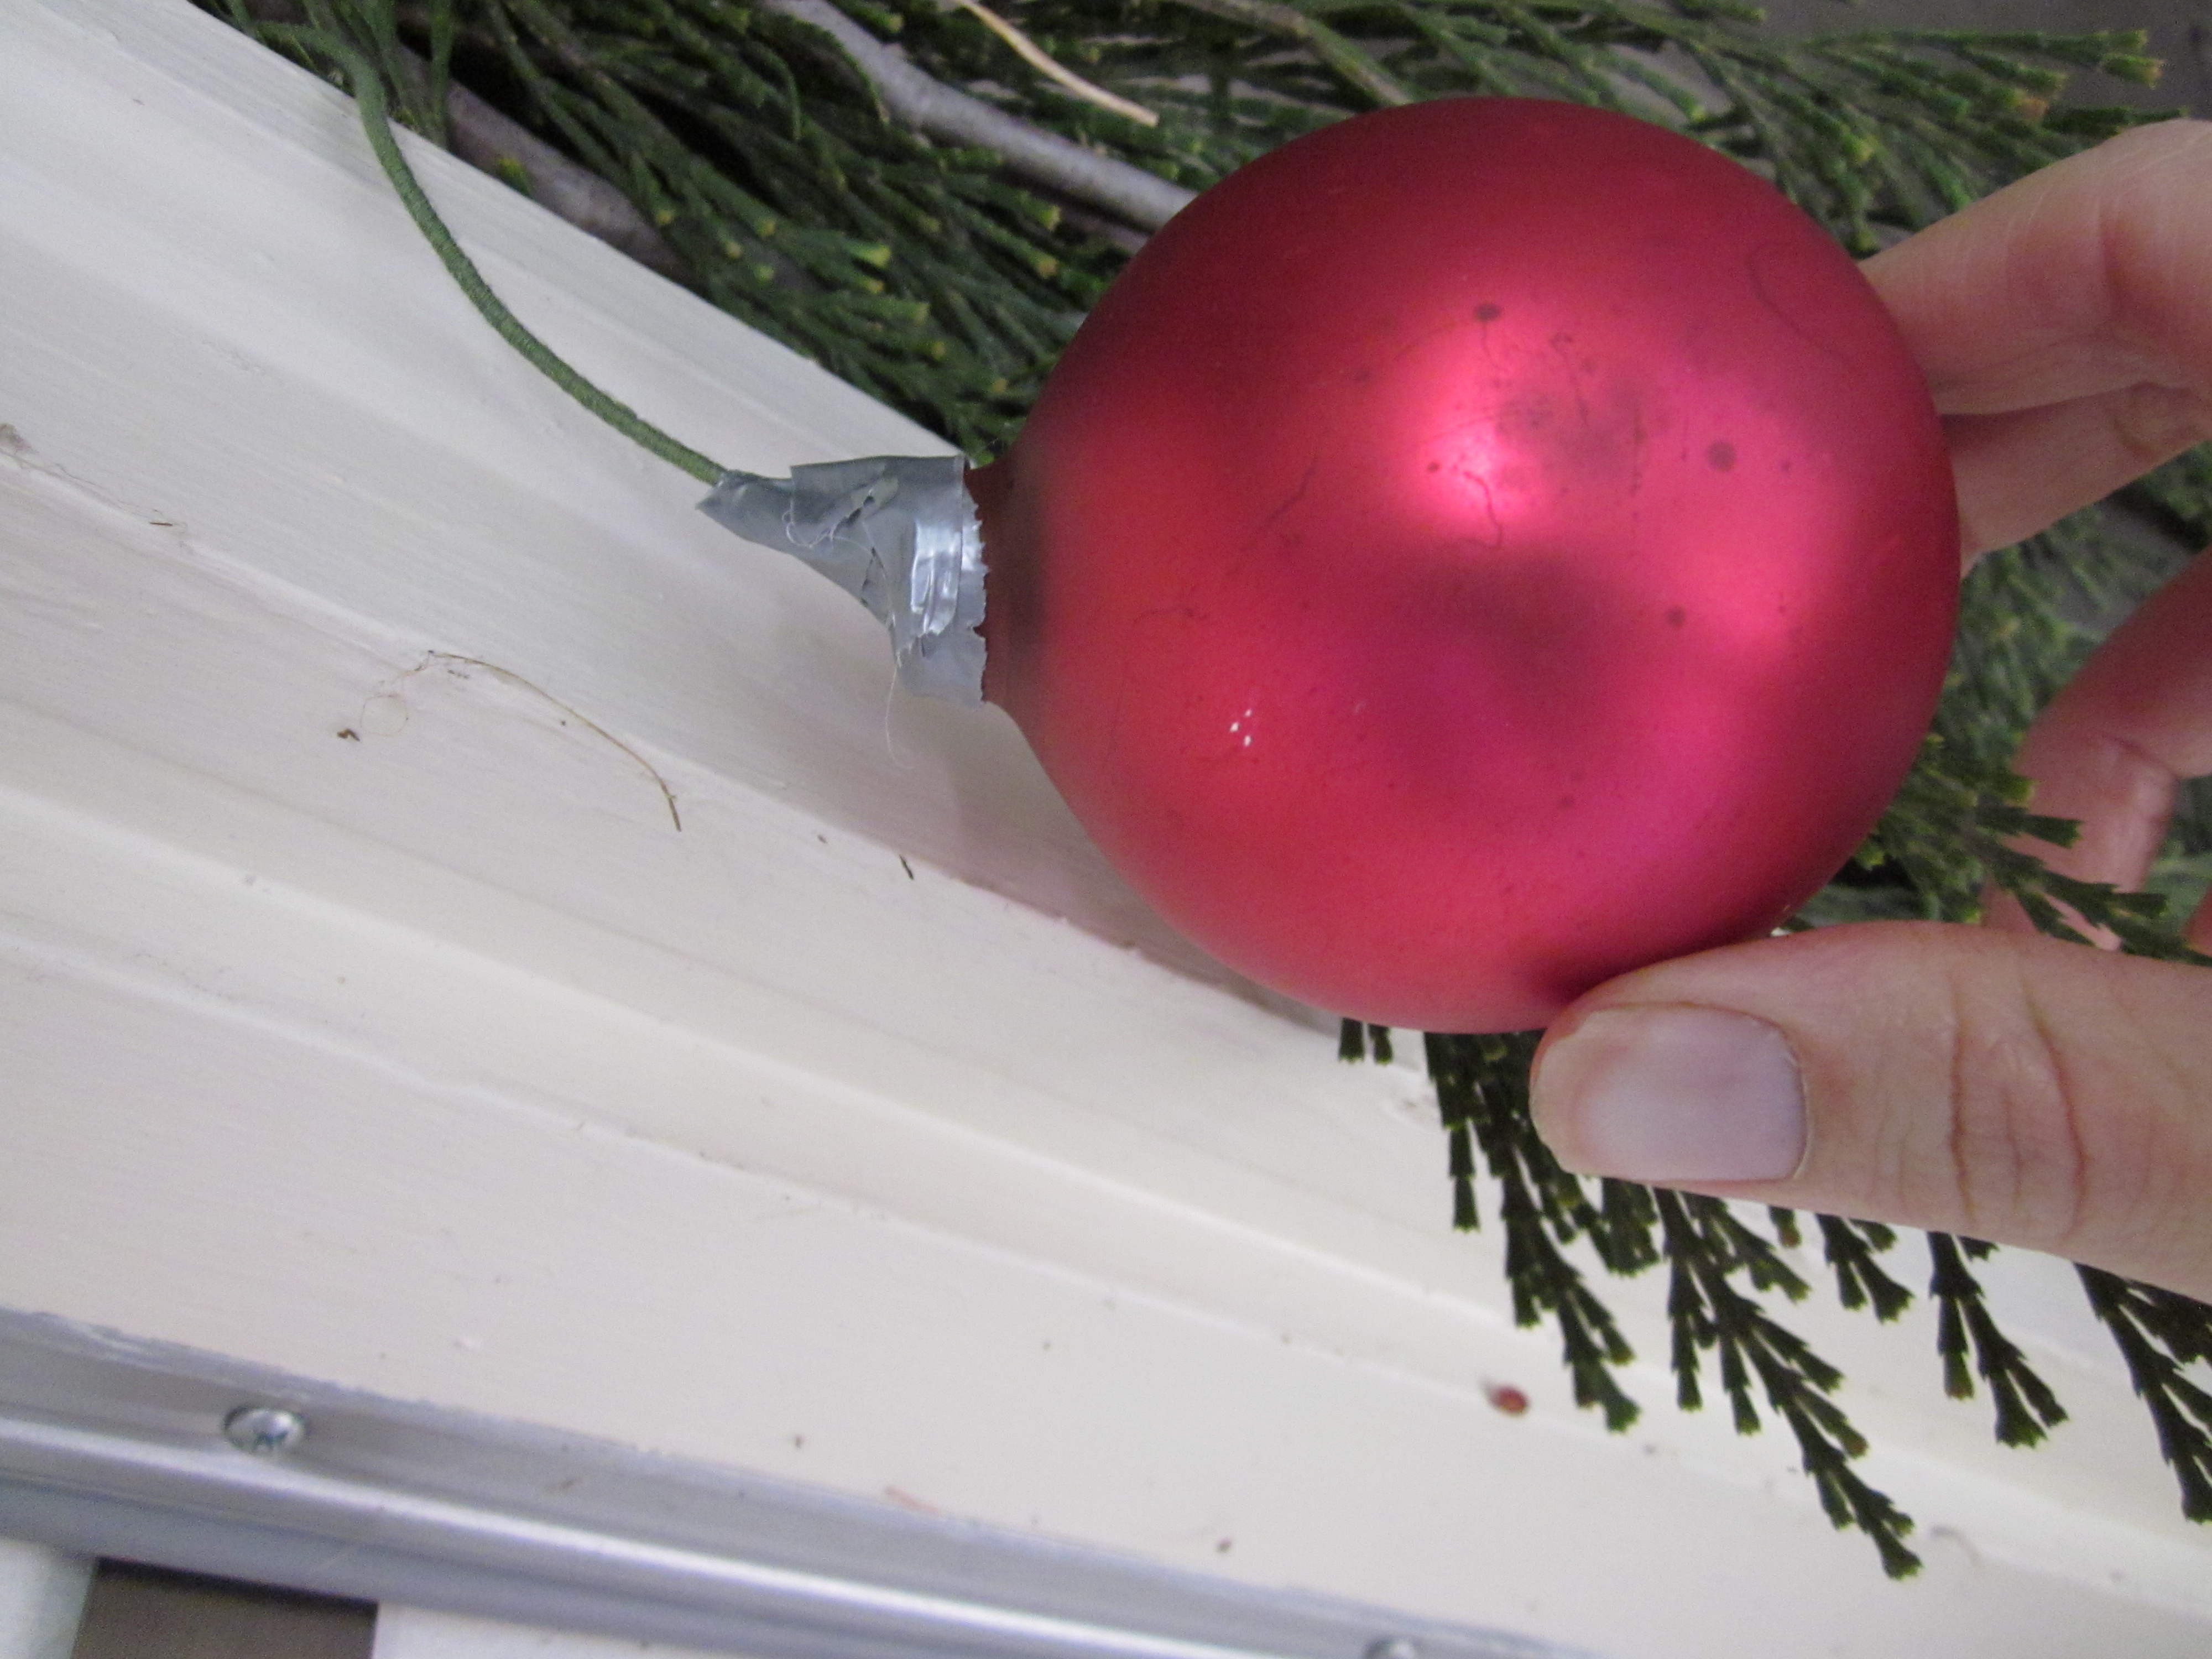
I described how to attach the florist wire to the top of the ornaments using duct tape in this post last year, and these are the exact same ones so they were already prepared. Here’s a photo of what they look like.
I added some red plastic holly berries mostly to cover up the duct tape that was still visible. The result was a very quick wreath that is really red. Here’s what it looks like on my door when all of my Christmas lights are working ( a rarity!):
Yarn Trees
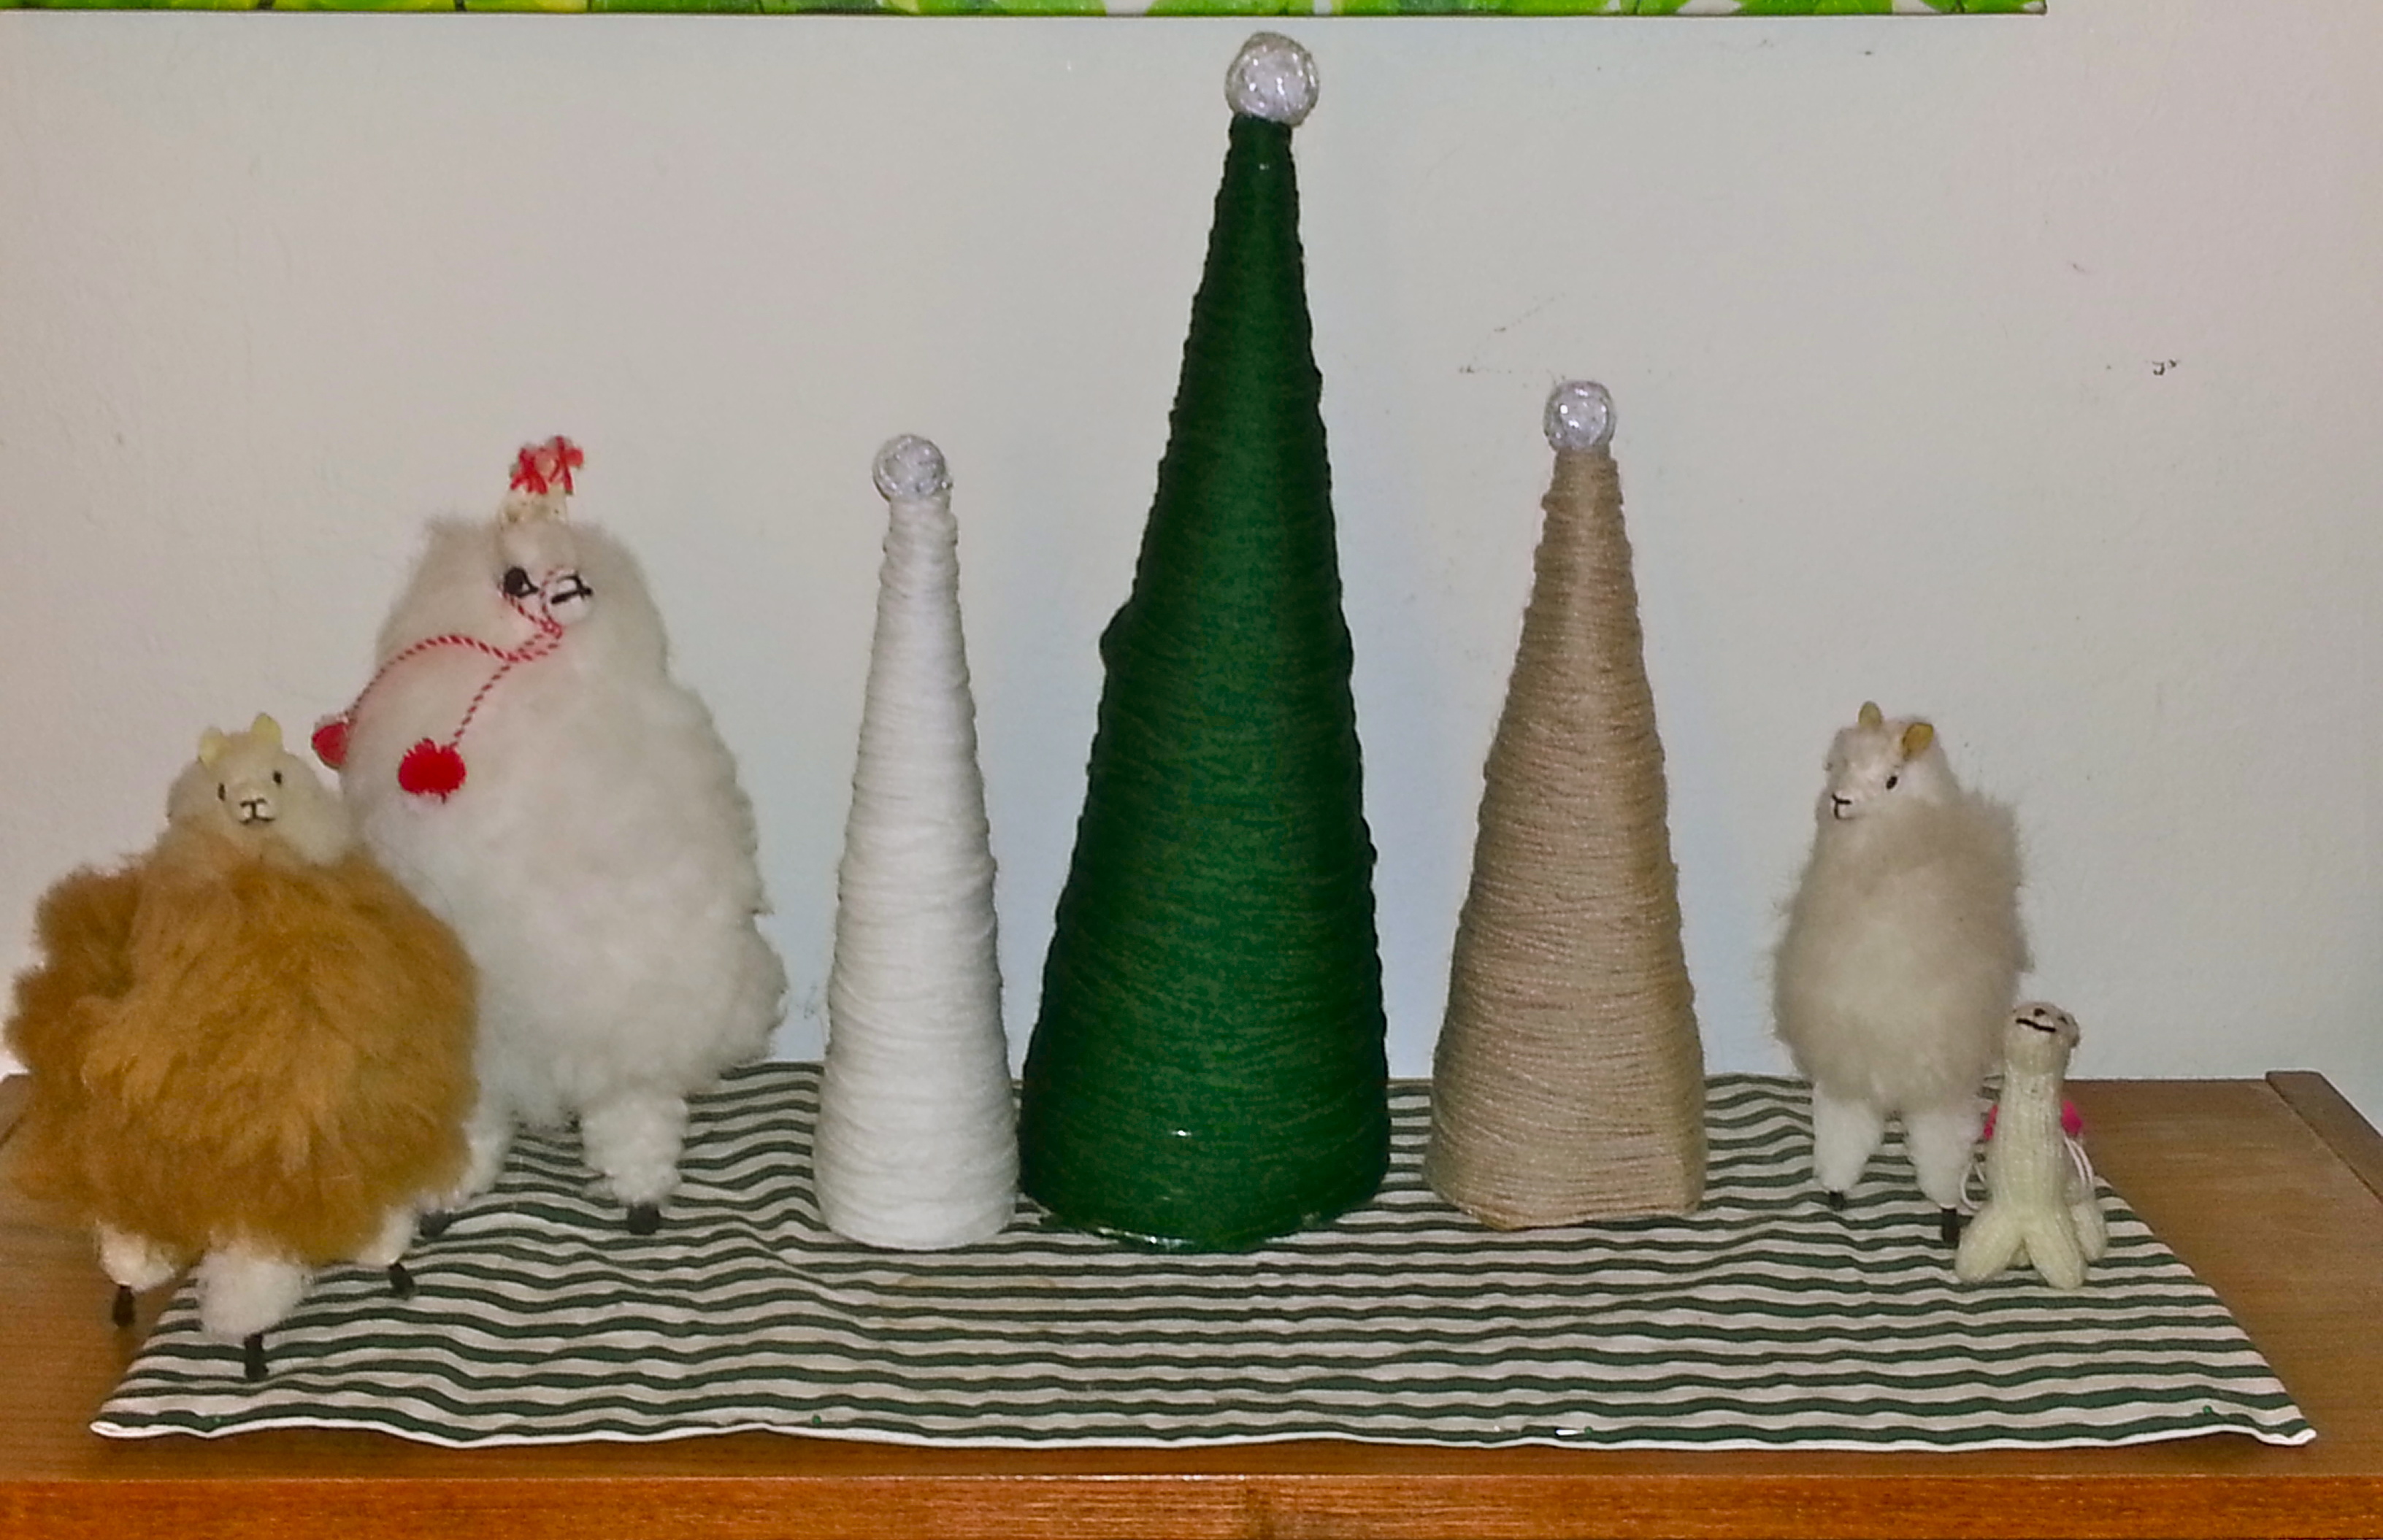
materials: cereal or other thin cardboard boxes, scissors, tape, yarn, hot glue gun. (optional: llamas or other animals to roam the forest of trees)
Once I did the first two projects, I was really wanting to do at least one more wrapped yarn thing, and I figured it might as well be Christmas themed. So when I saw this blog post, I figured why not? I even decided to do the same colors as the original blogger, though I did make some changes.
First step is to open your boxes, trim off excess edge flaps and roll them into cones. To get the come shape, try to pinch it more at one end. I only had one cereal box on hand, but I had two other boxes that were of similar quality and they worked fine. I duct taped mine in place and then trimmed the bottoms until they sat more or less flat on the ground.
Starting at the bottom, I taped the end of the yarn, wrapped it around to the top, hot glued it there, and then wrapped it all the way to the bottom again, and hot glued it around the very base of the tree. The yarn here is some old acrylic in what seemed like good tree colors.
Finally, I decided that my trees should have toppers, so I wound tiny balls of this sparkly silver yarn from my stash and hot glued them onto the tops. And, of course, added the Christmas llamas to the forest.
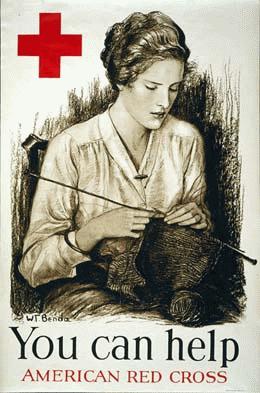
Knitbyahenshop turns two today! Starting my blog on Veteran’s Day (and on 11/11/11) makes this a fairly easy date to remember. In honor of both things, I’m posting more free patterns from my 1918 copy of Fleisher’s Knitting and Crocheting Manual. This time, I’m posting patterns for a blanket, several kinds of men’s “service wear,” and two children’s patterns. There’s both knitting and crochet to be found too. Enjoy!
(For last year’s free World War I era patterns, which include women’s sweaters, women’s hats, and men’s service wear, see my “Knitting for Victory” post.)
Blanket
As I indicated in last year’s post, most of these patterns will take some interpretation and creativity if you want to make them—a lot of the descriptions assume you know the basics of knit and crochet, and needle and yarn sizes many not match contemporary ones. But this blanket pattern looks pretty self explanatory to me:
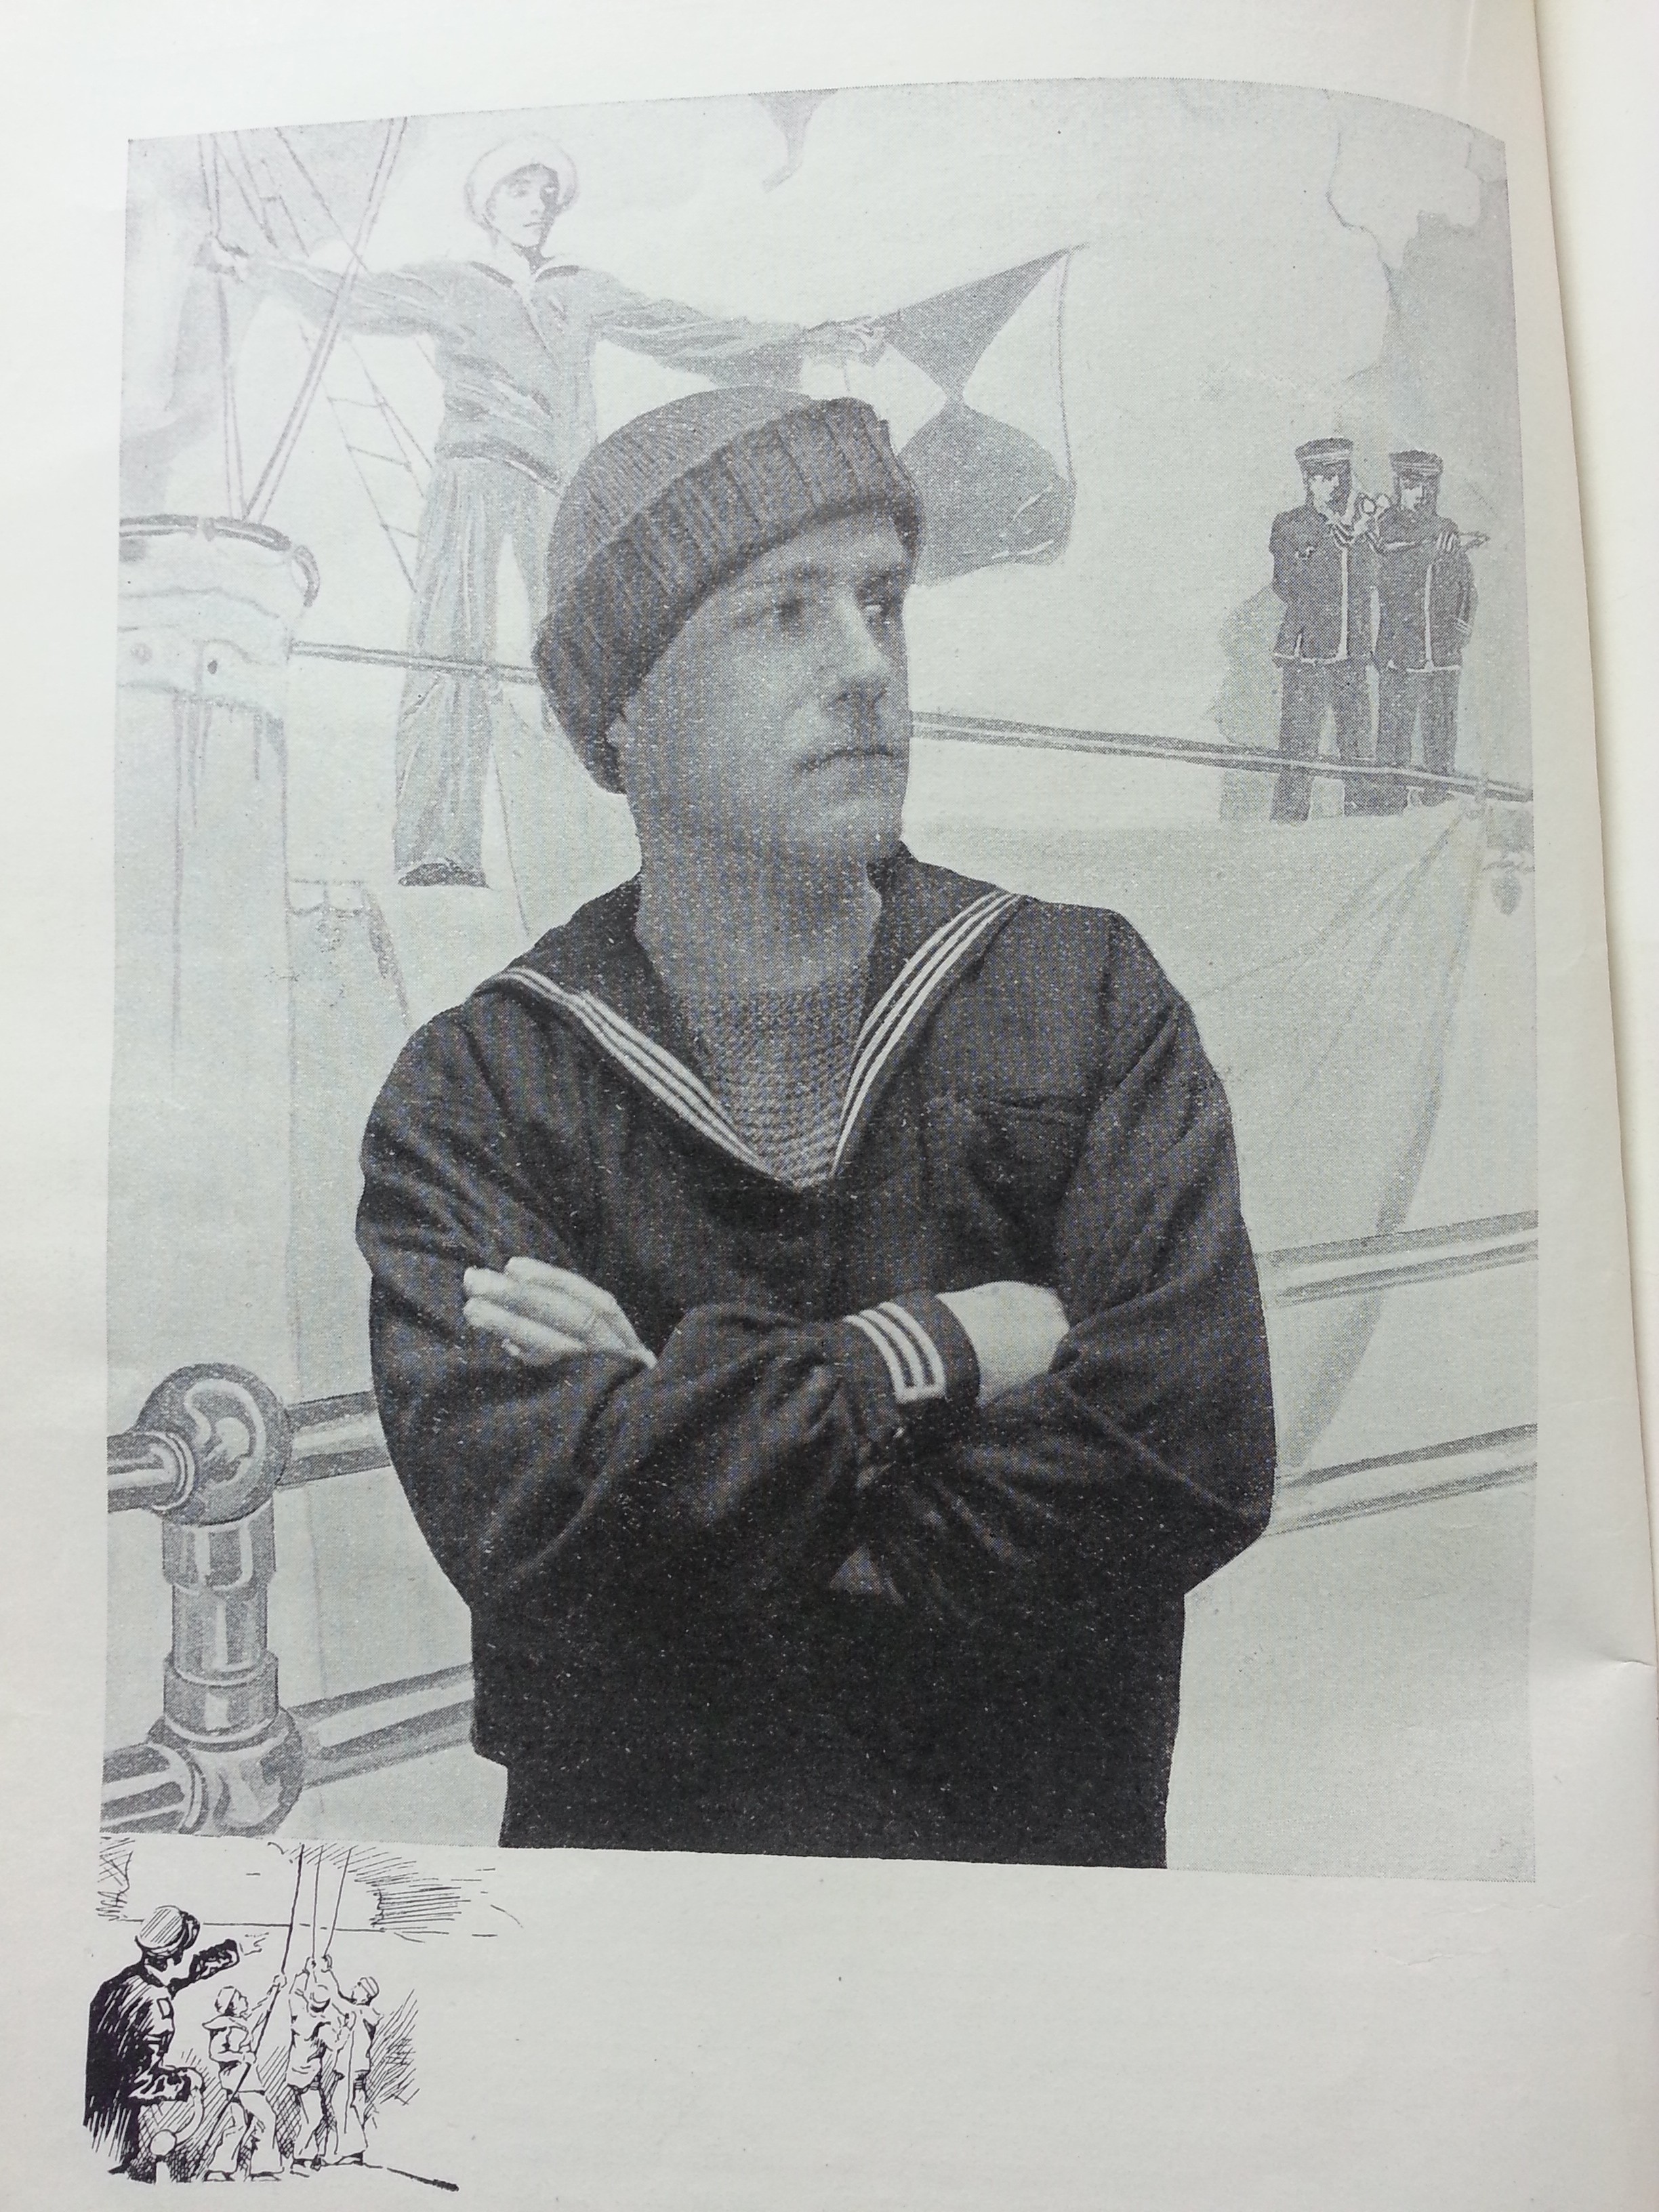
Sweater
The man modeling Service Sweater Type B looks rather unhappy in this photo, but I really like the construction of this pattern—especially the three pockets. Very practical indeed.
Hat
There’s a pattern for his hat too! I like this photo much better. The pattern here looks quite doable to me, pretty straightforward hat construction.
Socks
I have been knitting socks recently (still a work in progress) so I was curious about what sock pattern was considered standard in 1918. Looks like it was a top down sock with a gusset heel. If you are quite familiar with sock construction I bet this pattern would be fine, but the directions are a little vague so I don’t think it would be good for a beginner.
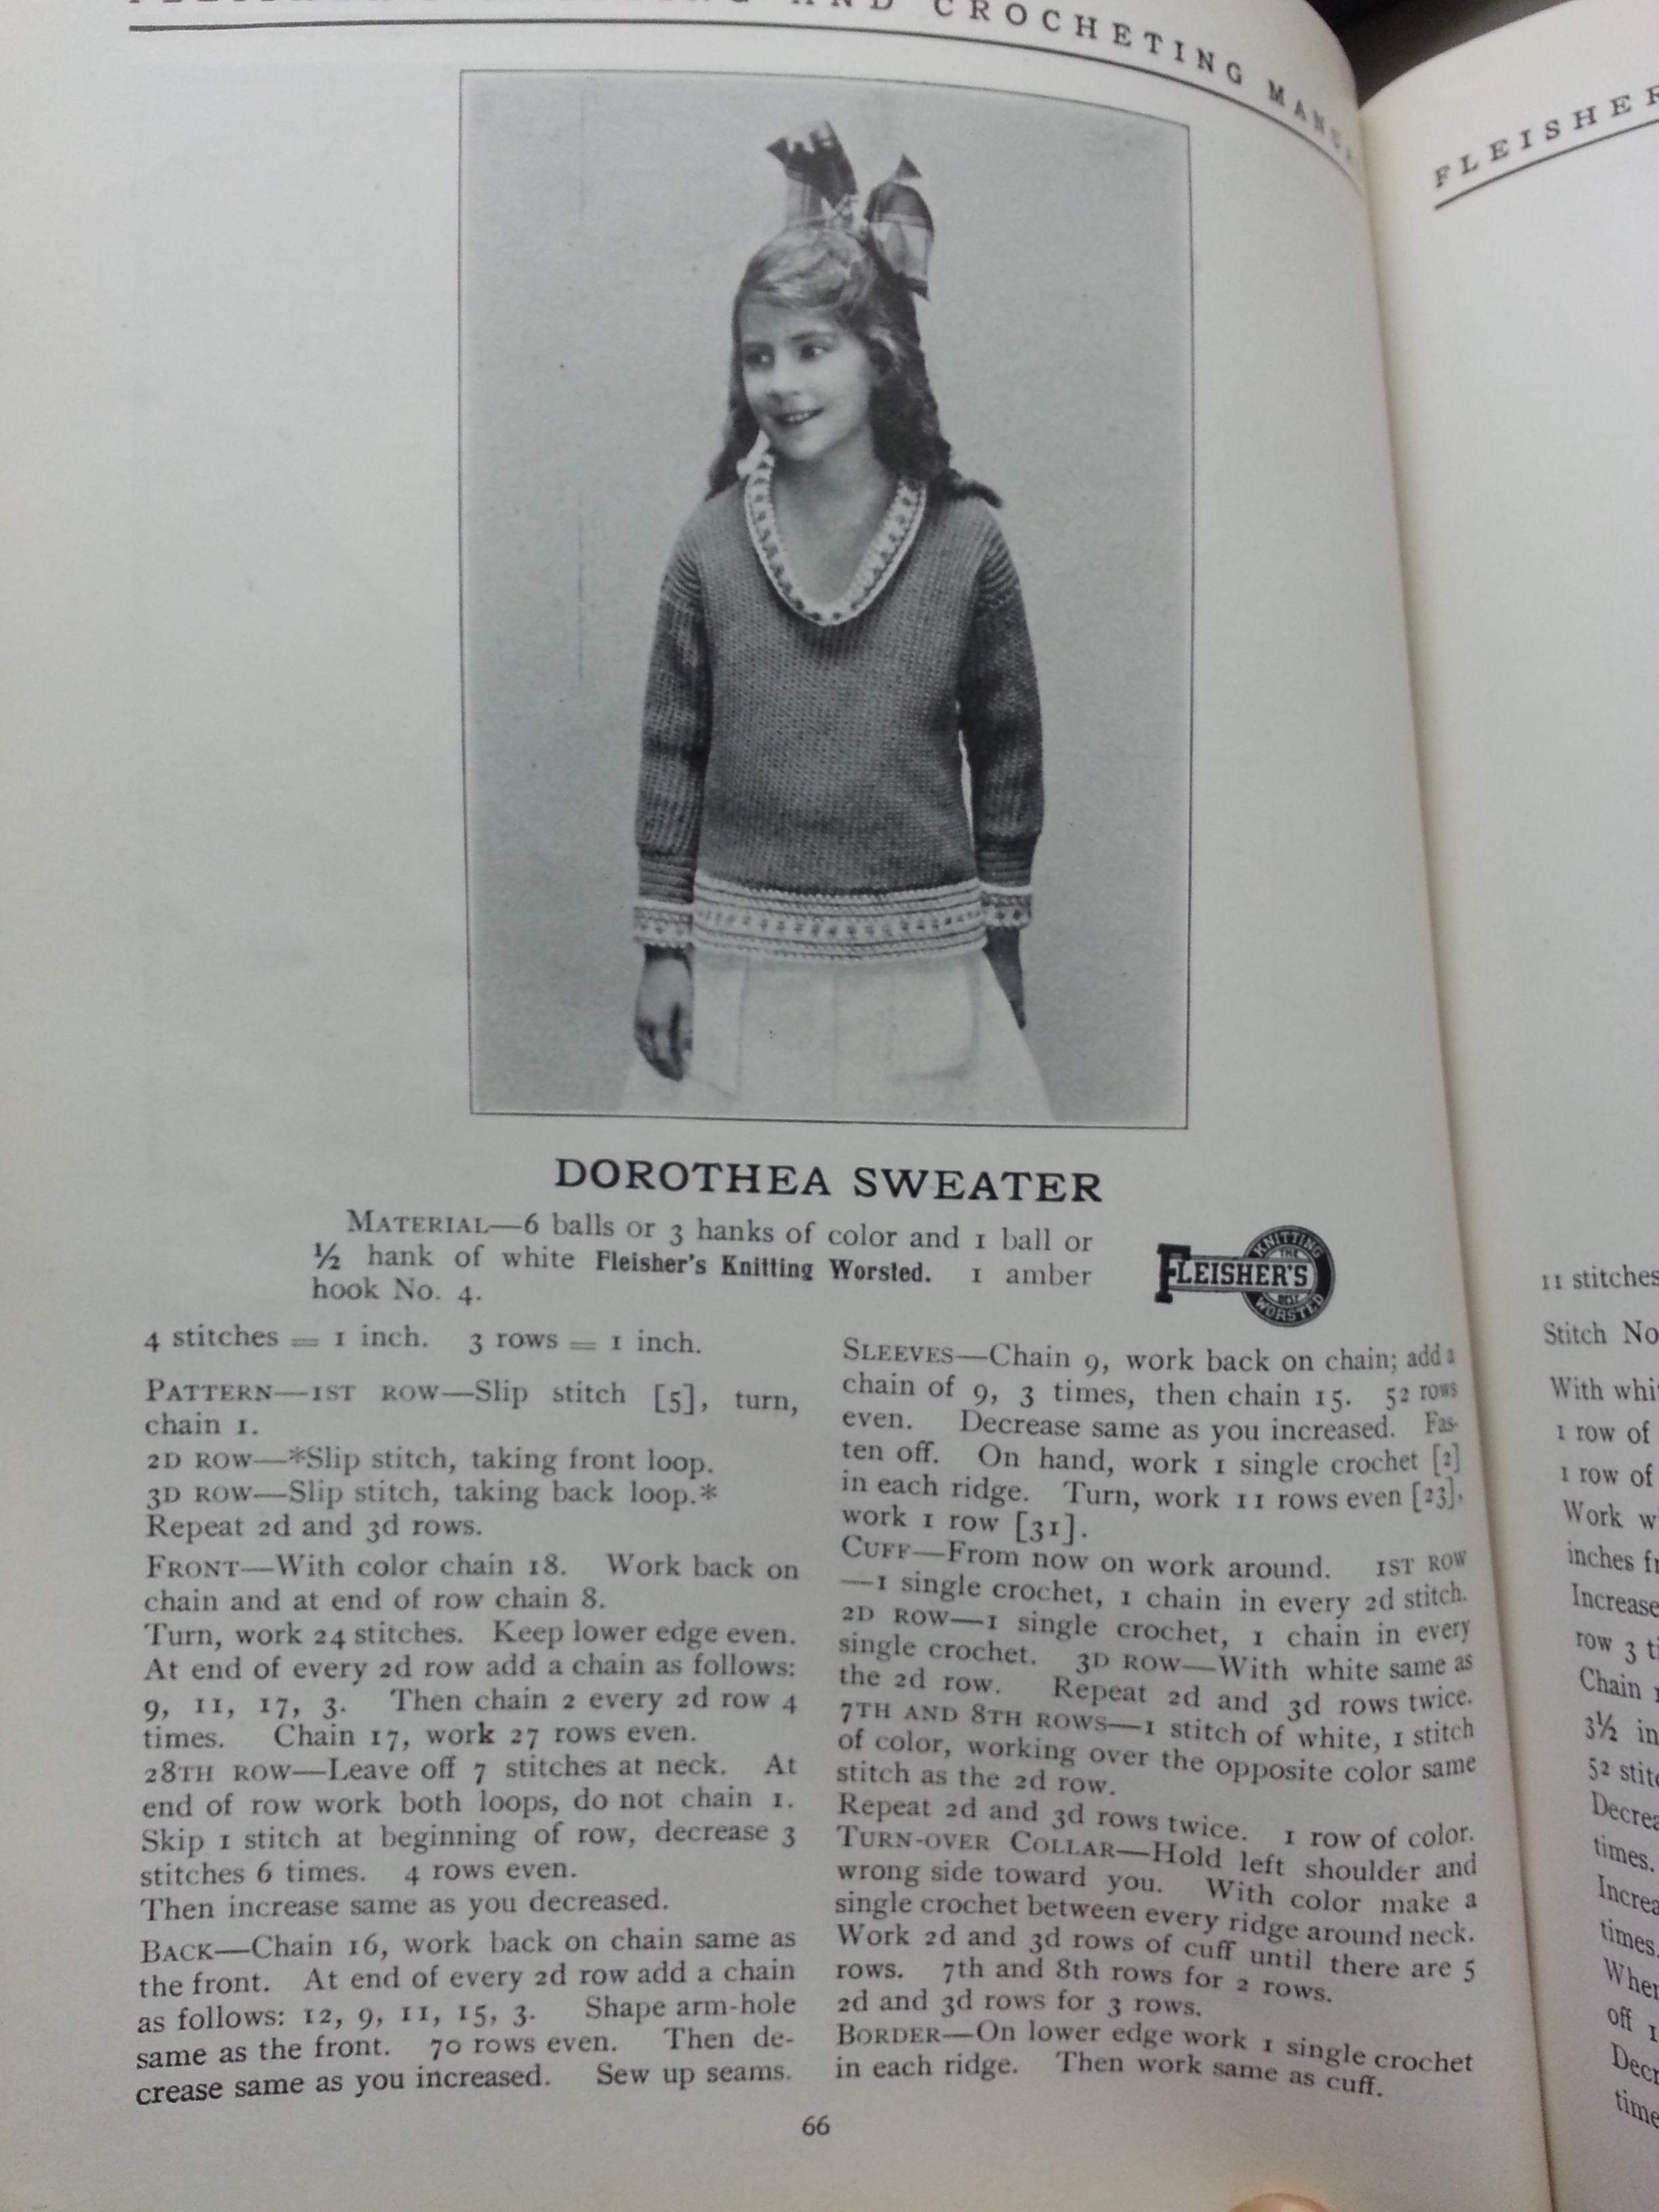
Children’s Sweaters
Here’s a little crochet for you! I love the color pattern banding on this Dorothea Sweater. The collar looks especially fun. Too bad it doesn’t say what colors were used in the original!
I also love the collar detail on this Pearl Sweater. Again, apparently there are two colors used here but I can’t tell what they would be. It looks like three quarter length sleeves to me, but it’s hard to tell from the photo.
Measurements
These should help you if you want to actually make these patterns:
November in the Northern Hemisphere seems to be when knitting season kicks into high gear. If you’re a super productive knitter, you’ve probably finished your Socktober socks and moved on to your sweater for National Knit a Sweater Month (aka NaKniSweMo) and your holiday gift projects. Unless you are like me, in which case you are simply looking at your stash and thinking “I am sort of cold. Can I make something from this yarn to make me less cold?” The answer, of course, is yes. Here are three (free!) patterns for the things I think I’ll be wearing a lot this month to keep warm.
(p.s. I realize the title of this post is a little misleading— one of these projects is actually crochet, and I did not make any of them in November—I am simply planning to wear them this month. But I wanted the alleteration!)
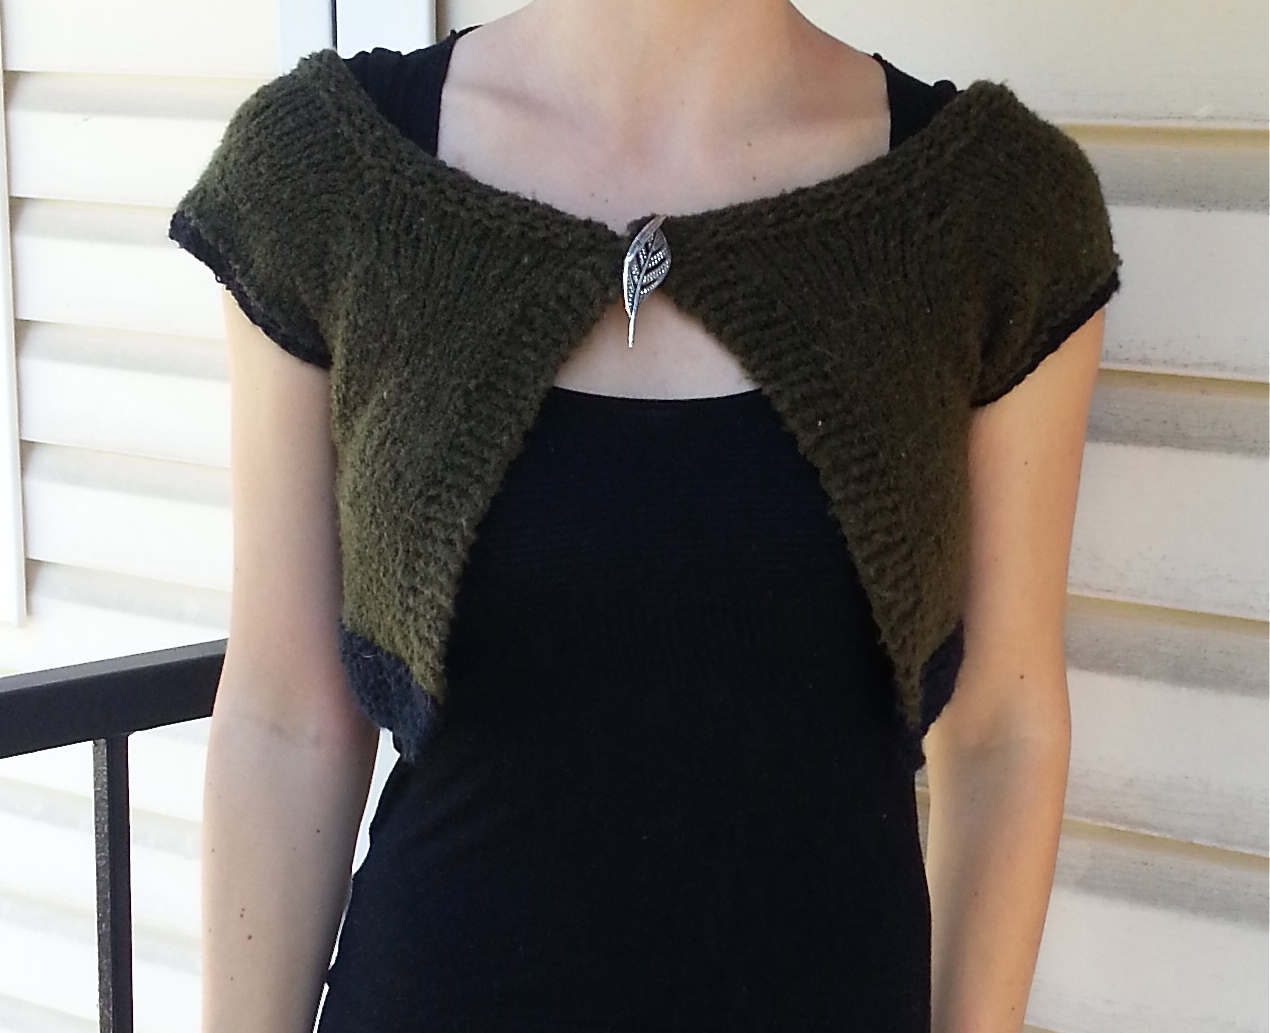
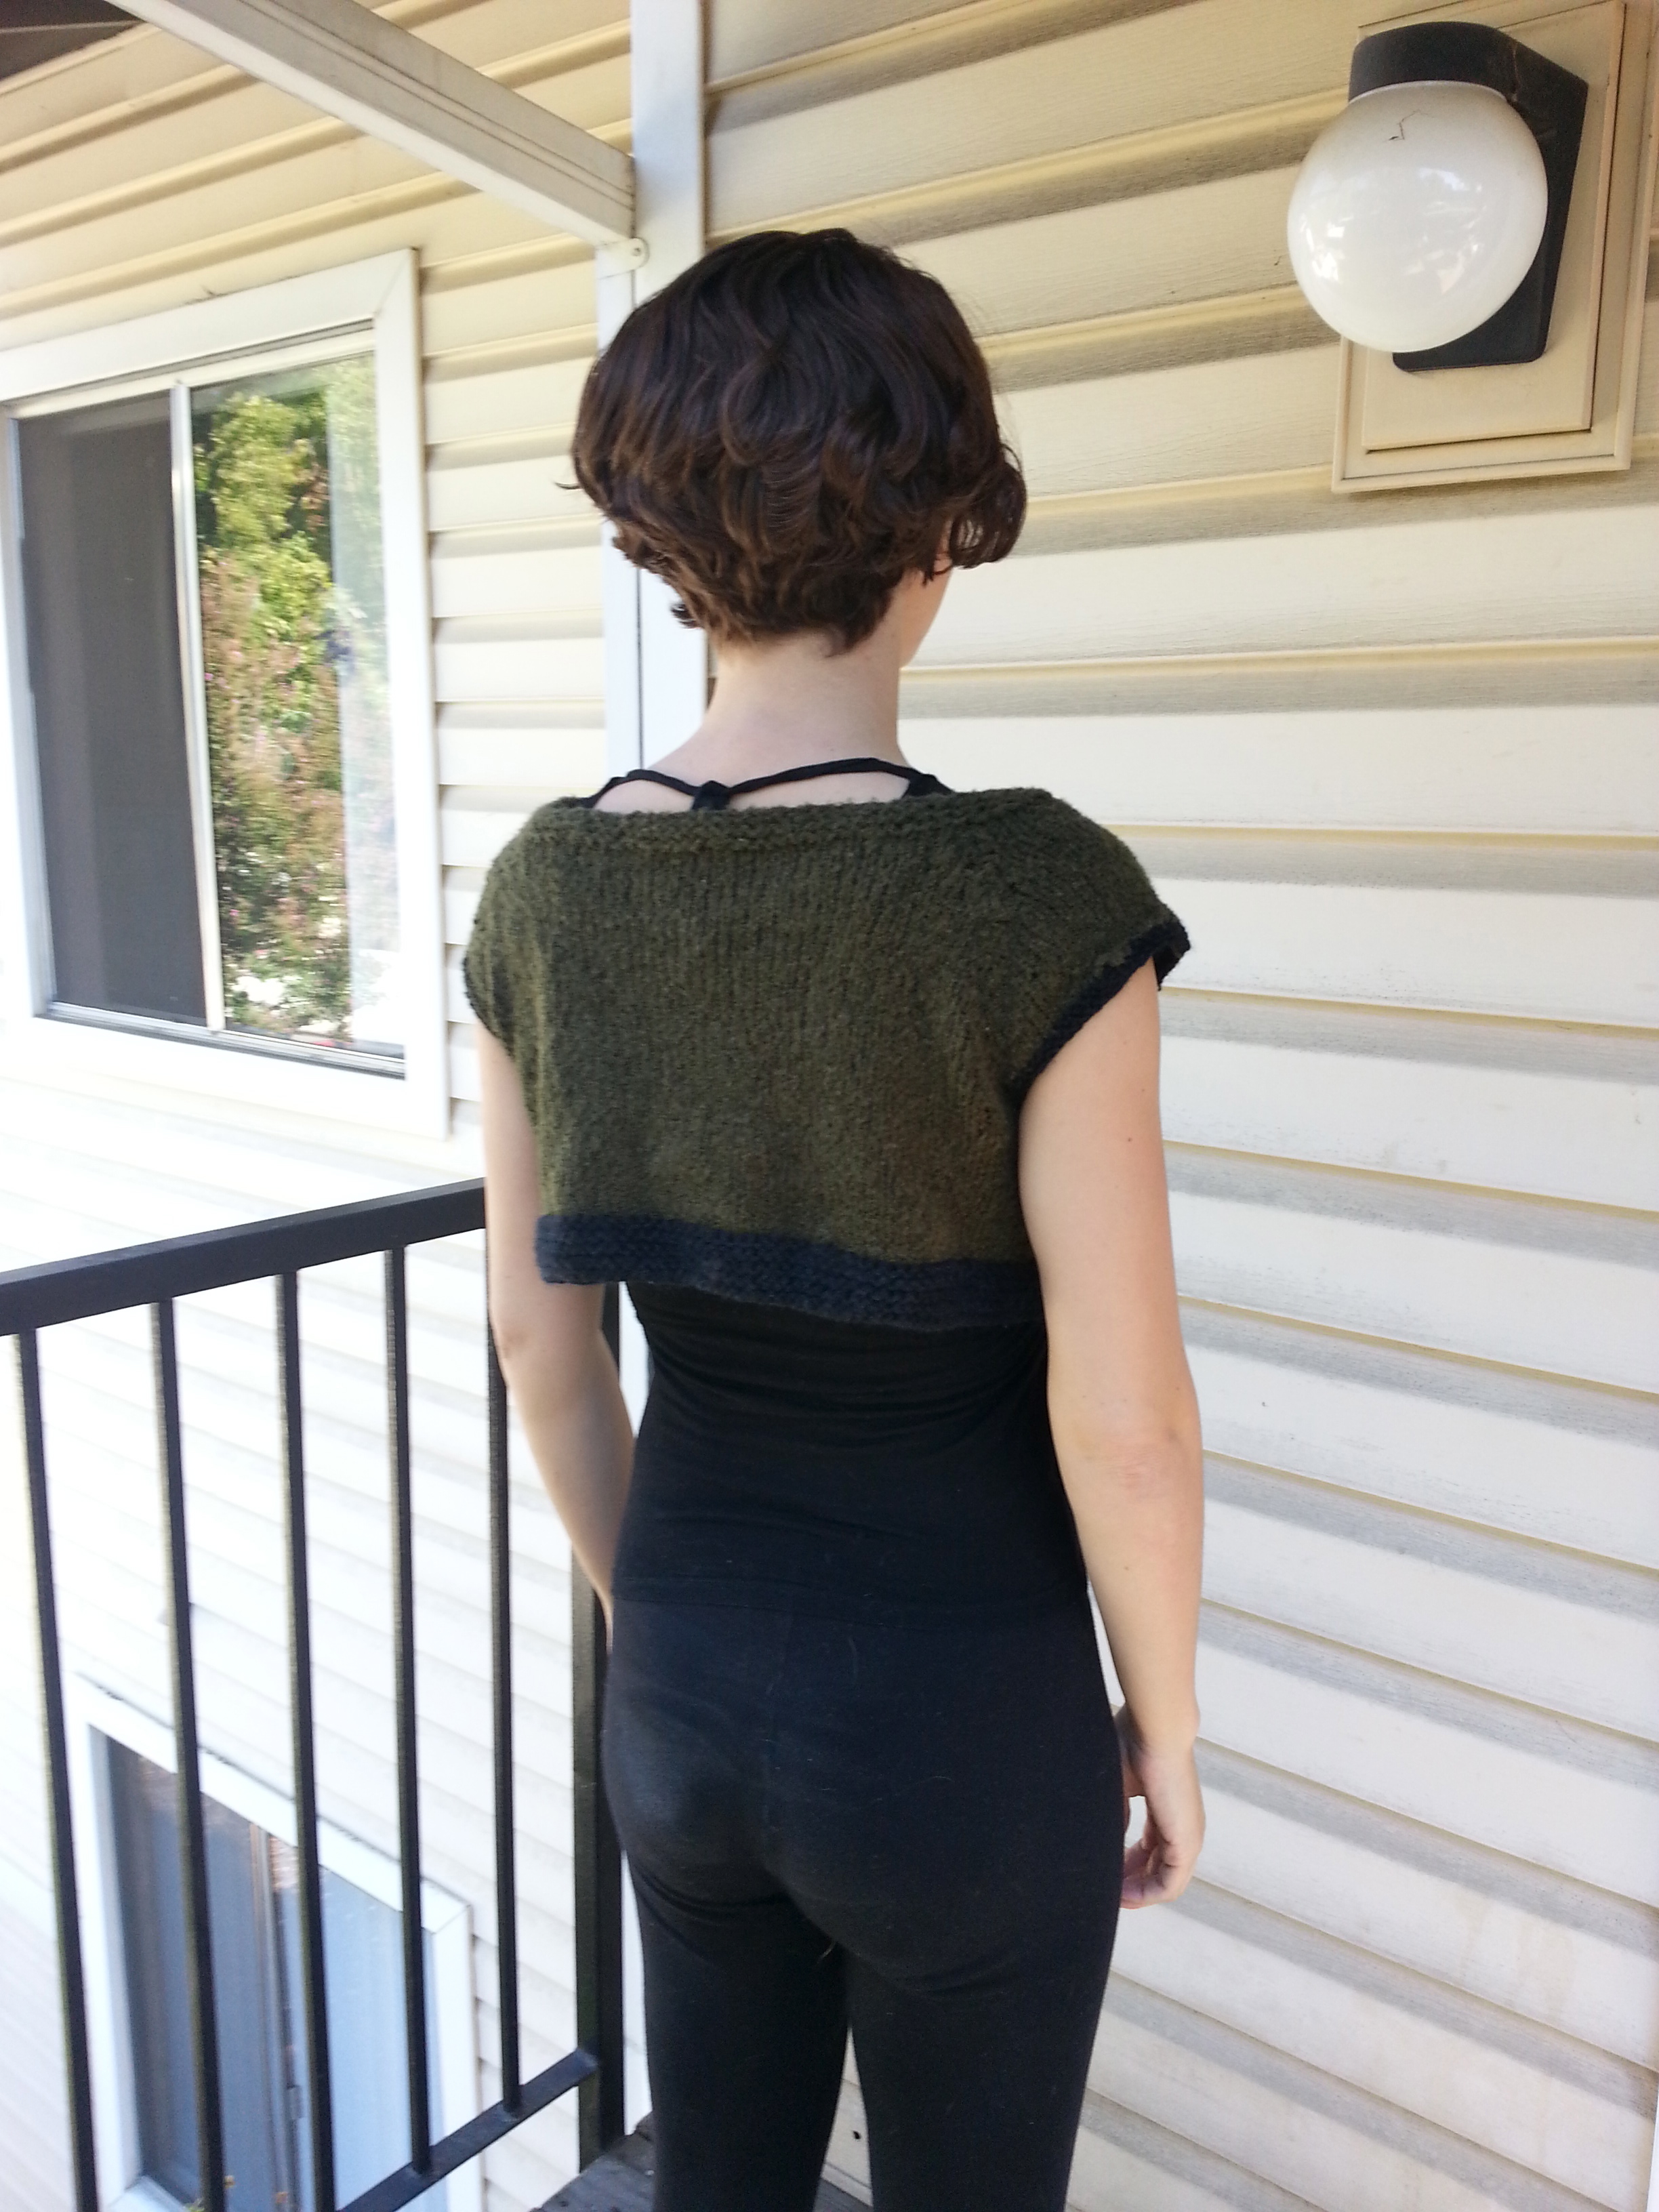
1. Half a Cardi
I actually made this little cropped short-sleeve cardigan three years ago but I seem to get use out of it every fall. The pattern here is Half a-Cardi by Patti Gonsalves. It’s a great chance to try out a top down raglan style if you haven’t already. It knits up pretty quickly too. I usually wear it over a black tank top or long sleeve shirt with the leaf pin to keep it connected at the top. It adds an extra layer without adding too much bulk.
You’ll notice that my half a-cardi is shorter than some of the others on ravelry, and that it has a contrasting black band at the hem and sleeves. That’s because I knit this with a completely unknown yarn that someone had given me. I’m not even sure what kind it is—it’s kind of chenille like, kind of boucle like. I love the color. When I ran out of yarn a bit shy of my target length, I added the garter stitch bands in black.
This is the eternal problem with stash knitting—if you don’t have the label and you didn’t get to measure how much might be missing from a skein, it can be a little tricky to predict if you have enough. I thought I had the 260 yards required to make the smallest size, but it didn’t quite make it.
However, I am still a firm believer in knitting from the yarn the you already have, whether it’s left over from another project or gifted to you from a friend. I try to focus on stash knitting as much as possible not only because I am a proponent of not wasting what I have, but also because it makes me more creative in choosing and executing projects.
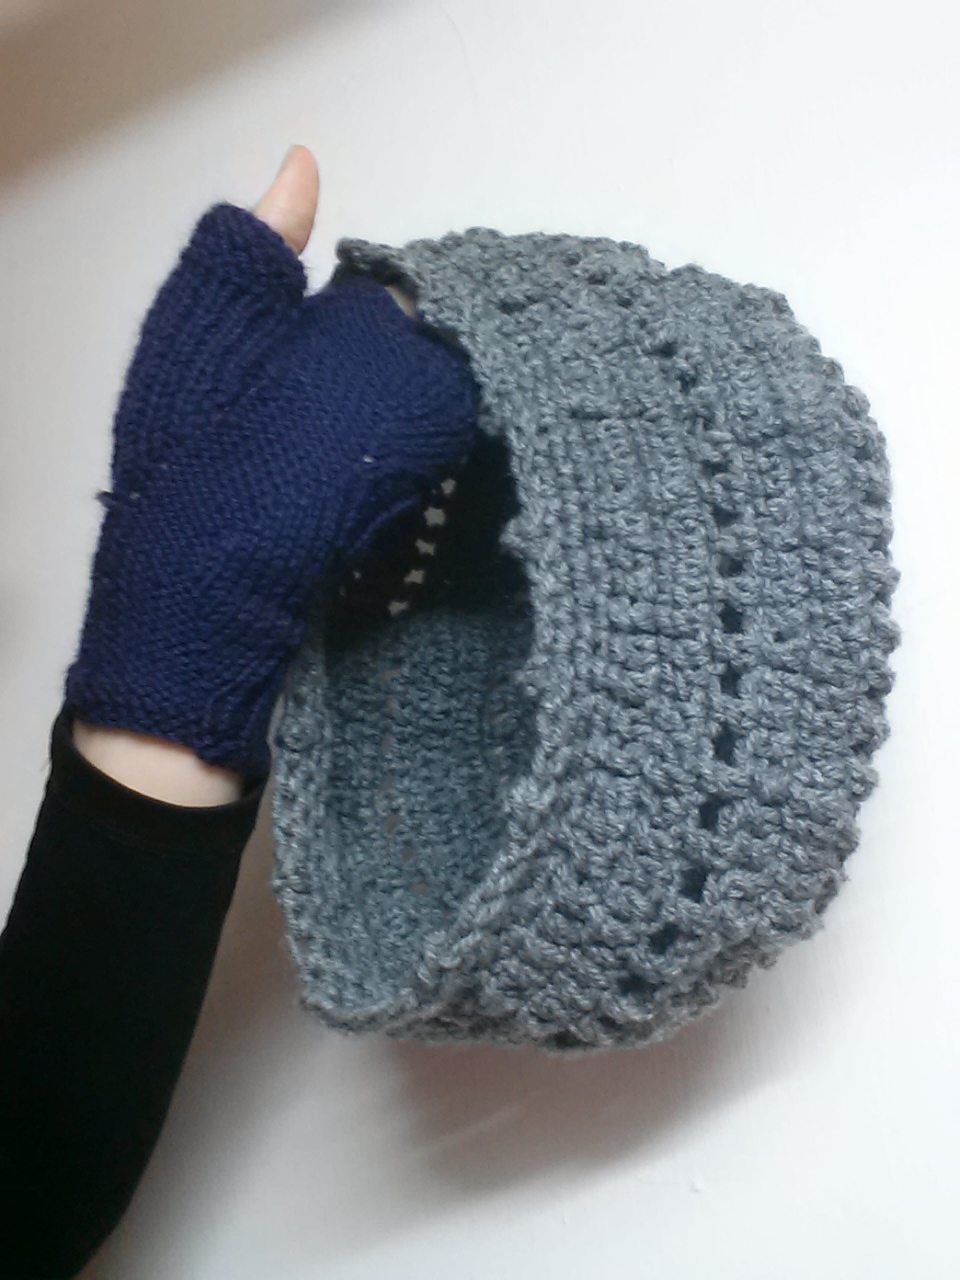
2. Onda su Onda Fingerless Mitts
I call these my Purple Wave fingerless mitts, though maybe I should have called them Purple Pain because that’s what they were to knit. I think it was a combination of many factors, including knitting on an airplane, using some rather old yarn, and difficulty reading the chart (it’s a left handed knitting problem for me). However, in then end I definitely will be using these!
The pattern is Onda su Onda by Annalisa Dinoe. So far these have been great for riding my bike when it’s a bit too chilly for my hands but not so cold that I actually need gloves. I think I may need to make another pair of fingerless mittens or gloves just so I don’t wear these ones out too quickly.
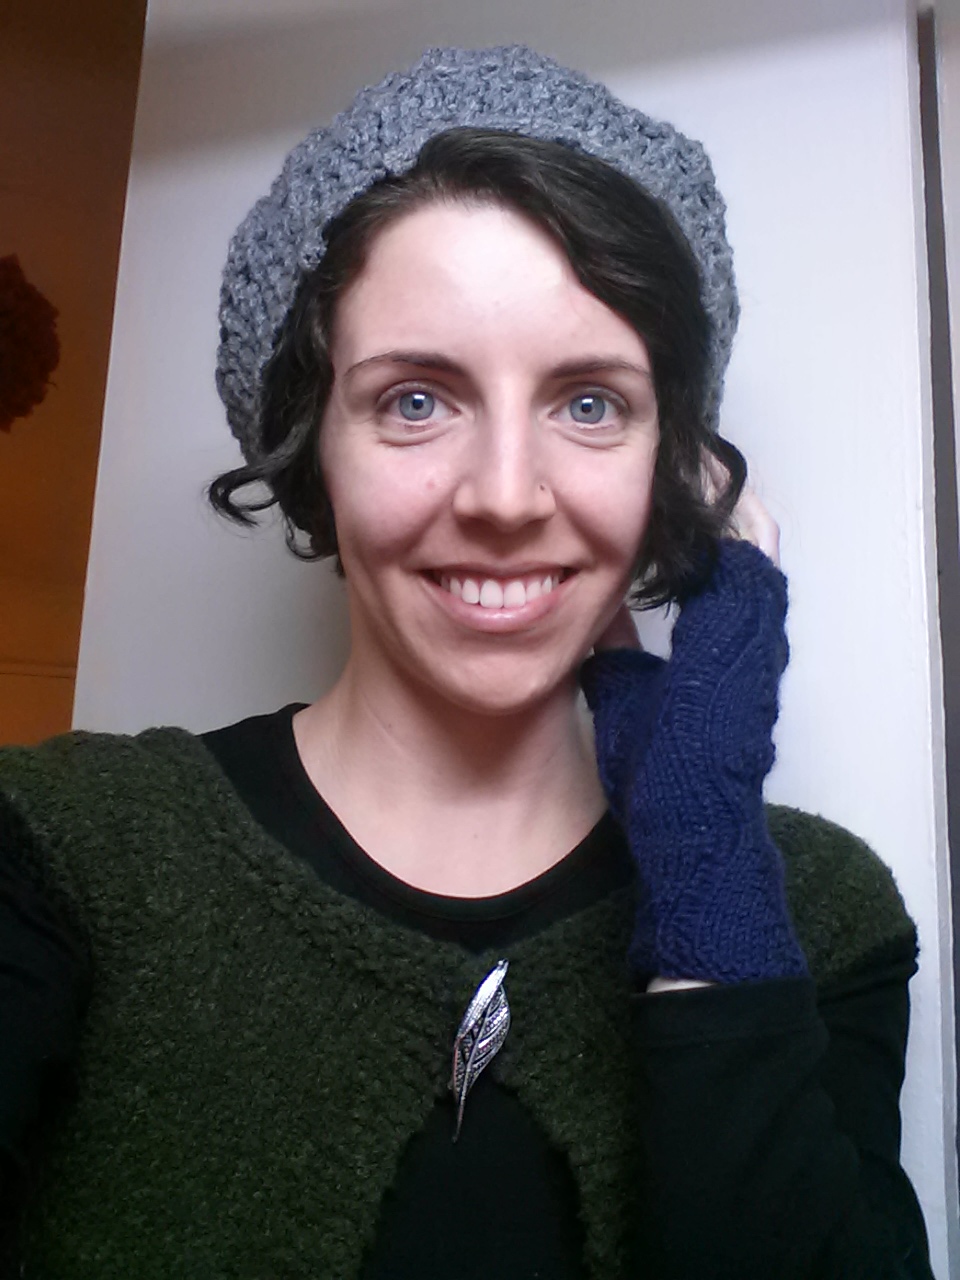
3. Slouchy Crochet Hat
I made a version of this hat five years ago and I absolutely loved it. I loved it so much that even though I never crochet and only had cheap acrylic yarn and the wrong size hook handy, I made this gray version for myself the other week.
The pattern is a little tricky to find—it has no name so far as I can tell, but it was posted in this craftster forum by BendyBones. As you can see it’s a slouchy hat with some open work mixed in. The pattern doesn’t include instructions for the picot border, but you can learn how to do it by watching a video like this one.
My original hat, pictured below, was a bit more slouchy and had larger picot edging—as I said, at the time I actually used the right size crochet hook. On the gray hat, I had to repeat several rounds to get the correct size for my head.
This is a pretty good crochet pattern for a knitter—it’s fairly straightforward. I don’t do much crocheting, but I learned a little bit when I was a kid and there are some times when it’s really useful. I think crochet’s thickness makes it especially suited to hats. I like both versions of this hat because they keep my head warm but I don’t get too hot thanks to the natural vents. Also, the hats are loose enough so that I can wear them over damp hair without getting hat head. Win-win.
It’s almost Halloween, and you know what that means: COSTUMES!
If I had my way, every party would be a dress up party. Because when I was a little kid, every birthday party WAS a dress up party, with a theme, and with costumes. Occasionally I have continued this tradition, as I did this year with a reprisal of my Alice in Wonderland themed birthday party:
2nd grade Alice21st grade Alice
Now that it’s October and more people are looking at my Halloween costume post from last year, I figured it was time for another round of crafty costume ideas. Lucky for you, I’ve done my fair share of costuming in the last year! This time I’ve organized them into individual and group costume categories for you. But I realized they could just as easily be categorized as “weird takes on famous individuals” and “characters from well known novels.” Enjoy!
Historical Women With a Twist: Radioactive Marie Curie and Ballerina Annie Oakley
So I’m a fan of DIY historical costumes, especially for women. Whether it’s one of these bizarre vintage costumes from days of yore, or one of these awesome new interpretations from Take Back Halloween, I’m all for it. The latter website makes a great point that the vast majority of store bought women’s Halloween costumes fall into the “Sexy ______” category, limiting your options. But if you make a costume yourself, it can be whatever you want it to be.
And for me, that means adding a twist to famous historical figures. Like being a glow-in-the dark version of physicist Marie Curie for Halloween last year.
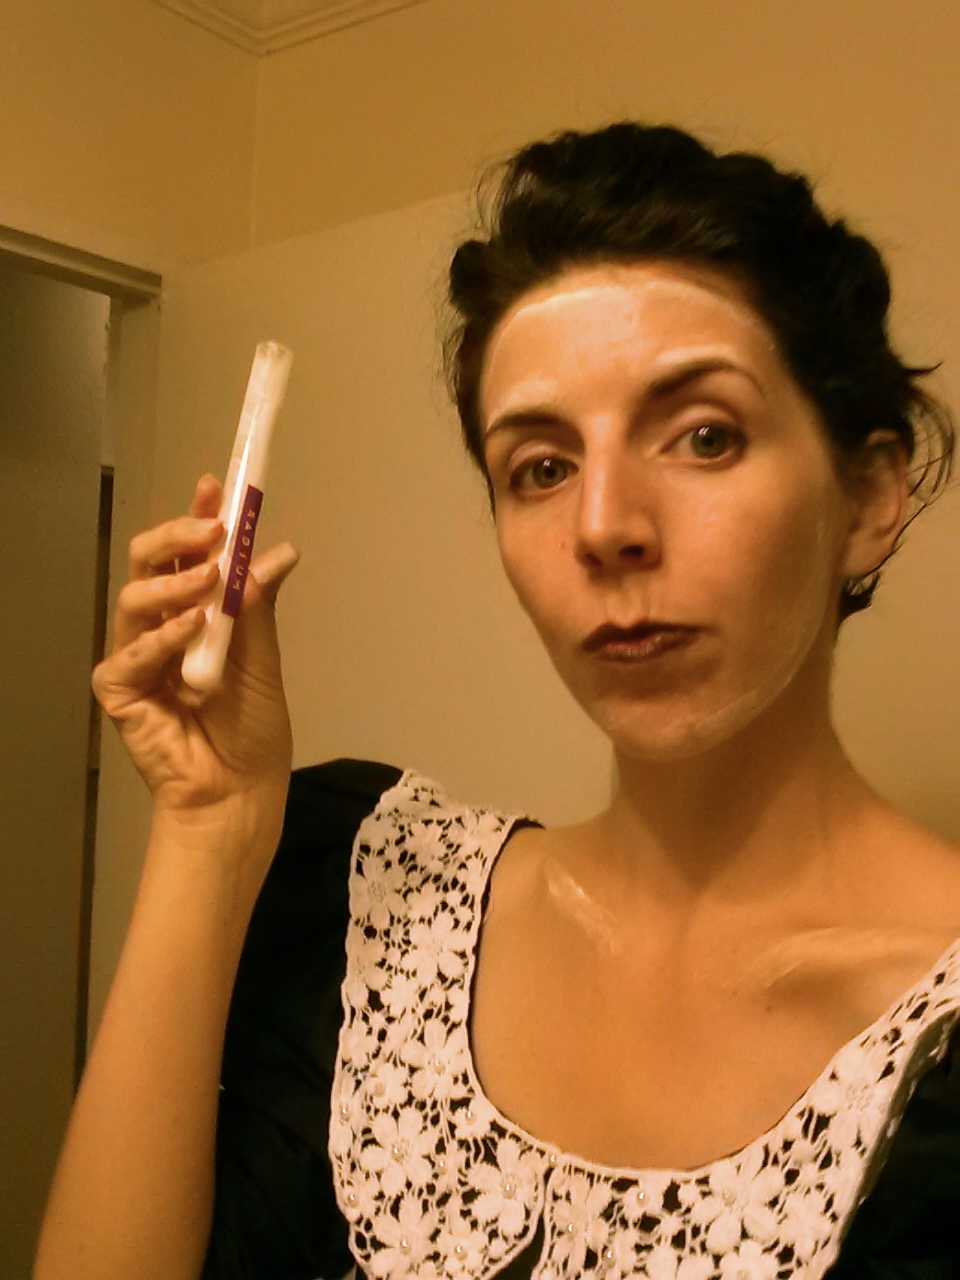
Marie Curie
Marie Curie was a Nobel Prize winning scientist who did groundbreaking research on radioactivity at the turn of the century. Her papers are still radioactive and she literally described seeing the tubes of radioactive material glow in the dark. Which meant I got to get all kinds of creative with my costume. First, I found this awesome black dress at a thrift store. I have no idea what it was in its past life, but the poofy sleeves and the full skirt were perfect for the time period. Next, I bought an attachable white lace collar on ebay and sewed it to the neckline of the dress. The clothing part was complete.
I actually wore this costume on two separate nights, and I did the make up and accessories a little different for each. The key was to make as much of me glow in the dark as possible. First, I needed my own test tube—I picked one up from a campus resale store, used glow-in-the-dark paint on the inside of it, and labeled it “radium.” For the rest of me, I used glow stick necklaces, glow in the dark face paint and green glow-in-the-dark nail polish. My recommendation is to get the nail polish at the drugstore if possible and the makeup from a Halloween store—the Halloween store version of the nail polish that came with the makeup in a kit was so clumpy it was unusable.
Seen here with Melisandre from Game of Thrones (see below for more of those costumes!), you can see that I had a thick line of makeup near my forehead. The make up has to be thick to show up, so I ended up just outlining the circle of my face instead of pasting it all over. I also recommend you have someone help you if you want a design on your body using the paint.
My dress had a dramatic open back so I had friends do designs there. The first night I went for a skeleton-like rib design and the second night I had the brilliant idea of using the radioactive symbol! It’s quite tricky to photograph these things, but we tried:
I had so much fun in this costume, especially when I found a blacklight!
Annie Oakley
Making the Marie Curie costume for Halloween inspired me the next time I was invited to a costumed dance party several months later. I had far less time to make this one happen, but I wanted to keep with my theme. I l also needed something I could dance in this time. So I came up with Ballerina Annie Oakley.
Annie Oakley was a famous sharpshooter in Buffalo Bill’s Wild West Show in the late nineteenth century. But I wasn’t about to bring a real firearm to a party. So I did the next best thing: I found me some gun tights.
You can get these on ebay for about $5. They totally made the outfit. And since they were tights, I figured, why not wear a tutu? So I borrowed this black leotard and tutu combo from a friend, who found it at a clothing swap. I already had the cowboy boots and the bandana, so all that remained to get was a hat and a western shirt.
Both the hat and the shirt came from the thrift store, but believe it or not the shirt required a fair amount of alteration. It was the best one they had (it even had snaps instead of buttons!) but it was a size or two bigger than me. So I took it in on the sides and a little in the seams and then tied it above the tutu to get the fit I wanted. It was worth it! And surprisingly I still wear the shirt quite a bit. Perhaps I’m a cowgirl at heart after all.
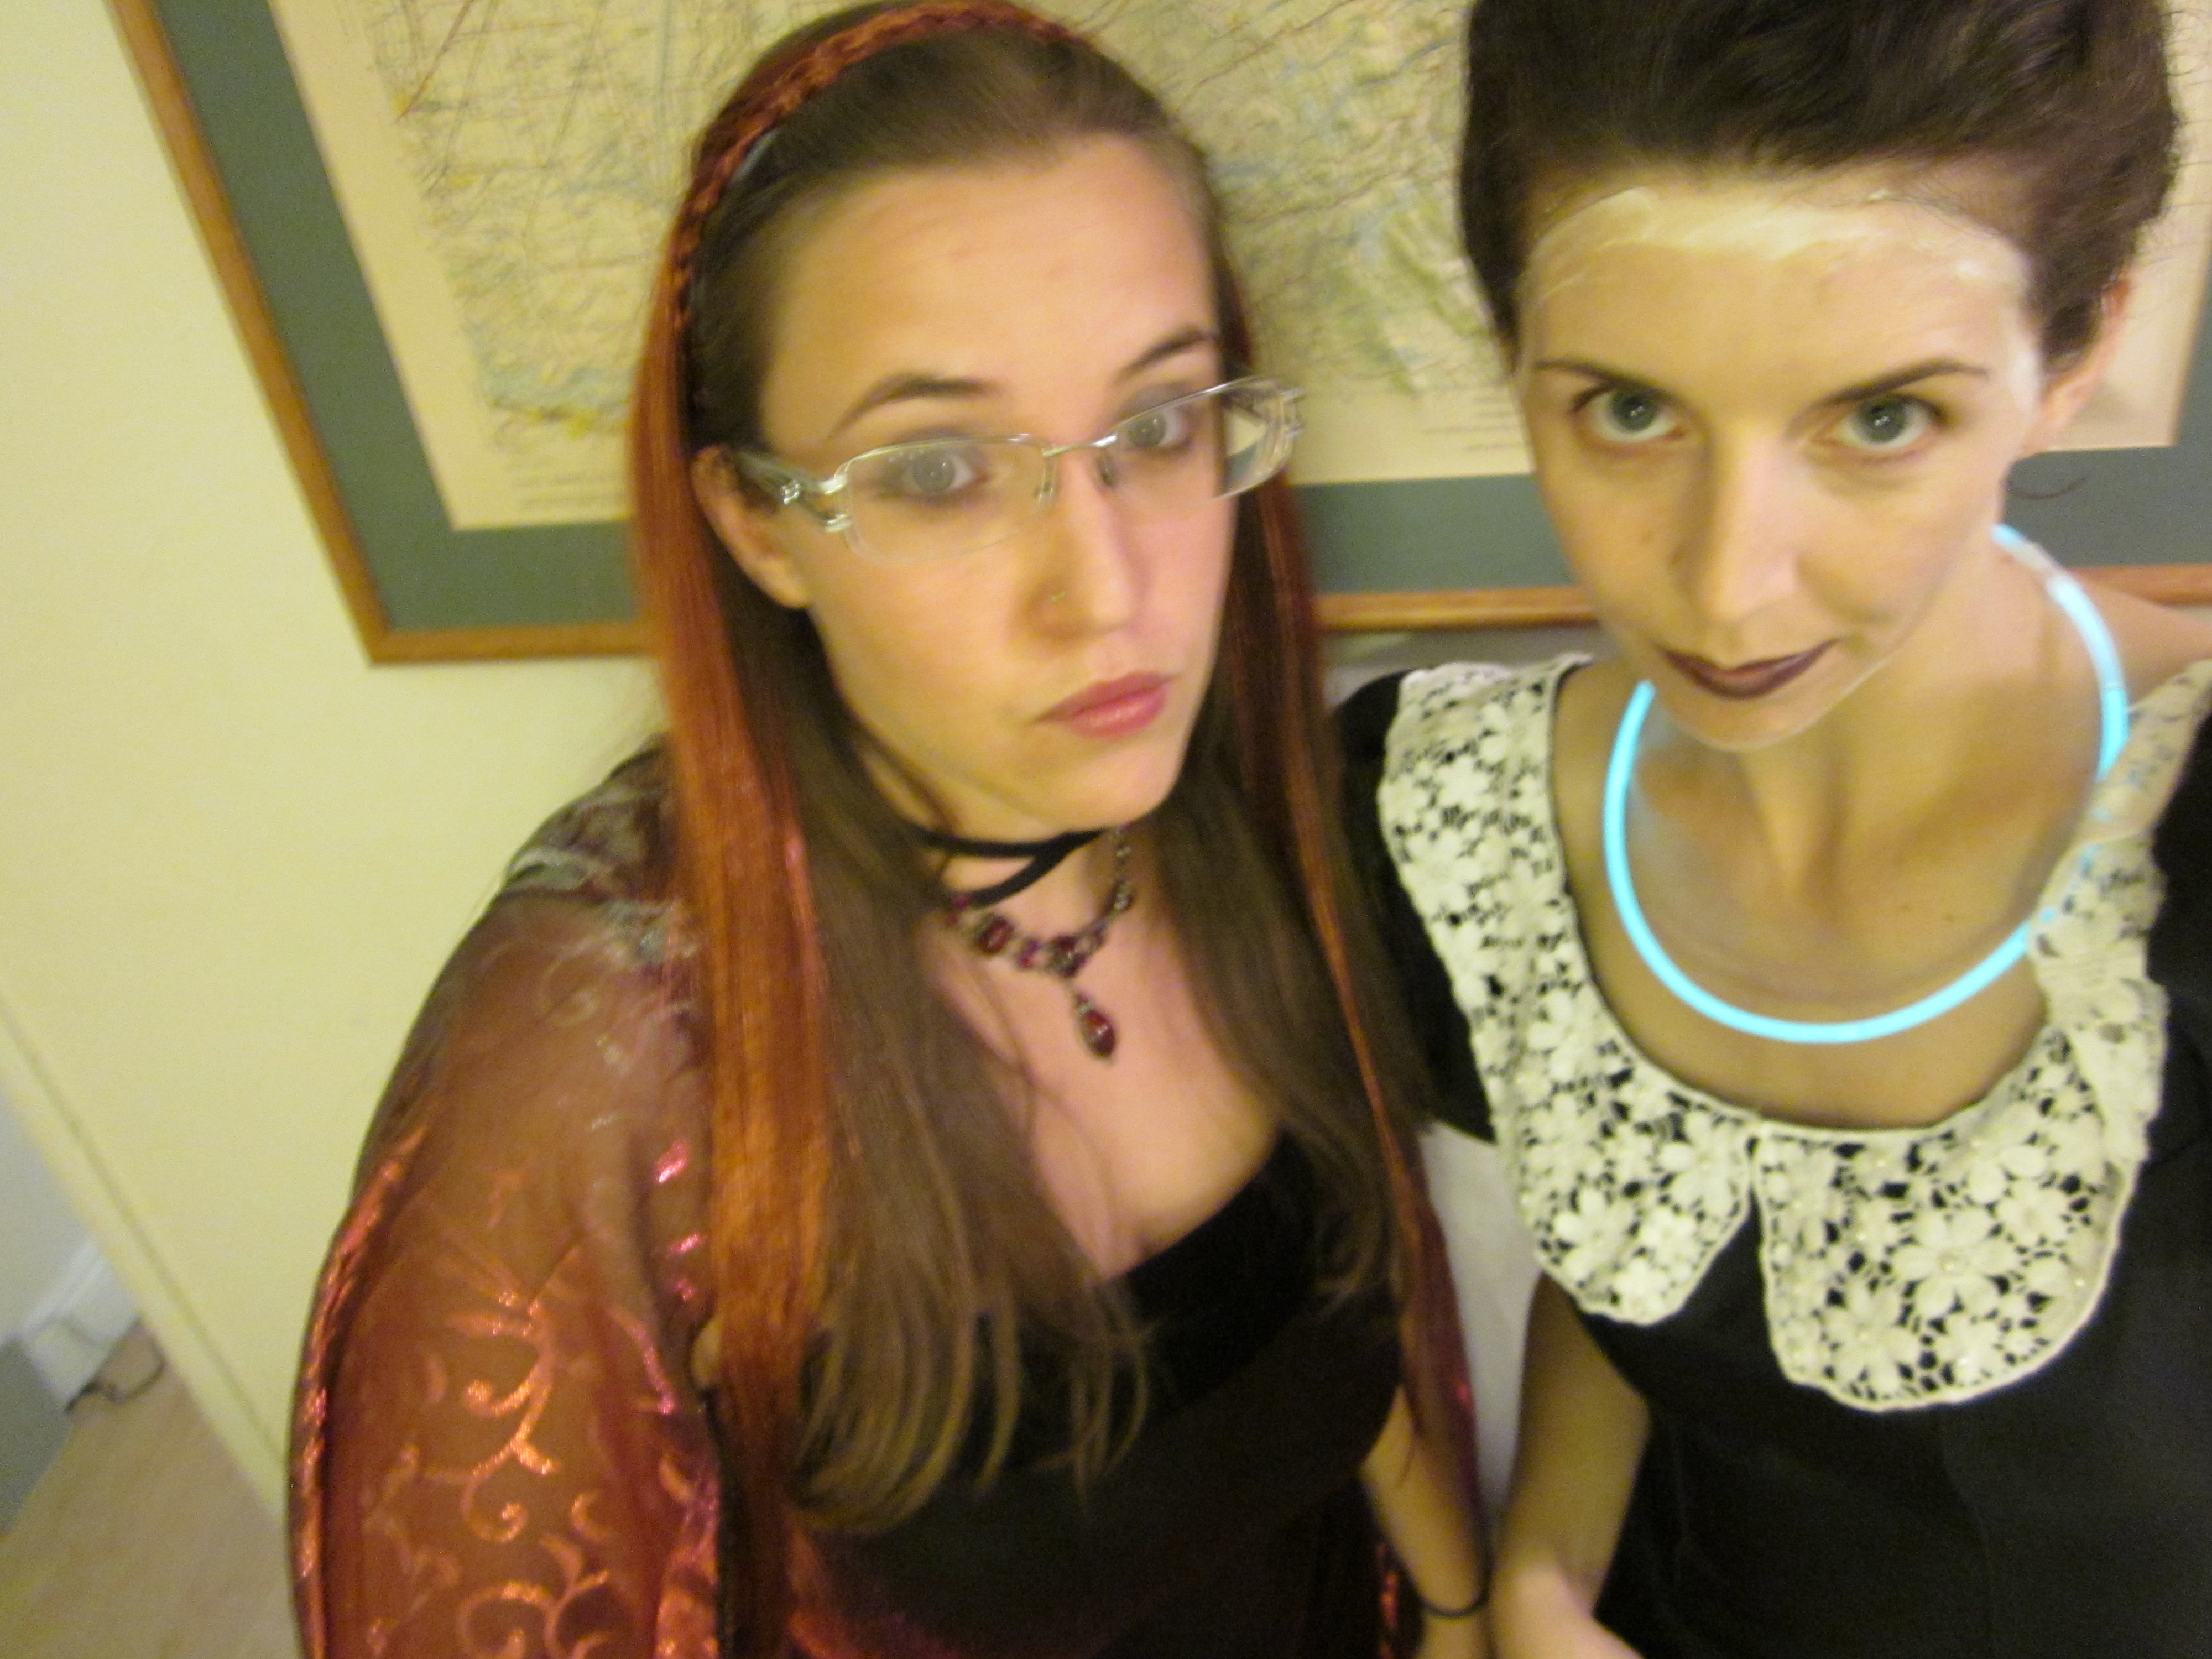
Lady David Bowie
Sometimes, the clothes simply make the costume. Other times, it’s all about the makeup. Especially when you are invited to a David Bowie themed birthday party. I present to you two female David Bowies.
This is David Bowie circa 1973, where we recreated the lightning bolt makeup from the Aladdin Sane album cover. You can buy Halloween makeup, but I used bright pink lipstick, dark teal eyeshadow, and black eyeliner. It stayed put really well, but be forewarned that your face may have some residual pink the next day! Not included but recommended: leather jacket and a bad ass expression.
This is David Bowie circa 1972 as Ziggy Stardust. The key to this look was a really good cream eyeshadow in gold, which I used for the circle as well as my lips. For my eyes I used the reddest blush I could find and some black eyeliner. There was no way I was going to be able to recreate any of Bowie’s amazing clothing from this era, but I did find a gold leggings/shrug set at a thrift store and a gold sparkly top that matched it.
GROUP COSTUMES
Game of Thrones
If you have a group of people who all want to do the same theme for Halloween, there are tons of great things you can DIY. Earlier this year, my friends and I did a team bike event that required having a group theme and costumes to go with it. We decided to be Team of Thrones.
From left to right: A wilding woman, Tyrion Lannister, Asha (Yara) Greyjoy, a Stark bannerman (with banner), Arya Stark, Khal Drogo, Danerys Targaryen, Cersei Lannister, Viserys Targaryen, Ygritte, and the Three Eyed Crow.
Unless you’ve been living under a rock/north of the wall this year, you’ve probably heard of the HBO show Game of Thrones, a TV show based on the epic fantasy novels of the Song of Ice and Fire series by George R. R. Martin. The best part about this show is that there are so many characters that you can get as obscure and outlandish as you want with your character and costume.
We obviously made some adaptations to be able to ride bikes on a rather hot spring day, but I think there were some rather creative costume elements here. To name just a few examples: the crow has little messages tied to her legs, Tyrion has little half shoes strapped to his knees, and Viserys covered her bike helmet with that giant golden crown.
I went as Asha Greyjoy (Yara in the TV series), Theon’s sister. I already had the black top, shorts and boots, all from thrift stores. I also happened to own a studded belt, sailing ship earrings and an octopus necklace…don’t ask me why on the last one but it worked beautifully. The little dirk knife and shield came from the dollar store, and I taped the Greyjoy sigil and motto, “We Do Not Sow” to the front of the shield. Also recommended: putting on the hardened face of a ironborn sea captain. (Showing off the forearm scar you got as a child helps too.)
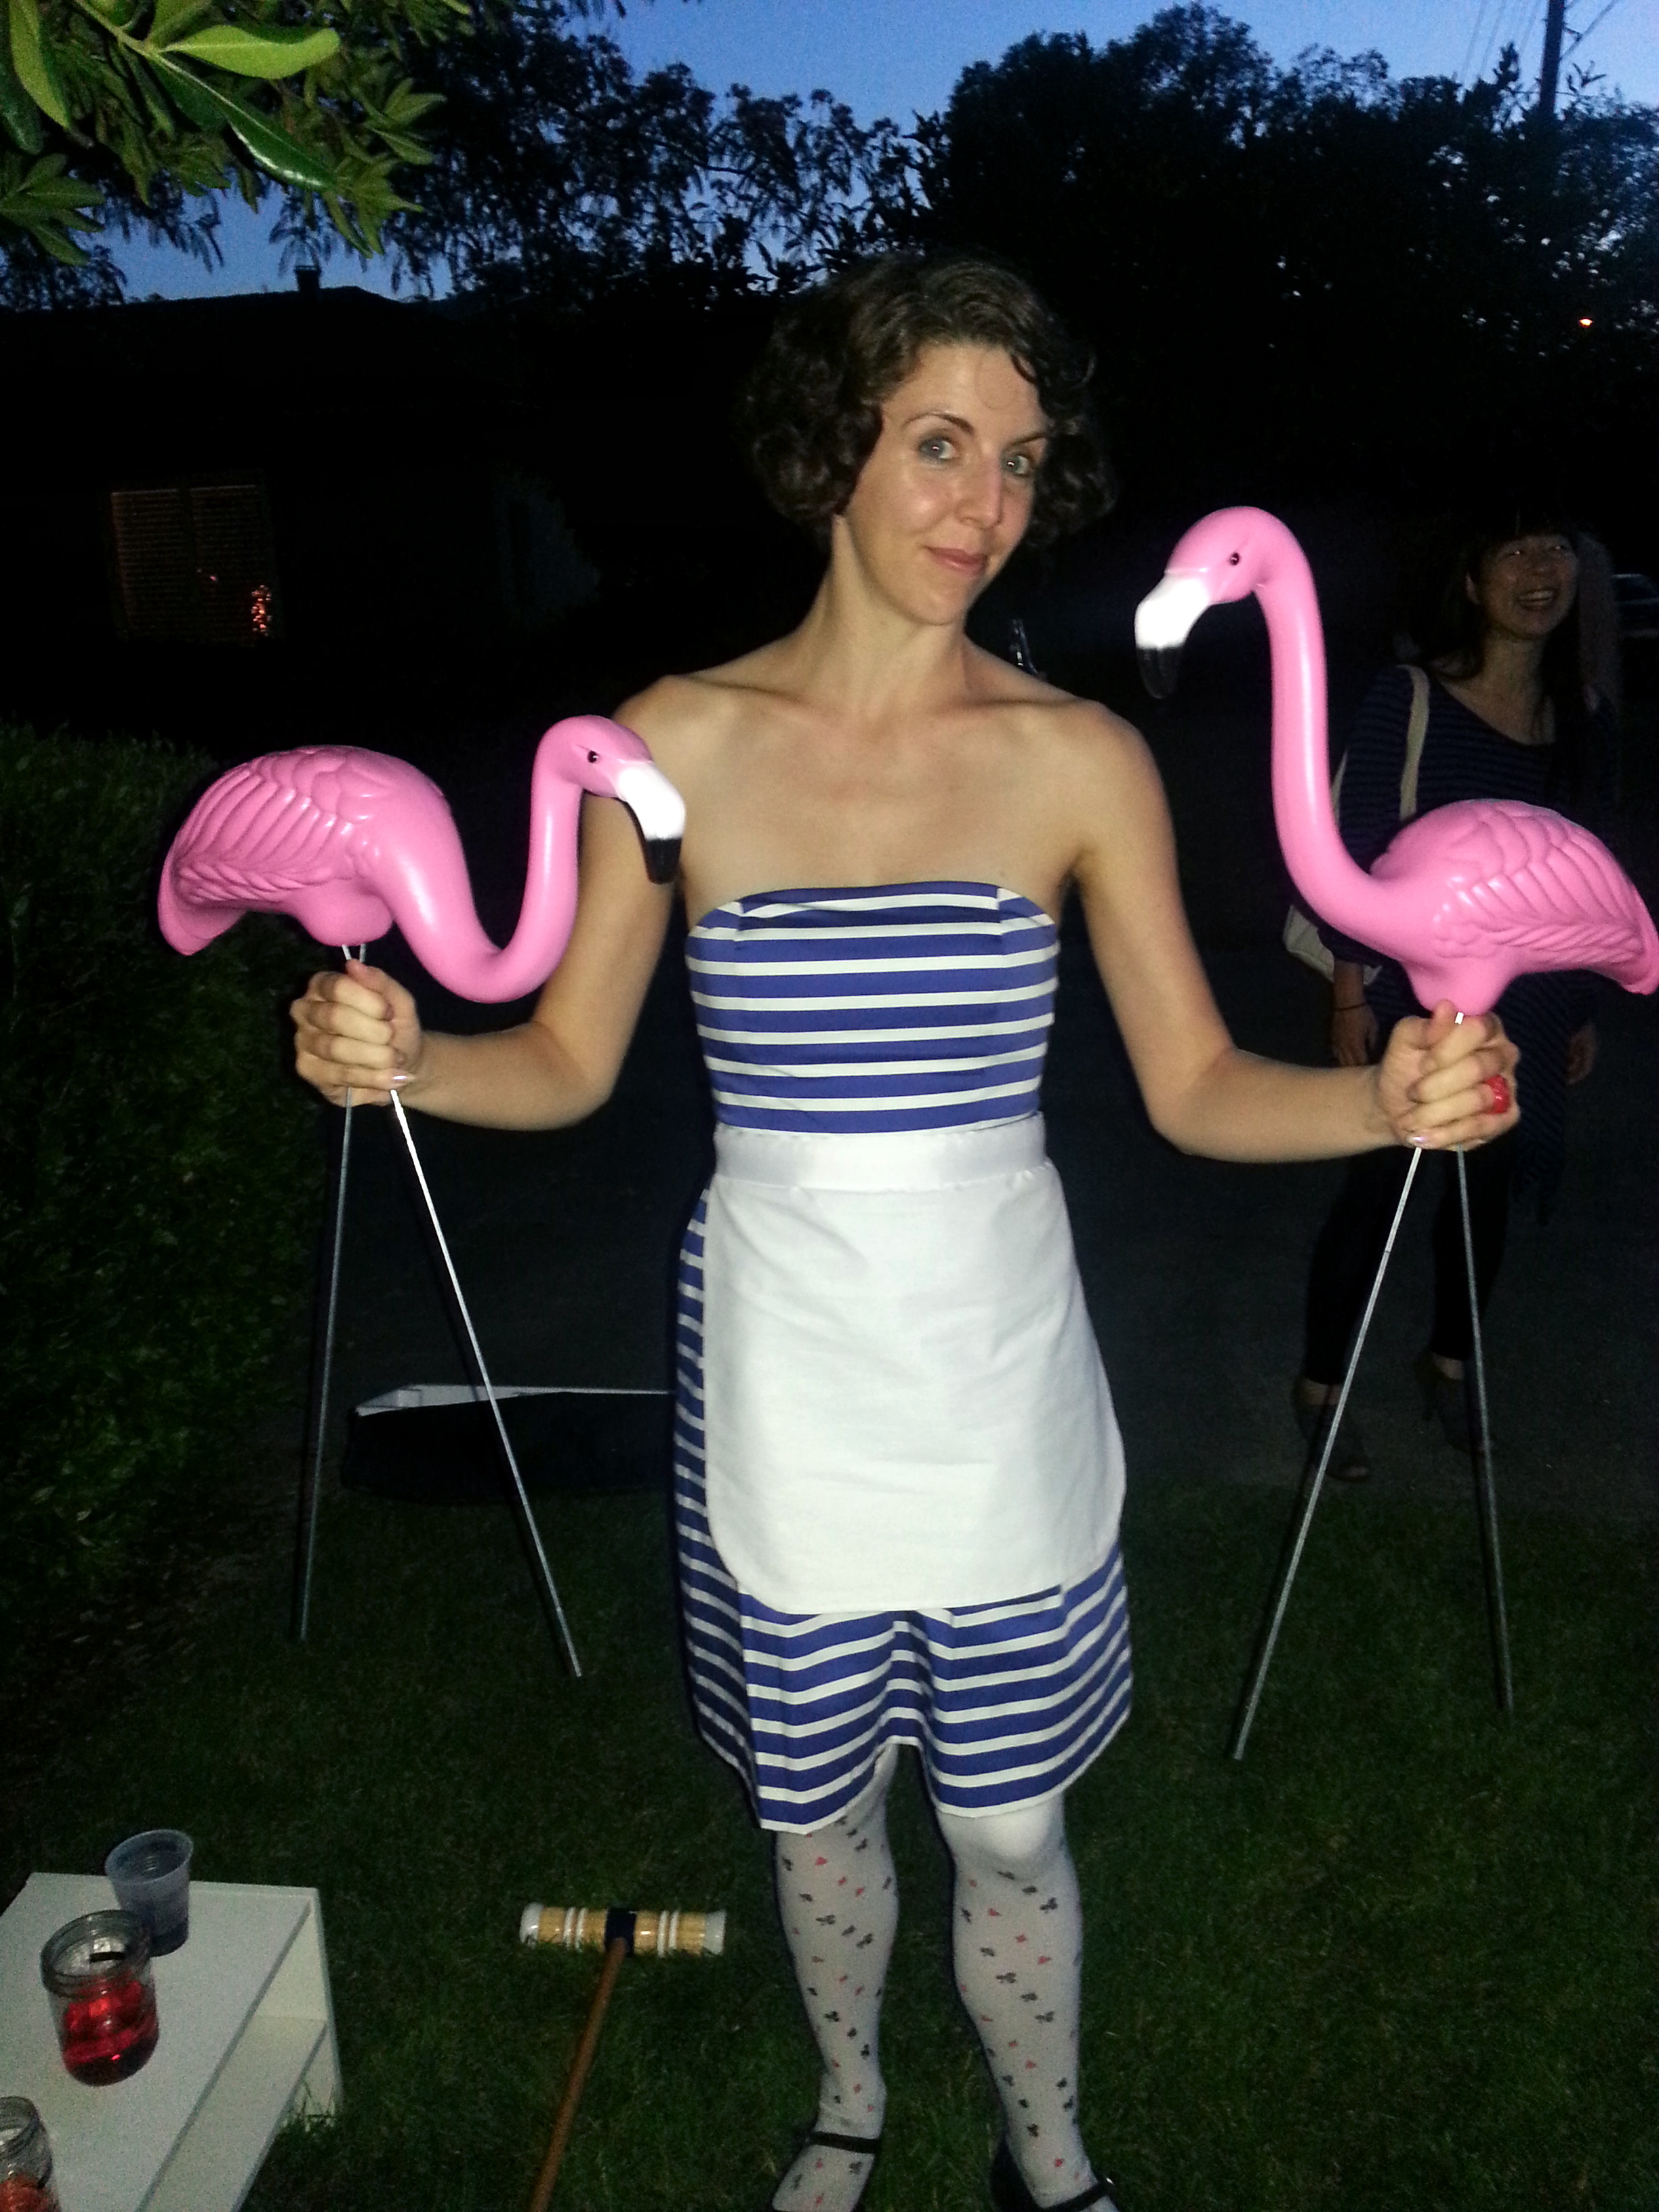
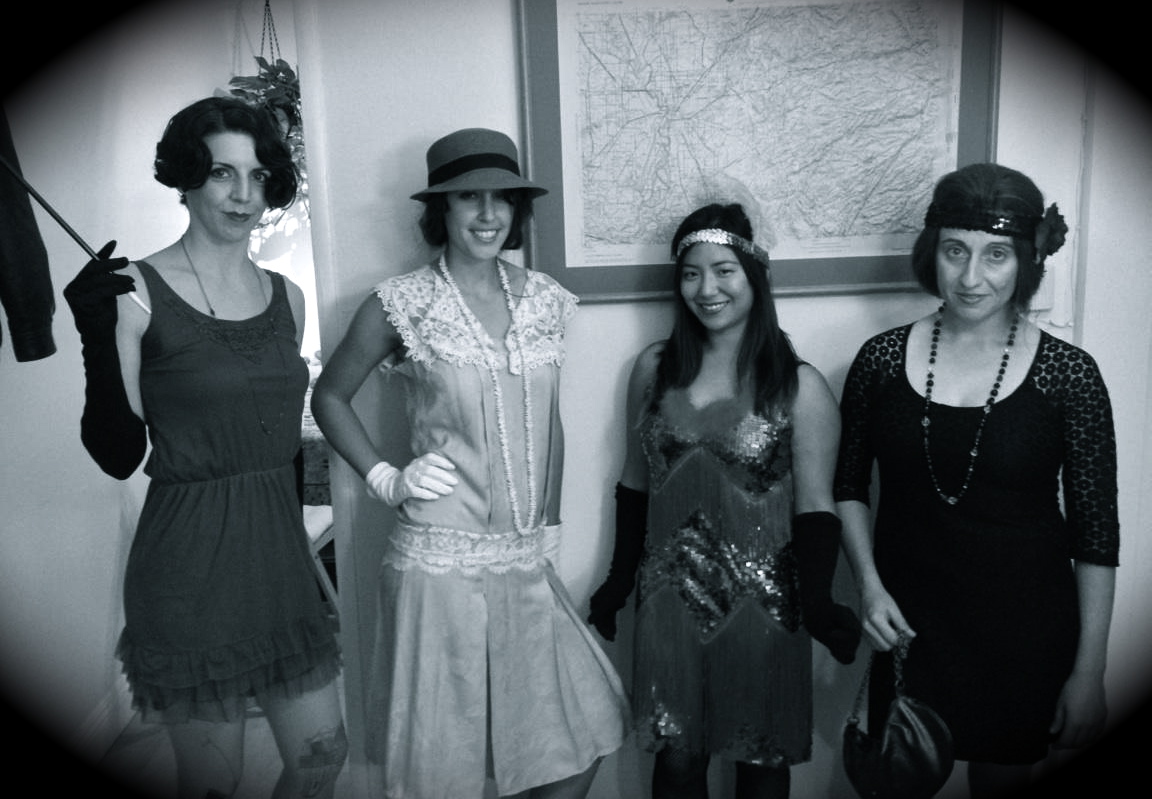
Gatsby Girls
Not up for fantasy novels? How about celebrating the Jazz Age novel The Great Gatsby with some roaring 20s costumes?
There’s plenty of inspiration in the new movie adaptation, but there’s actually quite a range of outfits that work for this era. All of the above dresses came from thrift stores, from the light pink drop waist dress with lace (it originally had long sleeves that she removed with a seam ripper) to the bright pink sequin flapper dress.
Accessories really help make these costumes work: among these four costumes we’ve got gloves, long beaded necklaces, hats, sequined headbands, feathers, flowers and even a cigarette holder (oh and the gun tights yet again!). Equally important is hair! You can’t really see it here but we’ve used two hair tutorials to get the styles of the 1920s, one that shows you how to fake a bob hairstyle if you have long hair and one that shows you how to create finger waves, which is a bit more challenging and works best with hair that already has a curl to it:
I tried to do the finger waves on myself, and I didn’t quite achieve the full look. I would really recommend that you have a friend who is good with hair do this on you. The nice thing is that both hair styles don’t require much in the way of equipment—for the fake bob you need a clip, a pony tail holder and some bobby pins. For the finger waves, you need gel, a comb, and bobby pins. That’s it! Combine with 1920s style make up, especially the “cupid’s bow” lips, for the full look.
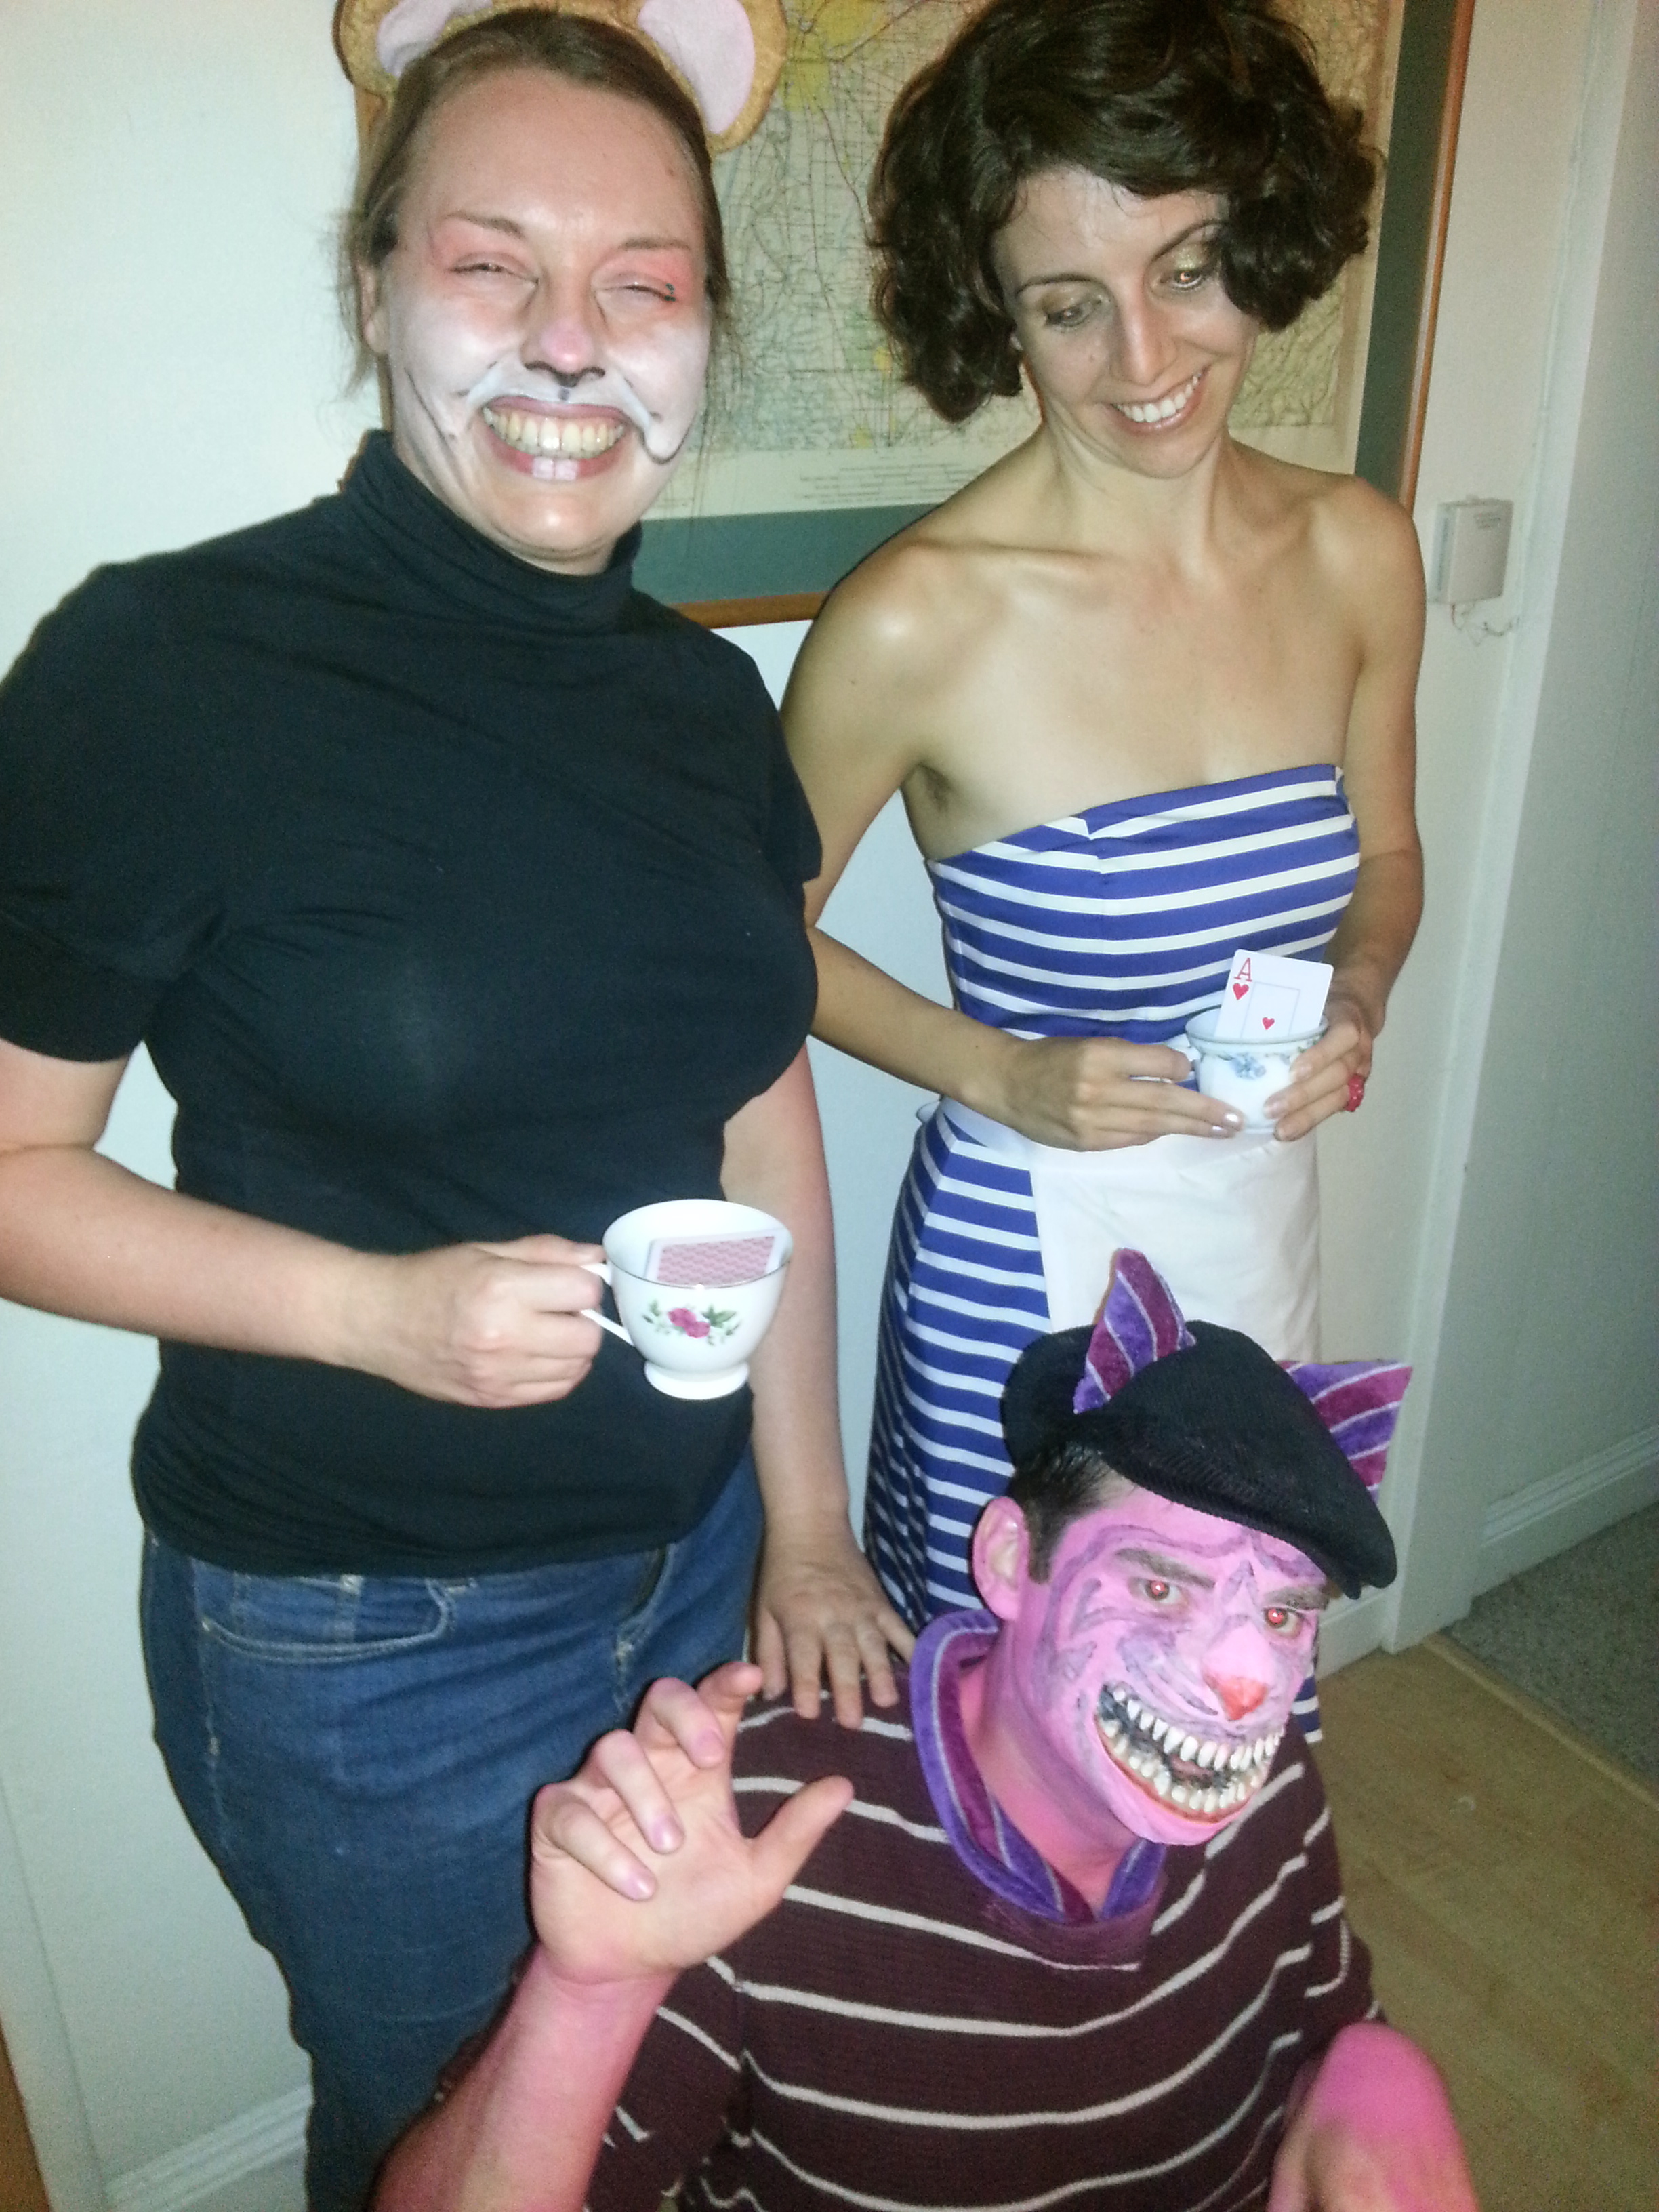
Alice in Wonderland
Last but not least, we have the Mad Hatters Tea Party!
Let’s start with Alice. I made this a low key costume since I knew I’d want to be comfortable all night. I used this strapless blue and white dress because it was a hot June evening, and paired it with these thigh high stockings that had card suits on them I got from a former roommate. The black Mary Jane shoes, red rose ring, and bow hair clip are things I’ve had forever, but they added a nice touch. I wanted to make a black bow out of ribbon, but I ran out of time.
I did, however, make the apron. To be honest, I didn’t use a pattern—I just tried on the dress, measured where I wanted the apron to come to, and used those measurements. The most similar free tutorial I’ve seen for how to make one like it is here. I used plain white muslin and a wide white ribbon instead of fabric to save time. I decided it should have rounded edges to match the top of my dress, and I think the effect worked nicely.
If you’re willing to take it a step further with face paint and/or prosthetics, you can go this route. The Dormouse combined mouse ears and a tail with Halloween makeup crayons to recreate the mouse face. The Cheshire Cat sewed his ears onto a hat, and used pink and purple face face paint for the stripes, but also attached some pretty awesome prosthetics.
Seen here with the Queen of Hearts, you can tell that this is a much more advanced costume project. But doable if you are adventurous! There’s actually two prosthetics, a cat nose and a grin, that he attached. He used spirit gum to attach the latex prosthetic to his face and liquid latex to blend the seam—you can get an idea for how to actually do this from this prosthetic nose tutorial. The effect, as you can see, is pretty remarkable.
.
And that’s all my costumes from the last year! I hope these can inspire you to come up with your own clever ideas—if they do, I’d love to see the results!
This summer, I took four old t-shirts and transformed them with stencils, cut outs, or both. I even altered the basic structure of two of them to get the fit I wanted. And thanks to my lovely friend, I now have pictures of myself wearing them. So if you want a DIY run down of how to cut, slash, and paint your way to a unique T, read on. (Bonus: Battlestar Galactica references ahead!)
Stencils
Let’s start with the least destructive activity—paint. If you read my post on nerdy crafts, you’ll notice I’m not new to stenciling. On that post I linked to the tutorial on stencilry that I use, but I’ll give you the short version here.
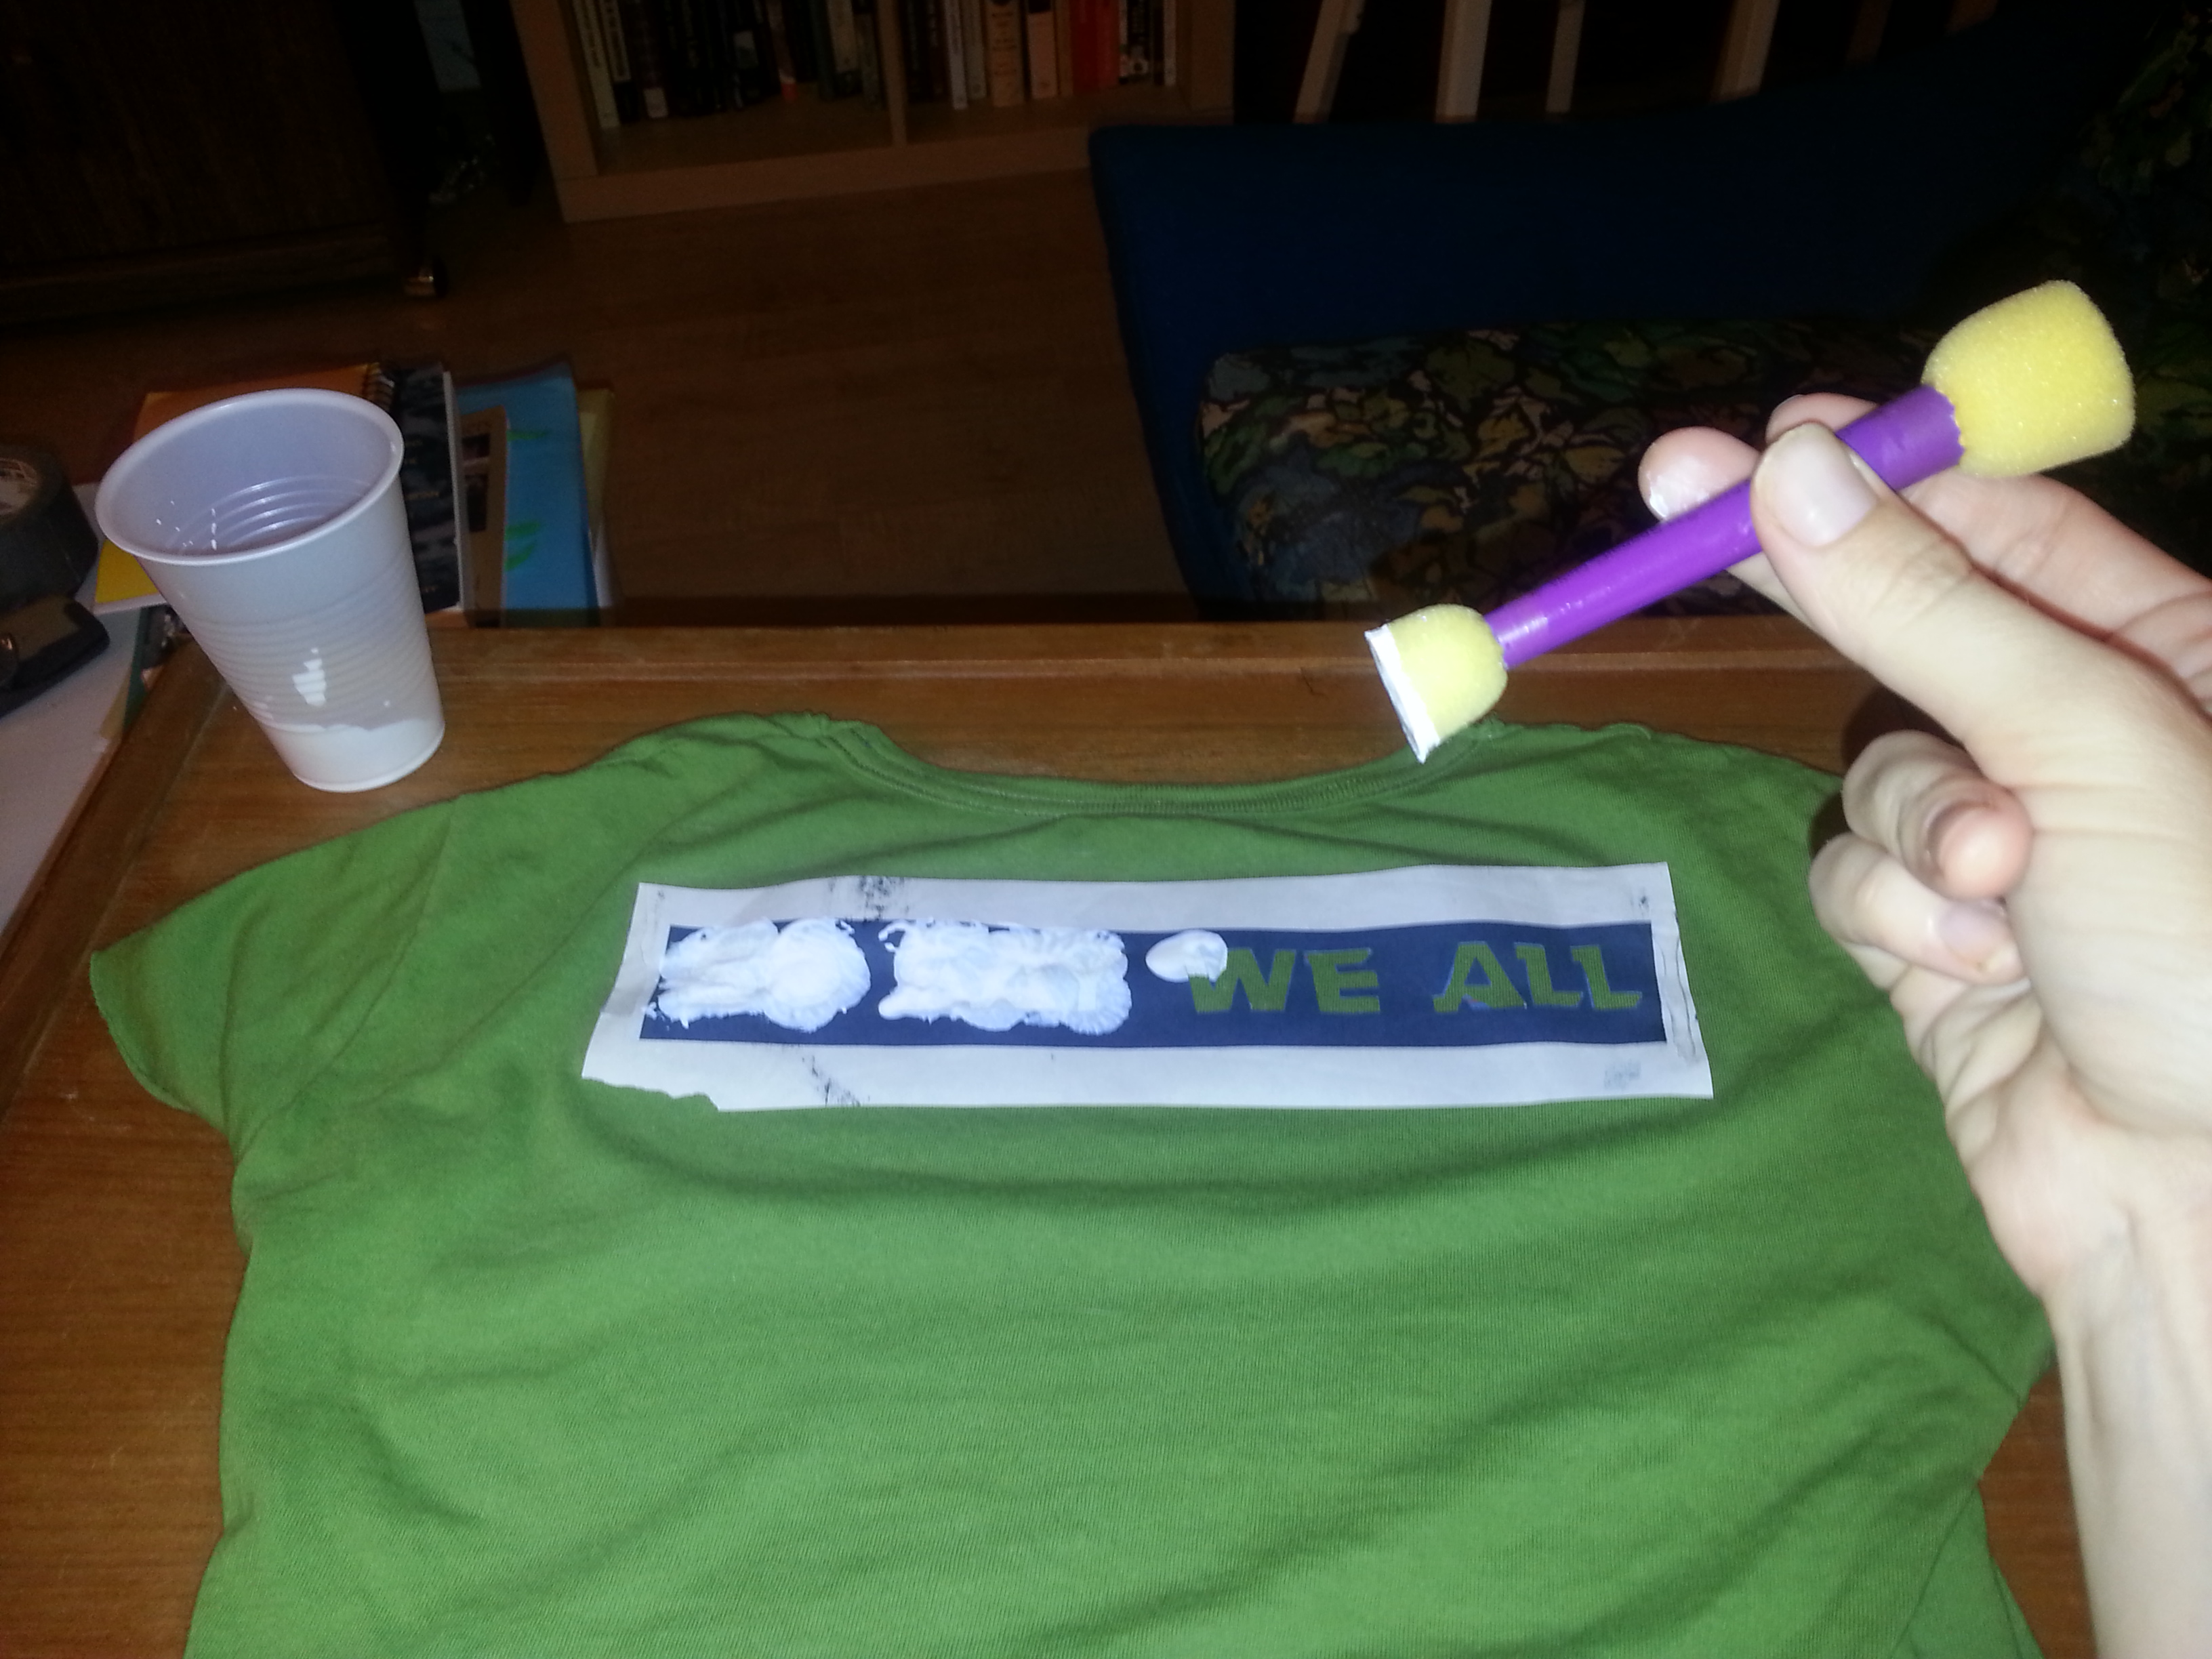
One of the easiest ways to make a clean stencil is to use the freezer paper method. First, pick a stencil image—in this case “So Say We All,” the “amen” of the Battlestar Galactica universe, in an appropriate font. Be sure to read the tutorial section on islands and bridges to make sure your image will work as a stencil—as you can see above, I had to add back in the “islands” in the middle of the “O” and “A” to keep the letters looking correct. Buy freezer paper, cut it to the size of paper your printer will accept, and print your stencil onto the non glossy side (some wrangling with the printer may be required). Cut out the stencil with an X-acto knife, and then with a dry iron, iron it directly onto the shirt.
For the painting part, mix your preferred color of acrylic paint with fabric medium according to the directions on the bottle, then paint onto the stencil with a sponge or a brush. Make sure to put something between the layers of the shirt so the paint doesn’t soak through (and not cardboard, because I’ve notice the paint will stick to it—I used my X-Acto knife cutting pad). Let dry completely before removing the stencil, then follow the fabric medium directions for heat setting and washing the shirt so that the stencil will be permanent and clean.
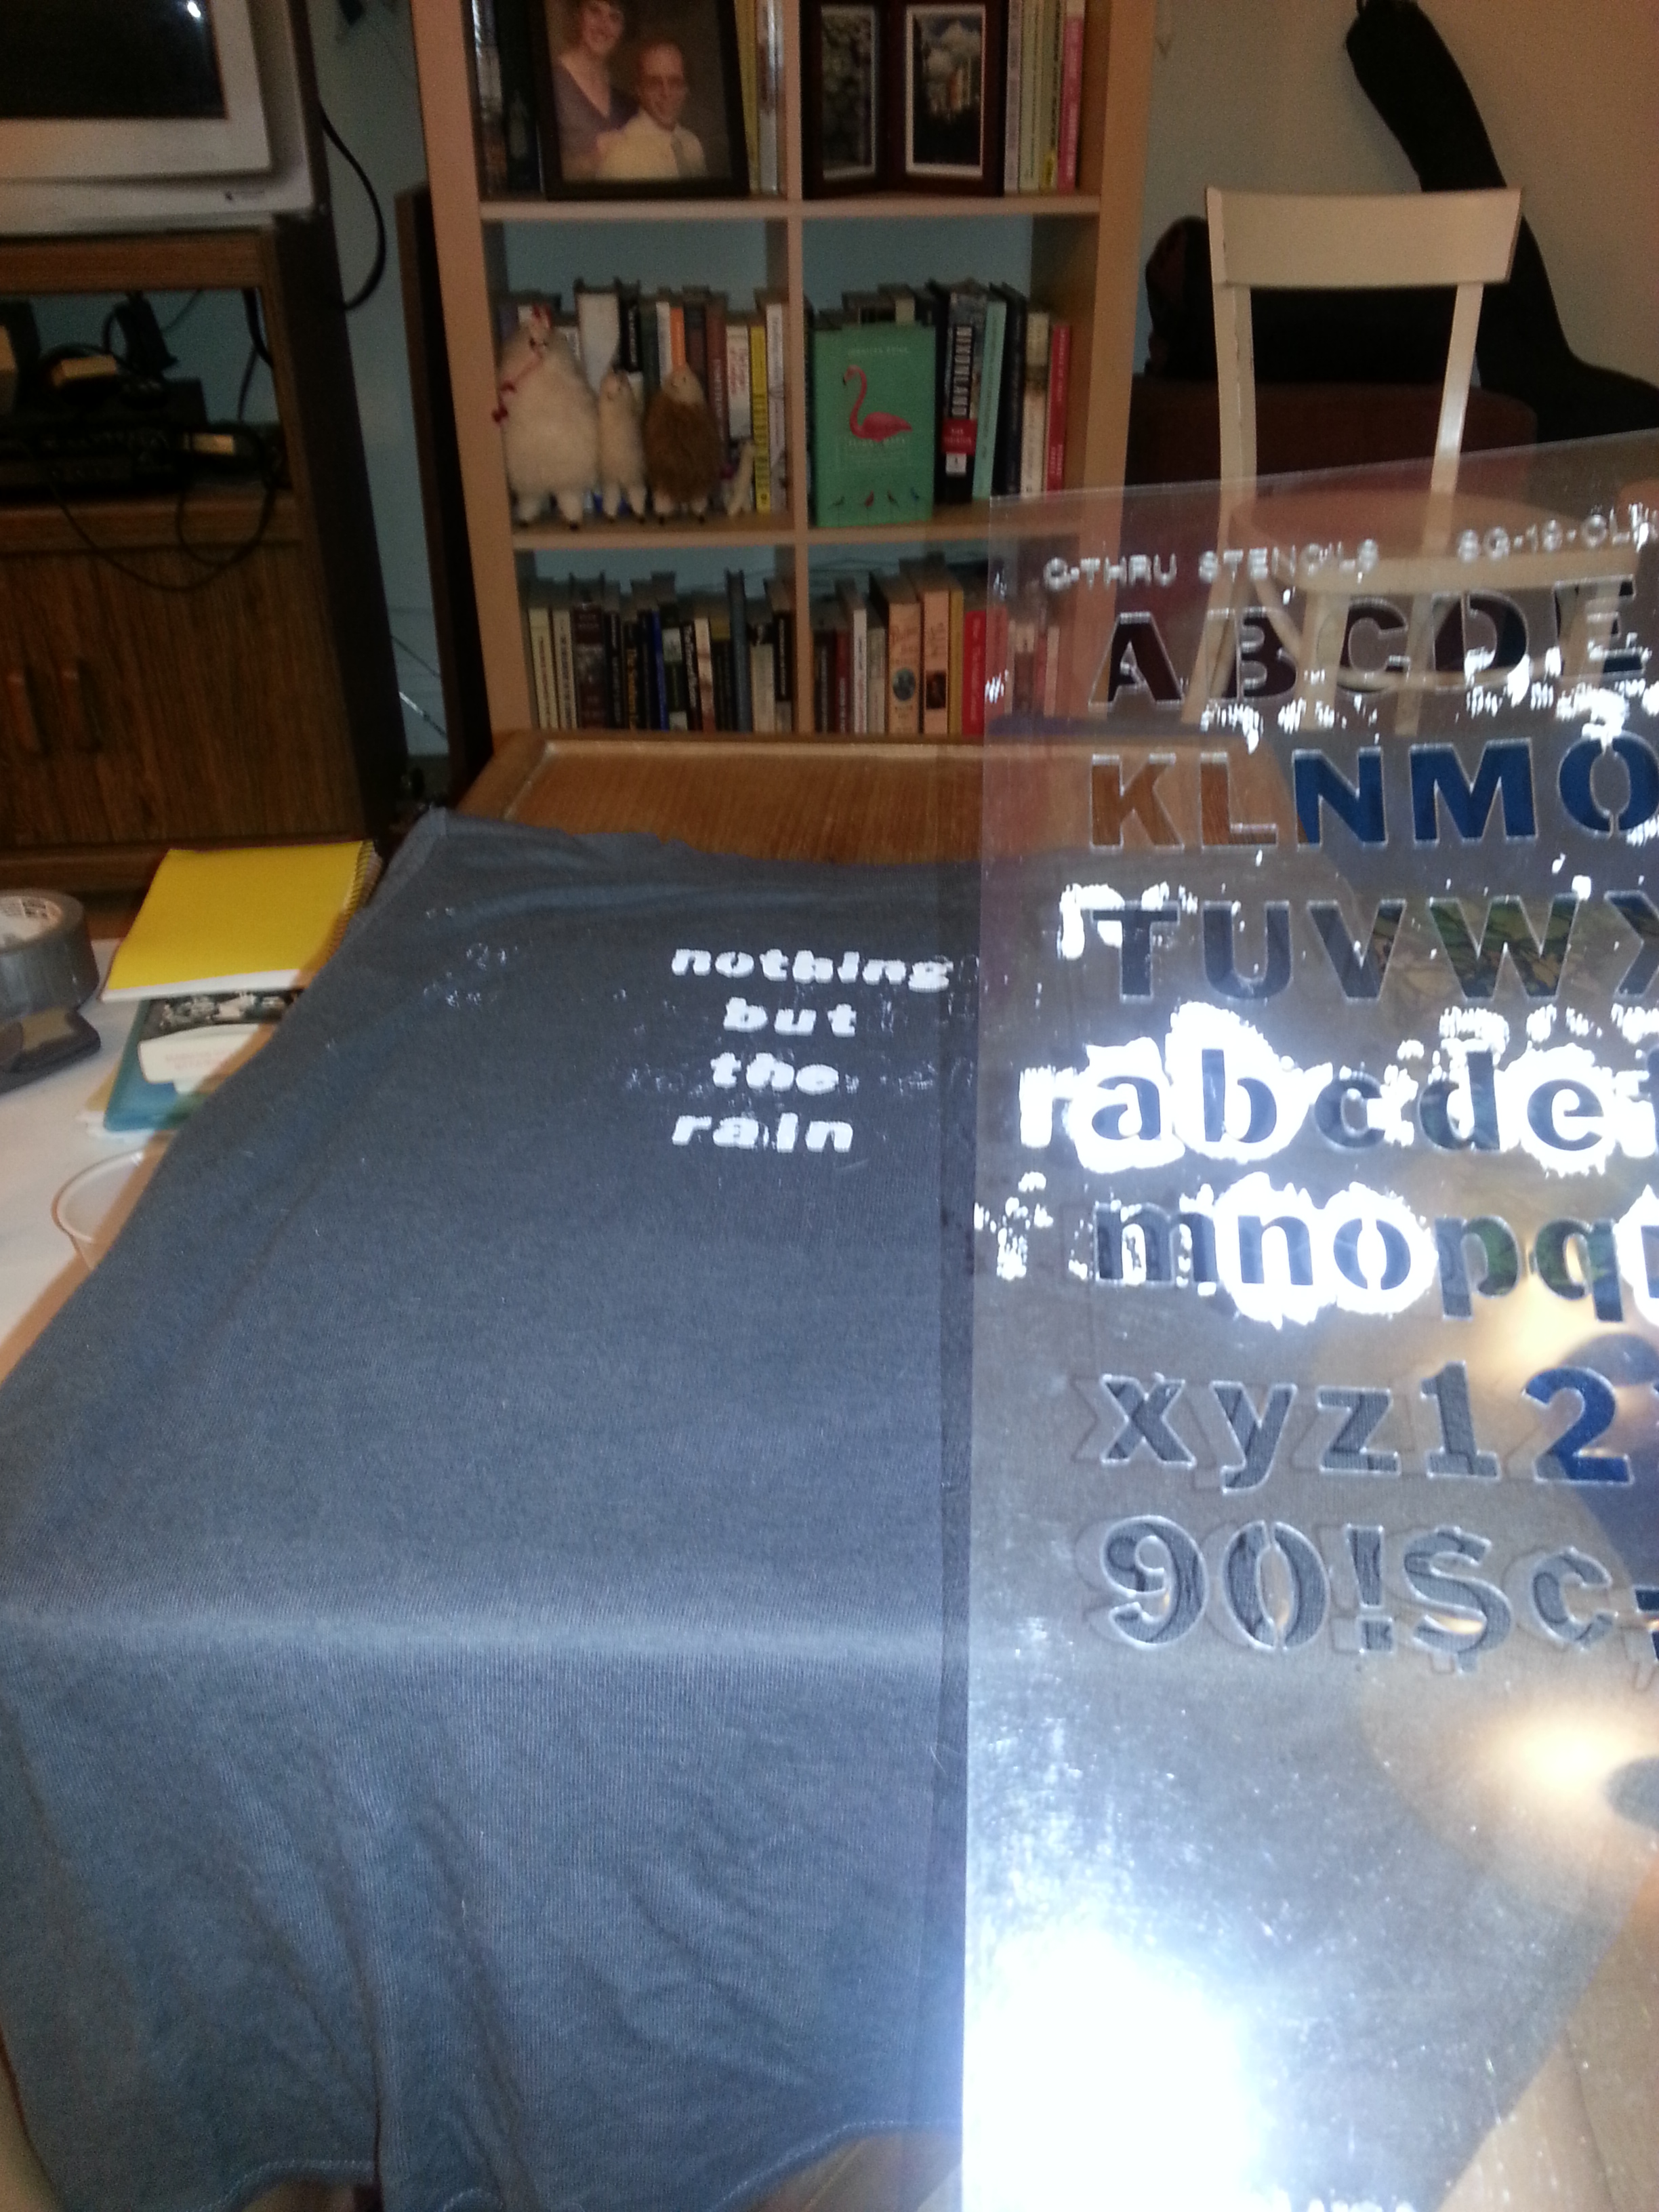
The process is somewhat similar if you have a permanent stencil, like this plastic alphabet one I used to make the phrase “Nothing But the Rain”—yet another BSG reference (its the phrase said by Starbuck to Captain Adama). The only difference here is being careful about getting paint everywhere when you move the stencil—I decided I didn’t care about the mess because I liked the splattered look, but you can decide for yourself.
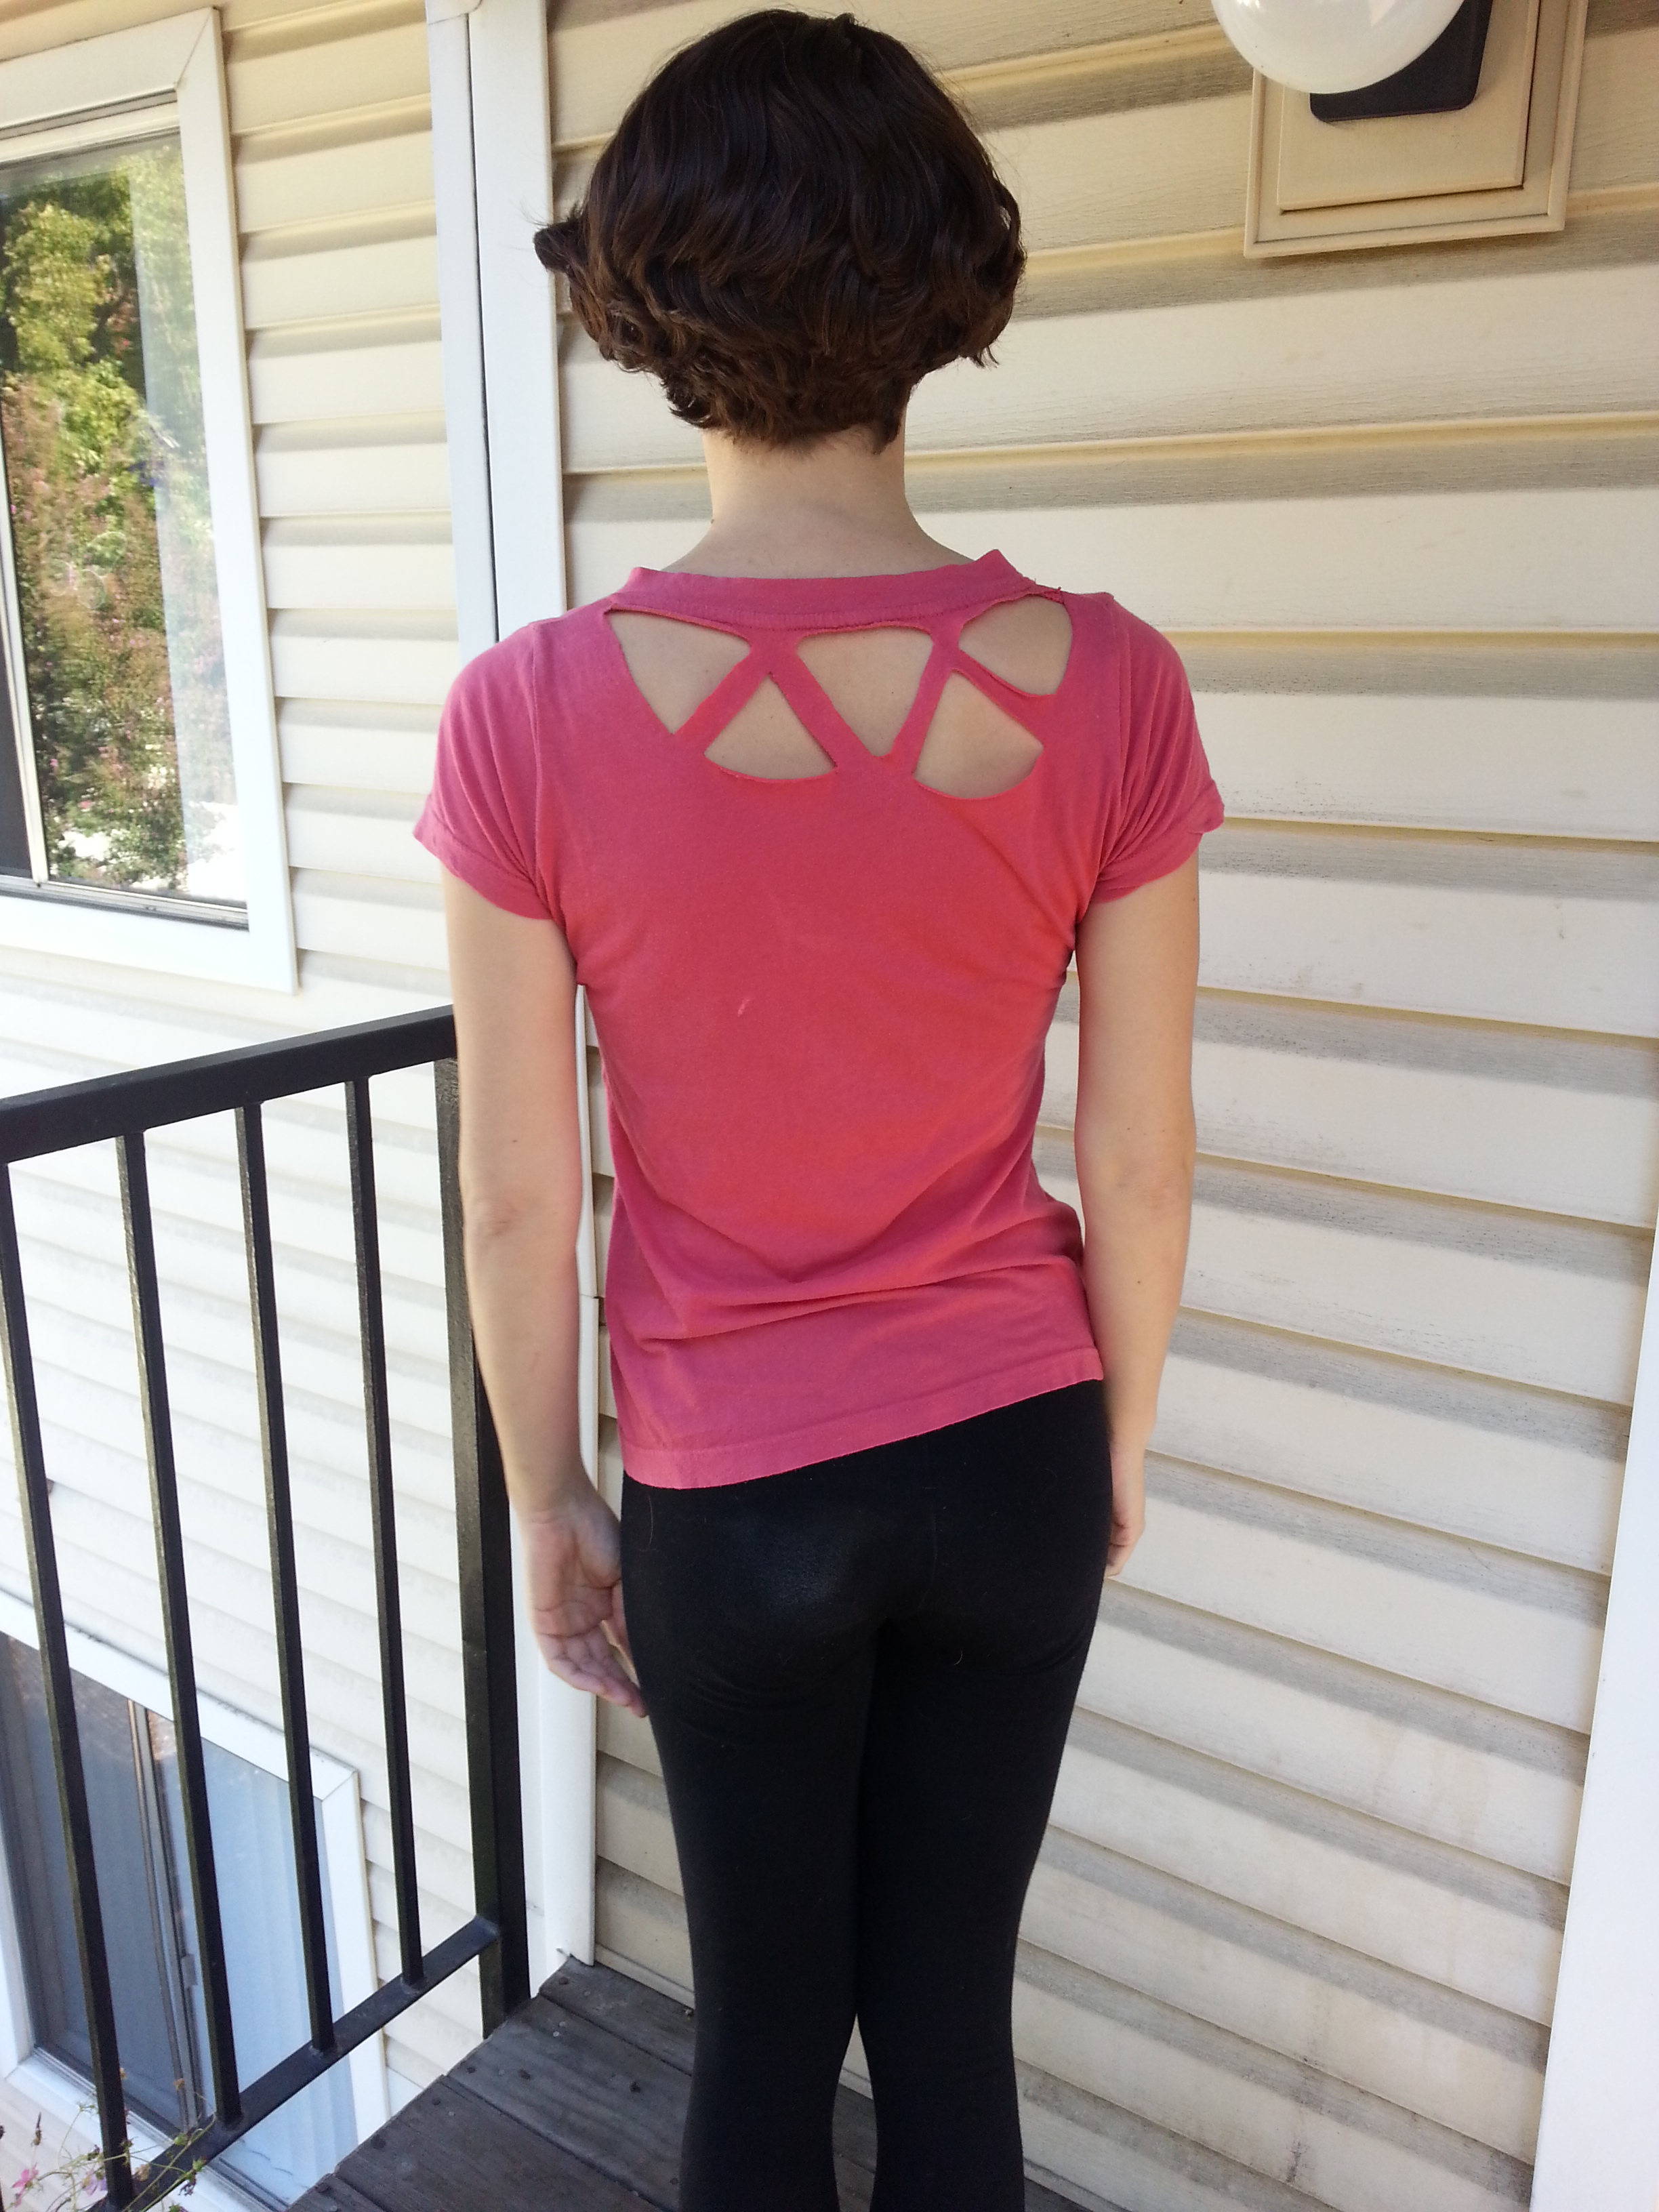
The last option is to just trace simple shapes directly onto the stencil paper and then cut those out—that’s the easiest option, and it’s what I did on my pink shirt when I wanted to use up the last of the paint I mixed. I did a pattern of triangles to match the cut outs on the back of the shirt.
Cut Outs
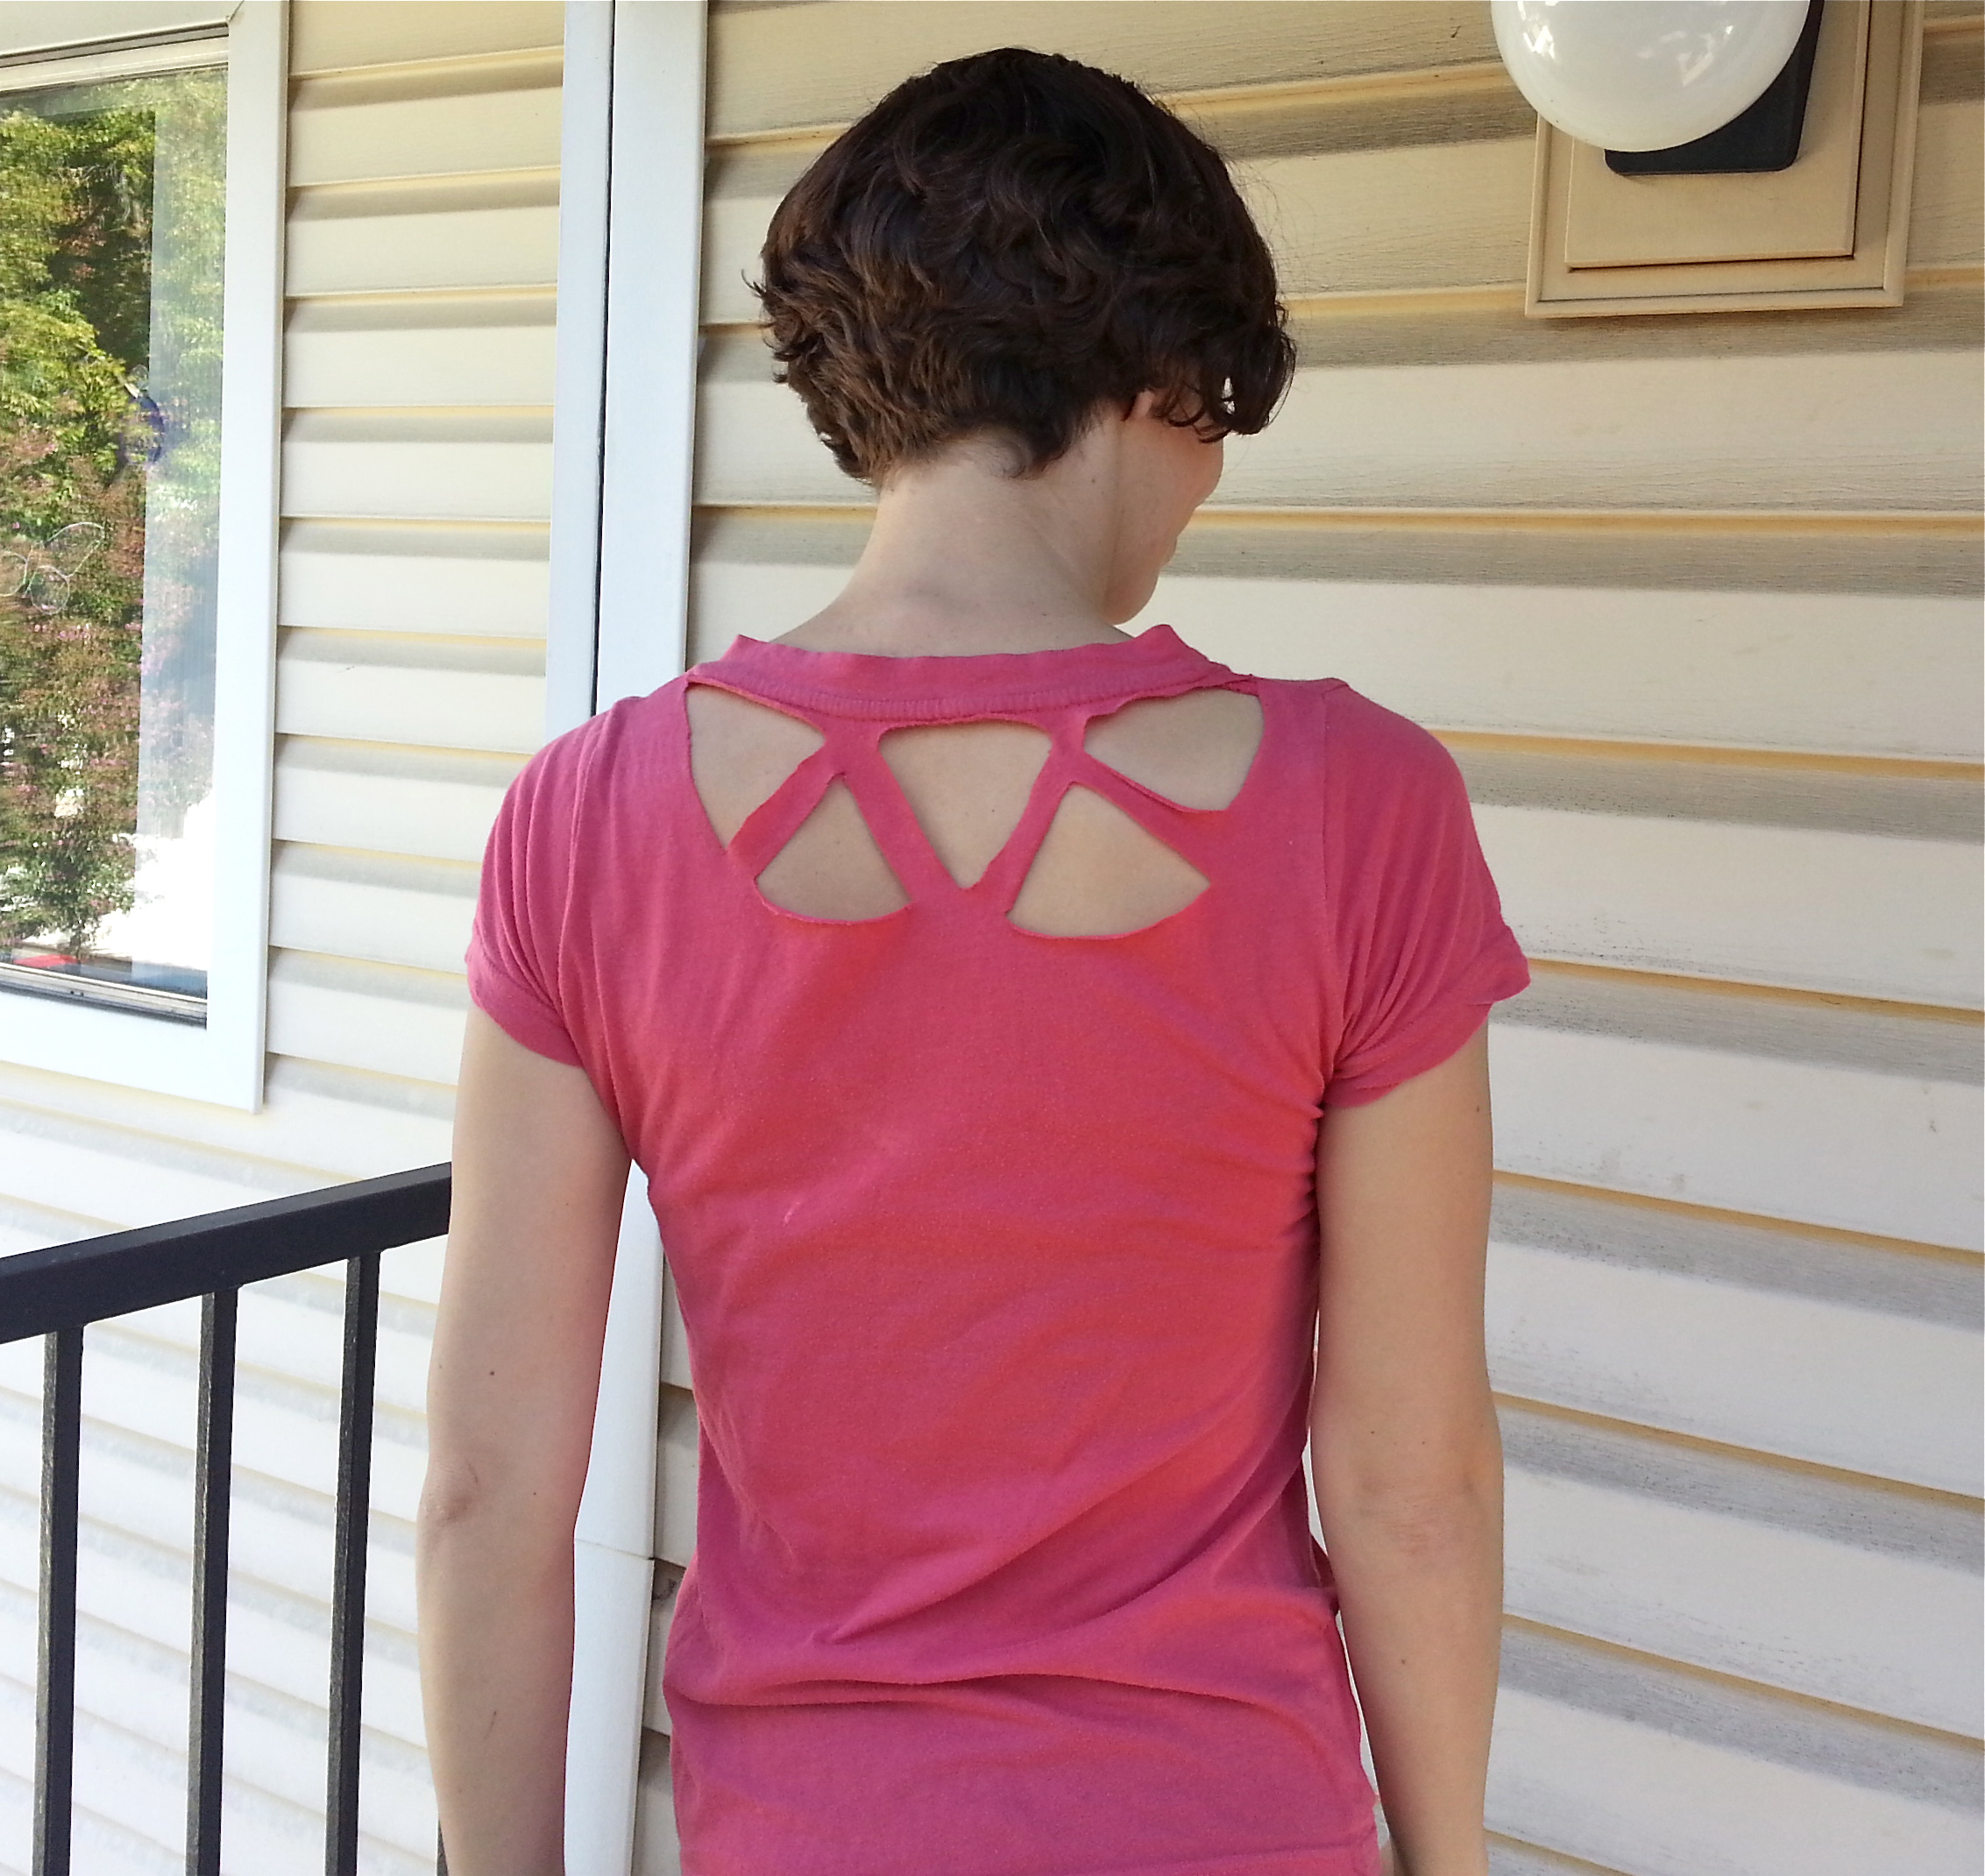
I had a strong urge to do something “destructive” to a few of the shirts I had. This pink shirt, for example, which my friend promptly dubbed the pink triangle (i thought she was referencing the Weezer song but she was not!). This shirt had been abandoned in my laundry room lost and found box for months, so it became the first guinea pig for my cut out and stenciling experiments.
I don’t have any in-progress shots for the cut outs, but here’s what I did. First I looked at some photos and tutorials online for some inspiration—this listicle of cut outs has some great images, and photos # 5, 21 and 22 intrigued me. I decided to do a simplified version of the triangle cut outs from photo # 22. That one unfortunately had no tutorial, so I decided to make a triangle template, trace it onto the shirt with chalk, and then cut it out with scissors. I did the stencils later with the same template.
This mostly worked, but it was tricky to get the triangles all the same size and shape with scissors. So when I tried it on another t-shirt, I used my X-Acto knife to cut them out. Much easier! I think it works especially well for straight lines.
I love the way that you can play with the placement of cut outs—for example, you can place them to reveal another shirt underneath and play with the contrast of colors and patterns. I think someday I’d like to attempt one of these two designs, especially the tree one.
Fit Alterations
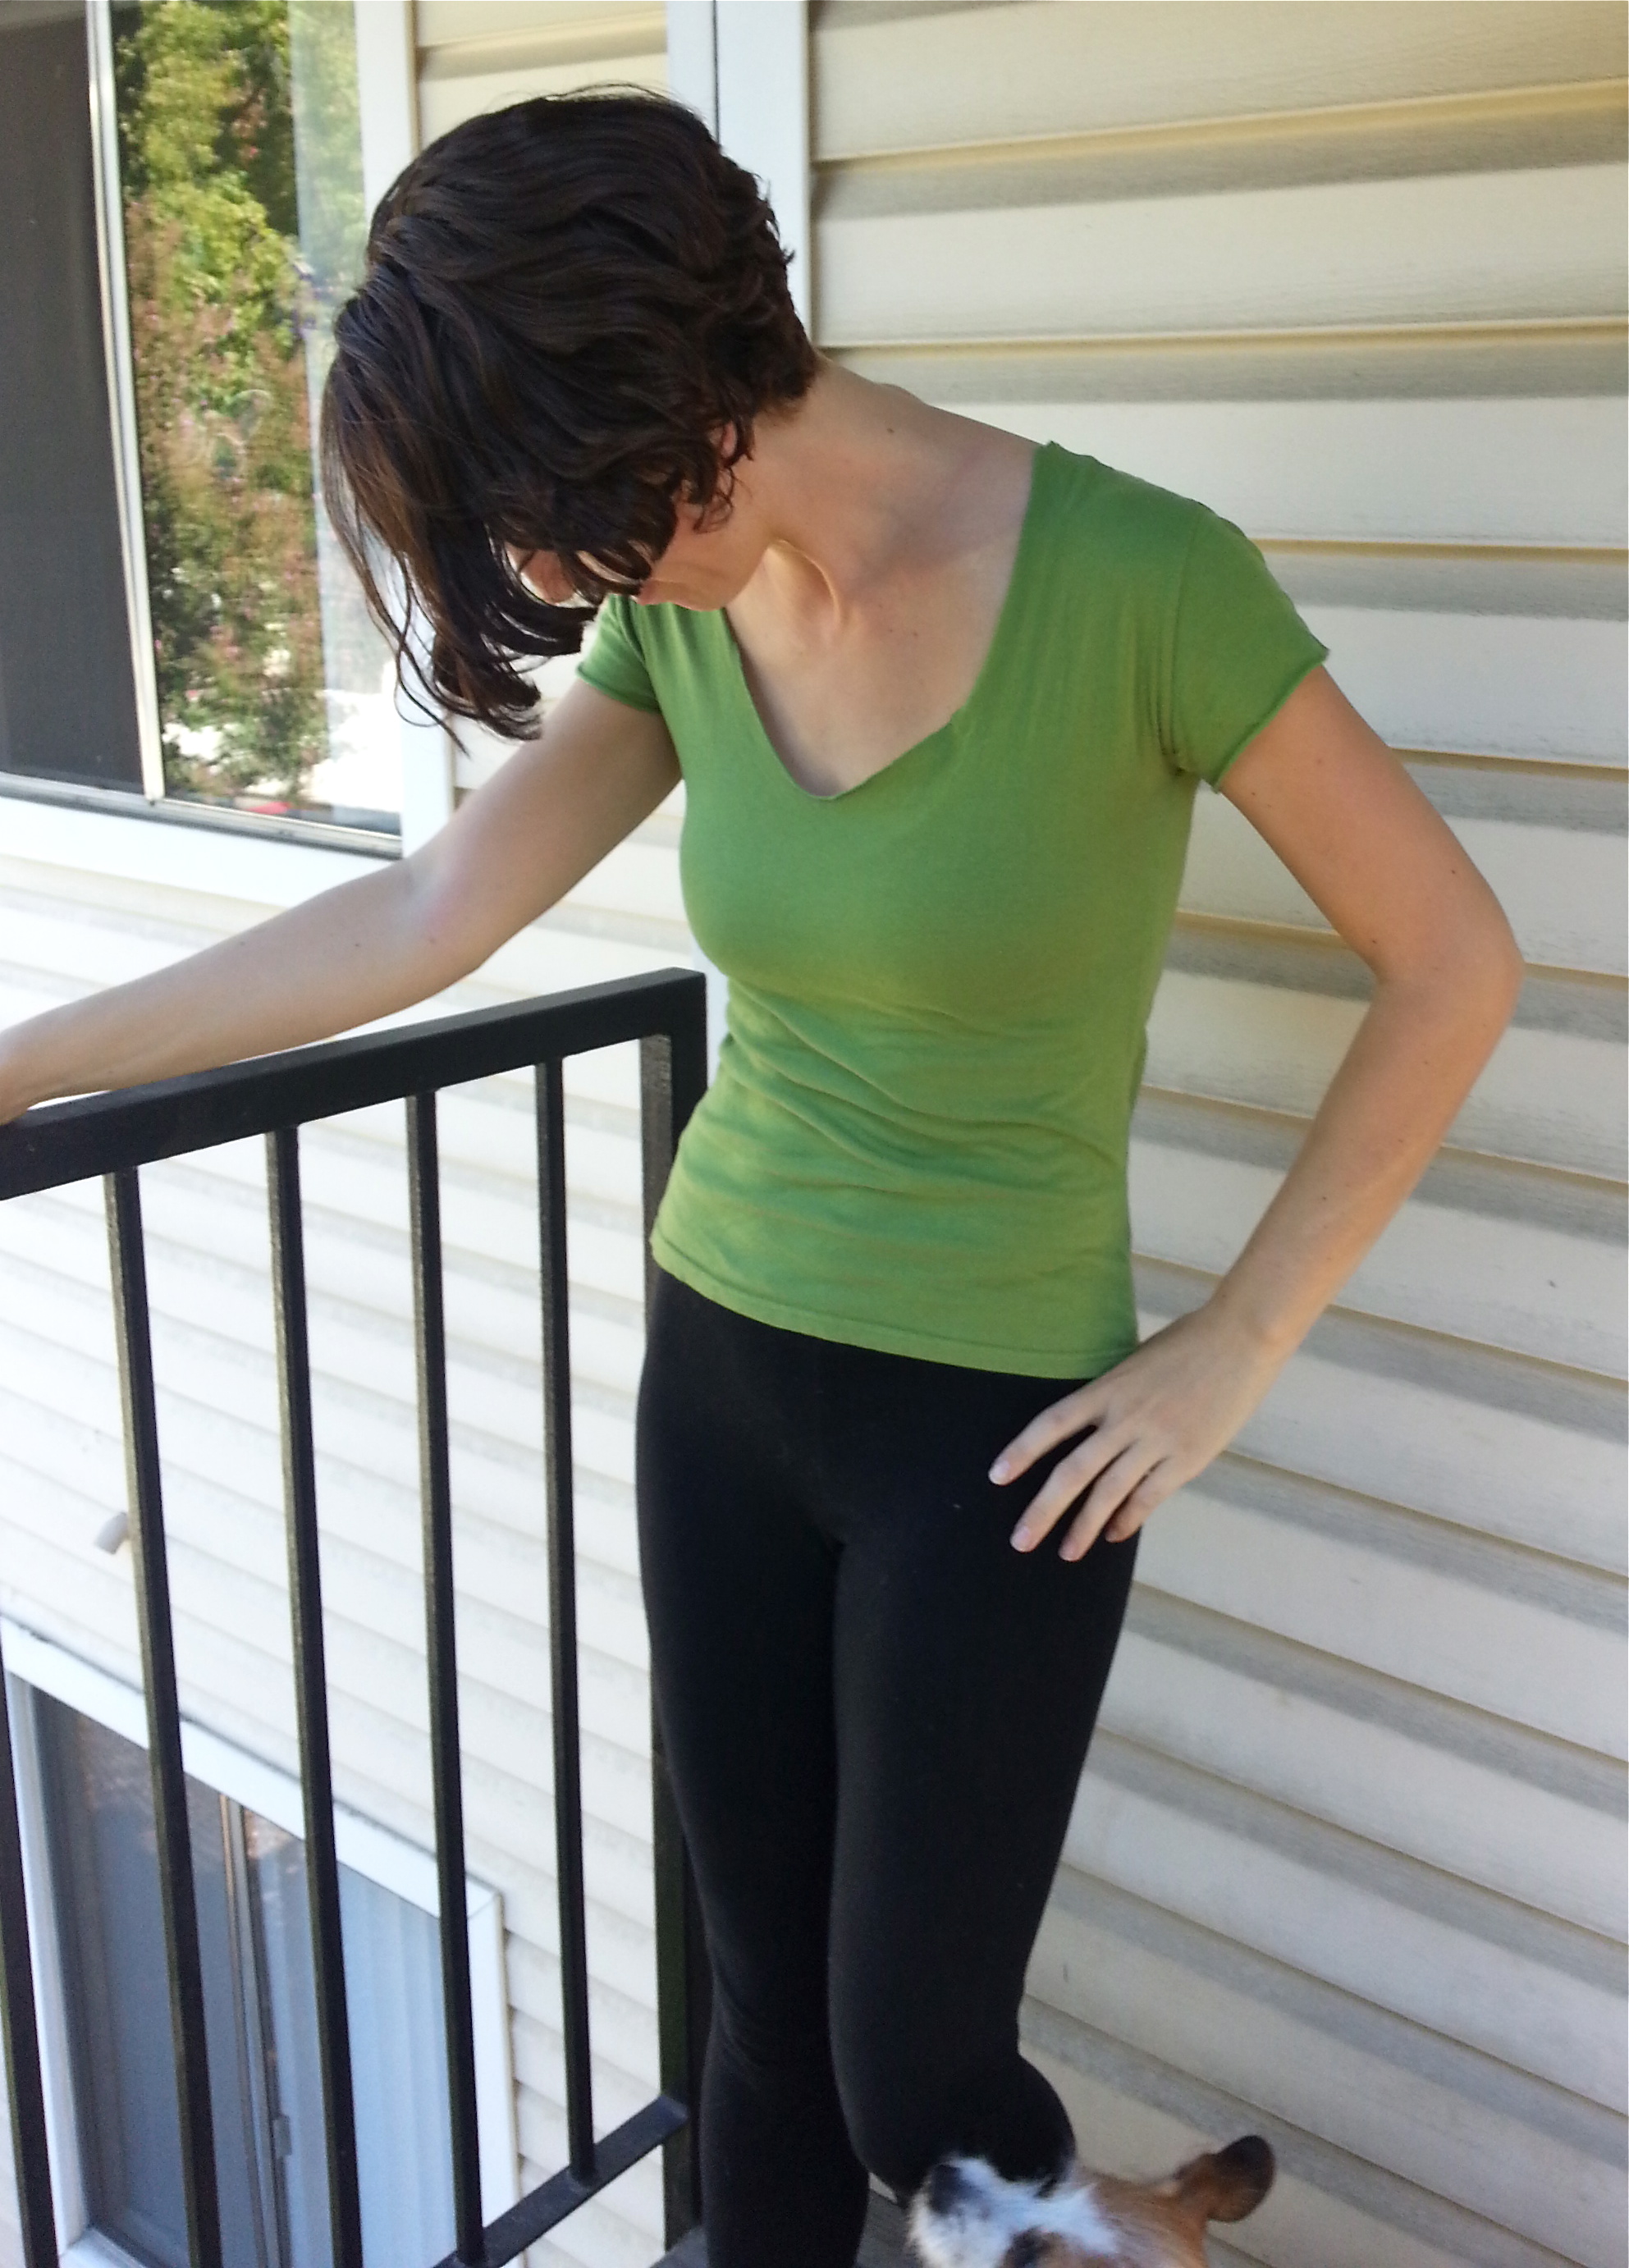
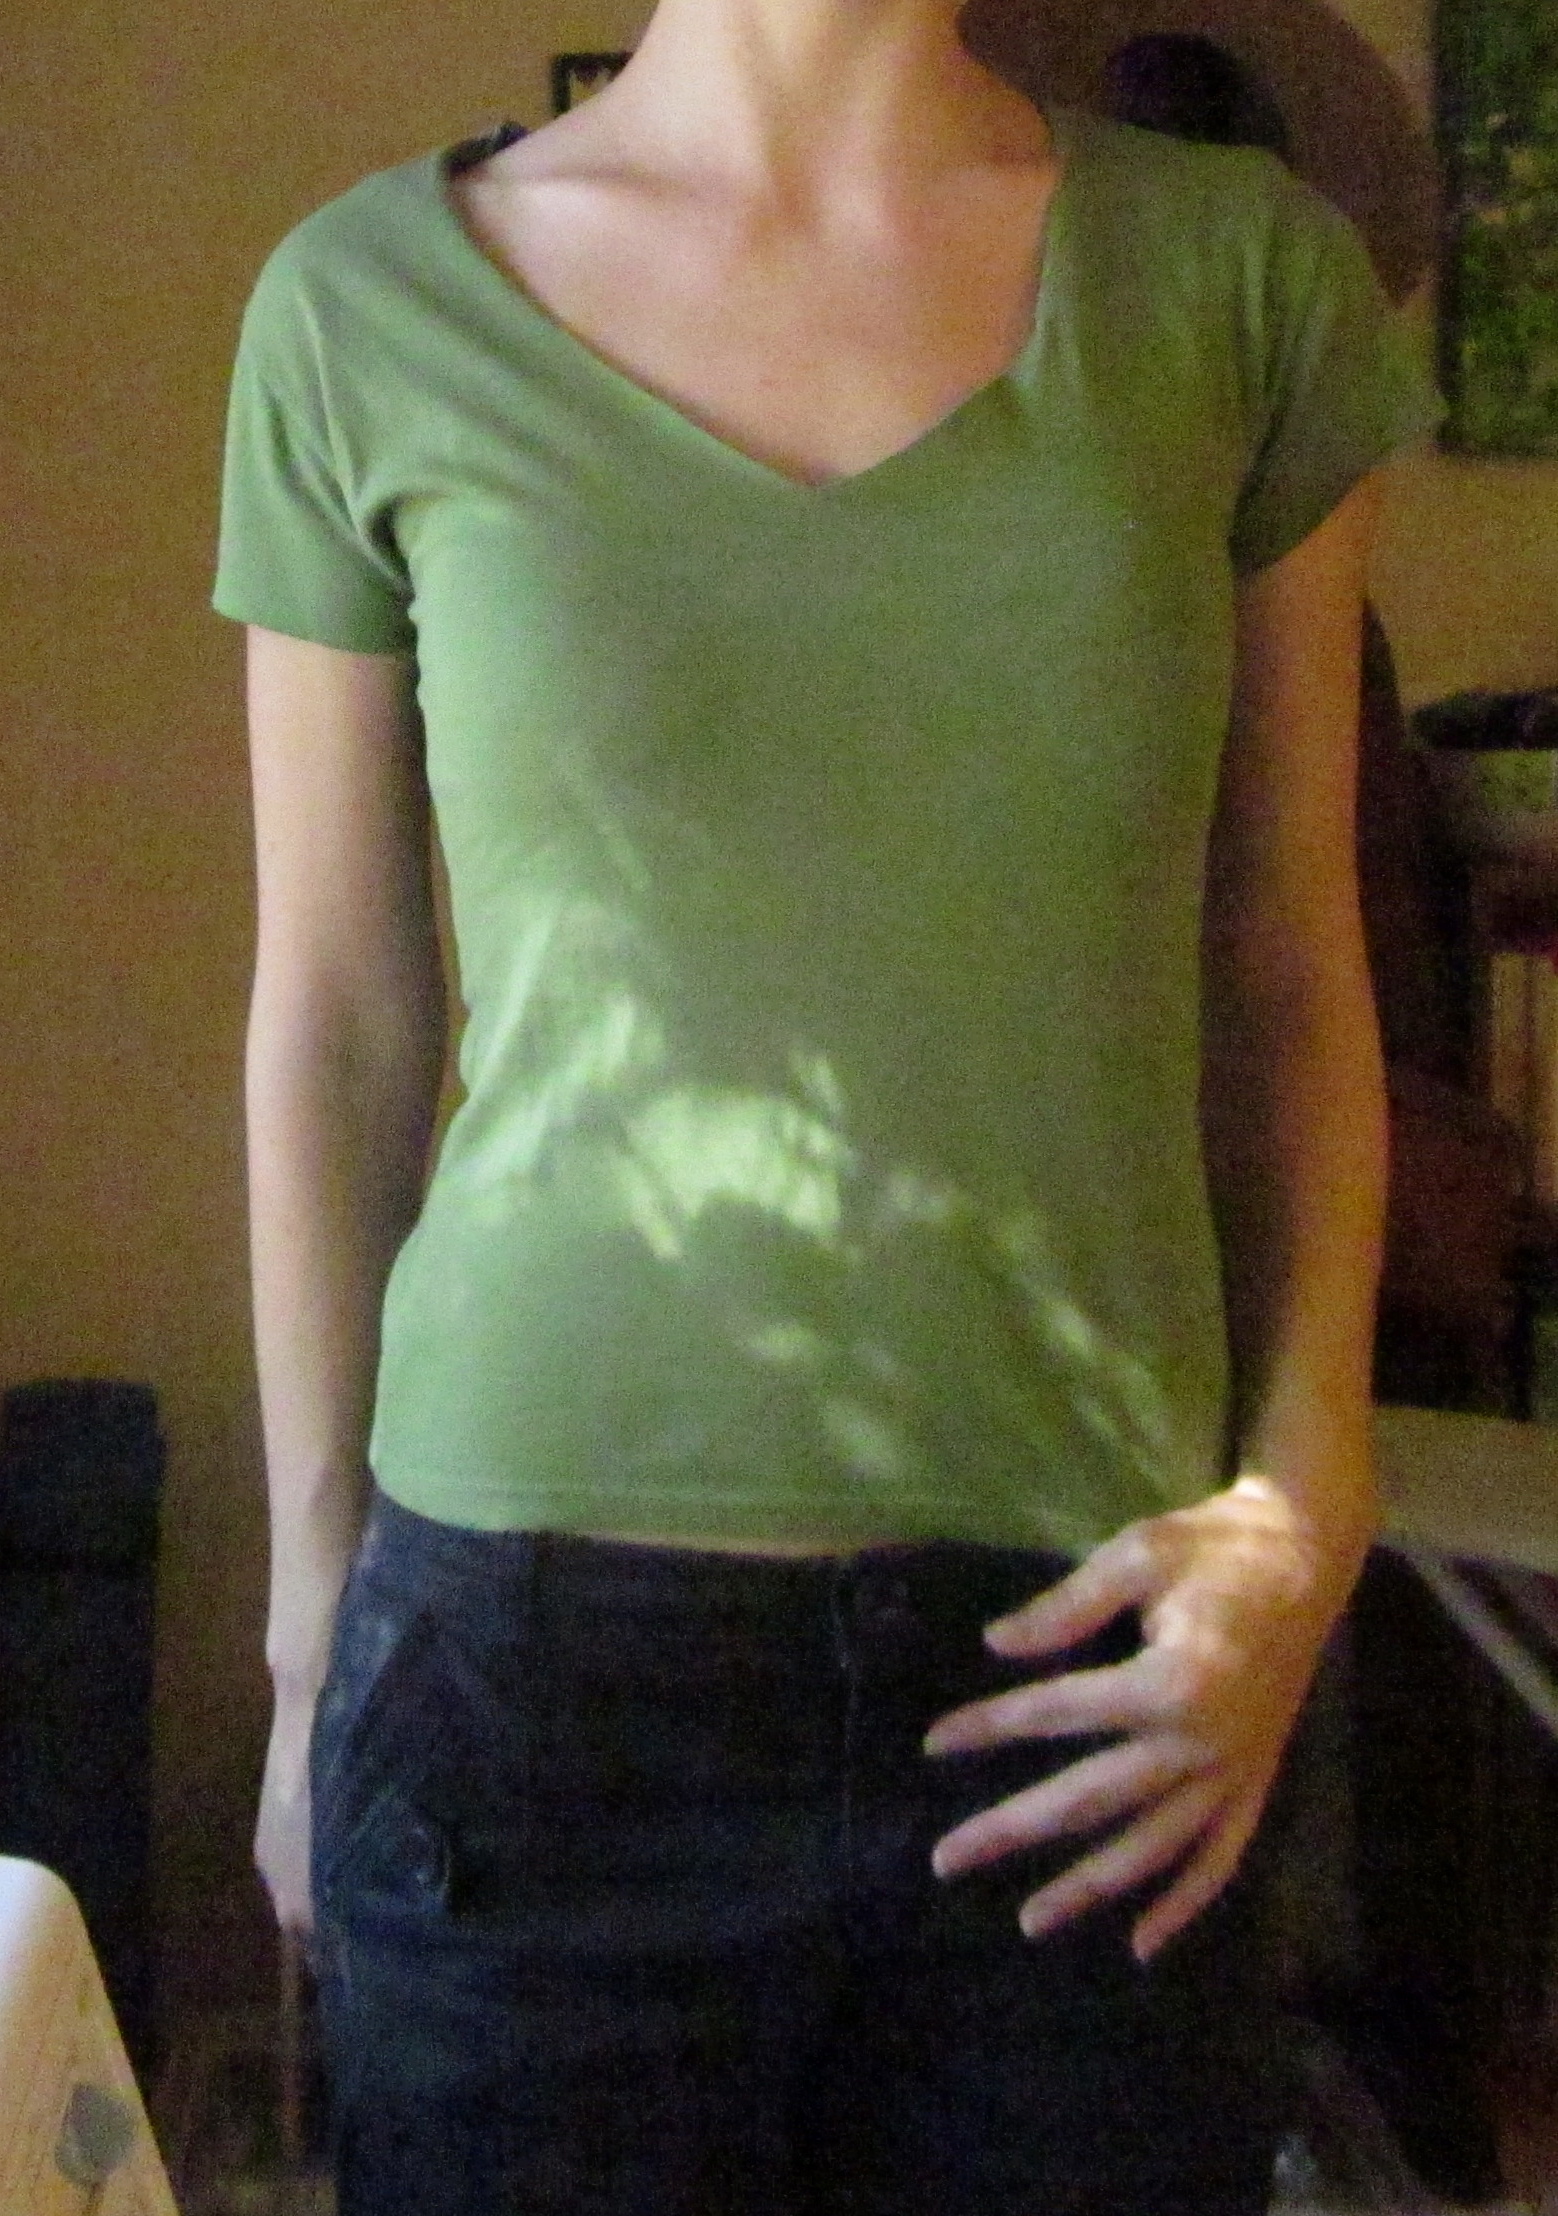
One of the most basic DIY t-shirt projects is also the one that requires the most patience and skill (and a sewing machine)—changing the fit and cut of a shirt. The above tank top used to be a men’s size medium crew neck tee that I found in a free pile. The green shirt below that I stenciled on was a boy’s size large crew neck t-shirt, also from a free pile. There are many tutorials out there for doing this, but I am going to show you the easier way I know.
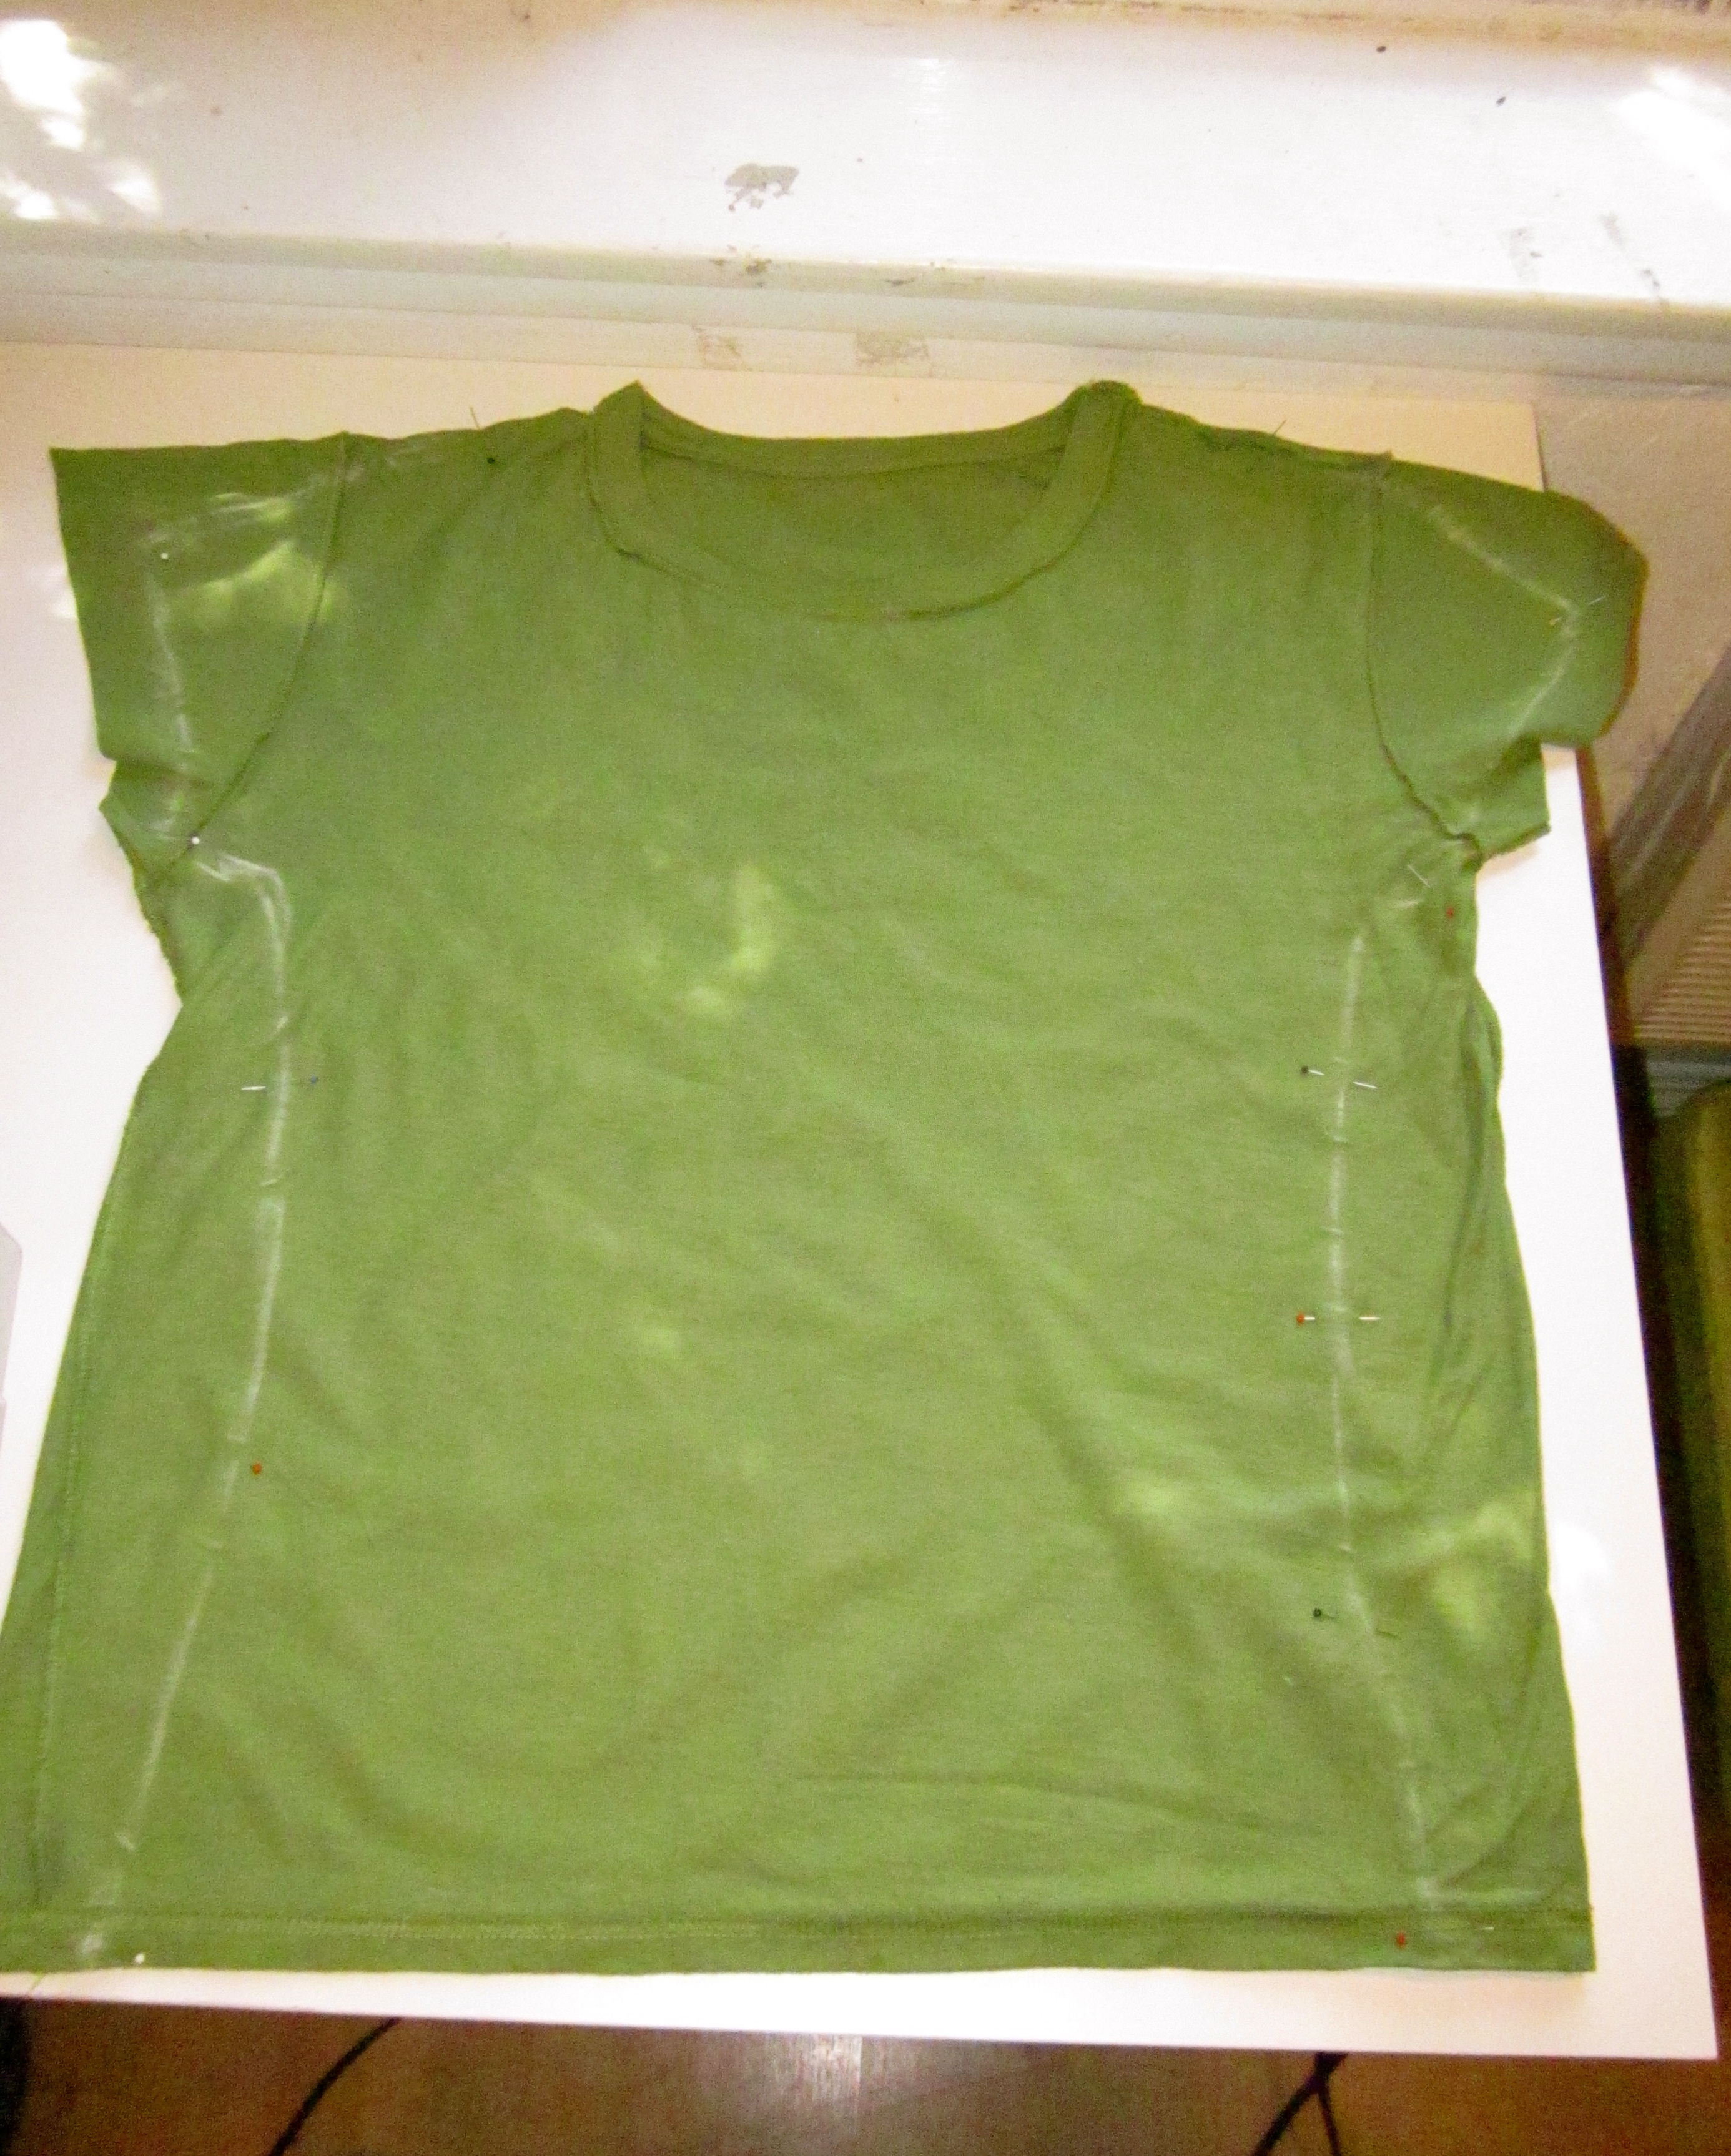
First, you need to start with a clean t-shirt that is larger than you want it to be ( in this case, green shirt). Your’e also going to need a smaller t-shirt that fits you well that will act as a template (here it’s the blue shirt). Both need to be true t-shirts—those made from the kind of material that doesn’t unravel if you leave raw cut edges, and that’s important. It’s also a good idea that they have about the same amount of elasticity—if one is super stretchy and the other has no stretch, the end result may be a poor fit.
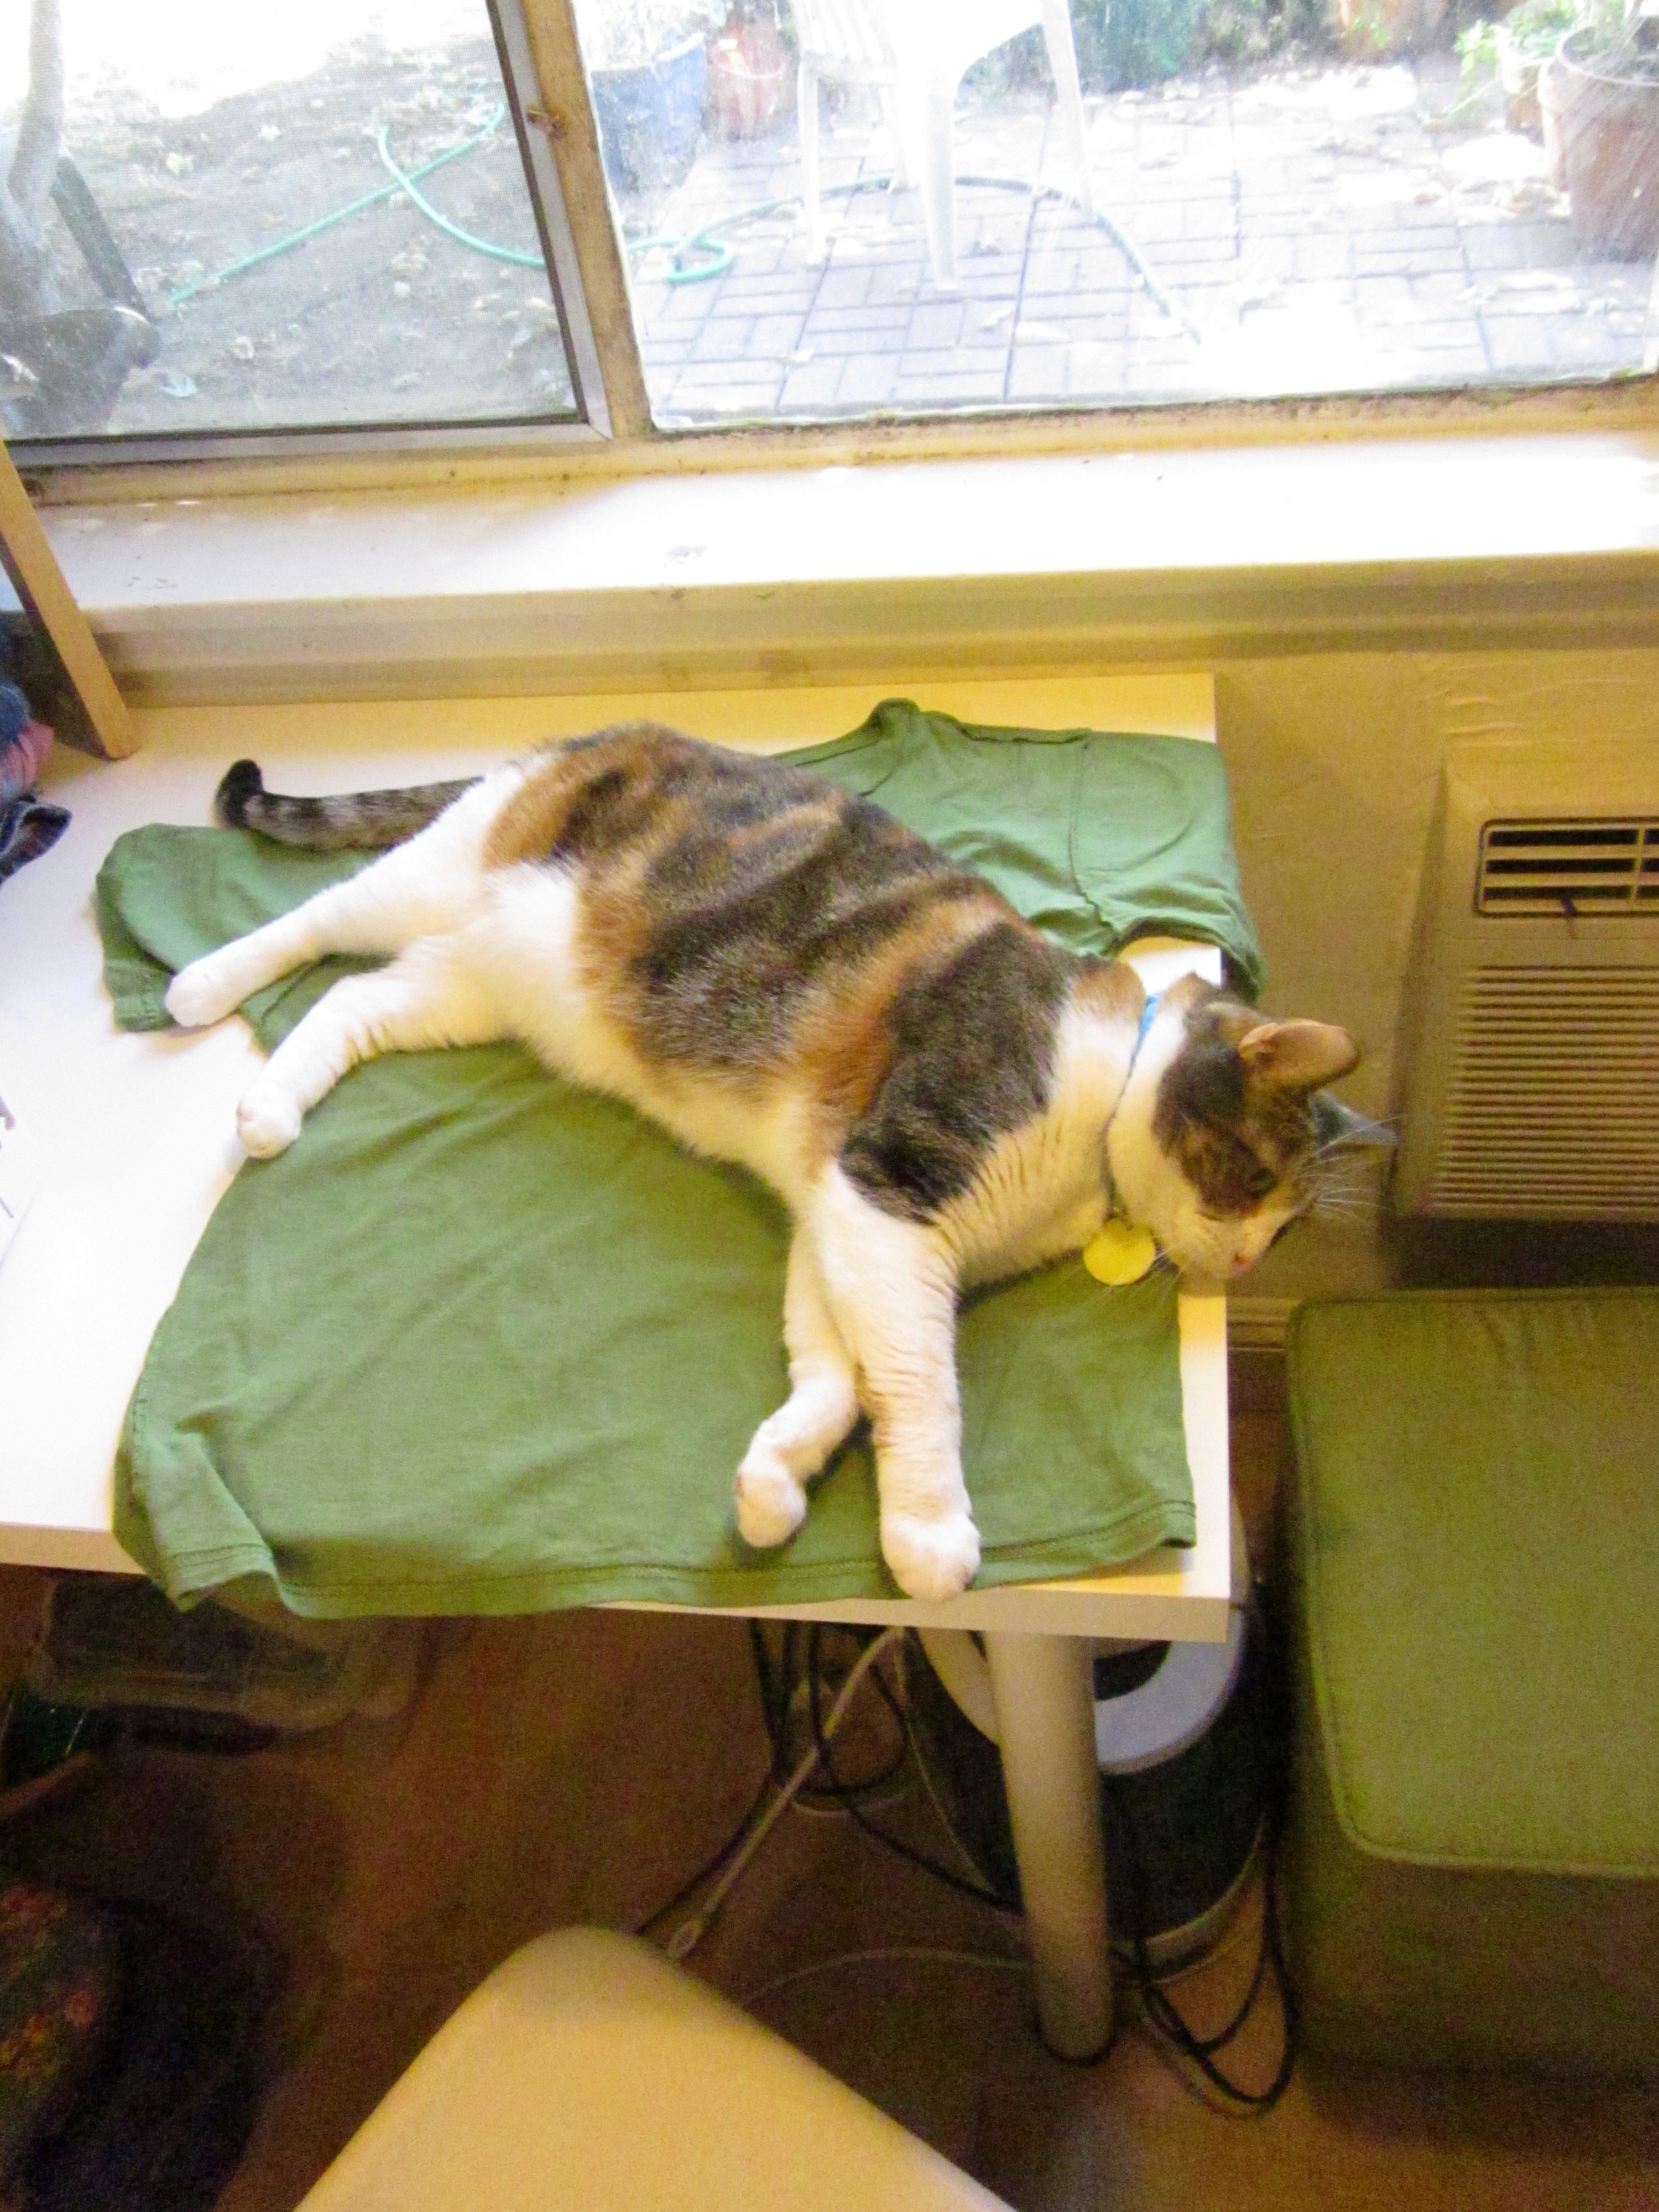
Iron out any wrinkles and lay the larger shirt on a flat surface, then place the template shirt on top of it (remove cat if necessary). Line up the top seams and trace the outline of the template shirt on top.
Pin the fabric together at the chalk edges and sew along that line using a matching color thread. After sewing, try it on once to be sure it’s not too tight, then trim the excess fabric off, and shorten the sleeves if necessary.
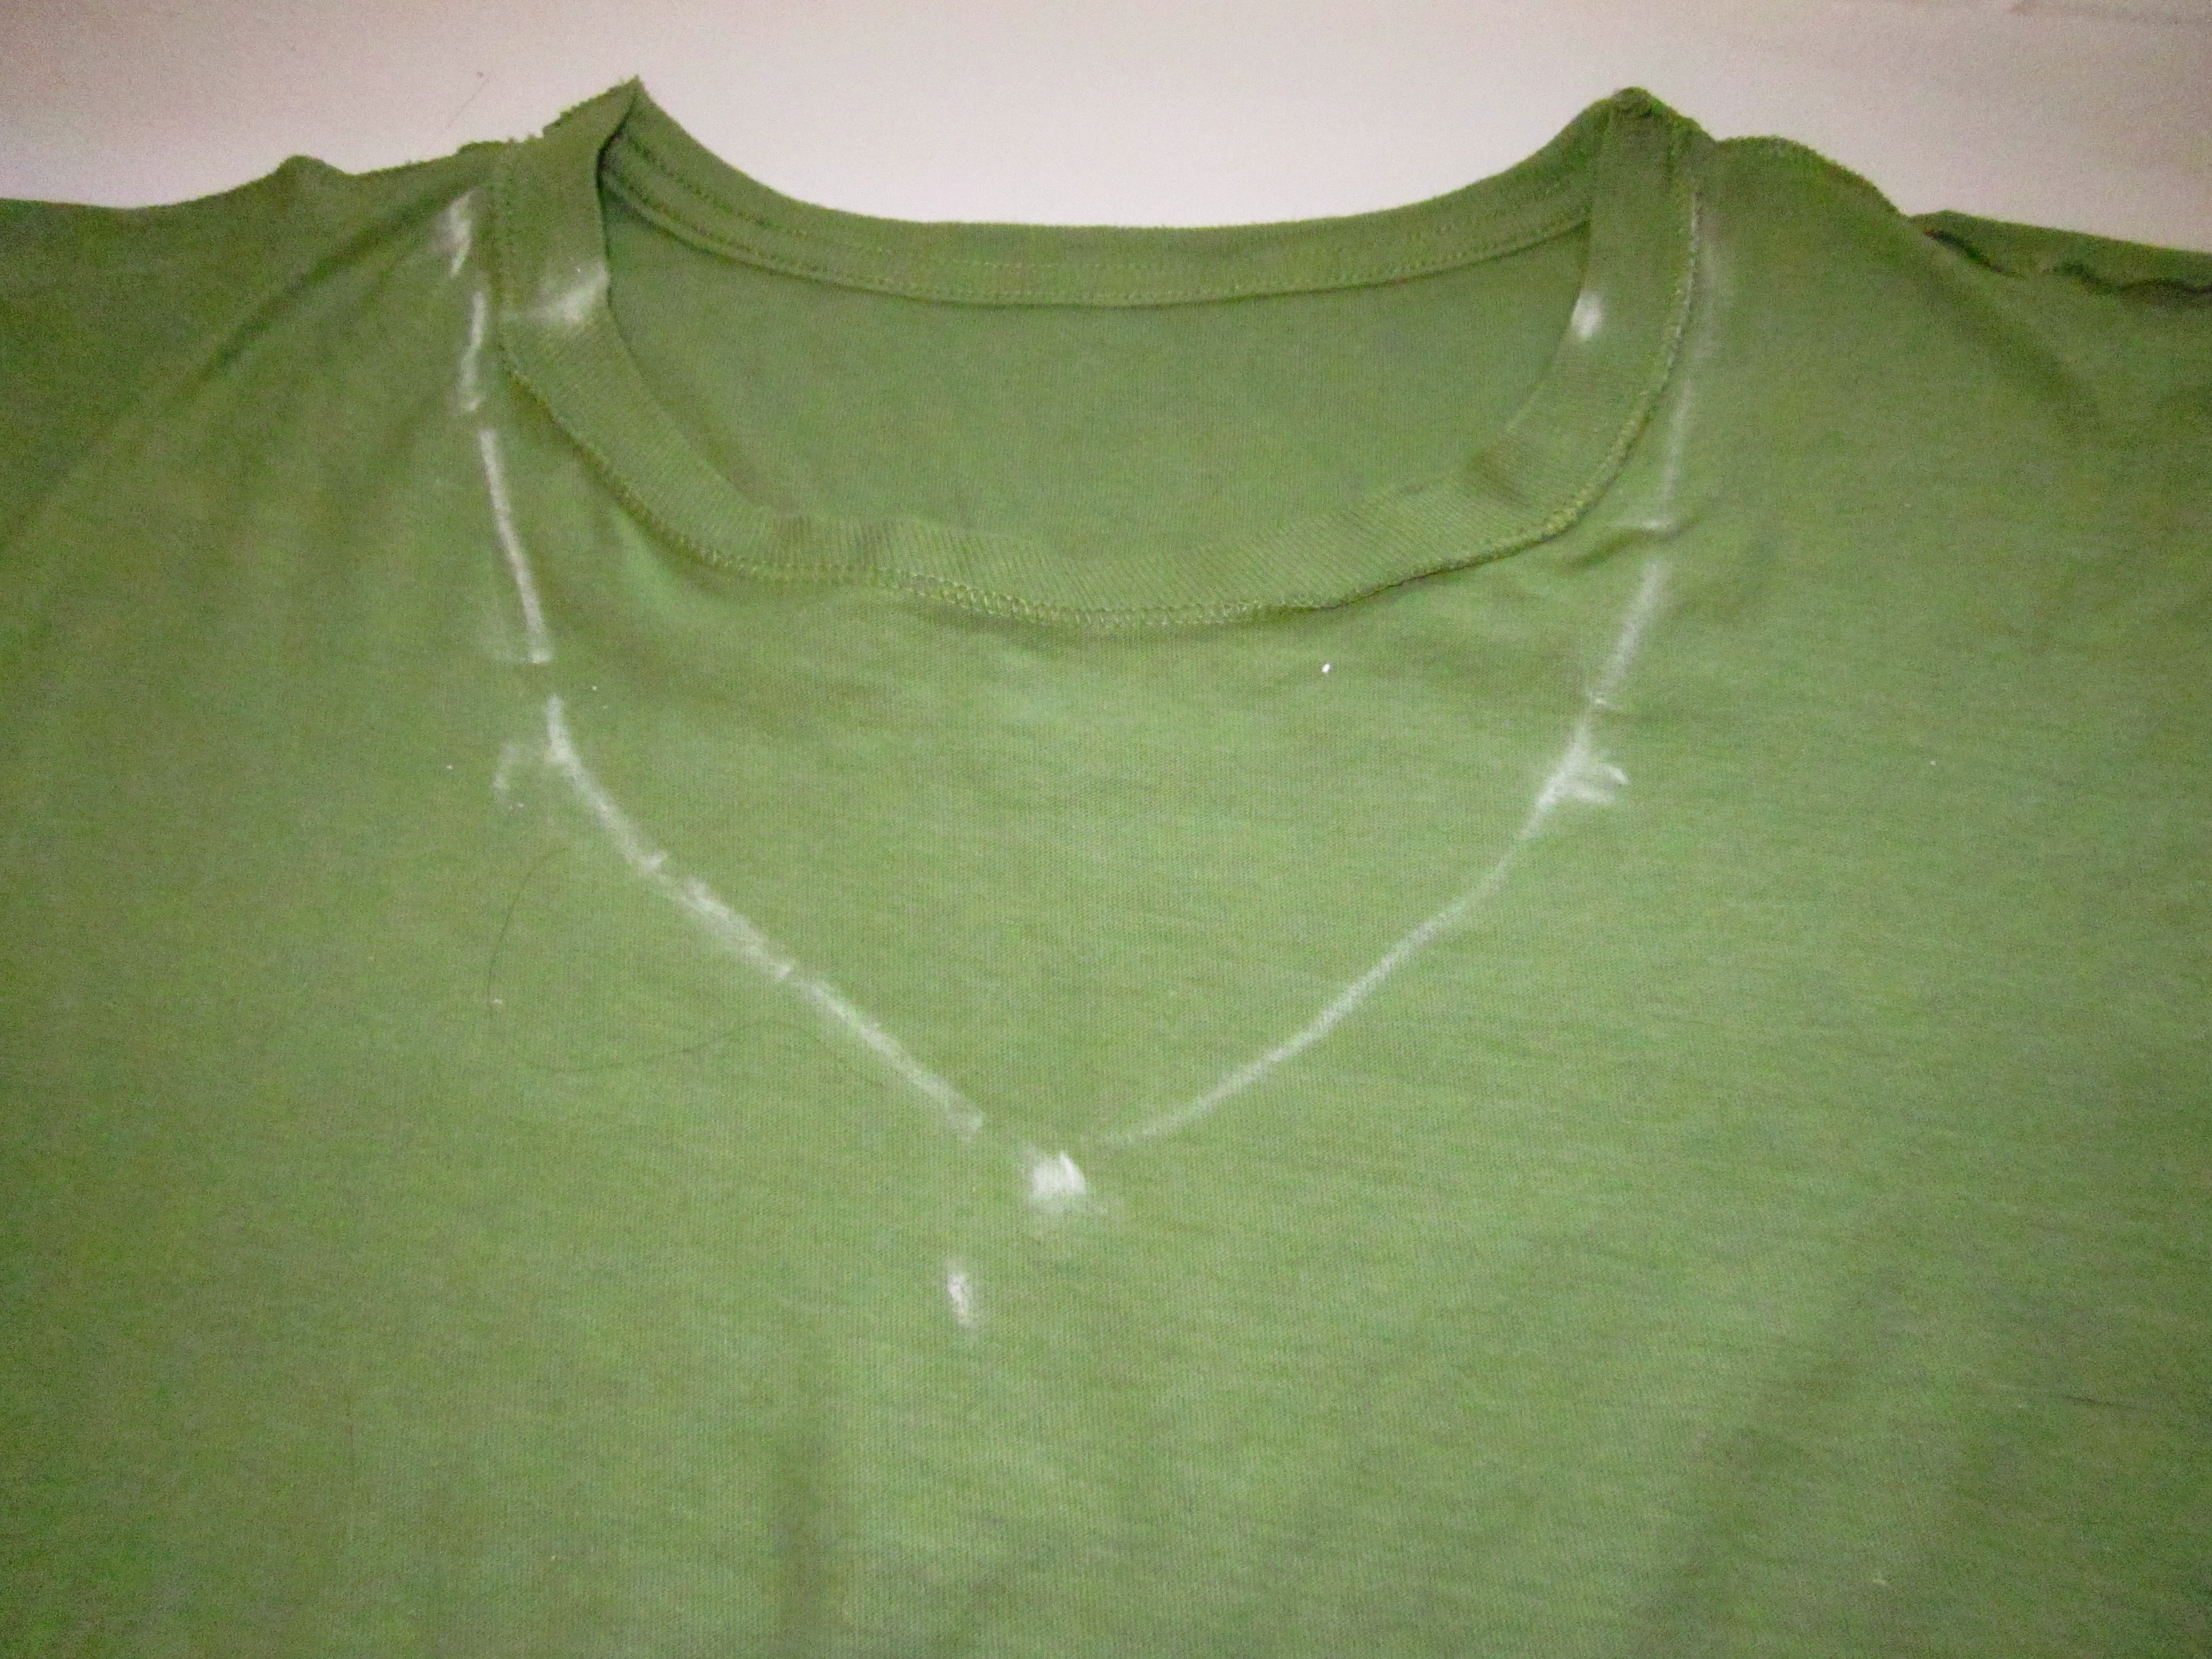
If the front and back necks are different, you now need to cut out the neck. You can either eyeball it or place the template shirt inside the other shirt and use pins to trace it by feel.
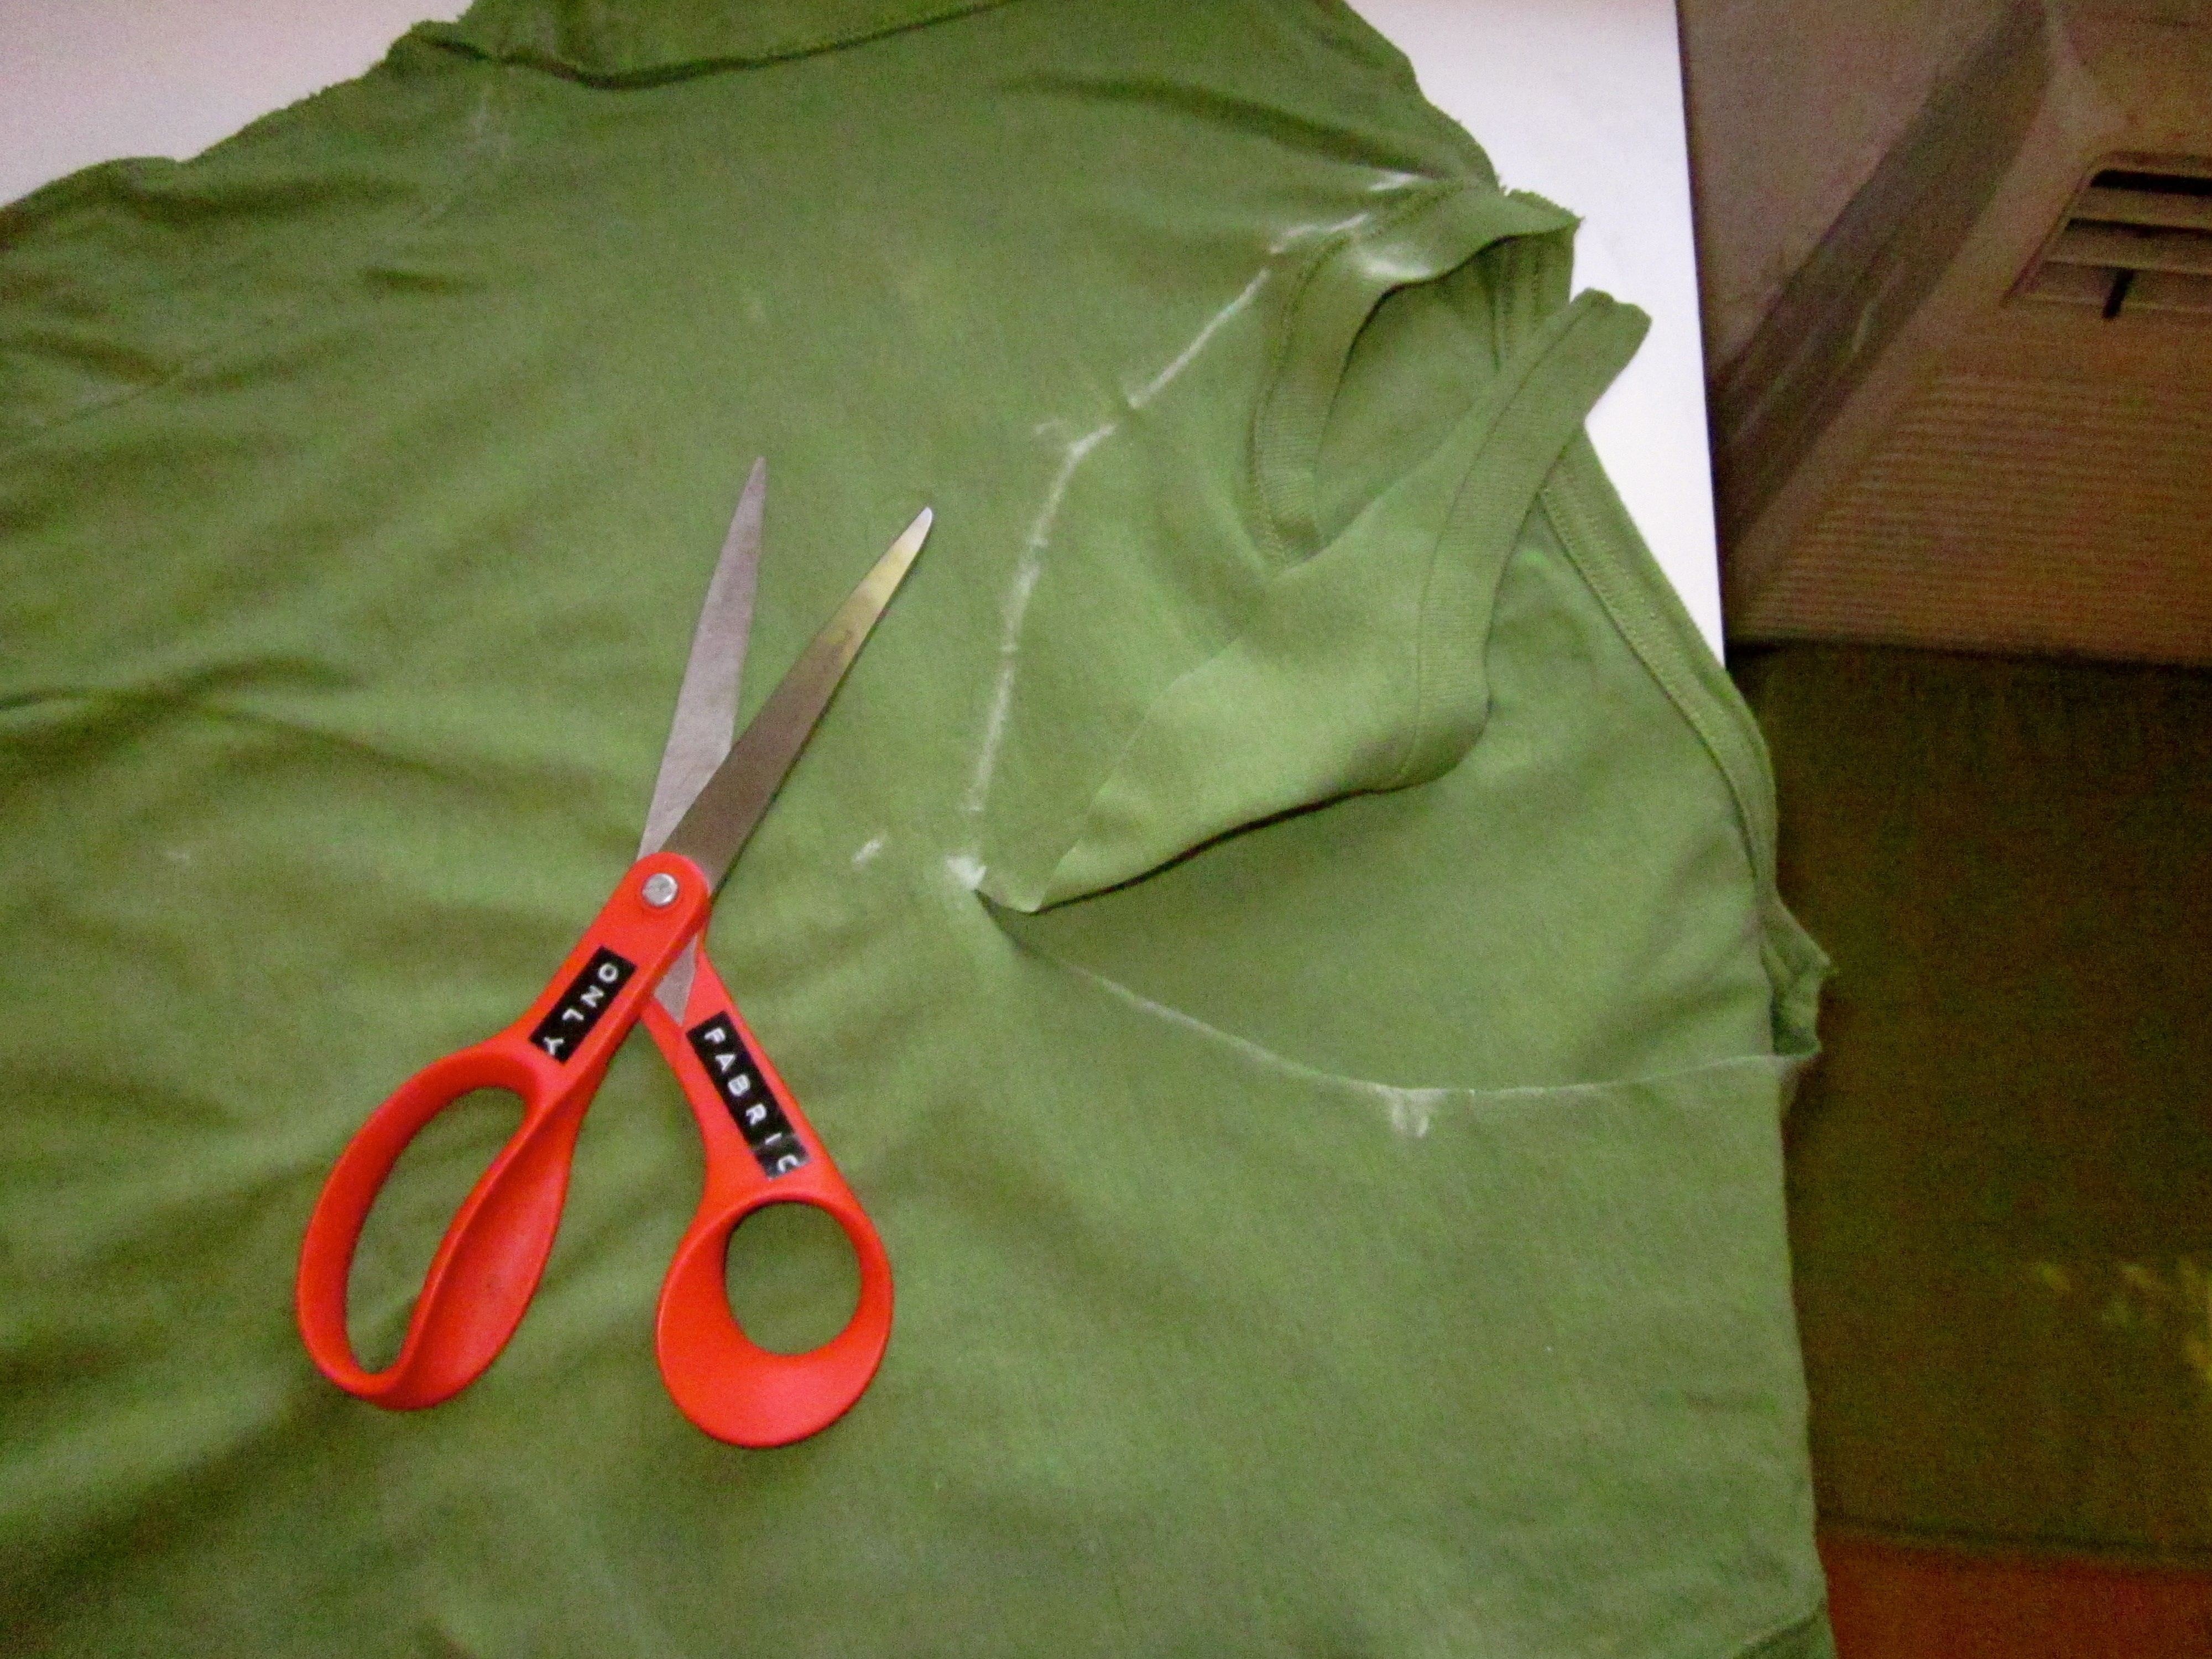
Cut out the neckline with some good sharp scissors.
…and try on the finished product!
Making the tank top was even easier—the front and the back of the shirt had identical necklines, and I cut out the sleeves entirely. I first used this technique years ago making my very first re-fit, cut up, stenciled tank top, which you can see below. The stencil was an homage to my very first pair of lefty scissors, which I’ve had since I was a kid and still own. That’s right—I’ve been cutting it up Lefty style since first grade.
Let me know if you use any of these techniques to (de)construct your own t-shirts! I’d love to see the results.
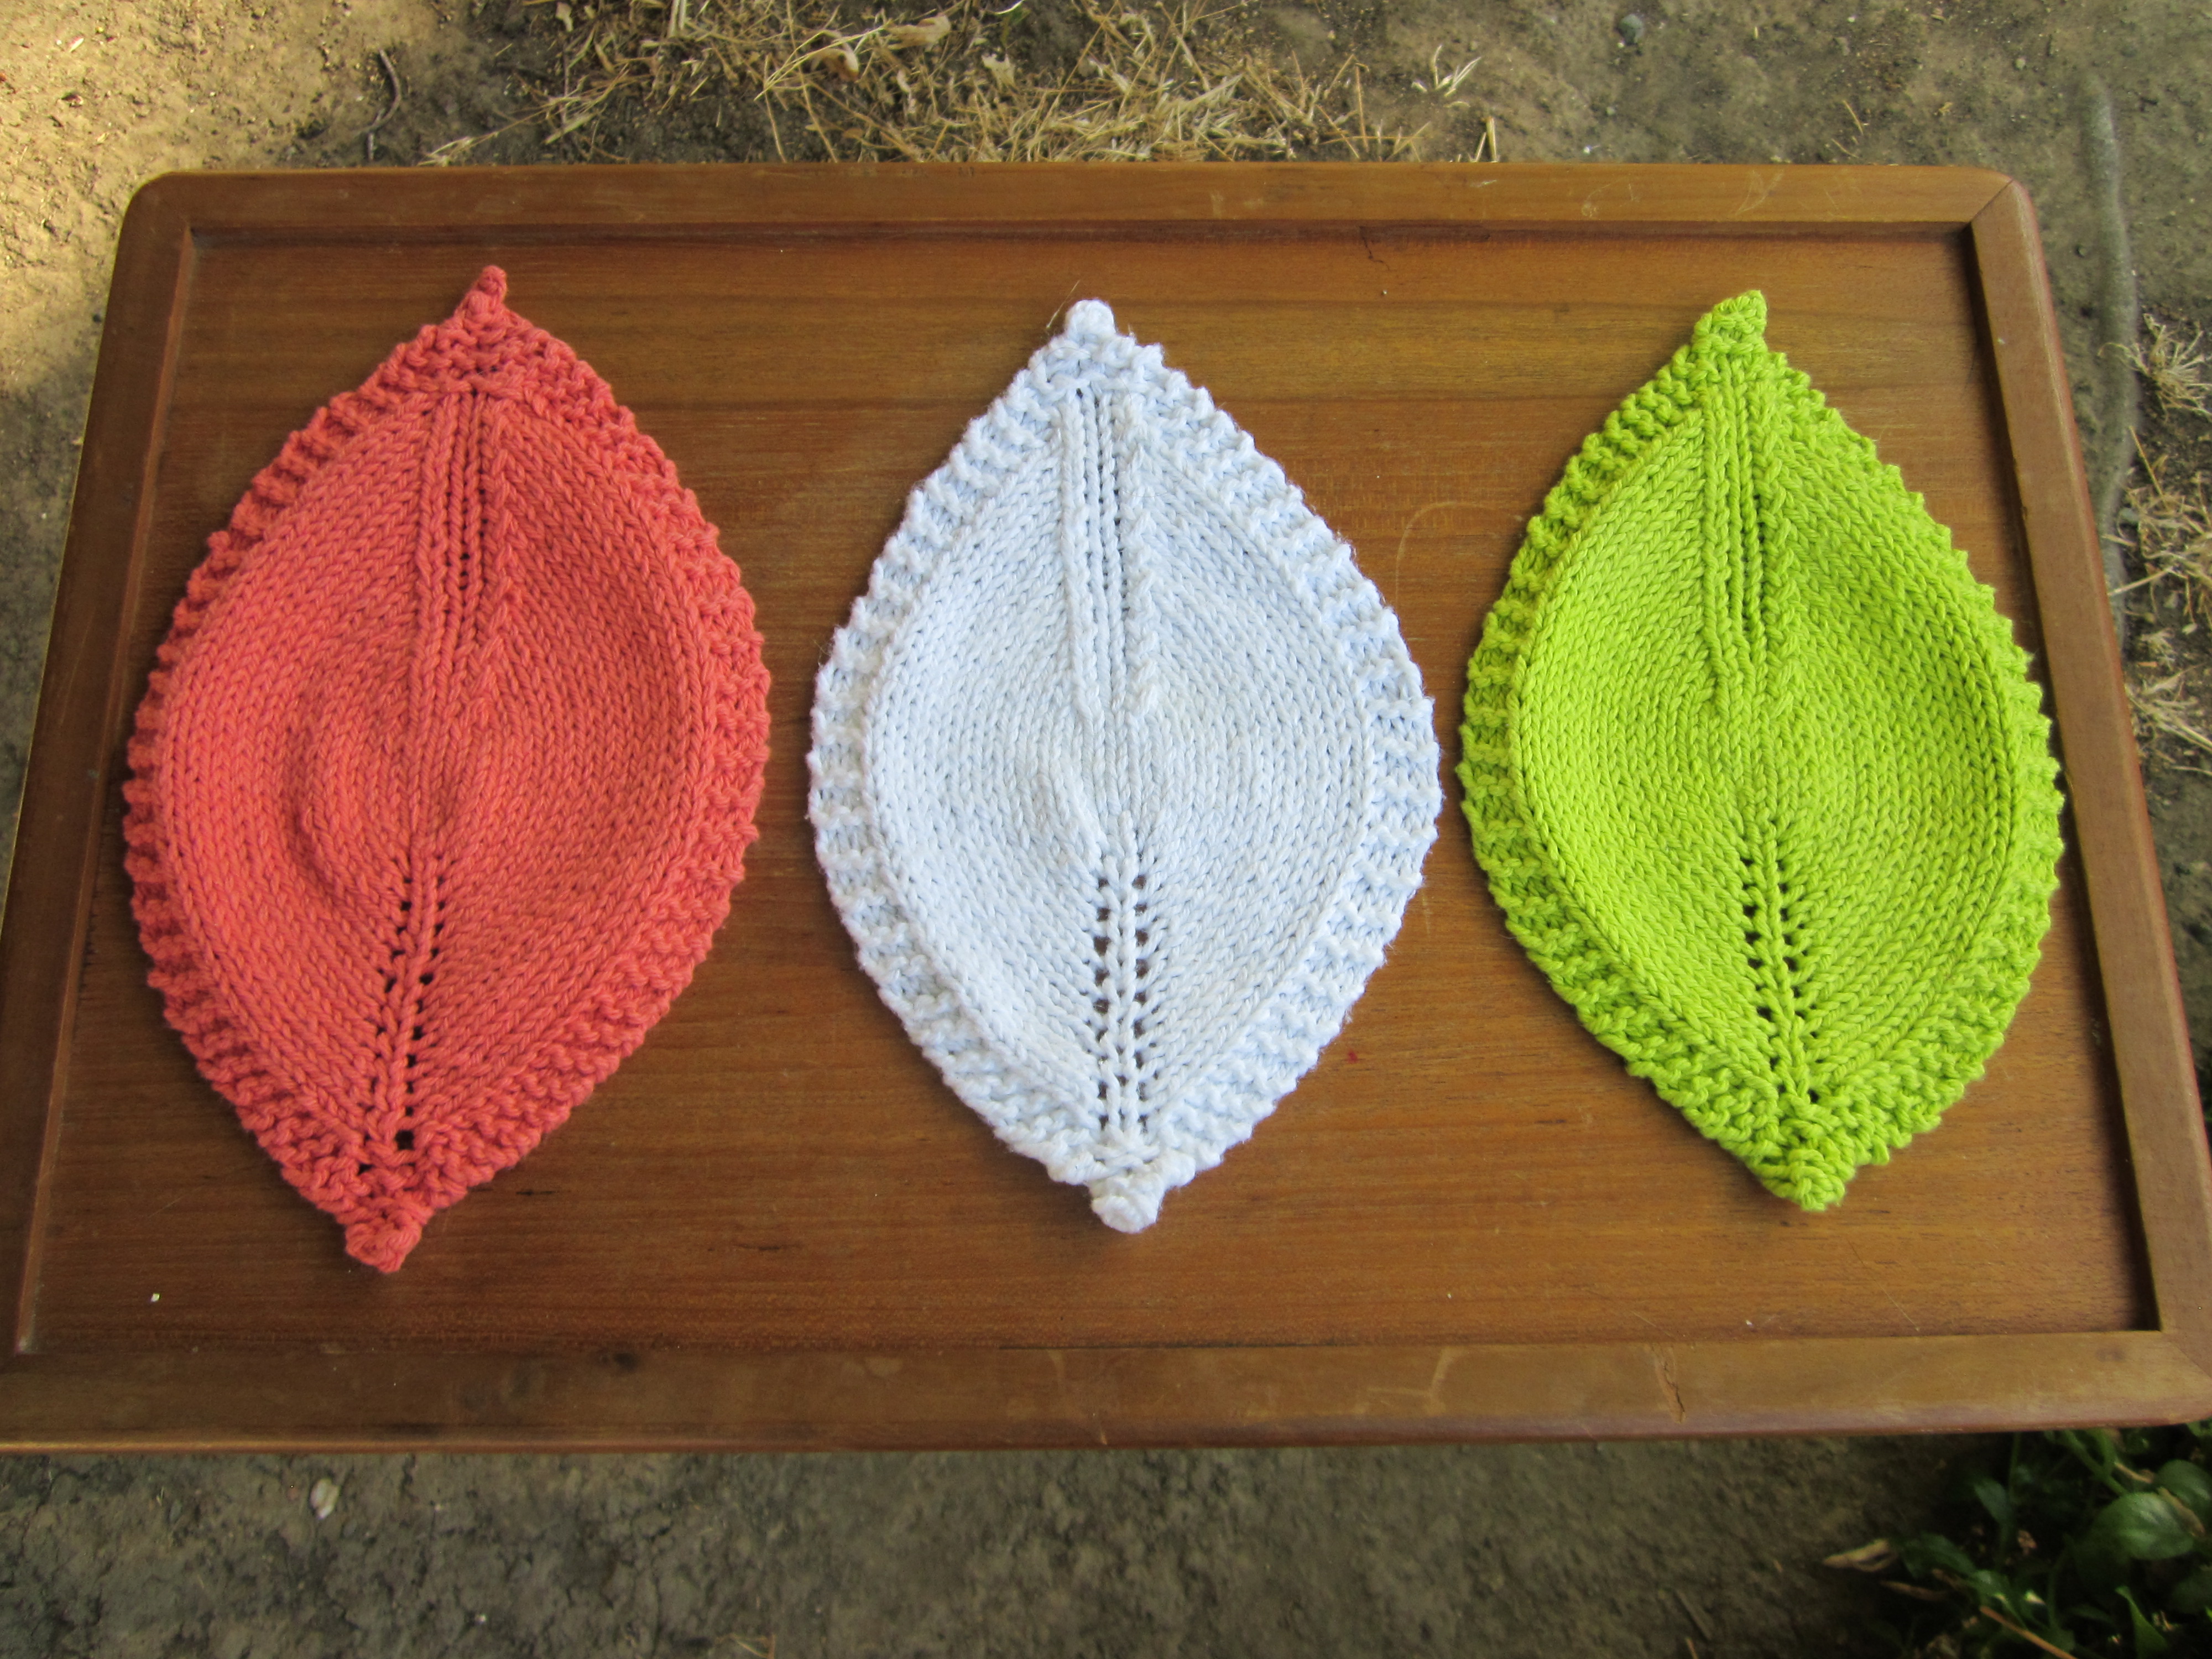
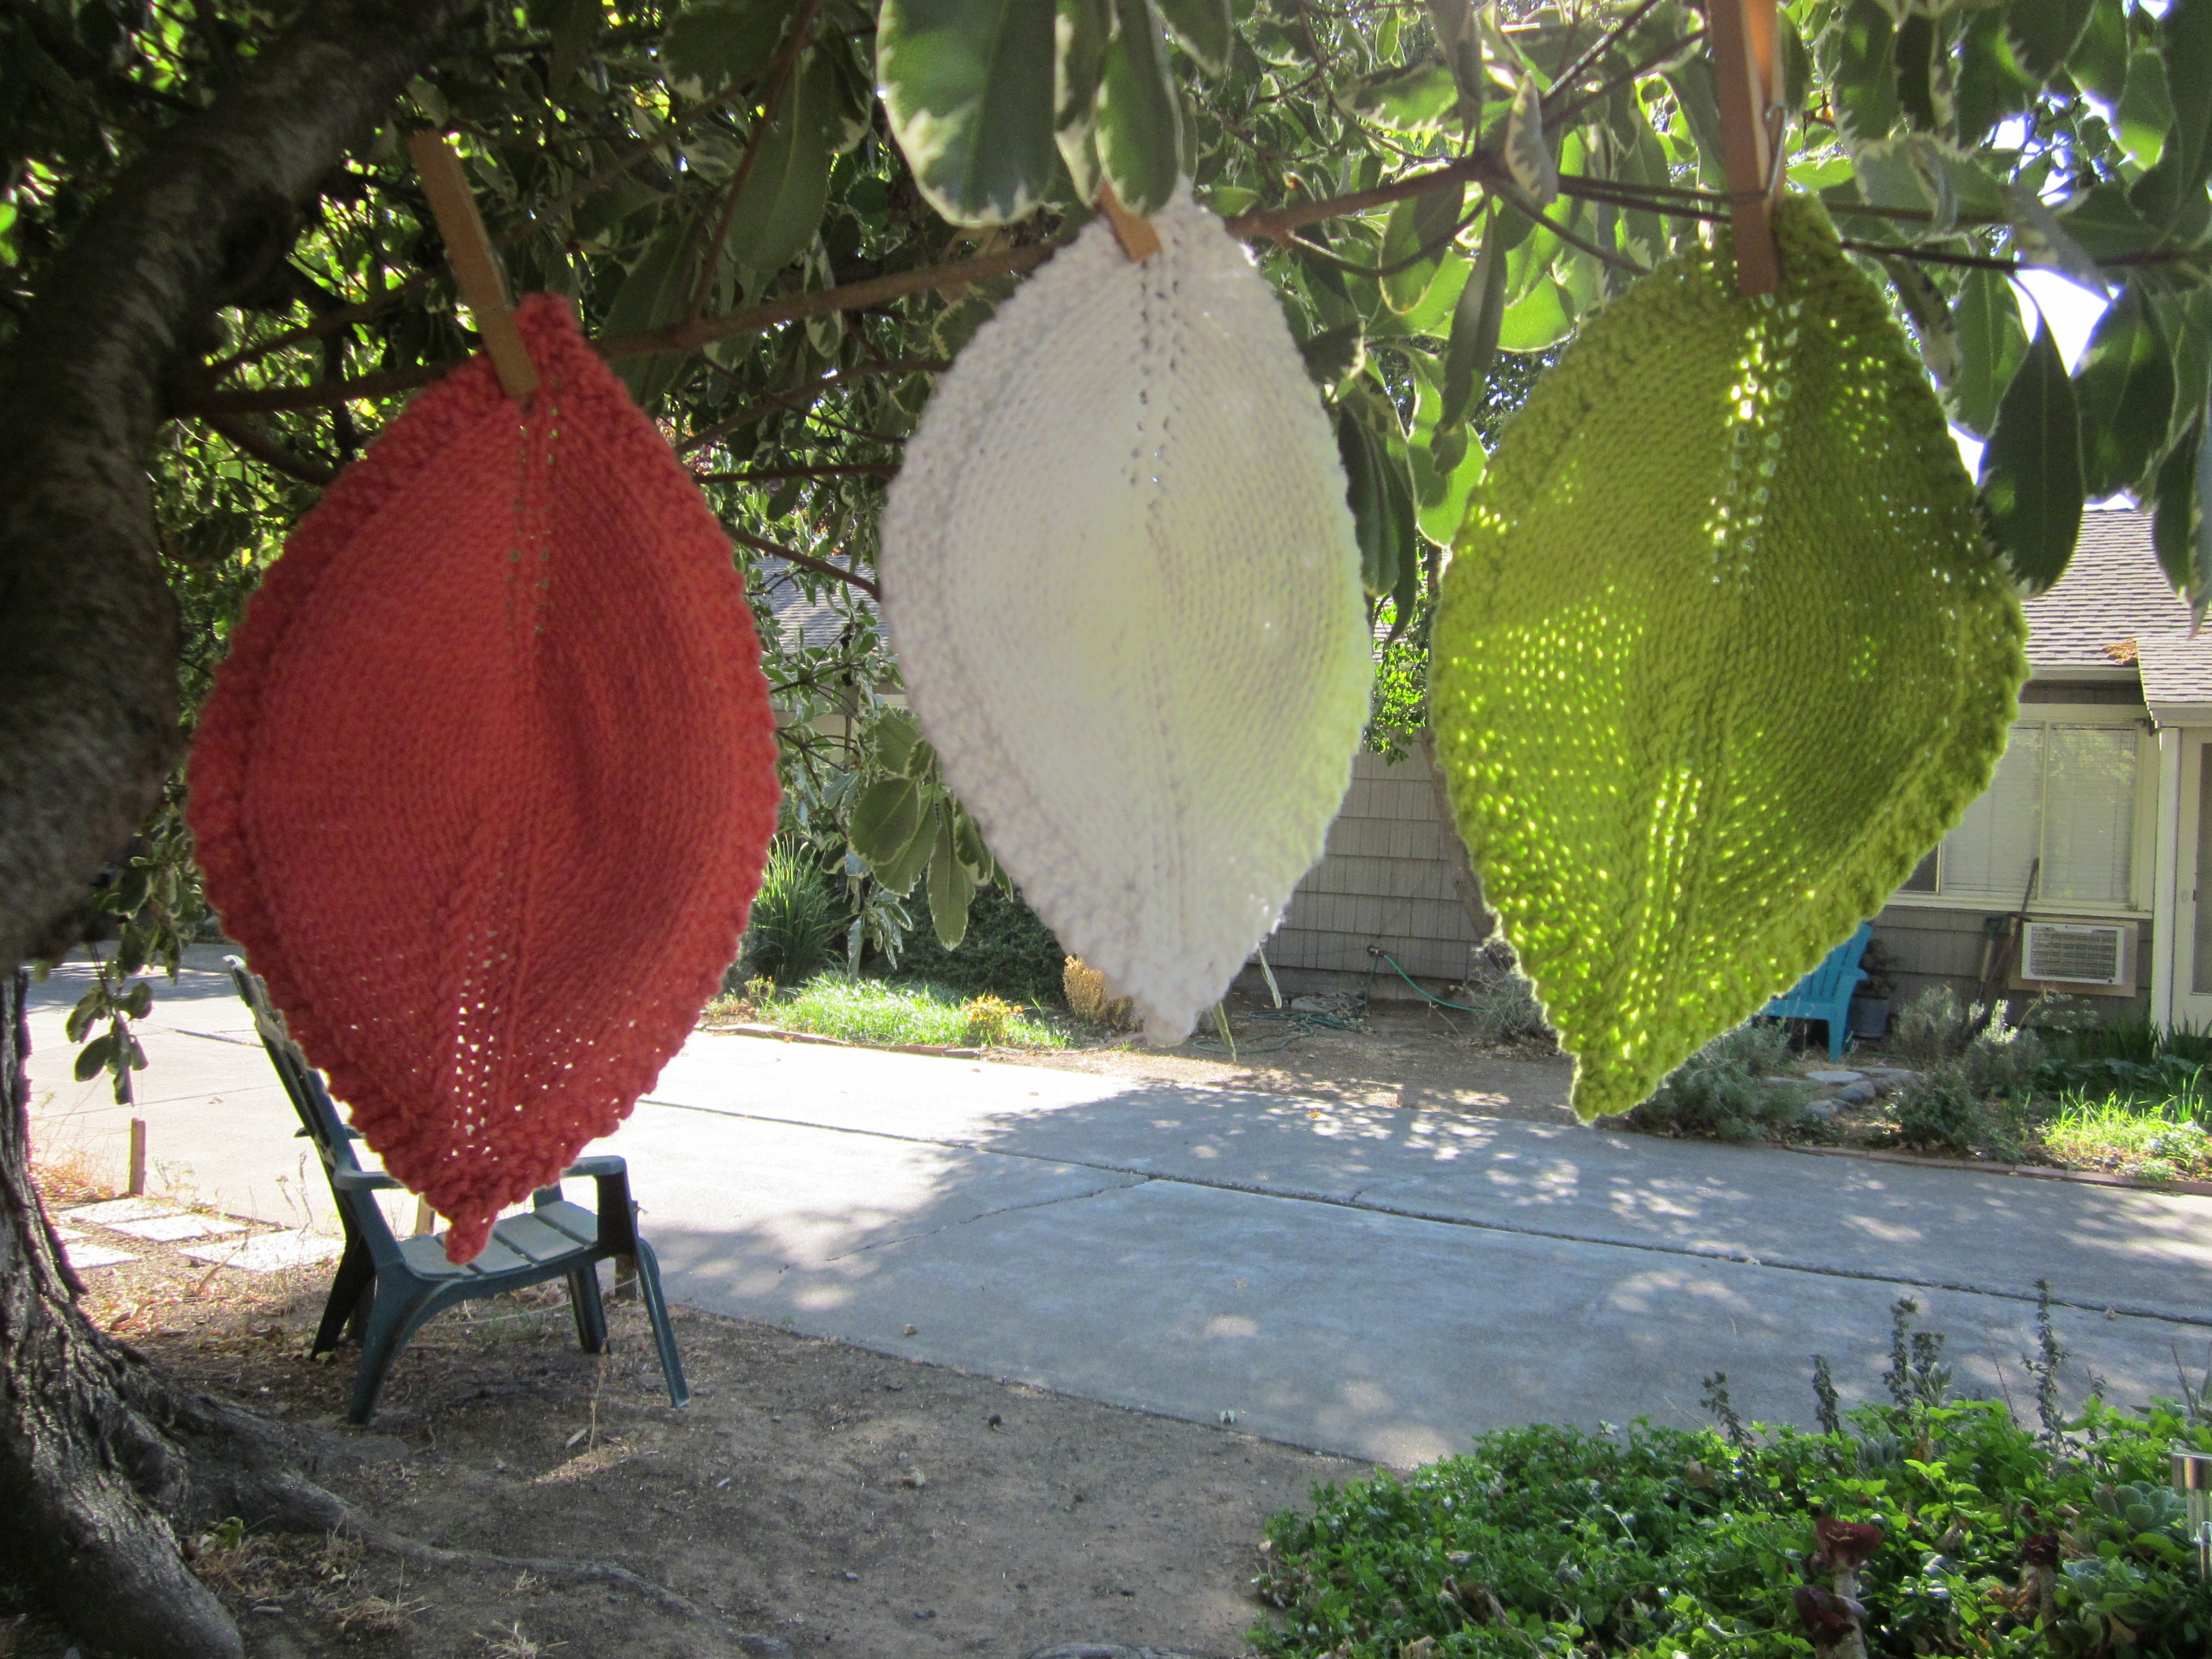
Greetings. You’ll have to forgive the lack of posts over the summer, but teaching my first college class did not give me a lot of extra time for blogging. I did, however, finish some crafts! I’ll need to find someone to help my photograph some of the more wearable ones, but in the meantime, I give you three leaf washcloths:
It came to my attention earlier this summer that I only own three washcloths, and one of those was slowly disintegrating. As you can imagine, they were always dirty. The easy solution would be to buy a new pack of washcloths at the store. The knitter’s solution, however, was to make some in a cool pattern.
If you’ve read other posts on this blog, you may have noticed I have a penchant for leaves. Last year I made a gray leaves shawlette scarf, a pair of peacock colored fern lace socks, and I even painted leaves on the square bowls I made in ceramics class. So of course, when I found a leaf shaped pattern for washcloths, it was my first choice.
This were a pretty easy knit—it required some attention, but I was able to watch a movie while making them once I got the hang of the pattern. They curl a bit even after blocking—and I’m not sure why the orange leaf turned out larger than the rest! I used the same Bernat Handicrafter Cotton Solids & Denim yarn that I used for the washcloths, dish towels and pot holders that I made for Christmas gifts last year. I ordered a few balls since then because I was running low on some of the colors I liked, but I didn’t end up using them all.
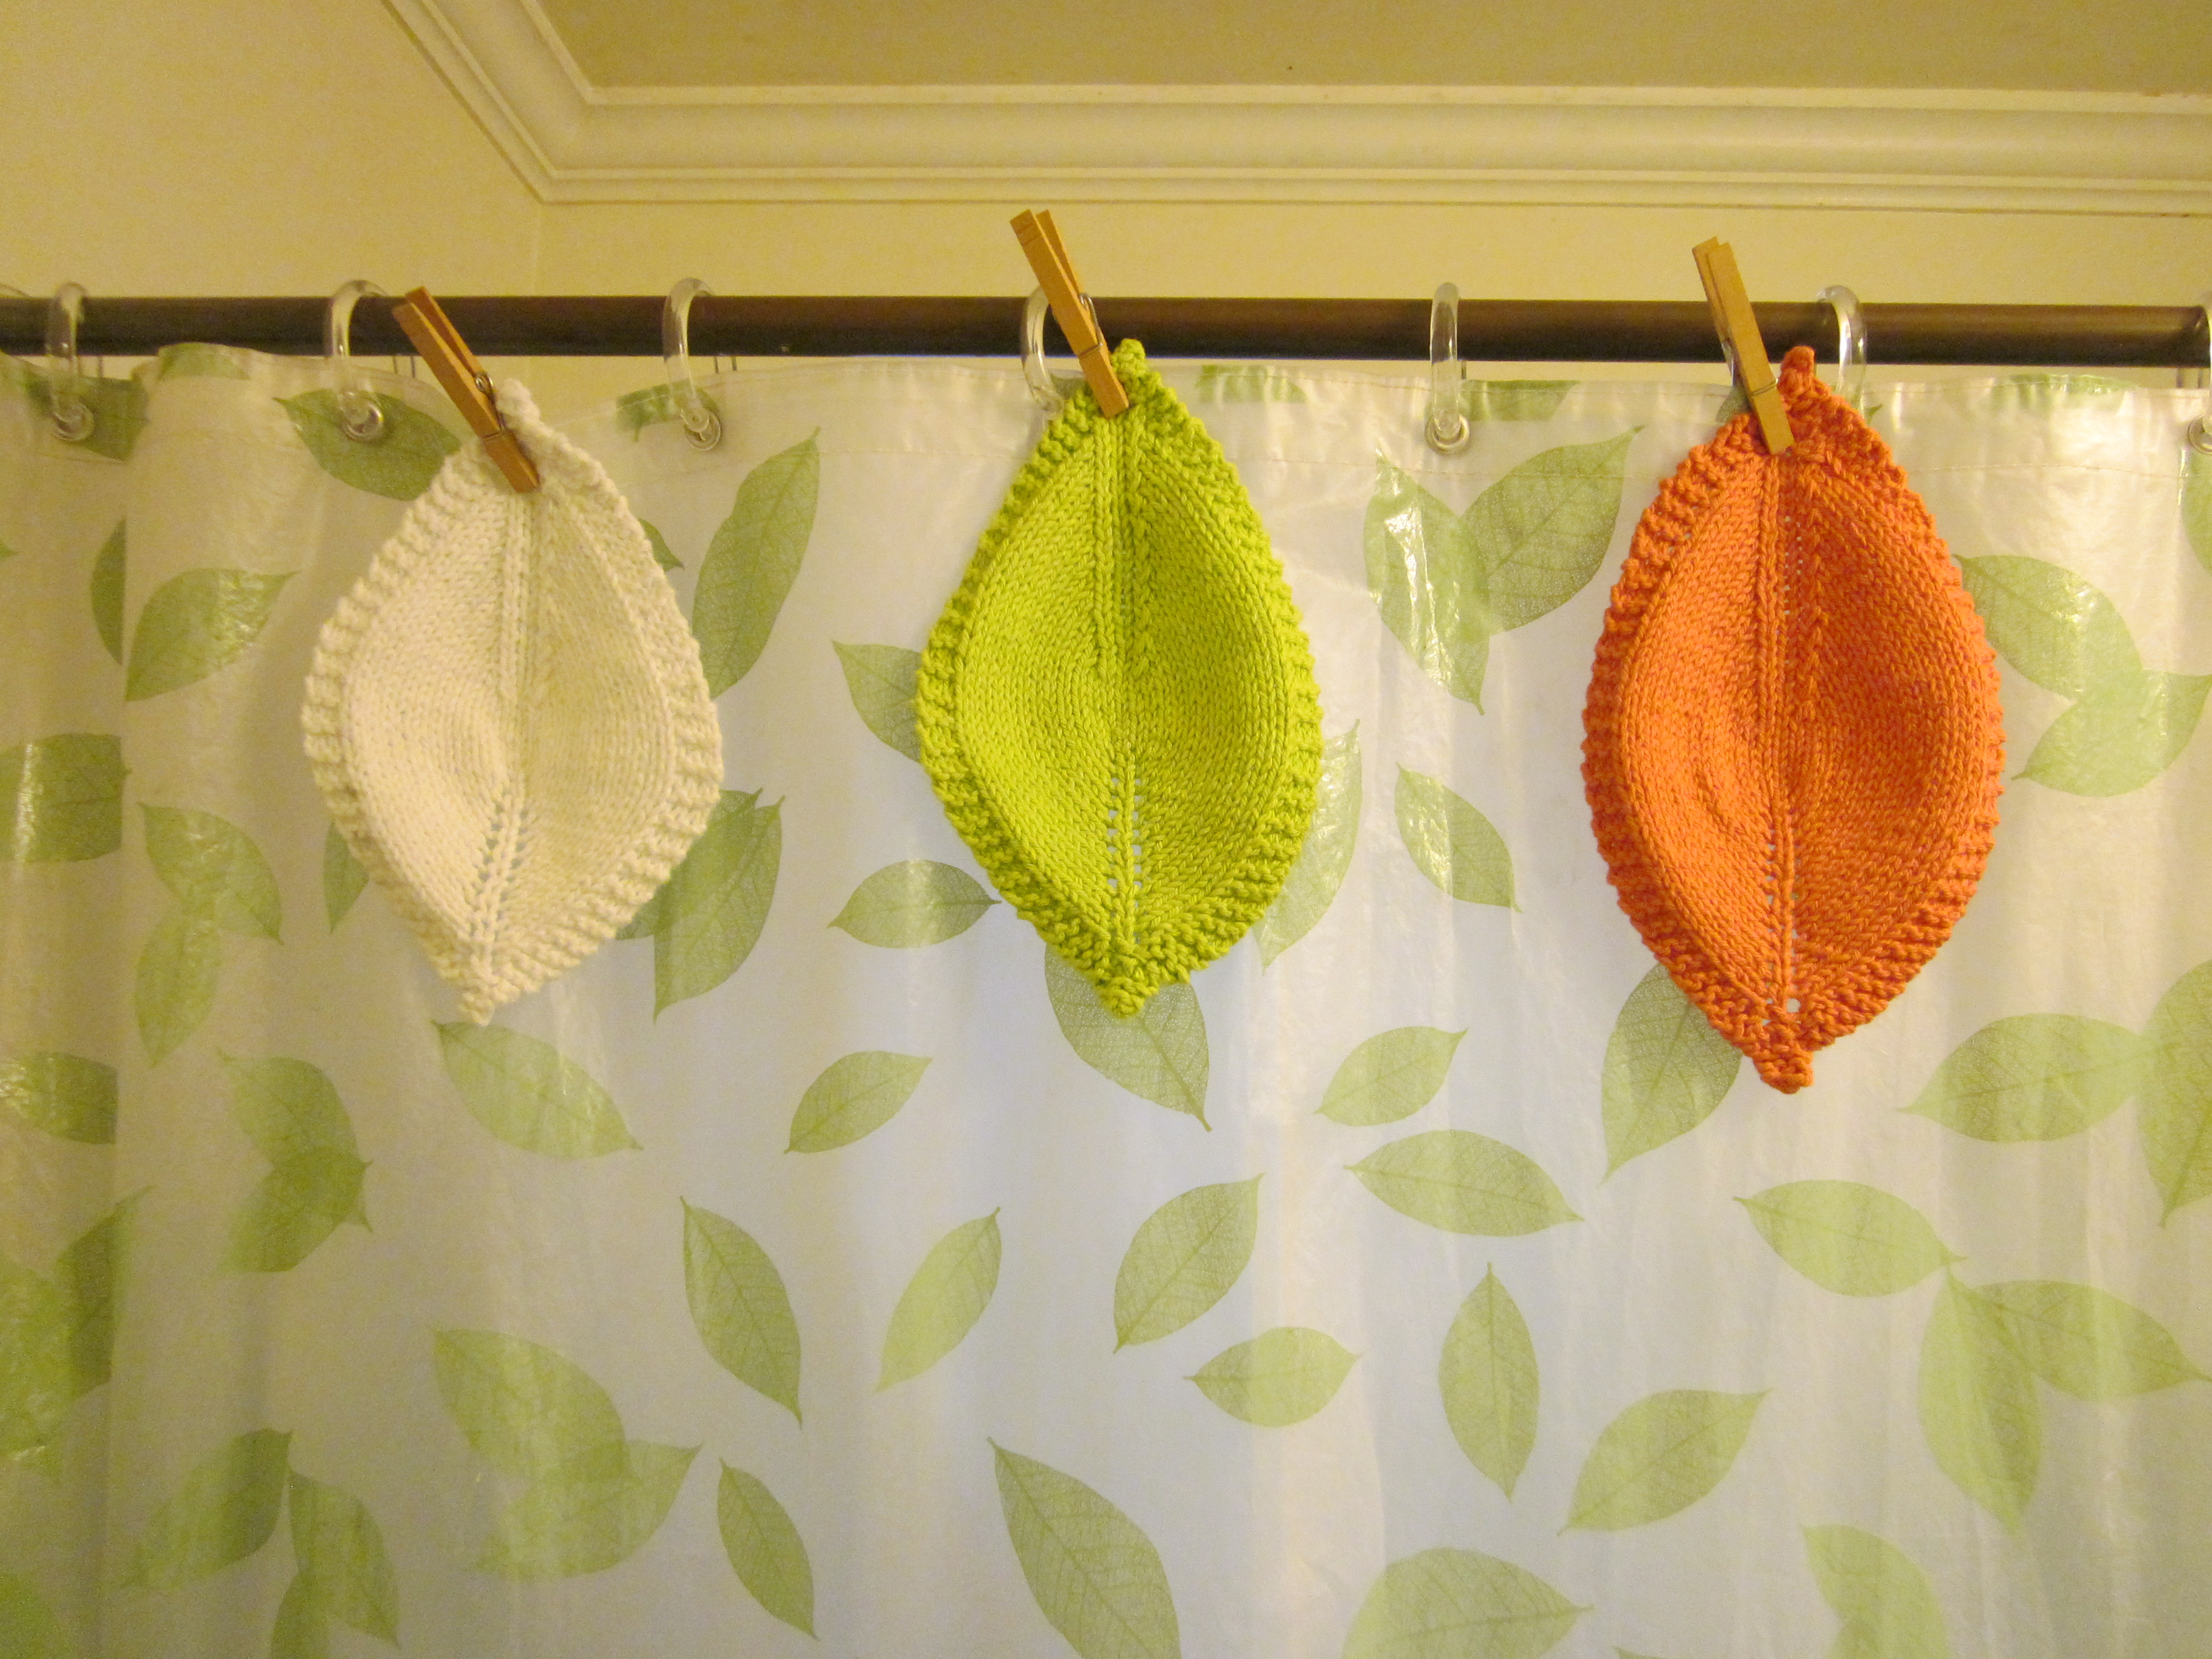
As you’ll notice, the leaf washcloths look right at home in my bathroom, where I already have a leaf print shower curtain and leaves on the bathmat. Yay for serendipitous consistency!
The leftover cotton yarn from this and my earlier projects will probably going into the making of this yoga bag pattern, since I think it would be a great use of a bunch of odds and ends to make some colorful stripes. Hopefully that will be yet another quick knit.