Quick Knits & Crafts

Feathers and stripes! A knitted skirt—also, earrings.

I have returned from a long blogging hiatus! It’s hard to say what exactly kept me away. Life, I suppose. I’m pretty sure I  missed any opportunity to capitalize on my spike in blog traffic when a Make magazine blogger linked to my post about the nerdiest crafts I have made. At least I can now say that I was famous on internet for 15 minutes for sewing a Star Trek pun onto an oven mitt!

Anywhizzle, on to the crafts. Which I made a while ago, but never blogged. So new to you!

Stripes.

IMG_2090

Q: How hard is it take a photo of yourself in a skirt if you don’t have a friend around or a tripod?

A: Pretty freaking hard!

This is my version of the Lanesplitter skirt from Knitty (here’s my ravelry project page for it). I started this way back in late November, it was a great easy project for knitting while watching movies.

IMG_1983

I used the rather silly named “Amazing” yarn from Lion Brand in the Ruby colorway because it’s got beautiful color changes and it was a slightly more affordable alternative. It’s a wool blend but in the few months I’ve worn it, the yarn has held up well.

IMG_2089

It’s a little bit tricky to bike in—this has become the standard by which I judge clothing these days—but it does work! Best with leggings underneath though. If you’ll notice, I alternate which side I wear in front, because the color changes are different.

IMG_1984

I used some leftover Bernat cotton yarn in denim for the top band. I ended up ignoring the directions to tuck this band under and sew it to the skirt because I wanted a bit more length. I ended up kind of combining the directions for the XS and the S so that I could get the circumference of the extra small but the length of the small—yay for customizing patterns! But in the end I wanted just a few more inches of length anyway.

IMG_2088

I loved this pattern, especially the way that it was knit on the diagonal! I wish more knitting patterns were like this—clever construction, easy repeats, great for showing off color changes.

Also, I like stripes. I should knit more things with stripes.

Feathers. (oh and some balls…)

IMG_0704

Q: What can you make with a bunch of craft feathers, some broken necklaces, and a hot glue gun?

A: Earrings that look like you got them at Forever 21—except possibly of higher quality.

Eons ago, I got bored and remembered I have a bunch of metal earrings hooks and rings and some needle nose pliers. I decided to experiment. I made earrings that are just long enough to slightly tickle my collarbone.

IMG_0701

These were the first and most outrageous ones. I have since given them away. I had the idea of sticking a long metal piece through a large pink bead from a broken necklace, then gluing a bunch of pink and purple and red feathers to the pink bead. It worked, though it was a little bulky.

IMG_0700

I did pretty much the same thing here, except I used a small gold bead in the back. I like the feather colors here! But both of these earrings were kind of stiff. So I changed it up a bit.

IMG_0699

For the yellow and gray feather earrings, I just glued the feathers to a few small links of a chain from a broke necklace. These earrings tend to float more, if that makes sense. They are my favorite.

IMG_0702

As it turns out, the best thing to do with the pink beads from the broken necklace was to just make them into their own earrings, no feathers involved. If I actually knew any beading terms, I would explain to you how attached them. But I don’t! So as you can see, I, um, connected them and stuff. And I like them. That’s what counts.


Holiday Knits & Crafts, Nerdy Knits & Crafts, Quick Knits & Crafts

Procrastiknits! Quick knitting projects to keep or gift

After my last post, you may have the impression that I am a big-intense-project kind of knitter. It’s actually the opposite! In the great debate of process knitter vs. product knitter, I often fall into the latter category. I like to have a regular supply of finished objects. And when I am slogging through a long-term-commitment pattern (like a sweater), I have to have a small project (or two) on the side just so I can finish something.

I’ve collected eight knitting projects that I have completed in the last three months, all of which take a minimum amount of yarn and less-than-average amount of time to complete. Some of them follow a specific pattern, some of them are my modifications of other patterns, and a few of them are my own original work.  I wasn’t the best at getting quality photos of everything, but you can at least get the gist of how they look. Enjoy.

Washcloths, dishtowels, pot holders

In a category that could alternately be called “small square things knit with cotton,” I made the following Christmas gifts.

Adventure Time washcloth

IMG_1935

For my brother, I made an Adventure Time washcloth of Finn (I was going to do Jake too, but I used up all my yellow yarn on the potholder…) I used this fingerless mitts pattern as a starting point, but obviously I changed many things. I used size 3 needles and both ribbing and garter stitch for the edging. I knit from both ends of the white yarn so that there would be no stranding on the reverse side. I honestly didn’t write down the number of stitches I cast on, it was probably 32 or 36. I had to improvise with Finn’s face, not having a skin color, but I think it still worked ok! I knit the entire thing while my mom and grandma were wrapping presents, so it went pretty quick.

Cylon dishcloth

20130101_113650

Clean your toaster with a toaster! For my friend Sarah, who introduced me to Battlestar Galactica, I made this Cylon dishcloth.  I love it, even though it came out a little squished because I went too small on the needles (size 2—I knit so loose usually). I followed this cylon potholder pattern but when it became clear that my gauge was too small, I added a new detail to the top. It’s hard to see, but if you look you can just make out the word FRACK. And then of course, I couldn’t resist cutting off the top corners (wish I’d thought of this at the bottom corners!) and adding some duplicate stitch in a reddish yarn to get that eerie Centurion look. These details meant that this took a bit longer than the washcloth, but because of the small size it was still a pretty quick knit.

bright yellow potholder

IMG_1937

This was a gift for my grandma, and while in appearance it is the most simple, it actually took about the same amount of time as the others. I noticed that my grandmother preferred hand knitted and crocheted potholders above all other kinds, but that they were getting worn out and too thin. I used this pattern for mitered hot pads because it was double the thickness. It basically requires knitting a tube on circular needles, stitching up the top in one direction and stitching up the bottom in a perpendicular direction. Worked great for me!

Kitty toys

Pinky and the Brain

20121218_203121

Ok, I’ve already posted about the first pirate mouse I made for my own kitty, which is pictured above on the right. But I’ve made three more as gifts, so I’m going to show you what variations on the orignal pattern I have come up with. The first is the “improved” pirate mouse on the left, which has fully pink ears, a pink tail, and is stuffed with a sock as opposed to batting. The weight of the sock is better and doesn’t bounce too much. I think it looks like the “pinky” to my original “brain” version above. Sewing the little bits on is by far the most time consuming part of the whole thing. Here are the other variants:

blue fuzzy

20130215_110725

I wanted to see what the pattern would look like with a super fuzzy yarn for the body and a contrasting yarn for everything else. The answer is this little guy, who reminds me of nothing so much as a muppet mouse. This mouse went to Leah, who is notoriously picky with her kitty toys, but she seems to have taken to it quite well:

Gryffindor lion mouse

20120821_174144

I made this one as a gift for a couchsurfing host during a research trip. She had two adorable cats, brothers, named Harry and Neville. I decided that as a thank you gift I would make her a Harry Potter pirate mouse in the gryffindor colors of scarlet and gold. (Don’t ask why I had this yarn with me on a trip, I just did!) I also added a mane and a shaggy tail end by adding some crochet loops, using more or less this technique. I forgot to add a nose or whiskers but it didn’t bother Mr. Potter one bit:

20120821_175300


Wrist things

[both of the following are my original patterns, so please respect this and do not use them for profit or republish them without my written permission!]

knitted bangle bracelet

20130224_17053320130224_170436

I’m sure there are many tutorials for making this kind of bracelet out there, but as since this bracelet was just for me, I decided to wing it. I love the results. I used a plastic ring that originally held a scarf on a rack at a store, if that makes sense…I just swatched until I figured out how many stitches it would take to cover the bracelet without being too tight or too lose, knitted for the appropriate length, and stitched it onto the ring. I used kitchener stitch to connect the two ends together, but since I chose a color changing yarn, the seam is still obvious (see smaller photo). I love how this shows off a tiny leftover remnant of an amazing yarn so well.

Madonna Mountain wristcuff

wrist band

This is more of a true pattern that I came up with over Christmas. It’s a small version of the Madonna Mountain located in San Luis Obispo, complete with the big white “M” on the face. I made this for my friend Phil specifically, because he has a clothing company in that town and makes t-shirts with unique line drawings of the local scenery. 

I wish I had written down the details for this pattern! I came up with it while playing board games with my family, and it just kind of flowed. I believe I cast on 32 stitches in green, and then after the ribbing I started decreasing the green on one stitch per side, and adding the dark blue at the same rate, knitting from both sides of the dark blue yarn so as not to have stranding in the back. Then I did the mountain in duplicate stitch using white yarn. I originally intended this to be a drink cozy, but he immediately wanted it to be a wrist cuff and I was not about to argue with a guy who sells apparel for a living.

Hat and collar

the ugly urchin

20130224_173920

I named this hat poorly because I ended up liking it way more than I thought I would. I used the urchin hat pattern from Knitty with size 9 needles. I wanted a new hat for myself that was quick and easy and could use up some crappy thickish acrylic yarn I had lying around. Much to my surprise, this short row hat looked lovely even in this kind of yarn. I recommend plenty of stitch markers for the short rows, because not losing track of where you are is key for these kinds of patterns. The shape of this hat is a bit hard to capture in photos, but it is beret like without being too much of a beret if that makes sense. I wear it a lot when my hair isn’t quite dry, as in the picture below.

20130224_17384620130224_17373120130224_173611


not quite blue collar

20130224_170134

The aquamarine yarn from my custom sweater is back again! Since I had leftovers, I went looking for a way to use them up and found this lovely peter pan collar pattern. This was probably the fastest project of the whole bunch!

20130224_170220

My only real modification was more of an accident, which you can kind of see above: my button for the back is off center. I made the collar the same length of the pattern one at first, but I decided that I needed it to be a bit longer. Laziness won out and I only extended one side. It doesn’t show from the front, however. I have another collar in a different color as well, but since that is one gift I haven’t given yet, I’m not going to post it yet so it can remain a surprise for the recipient.


Tweaks & Alterations, Yarn Dyeing

Blue yarn finished objects! Ombre waves cowl and custom v-neck sweater

It’s been exactly a year since I posted about my tutorial on how to dye yarn blue using black beans, and even longer than that since I wrote about the left-handed knitting challenges of a custom-fit raglan sweater. Now I’m finally going to show you the finished objects!

Blue yarn dyed with black beans –> waves cowl with ombre effect

IMG_1949

I love the finished product! But it certainly was a long road to get there.

As you may recall, the blue yarn was separated into 1/2 oz. dye lots and one 1 1/2 oz .dye lot. As I mentioned at the end of this post, I went back and divided the larger blue yarn into three 1/2 oz. skeins and overdyed so that every 1/2 oz. was a different shade of blue. Way too much work!

IMG_0038IMG_0039 IMG_0182

When I finally had them all complete, I started making the Wave Cowl by Rebecca Hatcher, using a half ounce skein of a different hue for each “wave” from lightest to darkest to create an ombre effect. It worked great!IMG_0330But I still had two issues to solve. The first you can see in the above picture—the bottom kept rolling up, which was made worse by the tightness of this end of the cowl. The 1/2 oz. skein didn’t quite go as far as planned on the last wave, which was the biggest since it tapered up at the neck. So then I blocked the whole cowl.IMG_0312It was beautiful, and the bottom rolled up much less! But it created problem two—now the cowl had lost its stiffness and would not stand up when around my neck. After all that work! So I did what I assume most knitters would do. I improvised. Which basically involved overlapping part of the cowl and stitching together at an angle, increasing the tapering effect and allowing the cowl to stand up properly once again! You can see the seam in the second photo here:IMG_1950  IMG_1946

And now, one winter later, this is one of my favorite things to wear on a cold night.

Custom fit raglan pattern –>perfect fit teal V-neck sweater

Unlike the cowl, with this project I started with Pamela Costello’s customizable pattern and then went through my stash to find enough yarn to knit it! I know it’s technically “aquamarine” not blue, but close enough:IMG_1065As I noted before, the main difficulty I had with this sweater was learning how to do the raglan sleeve increases while knitting left handed. I had no trouble at all with the directions to make it a V-neck (I did an increase every 4 stitch for this depth), and I loved being able to try it on in stages as I made it:I will say that the estimated yarn was not accurate for me because at almost 5’8 but making a rather small size otherwise, I ended up with extra skein of yarn (Hayfield Grampian DK wool blend, if you are curious). I loved that I was able to make it long enough for my arms! I might have made the V-neck  even deeper if I’d known how much the ribbing would add back to it— here’s the non-blocked sweater before adding the neck ribbing, and the blocked sweater with neck ribbing:

IMG_0412  IMG_0727

And here’s a view of the back of the completed sweater (ironically taken on a hot summer day, hence the shorts!)

IMG_1068  IMG_1069

And finally, here I am wearing it more recently under a blazer when it was actually cool weather. I probably would not have bought a sweater this bright, but it turns out I really like the color.IMG_1883And that concludes the blue yarn finished objects!

Holiday Knits & Crafts

Festive decorations that cost almost nothing!

Last weekend I had nothing but lots of work stretching out ahead of me—so to take breaks, I did a bunch of craft projects. And since it’s December, they all ended up being Christmas related. Now my apartment is decked out in a bunch of homemade and repurposed decorations. The best part of all this is that I literally spend $2.50 at the thrift store, total. Let me show you what I did.

Outdoors: wreaths, garlands, and bobbles

IMG_1913

Since my cat eats anything green and growing, all my seasonal greenery has to go outside. Last year I made a wreath out of boughs from shrubbery. This year I already had a grapevine wreath on the door, so I decided to just alter it by weaving in some branches from a nearby evergreen and berries from bushes in my complex. Here’s the result!

IMG_1897

Yes, I left up my “no solicitors” sign because it does seem to deter some of them. Also, it’s also homemade, so it fits right in. I’ll probably have to replace the berries in a week or so, but so far they’ve been holding up.

The next project took more work. I decided to make a garland for the top of my front door using more evergreen branches, mistletoe, and red bobble Chirstmas tree ornaments I got at the thrift store for $1.

IMG_1898IMG_1907I started by wrapping up branches of evergreen and mistletoe with twine. From talking to several people recently, I realize that the source of mistletoe may not be common knowledge. It’s a parasite, and it grows on a lot of deciduous trees around here. If you see a green bush like thing growing straight down on a tree branch on a tree that has lost its leaves—congratulations, you’ve found mistletoe.

486px-MistletoeInSilverBirch

Anyway, I wrapped three separate bundles—one leaning left, one leaning right, one that was just straight.

IMG_1904

Then I attached them above the door frame using what I had on hand. For the left and right leaning bundles, I used cup hooks. I suggest using a nail of slightly smaller size to make a pilot hole, then twisting the cup hook into the hole.

IMG_1899IMG_1900Here’s what that looked like once they were up. Kinda weird without the middle part to connect it.

IMG_1901IMG_1902For the middle part I used what I think is called a fencing staple—basically a U-shaped nail with no head but two points. For some reason I had one lying around. I just hammered it in over the middle part of the bundle and then pulled the greenery over it to over it.

IMG_1905IMG_1906Finally, I added the red bobble ornaments. I was seriously winging it at this point, but I ended up removing the top wire portion, jamming some floral wire into the opening, then securing that with duct tape. I know, duct tape! But the silver looked a lot like the top of an ornament would, I think.

IMG_1908IMG_1910Repeat for both ends of the floral wire, wrap it securely around a branch, and there you have it! I would have done three bobbles but my box of ornaments was missing one and I needed three for the last outdoor project. I still like how it looks! After this photo I trimmed the branches to make the sides a little more even.

IMG_1909

Finally, I decided that I really enjoyed the bats in the window decorations I made for Halloween. So did basically the same thing, but this time, with red bobble ornaments.

IMG_1912

While this was easy to set up (I already had yarn to tie onto the ornaments and nails installed to hang them from), it is also one you have to be careful with. If I did not have a small apartment and a cat that chases all dangly things, I would put these inside. Because when it’s windy, these ornaments tap against the window. If there is a crazy windy storm, I will have to bring them inside because they are ancient and would probably break. But for now, they are looking great.

IMG_1911

Indoors: paper chains and advent calendars

Ok, first of all, I do have some non-paper decorations up on top of my bookcases, pretty much the only free spaces in my home.

IMG_1928

This little tree and ornaments came from my family’s massive stash of Christmas decor. It goes on the tall bookcase every year, where it is hard for my cat to find it.

IMG_1926

I also added some pine cones and a really old copy of A Christmas Carol to the top of the small bookshelf. I was hoping I could find my own pine cones, but no such luck, so these were $1.50 from the thrift store. The book was my grandfather’s—writing in the inside says “Christmas ’44” and the book itself is from 1938. It has some beautiful illustrations.

On to the paper crafts!

IMG_1887

First up—a paper chain. For some reason I loved making these in elementary school. But I decided to ditch the red and green construction paper for strips from magazines and catalogs.  It was a lot more colorful this way. I did try to get some red and green in there though. I didn’t really measure the strips—they were all about an inch by 6 or 7 inches, but it didn’t really matter.

IMG_1889IMG_1888I ended up making 24 chains, because I had this idea that it could be an advent calendar paper chain. But then I decided I didn’t want to put numbers on them or break one of them off everyday, so it’s more of a decoration. I hung it on the entryway to the kitchen. It was surprisingly hard to photograph.

IMG_1891

But the paper chain inspired me to make a real advent calendar. On a whim. With no plan. And so I did. Below are most of the tools and supplies you need (except for the exacto knife and cutting mat, which I also ended up using).

IMG_1896

I started out with an old calendar that I liked and the magazine and catalogs from before. I measured the size of the box under each number, made a template, and then cut out lots of little rectangles for each day and glued them to the calendar. It would be super easy if you had a glue stick, but I used elmer’s glue and a paintbrush.

IMG_1914IMG_1915Once that dried, I worked on the overlay part. I measured an even smaller square for each day, and traced three sides of it onto some strips of nice green stationery paper I had. Using an exacto knife, I cut the three sides of the rectangle out so that each day would have a little door flap to open. When I had enough for all 24 days, I glued them over the calendar boxes, being careful not to glue the flaps down!

IMG_1917IMG_1916IMG_1920Finally, I covered up the days of the week and the year on the old calendar…and it was done!

IMG_1921


I was quite pleased with the results, especially because this was the one craft I did not make for myself—it was a gift for a friend. Because the only thing more exciting than opening those little calendar doors as a kid was not knowing what was behind them.

IMG_1924I think I’m done with Chirstmasing for a while now…at least until my yarn comes in the mail and I can start knitting little gifts.

Food & Garden

Fall Foods! Apples, acorn squash, and kale

I haven’t posted much on food and foodways recently, but I have been definitely been making the most of the autumn season in the kitchen. Since Thanksgiving is this week, I thought I’d share a little about the recipes I’ve been cooking and the stories behind the dishes. As it turns out, the stories about why I cooked these foods are part of what makes cooking them meaningful.

Apple Hill Apple Butter

This fall marks my first visit to Apple Hill—an area  just past Placerville with a large association of growers who attract tons of visitors to their ranches. Besides tasting the apple cider and apple cider donuts (which were as amazing as described!) my priority was to find a great U-Pick apple place and try a bunch of heirloom apple varieties.

I was not disappointed. The four of us who carpooled up there together had an awesome day filled with apple picking.

This was our haul—that’s my bucket with the scarf on the right. That night when we got home, two of us got together and made apple butter. Thus this recipe will forever remind me of Apple Hill Day.

Apple butter recipe*

Ingredients:

5  1/2 pounds tart apples – peeled, cored and finely chopped

2 cups sugar

1 tsp cinnamon

1/4 tsp salt

Instructions:

Prepare the apples and put them in the slow cooker. Add other ingredients and mix. Cook on high setting for 1 hour. Reduce temperature to low and cook for 9 or 10 hours. Towards the end of this time, check on the apple butter and use a potato masher or a whisk to make the mixture smoother. Place in glass jars and refrigerate.

*This recipe is a variation on the All Day Apple Butter recipe from allrecipes.com. The main difference is that I use about half the sugar and no cloves. I find that two cups of sugar is plenty sweet! It was also all I had in the house at the time. You can also omit the sugar completely—we did this with a second batch and it also turned out well:

This batch was made with much sweeter apples. One thing we noticed with this variation was that it cooked down much quicker—it’s possible that was just due to the crock pot used, but keep an eye on it if you try this version.

bonus apple recipe: apple rings!

I still had a bunch of apples after making apple butter, so I also made apple rings.

Ingredients:

Apples

Instructions:

Core and thinly slice apples. Place on baking sheets lined with parchment paper. Bake at 200 degrees F for about 30 minutes or until apples appear dry.

I pretty much winged it with this one—I took a look at a couple of recipes online to figure out the gist and then I went for it. If, like me, you don’t have a mandolin or a corer, I suggest slicing the apple whole until you get to the seeds, then core it, and then slice the rest. This worked the best for me. I used a bunch of different apple varieties and found that each takes a different time to cook, so some of my rings were crispy, some were chewy, and the rest were in between. I have no idea how long there would keep, because they were all gone within 24 hours.


Acorn Squash Election Night Soup (aka Ba-roth Obama Soup)

I have made this soup many times, but it gets its name from the time I made it on Election Night in 2008. Me and my roommate at the time were both home that night, watching the election returns. I don’t remember the exact circumstances, but I think it came up that she had pronounced broth (as in the broth I bought to make soup) as “ba-roth” as if it had two syllables. Somehow this turned into a pun on Barak Obama’s name, and before I knew it, my soup had a new moniker:  Ba-roth Obama soup.

[sorry, I don’t have any before photos of acorn squash, except for the little bit you can see in the apple butter photo. Enjoy this alternate squash photo instead.]

Acorn Squash Soup recipe

Ingredients:
2 medium acorn squash
4 cups chicken or vegetable broth (er, ba-roth)
1 small lemon
2 tablespoons olive oil
pinch of salt and pepper, to taste
smoked paprika (OR sazon goya con azafran, if you can find it!), to taste

Instructions:

Pre-heat oven to 400 degrees Fahrenheit. Cut acorn squashes in half with a good sharp knife. Scoop out and save the seeds for later. Set the halves face up on a baking sheet. Drizzle some olive oil on them and bake until tender, about 45 minutes. Put seeds on a separate sheet, sprinkle with salt and pepper, and stick them in for the last 10-15 minutes. When the squash start looking brown they are most definitely done. When the seeds start making popping sounds, they are also done.

Remove squash from oven and wait for them to cool down enough to touch. (I tend to rush this step and I usually regret it). Scoop the flesh from the skin and place into a blender with the broth. Blend.

Pour the mixture into a pot and heat it on the stove as you add the lemon juice, olive oil, salt, pepper and smoked paprika. Serve with parmesan cheese and/or roasted seeds on top.

I made this soup again on Election Night 2012 two weeks ago, and it was just as delicious. I’m pretty sure that I have started a new tradition. You can use other squash of course, but I really like the flavor of the acorn. I have no idea what originally inspired this recipe. I know that I first made it with sazon goya con azafran seasoning, which is amazing and which you should totally try. I haven’t had any luck finding it in a local grocery store though, so smoked paprika is my substitute. Still delicious!

Super Bowl Kale Chips

Store bought kale chips seem to be everywhere now (ok at least at Trader Joes and Whole Foods), but I distinctly remember the first time I tried one, it was homemade and delicious. It was at a Super Bowl party this year, and it was one of the tastier things among a sea of typical game day food. Do I remember who was playing in the game? No. Do I remember the kale chips? Yes. Because they tasted way better than I thought kale could taste. I will probably make them myself come January.

Bottom: uncooked kale  Top: cooked kale chips

Kale Chips

Ingredients:

Kale

olive oil

salt and pepper

Instructions:

Preheat oven to 175 degrees F (or 200 if you oven will not go lower than that). Wash and dry kale and remove center stalks. Cut into pieces and place on baking sheet. Drizzle all over with olive oil and turn pieces to coat. Sprinkle with salt and pepper. Bake for 15 minutes, then turn the pieces over with tongs. Cook an additional 10-15 minutes until pieces are crispy.

Ok with this recipe the temperature and the timing are actually pretty important. Basically, you want kale to cook at a low temp for a long time. A high temp with burn the thinest parts before the thick parts cook. Keep that in mind and you can’t go wrong!


Historical Knits & Crafts

Knitting for Victory! (free knitting patterns included!)

knitting and history

[UPDATE: I posted even more patterns from this historic knitting book here in 2013!]

Today is Veterans Day and it is also the 1 year anniversary of when I started this blog. So this post will combine two things I love: history and knitting. With free historic knitting patterns, no less!

As I wrote about in my very first post, what we in the United States call Veterans Day is known to Europe, Canada and most of the world as Remembrance Day. This year we’ll observe the holiday on Monday, but the actual date is the eleventh because Nov. 11 1918 was Armistice day—the day that World War I ended. The United States lost maybe about 100,000 or so soldiers in the Great War. European countries lost millions.

The  Great War, as it was then known, started in 1914, but the U.S. did not join until 1917. During the years the U.S. was at war, the government and other support organizations asked Americans to help the war effort. One of the ways they were asked to contribute? Knitting!

Socks were important in bad weather and trench warfare situations. Sweaters, wristlets, scarves and hats were also in demand. This website does a pretty good job of explaining some of the history about the wartime knitting effort if you want to know the details. I noticed that the article on the website cites a book called No Idle Hands: The Social History of American Knitting, if you want to know even more about knitting history.

Even though I knew about the knitting aspect of WWI, I never really thought much of it. That is, until I came across this book for $2 at my local thrift store:

I knew it was old when I first picked it up, but I was shocked when I discovered that it was from 1918!  What a find! The very first section of the book is all patterns to knit for soldiers. The rest of the book includes a bunch of crocheting and knitting patterns. Some of the patterns will probably never be fashionable again, but many of them are still rather stylish by today’s standards. And from what I can tell, they’re no longer in copyright. So without further ado, I present to you my favorite knitting patterns from 1918!

1918 knitting patterns

First off, of course, is “service wear,” or knitting patterns for soliders. Most of these are so basic as to barely need a pattern (like the garter stitch scarf). But a few caught my attention.

Helmet

First of all—look at those illustrations behind the model! As for the pattern itself, this looks thoroughly practical—it covers your head and a lot of your face, and has the scarf like parts to keep the rest of you warm. Also, it goes well with a hat.

Service Sweater Type ‘C’

Once again, the illustration really catches my eye. But I also like this design—a cardigan with three pockets, which I feel like I haven’t really seen before. This pattern also has this paragraph underneath it which begins with the sentence “Since 1914 The Fleisher Yarns have been in active service on the battlefields of Europe.”

Meta and Dexter caps

Ok, I know what your thinking—the names of these hats have certain pop culture associations now that they certainly never intended! Nevertheless, I think these hats could be conceived as fashionable today, though maybe minus the crazy huge bow on “meta.” Pretty much all of the hats in the book are crocheted, and these are no exception.

Marcelona Jacket

I was surprised at just how many crochet patterns I actually liked in this book. Normally I don’t care as much for its appearance and thickness, but I think it works with this jacket. I also like the wrap around effect.

Rivoli Sweater

This is probably my favorite of all the knit sweater patterns. It’s a fairly simple pattern but I love the overall effect. I’m not sure why this pattern has a separate page for the construction and dimensions of the sweater, because few of the patterns have this diagram. But it looks helpful.

Pensacola sweater

This is my other favorite sweater pattern. I really like the fit and the way the buttons are placed. I also like the idea of the cuffs, even though I’m not sure if I would use angora for them. I’m also not exactly sure how the snaps are incorporated.

EDIT: You can now see what this sweater looks like when made by a modern day knitter! Check out this post at knitthehellout. For more knitting details, see Cassy’s ravelry project page for Pensacola.

I really hope that I will have the chance to attempt one of these patterns someday! More than that, I hope that others out there can use these patterns to make something. Reading through the directions, I realize that there are some hurdles to actually re-creating these garments for yourself. The first is that there is only one size given for each pattern, and there’s not a lot of info on the finished dimensions (except on the rivoli sweater). The second is trying to figure out needle sizes and yarn types and amounts. There is a kind of visual knitting gauge in the book that I’m posting below because it seems helpful, and there is a list of the kinds of yarns and some descriptions that is less helpful:

One thing the patterns do provide? Gauge. I think that if you used the gauge, figured out a relatively similar yarn type by comparing it to the list, and then overestimated the yardage it would take, I think it would be possible. If anyone wants to try these patterns, I’d love to hear how they turn out!


Costumes, Holiday Knits & Crafts, Nerdy Knits & Crafts, Quick Knits & Crafts

More craft, less witch: Halloween costumes and creations!

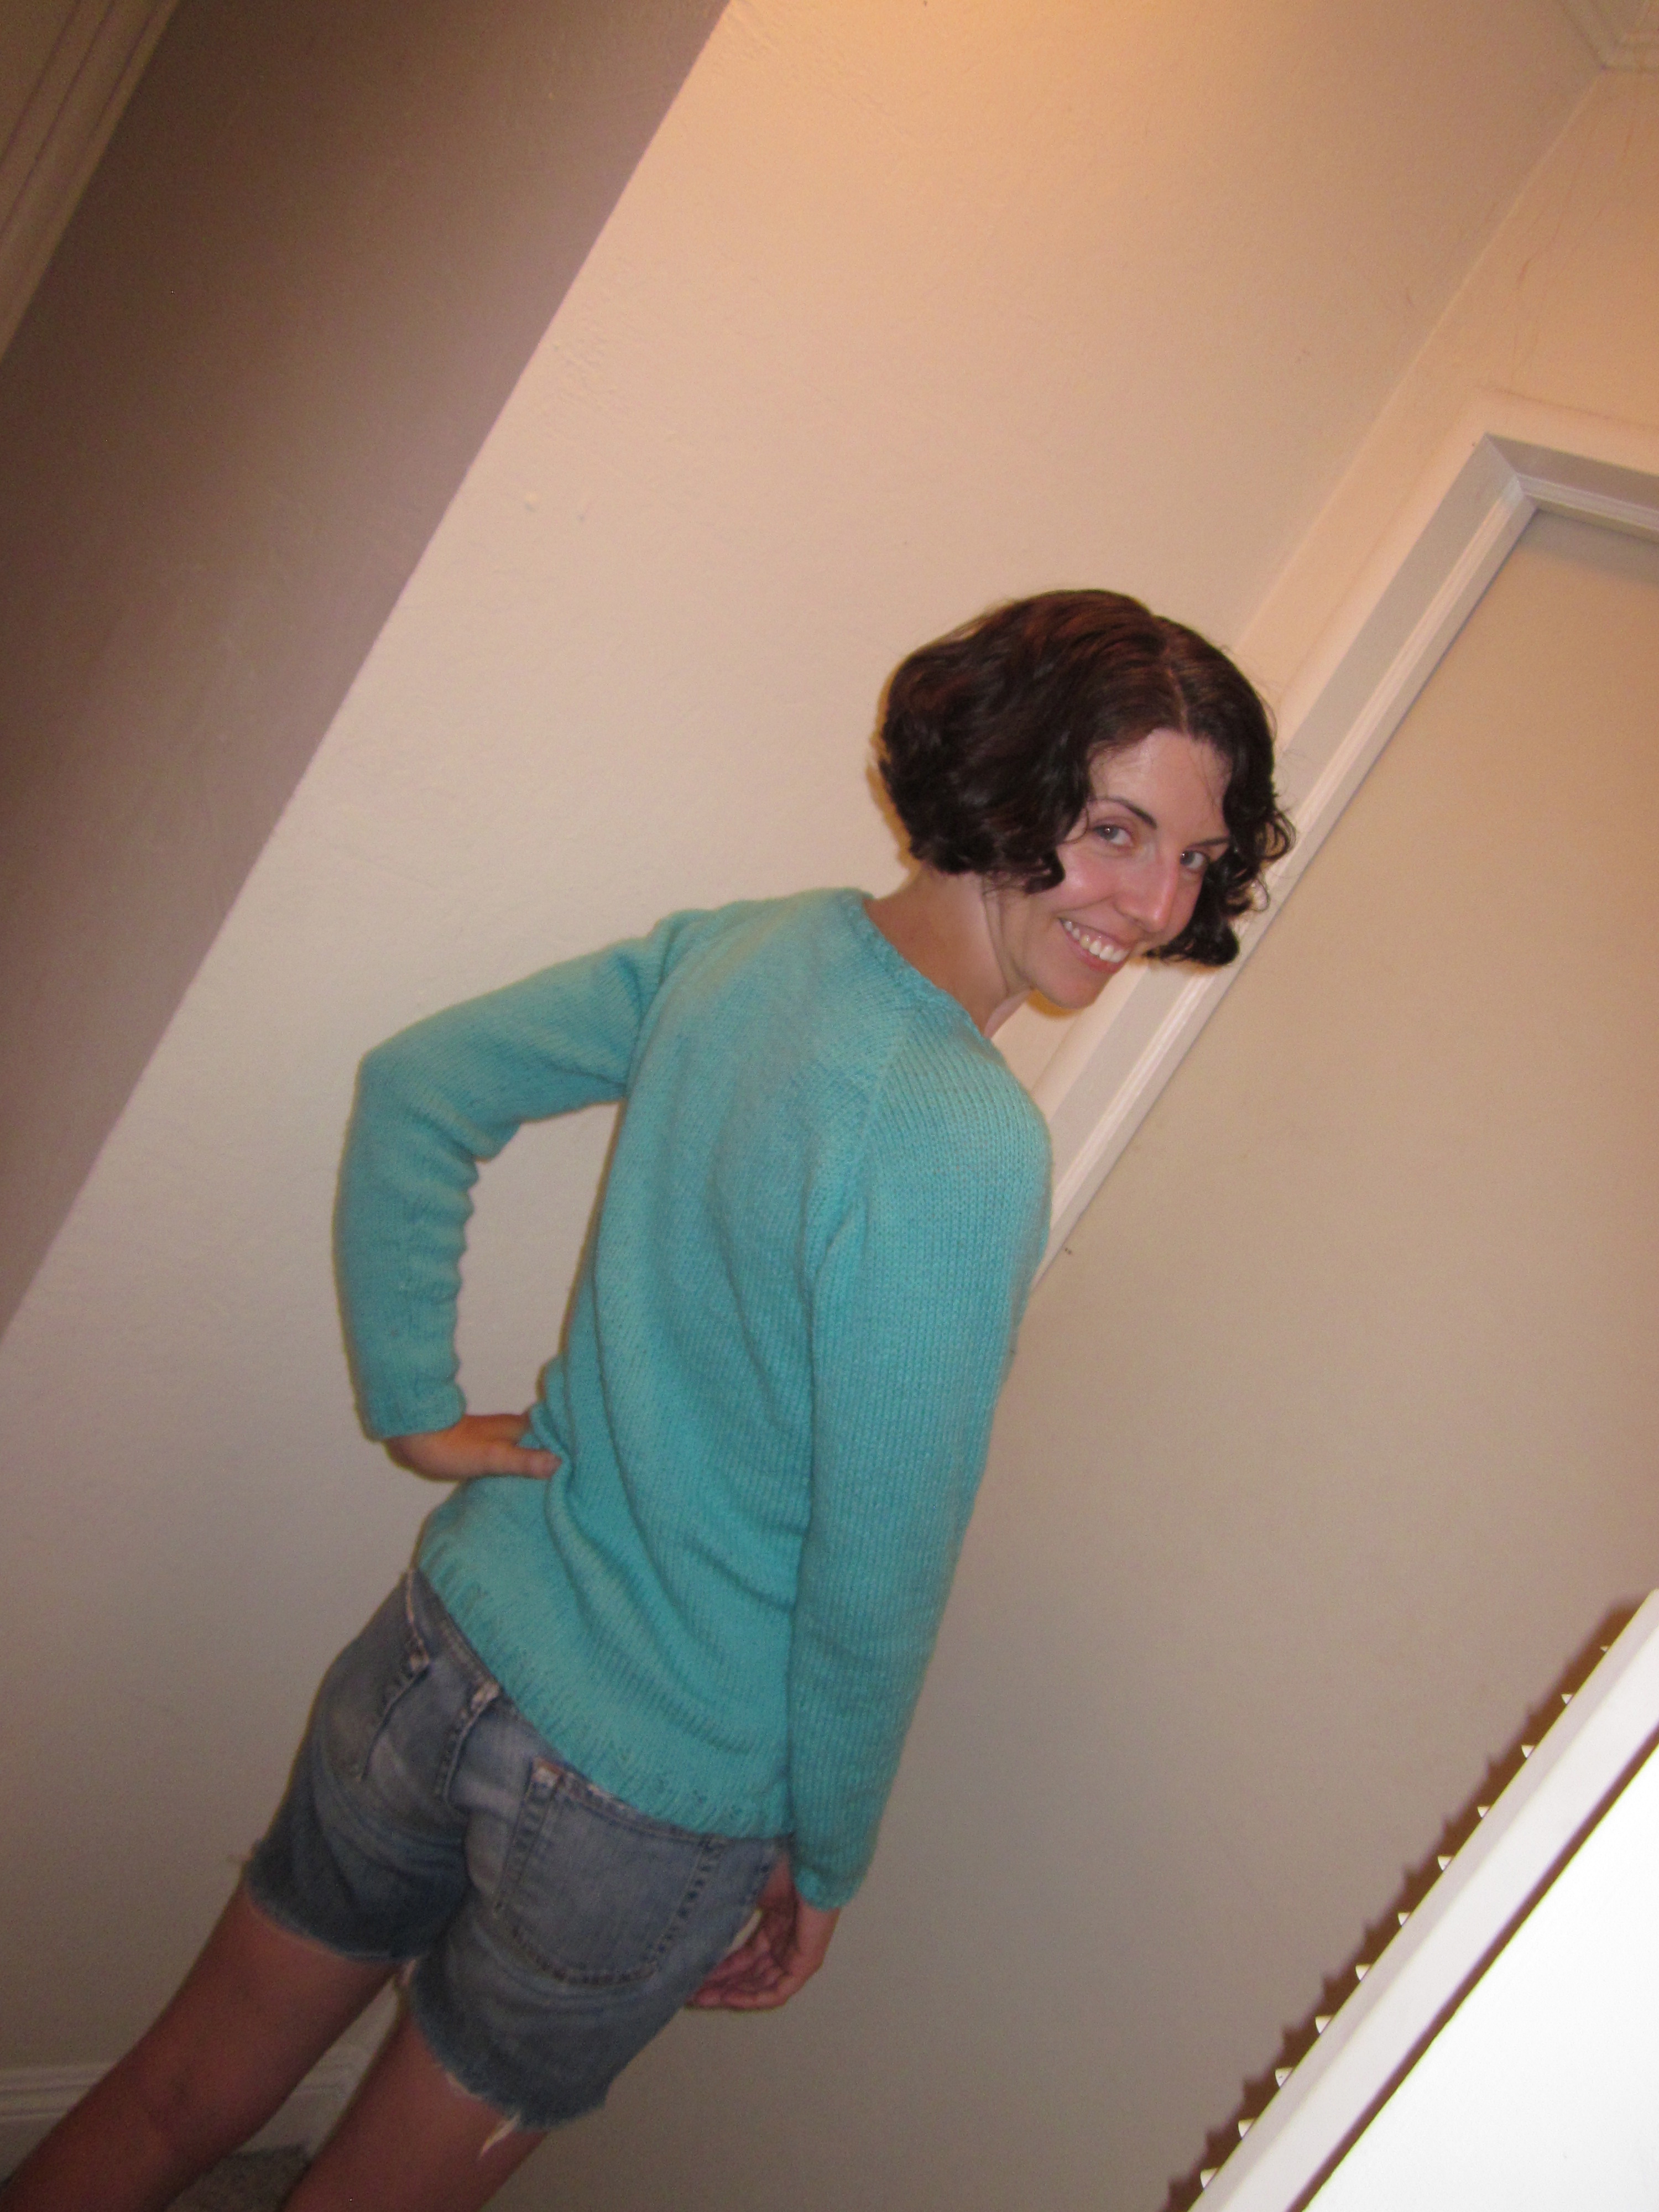
It’s almost Halloween—aka the I-get-to-make-a-new-costume holiday! Dressing up has been fun for pretty much as long as I can remember…

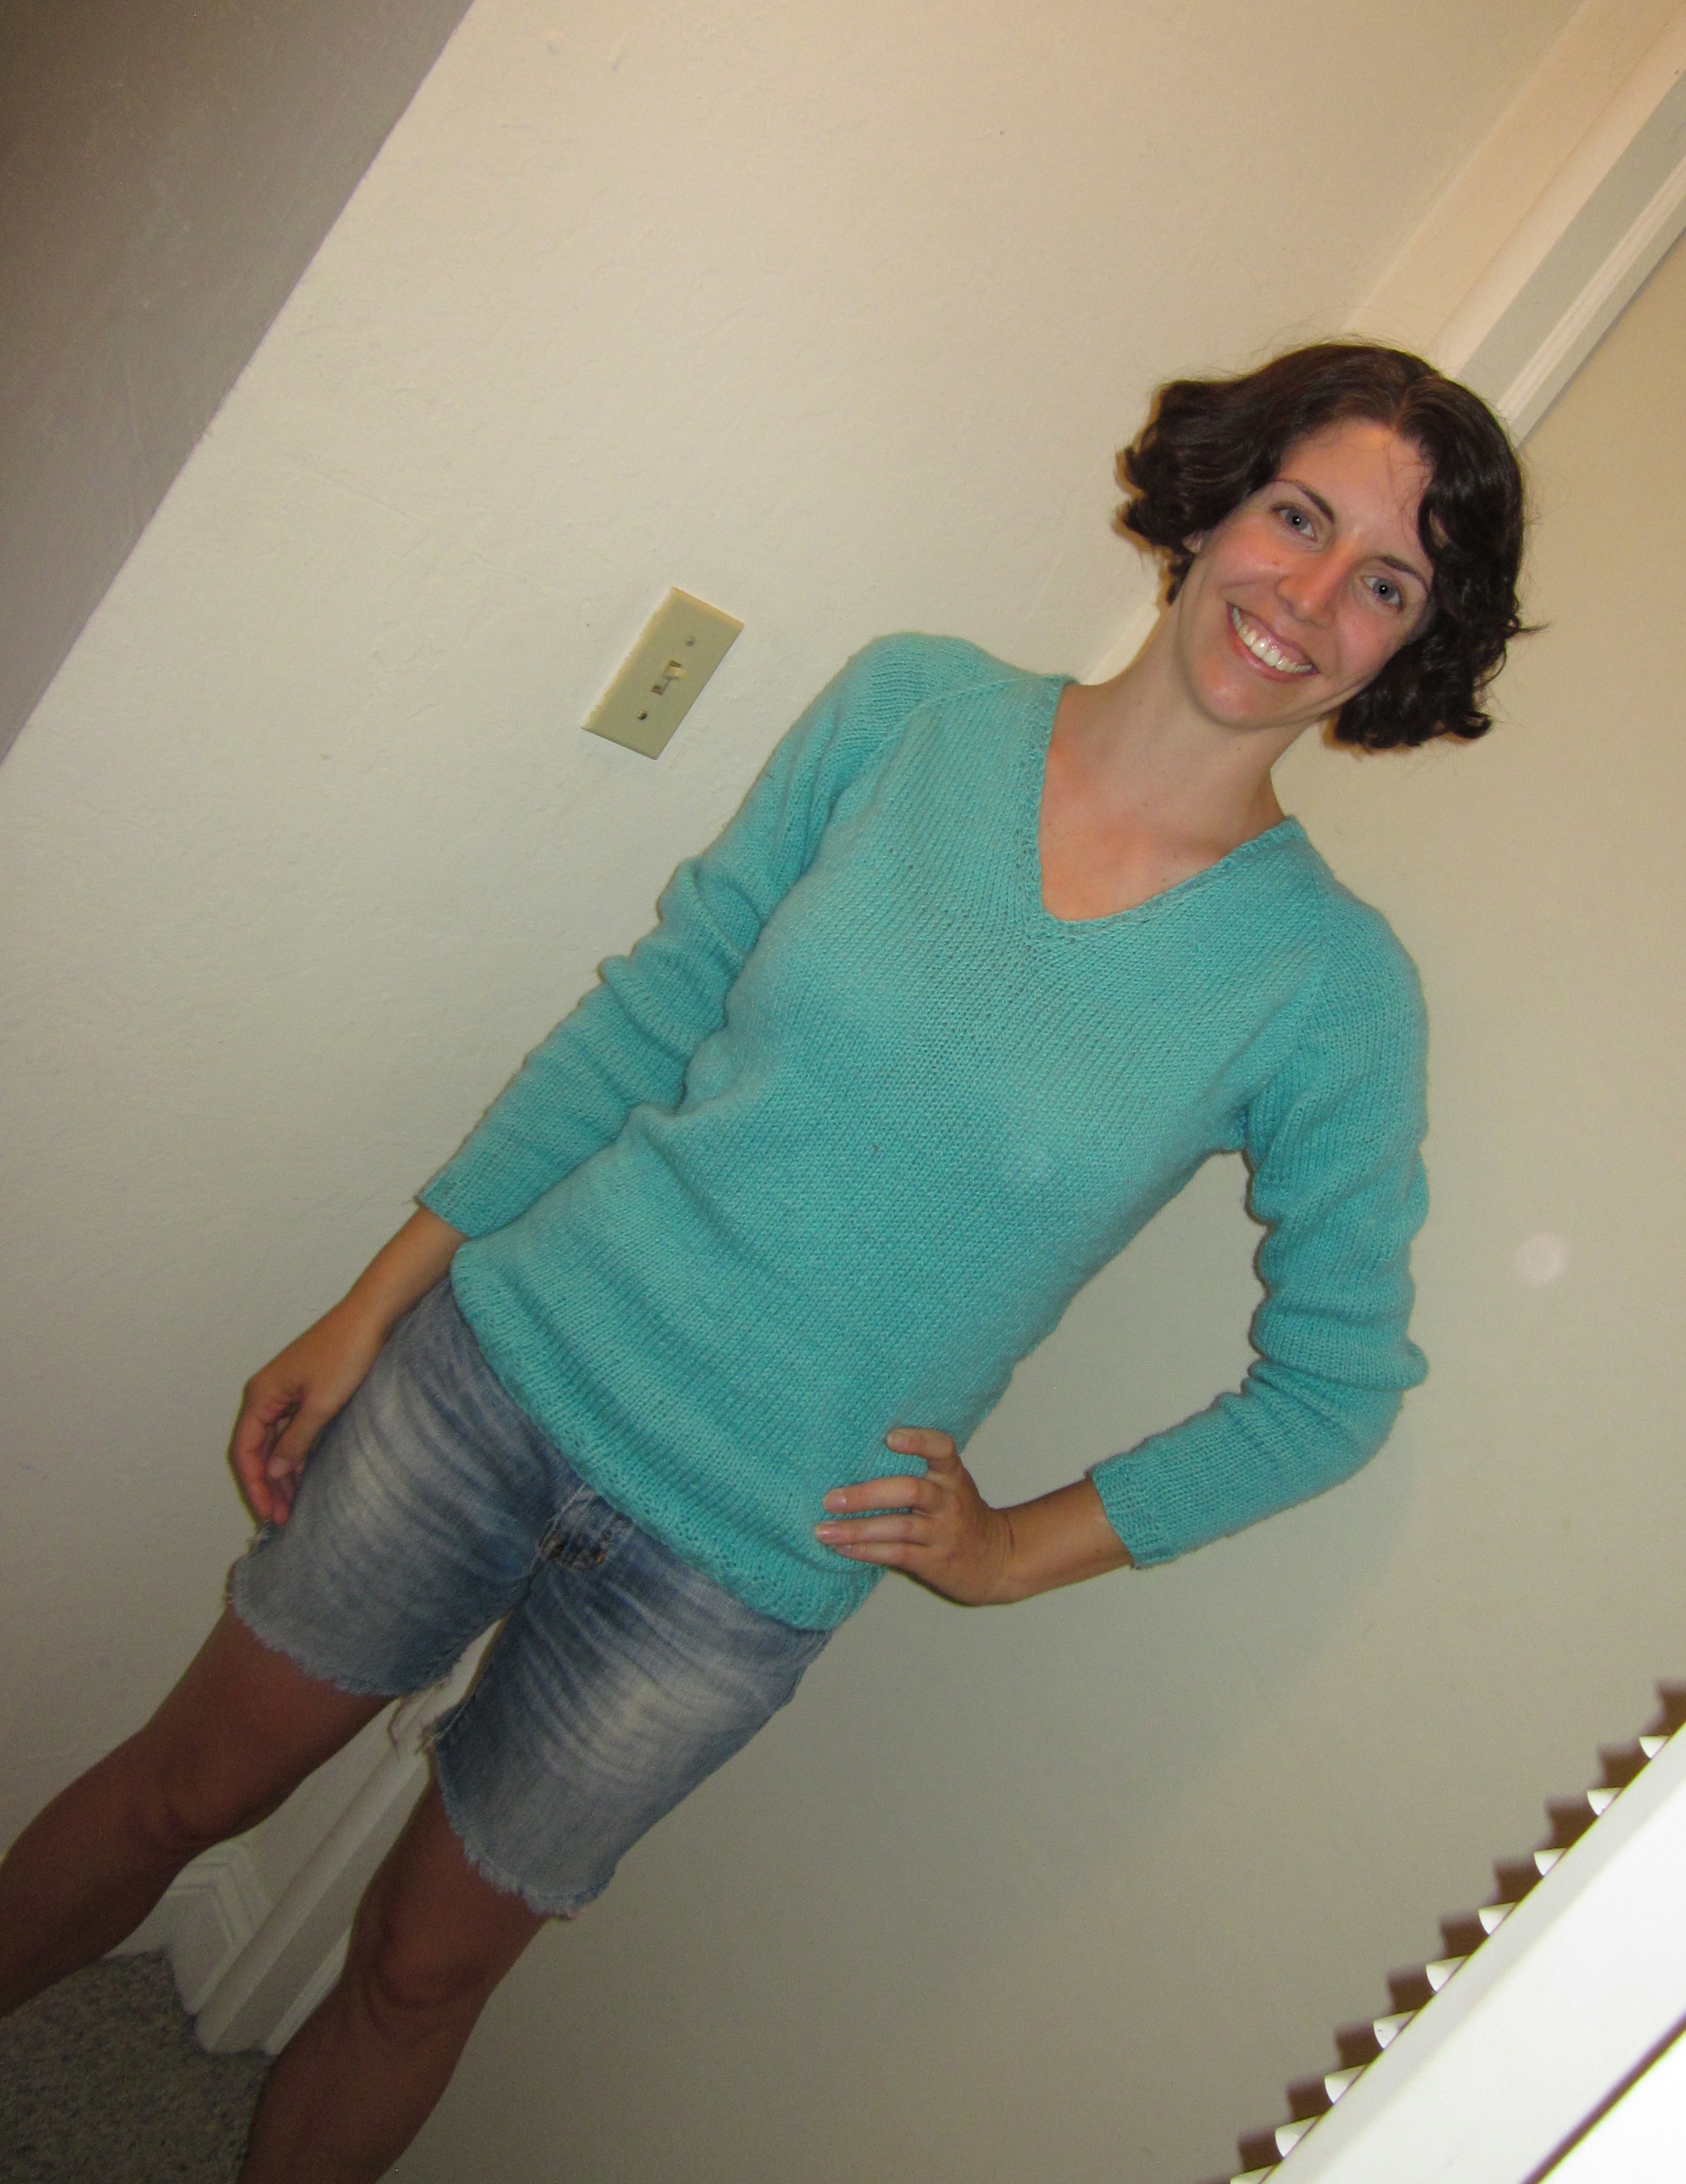
Yes, that’s me as Rainbow Brite, a homemade costume! More about those below.

Anyway, in the last week I have been stumbling across some creepily good Halloween crafts on the internets and

drawing inspiration from my previous Halloween creations as I come up with a costume for this year. Have a look!


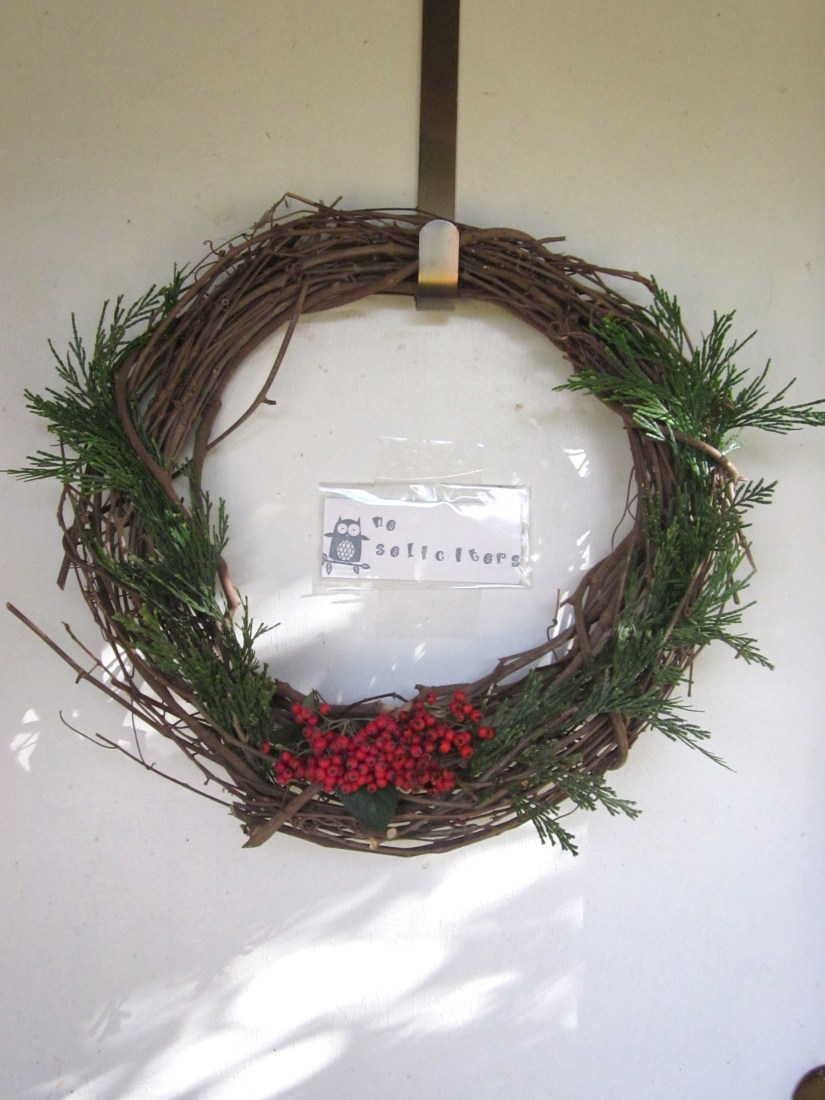
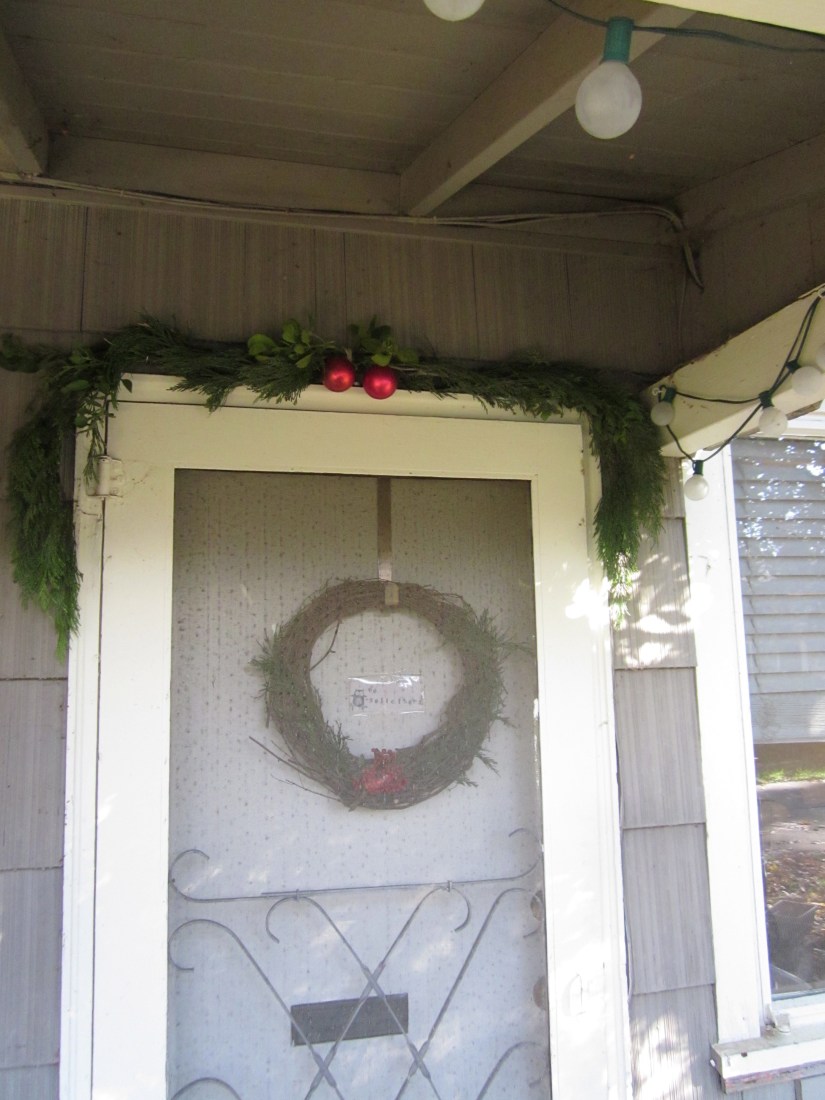
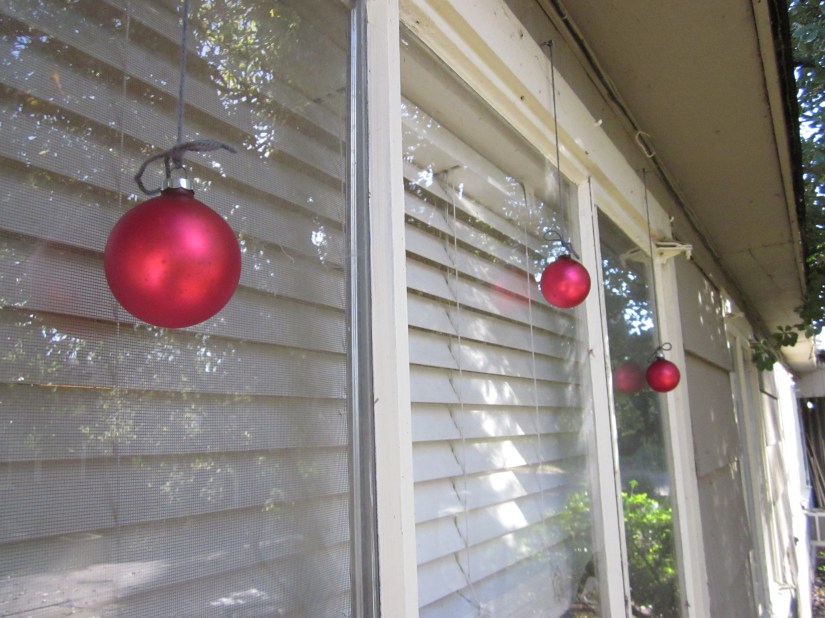
Bats! Spider webs! Ghosts!

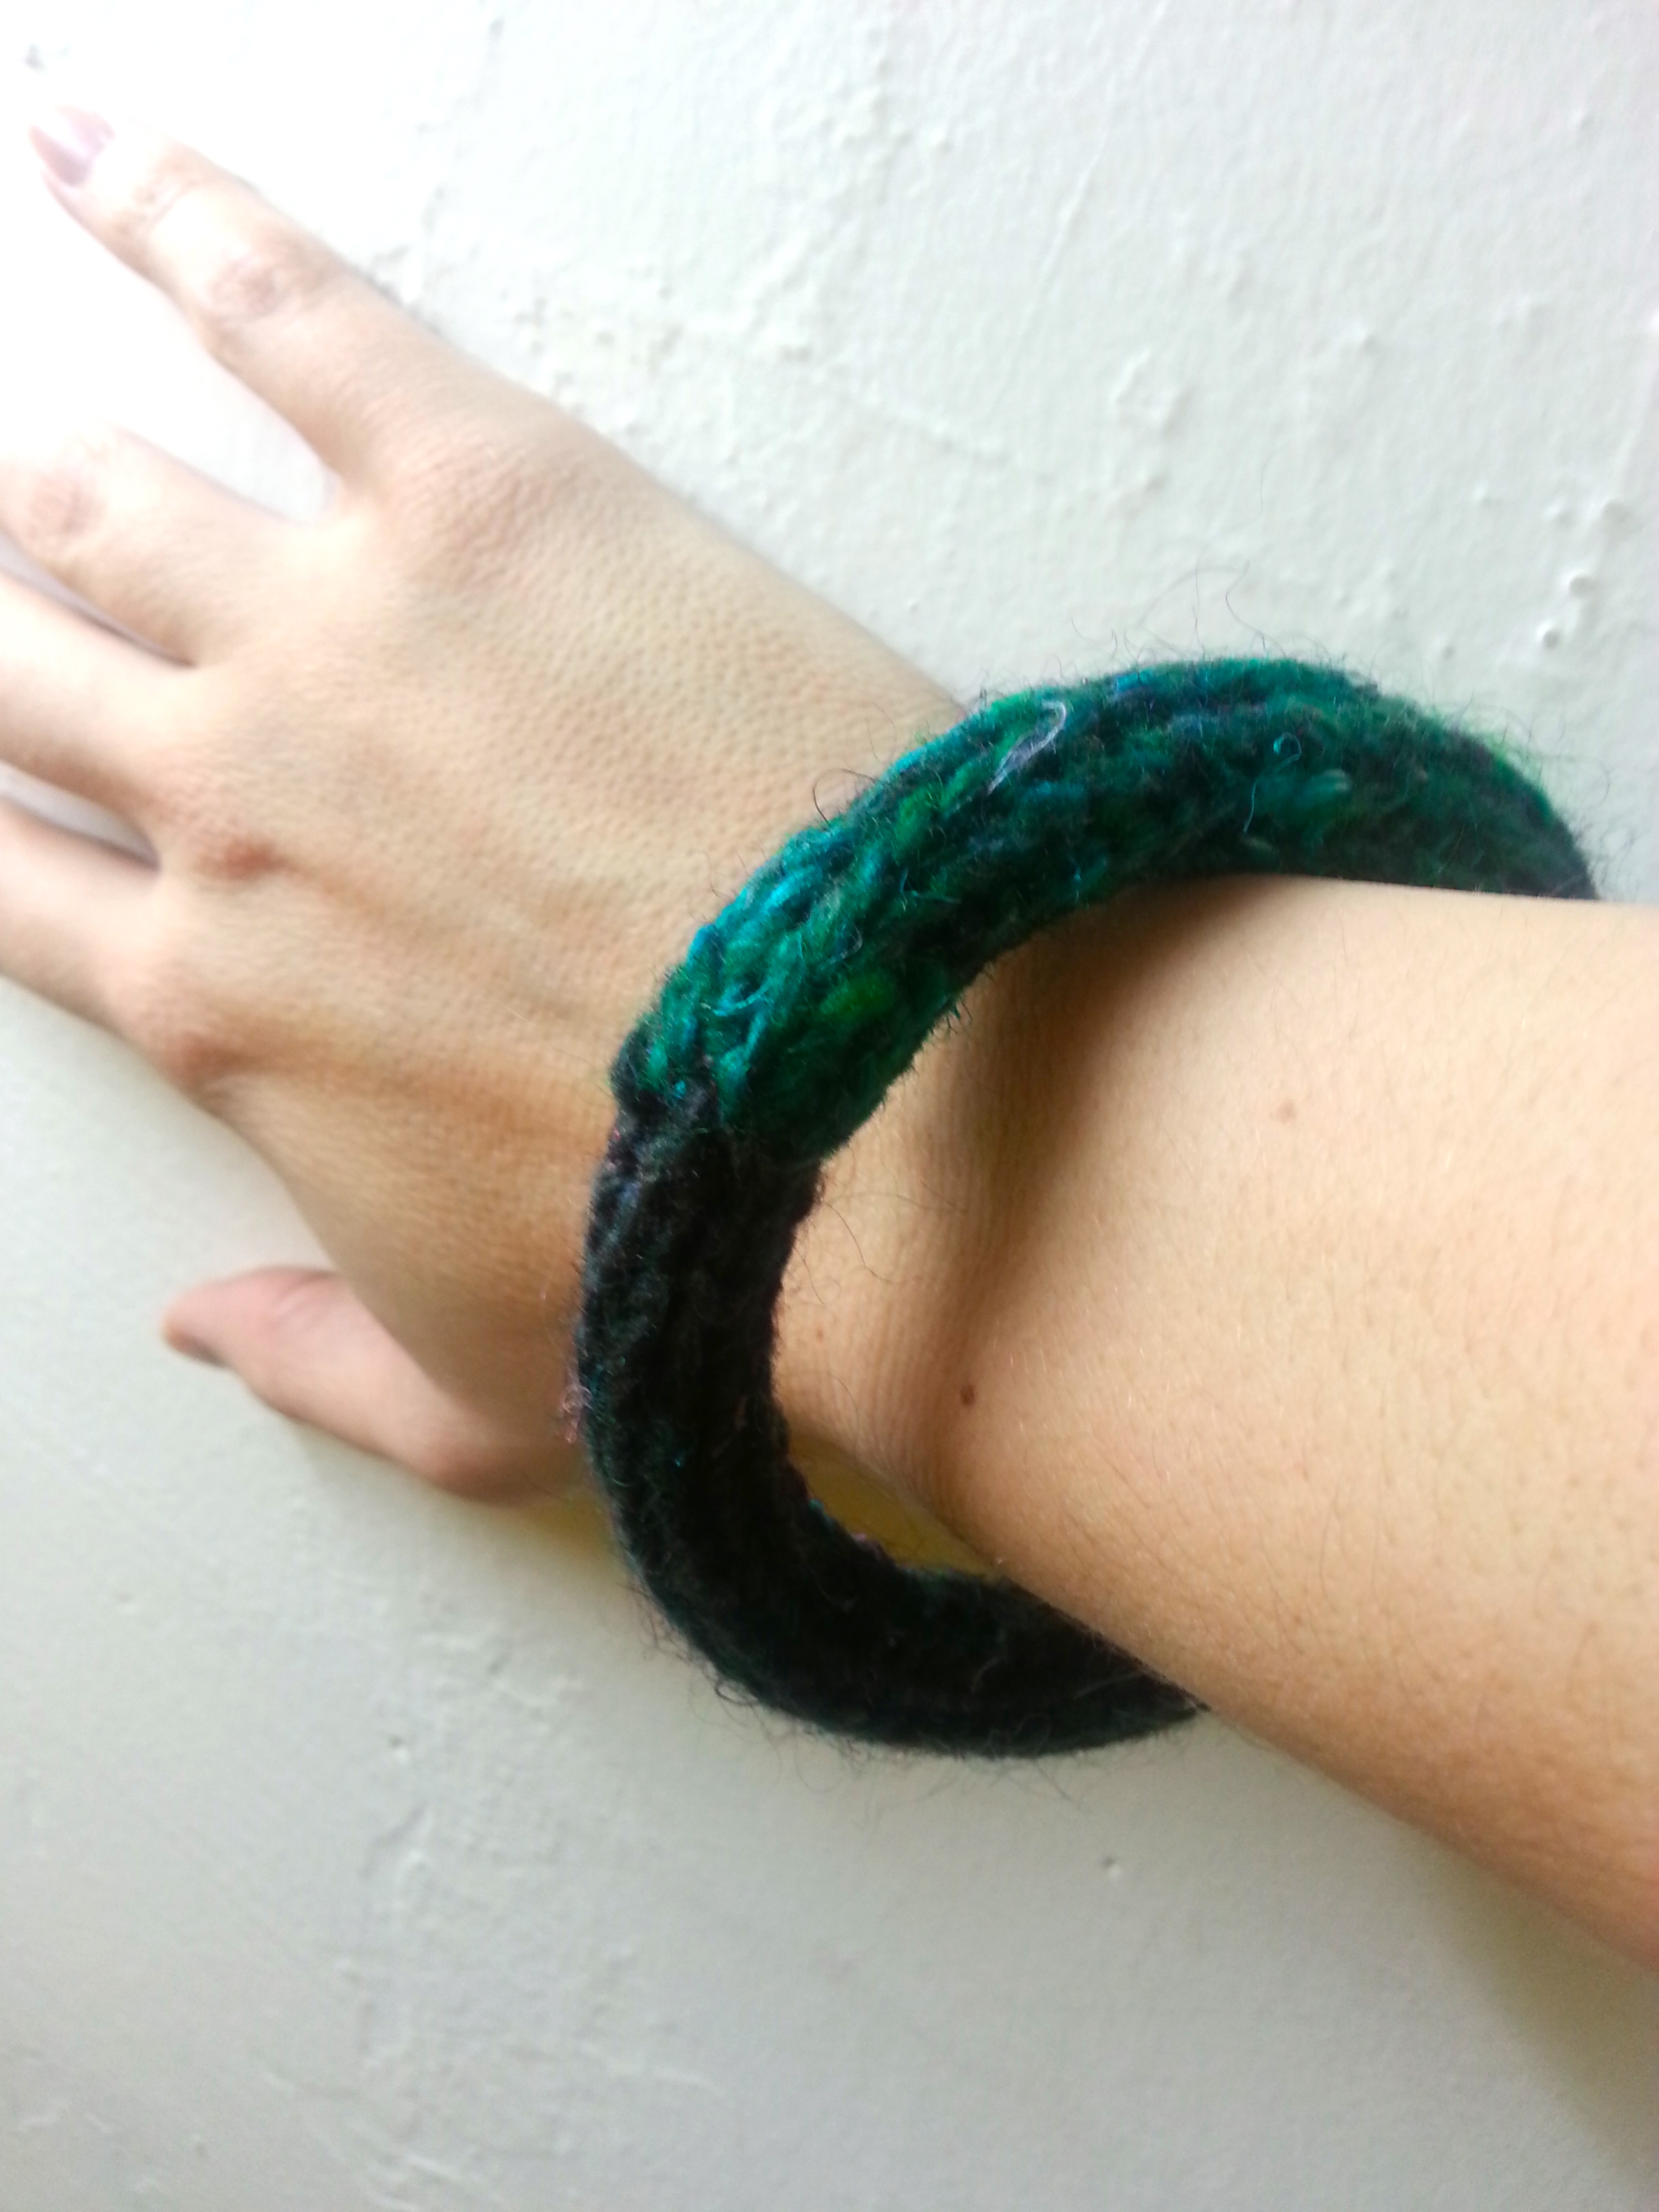
I don’t usually do Halloween crafts, but when I found this bat pattern I had decided I wanted to make it. It’s quick, it uses up cheap yarn, and it makes me giggle when I look at my window.

I think they look best from a distance, but here they are next to another bit of seasonal decor (i.e. my door stop).

If I had even more time I would probably be making a few other items. The first is this spiderweb scarf. I don’t do much crochet, but with this video tutorial  I think I could remind myself how to wield a hook. But what I’d really love to try is just about any pattern out of a ghost-inspired knitting book I heard about on this blog post (really like that blog btw).  It’s called Ghosts: historiographies, cultural manifestations, and the knits they’ve inspired. First of all, how could I not love a knitting book with “historiographies” in the title? Also, the patterns look really lovely, especially Calavera Catrina. The weather has just turned chilly here and a spooky bonnet would be really nice right about now.

Costume Creations!

But of course, what I’m most excited about are costumes!

I realized that when I posted about the top ten nerdiest craft I’d made, three of them were actually Halloween costumes: Ash Ketchum gloves, Bjork’s swan dress, and Daenerys Targaryen’s dragon Drogon:

Guess what? Those are not the only homemade Halloween costume photos I have. And since I love looking at the costumes other people make, I’m going to share a few of mine with you, along with their pros and cons about things like how comfortable it was to wear and whether or not others recognized what I was. For your convenience I’ve also divided them up between costumes I planned and costumes I put together at the last minute. Hope you get some ideas!

Costumes I made in advance 

If you have at least a week or two and you are willing to put in some effort, you too can make bizarre homemade costumes!

1. A Carrot

Pros: Orange top and skirt were easy to sew—Just two tubes with elastic at the top. Repurposed a hula skirt from an older costume, so I didn’t have to buy anything for the carrot top part.

Cons: No one knew what I was! Ok, granted, the green top didn’t stand up all carrot top like, but still. One guy thought I was asparagus. Also, I was with Edward Scissors hands at the time, which is admittedly an even more awesome costume to look at (I didn’t make that one, but I did do his makeup). Weight of the green “hair” became uncomfortable after a while.

Unrelated downside—I was sick that year, and so the only thing in my cup was saltwater to gargle. I don’t like missing an opportunity to dress up.

2. Holly Golightly 

Pros:  People recognized my costume right away (well, at least “Breakfast at Tiffany’s!”). Worked great with my hair when it was long enough to put up. Already owned the black dress (thanks concert band!) and the costume jewelry (thanks grandma!). Very comfortable to wear.

Cons: Not many! I suppose you may want to nix the cigarette holder if you’re dressing up around kids. Since I don’t smoke I had to borrow a cigarette to get the above photo.

3. Patti Mayonnaise 

Pros:  No sewing required! I found the blue shirt and some pink sweats at the thrift store, cut the pink sweats into circles, and used a steam iron and double sided fusible webbing to stick them to the shirt. Nice and warm to walk around in. Also works as a couples or group costume if you have a Doug Funnie, Skeeter Valentine, etc! (Not included—woodland fairy friend or dude who photobombs you pictures)

Cons: Only a few—wigs are not usually cheap (this was a man’s wig which was somewhat less expensive) and I could not truly mimic her orange skin tone. The dots were a bit stiff. And I suppose you need to watched Nickelodeon in the 90s to know the show Doug. Still one of my favorites!

4. Gadget Hackwrench

Pros: I got to wear a purple jumpsuit, a wig, mouse ears AND goggles! From my face you can tell it was a fun get up to wear. I got a purple sheet and the sewing patterns from the thrift store, and the goggles from the clearance aisle at the end of summer (yes sometimes I start planning my costume early).

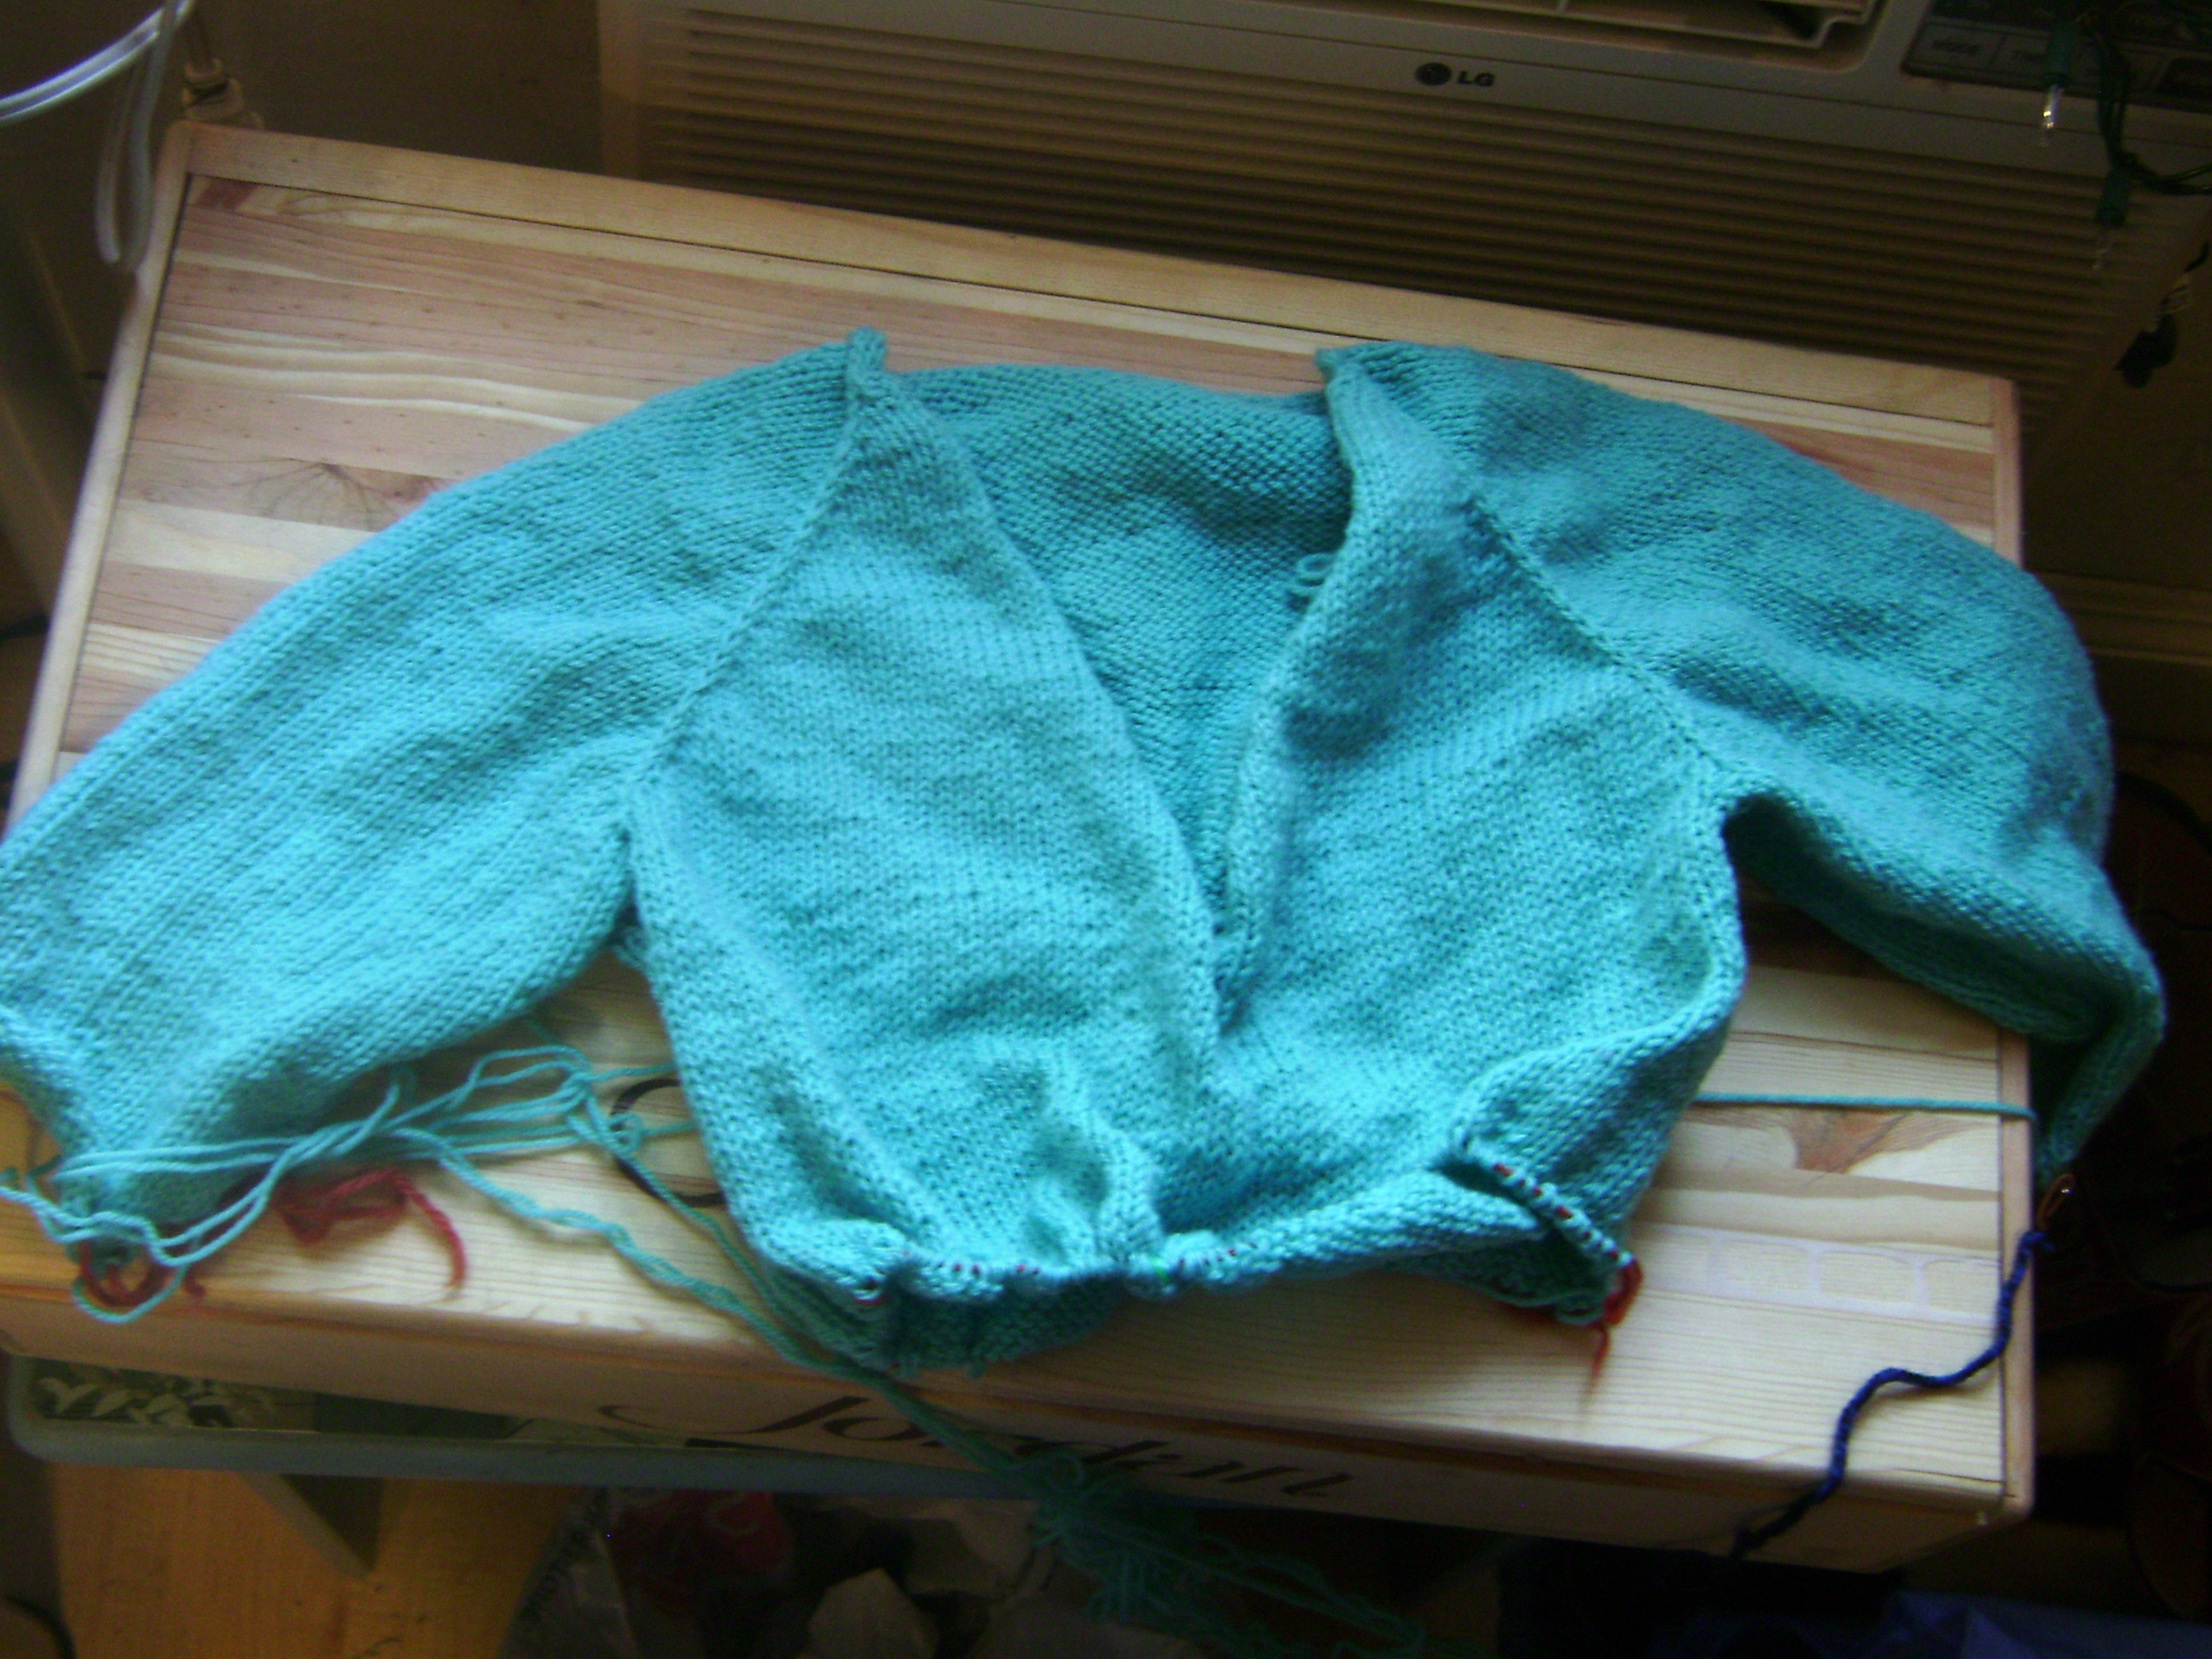
Cons: Fewer people recognized my Gadget costume as being from  Chip n’ Dale Rescue Rangers  (I didn’t think about the fact that the show was not on TV for that long). And many things to wear=more things to buy. I wanted to make more of the things like my ears but I ran out of time because of the sewing (see work in progress shot). Sewing was tricky because I combined two patterns (sleeveless jumpsuit + collared blouse) and then I altered that further to make the legs slim, etc. Final result: I could not lift my arms above my head without giving myself an extreme wedgie. So not exactly the most comfortable costume!

Costumes that I put together at the last minute

If you have a day (or maybe just a few hours) to figure out a good costume, you can still come up with something interesting-ish.

1. Cheshire Cat

Pros: Yet again all I had to sew was a shirt and tube top—you can sew fabric into tubes very quickly! In this case I was going to an Alice in Wonderland themed party and remembered that I had some fabric that looked like the Cheshire Cat’s stripes. Too bad you can’t see the tail here! Ears are made from origami paper. Pictured with the Queen of Hearts.

Cons: Besides the fact that I only have terrible photos of me with my eyes half closed, the only real downside was that I was cold. But I am usually cold.

2. A sad hipster

Pros: Our friends got such a kick out of this! At the time I owned the black wig and had a roommate whose accessories were perfect in that oh-so-emo kind of way, so nothing was bought or altered, just repurposed. Of course, sad hipster boy is wearing girls clothes too…the tighter the better.

Cons: No one else besides our friends knew we were dressed up for Halloween…everyone else just thought we were a real hipster couple. Now that should really make you cry.

3. Gender Bender

Pros: Don’t normally dress as a man? If so, you may be surprised to find you probably have everything you need minus an accessory or two (the tie was mine but the pipe was not). Can be super comfy.

Cons: Don’t normally dress as a woman? Good luck finding a dress than fits, putting on nylons without ripping them, applying  makeup, and/or walking in heels. If you can do all this and be comfortable, you must let me know how!

4. Princess Peach

Pros: You know how brides say you can totally wear that bridesmaid dress again, but you totally can’t because it always looks like a bridesmaid dress? This is one instance where I did figure out how to wear it again—at a Ninetendo costume party. Crown and necklace are made out of construction paper.

Cons: No cons! It was the perfect last minute costume for the party.

Botanical Knits & Crafts

Gray autumn leaves: a shawlette scarf

I finished my other leaf-themed knitting project: Saroyan, the scarf-ish shawllette!I’m pleased with how this project came out. It’s somewhere between a tapered scarf and a shawl, which is great because I didn’t quite know what I wanted. I just wanted leaves.

My earlier hunch that light gray would be a good color for this pattern ended up being correct— the leaf edge stands out really well.

 The only modifications I made were adding two extra repeats in the middle section to make it a wee bit longer. I definitely made some small errors in a few places, but they’re not visible unless you are me so I will spare you the details.

These photos come from last weekend, when my friend and I took a walk around Village Homes, meandering among the scraggly late summer gardens and early fall fruit trees. It was a lovely autumn day.

My friend Sarah was nice enough to take a these photos of me wearing Saroyan. Which was awesome. (This must be what an actual photo shoot for a knitting magazine feels like).

As it turns out, all of her candid shots (when I did not think she was taking a photo) were way better than the ones where I was posing!  Well, except for this one I took, which I mainly include so you can see the leaf earrings I was wearing. That is all.


Botanical Knits & Crafts, Quick Knits & Crafts, Tweaks & Alterations

Socks, Bows and Cuffs

Socks!

I finally finished my fern lace socks! Just in time for Autumn too. Of course, it’s still in the 90s here, so it’s not quite sock weather. I’m hoping that will change soon.

It is really difficult to photograph one’s own feet wearing socks…let’s just say you need some flexibility. Anyway, I’m quite happy with how they turned out. It’s difficult to do justice to this color, which a fellow knitter described as “peacock.” It is quite vibrant, and looks either more green or more blue depending on the light.

Overall I’m happy with the way the pattern turned out. I already wrote about the sock pattern(s) I used in an earlier post, so I don’t have a lot to add. It did take a while for me to get the hang of lace knitting, but even with the few errors I know are in there, I think it looks great.

For me, the key to lace knitting was a) lots of stitch markers and b) patience. I broke two of my double pointed bamboo needles while making these socks before I figured out that second point.

As you may have noticed, I changed the top banner of my blog to knitted pumpkins in honor of Fall (free ravelry pattern here; I also wrote about making them last November). Since it is my favorite season, I  figured I would include two other smaller knitting projects that I’ve made in appropriately autumnal colors.

Bows!

Around this time last year, I saw the pattern for this moss stitch bow headband on A Common Thread and decided it was the perfect quick project. I also liked that it would give me a chance to use the very small amount of burnt orange yarn I had in my stash.

I think if I made it again I’d make it a little smaller—I have short hair and this is a big bow. But I do like that I can shape the bow to have it either lay flat against my head or stand up a bit.

The band does not show up as well with wavy hair, but there are actually three individual strands made with a crochet hook. You can either scrunch them together or separate them out depending on your preference.

Cuffs!

I really thought I posted this project before, but it looks like I didn’t —which is fine, because the colors are the most fall like of all.

This is the Pretty Twisted pattern  from Knitty’s first fall 2011 issue (free, of course). I made the “framed” version (the light teal one in their photo) and finished it with a two-toned wooden button.

This was a great way to use up a small bit of sock yarn in colors I liked. The linen stitch does a great job of lying flat and looking bracelet-like. However, I think next time I would use a yarn that is not so marled, because that kind of detail seems to get lost in the stitch.

I think the idea of a twisted loop pulled through a hole and then over the button is quite clever. It’s a nice detail without a lot of added work.

Sometime soon, I will post photos of other fall knitting projects—my leaves scarf (75% done), my custom fit raglan sweater (100% done, it’s just too hot to wear!) and my blue ombre cowl made from the black bean dyed yarn (95% done—it was finished but blocking it messed up the shape so I need to make a few adjustments)!


Botanical Knits & Crafts

Glazed and confused: my first attempt at ceramics

This summer, I tried my hand at a new craft: ceramics.

I learned quite a bit along the way, but the main thing I learned was patience. This art form clearly takes a lot of time, skill and effort to master, not to mention a real artist’s eye if you want to make something beautiful. For noobs, that means a lot of flops. But the flops sometimes turn out to be endearing in their own way. If you can let go of perfectionism (and you must), it can even be kind of fun.

The specific class I took at the Craft Center was titled functional handwares. Translation: no wheel throwing, just handbuilding, and making things that are useful, not just decorative. I still have a few items to finish up, but here are the things I made, in the order I made them.

First batch

medium teal bowl:

This is a pinch pot—made, as you could guess, by pinching a ball of clay into a shape. While it didn’t come out even, I’m happy with the size of it, and I like the base. I also was pretty pleased with the glaze color for these two.

small teal bowl with leaves:

This is a coil pot, made by rolling out long thin pieces of clay and coiling them on top of each other to form the object. I did not like this technique as much—I didn’t much care for the rolling nor the blending required to make it. I did experiment with carving a leaf design into this pot, which you can just barely see.

winter tree:

Ok, so this wasn’t actually something I learned in class. Our instructor was gone during the second week, so I came into the studio, on my own. I saw that someone had built a little clay tree, and I basically copied it, albeit poorly. However, the cool thing about it is that I found a way to make it functional as a jewelry holder—right now it is on my dresser, with rings on its branches. I hope I get a chance to try this cool brown glaze again!

small periwinkle mug:

Ok—not my best work but I’m showing you anyway. This was the first mug I built, using slabs rolled out with a slab roller. I underestimated the size here—I’m told there is a 15% size shrinkage when you fire items, which made this mug child sized. It was also the first thing I ever glazed, and the glaze I chose was super thick–you can see the line where it overlapped when I dipped it.

large blue mug:

On the other hand, this mug is one my favorite things I’ve made so far. It felt gigantic when I built it but with the shrinkage it turned out to be a good size. The lines I carved out of the body are subtle but give it a nice shape, and the handle and rim on this one are less wonky. Also the glaze turned out great—a lovely color and the right thickness. I am drinking tea out of this mug right now.

“yellow” woodgrain impression bowl:


This was my first attempt at three things—shaping on a plaster mold, using a clay stamp(?), and underglazing. The shaping went ok except for the corner that droops. Keeping all the square shape does kind of make this look like an ashtray though. The clay stamp or whatever it is called turned out great—I love the woodgrain. However, the yellow underglaze I used did not turn out at all. Maybe I just put it on to thin? I used a clear glaze over it and really it just looks white. But I like it anyway.

blue and orange woodgrain pet bowls:

Combining a lot techniques here, I tried to make some short, thick bowls about the size of a food and water dish for a cat (or small dog?). I used the underglazes again here, and discovered that the colors come out very differently. I was not expecting such a deep blue or such a pale orange. Nevertheless I like them. Now I just need to find someone with a pet to give them to who doesn’t mind their homemade quirks, as my cat has an automatic feeder and waterer (we are both happier that way).

square bowls with leaves:

These are probably my favorite thing I’ve made so far. I did the wider one first, trying to get the hang of the technique—you have to measure and cut a square piece precisely, and then you have to cut kite shaped pieces out of the corners, then you reconnect the corners. Getting them to turn out even takes some skill.

The leaves are my favorite. I painted them before the first firing, then scraped out the design in the middle. The clear glaze lets the design shine through.


blue yarn bowl:

This is another piece that didn’t turn out as planned, and still worked great. Also, I’m combining two crafts here!

If you’re not familiar with the concept of a yarn bowl, the basic idea is this—when you pull from a ball of yarn as you are knitting (especially if it is not a center pull ball), the ball is going to roll around all over the place. However, if you can keep it stationary, knitting can commence without said ball rolling (sorry, yarn chasing cats of the world). A bowl with hole or a cutaway to pull yarn through provides this function.

So my yarn bowl turned out a bit, well, funky. First, the cut out part dried in an awkward way, separating at an angle. Then I was in a hurry to glaze it because they were doing the last glaze firings before closing the craft center for three weeks, and the blue glaze had not been stirred in many days. The result is a really swirly uneven glazing. If I’d know what to do then, I probably just could have dipped the not-well-glazed half into the glaze again. But since this is not a bowl that I will be holding or using for food items, I don’t really mind it. It even looks kinda cool, with the right mindset.

I doubt that ceramics will become a new craft in my life in the way that knitting is—after all, it takes a lot more equipment (kilns!) to actually do it. But it was a really fascinating artform to learn—and I wouldn’t mind trying my hand at a wheel eventually. After I find places for all these ceramic objects in my apartment anyway.