Quick Knits & Crafts

quick winter knits

Today’s post will be dedicated to following quick winter knits that I made in January*: a scarf, a hat, a headband/earwarmer, and fingerless mitts:

*Ok, I actually made the scarf in January 2010. But it was still in January!

It’s hard to believe that it is still winter, because it sure didn’t feel like February in Nor Cal this week, where the temperature hit 75 degrees. We’re back to the usual 50s during the day, 30s-40s at night now, but the nice weather made me really excited for spring! Just look at the daffodils that came up behind my apartment:


In spite of the warm days, most of the knits I’ve been finishing lately are definitely for winter. I’ve been trying to use up what I’m sure most knitters have in their stash— skeins of weird yarns. I’ve got a lot of yarn that other people have given to me over the years. It can be a challenge to figure out how to use it. In my case, the yarns in question have textures and colors that are not what I’m used to working with. But I’m trying to destash, so I took up the challenge!  With the help of Ravelry I found three free patterns that I liked (in addition to scarf one that I made up).  Please note that all links below require a (free) ravelry subscription to fully view. [Bonus: the only photos I have of the yarn before I knit it feature Jo the cat.]

Patterns 1 and 2: Canto, the thick and thin red yarn

I received nearly three ball of this yarn from a friend in 2008. For two years, I simply used it as decoration, as you can see in the photo. Then in January 2010, I got bored and cast 11 stitches onto size 13 needles and knit until it seemed like a good scarf length. It’s quite bulky in the thick parts, so 11 stitches was a good width.

But I still had a significant amount left over. I love the color, so this winter I searched ravelry to see what else I could do with it. Turns out, yarns like this just don’t look good in anything but really simple patterns. Once I realized this, I settled on the Overnight Hat.

I made the small/medium version and it turned out great. True to its name, this was a really quick hat: I made it while watching several episodes of Parks and Recreation. The funny thing is, I get more compliments on this hat than any other I’ve made. The thick and think texture makes it look more complicated than it it. Of course, the color helps too—putting these items two side by side is visually intense!

Patterns 3 and 4: unidentified multicolor yarn

My other yarn was even more of a mystery to me—I still don’t know what brand it is, or exactly how much if it I had. I believe I got this from a friend in 2010. All I knew about it was that it was thick, soft, and had seemingly random color changes in marled gray, black and brown. Jo thought it was the best cat pillow ever:

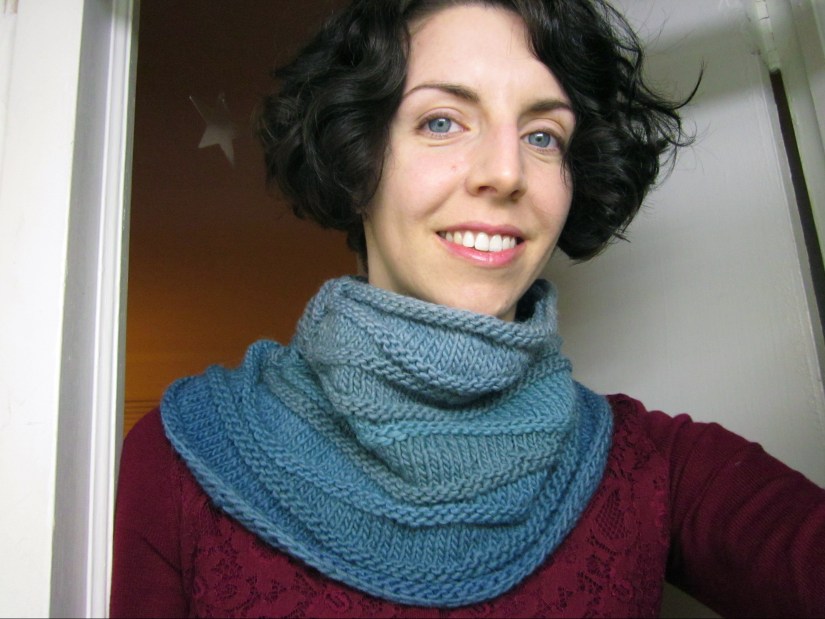
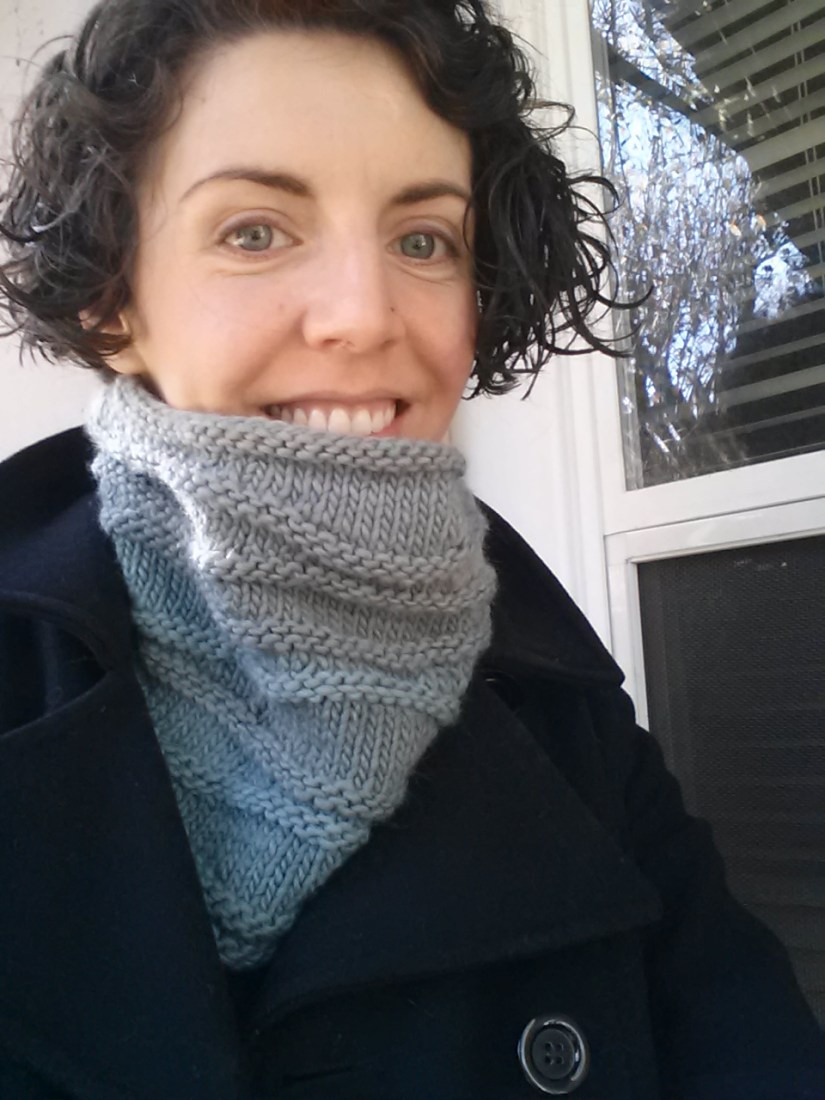
I tried several patterns before hitting on the first one that actually looked good with this yarn—the Vanessa Headband.

As you can see from this admittedly blurry photo, I made the thin version, though I’d love to try the wide version too. I’m really bad at remembering where I am in a cable pattern, but it was also a pretty quick knit. I usually wear it with the all gray side facing the front. Depending on how much my hair has grown out, I can either wear it as a headband proper or as an earwarmer—which is actually quite useful when riding a bike in the early morning hours of winter.

To use up the rest of the yarn, I eventually settled for modifying the pattern for Gradient Mitts.

I made the small on size 10 needles and the fit turned out perfect—I’m getting better at adjusting for bulky yarns and my own loose gauge. I didn’t do the gradient color pattern, but I did pick these because they looked good in odd color combinations on ravelry. I knew that no matter what, I was going to get two completely different looking mitts, thanks to the weird color pooling of the yarn. So with a little bit of planning, I divided the yarn into two balls and held them together double stranded while I knit—this helped break up some of the color pooling. Finally, I added half thumbs to the pattern by picking up stitches around the thumb holes—I found that my poor thumbs were just too cold while riding a bike or driving with these on. But now that I’ve done that, I really like them.

So those are my quick winter knits! I have one more I’m working on, but it’s not done yet, so I’ll save it for another time. And if anyone knows of any other free, quick winter knitting patterns, send them my way before it gets too warm!


Botanical Knits & Crafts, Yarn Dyeing

Natural dye tutorial: blue yarn from black beans!

EDIT: Want to see what I knit with blue yarn? Check out these other posts!

Blue ombre waves cowl   Green and blue striped socks

IMG_0312blue and green striped socks

Welcome to my dye tutorial, the most popular post on my knitting blog! This is a cold water dye using regular black beans, designed to be used on yarn made of wool or other natural fibers (it won’t work on cotton, acrylic, etc.). There’s a lot of soaking time involved, so expect to have a finished product after three or four days. If you have a question, put it in the comments and I’ll respond. Enjoy!

Natural blue dye: background

I have a really awesome fiber dye experiment to share! As you can see from above, we got several lovely shades of blue —a difficult color to achieve —in a process that took about four days start to finish.

Now that I have a spinning wheel(!) and some wool, I’ve been wanting to learn about natural dyeing. Since blue is my favorite color, I gravitated toward information about natural blue dyes. Turns out there aren’t that many. Indigo and woad are the main ones, and they sounded like a lot of work for a first time dying project. Then I came across web posts on black beans as a blue dye. My favorites were blog posts at waysofthewhorl and brambleberriesintherain (now defunct), which then led me to the discovery that there is a ravelry discussion thread (login required) that is many years old and has hundreds of posts! Needless to say, I was overwhelmed with information.

At the same time, no one post seemed to describe exact amounts of beans, water, and yarn used, nor exact times for the different steps involved. So with a little help, we set out to do a test run with all the steps and amounts recorded. As a caveat, not everything went as planned, record keeping wise, but we did out best.

Tutorial: dyeing yarn blue using black beans What you will need (amounts will be determined later):

  • Black beans
  • Water (tap is fine and what we used, but see note at the end of the post)
  • Non-reactive containers for soaking and dyeing (we used glass and stainless steel)
  • Natural fiber yarn, white or off-white (we used Lamb’s pride, 85% wool, 15% mohair, M-10 Creme)
  • Alum mordant (Aluminum Potassium Sulfate—you can find this in the spice aisle of a well-stocked grocery store)
  • Cream of Tartar (also in the spice aisle)
  • Large non-reactive pot for the stove (We used a large enamelware roasting pan. Technically this should not be a container you’re going to use for food after this, and although alum seems to be non-toxic, I played it safe.)
  • Misc. items: additional yarn to tie off your skein in sections, a rack or other place to dry finished yarn, newspaper or something else to protect surfaces from dye
  • Optional: food grade tubing

Dye Prep Instructions

First, figure out how  much water and beans to use, choosing a ratio from below.

Here are rough ratios of Water to Beans in each of our dye lots:

  • dye lot  # 1/2  = 7 to 1  (7 parts water to 1 part beans)
  • dye lot #1 = 3.5 to 1
  • dye lot # 2 = 2 to 1
  • dye lot #4 = 1.25 to 1 [furthest hank on the right]

blue yarn in different shades

Each of the numbered hanks of blue yarn in the photo above is 1/2 oz (14 g) of yarn.

Make sure that you have enough beans and water to create enough dye for your yarn.  I strongly urge to get more than you think you need because beans absorb water at a higher rate than we bargained for. You’ll need enough dye to immerse your yarn.

Ratios work best, because our  actual measurements were rather odd :

  • #1/2 = 1/2 cup beans and 3.37 cups water;
  • #1= 1 c. and 3.4 cups
  • #2= 2 c. and 4.125 cups
  • #4=4 c. and 5 cups

Let each of these bean and water combos soak for 24 hours. This is a cold water dye, so it needs time. I preferred the glass jars for this.

To get the best dye, you’ll need to get as much of the bean water with as few bean particles as possible. From what I read, the pieces of bean tend to make the yarn more  gray than blue.

We strained out the beans, let the dye settle for an hour or two, then siphoned the water off from the top using the food grade tubing so that the bean particle matter did not make it into the final dye. . Other people on the internet suggested spooning the water out and leaving the dregs.

Yarn Prep Instructions

When are 4 hours away from completing your 24 hour bean soak, start preparing the yarn. Alternatively, you can do this part earlier and let the yarn stay soaking in the mordant pot overnight.

First hour:  water soak.

I separated my yarn into four 1/2 oz skeins tied with bits of a thinner yarn to keep them from getting tangled, then unwound the skeins and soaked them in water for 1 hour.yarn soaking in water

Second hour: Mordant on the stovetop

Mordant is what allows the dye to adhere to the yarn and not just wash out or rub off. After water soaking, I moved my yarn to large stovetop pot to mordant it using alum and cream of tartar. I used Sasha Duerr’s Handbook on Natural Plant Dyes to calculate how much need:

  • 8 percent of the fiber’s weight for alum
  • 7 percent of the fiber’s weight for cream of tartar

For mordanting 2 ounces at once this comes to about 3/4 of a teaspoon each of alum and cream of tartar. I will admit that I was probably closer to 1 tsp each, because I couldn’t find my 1/2 tsp measuring spoon. It still worked.


Dissolve the alum and cream of tartar into hot water and add to the stovetop pot along with enough water to cover the fiber. I added the water soaked yarn and brought the pot to a simmer.**Important note: do not change the temperature of the yarn too quickly, it can cause felting** I simmered it for an hour then turned the heat OFF.

Final 2 hours: cooling and rinsing

I waited another 2 hours until it had cooled off, then removed the yarn and rinsed it off with clean water that was the same temperature as the yarn to remove any excess mordant (using a little pH neutral soap is supposed to help).

Dyeing the yarn

Finally, the fun part—adding the yarn to the dyes! blue yarn in yarns 
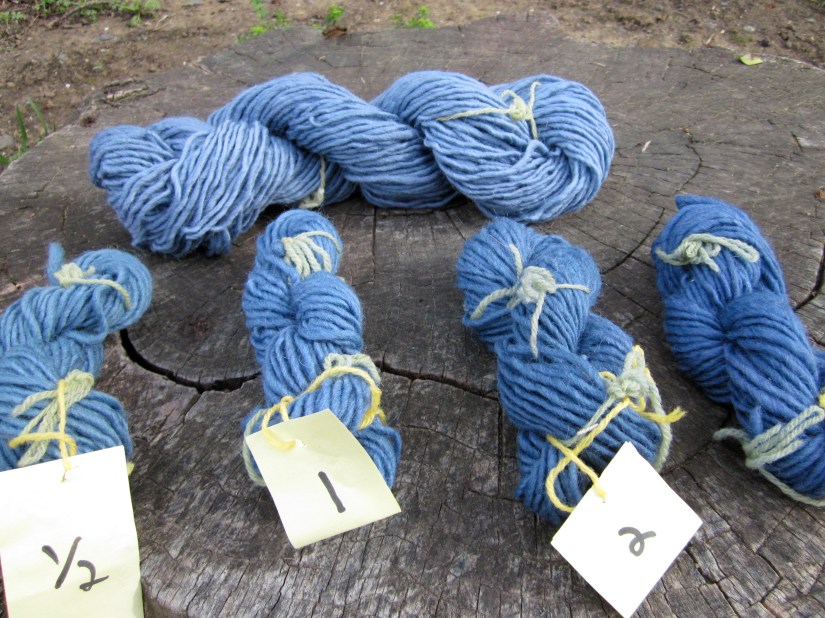
As you can see, some of our dye lots barely covered the yarn, so we turned them upside down or right side up periodically to avoid unevenness in the color. We let them stay in the dye for 42 hours. I’m sure an even 48 hours would be great, but sleep comes first.

During this time, I discovered something that no other blog really mentioned: the color you see immediately can be quite different from the final color. Observe what the yarn looked like about 10 minutes after I put it in the dye:blue yarn first looked purple 
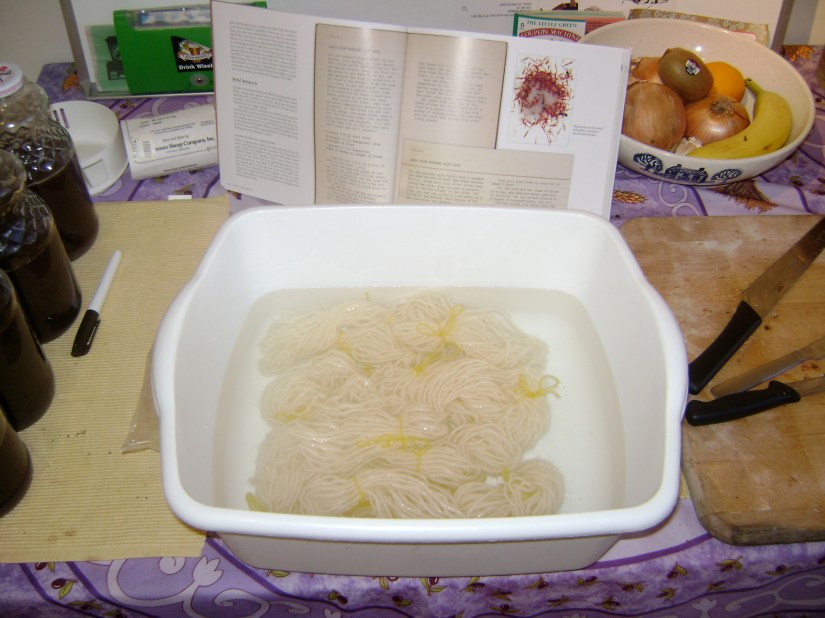
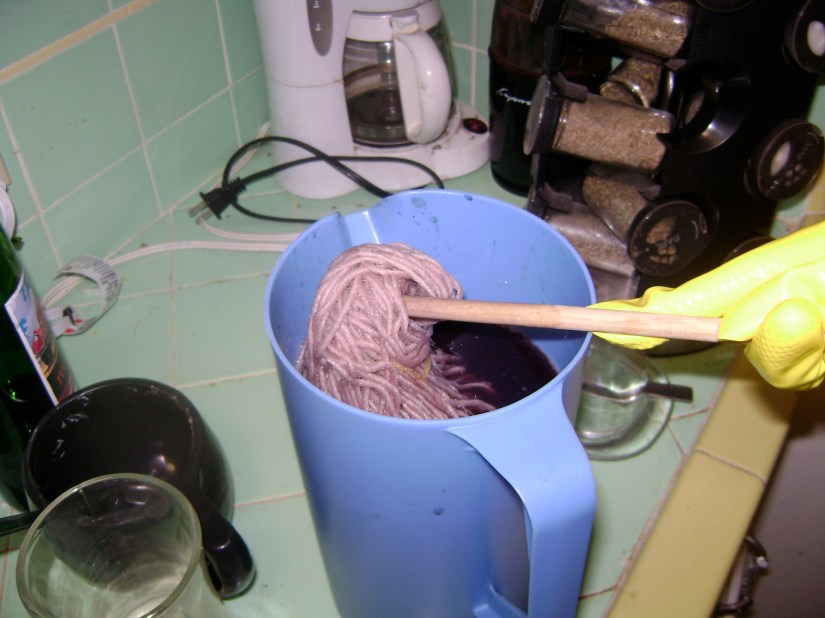
That’s right—it was a light purple color! At first I was disappointed that all our effort to get blue failed, but in an hour or two it started changing into the blue color you saw in the previous picture.

The photo in the blue plastic jar came from round two of dyeing the yarn. After I took out the four small test skeins, I still wanted to dye the remainder of the yarn. So I soaked and mordanted the remaining 2 ounces of yarn, poured all four dye lots into the blue plastic jar, and let it stay there for 48 hours. Not very scientific, although hopefully you can see in the photos that it came out a slightly grayer and more muted shade of blue—one which I still quite enjoy.

Drying the yarn

After removing the yarn from the dye, I rinsed them with lukewarm water and hung them to dry on my laundry rack (I wish I’d taken a picture then!) Here are  they are again, left to right from, darkest (1.25 to 1 ratio) to lightest (7 to 1 ratio), plus the extra hank made from all dye lots combined:

The darkest one is a distinctly deeper shade of blue than the rest. The difference between the two lightest shades is less subtle here, but in person you can definitely tell. And the last one of course has a distinctly grayer tone.

A note on the pH of your water

*The pH of your water can affect the final color of your yarn even if you do exactly what we did. I did some research and found out the tap water we used was rather alkaline, with a pH close to 8. I once saw a blog post that said they got a blue green color from acidic water. If you don’t know what pH your tap water is, you can use the red cabbage test to estimate it.

An updated note on colorfastness

Since creating this tutorial, I have gotten several questions about how much this blue color fades over time. The answer is yes, is does fade over time, but it still looks nice.

I made an ombre cowl from this blue yarn using this Wave pattern. Here it in 2012:

black bean blue dye ombre knit cowl in 2012

And here it is in 2014:

blue ombre waves knit cowl in 2014

So yes, the lighter blue yarns that were grayish faded to a blue gray over time. For more on this project, check out this post.  I still love this cowl!

Food & Garden

Breads! etc.

It’s funny to me that I post much less on this blog when I’m on vacation. I have more time, but I use this blog as a way to channel my procrastinating instinct into something productive—and there’s been no need to procrastinate on holiday 🙂

Anyway, I’m back with bread recipes!

As a disclaimer—I had very little hand in baking the breads. These are very much Keith’s handiwork.

Tips on baking bread

Keith says the key is  baking bread is just experience, but did have a few tips to include:

1. Make sure your water is warm and that you dissolve the sugar in it first, then mix the yeast into it. Don’t use this mixture until it starts frothing! Otherwise it won’t have a good rise.

2. For kneading, look at this epicurious video on youtube. He said the motion of the kneading was important to get down, but that your dough consistency will probably not be as perfect as the recipe says, so try not to get too caught up on it.

3. This is my personal addition: if you are baking a round loaf on a cookie sheet, put parchment paper underneath! It can leave a seriously annoying to clean mess if you don’t.

Enough talk, moar pictures!

I try to take photos of what he or I make these days. They may not be great quality but it helps me keep track of what I liked and didn’t. I used to say that they were for my non-existant food blog. But now I guess I’ll have to change the name. 🙂

So here are some of the breads that we’ve eaten in the past few months:Ok, I will admit I don’t know what recipe was used here! It’s some kind of  round whole wheat bread. I loved the oatmeal and flax seed on top—egg wash is a good way to get them to stick. I think he made this twice.This is a whole wheat bread in loaf form, using a recipe from epicurious.  It was equally delicious and went well with the soup. Poppy seeds and oatmeal made a nice top for this one. The soup was turkey barley vegetable soup he made from scratch using the carcass of my Thanksgiving turkey (thanks mom!)These were two whole wheat baguettes made using this recipe from diary of a locavore. They made awesome little toast slices for the lemon curd—which was basically just the left over lemon filling from the lemon tart (see this post for that recipe). I didn’t get a good shot of this one because there were a bunch of us eating it and it went fast! This is an Irish brown bread he made from this recipe. He was inspired by the bread served at deVere’s Irish Pub as there’s one in Davis now as well as Sacramento.Which is probably while it went delicious in this beef stew (again, sorry for the photo! hunger triumphed!)The key to this beef stew was a) Martha Stewart recipes (he took the best from two, not sure which) and b) red wine reduction. So delicious!

Finally, the most recent and perhaps one of the tastiest yet, was this:It may not be as visually striking as some other breads, but this is an impressive bread. It’s a rye bread made from this recipe, with a crucial addition of 2 T caraway seeds. I didn’t remember liking rye bread as a kid, but this bread made me change my mind. Without the distinctive caraway seeds for flavor, I think this would be an amazing bread for sweet toppings as well.

I was going to include some sweet recipes here too, but I think this is enough baking for one post. Hope you are inspired to try making bread this year!

Tweaks & Alterations

owl mittens, raglan sweaters and adventures in left-handed knitting

I’ve had these mittens done for more than a week now, but with finals grading I didn’t have time to photograph and post them—so finally, here are my owl mittens!

These are my version of the Give a Hoot owl mittens, from a free pattern I found on Ravelry. I know they’re unblocked and without eyes, but that hasn’t stopped me from wearing them and enjoying them. They are just what I needed for riding my bike to and from campus! The sizing came out perfect too, and after a mini-crisis where I lost the second ball from the matching dye lot of this yarn, all went pretty well.

However, doing this project reminded me about something very important: the challenges of left-handed knitting!

This pattern has unique directions for the Right and the Left mittens. I was working on the “Right” mitten over Thanksgiving, and it came out like this:The “Right” mitten ended up being the Left one. Same thing happened in reverse for the “Left” mitten:

And all of this reminded me about something I often take for granted: if you knit left-handed, you always have to be prepared for weird knitting issues. While I doubt there are many lefty knitters out there reading this, I thought I might use this post to provide what tips and tricks I know about how to knit left handed.

Left-handed Knitting

First of all let me say that I am no expert knitter. I just happen to knit the opposite way of most people—when I start a row, all my stitches are on the right needle, and I work them using my left needle. I knit English style (I “throw the yarn” over the needle) and I know that some people consider Continental or European style knitting to be “left-handed” in some respects, but I can’t really speak to that (I tried it, but couldn’t get the purling motion down).

What I have learned is that if you knit like me,  you must keep one key thing in mind things in mind if you want to knit left-handed with any kind of success: directionality.

By directionality, I just mean this: how much does it matter if you reverse the direction of knitting in a particular pattern? A lot of patterns are symmetrical, where the direction you knit won’t really matter. But when it matters, it really matters!

Let me use the own mitten pattern as an example. Here are the Gusset increases for the Left mitten, meaning the point in the pattern where you start adding stitches to eventually divide off to make the thumb part. (These are knitted in the round from the cuff up on double pointed needles):

Gusset increases:

Round 1: K3, K1f&b, K15, P4, K5 – 29 sts.

Round 2: K4, K1f&b, K14, P6, K4 – 30 sts.

Round 3: K5, K1f&b, K13, P8, K3 – 31 sts.

Round 4: K6, K1f&b, K12, P10, K2 – 32 sts.

Notice the bolded parts. If you knit right handed, you will be moving your stitches clockwise (from the needle in your left hand to the needle in your right) as you knit these rounds. So in each round you’ll knit just a few stitches in this direction, then you’ll add a stitch (k f&b), then you’ll go all the way around the tube of knitting without increasing again, coming back to your starting point. Doing this, your increases will all ended up on the Left side of your knitting.

But if you knit left-handed, you will be moving your stitches counterclockwise  (from the needle in your right hand to the needle in your left)  as you knit these rounds—so your increases will end up on the Right side of your knitted tube!

Now, lest you think, oh well, I’ll just wear the mittens with the top side down and that will fix the problem—remember, there’s an owl on the top of this pattern! You will ended up wearing the owl on the palm of your hand that way. It’s much easier to wear the “Left” mitten on your right hand and vice versa. Otherwise, you have to have to move the entire owl pattern to the other side of the mitten (and since those  purl stitches you see above are part of the own pattern, you’ll have to start altering the pattern as you’re making those increases—and I’m pretty sure that would be obnoxious).

The other time I’ve issue come up recently is on the slanted (i.e. directional) increases in the custom fit raglan sweater I’m working on:

I started making my V-neck version of the custom fit raglan sweater a while ago (don’t remind me how long it has been!). It is knit from the top down in stockinette. I decided to use Knit Right Loop (KRL) and Knit Left Loop (KLL) as my raglan increases (those increases at the shoulders) because I heard they were good for raglans. However, when I first started I could not seem to make the increases look like they did in the videos (knittinghelp.com etc.)

Finally I realized that since they were left- and right-leaning increases, they had directionality—as in, they slant in the direction of the sleeves, so doing what patterns said would be backwards. Everything seemed to recommend doing KRL then KLL. But that’s if you are knitting your sweater clockwise. I tried doing KLL then KRL and suddenly, it worked fine!

Resources for left-handed knitting

I’m actually kinda surprised that there isn’t more out there for lefty knitters. I can’t find the website I once used to look things up. But I have a few suggestions.

For beginners, I recommend watching a video on how to knit left-handed. I found some videos that knit in a variety of left-handed adaptations as far as which leg of the loop to knit into and which direction to wrap your yarn, so I’m sure you can find someone doing it “your way.” This youtube video  is how I do it, and  it includes casting on, knitting and binding off. While it doesn’t have any audio explanation, I think it is a very clear visual of what your hands should do (you can turn off the audio if the music annoys you).

Only downside is that it doesn’t show you how to purl—but there is another video for that.

For southpaw knitters who already know the basics, I like the Knitty article “Knitting in the Mirror”  for its general discussion of left-handed knitting issues. However, the article is old (2003) and almost all of the links in it are dead.

So if you have a specific question, I’d recommend the Ravelry group On the Other Hand. This requires joining ravelry of course (which you should do, since it’s like facebook for knitters but way less annoying). Again, some of the older discussion threads are full of dead links. But there are also active discussions going on. And if those don’t help, you can always post your own question or message one of the 1,620 members (or at least, you know, check out what they’ve knit and what was easiest for them!)

If any of this helped you out or you have another questions about left handed knitting (or crocheting or spinning for that matter!), feel free to leave a comment.

Botanical Knits & Crafts, Holiday Knits & Crafts

How to make a Christmas wreath from your shrubbery

(That’s right. Your shrubbery. Or, you know. Branches cut from your Christmas tree.)

I helped my mom pick out this noble fir over Thanksgiving weekend. We always go to the same seasonal lot (Hopper Bros.) This year, they went a bit crazy with a craft I hadn’t seen before: wood and branch reindeer.

We got the tree up and decorated before I left that weekend. It looks like a pretty standard Christmas tree, but it was a Christmas miracle that I got a non-crappy photo of it all lit up with my camera.

When my mom had to cut off the bottom branches to get the tree into its stand, and I asked if I could keep them to make a wreath. I do this pretty much every year—but normally, I just cut a few branches of juniper or other evergreen tree/shrub from around my apartment complex. This year, I got to…well I was going to say branch out but that’s a terrible, terrible pun. So I’ll just say I got to use branches from three different kinds of evergreens (including mom’s juniper shrubbery), plus red berries.

I ecently realized that I don’t know anyone else who does this. Even though its easy, very cheap, and (at least in CA) evergreen branches are super easy to come by.

So I made a tutorial.

Rustic Wreath, Made From Shrubbery: A Tutorial.

Things you will need:

wreath form (this one is 12″)

wire (I’m use green 1/4 gauge wire)

clippers (that will cut branches and wire)

evergreen branches (between 6-12 inches is best)

red berries

[not shown: wreath hanger]

There’s no one way to do this, but I’ll show you what I do. First, gather everything outside, as you will make a mess. Then, gather a handful of branches of varying lengths/types together and wrap them together using the wire, about a few inches from the base. Leave a tail of wire at least a foot long to wrap them around the wreath form later:

For my wreath form, I made five of these bundles. Make sure they curve in the same direction. Once you’ve made those, start to attach them to the wreath form using the excess wire. Wrap the first bundle tightly around , using the wire to go over and under branches a few places to secure it to the form. After you do this to one bundles, place the next one so that it overlaps and covers up the wire from the first.

After you’ve placed them all, hold you wreath up and/or place it on your wreath hanger. Chances are you will discover two problems: there’s a few sizable evergreen gaps in the wreath, and there are some crazy branches sticking out way too far.

This is when you go back and add more branches to the bundles that need them (using more wire and arranging the branches as necessary). Once you’ve got that under control, hang it on the wreath form and use the clippers to trip rogue branches. I don’t do a lot of trimming because, after all, this is a rustic wreath made from shrubbery! But I do shape it a little. And when that’s done, I add the berries.

Before trimming and berries:

After trimming and berries*:

*Yes I know most people would place berries, or a bow, at the top and not the bottom. But this is just how I roll.

The wreath forms and wreath hangers are really cheap this time of year (I’ve seen them both for about $1 each), and the wire can be anything similar to the one in the pictures as long as it holds and you can cut it (the green is just awesome for blending it—it’s usually less than $5).

If you don’t have a yard to raid for evergreen boughs, just put the word out—when my mom heard I wanted some branches for this wreath, I ended up with an entire garbage back full of them. I do recommend letting them sit out for a day or two, just to see how well they put up with being cut. The noble fir was actually drying up much faster than the other two (juniper and…I didn’t ask what the other was, I believe it was cedar), so I put it at the back of the bundles.

And that is how I make wreaths from shrubbery!


Food & Garden

Day of Thanks

Pilgrims! etc.

Happy Thanksgiving!

Being in a house with TV today, I woke up this morning to watch the Macy’s Thanksgiving Day parade. I was still a little sleepy but one of the the first  floats I saw, I swear, was a turkey surrounded by Pilgrims and  Avril Lavegne lipsynching. Yay weird American traditions!  Sometimes I think humor is the only way to handle the sort gross missrepresentation of American history one sees around this holiday. This image below, for example, made me chuckle:

Of course, there are always exceptions—last Thansksgiving, the NY Times has an excellent article by Jill Lepore on what life was really like for Ben Franklin—as compared to his sister Jane. Really fascinating stuff from a historian I admire.

Our bountiful table    thanksgiving1

Thanksgiving was a small but good one . I threw these decorations together at the last minute with other decorations my mom had and some leaves from outside. I was thinking that I wish I had brought my knitted pumpkins from my apartment—they would have fit right in:

I used this ravelry pattern, but after I made them I came across a ton of others that were even more elaborate. I’m pretty happy with how these turned out, though I never did get around to using thread to make the different sections. I bet it could be modified to make a gourd too. The best thing about these pumpkins is that you can use up small bits of really cool looking yarn that you have left over.

What I did “craft” to put on the table this holiday was the dessert. For some reason I wanted to make a tart. A lemon tart, specifically. And this turned out to be a lot more work than I bargined for

I used a Martha Stewart recipe for a caramelized lemon tart. While making the crust recipe  I discovered two things. 1. The tart pan I was had a raised bottom but not a removable one. The first time I tried to make a crust in this, it was a disaster, bubbling in the center and with no edges. But thankfully I discovered 2. The recipe was made for a much larger tart pan, so I had enough to do a second, improved crust:

Then I made the filling—squeezing 6 lemons and separating a dozen yokes from whites took forever, as did cooking it. I was in a hurry at this point, so the photo is pretty blurry.

But finally, I got to the really fun part: caramelizing the top. There was a brief moment where it looked like we were out of sugar (!) but it turned out okay because there was some left in the sugar bowl on the table. I used the broiler to get it to brown. Again, I wish I’d put on more and taken more time to do this, but the results were delicious.

I’m really pleased with the effect—the crunchy caramelized top is a great contrast with the smooth tangy lemon filling. But seriously: so much work!

Quick Knits & Crafts

adventures in Santa Cruz

I spent most of this weekend in a house in in Santa Cruz county surrounded by redwood trees and moss. I took the above photo this morning, when the sun finally peaked out of the fog.

It was too cold to do too much tromping around until this morning, but I’m glad I did have a look around. Because  otherwise I would have never seen.. my first banana slug!

I normally find slugs and their snail relatives to be rather unpleasant, but I was quite amused by this guy. It’s so yellow!

Other creatures spotted this weekend included four cats, two horses, and (appropriately for this blog), a bunch of chickens!

this hen followed us to the horses
then more hens followed

The house where we stayed was someone’s housesitting gig and it looks like something straight out of the 70s, complete with dark wood everything, thick carpet, and a harvest gold sink. It also had strange octagon shapes everywhere, and as far as I can tell was heated entirely by fireplaces. There were three of them. This meant performing what I imagine to be some of the oldest human chores—gathering wood and tending the fire:

gathering up kindling

I did manage to get a decent amount of knitting done both at the house and during the car ride (photos to come). But the photo above shows one of my Friday morning projects: a crocheted poppy for Remembrance Day. I downloaded a free knitting pattern but it gave me nothing but trouble—knitters will understand that trying to knit in the round with black yarn with only one stitch on each of your double pointed needles is just asking for frustation. So I whipped this one up from scratch using a crochet hook.

Quick Knits & Crafts

11/11/11, make a wish!

My No. 1 post

Flanders Poppy
Crochet Poppy
crochet poppy

I’ve been debating about whether to start a blog for a while. I figured I’d probably get around to it at the end of this week, maybe Friday. Then I realized: Not only is Friday Veterans Day. Friday is Nov. 11, 2011.

11/11/11.

Sounds like as good a date as any to start something. 🙂

. This article tells me people are planing to do quirky things to celebrate the weird date. Of course, this other article says other people are freaking out that the world is going to end (but then again, isn’t someone always freaking out about Armageddon?).

So. A blog. Yes.

Questions you might be asking yourself if you are here:

Ok you probably aren’t asking any questions. But I will ask some for you.

Q: Why is this blog called knitbyahenshop?

A: Great question. Several answers:

First and foremost it is an anagram, and I love anagrams. (if you don’t know what it is an anagram of, think about who is typing this:)

Second, its a completely made up phrase that sounds like it should actual exist. Like, oh, yes, knit by a hen shop. Isn’t that a yarn store? Er, a craft studio? It’s run by a lady?

Yes. Sort of. (google these words and you’ll see what I mean)

Third, and perhaps most important, no one else out there seems to be using this phrase or handle or what have you besides me. Yay! I’m a unique snowflake on teh internets! I will adopt this nonsensical moniker and people will know me!

Q: What do you blog about?

A: I don’t know yet, but I hope that it will include creative adventures like knitting and other craft-ish stuff, vegetable gardening haps and mishaps,  historical tidbits that I swear will be interesting even if you’re not into history, and anything else I feel like putting here.

Q: Do you have some sort of adorable animal that you can post cute pics of?

A: Of course I do! This is the internet!

A bit of light, furry reading.

This is Josephine, but mostly I call her Jo. Her hobbies include drinking from the shower, stealing socks from the drawer, and rubbing her face on men’s beards. She likes you even though she has not met you, because for some reason that is how she rolls. She’s a people cat.

Q: So, do you have something knitted to share or what?

A: Finished objects are harder to come by these days, and I don’t want to post any gifts that haven’t been delivered yet. But I do have a few.

[Edit: the Crochet Poppy above is my own pattern, but I never wrote it down!]

Aviator baby hat and booties

aviator hat

I made this aviator hat the night before my cousin Marie’s baby shower, while listening to Tina Fey’s Bossypants on audiobook. I had never done any baby knitting before, but it turns out to be exactly what you expect: knitting things in tiny sizes. I really liked the short row shaping for this hat. I’m also really impressed that the ravelry pattern comes with directions for three different yarn weights and six different sizes! I think the biggest would actually fit my head, so I might have to make myself one someday. Only tricky part was picking up stitches for the straps, but I think that’s because I knit left handed and it made semi-confusing directions completely backwards until I figured out to flip them.

baby booties

These baby booties are pretty basic, which is what I wanted. I picked this multicolored yarn to match Kaleb’s nursery theme (night sky with sun moon and stars), so I wanted a simple pattern. I actually made them first. Sewing them up was a bit of a pain, but I’m just impatient when I finish knitting and have to sew a seam. This also involved some short row shaping, which I’m starting to really like. I only wish I’d gone down one size—my loose gauge is always causing me problems with size. But overall I like them.

On a final note

This post has gone on far longer than I intended, but I have to say one thing about the poppy. I posted the poppy photo because I’ve meet a lot of people who don’t know why poppies and Veterans Day go together.

What we in the United States call Veterans Day is known to Europe, Canada and most of the world as Remembrance Day. Nov. 11 1918 was Armistice day, the day that World War I ended. While the United States lost maybe about 100,000 or so soldiers in the Great War, European countries lost millions. Its estimated that France and the United Kingdom lost 30-40% of their young male population—in a few short  years, a whole generation was cut in half.

One of the ironies of the war is that in the midst of the disturbed earth from trench warfare and the graves of so many casualties, poppies bloomed more beautiful than ever. There’s a famous WWI poem “In Flanders Fields” that came to symbolize the experience of that war for many, and the red poppy remains the icon of Rememberence Day.

It never seemed to have caught on in the States—but I kind of wish it would.